Feeds:
Posts
Comments

Posts Tagged ‘cookie’

This winter we had a lot of snow. And by a lot, I’m talking over a metre (yard) high piled up on our front yard. It’s been really crazy. I’ve talked about our wonderful neighbours before and I just have to say something again. It snowed about 10cm (4 inches) overnight and by the time we had gotten up the next morning, our wonderful neighbour John had shoveled our sidewalk, all 59 feet of it and even some of our other neighbour’s sidewalk too! Isn’t that nice? As a thank you I made a batch of biscotti, a little different than this version I made last year to give them after all, I wouldn’t want to discourage such neighborly behavior!

Almond, Cranberry and Orange Biscotti

Makes about 4 dozen little cookies

Ingredients:

  • 2 cups unbleached AP Flour
  • 2 tsp baking powder
  • pinch of salt
  • 3/4 cup toasted almonds
  • 1/2 cup dried cranberries
  • 2 eggs, lightly beaten
  • 3/4 cup granulated sugar
  • 1/3 cup melted butter
  • 2 tsp vanilla extract
  • 1 tsp almond extract
  • 2 tbsp orange zest
  • 1 lightly beaten egg white
  • Plus a small amount of dark chocolate, melted with a little butter (just enough to drizzle).

    Directions:

    1. Preheat the oven to 350°F or 180°C.
    2. Toast the whole almonds on a baking sheet for 10-12 minutes. Cool completely.
    3. Combine the flour, baking powder, salt, orange zest and nuts in a medium-sized bowl.
    4. In another bowl, whisk the eggs together with the sugar, melted butter, vanilla extract and almond extract ; stir the wet ingredients into the flour/nut mixture and combine until a sticky dough forms.
    5. Transfer to a floured surface and form the dough into two narrow logs about 30 cm or 12 inches long.
    6. Place the logs onto an ungreased baking sheet and brush with the beaten egg whites.
    7. Bake for about 25 minutes. Remove from the oven and allow to rest for about 6 minutes and then slice into 1 cm or 0.5 inch thick diagonal slices. Return slices to the cookie sheet and bake again for about 15-20 minutes or until golden brown. Allow to cool.

    Read Full Post »

    As we are approaching the end of autumn and the beginning of a long cold winter, I am once again excited about… Halloween! Last year I started telling you about some spooky stories all true, and now I’m going to continue this tradition. Buckle your seat belts ladies and gents.
    JT and I bought our first house north and east of Toronto in a small bedroom community called Stouffville. It was an old farming community from the 1800’s that the city planners linked to Toronto via the GO Train (Government of Ontario Train). The small city was limited only by the fact that it wasn’t on either main water or sewage; our little city’s water was from an arteasesn well. Being limited by the water made Stouffville even more desirable because it constrained mass building which was happening in droves in similar bedroom communities (we used to call it ‘the sea of houses’ because they went on and on). Our subdivision was the last of its kind until Stouffville joined up to city water and sewage in the mid-2000’s, which made it the fastest growing community north of Toronto. But we were gone long before that.
    Although the house was brand new, it always gave me the willies! I only ever spent one night by myself in that house, I would go spend the night with my Mom or in laws when JT travelled. There were creepy noises, creeks and cracks. But the weirdest thing that happened even made skeptic JT agree that the house was strange.
    One evening after dinner I was baking in our little kitchen, JT was watching television in the adjacent family room. I was turned away from the doorway and as I turned to put something in the sink out of the corner of my eye, I saw someone poke their head into the kitchen, they were wearing red. I just figured it was JT seeing if there were any samples to be had. But then a few moments later JT actually came into the kitchen and asked me what I wanted. I said I was just about to ask him the same thing. He said he thought I just poked my head into the family room, he thought I was wearing red too! Except neither of us had red on. Super freaked out, we checked all the doors and windows and they were locked tight. Then we checked all the rooms and closets. We found nothing.
    Even though I wasn’t baking biscotti that night, I think JT and our mystery guest would have enjoyed a few tasters from this recipe.

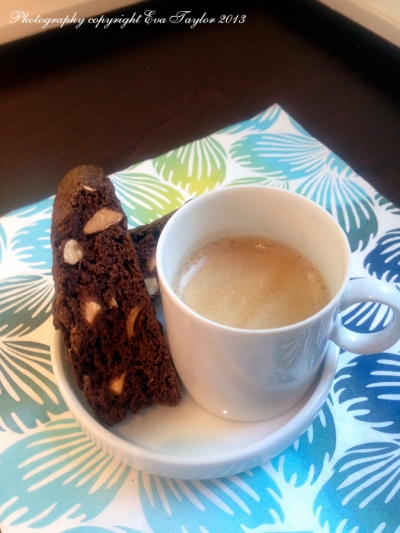
    ChocAlmondBiscotti_0978

    There is something so civilized about eating a little biscotti with an afternoon espresso, don’t you think?


    Chocolate Almond Biscotti

    Makes 2 logs, about 48 biscotti

    Original recipe from Food Network

    I was drawn to this recipe because it doesn’t have melted butter in it. Not having butter actually makes this cookie very hard and I would recommend not biting down on it unless you have dipped it into something warm.

    Ingredients:

    • 2 c flour
    • 1 c sugar
    • 1/3 c cocoa powder
    • 1 tbsp espresso powder
    • 1 tsp baking soda
    • 1/4 tsp salt
    • 2 eggs
    • 2 egg whites
    • 1 tsp vanilla extract
    • 2/3 c whole almonds, toasted skin on
    • 1/3 c chocolate chips
    • 1 egg white for brushing

    Directions:

    1. Combine flour, sugar, cocoa powder, baking soda and salt in a stand mixer with paddle attachment.
    2. Mix together eggs, egg whites and vanilla extract.
    3. Gradually add egg mixture to flour mixture blending on low speed.
    4. Toss almonds with chocolate chips and fold into the flour mixture until combined.
    5. On a well floured surface roll dough into 2 logs, 2 inches in diameter. They will expand quite a bit.
    6. Place on a greased pan and brush with beaten egg white.
    7. Bake at 350 degrees until light golden brown, about 30-35 minutes.
    8. Allow logs to cool 15 minutes then cut into slices on the bias. Place slices on a greased sheet pan and bake in a 350 degree oven until toasted, about 15-20 minutes. Cool. Store in an airtight container.
    ChocAlmondBiscotti_0976

    Delicate flavours of the almond are accentuated by the rich, creamy chocolate. Isn’t that crema gorgeous?

    Read Full Post »

    We always really luck out with our neighbours. Our first house was in a new, bedroom community north of Toronto and JT and I bought the smallest house snuggled in between two of the larger models in the subdivision. The neighbours to the west of us built our shared fence and didn’t even ask us for a penny for it; we built our fence to the east of us with the neighbour over a weekend culminating with a great big shared BBQ. When we moved back to the city, our northern neighbours held a BBQ for us and invited the entire street so that we could meet everyone; it was wonderful. We shared a driveway with these people and more often than not, when I couldn’t find JT (who should have been doing chores), he was sitting on the neighbour’s back porch having a beer with the neighbour.
    When both our careers moved to the west side of Toronto, we made our third move; there were no parties or BBQs this time around, but there was always Biscotti! Our lovely neighbours on our north side made us delicious biscotti every Christmas. When I started living in our new reality, coffee breaks from the gruelling job search became imperative and I couldn’t help but crave ‘a little something’ with my java and that’s when I remembered our sweet neighbour’s almond biscotti. I’d never made biscotti before so it not only satisfied a craving but it also became a blog post! What more can I ask for?

    Original recipe from Eyetalian Magazine.

    Almond Biscotti (Biscotti Albani)

    Makes about 2 dozen

    Ingredients:

    • 2 c unbleached All Purpose Flour
    • 2 tsp baking powder
    • pinch of salt
    • 3/4  c  almonds
    • 2 eggs
    • 3/4 cup granulated sugar
    • 1/3 but melted butter
    • 2 tsp vanilla extract
    • 1 tsp almond extract
    • 1 1/2 tsp lemon zest
    • 1 lightly beaten egg white

    Directions:

    1. Preheat the oven to 350°F or 180°C.
    2. Combine the flour, baking powder, salt, lemon zest and nuts in a medium-sized bowl.
    3. In another bowl, whisk the eggs together with the sugar, melted butter, vanilla extract and almond extract ; stir the wet ingredients into the flour/nut mixture and combine until a sticky dough forms.
    4. Transfer to a floured surface and form the dough into two logs about 30 cm or 12 inches long (as the dough bakes, it will increase in size, so unlike what I did, I would make the logs much thinner next time).
    5. Place the logs onto an ungreased baking sheet and brush with the beaten egg whites.
    6. Bake for about 25 minutes. Remove from the oven and allow to rest for about 6 minutes and then slice into 1 cm or 0.5 inch thick diagonal slices. Return slices to the cookie sheet and bake again for about 15-20 minutes or until golden brown. Allow to cool.
    7. Serve with a beautiful espresso.
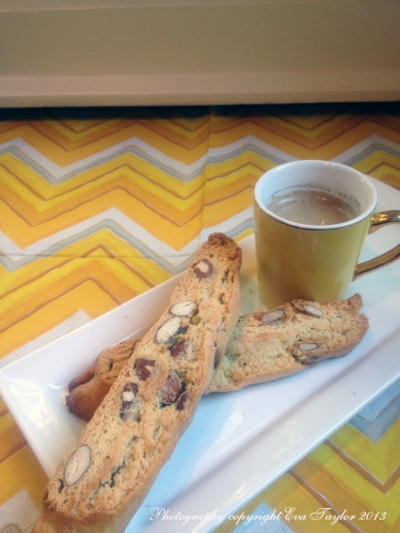
    Biscotti_IMG_0950

    We’ve had a hankering for biscotti these coolish days

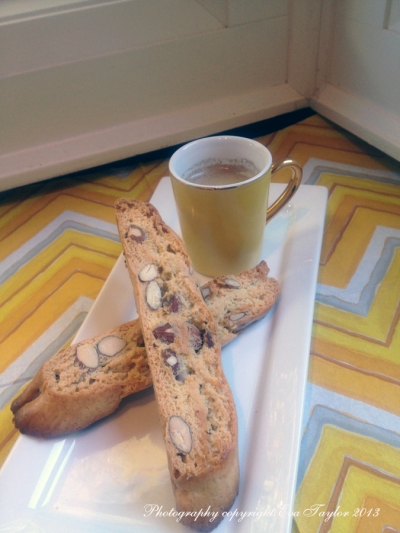
    Biscotti_IMG_0948

    A perfect snack when dipped into the aromatic, creamy espresso

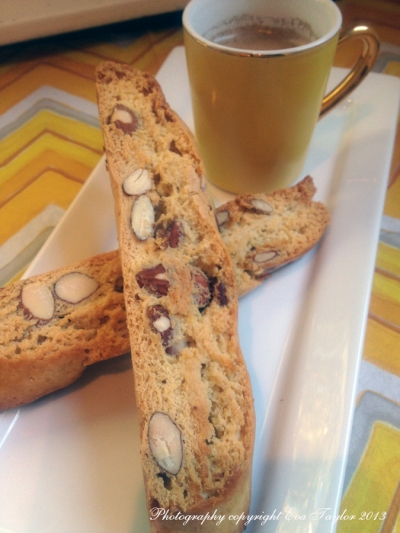
    Biscotti_IMG_0947

    Oh go ahead and take one please, I insist!

    Read Full Post »

    I got off to a slow start this year due mainly to the fact that my cold just didn’t want to give up, even though I was doing everything right, like my Chicken Soup, Kelly’s delicious alcohol free Hot Toddy and lots of ginger tea with honey. And I still have a slightly lower octave voice but I’m feeling a lot better!

    My Hungarian blogging buddy Zsuzsa suggested I post a list of my baking again this year, so here you go, my friend! I will also snap a few photos and post recipes in the days to come. Previously posted recipes are linked back, unless the photos were gross, in which case, I redid them and posted them again with a little twist!

    Here is this 2012’s round up:

    Now I bet you’re wondering where on earth did I get this gorgeous cookie mold; my dear friend Barb of Profiteroles and Ponytails was lovely to give it to me as a gift last June (shame on me for taking six months to make these gorgeous cookies with them). I know some of the bloggers (Betsy’s recipe, Sawsan’s recipe to name a couple) I follow have posted some very tantalizing recipes for ma’amouls, but I lacked their ingredients so I needed to find a recipe for which I had everything in my pantry. Plus these shortbread cookies have a lot, and I mean a lot of fat in them, so I searched and searched for a slightly lighter version. I made Bethany’s recipe with minor alterations and I also halved the quantity not knowing if we would love them. The dough is melt in your mouth shortbread dough, but it’s also a bit crumbly. The filling is lovely with the right amount of spice; before you jump to conclusions about the powdered sugar, I read somewhere that the date filled cookie is never sprinkled with powdered sugar . I will make these again, and I you’ll see how I’ve changed them up.

    Ma’amouls

    Please click here for original recipe, Bethany gives some great instructions.

    IMG_3635_BLOG

    Apparently the traditional ma’amoules are not dusted with powdered sugar.

    Dough Ingredients:

    • 425 g semolina
    • 100 g potato starch
    • 225 g of butter, melted
    • 125 mL orange blossom water (I substituted water with a few drops of orange essence)
    • 100 g of caster sugar
    • 1 tsp ground green cardamom
    • 1 ma’amoul mold

    Date Filling Ingredients:

    • 125 g dates, pitted
    • 1/8 teaspoon nutmeg
    • 25 g of almond flour
    IMG_3634_BLOG

    I was lucky that mine did not crack. Picture perfect.

    Directions:

    1. Combine the semolina, farina, cardamom, sugar and butter together.
    2. Slowly add the orange water a tablespoon at a time, kneading it into a soft sticky dough (it shouldn’t stick to your fingers). Cover the dough and let it sit 2 hours.
    3. Prepare the filling while the dough rests. Add all the ingredients to a food processor container and process until smooth
    4. After it has rested, knead dough one more time and then divide into two or three even balls. Roll out each ball into a rope with a thickness of 2.5 to 3 cm. Cut to about 2.5-3 cm and roll into a ball.
    5. Flatten the dough using the palm of your hand on the counter and spoon a small size ball of filling into the centre. Lift up all sides and form into a nice round ball. It was suggested to roll this in some additional semolina before you press it into the mold, but it was greasy enough and the mold released it quite quickly.
    6. Bake in a preheated oven 200° C / 400° F until the sides are slightly brown in color. It will vary depending on oven — I baked mine for 20 minutes. Cool and serve.

    No one will kick you out of bed for leaving crumbs!

    Read Full Post »

    Confession time: I made this cookie recipe about a week ago, but I completely forgot to add the brown sugar and I didn’t watch my syrup and it boiled up (sadly, I can’t blame it on drinking); the taste turned out OK while they were still warm, but the next day the cookies hardened so much that I was afraid I would crack a tooth on it. I don’t usually mess up a recipe quite so badly — into the composting bin they were tossed!

    So I tried my hand at the recipe again. The success of this traditional cookie is melting the sugar, butter and syrups gently and not to over bake because then the cookies become way too hard. I used Moroccan Ginger which has a rather strong flavour making this cookie a bit spicier than most other recipes but then again, I like spicy!

    Would you care for tea or coffee with your Ginger Snaps?

    Ginger Snap Cookies

    Makes about 36-46 Cookies depending on how big your melon baller is.

    Ingredients:

    • 1/3 cup butter
    • 1/2 cup packed brown sugar
    • 1/4 cup light corn syrup
    • 1/4 cup black molasses
    • 2 cups all purpose flour
    • 1 tsp baking powder
    • 1 tsp baking soda
    • 2 tsp ground ginger
    • 1 tsp ground all spice

    Directions:

    1. Pre heat the oven to 350°F.
    2. Line two baking sheets with parchment paper, sprayed with non-stick cooking spray.
    3. In a small saucepan gently melt the butter, brown sugar and both syrups (do not boil unless you want to end up with jaw breakers!). Cool slightly.
    4. Sift dry ingredients together into a medium-sized bowl.
      Make a well in the centre and pour in the syrup mixture. Mix well to make a soft dough.
    5. Using a large melon baller shape into small balls (about the size of a walnut). Place each ball about two inches apart; press down to form even rounds abut 1/4 inch thick.
    6. Bake 10-12 minutes or until very very lightly browned. Cool on cookie sheet for a minute and then remove to fully cool on a wire rack.
    7. Store in an airtight container or freeze. If they get too hard, add a slice of bread or a moist brown sugar disk for a few hours.

    Or perhaps some Sherry? It's a little early though, isn't it?

    So tell me lovely reader, have you ever messed up a recipe and were you able to save it or had to toss it?

    Read Full Post »