Feeds:
Posts
Comments

Posts Tagged ‘chocolate’

My dear friend/neighbour invited us for dinner one night and I offered to bring dessert. I spotted some frozen cherries at our grocery store and picked them up thinking they would be a good ingredient for dessert in a pinch, not thinking that pinch would be sooner than later. I’ve made these squares before, without the chocolate ribbons so I wanted to update the recipe, and because, as JT said, “What could possibly be wrong with cherries and chocolate?” You be the judge.

Chocolate Cherry Squares

A Kitcheninspirations original recipe

Makes one pan 23 cm x  33 cm (9” x 13”) about 20 squares

Ingredients:

  • 300 g frozen cherries, defrosted and drained
  • 3 eggs separated
  • 120 g unsalted butter (room temperature)
  • 125 g caster sugar
  • 250 g flour
  • 25 g baking powder
  • ½ tsp salt
  • 1 tsp vanilla
  • 125 mL cream
  • 150 g Belgian milk chocolate
  • 50 mL cream

Directions:

  • Grease and flour 9” x 13” x 2” baking pan (22cm x 33cm x 5cm).
  • Preheat oven to 350° F (175°C)
  • Heat the cream until almost boiling and pour over the chocolate and stir until entirely melted. Allow to cool.
  • Whip the egg whites until stiff but not dry (should be able to stand in a peak) – no need to wash the beater if you do it in this order, if you cream the yolks first, then you must wash the beater and dry thoroughly).
  • Cream the egg yolks with butter and sugar until light and fluffy (should be a lighter shade of yellow).
  • Sift flour, baking powder and salt – dry ingredients.
  • Alternating dry ingredients with the milk, fold into egg yolk mixture.
  • Gently fold beaten egg whites into the mixture.
  • Spoon  about half of the batter into greased pan. Note the batter is quite thick, you will have to spread it into the cake pan with an offset spatula. Drizzle the milk chocolate ganache over the batter and spoon the remaining batter on top, speading evenly with the offset spatula.
  • Dot with the cherries throughout (you may want to give each cherry a squeeze as you dot so ensure there are no pits!).
  • Bake in preheated oven for about 20 to 30 minutes (test with a toothpick to make sure it’s done).
  • Cool in the pan (don’t cut until it is entirely cool otherwise it will become ‘bacony’ or szalonás, as the Hungarians put it).

Read Full Post »

I have been using brown butter in place of melted butter for many years, particularly in sauces and some baked goods, but I hadn’t thought to use it in cookies! And as usual, I have been inundated with a lot of brown butter cookie recipes (has Google and Meta figured out how to read my mind?). Unfortunately,  they all seemed quite time-consuming: chilling the browned butter, chilling the batter etc., that is until I found this lovely recipe in Southern Living. Of course, I had to change it to weight measures, and, I never have salted butter on hand, so I upped the salt a tiny bit (from 5 g to 6 g) to compensate.

Brown butter is ridiculously easy to prepare, just melt the butter on medium heat and simmer it until the milk solids turn golden. That’s it. It really takes simple things to the next level. I love it in Béchamel sauce, whether I’m using it with roasted puréed garlic or just on its own. If your recipe contains melted butter, next time, take it to the next level and brown it.

It has a sophisticated, background flavour.

Brown Butter Belgium Chocolate Chunk Cookies
(the famous BBB-CCC)

For the original recipe, please click here.

Makes 41, 30 g cookies

Ingredients:

  • 170 g unsalted butter
  • 240 g brown sugar
  • 120 g granulated sugar
  • 2 eggs, room temperature
  • 10 mL pure vanilla extract
  • 315 g all-purpose flour
  • 5 g baking soda
  • 6 g table salt
  • 240 g milk and semisweet Belgium chocolate disks, roughly chopped
  • 115 g walnuts, chopped and toasted

Directions:

  1. Melt the butter in a light-coloured saucepan and simmer until the milk solids have turned golden. Pour into a small flat baking sheet with sides and cool to room temperature and refrigerate until solid (I did this the day before). When you are ready to make the cookies, remove the butter from the fridge and bring the butter to room temperature.
  2. Combine the sugars in the large bowl of your stand mixer fitted with the scraper paddle. Scrape the butter into the sugars and beat until light and fluffy. Add the eggs one at a time and beat well, add the vanilla and beat well until incorporated. Combine the flour, baking soda and salt and mix well. Add to the cookie batter and mix just until the flour is entirely incorporated. Fold in the chocolate chunks and walnuts.
  3. If baking them now, preheat the oven to 350° F. Line a cookie sheet with parchment and portion out 30g of batter about 5 cm apart on the pan (a scant medium Ice Cream Scoop ~ 4.5 cm in diametre). You can freeze the cookie balls at this point and bake them up individually as needed.
  4. If baking now, bake the cookies for 10-12 minutes or until lightly golden on the bottom. If they baked-up irregularly, use a large glass to coax them into a rounder shape. Allow to cool completely on a wire rack.

The perfectly round shape comes from coaxing the just-out-of-the-oven cookies with a large, round, drinking glass.

Notes:

  • I like to freeze unbaked cookie balls so that we can be deliberate about how many cookies we really want after a meal, that way you bake only the number you want and if you want more, you have to really think about it.
  • Baking cookies from frozen will take a few extra minutes (12-14 minutes) but once they defrost in the oven, they bake up rather quickly so be diligent.

Read Full Post »

Let me begin this post by admitting that I have not had a serious Christmas baking-spree in quite a few years. People are watching their sugar intake, fat intake and intake in general and during the Christmas holidays, we tend to overeat so leaving sweets off the list seems to be a no-brainer. Plus there seems to be plenty of sweets around anyway. This year was going to be no different, I would bake a few things but not the 10-15 items I used to bake back in the day. 

When we were down in Arizona (don’t worry, it’ll all tie together in the end), we hosted quite a few dinner parties and I cooked a lot. But, in order not to have too many leftover pantry items, I decided that I wouldn’t bake sweets but these dinner parties still needed something for dessert. For one such occasion, I bought a Ghirardelli  Caramel Brownie Mix that turned out much better than I imagined, they actually tasted homemade! I can usually taste a chemical flavour in mixes but I have to admit, I haven’t purchased a mix in several decades so I had no idea how far they’ve come along. This mix was so yummy, I brought 2 packages back for a friend who isn’t a baker as a souvenir gift. Because I hadn’t done my marathon Christmas baking in so many years, I’d completely forgotten that my dear friend’s daughter i’s allergic to walnuts and…you guessed it, the mix had walnuts! What a bummer! I felt horrible that I’d forgotten her allergy; my usual Christmas baking had me focused on baking items without walnuts just for her! How could I have forgotten? I blame age, that’s my story and I’m sticking to it. So fast forward to Christmas 2022, I baked my friend’s daughter these brownies to make up for my foolish mistake. They are a bit more finicky than my regular brownies, but they have the best texture that is worth the extra step. The changes I made to the recipe are listed in the notes below.

You might think this is an outdated photo, with the Christmas tree in the background, but I have the little tree out all year long!

Best-ever Fudge Brownies

For the original recipe, please click here.

Makes 1 23 cm x 23 cm (9″ x 9″) pan

Ingredients:

  • 165 g sifted all-purpose flour

  • 5 g salt

  • 113 g unsalted butter

  • 118 g semi-sweet Belgian chocolate, coarsely chopped

  • 62 g Belgian milk chocolate, coarsely chopped

  • 200 g sugar, divided

  • 5 mL pure vanilla extract

  • 4 large eggs, room temperature

Directions:

  1. Preheat the oven to 350° F. Line a 23 cm square pan with parchment.
  2. Sift together the flour and salt, set aside.
  3. Microwave the butter and two chocolates for 15-second spurts on hi, stirring and carefully watching it to make sure the chocolate doesn’t seize. Add 100 g of the sugar and stir to combine. Microwave for 1 minute on power 4, stir often, and then microwave for two 15-second spurts on high, stirring frequently. Mix in the vanilla and set aside.
  4. Combine the second 100 g of sugar with the eggs in the small bowl of your stand mixer and whisk well by hand. Add half of the egg mixture to the chocolate mixture slowly, making sure you don’t scramble the eggs with the heat of the chocolate. Set aside.
  5. Set the remaining egg mixture bowl onto your stand mixer and mix on high for 3 minutes or until doubled in volume and thickened. Gently fold this mixture into the chocolate mixture and when almost combined, add the sifted flour and salt and fold until combined.
  6. Pour into the prepared pan and bake in the centre of the oven for 23-27 minutes (the centre should just be set). Allow to cool completely and cut into squares.

Notes:

  • The recipe has been changed to metric and some steps have been converted to use the microwave instead of a bain-marie.
  • I used a metal 23 cm x 23 cm pan and my baking instructions have been adjusted to suit my pan and oven.
  • The original recipe used bittersweet chocolate and semi-sweet chocolate but I only had semi-sweet and milk chocolate and it turned out very well.


Read Full Post »

We’re coming up to our last few weeks in Spain and I’m thinking about how to use up all the groceries we bought. I probably shouldn’t have bought a pack of sugar (about 350 g) but it was only about €0.50 so I’m not going to kill myself but I will give an honest go of using some of it. Peanut butter is not a common ingredient in Spain (most likely all of Europe) and is therefore expensive (€6.00 for a 500 g jar) but JT loves the stuff, so we splurged. We’ll be away for about 9 days of the last 18 days in Spain so I wanted to start on my pantry cleanup sooner than later.

I didn’t want to buy another package of butter so I needed a recipe that did not use it. Fortunately, this one is an old favourite, slightly modified to incorporate pantry ingredients. The 30 g portions make a decent size cookie but not large by any stretch of the imagination. The butter is not beaten into the peanut butter (mainly because I didn’t have a mixer) just mixed in well, without too much exertion which makes it an easy cookie recipe. I’ll be definitely keeping this one in my repertoire.

Delicious cookies with just the right amount of chewiness.

Pantry Clean Out Peanut Butter Cookies

A KitchenInspirations Original Recipe

Makes 19 cookies about 30 g each

Ingredients:

  • 250 g crunchy peanut butter (natural, no salt or sugar added)
  • 2 eggs
  • 80 g flour
  • 165 g sugar
  • 3 g salt
  • 50 dark chocolate with sea salt

Directions:

  1. Preheat the oven to 350° F.
  2. Combine the peanut butter and eggs and mix well.
  3. Combine the flour, sugar and salt and mix well.
  4. Add the dry ingredients to the wet and mix well.
  5. Portion out 30 g balls and flatten slightly with your palm. Dot the chocolate pieces onto each one evenly.
  6. Bake for 8-12 minutes at 350° F.

Read Full Post »

I really wanted to class-up these lovely little single-bite gingerbread cakes, so I called them Petit Fours, if it’s not a celebration you want to serve them at, just call them two-bite Gingerbread Cakes. They are warmly spiced, light, somewhat chewy, little gingerbread cakes with a slightly crispy exterior which makes them perfect for ganache. They are always a hit. I made them for a few dinners over the holidays because the meals are always so filling, it’s nice to have a little something to choose one or four of (see what I did there?)!

Gingerbread Petit Fours

Makes about 36 mini muffins-sized cakes

Ingredients:

  • 37 g unsalted butter, room temperature, plus more for pan
  • 125 g all-purpose flour, plus more for pan
  • 3 g baking soda
  • 75 mL boiling water
  • 4 g baking powder
  • 1 g ground ginger
  • 2 g ground cinnamon
  • Pinch of ground cloves
  • Pinch of ground nutmeg
  • Pinch of salt
  • 72 g dark-brown sugar
  • 25 g egg
  • 80 mL un-sulfured molasses
  • 9 g finely grated peeled fresh ginger
  • 2 pieces crystallized ginger, thinly sliced lengthwise, for garnish
  • Chocolate Ganache

Directions:

  1. Preheat the oven to 350°F. Generously butter and flour a mini 12-cup muffin pan, tapping out excess flour; set aside. In a small bowl, stir together the baking soda and boiling water; set aside. In a medium bowl, sift together the flour, baking powder, ground ginger, cinnamon, cloves, nutmeg, and salt; set aside.
  2. In the bowl of an electric mixer fitted with the paddle attachment, beat the butter and brown sugar on medium speed until light and fluffy, 2 to 3 minutes. Add the egg, and beat until combined. Add molasses, fresh ginger, and reserved baking soda mixture; beat until combined. (The batter will look curdled but will come together once the flour is added.) Add the flour mixture, and beat until well combined.
  3. Divide batter evenly among prepared muffin cups, filling each halfway. Bake, rotating pan halfway through until a cake tester inserted in the centre of a cake comes out clean, about 10-11 minutes. Transfer pan to a wire rack to cool for 15 minutes. Invert cakes onto rack to cool completely.
  4. Set rack over a parchment-lined rimmed baking sheet. Spoon about 1 tablespoon of Chocolate Ganache over each cake, letting some drip down the sides. Garnish with a couple of strips of crystallized ginger. Once glazed, cakes can refrigerated, in air-tight containers, for up to 3 days; bring to room temperature before serving.

Adding a little silver ball on top really classes them up.

Notes:

  • You can visit the original recipe here, it makes 12 regular-sized muffin cup cakes.
  • These cakes absolutely require the buttering and flouring the pans, without this step, the cakes will stick. I was lazy about 2 months ago and only sprayed the pans and they stuck.
  • Seriously only add enough batter to fill half of the mini muffin cups, they will rise beautifully. You don’t want them overflowing on the top of the muffin pan because they will stick.
  • These little cakes freeze well before you cover them in Ganache.

Read Full Post »

I saw this recipe on Celia’s Instagram account and was instantly curious. I have an old blondie recipe that is completely different so I was intrigued by Celia’s recipe that creamed the butter instead of melting it, I wondered what kind of textural differences are there? To my absolute delight, I loved Celia’s recipe, it makes more of a fudgy cookie bar than a crispy, chewy blondie as my ancient recipe does but I loved the addition of the chocolate chips. Even though there is an entire cup of brown sugar, it is not as sickly sweet as my recipe is which really surprised me. Although this recipe takes a bit of planning (bringing the butter to room temperature), it is worth it. It makes a nice treat on a chilly winter’s day.

Butterscotch Blondies

For the original recipe, please click here.

Makes one 23 cm x 23 cm (9 inch x 9 inch) pan

Ingredients:

  • 300 g AP) flour
  • 5 g baking soda
  • pinch of salt
  • 250 g unsalted butter, room temperature
  • 215 g brown sugar
  • 1 large egg
  • 125 mL milk (I used hazelnut almond milk, because I had it)
  • 10 mL pure vanilla extract
  • 360 g mixed chocolate chips (I use Belgium dark and milk)

Directions:

  1. Preheat the oven to 300° F.  Prepare a 23 cm x 23 cm (9 inch x 9 inch) pan by lining with parchment paper.
  2. Combine the flour, baking soda and salt, set aside.
  3. Cream the butter and brown sugar until light and creamy then beat in the egg, milk and vanilla.
  4. Mix in the flour and then fold in the chocolate chips. This makes a rather stiff batter.
  5. Turn into the prepared pan and spread evenly to the corners and sides with a stiff spatula.
  6. Bake for 30-35 minutes or until a wooden toothpick comes out clean.
  7. When completely cooled, cut into desired bars or squares with a clean, sharp knife.

Read Full Post »

Loaded Double Belgian Chocolate Cookies

Makes about 40 cookies using a 4.5 cm ice cream scoop

Ingredients:

  • 227 g unsalted butter at room temperature
  • 200 g brown sugar
  • 100 g granulated sugar
  • 2 large eggs
  • 10 mL pure vanilla extract
  • 360 g all-purpose flour
  • 1 teaspoon baking soda
  • ½ tsp salt
  • 150 g semi-sweet chocolate, chopped into chunks (chocolate chips work too)
  • 150 g milk chocolate chips
  • 50 g Skore bits
  • 100 g of dried, unsweetened cranberries or dried cherries

Directions:

  1. Cream the butter and the sugars together until light and fluffy. Add the eggs one at a time until well incorporated, add the vanilla.
  2. Sift the flour, baking soda and salt together and add to the butter mixture to form a batter.
  3. Fold in the inclusions (reserving a small amount to add after the cookies come out of the oven for presentation, if desired).
  4. Bake in a pre-heated 350° F oven for 12-15 minutes or until the cookies are slightly golden at the bottom.
  5. Add the remaining inclusions, if desired and allow to cool completely on a cooling rack.

Notes:

  • I used a 4.5 cm releasing ice cream scoop, if you use the slightly smaller one, you will likely get about 60 cookies.
  • To help with portion control, I generally freeze the raw batter in scoops on a cookie sheet and bake as needed, 1 to 2 at a time (it drives JT crazy but he is grateful for the portion control).

Read Full Post »

At the beginning of December, we had close friends come over for a lunch outside, it was still pretty warm with the heater and electric blankets plus we lucked into a super warm December afternoon. JT made his famous Bœuf Bourguignon and I made these Low Carb Icy Squares; they literally melt in your mouth. My friend recently lost 50 lbs on a keto diet and she wanted a little treat but didn’t want to overindulge and these fit the bill perfectly.

The paper cups are necessary because without them these little flavour bombs will melt all over your hands

Low Carb Icy Squares

For the original recipe, please click here.

Makes 36 little squares (each square is about 5 grams of net carbs)

Ingredients:

  • 480 ml heavy whipping cream
  • 1 tsp vanilla extract
  • 90 g butter
  • 1 tbsp espresso powder
  • 2 tbsp erythritol
  • 90 g dark chocolate with a minimum of 70% cocoa solids, chopped
  • 25 g milk chocolate, chopped
  • Gold sea salt

Directions:

  1. Boil the whipping cream and vanilla in a heavy-bottomed saucepan for one minute and then reduce the temperature to a simmer until the cream is reduced to about half of the amount (about 20-30 minutes). Stir occasionally.
  2. Reduce the heat even further and add the espresso powder, erythritol and butter and stir until smooth (make sure the erythritol melts completely).
  3. Place both chocolates into a bowl and pour the reduced cream over it and stir until melted.
  4. Pour the chocolate cream into a parchment-lined 20 cm square (8 inch square) baking pan (squared-off sides is preferred) and allow to cool in the refrigerator for a few hours. When ready to serve, sprinkle with gold sea salt and cut into 36 equal squares. Serve in tiny paper muffin cups.
  5. Store in the refrigerator in an air-tight container for 2-3 weeks.

Notes:

  • The original recipe did not call for the erythritol but because I added the espresso powder, it made it a bit bitter so I had to add it along with the milk chocolate, you could try omitting them both for a  2 g net carb dessert.
  • The better quality ingredients you use, the better the taste and in this recipe, it is worth it to splurge.

Read Full Post »

I am not a huge pumpkin fan. There I said it. I was around 19 years old when I first tried pumpkin pie and I just never got into it. Don’t get me started on the pumpkin spice craze! So pumpkin type desserts are never high on my list during the holidays. We had our Thanksgiving on October 12 and I wanted a dessert I could make in smaller portions (because, let’s not kid ourselves, stretchy pants can only stretch so far!) so I made this spice cake in very shallow muffin cups. If someone was still hungry, they could have two, and believe it or not, they did!

Our awning and natural gas heater have had some good use as the temperatures become more fall-like. Unfortunately, the combination of the heat and sun has dried out the awning; at one point after a good rainfall, as we were pushing the water off the awning, a fist went through it. I was able to glue the small hole together with a glue gun, but now we were aware that the awning is precariously brittle. Too bad that fat raccoon never got the memo. Sometime during the night, an 18 kg (40 lb) beast was climbing across said awning and unfortunately fell through it, causing a 50 cm (20 inches) hole. Poor thing must have broken its neck on the fall because I, unfortunately, found him dead as a doornail the next morning. We’ve never had to dispose of any dead animals before so I called the information number of the city. After a 20 minute conversation, which resulted with NO HELP what-so-ever, we decided to discard him ourselves (the city was backlogged 20 days for pickup so they suggested we dispose of him in our next garbage collection which happened to be 2 weeks from the date!) I found a company online who came out and did the dirty deed for us. JT was perfectly willing to do it, but I didn’t want him to, plus we had nowhere to dump the guy. UGH! A good bleach washing of the deck and 24 hours drying time in the sun, and no one was the wiser.

We lucked out for weather that weekend, as the temperatures progressively became warmer and warmer and Saturday October 12 turned out to be around 25° C (77° F)! The evening cooled off a bit, but our natural gas heater did the trick to keep us warm. We had the dinner with two, socially distanced friends and the evening was wonderful. I was so relieved it was warm enough for an outdoor dinner because our COVID numbers are on the rise again and I’m just not comfortable entertaining indoors.

These cakes are a remake from a blog post from 2010.

Ginger Spice Cakes Revisted

Makes about 24 mini spice cakes (60 mL (1/4 cup) muffin pans or 12 standard muffin-sized spice cakes

For the original recipe, please click here

Ingredients:

  • 75 g unsalted butter, room temperature, plus more for pan
  • 200 g all-purpose flour, plus more for pan
  • 1 teaspoon baking soda
  • 160 mL boiling water
  • 1 teaspoon baking powder
  • 1 teaspoon ground ginger
  • 3/4 teaspoon ground cinnamon
  • 1/4 teaspoon ground cloves
  • 1/4 teaspoon ground nutmeg
  • 1/4 teaspoon salt
  • 85 g packed dark-brown sugar
  • 1 large egg (if halving the recipe, use a small egg)
  • 160 mL un-sulfured molasses
  • 1 1/2 teaspoons finely grated peeled fresh ginger
  • Crystallized ginger, thinly sliced lengthwise, for garnish
  • Chocolate Ganache

Directions:

  1. Preheat the oven to 350°F. Prepare a 60 mL (1/4 cup) muffin pan by generously buttering and flouring it*, tapping out excess flour, set aside.
  2. Carefully stir together the baking soda and boiling water (this will bubble up, so be careful), set aside to cool.
  3. In a medium bowl, sift together the flour, baking powder, ground ginger, cinnamon, cloves, nutmeg, and salt, set aside.
  4. In the bowl of an electric mixer fitted with the paddle attachment, beat the butter and brown sugar on medium speed until light and fluffy, 2 to 3 minutes. Add the egg, and beat until combined. Add the molasses, fresh ginger, and reserved baking soda mixture; beat until combined. (The batter will look curdled but will come together once the flour is added.) Add the flour mixture, and beat until well combined.
  5. Divide batter evenly among prepared muffin cups, filling each about halfway. Bake, rotating pan halfway through until a cake tester inserted in the centre of a cake comes out clean, about 20-25 minutes. Transfer pan to a wire rack to cool for 15 minutes. Invert cakes onto rack to cool completely. Place a piece of parchment under the wire rack while cooling
  6. Spoon about 1 tablespoon of Chocolate Ganache over each cake, allowing some drip down the sides. Garnish with a small chunk of crystallized ginger. Cakes may refrigerated, in air-tight containers, for up to 3 days; we suggest you bring them to room temperature before serving.

Silicon Muffin Cups 60 mL or 1/4 cup size.

Notes:

  • You may wish to save time and just spray the muffin pans with non-stick spray but I warn you, half of your cakes will stick to the pan. Buttering and flouring is the only way to go.
  • These have a very rich molasses flavour, which we like but some will find it too strong.
  • I made a semi-sweet chocolate ganache for these cakes and it was just the right foil for the rich, sticky cake.

Read Full Post »

In late August we had friends over for a wonderful outdoor dinner and I asked if they wouldn’t mind bringing dessert. I usually like to control the entire event, but summer is a lot more casual and dining al fresco has added more of a casual flavour to our entertaining, so I thought, why not. My friend made these chocolate brownies (with raspberry instead of cherry) from Donna Hay and I must say they were totally swoon-worthy. So rich and chocolatey and the preserves just added a lovely moist texture. I did not have raspberry jam but I did have a good handful of frozen cherries so I popped them into a pan with a drizzle of water and a spoon of sugar and cooked them, then I puréed them with my stick blender and further cooked them down to just less than 125 mL.

Just dollop the preserves on top and swirl a knife through to make this marble-like pattern.

Chocolate-Cherry Brownies

Makes 1 23 cm square pan. Original recipe by Donna Hay

Ingredients:

  • 114 g butter
  • 125 g unsweetened chocolate, finely chopped
  • 3 large eggs
  • 375 g sugar
  • Pinch of salt
  • 5 mL vanilla extract
  • 125 g all-purpose flour
  • 125 mL cherry preserves

Directions:

  1. Preheat the oven to 350° F. Line a 23 cm square pan with parchment and butter or spray with non-stick spray.
  2. Melt the butter and chocolate over low heat.
  3. Whisk together the eggs, sugar, salt and vanilla extract until smooth. Add the flour and stir in.
  4. Pour the batter into the prepared pan. Dot with spoonfuls of cherry preserves on top. Run a knife through to make a marbled pattern.
  5. Bake for 35-40 minutes or until an inserted toothpick still has a few moist crumbs attached when extracted. Allow to cool completely in the pan and cut into even squares, I got 16.

Read Full Post »

We have been doing a lot of entertaining since our return from Arizona. I love feeding my friends, it really does make me happy. A few weekends ago we had a marathon weekend entertaining on Friday, Saturday, Sunday AND Tuesday! Fortunately, I was able to plan ahead and make a few things for a couple of the dinner parties considering both friends had gluten-free requirements. First, I made a batch of the original recipe with almonds then I recalled that my dear friend’s hubby is a nut-hater (the food kind) so I created a chocolate version of the recipe. It was wonderful. I served them with coffee.

The snow just doesn’t want to stop.

Gluten-Free Chocolate Tuiles of Sevilla (Tejas Dulces de Sevilla)

A KitchenInspirations Original Recipe

Makes 25 cm x 30 cm (10″ x 12″) sheet, cut to make cookies of various sizes

Ingredients:

  • 1 large egg, at room temperature
  • 95 g sugar
  • 1 tsp pure vanilla
  • 30 mL unflavoured oil
  • 50 g Gluten Free flour (I used this mix)
  • 15 g cocoa powder
  • 80 g milk chocolate chips

Directions:

  1. Pre-heat the oven to 250° F.
  2. Beat the egg with the sugar until it reaches the ribbon stage, about 5 minutes. Beat in the vanilla and oil.
  3. Sift the gluten-free flour with the cocoa powder and salt together then fold into the egg mixture.
  4. Pour the entire batter onto a parchment-lined cookie sheet and spread out until it is quite thin (about 3-4 mm (about 1/8-3/16 inch) works out to about 25 cm x 30 cm (10″ x 12″). Evenly sprinkle the chocolate chips onto the batter and gently push into the batter.
  5. Bake for 45 to 50 minutes or until evenly baked, turn the pan once about halfway.
  6. While still warm, move parchment onto a cutting board and cut into uneven shapes with a pizza cutter or break into natural shapes after it cools. Transfer parchment to a cooling rack and allow to cool. Cookies will firm up as they cool.
  7. Once cooled, store in an airtight container for about a week, but they won’t last that long!

Notes:

  • I use an offset spatula to spread the batter onto the parchment paper.
  • This recipe will work well with store-bought gluten flour too.

Read Full Post »

As you know, we spent just over a month in Arizona again, and our friends house-sat for us. I made these tasty treats for dessert the night before we left, they absolutely loved them. The cornflakes replaced the graham crackers and we didn’t even miss them. I have made these treats a few times since then.

I often get my dessert inspiration from my dear friend Liz, that Skinny Chick Can Bake; this tasty treat came from her but I modified it to be gluten free. Although I’ve never tasted the original version, I can tell you hands down that this one is a real winner! If you like peanut butter and chocolate, give this super easy, tasty treat a go.

Gluten-Free Reese’s Peanut Butter Squares

Makes one 20 cm pan

Please click here for the original recipe.

Ingredients:

  • 45 mL butter, melted
  • 120 g corn flakes, pulsed to a powder
  • 170 g icing sugar
  • 195 g natural peanut butter
  • 6 g sea salt
  • 190 g semi-sweet chocolate chips
  • 15 g butter or vegetable oil

Directions:

  1. Combine everything but the chocolate chips and vegetable oil in the large container of your food processor and process until smooth and comes together.
  2. Press into a 20 cm square pan lined with parchment paper and refrigerate for 30 minutes.
  3. Meanwhile add the chocolate chips and butter or vegetable oil to a microwaveable bowl and melt, stirring intermittently.
  4. Cool slightly and pour over chilled peanut butter pan, spread evenly. Refrigerate for an hour before slicing.
  5. Slice with a warm, dry knife, wiping between slices.

The winter light is quite evident here, but don’t allow that to dissuade you, these are very yummy.

The cornflakes add an incredible texture that make these taste just like Reese’s Peanut Butter Tarts, only better!

Notes:

  • I’ve used a variety of natural peanut butters (no sugar or salt) to make these, including crunchy, with no substantial difference to the outcome of this recipe.
  • To make this recipe vegan, try melted coconut oil. Although I have not tried using melted coconut oil, I’m certain it would work because there is not much in the recipe.
  • Once the recipe initially sets, you can bring the bars to room temperature to serve.
  • Try using other nut butters (such as Hazelnuts) to up the ante!

Read Full Post »

This unusual cake was a contribution of a dear neighbour we had over recently for a dinner party. We were so blown away with the use of quinoa that we had to give it a try ourselves. The recipe is super easy and oh-so-chocolatey! The original recipe isn’t vegan or dairy-free but I did substitute melted coconut oil for the butter and lactose-free milk for the milk. For Vegan, you could use soaked chia seeds for the eggs. Let me know how it turns out if you try the vegan version.

Be ready to hand out the recipe, this cake is that good. I was pleasantly surprised with the frosting, very rich and chocolatey; the mild avocado flavour was not off-putting (unless you hate avocados).

Care for a slice?

Chocolate Quinoa Cake

For the original recipe, click here.

Makes a double layer 20 cm cake

Ingredients:

  • 300 g cooked quinoa (135 g or 3/4 cup dry yields about 300 g cooked)
  • 120 mL whole milk
  • 4 eggs
  • 5 mL pure vanilla extract
  • 170 g unsalted butter, melted
  • 140 g coconut sugar
  • 90 g unsweetened cocoa powder
  • 2 tsp baking powder
  • 1/2 teaspoon salt

Directions:

  1. Preheat the oven to 350F. Line 2 20cm round baking pans with parchment and spray with non-stick spray.
  2. Add all of the wet ingredients, quinoa, eggs, vanilla, milk with sugar, salt and cocoa to your large food processor and process until smooth and creamy. Add the baking powder snd blend until combined.
  3. Turn into prepared pans in equal portions and bake for 30 minutes-or until a cake tester comes out cleanly.
  4. Cool. Turn out of pans and frost with the frosting below.

Chocolate Avocado frosting

Click here for the original recipe.

Makes about 250 mL, plenty to frost the cake above

Ingredients:

  • 2 very ripe avocados
  • 45 g unsweetened cocoa powder
  • 90-120 mL pure maple syrup
  • Splash of pure vanilla extract
  • Pinch of sea salt

Directions:

  1. Add all of the ingredients into the cup of your immersion blender and blend repeatedly until entirely smooth.
  2. Frost cake as soon as it has cooled. Store covered in the refrigerator.

Notes:

  • If you blend all of the cake ingredients together for too long, you’ll get a brownie-like texture.
  • Flegg (vegan egg substitute) is ground flaxseed with water mixed until gelatinous.
  • For the frosting, I used 90 mL Maple syrup and it was sweet enough.
  • The original recipe suggests the icing will discolour if made too soon before serving but we didn’t think leaving it for a couple of days impacted the colour to a great degree after all it’s pretty chocolate-brown anyway!
  • Avocados must be super ripe to get the creamy texture of a buttercream. You may use frozen avocados.
  • The second time I made this recipe I used coconut oil instead of butter and it was lovely.

Well, the renovation is complete. What should have taken 4-6 weeks ended up almost 5 months! This was a better experience than the first; our contractor was younger and had excellent communication skills which made the process much smoother. Basically, we took about 1/3 of our master bedroom and added an ensuite and walk-in closet and we also updated the main bathroom. We contracted the cabinet maker to make the built-ins on the wall across from the bed. JT and I installed the crown moulding. The master bath has all the amenities: fog-free mirror, heated floor, heated towel rack, flush-mount rain shower and so on. I am still on the hunt for a carpet for the bedroom. Here is a short video of the project.

Read Full Post »

I will reveal our latest adventure now! Drumroll please: We spent the month of November in Arizona. We have dear friends who live there during the winter and when we were visiting during February, we tossed around the idea to buy a second house there. But before we make the plunge, we wanted to be certain we liked it so we rented an awesome house in the same community that our friends live.

Now who were we kidding? It was -5° C (23° F) (but it felt like -10° C (14° F)) in Toronto while we were enjoying 28° C (82° F) with sunshine. Every. Single. Day. What’s not to like? The community is tagged as resort-style living with a gorgeous golf course and 4 swimming pools, a spa, workout facilities and a couple of restaurants. Yep, I could get used to it!

The community is located in Queen’s Creek. Queen’s Creek is situated in the San Tan Valley, south-east of Phoenix, Arizona. As another friend said, “it’s not quite the end of the world, but you can see the end of the world from there!”

It is also a mere 4.5-hour drive to the Grand Canyon and that is where we did our EPIC hike! We hiked 7.5 hours to Indian Grove and back. Going down was relatively easy, we bought good hiking boots and sticks, but going up was significantly more challenging because of the altitude and lack of oxygen. We stopped and rested a lot. Listening to your body is essential as is allowing your muscles to recover as you’re ascending. It took us 3 hours to hike down and 3.5 hours to hike back up (which isn’t bad for a couple of old folks!), the rest of the time we spent at Indian Grove eating a delicious lunch I packed. The worst part was the day and day two later, my calves ached like a demon. But it was worth it! I’ve put together s little slide show of our hike at the end of this post, if you are interested. And by the way, my stupid FitBit died sometime during our hike so I don’t even know how many steps we did, but if the last time we hiked only 1.5 hours down and back was any indication, we did 22,000 steps! This is my third FitBit Zip and when I called them that it was eating the batteries like crazy (one every 2-3 weeks) they said it was a known issue and they are working on fixing it but would do NOTHING ELSE. So I am done with FitBit, they let me down in one of the most epic hikes of my life and had nothing but “oh, sorry” to say about it. I am going to get a Garmin which I hear are much more reliable.

This cookie has nothing to do with the hike or our trip, it’s a cookie I made for Canadian Thanksgiving at my sweet cousin Lucy’s place. My dear blogging friend Liz (of That Skinny Chick Can Bake, blog) was the inspiration, I saw the recipe on her site a while back. These cookies were all the rave in the 90’s on restaurant menus but I haven’t seen one in ages. Liz’s recipe will change that for sure.

Skillet Chocolate Chunk Cookie

Makes 1 12″ Cookie

Please click here for the original recipe.

Click here to print this recipe.

Ingredients:

  • 195 g butter
  • 100 g granulated sugar
  • 150 g brown sugar
  • 15 mL vanilla
  • 1 egg
  • 1 egg white
  • 350 g AP Flour
  • 3 g baking powder
  • 5 g salt
  • 100 g chocolate chips (I used Belgian milk and semi-sweet chocolate)

Directions:

  1. Pre-heat the oven to 375° F (I used the convection setting). Prepare a 30 cm cast iron skillet with non-stick cooking spray.
  2. Melt the butter and sugars in a heatproof bowl in the microwave, stir until sugars have melted. Cool slightly and then stir in the vanilla. Combine the egg and whites and whisk. Whisk into the butter-sugar mixture.
  3. Sift the flour, baking powder, and salt, add it to the butter-sugar mixture and mix until well combined.
  4. Fold in 3/4 the chocolate, reserving about 1/4 to dot the top of the cookie for garnish.
  5. Bake for 25-35 minutes or until a cake tester comes out clean.
  6. Cool to room temperature. Serve slicing fractions of the circle.

Notes:

  • I like to buy Belgian chocolate disks (not molding chocolate) and melt them, spread them on a cookie sheet and chill until set. Then I break up the sheets by hand, making different sized pieces with a variety of thicknesses.

It’s a cross between cookie and blondie that is quite difficult to resist.

Click on the first photo to see the slideshow.

Read Full Post »

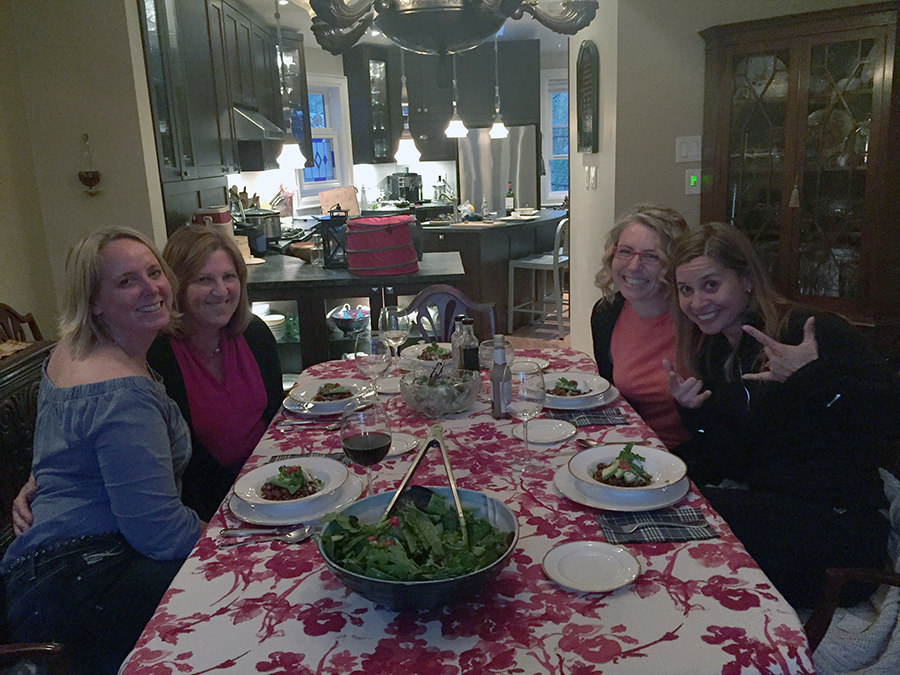
In early August, JT and I had the honour of giving Dave (Fine Dining at Home) a foodie tour of our fair city. You see, Dave is a Captain of a Jet and was flying to the Big Smoke, so obviously, we wanted to take him on a foodie tour. It’s been a tour, a long time in the making, as soon as Dave mentioned that his airline would be flying to Toronto several months ago, I started making a list of things to do…it was long and heavy so the day before Dave’s arrival, JT and I sat down and made a lean list with opportunity to be spontaneous. Dave was a great guest, being very flexible to what we were going to do; it was a super hot and humid day so I also altered the tour to be more air conditioned car oriented than walking, even though we did our share of walking too!

It was a hot, humid day.

We started our day with the St. Lawrence Market, Toronto’s oldest market; it is made up of two stories of food and food related independent stores. While there, we had to have Toronto’s world famous Peameal Bacon on a bun (also known as back bacon or Canadian bacon) at the infamous Carousel Bakery. We loaded up our sandwiches with condiments and sat outside on picnic tables to have our breakfast! It’s a serious sandwich and I could only finish half of it! Then we toured the market, taking in the smells and sounds of Toronto’s culinary marketplace. We ended our tour in Placewares, one of my favourite kitchen stores in the city. From there, we detoured and walked along Front Street to see the new dog fountain (I know it’s not food, but it was along the way). We walked to Brookfield Place where we showed Dave the worlds largest underground pedestrian walking path, called PATH! Path sure comes in handy in the middle of winter when temperatures could be as low as -20° C because of wind chill! It’s basically a system connecting one food court to another under almost every building in downtown Toronto!

The dog fountain, they are all dog statues

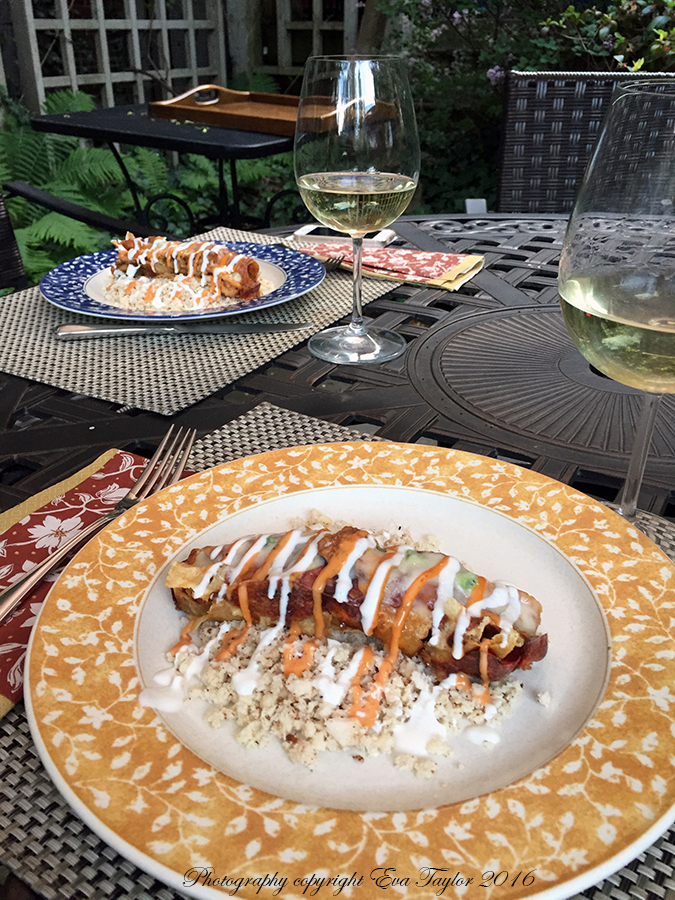
Then we headed back to the car and did a little car tour of the city on our way to The Distillery District where we walked around the old distillery grounds and popped into Vom Fas, where I found a rather unique spice called Tasmanian pepper berry, that I had to have! While at The Distillery, we thought we would do a beer tour of Mill Street Brewery but sadly their tours only begin at 4pm and we didn’t want to wait around so I googled another brewery in the city and found that Steamwhistle did tours every 30 minutes. So off we went, unfortunately, the tour was very hot in some places which made it rather uncomfortable and made us sleepy, particularly with the free beer they offered. We decided that we needed lunch and we took Dave to our favourite French bistro, Le Select. By the time we finished lunch, we were all ready for a nap. We dropped Dave off at the hotel and beat the rush hour traffic home.

Dave generously gave me some gifts: Tonka Beans and a delicious bottle of Hungarian Tokay, dessert wine.

What are Tonka Beans? And, why can’t you buy them in the U.S.? They are the black seed of a South American tree that have a similar flavour to vanilla but more complex. Apparently they are poisonous if consumed in large quantities and are illegal in America! In 1995, Health Canada deemed them unacceptable as an additive in food and drugs but they are not illegal here! I guess Canadians are less likely to eat a tree full of them 😉!

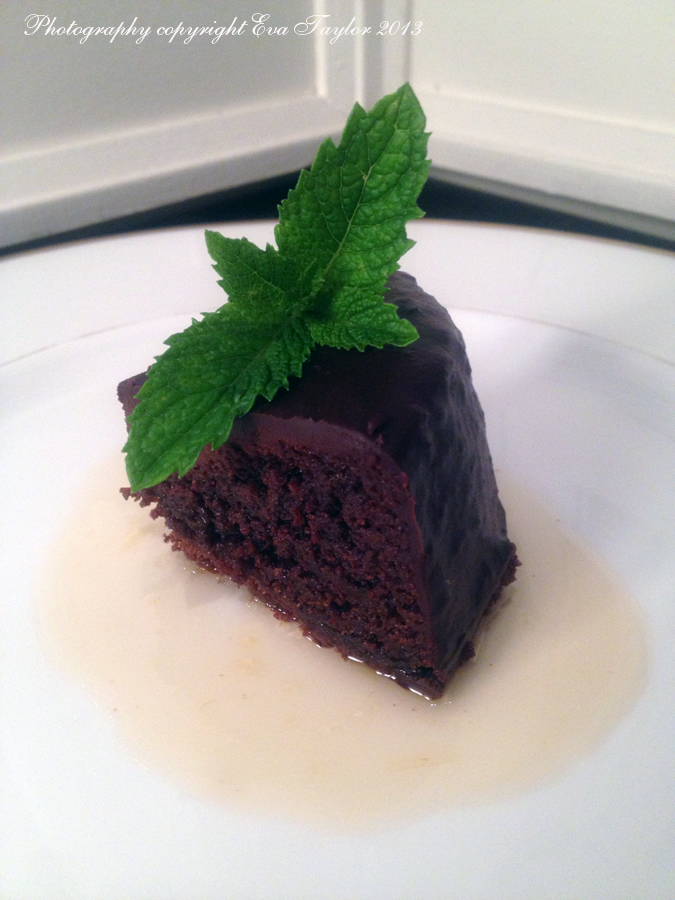
A few months back, I had commented on a beautiful Tonka Bean panna cotta dessert that Dave had posted on his blog, hence the thoughtful gift, so I knew I had to make my interpretation. If you follow Dave’s blog, you will know that he makes rather fancy, labour intensive and multi-layered food and this lovely dessert was no exception; I, however, do not have the patience, so I cut it down to something I could do again, without being too labour intensive. Thank you Dave, for your generosity and inspiration. I thought the Tasmanian Pepper Berry that I picked up at Vom Fas would be a lovely accompaniment to the Tonka Bean Panna Cotta. The pepper berries have a distinct peppery flavour with hints of fruit and best of all, it lightly colours what you make a pink colour! I knew the panna cotta would be a winner.

Tonka Beans are mostly aromatic but there is unmistakable vanilla flavour with a subtle flowery, smoky cinnamon. It is rather complex and works well with both sweet and savoury applications. I can certainly see this as a flavouring in butternut squash soup or even a beautiful risotto.

Tonka Bean Panna Cotta on Chocolate Crumble with Almond Tuile

Makes 400 mL of panna cotta (I used 4 x 100 mL forms)

Tonka Bean Panna Cotta Ingredients:

  • 400 mL 1% milk
  • 25 g granulated sugar
  • 1/2 Tonka bean, finely grated
  • 5 Tasmanian pepper berries, chopped roughly
  • 8 g (1 packet) gelatine

Directions:

  1. Reserve about 25 mL milk and add the gelatin powder, stir, set aside.
  2. In a thick-bottom small pan, add the remaining 375 mL milk, sugar, Tonka Bean and Tasmanian pepper berries and heat until lightly boiling, stirring constantly.
  3. Strain through a fine sieve and pour the dairy mix into the gelatin dairy and stir until gelatin has entirely dissolved. Allow to cool to room temperature, then pour into vessels and refrigerate until set (4-6 hours or overnight).

Chocolate Crumble Ingredients:

  • 9 g butter
  • pinch of sea salt
  • 15 g coconut sugar
  • 16 g ground almonds
  • 8 g coconut flour
  • 6 g cocoa powder

Directions:

  1. Melt butter with the salt and pour over the sifted remaining ingredients and mix well. Spread evenly on a Silpat covered baking sheet and bake at 350° F for about 5-8 minutes. Allow to cool, then crumble.

Almond Tuile Ingredients:

  • 50 g sugar
  • 25 g sliced almonds

Directions:

  1. Caramelize the sugar, add the almonds and cook a bit more until the almonds are toasted.
  2. Spread thinly onto a Silpat and cool until hardened.
  3. Break into smaller bits and pulse in a food processor until sugar and almonds have broken down (I left a few in slightly larger chunks).
  4. Spread out onto a Silpat sheet and bake again for about 6 minutes in a 350° F oven, remove and cool slightly, cut or score while warm or break into uneven bits after it has hardened.

Assembly:

  1. Sprinkle a bit of the crumble onto each plate.
  2. Place the panna cotta on top of the crumble. Decorate with the tuile.

Notes:

  • This dessert is a celebration of flavours and textures; the chocolate crumble brings intense chocolate flavour and wonderful texture, juxtaposed to the smooth and creamy, exotically flavoured panna cotta. And then there is the tuile, easier to eat than brittle because it won’t break your teeth. Crumble, creamy, crunch. This is definitely a keeper recipe but I’m going to toss the moulds, they were not impressive!
  • Dave’s version had a fruit jelly cube and a chocolate mousse which I’m sure made it out of this world, but I was too lazy to add the two additional layers, even so, it was restaurant worthy!

Read Full Post »

It was somebody’s birthday last month and I wanted to bake a special birthday cake that was not too sweet or too heavy because it’s been ridiculously hot and humid in these parts. I had also just finished baking a mess of macarons so I was still in the meringue-making kinda mood. I found this recipe from Ricardo Larrivée’s of Food Network Canada and was intrigued. Years ago, a dear friend had brought a La Rocca Caramel Crunch Cake to the cottage and it was made with meringue instead of cake and I’ve never quite forgotten how moreish the texture was (think giant macaron!) so I modified Ricardo’s recipe a bit and came up with this decadent Chocolate, Chestnut, Coffee, Crunch Cake.

Decadent Chocolate, Chestnut, Coffee Crunch Cake

Makes one 20 cm (8 inch) layered cake.

Original recipe may be found here.

The Cake

Ingredients for the light cake:

  • 40 g (1/2 cup) almond flour
  • 65 g (1/2 cup) all-purpose flour
  • 30 g (1/4 cup) icing sugar
  • 2 egg whites
  • 95 g (1/2 cup) granulated sugar

Directions:

  1. Pre-heat the oven to 325° F (170° C).
  2. Cut four parchment paper circles, about 20 cm (8 inches) in diameter. Spray circles with non-stick spray.
  3. Combine almond flour, all-purpose flour and icing sugar in a bowl and mix well. Set aside.
  4. Beat egg whites until soft peaks form, then add the granulated sugar one tablespoon at a time until stiff peaks form.
  5. Add the almond flour mixture all at once and fold into the beaten egg whites, macrophage-style.
  6. Spread 2 circles with the batter right to the edge and bake for 30 minutes or until lightly golden and firm to the touch. If the batter sticks too much to your spatula, spray it with non-stick spray.
  7. Cool completely.

Ingredients for the chocolate cake:

  • 40 g (1/2 cup) almond flour
  • 65 g (1/2 cup) all-purpose flour
  • 25 g (scant 1/4 cup) icing sugar
  • 5 g (1 tbsp) cocoa, sifted
  • 2 egg whites
  • 95 g (1/2 cup) granulated sugar

Directions:

  1. Combine almond flour, all-purpose flour, cocoa powder and icing sugar in a bowl and mix well. Set aside.
  2. Beat egg whites until soft peaks form, then add the granulated sugar one tablespoon at a time until stiff peaks form.
  3. Add the almond flour mixture all at once and fold into the beaten egg whites, macronage-style.
  4. Spread 2 remaining circles with the batter right to the edge and bake for 30 minutes or until lightly golden and firm to the touch. If the batter sticks too much to your spatula, spray it with non-stick spray.
  5. Cool completely.

Chestnut filling:

Ingredients:

  • 100 g (3.5 oz) peeled chestnuts*, roasted
  • 30 mL (2 tbsp) milk or cream
  • pinch of salt

Directions:

  1. In a small, narrow container blend the chestnuts with the milk and pinch of salt with a stick blender, until smooth and creamy. Set aside.

Cake assembly:

Ingredients:

  • 125 mL (1/2 cup) Chocolate Buttercream
  • 125 mL (1/2 cup) Coffee Buttercream
  • 200 g (7 oz) Belgian chocolate wafers
  • 30 mL (2 tbsp) heavy cream

Directions:

  1. Place the chocolate layer first and spread the entire quantity of the chestnut cream on top. Add the white layer and spread the coffee buttercream on it. Add the chocolate layer again and spread the chocolate buttercream on it. Finish the cake with the white layer but place it upside-down so the smooth side is up.
  2. Melt the Belgian chocolate wafers the heavy cream to make a ganache, pour over the cake and spread out on top and sides evenly.
  3. Refrigerate. Decorate with chocolate curls. Serve chilled (it’s been extremely warm in these parts and the buttercream would melt if served at room temperature!)

Like a Macaron, this cake is best if filled a day or two before serving so that the buttercream has time to soften the meringue cake.

Notes:

  • For buttercream, I always use this recipe.
  • For roasted chestnuts, I usually buy this brand.
  • Use a serated knife to make a clean cut of the meringue.

Read Full Post »


My Father in Law passed recently. He made his 92nd birthday two-weeks earlier. It was very sad to lose him but to be honest, the last few years have not been kind to him, he simply existed, partly by choice and partly by nature (use it or lose it). That’s all of our parents now and I must tell you that it feels weird being an orphan at my age, both JT and I were very close to each other’s parents. Since Dad lived in Toronto, we made arrangements close to home and our home was the hub, which proved to be a lovely distraction. Our dearest friends Paul and T drove up from Wisconsin to help us and console us. Paul had known JT’s Dad through business so there was a strong connection with him. My newly married nephew and his bride also stayed with us because they live about two and half hours from the city. The house was alive with action! My FIL would have LOVED it!

Everyone came to the city to be at his bedside—I know he would have loved that too, although he didn’t love attention, he loved the buzz of activity. He passed very peacefully during the early hours of the morning of May 28, he didn’t suffer long. That evening, everyone gathered at our home and we had a wonderful family dinner telling stories and being there for each other. We ate rotisserie chicken, a variety of store bought salads and some homemade cookies I had in the freezer (I didn’t have time to throw anything together). We had the visitation on June 2 and the service on the 3rd. At 12pm on the 2nd, I discovered that everyone was coming for dinner just prior to the service the very next day so I sprung into action and made a huge batch of chicken mole out of the leftover rotisserie chicken. Fortunately, I had tried this recipe before and got the thumbs up from JT, so it was an easy decision to make it again.

ChickenMole_2 We had a couple of leftovers that JT and I had for dinner later that week.

The mole sauce can be made in a slow cooker but I did it stove-top this time—I found it therapeutic to be involved in the dish, chopping, stirring and cooking. Like any saucy dish, this definitely tastes better the next day. The rotisserie chicken is an easy addition to the mole, just shred it and stir it into the cooled mole sauce, fill the corn tortillas, refrigerate overnight so the flavours can meld. It was a huge success! Everyone loved it.

JT usually orders a mole when we dine at a Mexican restaurant and I’ve always wanted to try my hand at it. Although there are many recipes handed down generations that take two to three days to make, this one can be made in about an hour. It developes the depth of flavour as it sits overnight. I would not rush it, make it a day or two ahead.

Bucket List

Chicken Mole Enchiladas

Makes 24 Enchiladas (15 cm or 6 inch corn tortillas)

For the original recipe, please click here.

Ingredients:

  • 750 mL (3 cups) sodium-free chicken stock (or vegetable stock)
  • 500 mL (2 cups) freshly squeezed orange juice (about 3 good sized oranges)
  • 30 mL (2 tbsp) EVOO
  • 570 g (1 1/4 lb) sweet onions, sliced
  • 55 g (about 1/2 cup) sliced almonds
  • 6 large garlic cloves, finely chopped
  • 8 g (4 tsp) cumin seeds
  • 8 g (4 tsp) coriander seeds
  • 4 g dried pasilla chiles, stemmed, seeded, torn into 1-inch pieces, rinsed*
  • 4 g dried ancho chiles, stemmed, seeded, torn into 1-inch pieces, rinsed*
  • 40 g (about 1/4 cup) raisins
  • 4 8 cm x 1 cm (1/2-inch) strips orange peel (orange part only)
  • 1.5 g (1 1/2 tsp) dried oregano
  • 45 g semi-sweet chocolate, chopped
  • 4 g ground cinnamon (omit if using Mexican chocolate)
  • Chopped fresh cilantro or green onions
  • 24 corn tortillas
  • 1 rotisserie chicken (or 3 left over), shredded (replace with firm tofu or beans if vegetarian)
  • 200 g (2 cups) Queso de Oaxaca or Mozzarella Cheese, grated
  • Crème fraîche, sour cream or yogurt as garnish
  • Sriracha sauce/or chipotle mayo as garnish

Directions:

  1. Heat the EVOO (Extra Virgin Olive Oil) a large Dutch oven, add the sliced onions and sweat them out.
  2. Add the almonds and toast slightly. Add the garlic and cook until they release aroma, then add the cumin, coriander, two types of chilies (*replace with 15 mL (1 tbsp) smoked paprika if you prefer less spicy food) and cook until you can smell the spices.
  3. Add the raisins, orange peel, oregano, chicken stock and orange juice. Mix well. Simmer for 30-40 minutes, stirring occasionally. If using the dry chilis, remove them and discard.
  4. Add the chocolate and cinnamon (or Mexican chocolate) and stir until chocolate has completely melted. Using an emersion blender, blitz the sauce until very smooth. Cool completely. Set aside 2 cups of sauce. Stir in the cold shredded rotisserie chicken.
  5. Fill each corn tortilla with some chicken mole and a little cheese, tuck the rolls into an oven proof pan with the rolled end secured. Repeat until there is no more mole. Pour reserved sauce over the enchiladas, sprinkle with grated cheese. Cover with foil and refrigerate overnight.
  6. 1 hour prior to sitting down to eat, preheat oven to 350° F (177° C). Bake enchiladas for 30-40 minutes or until totally heated through (inside temperature should be around 150° F (66° C) and cheese should be melted and bubbling.
  7. To serve, drizzle with Crème fraîche, sour cream or yogurt and Sriracha sauce or chipotle mayo. Sprinkle with chopped cilantro and/or green onions. Serve over Coconut Cauliflower Rice (recipe to come).
ChickenMole_3 We had these at the cottage a week or so ago. I added a little guacamole for fun. I don’t have many food style tools at the cottage so the garnish is quite rough.

Notes:

  • The enchiladas freeze well. You may wish to slip a piece of parchment between each enchiladas so you can easily separate them.
  • *If you are concerned about the dish being too spicy, omit the dried chilis and replace them with 15 mL (1 tbsp) smoked paprika.

Read Full Post »

ChocScoreMacarons_First

I had the good fortune to be called to work a continuous 9-day job recently. It was a crazy schedule that had us styling and shooting 10-20 shots per day; I was first assistant and we even had a second assistant to help with cleanup and be our runner (running things to set when needed).  Even when everything goes right, it’s a crazy ambitious schedule and at the end of each day, I was so beat, I could barely talk — most days were 11 hours but the last day went 13! I even got to style some of my own work as we had two sets going on a couple of days. We did get one day reprieve in the middle of the hectic schedule and being the crazy woman that I am, I made Chocolate-Skor* Macarons for the team!

To be honest, this flavour combo came by, by error; I had made a batch for our anniversary party and the tops cracked (I beat the egg whites too long), so to hide my error, I coated the cracks with melted chocolate and skor* bits! No one was the wiser and they were by far, the most talked about during the party!

The team LOVED them, so I thought I’d record the recipe for posterity! I’ll be making them again for sure!

Macarons These are the one’s I served at the party, the bottom tray macarons are the cracked ones I hid with chocolate and skor* bits!

Bucket List

Chocolate-Skor* Macarons

A KitchenInspirations Original Recipe

Makes about 18-22 macarons (depending on how large your cookies are)

Ingredients:

  • 70 g blanched almond meal or flour (finely ground)
  • 116 g icing sugar
  • 2 large egg whites, room temperature
  • 50 g granulated sugar
  • 15 g cocoa powder

Directions:

  1. Pre-heat the oven to 350° F (177° C). Prepare your macaron template using your computer to draw 2.5 cm or 1″ circles about 2.5 cm or 1″ apart. Print two sheets. Put the two sheets under your UNSTICK™ baking sheet liner to use as your circle templates.
    MacaronTemplate
  2. Add finely ground almonds, cocoa powder and icing sugar into a food processor and pulse a few times to completely combine.
  3. Press the almond/sugar/cocoa mixture through a fine-mesh sieve to remove the larger bits. You should have no more than 2 tbsps left (discard or save larger almond bits for something else).
  4. In the bowl of your stand mixer, whisk egg whites and granulated sugar by hand to combine. Beat until you have very stiff and glossy peaks when you lift the whisk out of the bowl. DO NOT OVER WHIP or you will get cracked tops.
  5. Add the almond/sugar/cocoa mixture ALL at ONCE to the stiffly beaten egg whites and fold with a silicone spatula starting from 12 o’clock all the way back to 12 o’clock in a clockwise motion, then drag the spatula directly down the middle, pressing firmly against the bowl. Repeat this process until all of the almond/sugar/cocoa mixture has been incorporated and the ‘batter’ flows like lava (I counted about 35 complete strokes). Too few folds will result in cracked tops and too many folds will not permit the feet to form while baking.
  6. Prepare a pastry bag fitted with a 1 cm or 3/8″ round tip. Transfer the batter to the pastry bag.
  7. Begin piping the batter onto the prepared UNSTICK™ baking sheet liner directly over the circles you’ve previously prepared. I found starting directly in the middle and piping a quantity of batter until it reaches the circle edge and lifting the pastry bag up and giving it a little twist to release from the pan, is the best way to do it. However you do the piping, you must be consistent to keep the batter size even. Gently slide out the template paper from beneath the UNSTICK™ baking sheet liner.
  8. Allow the pan to rest for 5 minutes, by doing this you give the peaks time to even out so your Macarons are beautiful and flat on top. Some suggest that you gently bang the pan a few time to remove air bubbles, I found I didn’t have many bubbles.
  9. Bake each sheet separately for 11-13 minutes, rotating halfway through if your oven doesn’t bake evenly. Gently slide the non-stick liner off the baking sheet and allow to cool for a couple of minutes. The UNSTICK™ baking sheet liner allows you to  pry off each macaron half easily onto a cooling rack and allow to cool completely. You may freeze the Macaron halves at this point in a well sealed, air-tight container.
  10. Prepare your buttercream, I loved this recipe from Lorraine Elliot of Not Quite Nigella Blog but I did find that I did not need the entire 75 mL of water, I used only about 35 mL.

Chocolate-Score topping

Ingredients:

  • About 65 g Belgian chocolate
  • About 1/3 cup skor* bits

Directions:

  1. Melt Belgian chocolate in a double boiler until smooth and shiny.

Macaron Assembly:

  1. I prefer to work with at least 1-day old macarons which have sat in the fridge or freezer in an airtight container.
  2. Pipe buttercream onto 1/2 of the macaron cookies. Complete the macaron by choosing a similar-sized bottom and press gently onto the buttercream.
  3. Smear a bit of melted chocolate over the top and bottom of each macaron and dip into the skor* bits.
  4. Place macarons in an airtight container and refrigerate overnight. This is an important step to allow the macaron to develop the correct texture.

Notes:

  • I would not recommend freezing macarons which have already been filled with buttercream.
  • Freeze fully cooled macaron ‘cookies’ in an airtight container, they will last about 1 month (after then they dry out too much).
Macaron_1 They were so good!
This batch the tops did not crack, but I wanted the chocolate-score topping anyway! The tops did not crack with this batch, but I wanted the chocolate-skor* topping anyway!

*Skor was corrected from Score!

Read Full Post »

The marketing company that I work with from time to time recently moved into their new exciting office space and they invited me down for a look. I decided to bring them a baked treat (because that is how I roll) and created this new chewy chocolate peanut butter brownie recipe! I was inspired by your generous reaction to the Chocolate Peanut Butter Bark with Gold Sea Salt that I created, thank you. This is not an overly sweet brownie but it is richly flavoured with chocolate with the classic peanut butter combo. I used natural, chunky PB that isn’t sugared or salted, but feel free to use your traditional grocery store PB and omit the additional sugar and salt that I add in the later part of this recipe. The recipe is loosely based on my Go-To brownie recipe that my dear Mom cut out of the Toronto Star about 20 years ago (click here and here).

Chocolate Peanut Butter Brownies 

A KitchenInspirations Original Recipe

Makes about 25 brownies

Ingredients:

  • 1 cup all-purpose flour
  • 1 cup icing sugar
  • 5 tbsp cocoa powder
  • 1 tsp baking powder
  • 45 g (1 1/2 oz) semi-sweet dark chocolate chips
  • 3 tbsp butter
  • 1/2 cup water
  • 2 tsp vanilla extract
  • 2 egg whites
  • 1/2 cup natural, chunky peanut butter
  • 1/3 cup water
  • 1 tbsp icing sugar
  • Pinch of salt

Directions:

  1. Sift flour, icing sugar, cocoa powder and baking powder.
  2. Melt butter  with chocolate chips, add vanilla and water and stir well.
  3. Beat in the egg whites (if the liquid is still hot, temper them so you don’t get scrambled eggs!)
  4. Add dry ingredients and stir well.
  5. Pour into a prepared 9″ x 9″ pan and line the pan with parchment paper, then spray with non-stick baking spray. Bake for 25-40 minutes until firm and cake tester comes out clean.
  6. Option to frost with a butter icing, but not necessary as this brownie is very moist and flavourful.

Read Full Post »

ChocolateCherryBrownies_1

As I was recently cleaning out my freezer, I discovered I had some cherry pie filling likely left over from a shoot or test because frankly, I would not buy the stuff myself! Being one who does not like to discard food I came up with this chocolate cherry brownie recipe. It’s moist, very chocolatey and surprises you with the odd cherry. I cut them into 2.5 cm (1 inch) cubes so you could have more of them, but you may cut them into the larger, traditional brownie shapes and have fewer or more, who am I to judge.

ChocolateCherryBrownies

Chocolate Cherry Brownies

A KitchenInspirations Original Recipe

Makes 1 pan 23 cm X 23 cm (9″ x 9″) about 2.5 cm (1″) thick.

Ingredients:

  • 1 cup all-purpose flour
  • 1 cup icing sugar
  • 5 tbsp cocoa powder
  • 1 tsp baking powder
  • 45 g semi-sweet chocolate
  • 1/2 cup brown sugar, packed
  • 1 cup cherry pie filling
  • 2 tsp vanilla extract
  • 2 egg whites, lightly beaten

Directions:

  1. Pre-heat the oven to 350 °F.
  2. Sift flour, icing sugar, cocoa powder and baking powder.
  3. Combine the brown sugar and chocolate chips and slowly melt the chocolate, add vanilla and mix well.
  4. Beat in the egg whites (if the liquid is still hot, temper them so you don’t get scrambled eggs!)
  5. Add dry ingredients and stir well.
  6. Pour into a prepared 23 cm X 23 cm (9″ x 9″) pan lined with parchment paper. Bake for 30-35 minutes until firm and tester comes out clean.

ChocCherryBrowniesNutrition

Per single 2.5 cm cube brownie.

OK, I lied. Full disclosure: I really came up with this recipe so that I could use my adorable, new petite sweet stand (using up the cherry pie filling was just a bonus!). Isn’t it gorgeous? Cue JT’s famous Eye Roll.

Read Full Post »

PB ChocolateBark

This is a perfect recipe to show case the gorgeous gold sea salt that Barb (Profiteroles and Ponytales) so generously gave me at Christmas. Admittedly, this recipe is more appropriate for Christmas but what the hay…you get it now. On the plus side, it’ll give you enough time to source gold sea salt! Now this sea salt isn’t just brown made to look like gold, it actually looks like the real McCoy (probably not real gold, though but it’s just as pretty)! I would have liked to pry the top off and get the actual larger chunks but it seems it was glued on so I was out of luck. I can see this gorgeous sea salt on so much more so you’ll likely be reading about it again.

GoldSeaSalt copy

This is the gold sea salt that I sprinkled on the bark

Peanut Butter Chocolate Bark with Gold Sea Salt

A KitchenInspirations Original Recipe

Ingredients:

  • 285 g semisweet chocolate
  • 1/4 tsp cinnamon
  • 1/3 cup chunky peanut butter (just peanuts, no salt, no sugar)
  • 2 tbsp icing sugar
  • gold sea salt

Directions:

  1. Slowly melt the chocolate in a double boiler or bain marie, stir in the cinnamon and mix well. Meanwhile, mix the chunky peanut butter and icing sugar well.
  2. Spread the melted chocolate onto a silicon lined baking sheet to about 3-5 mm (just less than 1/4″). Dot the peanut butter onto the melted chocolate and swirl with the blade of a very thin knife. Sprinkle with gold sea salt. Refrigerate until hard and then break into bite-sized portions.

PB Bark

Mmmmm PB and chocolate, a match made in heaven!

Notes:

  • Melting chocolate should always be done very slowly and never over boiling water.
  • I used a natural peanut butter because that is what we have, if you use peanut butter with added sugar and salt, you will need to modify the recipe.

Read Full Post »

ChocolateAlmondCake_First

I was recently reminded of a project I completed in anticipation of family arriving from overseas. The project wasn’t imperative for their comfort or enjoyment, it was just the impetus I needed to “git ‘er done” as they say!

We’ve lived in our present home for almost 15 years, and ever since the first day we moved in, I’ve wanted curtains on both windows in our living room (or lounge) but we already had perfectly good, and totally lovely curtains on the back sliding doors. To replace perfectly good (and well made, I might add) curtains seemed excessive to me, so we lived with them. For 14+ years. Until I did some math and to my utmost delight , I discovered I could get two for the price of one, out of the generous fabric that the original curtains had. I wanted the dated tabs replaced with a more contemporary and clean look (for the sewers out there, I simply folded the tabs down, behind the top and stitched across. Pull the rod through the tabs to hang. I also added recycled toilet tissue rolls to help hold  the role). The sliding door curtains are functional and we do close them down on the very cold days, but the front ones are just for show! I am just so happy every time I look at them. Of course, I had to do the dining room next…it’s really never ending. While hemming the new dining room curtains, I started thinking about the Indonesian Spekkoek Lapis Legit cakes I made a couple of years ago (here and here), specifically about how I can change it up. My FILs birthday was in mid-May so making a cake for him was the perfect opportunity to experiment. We all love Charles’ Kladdkaka and Tuppkaka so I wondered if I could combine the two delicious cakes using the Spekkoek Lapis Legit technique. It was a huge success and the two flavours went together famously. I made the cake again for JTs birthday in June, by special request.

What project have you put off only to get it done for guests?

OldCurtains

These are the very generous old curtains

I changed the rod to something a little more in style with the Craftsman home. I’ve also fixed the hem since this photo!

Kladdkaka

Ingredients:

  • 200 g Caster Sugar
  • 140 g unbleached Flour
  • 50 g Cocoa Powder
  • 2 tsp Baking Powder
  • 2 tsp Vanilla
  • 120 g Butter
  • 2 eggs
  • 1/4 cup water

Directions:

  1. Prepare your spring-form tart pan with non-stick cooking spray. Line the bottom with parchment paper.
  2. Add the sugar, flour, cocoa powder and baking powder to the bowl of your food processor. Plus few times to incorporate evenly.
  3. In the microwave, melt the butter slowly so it doesn’t overheat. Combine the cooled melted butter, eggs, vanilla and water. Slowly pour the melted butter mixture in an even stream while processing. Mix well, scraping down the sides as required. 
  4. Lightly grease a round tin about 20cm in diametre (I used a spring form tin). Spoon the batter into the tin and smooth out to the edges (it is rather thick). Resist the urge to try this batter, it’s seriously good and you will not be able to stop.
  5. Set aside while you make the Tuppkaka layer.

Tuppkaka

Ingredients:

  • 300g Caster Sugar
  • 200g Plain Flour
  • 74g Butter
  • 2 Eggs, separated
  • 2 tsp almond flavouring
  • 1/4 cup water

Directions:

  1. Melt butter and allow to cool to room temperature.
  2. Combine the eggs with the sugar and beat well (until thick and very pale yellow). Combine the melted butter with the almond flavouring and water and and mix well.
  3. Sift in the flour and stir until entirely incorporated.

Making the layered cake:

  1. The first layer is chocolate, use about 1/2 cup of chocolate batter for the first layer.
  2. Broil for 2-4 minutes watching carefully so it doesn’t burn. Once it is set and your tester comes out clean, pour 1/2 cup of the almond batter on top and spread evenly (the heat from the chocolate will begin cooking the batter so you’ll need to work fast.
  3. Broil for 2-4 minutes until it is set and your cake tester comes out clean. Repeat alternating the flavours until you have used up both almond and chocolate batters, broiling each layer individually.
  4. Allow to cool completely before layering the ganache on the cake.

Chocolate Ganache Ingredients:

  • 114 g dark semi-sweet chocolate
  • 125 mL (1/2 cup) heavy cream

Ganache Directions:

  1. Heat cream to almost boiling, pour over chocolate and stir until melted and entirely incorporated and smooth.
  2. Pour over cake and smooth top and sides.
  3. Refrigerate until set.

Notes:

  • Set your oven rack 2nd highest from the top.
  • As the cake becomes taller you may need to reduce the broil to low so it doesn’t burn.
  • I baked the final layer in a 350°F oven for 10 minutes because it just got too close to my boiler and I was concerned it would burn.

ChocolateAlmondCake

It’s a little like eating chocolate marzipan!

ChocolateAlmondCakeCut

I still need to work on my layers but it tasted darn good!

Read Full Post »

BBQ Sauce_first

The Hungarians have arrived and the “to do” list is finally complete! Just in the nick of time too. We decided to start their visit off with a little welcome party but we all know it’s just my excuse to cook and feed my kin!!! I was fortunate enough to score a sizeable number of vine ripened tomatoes so I decided to make barbeque sauce because JT made a special request for Pulled Pork. The sauce turned out perfectly, sweet, piquant and zesty — cooking it with the pork tenderloin for 5 hours made the flavours all the more richer and balanced the vinegar very nicely. Like any low and slow cooked meal, I made the pulled pork a day in advance because we all know it tastes better the next day!

I’ve geared up a couple of posts for the following weeks, but I may be AWOL depending on how busy things get, so if I miss to comment on your blog or I don’t post, I apologize in advance. Thanks for understanding.

Barbeque Sauce

Makes 1.25 L (42 oz)

Ingredients:

  • 200 g onions, coarsely chopped
  • 50 g garlic, finely chopped
  • 125 mL white vinegar
  • 1.2 kg tomatoes, chopped
  • 30 mL tomato paste
  • 125 mL molasses
  • 50 g sundried tomatoes (not in oil)
  • 1/2 tsp salt
  • 1/2 cup packed brown sugar
  • 1 tsp smoked paprika
  • 1 tbsp of each sweet paprika, cumin, coriander and cocoa powder

Directions:

  1. In a splash of canola oil, sauté onions and garlic until translucent, add dry spices and stir until fragrant.
  2. Add remaining ingredients and stir well. Simmer for one hour or until dark and thickened.
  3. Purée until smooth and press through a fine sieve.
  4. May be kept in the refrigerator for 3-4 days or freeze for 3 months.

BBQ Sauce

Read Full Post »

TurkeyChiliFirst

JapaneseCherryBlossoms

The Japanese Sakura Cherry Blossoms in High Park

CherryBlossomTree

Our Cherry Blossom tree in the front yard

Cinco de Mayo Inspired Turkey Chili

A Kitcheninspirations Original Recipe

Serves 8-10

Ingredients:

  • 1 cup dried red kidney beans, soaked overnight in water
  • 250 g sweet onions, chopped
  • 25 g garlic, finely chopped
  • 300 mL tomato sauce
  • 2 tbsp tomato paste
  • 500 mL water and or chicken stock
  • 900 g ground turkey breast
  • 1 1/2 tbsp cumin
  • 1 tbsp coriander
  • 1/2 tsp smoked paprika
  • 1/2 tsp chili
  • 1/2 tsp sea salt
  • 5 g dried ancho chili (seeds and veins removed)
  • 1 tbsp unsweetened cocoa
  • 30 mL tequila (a nice smokey one)

Garnish:

  • 1 ripe avocado, sliced thinly
  • 10 tbsp Greek Yogurt (approx 150 mL)
  • 10 tbsp mozzarella cheese
  • handful of Cilantro, or to taste
  • 3-4 Green onions, finely chopped
  • 1 red chili pepper, finely sliced

Directions:

  1. Pre-heat slow cooker on high. Rinse beans and add to the slow cooker along with the onions, garlic, tomato sauce, tomato paste and the water and/or stock and give it a good stir.
  2. Brown the turkey meat in a very hot cast iron pan in batches. Add the browned turkey and juices into the slow cooker in batches. Once you have browned all of the turkey, remove the pan from the heat and deglaze the pan with the tequila, scraping off all the delicious turkey bits from the pan. Add this liquid into the slow cooker.
  3. Give the chili a good stir. Cook on high for 4-5 hours or until the beans are fork tender. If the chili is too liquidy, then remove the lid for the final hour of cooking.
  4. Serve hot garnished with sliced avocado, a tablespoon of yogurt or sour cream, cilantro, chopped green onion, shredded mozzarella cheese and finely sliced peppers.

Based ib 10 Servings

Based on 10 Servings

It's heavy on the points but high on flavour.

It’s heavy on the points but high on flavour.

TurkeyChili

A delicious Mexican Flavoured Chili

Ladies Night May 2015

Ladies Night May 2015

LadiesNight2

I should have set up the tri-pod for an all in shot.


Read Full Post »

Macarons

Strike one off the bucket list: French Macarons


Updated May 2016.

Do you have a cooking bucket list? I’ve had an informal (read: in my head) bucket list for quite some time; on it you’ll find duck, szalonczukor (a Hungarian fondant candy), spun sugar, puff pastry, phyllo pastry and last but not least, French Macarons! This post is about Macarons.

I was first introduced to these French Macarons a few years ago, a friend had brought a few back for me from Ladurée in Paris. My first bite experience was INCREDIBLE: crunchy, airy, lightly sweet, slightly chewy, fragrant, creamy, buttery. It was an awakening! It’s what you Aussie’s would call moreish and I would even go further to say needish, wantish, must-haveish!

The flavour combinations are limitless and I’ve even seen some savoury versions floating about the web-o-sphere (I must admit, a savoury version makes me cringe a bit). Today, I will share with you my second attempt recipe even though my first version turned out wonderfully, they were rather irregular in size and therefore not blog worthy. I used a Martha Stewart recipe for the meringue bit and a standard custard-based butter cream for the filling. The flavours I chose were: attempt 1 was lemon, attempt 2 were ice wine and pomegranate, chocolate and hazelnut. All were really delicious but my favourite was the lemon.

I will begin by saying that making Macarons are not as difficult as you might think; you need patience, a little know how and perseverance. The ingredients are simple and few. It makes me wonder why they charge so much for them, it must be the pomp and circumstance because it isn’t the cost of ingredients!

This blog post is an excellent reference; the professional baker did all the time-consuming comparisons and experimentation and documented it. My advice: Go with confidence and you WILL rock the recipe.

Bucket List

Macarons

Original Martha Stewart recipe can be found here.

Ingredients for basic Macaron:

  • 35 g blanched almond meal or flour
  • 58 g icing sugar
  • 1 large egg white, room temperature
  • 25 g granulated sugar
  • 1/4 tsp gel food colouring (I used Christmas red)

Ingredients for Favoured Macarons:

  • 35 g blanched almond meal or flour
  • 53 g icing sugar
  • 5 g flavour such as unsweetened cocoa powder (sifted) or espresso powder
  • 1 large egg white, room temperature
  • 25 g granulated sugar

Directions:

  1. Preheat oven to 350° F (177° C). Place the rack in lower part of the oven.
  2. Prepare your macaron template using your computer to draw 2.5 cm or 1″ circles about 2.5cm or 1″ apart. Print two sheets. Put the two sheets under your UNSTICK™ baking sheet liner to use as your circle templates.

    MacaronTemplate

    This is the circle template under the UNSTICK liner.

  3. In a coffee grinder, grind the almond flour in batches to a fine consistency (being careful not to make paste (marzipan) out of it). Omit if you can purchase extra finely ground almond flour.
  4. Transfer ground almonds to a food processor and add the icing sugar; process until combined, about 1 minute.
  5. Press the almond/sugar mixture through a fine-mesh sieve to remove the larger bits. You should have no more than 1 tbsp left, if you do, grind in coffee grinder again and press through fine sieve until you have no more than 1 tbsp left (save larger almond bits for something else).
  6. Whisk egg whites and granulated sugar by hand to combine. Then beat on medium speed (#4 on a KitchenAid) for about 2 minutes, then increase speed to medium-high (#6) and beat 2 additional minutes. Then beat on high (#8) for 2 minutes more. The beaten egg whites will hold very stiff, glossy peaks when you lift the whisk out of the bowl. DO NOT OVER WHIP.
  7. Add your choice of flavourings and food colourings and beat on the highest speed for about 1 minute. Just a drop if using flavouring or colour.
  8. Then add dry ingredients ALL at ONCE (yes, I know many recipes say to fold in gingerly, but you really don’t have to), then fold with a spatula from bottom of bowl upward and end by pressing the flat side of the spatula firmly through centre of mixture. Repeat this process until all of the almond/sugar mixture has been incorporated and the ‘batter’ flows like lava (I counted about 35 complete strokes).
  9. Prepare you pastry bag fitted with a 1 cm or 3/8″ round tip. Transfer the batter to the pastry bag.
  10. Begin piping the batter onto the prepared UNSTICK™ baking sheet liner directly over the circles you’ve previously prepared. I found starting at the outer edge and piping into the centre to the easiest way to keep the Macarons uniform, repeat until you’ve used up your batter. Martha suggests you pipe about 1 cm or 1/2″ above the pan, whatever you do, you must be consistent to keep the batter even (so your circles are all the same size). Gently slide out the template paper from beneath the UNSTICK™ baking sheet liner.
  11. Allow the pan to rest for 15 minutes, by doing this you give the peaks time to even out so your Macarons are beautiful and flat on top. Some suggest that you gently bang the pan a few time to remove air bubbles, I found I didn’t have many bubbles.
  12. Bake each sheet separately for 13 minutes, rotating halfway through if your oven doesn’t bake evenly. Gently slide the liner off the baking sheet and allow to cool for a couple of minutes. The UNSTICK™ baking sheet liner allows you to  pry off each macaron half easily onto a cooling rack and allow to cool completely. You may freeze the Macaron halves at this point in a well sealed, air-tight container.
  13. Prepare your butter cream.

MacaronFlavours

Great flavours to make macarons with.

Basic Butter Cream Recipe:

Ingredients:

    • 3 egg yolks
    • 35 g granulated sugar
    • 3 1/2 tablespoons milk
    • 105 g unsalted butter, softened
    • 62 g icing sugar

Ingredients for Ice Wine and Pomegranate Butter Cream:

    • 5 g ice wine syrup
    • 1 g pomegranate molasses
    • 2 drops generic red icing colour

Ingredients for Chocolate Hazelnut Butter Cream:

    • 2 tbsp Nutella or hazelnut chocolate spread

Directions:

  1. In a small saucepan, combine the egg yolks, milk and granulated sugar and whisk. Cook over medium heat until the egg thickens to coat the back of a spoon (like pudding). Remove from heat and allow to cool COMPLETELY.
  2. When cool, beat the butter with the icing sugar until light and fluffy and add the cooked egg mixture and beat on high until very fluffy.
  3. To make two flavours, divide the buttercream in half (roughly) and to each half add the flavourings.
  4. Pair each Macaron half to a half that is more or less is the same size and shape, set aside.
  5. Onto one-half of each Macaron pair, pipe the buttercream but not to the edge. Take the other half and gently squeeze the to side together so the buttercream squishes almost to the edge. Set aside. When you have filled all the halves, set on a clean baking sheet and refrigerate until buttercream is set. Store in an air-tight container on their sides until ready to serve. Allow to come to room temperature before serving.

A few notes:

    • I prefer weight measures over volume because it’s more accurate.
    • I ground my almonds in a coffee grinder because it results in a finer grind and apparently the grind is very important. Update May 2016: a fine grind almond meal is now available at my Bulk Barn so I no longer require to grind it in the coffee grinder.
    • I used Wilton’s paste food colouring for the ice wine Macaron cookies.
    • I ruined a batch using the convection setting in my oven; they didn’t spread nor did they rise or develop feet.
    • Over the years, I have made quite a few batches of these treats (the latest May 2016 was 146 macarons for our anniversary party). Two observations: Do not over beat the egg whites or they will not form feat and they will crack. Also, I found that they will crack if you do not fold the almond meal into the egg whites enough, the batter really needs to behave like lava, a slow moving thick batter.
    • Update May 5, 2016: I have also used this recipe from the very lovely Lorraine over at Not Quite Nigella and it is excellent. Her recipe makes 461 g of buttercream and by my estimation, each macaron takes about 14 g of buttercream (or if you make small macarons, only about 7 g of buttercream).

Macarons_2

Tender, delicious, delicate cookies

Macarons_4

Betcha can’t eat just one!

Macarons_1

Yes, I did get carried away with the photos!

FirstMacarons_2

For my first attempt, I didn’t grind the almonds quite fine enough and that’s why the macaron is not smooth.

FirstMacarons_1

This is my first attempt, it’s lemon flavoured.

Read Full Post »

VeganTruffles_4256

Do not be fooled that these are Vegan, they are surprisingly, incredibly truffle-like.

This is the last of the vegan recipe series that I’m doing for the time being. It was a great experience to cook this way and I’m very happy to have been able to document it. Cooking vegan is not nearly as difficult as I originally thought and like most everything, it’s not always healthy. If I were to be serious about this type of cooking, I would definitely research different types of fats to use because I really did not like the vegan margarine one bit. The blog resource I found is excellent and I would definitely recommend it to anyone cooking vegan.

I have definitely left the best for last, these vegan truffles are the pièce de résistance!

VeganTruffles_4257

Incredibly creamy truffles, just as they should be.

Vegan Truffles

Makes about 3-5 dozen, depending on size

Ingredients:

  • 12 oz bittersweet or semi-sweet chocolate chips (I used Belgian chocolate)
  • 1/2 cup coconut milk (full fat)
  • 1 tbsp margarine or coconut oil
  • 1 tsp orange extract
  • 1 tsp orange zest
  • 1 tsp espresso powder + 1/4 tsp cinnamon
  • Espresso powder and icing sugar for rolling in

Directions:

  1. Combine chocolate, coconut milk and margarine in a saucepan and heat until chocolate has melted and mixture is thick. Divide into two portions, about the same volume. Add your choice of flavourings to each portion.
  2. Pour into a bowl , cover with plastic wrap and set in refrigerator overnight (I actually had mine sit a couple of days and it was fine).
  3. Using a melon baller, sprayed with oil or vegan butter,  shape into spheres. Roll into your favourite topping. Store in the refrigerator.

I was completely floored by how authentic these truffles tasted.The coconut flavour was quite subtle, if any and what it brought to the table was total creaminess. I would make these again, even for non-vegans. I think this recipe is totally a keeper and I hope you like it too. These truffles act much the same way as real, cream version truffles so you need not worry about them melting into a puddle.

VeganTruffles_4260

Indeed, they are as creamy as they look.


Read Full Post »

It was someone’s birthday recently and a very specific request for cake was made: Black Forest Kirschtorte! I haven’t made this cake in quite some time and had forgotten which was my GOTO recipe. So I sat down with my favourite pastry cookbook, Barbara Maher’s Traditional Cakes and Pastries, published by Burlington Books in 1984. Coincidentally, this book was a gift from one of my dearest friends, University Kim (I have two Kim’s so I’ve differentiated this way for years!) she signed it “a friend forever” and she sure is!

I’ve made many successful recipes from this cookbook from the Normandy Apple Tart to Profiteroles (and some that I haven’t even blogged about) and for the most part the recipes were detailed and correct. Not this one.

I usually read through the ingredients to make sure I have everything I need and I skim the directions to make sure I know what I’m doing, which I also did. But when I actually got down to the nitty gritty to make the cake (well into it, to be exact), I noticed that they completely forgot to include the flour in the instructions (actually, in this case it was the almond mix). So I had to improvise and it seems to have worked. The cake is a genoise-style with strong chocolate flavouring from both melted good quality chocolate (I used this one) and cocoa powder. It’s light enough that you don’t squeeze out all the whipped cream when you cut it, but it’s got enough body to hold the drunken cherries. All in all, quite a tasty recipe and it’s Gluten Free! I stabilized the whipped cream so that it lasts a few days, otherwise it will just make the cake soggy.

I cut the recipe down to 1/3 size because we didn’t want a large cake and I added the cocoa powder because we like chocolate and removed flour and bread crumbs ingredients, you can definitely check the original recipe on page 93 in her cookbook. The recipe is a bit different that what you might be used to in North America as the cinnamon really flavours the chocolate beautifully, if you’re not a fan, leave it out!

BlackForestCake_3147

A deliciously boozy cake

Black Forest Kirschtorte

Original recipe by Barbara Maher’s Traditional Cakes and Pastries, published by Burlington Books in 1984.

Makes one small cake, about 2 cups of batter. Serves 4-7 people.

Ingredients for the cake:

  • 42 g ground almonds (not blanched, coarsely ground)
  • 1/3 tsp cinnamon
  • 1/3 tsp ground cloves
  • 10 mL kirsch
  • 47 g caster sugar
  • 3 egg yolks
  • 1/2 tsp orange extract
  • 2 tbsp crême fraiche or sour cream
  • 33 g good quality chocolate, melted and cooled slightly
  • 2 tbsp good quality cocoa powder
  • 2 egg whites

Directions for the cake:

  1. Pre-heat your oven to 350° F (180° C).
  2. Prepare your pan by coating all over with butter and dredge with sugar.
  3. Combine the almonds, cinnamon, cloves and moisten with kirsch.
  4. In a separate bowl, beat the egg whites until stiff but not dry. Set aside.
  5. In another bowl, combine the sugar and egg yolks and beat until thick, creamy and pale in colour. Add the orange extract, melted chocolate, crême fraiche and lastly the cocoa powder and mix well.
  6. Fold in the beaten egg whites.
  7. Pour evenly into your prepared pan and bake for 25-30 minutes until a tester comes out clean and the cake has shrunken for the sides a little bit.
  8. Cool for 10 minutes in the pan, then turn out to a cooling rack.

Ingredients for the cherry syrup and whipped cream:

  • about 20 fresh cherries with stems and pits (around 330 g or 3/4 lb). Reserve 7 cherries for decoration, set aside.
  • 33 g (1 oz) granulated sugar
  • 85 mL (3 oz) red wine
  • 85 mL (3 oz) water
  • 1 cinnamon stick
  • 30 mL (5 oz) kirsch
  • 1/2 cup whipping cream (35%)
  • 1 tsp gelatin

Directions the cherry syrup and whipped cream:

  1. While the cake is baking wash, pit and stem the cherries; cut them in half.
  2. In a small sauce pan add the sugar, red wine, water, cinnamon stick. Simmer for 20 minutes, add the halved cherries and poach lightly for 10 minutes.
  3. Remove the cherries and allow to drain into a dish. To thicken the syrup, bring to a boil and cook down for about 3-4 minutes. Remove from the heat and allow to cool completely. Remove the cinnamon stick and add the kirsch, stir well.
  4. Soften the gelatin in a very little bit of water (2 tbsp) set aside while you whip cream.
  5. In a very cold bowl, whip the cream until stiff peaks form, add the softened gelatin and whip to combine evenly.

Directions to decorate the cake:

  1. Cut the cooled cake in half. Drizzle the cherry syrup onto the bottom and top layers and allow to absorb. Spread an even layer of whipped cream and dot with poached cherries. Add a bit more whipped cream on top.
  2. Place the top layer down on the bottom layer and drizzle with the cherry syrup (reserve some syrup and poached cherries for serving). Spread the remaining whipped cream on top and decorate with the seven cherries that were reserved at the onset.
  3. Serve with cherry syrup drizzled on the plate and some of the reserved cherries.

Happy Birthday!

Happy Birthday!

Read Full Post »

My parent’s home was always filled with the wonderful and delicious aromas of baked goods. My Mom always made bread and these were the days before bread machines! She would start the process shortly after dinner, making the bread for the following days. Mostly she would bake it when we kids had already gone to bed teasing our senses as we drifted off to sleep, but on occasion it would be in the oven while we were still up, the gorgeous aroma of home made-bread wafting throughout the house. Sometimes we could have a warm slice slathered with butter, but most often not. During the holidays my Mom made the most special bread, chocolate brioche! I can’t even begin to describe the incredible aroma that it made throughout the house. Now that bread was always cut into the night it was baked! I’ve not had this type of bread outside our home before but years ago at a Club Med in Mexico — I think the chef must have been French. It was such a delicious surprise when they served the chocolate brioche for breakfast most days.

I baked these brioche braids for New Year’s Day breakfast, it was to be a feast of delicacies, but plans changed and we had it toasted with butter. And now I have a loaf in the freezer taunting me. Against better judgement, it will likely be defrosted and eaten toasted or lightly warmed with sweet butter dripping from its crispy edges…slice after slice until there is no more. But the memory will remain.

Please excuse the winter evening photos, no matter what I do in Photoshop, they just cannot be helped.

ChocolateBread_1766

Baked and now cooling.

it's irresistible, like me ;-)!

it’s irresistible, like me ;-)!

Chocolate Brioche

Makes 3 relatively good sized braids. Original recipe was modified from Baking with Julia.

Ingredients for the dough:

  • 1 1/2 tbsp dry yeast
  • 1/2 cup tepid water (80°F to 90°F)
  • 1/3 cup granulated sugar + a pinch, divided
  • 1/2 cup unsalted butter, cut into smallish cubes
  • 1 cup whole milk
  • 2 1/2 tsp salt
  • 4 large eggs, room temperature
  • 6 – 6 1/2 cups all purpose, unbleached flour
  • 2 tbsp skim milk powder
  • 1/4 cup unsweetened cocoa powder
  • 1/4 cup icing sugar
  • non-stick cooking spray or 2 tbsp melted butter

Ingredients for the glaze:

  • 1 large egg
  • 1 tbsp cold water or heavy cream

Directions:

  1. Spray two large mixing bowls with non-stick cooking spray, or rub with butter and set aside.
  2. Whisk the yeast into the water with a pinch of sugar in a measuring cup and allow to bubble up, about 5 minutes.
  3. Heat the milk with 1/3 cup granulated sugar and the cubed butter until warm to touch and the butter has entirely melted. Stir in the salt until melted. Allow this mixture to cool to 110°F.
  4. Pour the milk mixture into the large stand mixer bowl attached with a whisk and add the eggs one at a time, add the milk powder, mixing well to combine. You should have about 4 cups of liquid. Divide into two portions of about 2 cups each and set one portion aside.
  5. Add 2 1/2 cups of flour to the portion at hand and beat on low with your cookie dough paddle for about 3 minutes or until it comes together. Now switch to the bread dough paddle and add as much flour as needed (I was able to add another cup), kneading on medium low speed to make a soft dough that is clean off the sides of the bowl. Now knead for 8-10 minutes until smooth and elastic. Transfer to one of the bowls that has been spray with non-stick cooking spray or rubbed with melted butter. Cover with plastic wrap and place in a warm dark place to double in size (1 or 1 1/2 hours).
  6. Sift 2 cups of flour with the unsweetened cocoa and icing sugar. Retrieve the second portion of the liquid and add the sifted flour, cocoa and icing sugar and beat on low for about 3 minutes or until it comes together. Add as much flour as needed (I was able to add another cup), kneading on medium low speed to make a soft dough that is clean off the sides of the bowl. Now knead for 8-10 minutes until smooth and elastic. Transfer to the other bowl that has been spray with non-stick cooking spray or rubbed with melted butter. Cover with plastic wrap and place in a warm dark place to double in size (1 or 1 1/2 hours).
  7. When dough has doubled in size (both the chocolate and the plain versions) punch down and deflate them. Cover again and allow to rise until doubled in size (about 45 minutes to 1 hour).
  8. Line a large baking sheet with parchment. Divide the plain, white dough in 4 equal portions (I find a scale very helpful) and roll into approximately 16″ lengths. Divide the chocolate dough into 5 equal portions. For 2 of the 3 loaves, take two chocolate portions and one plain portion, for one of the braids take 2 plain portions and one chocolate portion. Braid from the centre to each end, fixing each end well beneath the braid to make a nice neat end. Place on lined baking sheet and allow to rest for 40 minutes.
  9. Preheat the oven to 375° F. Combine the egg and cold water or heavy cream and mix well. Brush each braid with the glaze and bake for 20 minutes. Remove from the oven and brush the expansion joints of the braid and return to bake for an additional 15 to 20 minutes. If they brown too quickly, cover browning parts with a little piece of foil.
  10. Cool before slicing. This can be frozen in an air tight plastic bag for about 1 month. Stale slices of this bread makes excellent French toast or Bread Pudding!

ChocolateBread_1763

Read Full Post »

As we are approaching the end of autumn and the beginning of a long cold winter, I am once again excited about… Halloween! Last year I started telling you about some spooky stories all true, and now I’m going to continue this tradition. Buckle your seat belts ladies and gents.
JT and I bought our first house north and east of Toronto in a small bedroom community called Stouffville. It was an old farming community from the 1800’s that the city planners linked to Toronto via the GO Train (Government of Ontario Train). The small city was limited only by the fact that it wasn’t on either main water or sewage; our little city’s water was from an arteasesn well. Being limited by the water made Stouffville even more desirable because it constrained mass building which was happening in droves in similar bedroom communities (we used to call it ‘the sea of houses’ because they went on and on). Our subdivision was the last of its kind until Stouffville joined up to city water and sewage in the mid-2000’s, which made it the fastest growing community north of Toronto. But we were gone long before that.
Although the house was brand new, it always gave me the willies! I only ever spent one night by myself in that house, I would go spend the night with my Mom or in laws when JT travelled. There were creepy noises, creeks and cracks. But the weirdest thing that happened even made skeptic JT agree that the house was strange.
One evening after dinner I was baking in our little kitchen, JT was watching television in the adjacent family room. I was turned away from the doorway and as I turned to put something in the sink out of the corner of my eye, I saw someone poke their head into the kitchen, they were wearing red. I just figured it was JT seeing if there were any samples to be had. But then a few moments later JT actually came into the kitchen and asked me what I wanted. I said I was just about to ask him the same thing. He said he thought I just poked my head into the family room, he thought I was wearing red too! Except neither of us had red on. Super freaked out, we checked all the doors and windows and they were locked tight. Then we checked all the rooms and closets. We found nothing.
Even though I wasn’t baking biscotti that night, I think JT and our mystery guest would have enjoyed a few tasters from this recipe.

ChocAlmondBiscotti_0978

There is something so civilized about eating a little biscotti with an afternoon espresso, don’t you think?


Chocolate Almond Biscotti

Makes 2 logs, about 48 biscotti

Original recipe from Food Network

I was drawn to this recipe because it doesn’t have melted butter in it. Not having butter actually makes this cookie very hard and I would recommend not biting down on it unless you have dipped it into something warm.

Ingredients:

  • 2 c flour
  • 1 c sugar
  • 1/3 c cocoa powder
  • 1 tbsp espresso powder
  • 1 tsp baking soda
  • 1/4 tsp salt
  • 2 eggs
  • 2 egg whites
  • 1 tsp vanilla extract
  • 2/3 c whole almonds, toasted skin on
  • 1/3 c chocolate chips
  • 1 egg white for brushing

Directions:

  1. Combine flour, sugar, cocoa powder, baking soda and salt in a stand mixer with paddle attachment.
  2. Mix together eggs, egg whites and vanilla extract.
  3. Gradually add egg mixture to flour mixture blending on low speed.
  4. Toss almonds with chocolate chips and fold into the flour mixture until combined.
  5. On a well floured surface roll dough into 2 logs, 2 inches in diameter. They will expand quite a bit.
  6. Place on a greased pan and brush with beaten egg white.
  7. Bake at 350 degrees until light golden brown, about 30-35 minutes.
  8. Allow logs to cool 15 minutes then cut into slices on the bias. Place slices on a greased sheet pan and bake in a 350 degree oven until toasted, about 15-20 minutes. Cool. Store in an airtight container.

ChocAlmondBiscotti_0976

Delicate flavours of the almond are accentuated by the rich, creamy chocolate. Isn’t that crema gorgeous?

Read Full Post »

Thank you all for your lovely words and kind wishes to JT for his recent birthday in June. It was fairly low key because it landed on a Tuesday, but we still went out for a very nice dinner (review to come). The Monday before JTs birthday, he’d made plans with a friend to go out for dinner, which left me with some private time in the kitchen and I knew exactly what I wanted to do: Bake a cake as a surprise for his birthday! But I only had a small window of opportunity to bake, cool and ice it.

JT had walked up to a local place to meet this friend, so he was gone by the time I got home. Good, but I was home a little later than expected having to finish off a few things at work and ride my bike the 8 km home. As soon as I got in, I was immediately racing around in record time to bake this cake. But first I had to find a recipe! Without much time (I was expecting JT back around 8-9) I found this recipe which was called fastest fudge cake (just what I needed) and I was able to easily half the recipe so that I can bake it in a small spring form pan. Just as I was cleaning up and waiting for the cake and ganache to cool, I get a text from JT at 7:30 that he’s one his way home. That means I’ve got 10 minutes tops. Even with this easy recipe, I just barely squeaked by, dumping the barely cooled ganache onto the barely cooled cake and hiding it in the living room credenza! It was a very nice surprise.

ChocFugdeCake_0363

A very special little cake. Night pictures suck.

Fast and Easy Fudge Cake

Makes one 13 cm or 5″ cake plus a muffin-sized cake

Ingredients:

  • 1/2 cup all-purpose flour
  • 4 tbsp unsweetened natural cocoa powder (not Dutch processed)
  • 1/4 tsp baking soda
  • pinch table salt
  • 1/4 cup  unsalted butter, melted and warm
  • 3/4 cups packed light brown sugar
  • 1 large egg
  • 1/2 tsp pure vanilla extract
  • pinch of cayenne
  • 1/4 cup orange liquor
  • 1/2 cup Ganache

Directions:

  1. Preheat the oven to 350°F  (177°C). Grease the bottom of an 13 cm spring form cake pan and line it with parchment.
  2. In a small bowl sift the flour, cocoa powder, baking soda, cayenne and salt.
  3. In a large bowl, combine the melted butter and brown sugar and stir with a wooden spoon or rubber spatula. Add the egg and vanilla and stir until well blended.
  4. Add the flour mixture all at once and stir just until all the flour is moistened. Scrape the batter into the prepared pan.
  5. Bake until a toothpick inserted in the center comes out clean, about 35-40 minutes for a 13 cm (5″) spring form pan. Let cool in the pan on a rack for 10 min. Run a thin knife around the edge and invert the cake (peel off the parchment). Pour the orange liquor over the cake and allow to saturate. Allow to cool completely (or mostly as in my case!).
  6. Once cool, set the rack over a baking sheet or foil. Pour the warm ganache over the cake and use an icing spatula to spread it over the top of the cake and down the sides. Let set for about an hour before serving.

Ganache Ingredients:

  • 4 oz of dark semi-sweet chocolate, finely chopped
  • 1/2 cup of 18% cream

Ganache Directions:

  1. Warm the cream just before boiling point. Pour the hot cream over the finely chopped chocolate and stir until it’s all melted.
  2. Allow to thicken (or not) and pour over cooled (or not) cake (place cake on a piece of parchment). Even out. Allow to cool in a cool dark place (like a credenza!).
  3. Serve with a sprig of mint over a small puddle of orange liquor.

ChocFugdeCake_0366

Would you like a little cake with your mint?

Notes:

  • The batter was a bit too much for the pan, it did bubble over a bit, so I was glad I put a cookie sheet under the spring form.
  • The cake has a rich, chewy texture with a nice crunchy crust (like brownies).
  • The ganache would have been better if it had been allowed to thicken a bit more, but it was still super tasty.
  • Recipe updated (May 2016) to reflect correct pan size. To make a slightly larger cake (22 cm or 8″), double the recipe.
  • The original recipe in the link makes 600 mL of batter (using only 1/4 cup hot water), the perfect size for an 22 cm or 8″ spring form pan (updated December 2016).

Read Full Post »

Chocolate Hazelnut Lapis_4266

I still have to work on getting my layers more even.

I knew when I made this cake before that I wanted to try it again with different flavours. I made this version for a dinner we had for our nephew Brian some weeks back. Hazelnut and chocolate are a great combo, think Nutella and I figured it would make a wonderful layer cake!

Chocolate Hazelnut Lapis_4264

I actually got 16 layers out of the batter because I used less per layer.

Hazelnut and Chocolate Spekkoek Lapis Legit with Chocolate Ganache Topping (Thousand-Layer Spice Cake)

Serves 4-6 depending on how thick you slice it

Ingredients:

  • 170 g (1 1/2 sticks) unsalted butter, softened
  • 1/2 cup granulated sugar
  • 1/2 tsp pure vanilla extract
  • 1/4 tsp salt
  • 6 large eggs, separated
  • 2/3 cups all-purpose flour
  • 2 tbsp confectioners’ sugar
  • 1/4 cup hazelnut butter
  • 1 tsp hazelnut essence
  • 1/4 cup sifted unsweetened cocoa powder
  • 1/4 cup chocolate chips
  • 1/4 cup whipping cream
  • 1 tbsp hazelnut butter
  • 1/4 cup whipping cream

Directions:

  1. Preheat the broiler (I have this range with two ovens, this time I used the smaller oven and it still took 2 minutes per layer and did not burn).
  2. Butter the bottom and sides of a 4″ x 6.7″ loaf pan and line with buttered parchment paper. I left enough of the parchment to go past the top of the pan, so I could use it to lift the cake out when it was done.
  3. Weigh your empty bowl, write down the measurement. In this bowl, cream the softened butter, 1/4 cup of sugar, vanilla, and salt. Add the egg yolks one at a time and beat until smooth. Fold the flour into the batter with a rubber spatula.
  4. In a clean bowl with clean beaters, beat the egg whites with the remaining 1/4 cup of sugar until stiff and shiny but not dry. With about 1/3 of the beaten whites, loosen the batter by mixing it in with a wooden spoon. Fold the remaining whites into the loosened batter, being careful not to over-mix.
  5. Weigh your bowl with the cake batter. Subtract this new weight from the old weight so you know how much your batter weighs and divide this weight in half. Put a second bowl on a scale that can tare and zero it out. Pour half the batter into this bowl (you can see exactly when you reach half on the scale).
  6. Into one half of the batter, gently fold in the 1/4 cup hazelnut butter and the essence. Into the other batter, gently fold in the 1/4 cup sifted cocoa powder.
  7. Pre-heat the pan (this makes the batter easier to spread out). Pour 2 tablespoons of the hazelnut batter into the bottom of the pan and spread out evenly.
  8. Bake in a hot broiler for 2 minutes. Watch carefully. Mine is exactly two minutes.
  9. Pour 3 tablespoons of the chocolate batter, spreading it over the first layer to form a thin second layer. Place the pan under the preheated broiler for 2 minutes, or until the layer is firm. Continue until you have exhausted both batters. Emeril noted that the cake typically has between 12 and 15 layers — I ended up with 16, not bad for a second timer!
  10. Allow the cake cool on a wire rack, turn out onto a cutting board and even up the sides by cutting clean new edges.
  11. To make the ganache, heat 1/4 cup of whipping cream until it almost boils. Pour over the chocolate chips and stir until melted. Allow to almost cool and pour over the cooled cake (you can allow it to drip down the sides, I didn’t want to).
  12. To make the hazelnut whipped cream, beat 1/4 cup of whipping cream until stiff, add 1 tbsp hazelnut butter and whip until entirely incorporated and smooth.
  13. Slice thinly and serve at room temperature with a dollop of the hazelnut whipped cream.

Chocolate Hazelnut Lapis_4271

A nice delicate hazelnut flavour in the whipped cream balances the chocolate ganache on the cake.

Read Full Post »

With JTs job, he sometimes misses lunch or dinner, so I went to our local health food stores to pick up some healthy energy bars. I was shocked! The high protein versions could run as high as $5 EACH! That’s absolutely crazy, and they are not even that “good” for you. So instead I bought some quinoa (sorry indigenous people of Peru), sunflower seeds, flax seeds, dark chocolate, dried cherries and agave and came home to search for a tasty recipe. My inspiration came from this recipe in Epicurious but it was purely Barb (from Profiteroles and Ponytails) that inspired the Quinoa addition to this treat, thank you Barb!

I toasted the quinoa so that it popped like pop corn; toasting brings out the nuttiness (hmmm, that’s a coincidence, when I’m toasted I become nuttier too ;-)!) and makes them nicely crunchy and not too jaw breaking.

Note that I updated the nutritional facts because someone asked about calories. Check out the tool I used here.

A delicious healthy snack or meal replacement

A delicious healthy snack or meal replacement

Quinoa Energy Bars

Makes one pan 10″ x 13″ (25cm x 33cm), cut into 20 bars

Ingredients:

  • 2 cups toasted quinoa (or you could buy the commercially puffed quinoa, which is like puffed rice)
  • 1 cup unsalted sunflower seeds, slightly roasted in a frying pan
  • 2 cups uncooked oatmeal, old-fashioned or instant
  • 1/4 cup partly ground flax seeds
  • 1/2 cup dried cherries or other dried fruit
  • 3/4 cup crunchy peanut butter, organic, just peanuts
  • 1/2 cup packed brown sugar
  • 1/2 cup agave syrup or honey
  • 1/2 cup dark chocolate chips
  • 1/2 cup water

Directions:

  1. Pre-heat the oven to 121° C or 250° F.
  2. Prepare a 10″ x 13″ pan by lining it with parchment paper, enough to have the sides come up as ‘handles’.
  3. Add the quinoa to a hot dutch oven (you will need the high sides) and stir as the quinoa pops. Keep stirring so it doesn’t scorch. This volume will take about 10-12 minutes. The quinoa pops like corn, but not nearly as aggressively, but you do need the high sides of the pan, otherwise you’ll be chasing the quinoa all over the place!
  4. In the same pan, slightly roast the sunflower seeds. Combine with the puffed quinoa, oatmeal, flax and cherries. Set aside.
  5. In a micro-wave proof bowl, add the peanut butter, brown sugar, agave syrup and chocolate chips and microwave on a low setting until chocolate and sugar have melted . Add the water and stir well.
  6. Pour into the dry ingredients and mix well (I used a very large bowl with a wooden spoon). You want to make sure that everything is coated with the wet ingredients.
  7. Pour the combines ingredients into the prepared pan and press evenly into all corners (I used a glass as a rolling pin). Bake for about 20 minutes.
  8. Allow to cool about 10 minutes, carefully remove from the pan with the parchment handles onto a cutting board and cut into 20 slices. Allow to cool completely before storing in an air tight container in the freezer.

Notes: depending on how dry your house is, you may need to adjust the wet ingredients as the final product can be a bit crumbly (so say the comments on Epicurious). That’s why I added the water and baked it out. Mine came out nice and tight and even after freezing wasn’t crumbly.

Screen Shot 2014-01-27 at 12.29.17 PM

Read Full Post »

Christmas Wishes

Clipart from Microsoft Clip Art Gallery

I’ve never made fudge. There. I said it. I love fudge, but have never made it and when I saw Katherine’s (Rufus’ Food and Spirits Guide) recipe for his mother’s back of the bag fudge, I had to try it and with pure luck, I had everything in my pantry! The recipe came together very easily and the taste was wonderful, and great creamy texture (very much like ganache). Our tin of Sweetened Condensed milk was a slightly different weight than what the recipe called for so I had to adjust all the ingredients accordingly, plus I didn’t have butterscotch morsels so I used chocolate chips as the flavour. Kudos Katherine another great recipe to add to my Christmas baking collection!

Chocolate Peanut Fudge

Original recipe by Katherine at Rufus’ Food and Spirits Guide

Melt in your mouth, fudge-o-licious

Melt in your mouth, fudge-o-licious

Makes one 23 cm (9 inch) square pan, about  2 cm (0.8″) thick

Ingredients:

  • 3/4 cup sugar
  • 20 g unsalted butter
  • 300 mL Sweetened Condensed Milk
  • dash salt
  • 300 g chocolate chips
  • 155 g marshmallows
  • 1 tsp vanilla
  • 100 g peanuts (unsalted, skin off)

Directions:

  1. Line your square pan with parchment paper (it’ll make it easier to lift it out of the pan to cut it).
  2. In a heavy bottomed pot over medium heat, bring sugar, butter, sweetened condensed milk and salt to a boil, stirring constantly. Lower heat if it starts to brown too quickly.
  3. Remove from heat and add chocolate, marshmallows and vanilla; stir until smooth and marshmallows have entirely melted. Add peanuts and stir to combine.
  4. Pour into prepared pan and let set. Refrigerate once cool. The fudge should take a few hours to set.
  5. Cut into smallish square.

Delicious Chocolate Peanut Fudge

Delicious Chocolate Peanut Fudge

Read Full Post »

This time of year the blogosphere is chuck full of tempting recipes and creative ideas, the trick is to try to manage what you want to bake with what you can bake, given your time constraints. Last week, Kelly over at Inspired Edibles (a fellow Canadian) made up a very interesting vegan ‘brownie’ and although her’s looked delightful, I was inspired to make something a wee bit different, dare I say festive, plus it wasn’t necessary for me to keep it 100% vegan.

These are surprisingly good. I have a high tolerance for healthy (or healthier foods) but JT does not; if it doesn’t taste as good as it’s full fat/sugar cousin, he will want no part of it. But I kid you not, these passed even the strictest taste test: the JT taste test. So Kelly, I hope you don’t mind, here is a slight variation on your wonderful recipe, my dried fruit hazelnut truffles, thank you kindly for the inspiration. I used hazelnut butter and hazelnut essence because hazelnuts and chocolate are a winning combo in this household.

IMG_3694_BLOG

The smooth, sweet centre is nicely contrasted by the rich chocolate and crunchy peanuts.

Dried Fruit Truffles

Adapted from Inspired Edibles’ Vegan Brownies

Makes 50-60 pieces

Fruit Paste Ingredients:

  • ½ c dried prunes
  • ½ c dates
  • 1 cup dried blueberries (I couldn’t find cherries)
  • 1 c almond flour
  • 3 tbsp hazelnut butter
  • ¼ c unsweetened coco powder
  • 1 tsp hazelnut essence (or more depending on how strong it is)

Chocolate Coating Ingredients:

  • 1 cup semi-sweet and milk chocolate chips
  • 2 tbsp unsalted butter
  • 1 tsp hazelnut essence (or more depending on how strong it is)
  • 1 ½ cup coarsely chopped peanuts

Fruit Paste Directions:

  1. Combine all the ingredients for the fruit paste in a food processor and process until smooth. Make 1-1.5cm balls of the paste, set aside.
  2. Melt the two chocolates and butter in a saucepan over low heat, dip the balls one by one into the hot chocolate and roll in the chopped peanuts to coat. Refrigerate to set. Serve at room temperature.

Don't let these little delights fool you, they are darned tasty!

Don’t let these little delights fool you, they are darned tasty!

Read Full Post »

I posted a quick picture of this recipe on Facebook and Pinterest and received overwhelming response so instead of putting it in-line with my Christmas 2012 baking, I thought I would interrupt regular programming and post the recipe today. I did a search and found that I might indeed be the first person to make these all-time Canadian favourites into a truffle instead of their normal bar form. Every year JT asks me to make this bar, which personally I find just too sweet. I got to thinking a smaller, bite sized version might be the answer I was looking for so I came up with this idea and only had to marginally modify an existing recipe. I hope you enjoy it. And if you make them, please do let me know how it worked out.

Almost as teeth tingly as the regular Nanaimo Bars

Not nearly as teeth tingly as regular Nanaimo Bars

Nanaimo Truffles

For the original recipe, please click here.

Makes about 36 truffles

Inside Layer Ingredients:

  • ¼ cup unsalted butter, room temperature
  • 1 tbsp vanilla custard powder
  • 1 cup icing sugar

Inside Layer Directions:

  1. Cream butter, custard powder and icing sugar together well. Scoop out about 1 tsp and roll into a ball. Freeze for 30 minutes.

Second Layer Ingredients:

  • ½ cup unsalted butter
  • ¼ cup sugar
  • 5 tbsp cocoa
  • 1 egg beaten
  • 1 ¼ c graham wafer crumbs
  • ½ c finely ground almond flour
  • 1 cup coconut
  • 1/4 cup corn syrup (spray your measuring cup with non-stick spray and it will slide right out)

Second Layer Directions:

  • Melt first 3 ingredients in top of double boiler. Add egg and stir to cook and thicken. Remove from heat.
  • Stir in graham crumbs, coconut, almond flour and the corn syrup. Set aside.

Assembly Directions:

  1. Take about 1 packed tbsp of the second layer (crumb layer) in the palm of your hand and press to flatten to a large circle about 2mm thick.
  2. Put one custard ball into the centre and wrap the circle around the custard so that it totally covers it. Squeeze the crumb layer to form a tidy ball. Repeat until you have made all of the balls. Freeze for 30-60 minutes.

Chocolate Layer Ingredients:

  • 1 cup semi-sweet chocolate chips
  • 4 tbsp unsalted butter

Chocolate Layer Directions:

  1. Melt chocolate and butter over low heat and mix well. Without allowing the chocolate mixture to cool down, take a frozen ball and carefully stick a toothpick or skewer into it and dip into the melted chocolate to cover. Remove the stick and allow the chocolate to set on parchment paper (you could dip a finger into the chocolate to hide the hole, or not). The frozen balls will help set the chocolate faster. Store in refrigerator. Allow the balls to come back up to room temperature to serve.

IMG_3649_BLOG

The centre is creamy and smooth which is a nice texture to the outside

IMG_3651_BLOG

Yum.

;

Read Full Post »

Happy Thanksgiving to all my American friends! And anyone else who happens to celebrate Thanksgiving now. Hope you enjoyed an overload of turkey, stuffing and pies! And then there’s Black Friday, which for some reason Canadian retailers have jumped on and are promoting the heck out of it! Get out there and get some GREAT DEALS, but not before you leave me some of your lovely words.
Honestly, I don’t eat sweets. I just like to bake ’em! And fortunately, JT started a new job (and career) in June and his office are the perfect guiney pigs recipients of my baking! I wanted to bake another batch of the molasses spice cookies, but JT put in a request for something chocolate. OK, I can live with that. The cookies lasted less than one hour and JT only had two. He came home with a request for the next bake: macarons! Can you believe it?

A very tasty treat, if I do say so myself

The recipe is an adaptation from the wonderful Chocolate Crinkle Kisses I make every year at Christmas, but since it’s not Christmas yet (unbenounced to many department stores who are playing Christmas music incessantly) I altered the recipe to be a Chocolate Espresso flavour and I omitted the Candy Cane Kisses!

These cookies have a strong coffee and chocolate flavour and it’s texture is a little browny like.

An explosion of chocolate and espresso in every bite

Chocolate Espresso Crinkle Cookies

Makes about 30-36 cookies

Ingredients:

  • ½ cup icing sugar
  • 3/4 cup melted butter
  • 1/2 cup unsweetened cocoa powder
  • 1/4 cup espresso powder
  • 1 cup sugar
  • 2 cups all-purpose flour
  • 1 tsp baking powder
  • 1 tsp baking soda
  • 2 tsps vanilla extract
  • 1/2 tsp salt
  • 2 large eggs
  • 6 ounces semi-sweet chocolate chips

Directions:

  1. Sift icing sugar into a small bowl.
  2. In a large bowl, mix the melted butter with the cocoa powder, espresso powder and sugar.
  3. Using an electric mixer, beat the eggs and vanilla Into the chocolate mixture.
  4. Slowly mix in all the dry ingredients until combined. Stir in the chocolate Chips.
  5. Cover and refrigerate about 2 hours.
  6. Preheat oven to 350°F. Roll dough into a small ball about the size of a walnut; roll balls in the icing sugar and press flat with the palm of your hand.
  7. Place on parchment covered baking sheet, leaving about 2 inches between the cookies. Bake 8-10 minutes.
  8. Let the cookies cool on the sheet; transfer to racks to cool completely before storing.

Read Full Post »

Happy Halloween, tomorrow! What will you be for this momentous occasion? JT and I will share a costume, one that he thought up! I need mine for work on Tuesday and he needs it for Wednesday! Good timing! We’re Phantom of the Opera! Well, I hope you all have a great time Trick or Treating tomorrow night!
As you know during our cooking class in Lyon, we made this absolutely delightful Claffoutis with a wonderful Caramel Sauce. Chef Villard was kind enough to provide the recipes for the dishes we made together in his kitchen and we recreated the entire dinner for my friend Barb and her hubby (Profiteroles and Ponytails).

It’s a delicious dessert. I snapped this pic earlier in the day because of the light.

Pear and Milk Chocolate Clafoutis with Caramel Sauce

Makes 6 Claffoutis about 10cm or 4 inches in diametre

Ingredients:

  • 2 eggs
  • 1 egg yolk
  • 80 g granulated sugar
  • 40 g all purposes unbleached white flour
  • 100 mL Carnation Evaporated Milk (or cream)
  • 150 mL milk (I used skim)
  • 2 ripe bosc pears
  • 50 g Lindt milk chocolate, chopped
  • 5 g butter
  • 5 g sugar

Directions:

  1. Pre-heat oven to 175° C (350° F).
  2. Butter the pans and dust with sugar until sides and bottom are totally coated.
  3. In a bowl, mix the sugar and flour well. Make a well in the centre and slowly pour the cream in and then the milk. Add the lightly beaten whole eggs and yolk and mix delicately until all of the flour and sugar are combined.
  4. Peel and cut up the pears into smallish cubes (1 cm or 0.5 inch), divide evenly in the 6 pans. Add the chocolate so that it is evenly distributed in each pan.
  5. Pour the egg mix into the pans dividing equally among the 6.
  6. Bake for about 30-40 minutes or until firmly set. Cool in pans and remove carefully.
    Set aside.

This is only the photo I took of the Clafoutis, it was pear, chocolate with a glorious caramel sauce. I can hardly wait to make this again!

You can make the traditional caramel sauce, or try this unique microwave version.

Caramel Sauce Ingredients:

  • 200 g sugar
  • 50 g water
  • 150 mL heavy cream (I did not substitute this one as the sauce needs the fat)
  • 15 g unsalted butter
  • pinch of salt

Directions:

  1. Add the sugar and water to a heavy bottomed pan and heat on a low setting until the sugar is dissolved and has cooked to a beautiful golden caramel colour (be careful, I burned my first two attempts!)
  2. DO NOT STIR. Apparently stirring causes the sugar to crystallize and you will not have a smooth sauce.
  3. When you have achieved the desired colour, add the cream carefully and whisk well. Add the butter and a pinch of salt. Allow to cool.

Assembly:

  1. Warm the clafoutis in the oven for about 10 minutes.
  2. On a large rimmed plate, pour the caramel sauce into the centre and spread out evenly.
  3. Drop one clafoutis into the centre of the sauce and serve warm.

And that concludes our dinner party from Lyon. I hope some of these recipes will inspire you to make something similar. Cheers.

Read Full Post »

There were too many candles to put on the cake so I just used one

It was JT’s birthday last week. It’s just the two of us, so we usually keep it low key, but we do like to fancy it up with the food. Lobster was on sale at our local market so we took advantage and bought two for his birthday dinner. We love lobster and rarely indulge due to its rich and pricey nature so a birthday celebration is the perfect time to take advantage of this delicacy. We dined in our outdoor dining room under the early evening sky. It was wonderful.

JT didn’t mind, because this entire cake was his. Of course, he didn’t eat it in one sitting 😉

When I asked what JT would like for dessert he said cake. Now that stopped me in my tracks because he is more of a pie person than a cake person. But then again, I had just shown him Charles’ recipe (Five Euro Food) for Kladdkaka and he knew I was dying to make it so he said ‘cake’ or kaka in Swedish. He is so thoughtful and generous. Oh, but wait…this generosity may have some selfish motivations ;-)!

Night-time photos are not the best

I knew I would like this dessert from the name alone. Kladdkaka. Kladdkaka, kaka, kaka, kaka, kaka, Kladdkaka. Giggle, giggle, giggle. But I digress; I knew I would like this dessert because I LOVED his Tuppkaka dessert (that, for the record I have now made about 6 times). Plus Kladdkaka is very easy to make, one bowl is all you need. In fact, I was lazy and made the entire cake in the food processor. I didn’t even bother to change the blade to the plastic ones. Just processed away. The cake has an intense chocolate flavour without being sweet; don’t be too afraid of the sugar quantity, you need it to mellow the bitterness of the cocoa powder. Next time I think I’ll add a tbsp of espresso powder and a good pinch of cayenne pepper! I may even try to make this gluten free, using almond flour instead of white flour. Stay tuned.

Caster sugar is plain sugar that is much finer than regular sugar but not as fine as powdered sugar. It is supposed to melt a lot easier. I just put my regular sugar in the food processor with metal blades and I pulsed it until it looked significantly finer than original but now powdery.

Kladdkaka

Such a moist and chocolatey cake, but not as sweet as you would think

adapted from Charles at Five Euro Food

Ingredients:

  • 200 g Caster Sugar
  • 140 g unbleached Flour
  • 50 g Cocoa Powder
  • 2 tsp Baking Powder
  • 2 tsp Vanilla
  • 120 g Butter
  • 2 eggs
  • 75 mL milk*
  • 1/4 cup seedless raspberry jam, heated until runny

Directions:

  1. Preheat your oven to 350°F. Add the sugar, flour, cocoa powder and baking powder to the bowl of your food processor. Plus few times to incorporate evenly.
  2. In the microwave, melt the butter slowly so it doesn’t overheat. Add melted butter and vanilla to the food processor in an even stream. Mix well, scraping down the sides as required. Lightly beat the eggs and add to the chocolatey mix until a smooth thick batter forms. *the batter was a little thick (like dough) so I added a little milk to it.
  3. Lightly grease a round tin about 20cm in diametre (I used a spring form tin). Spoon the batter into the tin and smooth out to the edges (it is rather thick). Resist the urge to try this batter, it’s seriously good and you won’t be able to stop.
  4. Take a knife and draw a spiraling circular pattern into the cake top (dig in about 1/2cm). Using a fine tip cake decorator, squeeze the slightly warm but runny seedless raspberry jam into the cut pattern. Don’t worry about how it looks on top, it will be dusted with confectioner’s sugar so it doesn’t matter. I wanted the raspberry jam to seep into the cake, which it did very nicely.
  5. Bake in the preheated oven for 25 minutes before removing and allowing to cool for ~10 minutes before carefully removing from the tin. Try not to over-bake the cake. If you do, all delicious gooeyness may be lost!
  6. Serve with fresh raspberries and whipped cream, or just on its own, for a gooey, chocolatey delight!

Thanks Charles for another winner — hope you don’t mind my creative license!!

Read Full Post »

My SIL’s mother, Lea was one of my Mom’s dearest friends (JT’s Mom was her other dearest friend but sadly she passed away quite a few years before my Mom). Lea recently had hip replacement surgery and is recovering slowly, and when I spoke to her, I detected quite bit of frustration in her voice. She has 6 grand children and she likely feels like she’s missing out on quite a bit of action! So, to help cheer her up, I decided to bake her some brownies, but not just any brownies, but Peanut Butter and Milk Chocolate Chip Brownie Bars! Now who wouldn’t cheer up with a big, fat bucket full of Peanut Butter and Milk Chocolate Chip Brownie Bars? Frankly, she wouldn’t expect anything less from her good friend’s daughter; my Mom always had food whenever there was a visit!

Chewy, chocolatey and peanuty. I know you want one!

Year’s ago JT was in NYC on business (why wasn’t I with him you ask aghast? I’m still asking myself that same question) and he bought me a Hershey’s Chocolate Cookbook as consolation (huh, diamond tennis bracelet would have done the trick!). Believe it or not, I have not made a single thing from that book. Why, you might ask? Although the book is FILLED with wonderful delectable sweets, it is by far, the most unhealthiest recipes I have in my collection and therefore put it aside for the ‘right moment’. And the right moment is upon us, because as we all know ‘cheer’ is nothing without copious amounts of calories and fat.

So join me in wishing my SIL’s Mom a speedy recovery so she can get back to baby-sitting those rug-rats ;-)!

Peanut Butter and Milk Chocolate Chip Brownie Bars

Small, bite sized little morsals

Ingredients:

  • 6 tablespoons unsalted butter, melted
  • 1-1/4 cups sugar
  • 2 teaspoons vanilla extract, divided
  • 3 eggs
  • 1 cup plus 2 tablespoons all-purpose flour
  • 1/3 cup cocoa
  • 1/2 teaspoon baking powder
  • 1/2 teaspoon salt
  • 1 can (14 oz.) sweetened condensed milk (not evaporated milk)
  • 1/2 cup crunchy peanut butter (I used all natural, unsweetened)
  • 1 cup milk chocolate chips
  • 1 cup peanut butter chips
  • 3/4 teaspoon shortening

Directions:

  1. Heat oven to 350°F. Grease 13x9x2-inch baking pan.
  2. Stir together the melted cooled butter, sugar and 1 teaspoon vanilla in large bowl. Add 2 beaten eggs; stir until blended.
  3. Sift together flour, cocoa, baking powder and salt. Add to egg mixture, stirring until blended. Spread in prepared pan.
  4. Bake 20 minutes.
  5. Meanwhile, stir together sweetened condensed milk, peanut butter, remaining beaten egg and 1 teaspoon
    vanilla extract. Pour evenly over hot brownie. Set aside 1 tablespoon each milk chocolate chips and peanut
    butter chips; sprinkle remaining chips over peanut butter mixture.
  6. Return to oven; continue baking 20 to 25 minutes or until peanut butter layer is set and edges begin to brown.
  7. Cool completely in pan on wire rack.
  8. Stir together remaining milk chocolate chips, remaining peanut butter chips and shortening in small
    microwave-safe bowl. Microwave at MEDIUM (50%) 30 seconds; stir. If necessary, microwave at MEDIUM an
    additional 15 seconds at a time, stirring after each heating, until chips are melted and mixture is smooth when
    stirred. Drizzle over top of bars. When drizzle is firm, cut into bars. Store loosely covered at room temperature.
    24 to 36 bars depending on the size you cut them.

Read Full Post »

To finalize Super Bowl Food Frenzy, I deliver to you the piece de resistance: New York Style Chocolate Cheesecake with a Cherry Pie Topping.

Would you like extra cherry sauce with your slice?

I made a cheese cake which was supposed to be representative of the NY Giants, New York Style Chocolate Cheesecake with a Cherry Pie Topping. The recipe originated from my very old and battered Fanny Farmer Cookbook which was given to me as a wedding gift by one of the wives of a guy that worked in John’s Father’s factory. I used to make it all the time, but now it’s reserved for very special occasions (mainly because it is quite rich and fattening). I’ve lightened it up quite a bit from the original, but you can use the full fat versions should you please. This is a baked cheesecake and therefore not as creamy as an unbaked cheesecake, but that’s exactly what I love about it.

New York Style Chocolate Cheesecake with a Cherry Pie Topping

Crust Ingredients:

  • 1/2 cup graham cracker crumbs (or any type of cookie, your choice)
  • 2 tbsp ground almonds
  • 2 tbsp sugar
  • 2 tbsp melted butter
  • 1/4 tsp nutmeg
  • 1 tbsp unsweetened cocoa, sifted

Crust Directions:

  1. Mix all of the ingredients above well and press into a 7″ spring form pan. Set aside.

Cheese Cake Ingredients:

  1. 2 small eggs separated
  2. 200 g low fat cream cheese
  3. 1/2 cup fat free Greek yogurt
  4. 1/4 cup sugar
  5. 2 tbsp unsweetened cocoa
  6. 1 tbsp flour
  7. 1/4 tsp salt
  8. 1 tsp vanilla

Cheese Cake Directions:

  1. Pre heat oven to 325°F / 165°C.
  2. Beat the egg yolks until thick and pale.
  3. Add the yogurt, sugar, sifted cocoa, flour, salt, sugar and vanilla and beat until smooth.
  4. Add the cream cheese and beat until smooth. Set aside.
  5. Beat the egg whites until stiff peaks form, add 1 tbsp sugar gradually, until it is stiff and shiny (as if you were making a meringue).
  6. Fold the egg whites into the cream cheese mixture until fully incorporated being careful not to deflate.
  7. Bake for about 1 hour until a cake tester comes out clean.
  8. Top with sour cherry pie filling topping (recipe below).

Sour Cherry Pie Filling

Ingredients:

  1. 540 mL / 19 oz Pitted Sour Cherries in a jar, strained, liquid reserved
  2. 2 tbsp cornstarch
  3. 1/4 cup sugar

Directions:

  1. Dissolve the cornstarch in a little bit of cold water.
  2. Bring the reserved liquid to a boil, add sugar and stir until dissolved.
  3. Gently pour in the cornstarch and stir until the liquid has thickened.
  4. Return cherries to the liquid and stir gently.
  5. Allow to cool a bit. Gently pour over cheese cake. Save any left over sauce for extra sauce for the cheese cake.

Read Full Post »

Older Posts »