Feeds:
Posts
Comments

Archive for the ‘Condiments’ Category

Sometimes, you just need a simple little sauce for a fish dish and this one fits the bill.

Lemon Caper Sauce

A Kitcheninspirations original recipe

Makes about 200 mL sauce

Ingredients:

  • 20 g shallots, finely chopped
  • 15 mL EVOO
  • 20 g capers, finely chopped
  • 150 mL chicken broth
  • 20 mL lemon juice, freshly squeezed
  • 30 g parsley, finely chopped
  • 5 g tarragon, finely chopped
  • zest of 1 lemon

Directions:

  1. Heat the EVOO in a small pan and cook the shallots until translucent. Add the capers, and chicken broth, and boil for 3 minutes.
  2. Remove from the heat and cool slightly. Stir in the herbs, lemon juice, and zest.
  3. Serve warm.


A beautiful sauce to compliment fish, we had it on salmon.


Read Full Post »

My besty from uni is gluten intolerant and allergic to soy! It’s always a bit of a challenge cooking Asian foods because of the soy allergy but I try to be inclusive and make something special for her if she can’t eat my dish. One such occasion was Christmas day, I served Gyoza as the hors d’œuvres and I made her a special gluten-free version. Had I known how good the gluten-free version would turn out, everyone would have had it. The dipping sauce I usually serve with them has soy in it so I wanted to make a special sauce without soy so my friend can enjoy it too. This imposter has the forward saltiness and a bit of sweetness with a finish of umami from the Nori that actual soy sauce has. It turned out very well, in fact, I will make only one sauce with this soyless soy sauce that everyone can enjoy!

Soyless Soy Sauce (soy-free, gluten-free)

A KitchenInspirations Original Recipe

Makes 30 mL sauce

Ingredients:

  • 5 mL molasses
  • 375 ml water
  • 2 g black garlic salt (I used this one)
  • 3.5 dried black fungus
  • 3 g dried shiitake mushrooms
  • 0.5 g Nori Seaweed

Directions:

  1. Combine everything but the Nori in a small saucepan and bring to s boil. Boil for 15-20 minutes or until reduced to about 30 mL.
  2. Remove mushrooms and reserve for another use. Strain the liquid and add salt and pepper to taste. add the nori seaweed and immerse entirely, refrigerate with nori for 1 day.
  3. Strain Nori and the sauce is ready for use.

This imposter has the forward saltiness and a bit of sweetness with a finish of umami from the seaweed that actual soy sauce has.

Read Full Post »

Back in mid-July, after a full-day of working on our deck project, we needed some appetizers for cocktails one evening. I didn’t want to spend a lot of time making them because I was pooped. I saw local cantaloupe and I immediately thought of the simple, yet tasty cantaloupe wrapped in Proscuitto (we used Serrano ham from Spain). It totally hit the spot. When I was selecting the melon, I wasn’t able to smell it as I usually do because we are still mandated to wear masks so I just picked one and I was lucky, it was wonderful. We had about 1/8th of it, so I had to figure out what to do with the remainder (other than eating it for dessert). I came up with this fresh, tasty recipe to go with some fish I had broiled, it was delicious.

Cantaloupe Salsa

A KitchenInspirations Original Recipe

Makes about 250 mL salsa

Ingredients:

  • 150 g cantaloupe, finely diced
  • 50 g cucumber, finely diced
  • 1/2 small avocado, finely diced
  • 1 green onion, finely sliced
  • Fresh Basil and Mint, in a chiffonade
  • 15-30 mL freshly squeezed lime juice
  • Salt to taste

Directions:

  1. Combine all of the ingredients, tasting and seasoning as required.
  2. Serve chilled with fish or barbeque.


Read Full Post »

We’ve fallen in love with Vietnamese food. Banh Mi in particular. This Vietnamese/French delicacy is packed with flavour that a typical sandwich simply cannot compete with.

The sandwich begins with a fantastic bun that feels light (as in weight) and doesn’t have a rough, mouth tearing crust, but a fine, thin one. The crumb needs to be a little chewy with a hint of sweetness. It bounces back slowly if imprinted with a finger. It needs to contain some wet and heavy fillings so it needs good structure. The bun will make or break this delicious sandwich.

The fillings are equally as important. Our favourite sandwich is lightly smeared with butter on both sides (this waterproofs the spongy bread). Then there’s a good smear of paté, layered with a protein (usually in the form of a cold cut), topped with a sweet and sour carrot/daikon pickle, a decent squirt of mayonnaise, finished with thinly sliced cucumber and a good handful of cilantro. It is a work of art. But don’t admire it too long as it’s best consumed shortly after assembly. Sure, you can get grocery-store banh mi that was assembled earlier that day and wrapped in plastic wrap, but there is no comparison.

We had some roast beef leftover from a Sunday dinner that I sliced thinly for our first foray into this special sandwich. I made my own pickled carrot. The rest is carefully selected, good quality, store-bought ingredients.

Always use sterylized jars with new lid inserts.

Check out your local Vietnamese restaurants for this delicacy, if it’s your first time. But be sure to read the reviews because a bad banh mi will ruin your experience.

Pickled Carrot

Makes about 500 mL pickled carrot

Ingredients:

  • 450 g carrot, peeled, cut into strips 1 mm square and 5 cm long (I had about a half a parsnip so it went right in!)
  • 50 g sugar
  • 30 g sea salt
  • 1 L water
  • 200 mL white vinegar

Directions:

  1. Combine the sugar, salt, water, vinegar, and heat gently to melt the sugar and salt. Pour over the carrot and fill a sterilized mason jar with the carrot and warm liquid.
  2. Allow to cool then refrigerate. May be consumed right away for about a month or so.

Read Full Post »

Recently, we have fallen in love with Cholula Green Pepper Hot sauce but it is very difficult to find in Toronto. Sure, everyone carries the original red version, but we can never seem to find the green one. It’s not quite as hot as the red one but it really livens up flavours, like our Huevos Rancheros! I decided I would try and make my own and so I shall share it with you.

Green Pepper Jalopeño Hot Sauce

A KitchenInspirations Original Recipe

Makes 400-500 mL hot sauce

Ingredients:

  • 15 mL olive oil
  • 440 g green peppers (about 355 g cored and seeded)
  • 320 g jalapenos (about 235 g cored and seeded)
  • 1 large shallot (about 65 g)
  • 15 mL puréed garlic
  • 300 mL water
  • 75 mL cider vinegar
  • splash of agave syrup
  • Salt and white pepper

Directions:

  1. Core, seed and remove veins of the peppers (to your taste) and toss with the olive oil.
  2. Roast the peppers until their skin blisters. Peel off the skin as best as you could. Roast the shallot so that it’s almost soft.
  3. Add everything but the agave syrup to a pan and cover with the water and vinegar. Simmer until everything is super soft, about 10-15 minutes.
  4. Purée the pepper mixture until smooth and press through a fine sieve. Add in a splash of the agave syrup, salt and pepper to taste.
  5. Transfer to sterilized jars and refrigerate. Will last a few months in the fridge.

Notes:

  • The quantity will depend on how fine a sieve you have. I generally run it through a fine metal sieve to catch larger bits, then I press it through a very fine, reusable coffee filter. It makes a beautiful, silky sauce.
  • If you prefer a hotter sauce, leave more of the ribs on the Jalopeños. I can’t tolerate the extreme heat so my sauce is only mildly hot.


Read Full Post »

We just love Asian flavours, particularly in the summertime. The food is light, fresh and easy to eat on these endless, hot, muggy, summer days. I’ve made quick-pickled daikon in the past as a garnish but this time I wanted something that will serve a few meals. I love Nami’s no-nonsense approach to authentic Japanese food so her blog Just One Cookbook is generally my go-to and this was no exception. I did make a minor change by omitting the heat and reducing the sugar (even though she warned against it). I love the fresh crunch of this daikon pickle. But be warned, the daikon odour will penetrate everything and it is potent! I put the Lamp Berger on every time I open the jar!

Pickled Daikon

For the original recipe, please click here.

Makes about 500 mL

Ingredients:

  • 454 g fresh daikon, julienned thinly
  • 45 g sugar
  • 30 mL rice vinegar
  • 5 mL mirin
  • 2 g salt

Directions:

  1. Combine all of the ingredients in a tightly sealable container (you may wish to double bag it because it really stinks up the refrigerator).
  2. Mix well. Seal the container and place in the fridge for 2 days.
  3. After 2 days, rinse well and strain. Sterilize a jar and add the daikon to the jar, seal and refrigerate. Will keep for about 1 month.

Read Full Post »

A similar, unbelievably moreish dish was the first course that Dave (Fine Dining at Home) served us at his beautiful home in Manchester. It was creamy, full of flavour, and so delicious that my mouth is watering as I think of his dish. You can see his version here.

I really didn’t have a high-brow enough opportunity to serve this dish before our reno started, so I made a version that I used as a dip for a more casual starter. This was the basis of my recipe. Dave generously gifted me with several truffle-y food items and one was a beautiful bottle of truffled olive oil. I used his olive oil for the dip. If you are not a fan of truffle flavour, simply use a good quality olive oil instead.

Deliciously light and dreamy.

Truffled Parmesan Mousse

Makes about 125 mL mousse

Ingredients:

  • 20 g unsalted butter
  • 25 g sweet onion, finely minced
  • 30 mL cognac
  • 125 mL whipping cream
  • 125  g parmesan rinds
  • pinch of rosemary
  • 15 mL white truffle olive oil
  • sea salt to taste

Directions:

  1. Melt the butter in a small saucepan and sweat the onion until translucent. Add the cognac and cook until it has almost evaporated.
  2. To the onion, add the whipping cream, parmesan rinds and rosemary and bring to a slow simmer. Simmer for about 30 minutes stirring often.
  3. Taste and season with salt.
  4. Strain to remove the rinds, onions and rosemary. Allow the liquid to cool to room temperature and then refrigerate for 30 minutes or overnight.
  5. Add the white truffle olive oil and mix well. Whip with a hand mixer until it is somewhere between soft and stiff peaks. Refrigerate until needed.


Notes:

  • This is a very rich dish, so if you serve this as individual appetizers, I would choose smaller glass vessels. Garnish as Dave did with a demiglace and steamed asparagus spears with a parmesan tuile.

Read Full Post »

We have been really enjoying Korean cuisine for a while now, and my dear friend Barb (Profiteroles and Ponytails, in hiatus) gave us a wonderful jar of gourmet Kimchi for Christmas. The first time I ever tried Kimchi was in Paris with my friend Charles (Five Euro Foods, also in hiatus) when he took us to a Korean BBQ place. It was a delicious lunch filled with bright and heady flavours but I have to tell you that I did not love my first experience with Kimchi. Fortunately, since then, I have tried many different versions and I am very happy to report, I LOVE IT! My friend Sissi over at With a Glass is the Kimchi expert, she has made several versions and recipes using Kimchi, check out her lovely blog. In fact, it was the persistence of Sissi’s recipes on her blog that made me want to make my own, plus that jar that Barb so generously gave us was awesome and I wanted more! Thank you, Sissi and Barb.

The recipes are as easy as they sound, the most difficult part will be the waiting until it ferments and then dig in. It works well with Korean but we’ve also had it with Indian and it is wonderful. This makes a smallish batch but it is enough for a few meals.

Kimchi

Please click here for original recipe.

To print recipe, click here.

Makes 1 650 mL jar

Ingredients:

  • 450 g chopped and grated vegetables (see notes)
  • 75 g table salt
  • water to cover
  • 20 g ginger, grated
  • 16 g garlic, grated
  • 6 g Korean red pepper
  • 13 g sugar
  • 30 mL fish sauce (or 45 mL, to taste)

Directions:

  1. In a large bowl, add the coleslaw mix (minus the celeriac). Pour the salt over the entire mix and rub in with your hands. Cover with water. Allow to sit at room temperature for 12-24 hours, stirring occasionally.
  2. Rince the salted coleslaw mix 4-5 times with fresh water. Add the green onions and celeriac and mix thoroughly.
  3. In a small glass bowl, combine the ginger, garlic, red pepper sugar and fish sauce and mix well to create a smooth paste. Pour over the coleslaw mix.
  4. Using a gloved hand, rub the paste into the slaw until it is fully incorporated and evenly mixed. Pack the entire slaw mix into a sterilized jar, pressing down to remove large air bubbles, leaving about 2.5 cm space at the top, then cap with the lid. Allow to ferment for 2-3 days in a cool spot but not the refrigerator. It’s probably a good idea to open the jar every-so-often to release the gases that build up during fermentation. Once it has reached your desired flavour, refrigerate. Some recipes need to sit in the refrigerator for a couple of weeks but this one you may use right away, knowing that the flavours will only get better as it ages.

Notes:

  • Buying an entire cabbage is far too much for just the two of us, it would take us a year to go through it all, so I buy the pre-shredded coleslaw mix in the bag salad section and augment it with what I have at home, this time it was celeriac and green onions.
  • I would use gloves to massage the paste into the vegetables, the red pepper may stain your hands and nails.

Read Full Post »

Just prior to Christmas, I did a couple of jobs which had me buying a lot of garlic. When I say a lot, I mean literally dozens of heads! Of course, I gave away as much as I could but the majority came home with me. I am not one to toss perfectly good food in the bin, so I decided to roast the heads and freeze them for quick additions to sauces and soups. Now, I must say that this idea is genius because roasted garlic is so tasty and having some quick at hand makes it easy to add another level of flavour without the harshness of raw garlic. Over the holidays, we got together with our wonderful neighbours and I made this delicious roasted garlic dip.

Now there is that cold winter light!

Roasted Garlic Dip

A KitchenInspirations Original Recipe

Serves 6-8, makes about 300 mL

To print recipe, please click here.

Ingredients:

  • 200 g roasted garlic (about 4 heads)
  • 125 g cream cheese, room temperature
  • 50 g Greek Yogurt
  • Sea salt to taste

Directions:

  1. In a small bowl large enough to accommodate a stick blender, combine all of the ingredients and purée until smooth and silky.
  2. Serve at room temperature.

Notes:

  • I roast garlic by cutting off the bottom of the head (the root end) and setting it in about 30 mL of olive oil. I like to cover the garlic I roast so it steams and roasts at the same time. I roast the garlic in a 350° F oven for about 45 minutes or until they are very soft.
  • To extract the garlic, simply squeeze each clove into a container.
  • Some people add freshly grated Parmesan to this dip but I find it rich enough without it.
  • Save the cut ends of the garlic for soup stock.

This dip would also be a tasty cream sauce for pasta.

Read Full Post »

I have seen this beautiful sauce pop up over a couple of blogs I follow, like Karen of Back Road Journal and Maureen of Orgasmic Chef and since I was making a Spanish potato omelet for an appetizer for a recent dinner party, I knew I had to pair it with this luxurious sauce. Spaniards sure know how to make beautiful raw dishes like Gazpacho, this sauce is smooth and perfectly balanced, making it an amazing addition to chicken or fish or even a simple pasta or gnocchi dish. The toasted almonds become the thickener and the olive oil emulsifies everything to a smooth, creamy sauce. I omitted the bread because I wanted to make it gluten free and because our dinner party had two kids, I went light on the smoked paprika and garlic, feel free to ramp it up if you’re in the mood.

Spanish Romesco Sauce

Makes 375 mL  (1 1/2 cups) sauce

Original recipe, please click here

Ingredients:

  • 1 large fire roasted red pepper, skin removed
  • 1 garlic clove, finely chopped
  • 1/2 cup almond flour, toasted
  • 3 Campari tomatoes (see notes)
  • 2 tbsp Red Wine vinegar
  • Pinch of smoked paprika
  • 1/2 cup extra-virgin olive oil
  • Mediterranean Sea Salt*, to taste
  • Freshly ground black pepper, to taste
  • Parsley, finely chopped

Directions:

  1. Add everything but the parsley to your immersion blender container and blend until creamy and smooth.
  2. Stir in the finely chopped parsley.
  3. Serve warm or room temperature over fish, chicken or pasta. You can even use it as a dip for raw veggies or crackers.

*This is the sea salt I used. I purchased it San José, Spain last year.

Notes:

  • You may use 1/2 cup passata if you don’t have campari tomatoes
  • I always forget the parsley so it’s not a big deal if you miss it.
  • I have also used smoked sea salt and it’s heavenly
  • I generally use roasted garlic purée which I have on hand because our stomachs can’t take raw garlic

Read Full Post »

pickledradishes_first

I had an excess of radishes in my pantry so I decided to pickle them before they turned bad. They will make a nice garnish to pulled pork or a rich stew like bœuf bourguignon.

Pickled Radishes

A KitchenInspirations Original Recipe

Makes 250 mL (1 cup)

Ingredients:

  • 160 g (~1 cup) radishes, sliced thinly
  • 30 g (~5 cloves) garlic, sliced thinly
  • 250 mL (1 cup) white vinegar
  • 5 mL (1 tsp) salt
  • 5 mL (1 tsp) sugar
  • 5 g (~ 6 sprigs) dill sprigs
  • 250 mL (1 cup) sterilized canning jar

Directions:

  1. Combine vinegar, sugar and salt and heat until both salt and sugar have dissolved, stir well.
  2. Add the radishes and garlic slices to the jar and pour the hot liquid over to cover. Tap the jar a few times to burst any air bubbles.
  3. Pour the liquid over the radishes and tap the jar on the counter a few times to get the liquid dispersed evenly. Add the dill sprigs, making sure they are covered in the liquid. Screw on the lid.
  4. Use immediately or process jar for 10 minutes (or as required in your neck of the woods), allow to cool on the counter. Label. Store for 3 months in a cool, dark place or use within a month in the fridge.

pickledradishes

Read Full Post »

applepreserves_first

This is a naturally sweet applesauce, no added sugar or chemicals, just the beautiful sweetness of the apples!

Since JT and I have embarked on our diet, I have been expanding a recipe collection because there is nothing worse than eating ‘diet food’. JT can attest that our food has been the furthest from ‘diet’, at least, our perception of ‘diet food’. We’ve had:

  • Chicken Schnitzel with cauliflower mash
  • Zucchini spaghetti and chicken meatballs
  • Mushroom and cauliflower crêpes with lentil béchamel sauce
  • Apple and Dijon glazed pork tenderloin
  • Pulled pork tenderloin crêpe with homemade BBQ sauce
  • Navy bean mushroom ‘risotto’
  • Pacific Salmon with cauliflower dill sauce on wilted spinach
  • Chicken Tikka Masala on cauliflower ‘rice’
  • Pork tenderloin on braised red cabbage
  • Pork tenderloin with mushroom sauce on sautéd veggies
  • Tilapia en papillote
  • Bouillabaisse

The real challenge is finding alternatives that fit into the diet parameters so I created this apple preserve (or butter) as a condiment, but also as a sweetener in some of the dishes named above. I try to vary the meals so that we don’t get bored of the same thing.

The other thing that I’m finding quite helpful is weighing everything to make sure we are not having more than we should — I’ve fallen off that bandwagon a few times, so it’s great to get back to it. Measuring is a great tool to keep you on track and it keeps you from inching up the volume (which I can be guilty of)! I measure out 100 g  (3.5 oz) portions of any protein we purchase and freeze them individually. I know each baggy is 100 g (3.5 oz) which is exactly the portion size we should be eating. It doesn’t take long to get used to the smaller volumes particularly since we have to drink a lot of water. And the veggies are quite generous (230 g 8 oz per portion), in fact, JT has a difficult time eating the allotted volume of veggies sometimes (I do a lot of wilted spinach…makes for a smaller amount!). Fortunately, we can season to our heart’s content so the food isn’t bland. The other thing about 100 g or 3.5 oz portions is that it makes the budget go further! I’m not going to post a lot more about my regimen but I will share the odd recipe I think you might enjoy. Plus, we have a few cheat days planned (Super Bowl for one!) so I’ll share some of those tasty treats. Thank you for allowing us to indulge in our resolutions, while I enjoy your wonderful recipes from afar, for the time being.

Unsweetened Apple Preserves

A KitchenInspirations Original Recipe

Makes 750 mL (3 cups) preserves.

Ingredients:

  • 1 kg (about 2 lb) red delicious apples, peel and core included*.
  • 1 L (about 4 cups) water
  • 6 cinnamon sticks
  • 10 g (about 3 tbsp) freshly grated ginger
  • pinch of salt

Directions:

  1. In a medium Dutch oven, add chopped apples, water and cinnamon sticks and cook on medium heat until apples have broken down and thickened and most of the water has evaporated, about xx minutes.
  2. Add freshly grated ginger and pinch of salt, stir well.
  3. Pour into prepared containers and seal with new lids. Store in the freezer. Use refrigerated preserves within a month.

Uses:

  • Use to sweeten sauces and dressings instead of sugar.
  • Pour over unsweetened yogurt or ice cream or gelato.
  • Use as a condiment for pork.
  • Combine with a little Dijon Mustard as a glaze over pork tenderloin.

*The peel and core add natural pectin to the preserves which help to thicken and preserve it.

applepreserves

Read Full Post »

strawberrypreserves_first

This is an apple sweetened preserve with strong strawberry flavour and a hint of cinnamon. It’s delicious on toast, cheese or even a garnish on dessert. However, if you are a sweet tooth, this may not be for you.

Late last year, JT and I decided to hunker down and lose the weight we put on in 2016, start date January 3, 2017. I don’t know about you, but it keeps getting more and more difficult to shed those pesky pounds. So over the last few weeks, we have been dry and on a very strict regiment. I’ve joined a doctor supervised program that I’ve had much success with in the past and I am happy to report, I am doing rather well. At this rate, I should reach my goal by March! I also bought a fit bit zip, so as corny as it sounds, I am getting in my 10,000 steps, a day! We got a bit lazy after our trip to Europe last fall, so it feels great to get back on track.

The diet we subscribe to has you eating real food (in moderated proportions) so it will be easy to keep up the practice even after we reach our goals. Having said that, there are a few things that I miss because the preferred brands contain aspartame or some other chemical sugar that I decided many years ago to avoid like the plague. So, in this simple post, I present to you an apple-sweetened strawberry preserve recipe. I must warn the super sweet tooths out there that this recipe is definitely not for you. It does, however, have excellent strawberry flavour and the apple just curbs the tartness of the berries without any processed sugars! I suspect I could have added honey or some other natural sugar, but the diet really limits ALL sugars (except chemical) so my hands were tied. These preserves should be frozen as opposed to canned because it does not contain processed sugars as a preservative. At first, I made a single batch of one jar, but JT loved it so much, the jar did not last long. So when I saw strawberries (from Mexico) on sale for $1.88/454 g (1 pound) I jumped! Surprisingly, they have excellent flavour and aroma and the berries really shine through in this preserve.

Apple Sweetened Strawberry Preserves

A KitchenInspirations Original Recipe

Makes about 500 mL (about 2 cups)

Ingredients:

  • ~1.8 kg  (~4 lbs) strawberries
  • 1 cup water
  • 4 cinnamon sticks
  • 1 apple, chopped finely, peeled, cored (reserved)

Directions:

  1. Roughly chop strawberries, add them to a heavy bottom saucepan along with the cinnamon sticks, apple and the water. Wrap the apple peel and core tightly in cheesecloth and add to the mix (the peel and core will add natural pectins which will help thicken it).
  2. Boil until the berries and apple have broken down, most of the water has evaporated and it has thickened. With a fork, mash any berry chunks or apple that have not broken down. Remove the cheesecloth bag, drain and discard.
  3. Bottle in sterilized jars and refrigerate for immediate use or freeze for future use. The refrigerator preserves are good for about one month, but it probably won’t last. The freezer jams will be good for about 6 months if they are sealed tightly.


Read Full Post »

marmalade_first

My dear friend Lorraine recently launched her new travel company, focussing on unique food and travel experiences, traveling in the style and class that she has grown accustomed to! Her first journey is to Peru, a gastronomical hot-bed, who knew? Do take a gander to her new site Experiential Traveller and check it out.

It so happens that I have had Peruvian cuisine only a couple of times, in New York City, of all places! A few years ago, JT and I were sitting in our hotel lobby waiting for our dear friends Paul & T to arrive when this very animated woman, Melony comes in holding a bag of freshly baked bagels. She comes bounding over to us with such excitement and says, “I bet you’ve never had a Brooklyn bagel!” We said we’ve had bagels in New York but she interrupted and claimed with no uncertainty that they were most likely not authentic Brooklyn bagels and that today was our lucky day because she just bought a bag of the city’s finest and we MUST try them. It’s not like we had a choice, so we followed her into the attached hair salon (she was the manager) and she proceeded to hand us authentic Brooklyn bagels. Well, you can’t just eat someone’s authentic Brooklyn bagels without some small talk, and that’s how we found out about the BEST (THE BEST, Jerry. THE BEST) Peruvian restaurant in the city (Mancora in The Lower East Side)! And on the plus side, it wasn’t a wallet-breaker either! We had one of the best lunches there with our dear friends Paul and T! You see, I did come back around to Peru!

Orange marmalade goes so well with Brooklyn bagels so when I had a few oranges left over from a gig late last summer, I decided to make orange marmalade! I chose an Ina Garten recipe that took two days as we were heading up to the cottage and I didn’t have time to finish it in the city. Having to do it again, I’d probably go with a long cooking jam instead of macerating the fruit as I didn’t feel it gave anything different to the texture. But if you need a jam recipe spanning over two days, this one is for you!

This recipe is roughly based on Ina Garten’s Orange Marmalade

Easy Orange Marmalade

Yields: 500 mL (~2 cups)

Ingredients:

  • 2 large oranges (ends removed and sliced very thinly, yields about 575 g)
  • 2 cups water
  • 300 g sugar
  • 45 mL lemon juice

Directions:

  1. Combine thinly sliced orange slices and the water in a non-reactive pan (I used my Le Creuset). Bring to a boil, stirring often.
  2. Remove from heat and add sugar, stirring until entirely dissolved. Add lemon juice and stir.
  3. Cover and leave overnight.
  4. The following day, bring the mixture back to a boil, stirring often. Reduce to a simmer and simmer uncovered for 2 hours, stirring often. Turn up the heat again and gently boil for an additional 30 minutes, skimming off any foam that forms. Cook the marmalade until it reaches 105° C (220° F) or when a small sample forms wrinkles as you run your finger through it on a very cold plate. At this point, I felt there was too much peel and not enough jam, so I took about half and processed it smoothly with an immersion blender and returned it to the peel and combined. It’s quite a lovely texture.
  5. Pour into sterilized jars and apply lids. Process for 10 minutes in hard boiling water.

marmalade_2

Notes:

  • The sugar was reduced to 300 g  (a little more than the 3:1 ratio).
  • I found the multi-process a bit much for the result, I will find a version that is not so labour intensive next time. You may wish to try Helene’s family recipe.
  • The platter was a gift from my cousin and his wife when they stayed with us for a little more than two weeks, summer 2015. I adore gifts like that, I will always think of them when I use the platter. It’s hand painted Herend Porcelain, a very famous Hungarian porcelain house.

This is a good article on the differences between a Brooklyn Bagel and a Montréal Bagel (my favourite). Updated Jan 10/17.

Read Full Post »

strawberryjam_first

On a recent trip to Europe, our dear friends Paul and T met us in Almeria to spend a few days together at my cousin Lucy’s flat in San José, Spain.

We stayed one night in Almeria because the flat was already booked. We stumbled upon Joseba Anorga Taberna quite by accident and had one of our most memorable meals in Spain (not counting the one star Michelin, but that’s another story). The Tapas were excellent and beautifully presented. It was a ridiculously hot and humid evening in Almeria so we didn’t want a heavy meal to weigh us down so sharing tapas was the perfect solution.

Joseba Anorga Taberna is a contemporary restaurant rated as one of the top ten in Almeria, what luck we had finding it! These are just a few of the tapas we enjoyed our first night in Spain. Buen Apetito.

This slideshow requires JavaScript.

Just before we left for Europe, I found the last of the Ontario strawberries at my local grocer and they weren’t even overpriced! I bought a few pints and decided to make strawberry jam out of them to enjoy over the winter. I used a pectin-free recipe using a 3:1 ratio, three parts fruit to one part sugar. The jelling will take longer than a full-sugar version but it’s worth it. It’s not a sickly sweet jam, which is just fine by me!

strawberryjam_3

The jam is rich with strawberry flavour, just like Mom’s!

Strawberry Jam

Yield: 500 mL or 2 cups

Ingredients:

  • 936 g strawberries, washed and hulled
  • 309 g sugar
  • 1/4 cup lemon juice, about 1 good size lemon
  • zest of 1 lemon

Directions:

  1. Combine all of the ingredients in the bowl of your 10-cup food processor. Plus until desired consistency is achieved (see notes).
  2. Pour content into a non-reactive, heavy bottom pan (I used my Le Creuset). Slowly heat until the sugar is dissolved and bring very slowly to a boil. Remove foam as it appears (see notes).
  3. Boil until the jam reaches 105° C (220° F) and has thickened up and reached the jellied stage (test a small amount on an ice cold plate and if you can wrinkle the jam, it’s done!)

strawberryjam_2

We like this jam a lot.

Notes:

  • I reduced the sugar according to this website (see last paragraph). To get to the jelly stage will take a little longer than the full sugar version, but it’s worth it.
  • I do not have a potato masher, instead of pulsing you may mash the berries with said masher, add the remaining ingredients and mix well.
  • Apparently, foam contains a lot more air than the actual jam so leaving it may reduce the shelf-life of your jam (source here).

Read Full Post »

pomegranatesyrup_firstRecently, JT and I spent three wonderful weeks touring through London, Almeria, San José, Granada, Sevilla, Madrid and finally Paris. It was awesome. I will recount some wonderful meals and memories in future posts but I wanted to share a quick and easy recipe to make pomegranate syrup because my dear friend Sissi (With A Glass) recently posted a beautiful salad which included pomegranate seeds and the dressing was created with pomegranate molasses, a slightly sweet and sour syrup.

Sissi’s post went live around the time we had just spent the day in Granada, a large, historical city in the south of Spain. We did a wonderful walking tour of the city with Panchotours with Registered Tour Guide, Veronica and at one point she mentioned that the word Granada in Spanish means pomegranate! What a coincidence! The name is appropriate because the streets are lined with gorgeous pomegranate trees. Yes, you could just reach up and grab a fresh pomegranate, how cool is that? Sadly, they were not quite ripe enough, otherwise, you know I would have!

granada-pomegranate

ourtourguide

Our lovely tour guide, Veronica.

Several weeks prior to our departure, we purchased something and for some unknown reason were given a 473 mL bottle of Pom Pomegranate Cherry Juice for free. We don’t normally drink juice as it is far better to eat your fruit than drink it so it sat in the refrigerator until now! Making the syrup is so easy, I won’t even list it as a recipe. Simply pour the entire content of the bottle into a non-reactive pan and boil it on medium-high for about 30 -40 minutes or until it reduces to about 100 mL. I didn’t want an overly thick syrup (the viscosity is about the same as maple syrup) so you could boil it down even more — but be very careful, after a very short time, it can burn very easily! Allow to cool and pour into a sterilized bottle. Store in a cool, dark location.

pomegranate-syrup

It’s a thick, sweet and slightly sour syrup. that is delicious on chunks of Parmesan.

alhambra

The view of the Alhambra.

granadaview_new

Panoramic View of Granada.

Read Full Post »

AppleJelly_First

When life gives you lemons, make lemonade. But I didn’t get lemons. I got apples. 907 g (2.2 lbs) to be exact!

I made JT an apple pie with two, and then made apply jelly with the remainder. I was at the cottage, so I had limited ingredients but apparently apples have a lot of natural pectin in the skin and core so I wasn’t worried. The trick is to cook the apples with skin, core and seeds until very soft and that coaxes the pectin out. I made a clear apple jelly, or as clear as one can get without using this nifty Mehu-Liisa.

Apple Jelly

Makes 236 mL (8 ounces)

Ingredients:

  • 900 g (2 lb) apples (I used Granny Smith and Gala), wash and cut into small cubes
  • 600 mL (20 fluid ounces) water
  • 300 g (1.5 cups) granulated sugar
  • 1 tbsp lemon juice

Directions:

  1. Add all of the ingredients to a non-reactive Dutch oven and stir well.
  2. On medium-high heat, bring to a boil, then simmer until apples are very soft.
  3. Strain through cheese cloth and then through a very fine sieve.
  4. Pour into a smaller pot and bring to a boil. Boil for about 20 minutes to at least 104° C (220° F) or when it begins to gel (test frequently on an ice-cold plate).
  5. Pour into sterilized mason jars (I used two 118 mL (4 ounce) jars and continue the canning process, or use immediately.

AppleJelly_2

I was surprised at how relatively clear the jelly was.

Notes:

  • Save the soft apples (not the core or seeds) and purée until entirely emulsified, push through a fine sieve for a delicious apple sauce. Freeze in a zip lock bag if not using right away. Makes about 125 mL (1/2 cup) applesauce.

AppleJellyCalories

Apple Jelly serving is based on 10 mL (2 tsp) serving size.

WW Points

Read Full Post »

The marketing company that I work with from time to time recently moved into their new exciting office space and they invited me down for a look. I decided to bring them a baked treat (because that is how I roll) and created this new chewy chocolate peanut butter brownie recipe! I was inspired by your generous reaction to the Chocolate Peanut Butter Bark with Gold Sea Salt that I created, thank you. This is not an overly sweet brownie but it is richly flavoured with chocolate with the classic peanut butter combo. I used natural, chunky PB that isn’t sugared or salted, but feel free to use your traditional grocery store PB and omit the additional sugar and salt that I add in the later part of this recipe. The recipe is loosely based on my Go-To brownie recipe that my dear Mom cut out of the Toronto Star about 20 years ago (click here and here).

Chocolate Peanut Butter Brownies 

A KitchenInspirations Original Recipe

Makes about 25 brownies

Ingredients:

  • 1 cup all-purpose flour
  • 1 cup icing sugar
  • 5 tbsp cocoa powder
  • 1 tsp baking powder
  • 45 g (1 1/2 oz) semi-sweet dark chocolate chips
  • 3 tbsp butter
  • 1/2 cup water
  • 2 tsp vanilla extract
  • 2 egg whites
  • 1/2 cup natural, chunky peanut butter
  • 1/3 cup water
  • 1 tbsp icing sugar
  • Pinch of salt

Directions:

  1. Sift flour, icing sugar, cocoa powder and baking powder.
  2. Melt butter  with chocolate chips, add vanilla and water and stir well.
  3. Beat in the egg whites (if the liquid is still hot, temper them so you don’t get scrambled eggs!)
  4. Add dry ingredients and stir well.
  5. Pour into a prepared 9″ x 9″ pan and line the pan with parchment paper, then spray with non-stick baking spray. Bake for 25-40 minutes until firm and cake tester comes out clean.
  6. Option to frost with a butter icing, but not necessary as this brownie is very moist and flavourful.

Read Full Post »

SrirachaSauce_First

Recently, I was given a small basket of a variety of chili peppers. I don’t know about you, but these days I don’t like to tempt fate with overly hot things so incorporating them into a dish was out of the question. In the bunch were scotch bonnets, serranos, poblanos, jalopeños and Thai chilies so it was a basket of epic heat! Since I’ve already made Sweet Chili Sauce with Dried Apricots and Hot Sauce I decided to make a version of the very popular Sriracha Sauce because it is a staple in my pantry.

I love hot sauce, but sadly my innards, not so much so I wanted to  tame the heat without compromising flavour. The solution was grilling the peppers to a blistery/blackened stage, peeling and cleaning the seeds and veins out to temper the heat, the smoke flavour was a bonus! This recipe is roughly based on the link below.

Hot sauce.

Hot sauce.

Homemade Sriracha Sauce

Makes roughly 225 mL sauce.

Adapted from Leite’s Culinaria

Ingredients:

  • 400 g variety of hot peppers
  • 10 g garlic, minced
  • 25 g granulated sugar
  • 5 g sea salt
  • 125 mL white vinegar or to taste

Directions:

  1. Grill the hot peppers until their skin is blistered and black. Set hot chili peppers into a glass bowl and top with a plate to further steam the peppers (this makes peeling much easier, but if you have issues, just microwave them on high for 10-20 seconds). Peel, remove seeds and veins (the sauce will be hot enough even with this step) using gloves to protect your fingers (these are extremely hot peppers).
  2. Combine all ingredients except the white vinegar in a food processor and pulse until you have a paste. Scrape into a glass jar and tightly seal. Allow to sit on the kitchen counter (bench) for 1 week, stirring once daily. The mixture will ferment so if you see bubbling action, it is par for the course.
  3. After one week, transfer the chili mixture to a saucepan over medium heat and add the vinegar and bring to a boil, then lower the heat and simmer 5 minutes. Allow the mixture to cool slightly and then purée it again using an immersion blender. Push through a fine sieve, taste and season with sugar, salt and vinegar as desired.
  4. Store in the refrigerator in a glass jar with a tight lid. The original recipe indicates that this sauce is good for six months.

SrirachaSauce_8696

Perfect timing because I’m going to need a small bottle for the cottage!

Read Full Post »

HomemadeButter_first

My dear Mom encouraged us as children to participate in cooking. Sometimes it was as simple as cleaning green beans or popping sweet peas out of their pods, whatever the task, it always resulted in increasing our comfort level in the kitchen for which, to this day I am truly grateful. One such exercise was to make whipped cream for a dessert topping. I must have been quite young because Mom set-up a workstation on the kitchen table so I could see inside the bowl of our olive green Iona Stand Mixer!

I no longer have the stand for the mixer.

I no longer have the stand for the mixer.

We poured the ice cold cream into an ice cold glass bowl and I started the mixer. I learned that starting the mixer on high only resulted in cream splashing all over my face! The bowl sat on some sort of ball-bearing Lazy Susan which you had to gently hold so the bowl wouldn’t spin out of control (I was in charge of that). As you undoubtedly already know, whipping cream to stiff peaks doesn’t take long, but I didn’t know that back then! Dear Mom was distracted and before I knew it, the cream began separate and turn to butter, the fat congealing and separating from the buttermilk. These types of “mistakes” never resulted in a scolding, they turned into lessons and this one became Butter Making 101! In those days we ate a lot of butter so Mom knew this lesson wouldn’t go to waste! Fortunately, dear Mom always had extra whipping cream in the refrigerator and so I learned to make two things that day: butter and whipping cream.

This is a great exercise for children but be careful because today’s stand mixers can be very dangerous for small hands.

Homemade Butter

Ingredients:

  • 1 L (8 cups) whipping cream (35% fat)
  • Pinch of salt (optional)
  • Cheese cloth and a fine sieve.

Directions:

  1. Place your stand mixer mixing bowl and whisk into the freezer for 10-15 minutes or until very cold.
  2. When bowl and whisk have chilled through, secure bowl to stand and add the cream. Slowly begin beating cream, adding a pinch of salt if desired.
  3. At about 10 minutes, the cream should begin to thicken and separate from the whey, once you have distinct separation stop beating. Voilà, you have made butter!
  4. Strain through a sieve lined with cheesecloth. Reserve the buttermilk (I’ll use it to feed my sourdough starter), transfer butter to a resealable container and refrigerate. Or separate into smaller portion sizes and freeze. You will also need to squeeze excess buttermilk from the butter.

Butter_2

Deliciously creamy, homemade butter.

Notes:

  • You can make butter from any amount of whipping cream, I just had 1 litre left over from a gig.
  • I used my whisk attachment of my Kitchenaid stand mixer, but I’ve seen people do it in a blender too although I would find it too difficult to clean thoroughly.
  • Flavour butter with fresh herbs to make a compound butter and freeze in small portions to flavour fish, poultry or meats.
  • I chose not to salt my butter but you can add salt as you wish.
  • Butter freezes very well. Portion into 1/4 (125 mL) or 1/2 cup (250 mL) portions.

Portion size is 1 teaspoon.

Portion size is 1 teaspoon.

Read Full Post »

PlumButter_First

Small Italian plums would have been perfect for those delicious Plum Dumplings my cousin and I made in June, sadly they were not around then. When I spied them at my green grocer a week or so ago, I knew I couldn’t resist so I picked up a small container knowing full well they would be converted to something delicious. While Plum Dumplings are a great childhood memory, they are not the type of thing we eat on a regular basis so I decided on Plum Butter, another thick jam made without the use of pectin. Making jam or Lekvár is so easy, I’m astonished that I hadn’t done it more often in the past; perhaps it was the fear of making more than we could consume! Well, fear not my dear readers because this recipe makes a few small jars so we’ll be in great shape over the cold winter months.

plum butter, plum jam, szilvas lelvár

We enjoyed the delicious plum butter on homemade bread!

Plum Butter

Makes 370 mL thick jam

Ingredients:

  • 630 g plums (a small container)
  • 255 g sugar
  • 60 mL water
  • 1 tsp cinnamon

Directions:

  1. Cut plums in half and remove stone. Put plums into a heavy bottom pan and add water and sugar. Set over medium heat and cook until softened.
  2. Add cinnamon and cook for 30-40 minutes until thickened, testing often with the freezer method.
  3. Once the butter has thickened, pour into sterilized mason jars and follow canning best practice instructions.

Notes:

  • I left the peel in for texture, you may run the mixture through a fine sieve if you prefer no peel.
  • The plums cook down to a very creamy texture so there is no need to purée or press through a food mill, unless you wish to.

plum jam, plum butter, szilvás lekvár

It’s far too chilly to enjoy the plum butter outside now!

Read Full Post »

peach, butter, jam,

My parents emigrated to Canada from Hungary in 1956 during the Hungarian Revolution; the citizens revolted against the Russian takeover. After about 12 days of Revolution, the Russian army mounted and squashed Hungary once and for all. At 20 years old, my Mom left just prior to the Russian’s ending the revolution to escort her sister to Vienna but ended up continuing her journey on to Canada; she celebrated her 21st birthday alone in Halifax. My Dad was relatively active against the Russians and decided to leave to protect himself (my uncle and aunt were expecting their first child so they were not able to leave). My Dad’s family lost everything to the Russians (the Puppet theatre(Báb Szinház) in the Liget, their family home…E V E R Y T H I N G). My Mom’s family had already lost everything to the Germans during the WWII (they had a small store that sold coffee, flour etc.). The Russian hostility toward Hungary surprised the world and both my parents were able to immigrate to Canada as Refugees of War.

My parents did not know one another in Hungary so they made their way to the New World on their own. My Mom (13 years younger than Dad) talked about her journey but Dad sadly did not. I only know that Dad came through Gibraltar and an Ocean Liner. Mom also arrived by boat but I can’t remember how or where from. You know the movies that show people trying to escape oppression, desperately crawling on their bellies across vast lands under the cloak of darkness? That was my Mom’s story. She and her sister came across the farmlands of Hungary, all the way to the Austrian border near Vienna. The Austrians were very sympathetic to the plight of the Hungarians and they helped make their way to a better life.

I’m not sure either of the parents had a “plan” as such but I know my Mom already had some relatives in Canada (an Aunt and her husband, children and their spouses). My Mom’s sister’s husband had already arrived in Toronto and was instrumental in making arrangements for my Aunt to meet him there, sadly Mom was not in that equation due to the economic circumstances of my Aunt and Uncle so she had to find her own way to Toronto. Did you ever read Angela’s Ashes? I remember reading the bit about Angela only having enough money for one egg and it resonated with me…there were many times my dear Mom only had enough money for one egg during the first months in Canada. It’s difficult to understand that this happened only 59 years ago. Mom landed in Halifax and stayed for a few months. All Canadian immigrants were given $5 (around $45 today) upon arrival and were told to have a good life. Mom found a sympathetic Swiss woman who owned a beauty shop and she worked various odd jobs at her shop and rented a room in the woman’s home. Neither of my parents spoke a word of English, so they learned from listening to the radio.

My Dad found his way to Toronto and worked in restaurants to make a living, at first waiting tables and then later as a Maî·tre d’hô·tel (Maître-D) at a very prestigious hotel near the airport. Mom’s sister introduced Mom and Dad  in 1957; they dated on and off and then lived together in 1958 (yes, that was very risqué back then!). My Mom was the hold-out, she didn’t want to marry a ‘pretty boy’ as she called him. It’s true, Dad was quite the looker and the ladies loved him. Dad taught Mom puppetry and they travelled together working on the Chrysler Canada Tour in the late 50’s. He finally wore her down and they married in 1960. They eventually settled in Toronto and began having a family.

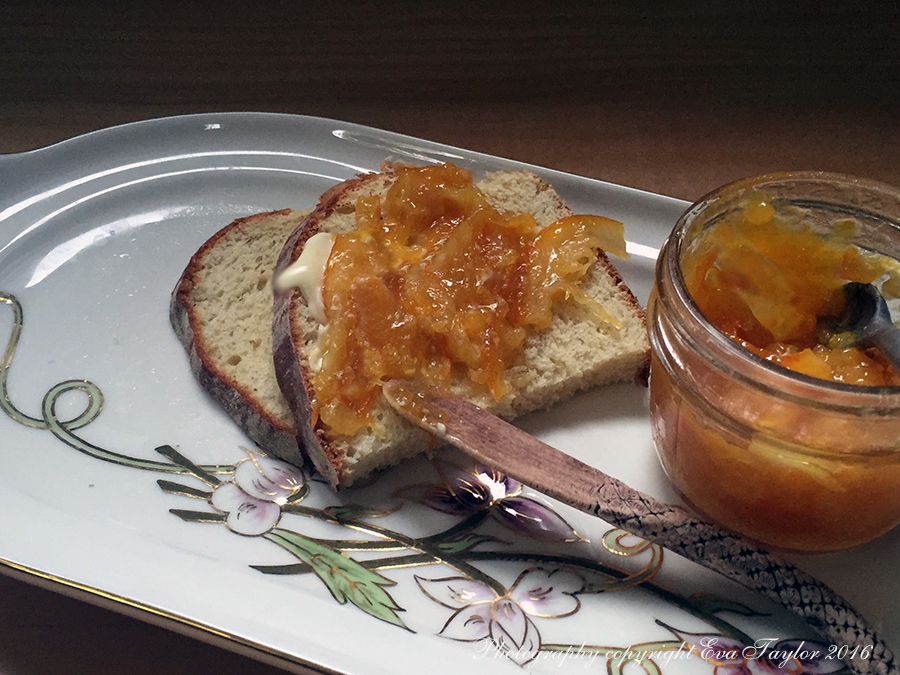
I remember my dear Mom making most of our pantry items, just like her mother did and my Dad’s mother. Jam was always a treat and as I mentioned before, Mom’s strawberry jam was one of my favourites. I bought some peaches for a photoshoot and it turned out we didn’t need them so I decided to make peach butter out of it. Mom would bottle several mason jars of jam, but since it’s only JT and I, I only made a small amount. Now that we’ve already gone through the first jar, I wish I had made more.

Jam, peaches, preserves,

A delicious, smooth peach butter or jam made without pectin.

Peach Butter

A KitchenInspirations Original Recipe

Makes 400 mL

Ingredients:

  • 650 g peaches, I had about 6  peaches (measure with peel and stone)
  • 100 mL water
  • 160 g white sugar
  • 30 mL lemon juice

Directions:

  1. Peel peaches and remove stone (see notes for tip on peeling). Cut into eighths and set into a heavy bottom pan. Add water and set over medium heat and cook until peaches are softened.
  2. Add sugar and lemon juice and purée with an immersion blender or run through your food mill.
  3. Return peach purée to pan and cook for 30-40 minutes until thickened, testing often with the freezer method.
  4. Once the butter has thickened, pour into mason jars and follow canning best practice instructions.

Notes:

  • An easy way to peel peaches is to score the skin into quarters, pour boiling hot water over them to cover and allow to sit for a minute. Take a sharp knife and begin by sliding the knife between the skin and flesh and peel away. Repeat for all of the peaches.
  • If you have a food mill, you need not peel the peaches (I have one but felt like peeling them anyway), the mill will capture all of the skin.

Read Full Post »

CherryJam_First

I read David Lebovitz’s recipe for No-Recipe Cherry Jam and loved it from the start because it was just ratios! Usually I have to take down recipes to suit the volume or quantity of ingredients I have on hand and David’s recipe made it super easy, plus I liked his first direction: “1. Wear something red.”

David suggests to cook the cherries and measure the volume and then add 3/4 of it in sugar (apparently the sugar is required so that it doesn’t spoil, otherwise I would have reduced it).

Delicious goodness of homemade jam.

Delicious goodness of homemade jam.

Cherry Jam

Makes 300 mL jam.

Original recipe, please click here.

Ingredients:

  • 350 g fresh Ontario cherries (you can use any old cherries, but I thought I’d give our Province a plug!)
  • 400 mL cherry juice (I had some left over from cherry squares I made a few weeks ago)
  • 375 mL sugar
  • zest and juice of 1 fresh lemon

Directions:

  1. “Put on something red.”*
  2. Pit all of the cherries and chop about 2/3 of the cherries into smaller pieces and the remainder into halves.
  3. Cook the cherries and cherry juice in a non-reactive pot. David suggests a slightly larger pot because the juices bubble up. Put a plate in the freezer (this will help you determine when the jam is done).
  4. Add the lemon juice and zest (I used a peeler to peel large slices of lemon so that I could remove them after). Continue to cook until the cherries are soft (about 20 minutes).
  5. Once cooked, measure the volume you have, including the juice. I netted 500 mL so 3/4 of that is 375 mL sugar. Stir in the sugar and continue to cook on higher heat until the bubbling diminishes and the jam congeals when a drop is put on the super cold plate and returned to the freezer for a moment. Be careful not to overcook the jam it will caramelize the sugar and it will taste terrible! It’s best to test often (David suggests it’s better to test often than to overcook the jam). My volume took 20-25 minutes to the perfect viscosity. Remove from heat.
  6. David suggest to add a bit of kirschwasser, but I was all out so I added a tiny drop of almond extract as he advised. Stir well.
  7. Cool to room temperature and bottle as you would normally. He suggests this jam will keep in the fridge for several months.

*From David Lebovitz

Read Full Post »

SweetPotatoHummus_first

A couple of weeks ago my kitchen had all sorts of half used leftover vegetables from a testing I did for my recipe testing lady. They were for recipes that called for specific volumes of vegetables (such as, 1 cup) instead of the quantity of vegetables (such as 1 medium carrot). I always find those recipes a bit odd because I am left with bits and pieces that lay around for weeks without any specific purpose. Indeed, I could have thrown them into a soup or stew but I wasn’t making either of those things. Then I saw my lovely friend Lorraine’s Roasted Vegetable Hummus recipes and thought “GENIUS”! What a great way to use up bits and pieces of leftover veg. Thank you Lorraine, truly a great idea (ps, it was darn delicious too!).

Because this recipe was created to use up leftover vegetables, feel free to modify the quantity or variety to what you have on hand. This would also work beautifully if you had leftover roasted veg from a dinner. Hummus is an easy Middle Eastern dip/spread and the seasonings should be to your personal taste; we love the traditional flavours so I’ve kept it pretty much the same with the exception of substituting tahini with toasted sesame oil because that’s what I had (you can use peanut butter too, I know, GASP!!!).

It turned out that The Hungarians had never tried sweet potatoes (not sure if it’s a veg not available in Budapest or they were never introduced to it) but it was a grand success as a dip AND as a roasted vegetable side for our roast chicken dinner one night.

Sweet Potato and Carrot Hummus

makes about 1 cup, depending on the size of your vegetables

Ingredients:

  • 1 medium sweet potato, peeled and cut into equal sized cubes
  • 2 medium carrots, peeled and cut into equal sized cubes
  • 1 large clove of garlic, whole
  • 3 tbsp EVOO, divided
  • 1/4 tsp sea salt
  • 1 tbsp each, cumin and coriander
  • 2 tbsp lemon juice
  • 2 tbsp water or vegetable stock
  • 2 tbsp smoked sesame oil
  • toasted sesame seeds for garnish

Directions:

  1. Pre-heat oven to 190° C (375° F).
  2. Add sweet potato and carrot cubes to a large roasting pan and drizzle with 1 tbsp olive oil.
  3. Add garlic (peel and all) to a small ramekin, top off with 2 tbsp olive oil and and water. Season with sea salt. Cover with foil and tuck into a corner of the roasting pan.
  4. Roast vegetables for about 35 minutes or until very tender, try not to brown the vegetables so that the dip colour remains vibrant.
  5. Scrape vegetables from roasting pan into a glass bowl, squeeze the garlic out from its skin and pour the liquid from the garlic into the glass bowl with the sweet potato and carrot.
  6. Toast the cumin and coriander until fragrant, add to the glass bowl along with the remainder of the ingredients (with the exception of the sesame seeds). Purée until smooth, season with salt and pepper, if desired. For an ultra smooth dip, press through a fine sieve. Garnish with toasted sesame seeds. Serve at room temperature with bread, crackers or crisp vegetables.

SweetPotatoHummus

It’s creamy and naturally sweet.

My dear friend Genie of Bunny, Eats, Design suggested I submit this post to our growing edge for June, themed Picnic, hosted by Maddie from Supper Lovin’

our-growing-edge-banner

Read Full Post »

BBQ Sauce_first

The Hungarians have arrived and the “to do” list is finally complete! Just in the nick of time too. We decided to start their visit off with a little welcome party but we all know it’s just my excuse to cook and feed my kin!!! I was fortunate enough to score a sizeable number of vine ripened tomatoes so I decided to make barbeque sauce because JT made a special request for Pulled Pork. The sauce turned out perfectly, sweet, piquant and zesty — cooking it with the pork tenderloin for 5 hours made the flavours all the more richer and balanced the vinegar very nicely. Like any low and slow cooked meal, I made the pulled pork a day in advance because we all know it tastes better the next day!

I’ve geared up a couple of posts for the following weeks, but I may be AWOL depending on how busy things get, so if I miss to comment on your blog or I don’t post, I apologize in advance. Thanks for understanding.

Barbeque Sauce

Makes 1.25 L (42 oz)

Ingredients:

  • 200 g onions, coarsely chopped
  • 50 g garlic, finely chopped
  • 125 mL white vinegar
  • 1.2 kg tomatoes, chopped
  • 30 mL tomato paste
  • 125 mL molasses
  • 50 g sundried tomatoes (not in oil)
  • 1/2 tsp salt
  • 1/2 cup packed brown sugar
  • 1 tsp smoked paprika
  • 1 tbsp of each sweet paprika, cumin, coriander and cocoa powder

Directions:

  1. In a splash of canola oil, sauté onions and garlic until translucent, add dry spices and stir until fragrant.
  2. Add remaining ingredients and stir well. Simmer for one hour or until dark and thickened.
  3. Purée until smooth and press through a fine sieve.
  4. May be kept in the refrigerator for 3-4 days or freeze for 3 months.

BBQ Sauce

Read Full Post »

TilapiawithMangoSalsat_First

Summer is coming. That’s what I’m told, I hardly believe them though. But with the warmer weather on the horizon (possibly as far away as Europe) I have again begun to think about lighter dishes. Fish seems to be a four-letter word, not for me, of course, I love the stuff. But some people in this household don’t love it as much as I do, so selling it on the plate becomes a thing. I simply broiled this tilapia, seasoned with salt and pepper and wanted a little something tasty to dress it up and my Mango Salsa recipe was born. Like many savoury recipes on this blog, I urge you to make it your own, volumes are simply suggestions — you hate cucumber, omit it! Hate mango, try pineapple instead! It’s pretty darn tasty and quite easy to prepare — I like my salsa cubed into even little cubes, but you may like yours another way…GO FOR IT!

Tilapia with Mango Salsa

Serves 2

Ingredients:

  • 1/2 cup ripe mango, cut into small cubes
  • 1/2 cup cucumber, cut into small cubes
  • 1/2 cup red pepper, cut into small cubes
  • 1/4 cup cilantro, chopped
  • 1/4 cup white balsamic vinegar
  • salt and pepper to taste
  • 200 g of cooked white fish (we used Tilapia but cod, halibut or monkfish would also work well)
  • a few handfuls of massaged kale (my dear friend Kelly at Inspired Edibles shares a very compelling story about getting intimate with your food, 50 Shades of Green-style!)

Directions:

  1. Combine the mango, cucumber, red pepper, cilantro and mix well. Pour the white balsamic into the mix and stir to combine, season to taste.
  2. Serve over broiled white fish on top of massaged kale leaves. Enjoy!

Notes:

  • This salsa would be lovely on BBQ chicken breast or even a steak if you’re feeling like red meat.
  • A mix of greens would be fine instead of the massaged kale but I love kale so I use it where I can.

Read Full Post »

SweetChiliSauce_First

Has spring arrived where you are? It sure hasn’t over here, in fact there is very little sign of it. Yes, we can be grateful that the snow has finally melted and that it hasn’t snowed in any measurable quantity for a few days, but these temperatures are killing us. Since I’ve begun my morning walks through High Park again (8km most mornings) it’s been so cold that I’m still wearing my long down-filled coat, hat, gloves and a balaclava around my neck at the ready when the howling wind rudely slaps my face. I’m ready for spring. With these cold temperatures, I’m still craving warming foods like my dear friend Sissi’s Dried Apricot and Chili Jelly. If you don’t know Sissi, she is an experienced cook with a passion for the Far East. Her recipes are uncomplicated and her writing style is elegant and beautiful and that’s something because English isn’t even her first language! I’m always drawn to Sissi’s recipes because she combines flavours that hit my palette perfectly. And she enjoys similar foods and textures that I do. Please visit Sissi’s blog for the original recipe because she has generously provided more details than I am providing.

Sweet Chili Sauce with Dried Apricots

Makes 250 mL sweet chili sauce

Ingredients:

  • 175 g dried apricots
  • 150 mL +100 ml cider vinegar
  • 100 g red Thai chili peppers
  • 200 g sugar
  • 50 mL water
  • 1/2 teaspoon salt
  • 1/2 package pectin in powder (25 g)

Directions:

  1. Bring 150 mL vinegar to a boil and add the apricots to soak for 30 minutes.
  2. To a small food processor, add the hot peppers (discard the stalks and seeds) and the soaked apricots and pulse to chop reasonably finely.
  3. Combine the remaining ingredients (including the additional 50 mL vinegar) and boil 20 minutes,stirring constantly.
  4. Sprinkle the pectin over the surface and cook 10 more minutes, mixing well.
  5. Transfer the hot jelly into the sterilised jar or jars and cover with lid(s). Allow the jar to cool and refrigerate. If your jars are smaller (I used one 250 mL jar) you will want to process them as you would any canning project. I popped my single jar into the fridge and will use over the next month or so (or I will freeze for later use).

This is a very hot sauce.

This is a very hot sauce.

Notes:

  • I had intended on reducing the sugar but believe me, it NEEDS the sweetness because these peppers are HOT!
  • This is an excellent condiment but use conservatively as it is VERY HOT.


Read Full Post »