Feeds:
Posts
Comments

Posts Tagged ‘sweet’

Firstly, I must apologize to my regular followers as I haven’t been able to comment on their blogs in the last week, I was taken down by the stomach flu that is going around and it was brutal! I could barely get out of bed for five days. I’m recovering but it takes time to reintroduce foods into your diet that won’t shock the system.

We are planning an epic adventure in 2024 and for that we need to get in shape so we are cutting back the carbs, cutting out the alcohol and bumping up the exercise. I will adapt as many of our favourite recipes on our journey and I started with this beloved sauce. This recipe isn’t as sweet as traditional hoisin sauce but it definitely has a good punch of umami and the best part is that 15 mL has 2 g net carbs, compared to 44 g! That’s a win-win for me.

It’s super salty but not as sweet as traditional Hoisin Sauce.

Low-Carb Hoisin Sauce

A Kitcheninspirations original recipe

Makes about 150 mL sauce

Ingredients:

  • 200 mL low sodium soy sauce
  • 30 g erythritol
  • 20 g roasted garlic purée
  • 12 g molasses
  • 5 g white miso paste
  • 10 g tahini

Directions:

  1. Combine everything but the tahini in a small saucepan and mix well. Bring to a boil and reduce to about 150 mL.
  2. Using an immersion blender, blend in the tahini. Pour through a fine sieve into a sterilized jar.

Notes:

  • The sauce will thicken when cool.
  • Use as a marinade for chicken or pork or as garnish for phõ as you would regular hoisin sauce.

Read Full Post »

We had some dear friends over for a BBQ in late-August and we made homemade Moroccan lamb burgers with a wonderful spiced prune and nut couscous; I needed a Morrocan-style dessert so I chose this wonderful baklava recipe. To be honest, I wasn’t able to differentiate between Middle Eastern baklava and Morrocan baklava but rest assured, they are both delicious. This version has walnuts, pistachios and almonds with a syrup flavoured with orange and lemon rind, cloves and orange blossom water. It should have rose water in it as well, but I am not a fan so I skipped it. 

Metaxas (Moroccan Baklava)

For the original recipe, please click here. Makes about 33 cm x 23 cm 5 cm (12 inches x 9 inches x 2 inches) baking pan of Metaxas.

Ingredients

  • 150 g sugar
  • 150 mL water
  • rind of an orange (no white pith)
  • rind of a lemon (no white pith)
  • 5 whole cloves
  • 60 mL honey
  • 5 mL orange blossom water
  • 100 g walnuts
  • 100 g pistachios
  • 100 g lightly toasted, blanched almonds
  • 100 g sugar
  • 2.5 g ground cinnamon
  • 200 g unsalted butter, melted
  • 10 commercial phyllo dough sheets, cut in half length-wise to fit your pan

Directions:

  1. Combine the sugar, water, both orange and lemon rinds, cloves and cinnamon stick in a medium saucepan. Bring to a slow boil then turn the heat down to simmer, uncovered for 8 minutes. Remove the pan from the heat and strain to remove the spices and rinds. Stir in the honey and orange blossom water. Set aside to cool. See notes to make use of the orange and lemon rind.
  2. Preheat the oven to 300° F and toast the nuts for 12 minutes. Remove from the heat and cool. Increase the oven temperature to 350° F.
  3. In the small bowl of your food processor, combine the cooled nuts, sugar and cinnamon and pulse so they are relatively finely chopped with some larger pieces.
  4. Line a 33 cm x 23 cm 5 cm (12 inches x 9 inches x 2 inches) pan parchment and brush generously with butter.
  5. Begin by lining the bottom of the pan with one sheet of phyllo pastry and brush generously with the melted butter. Continue until you have five sheets stacked. Spread about one-third of the nut mixture over the fifth sheet evenly to the sides. Continue with the next five sheets spreading each sheet generously with the melted butter. Spread another third of the nut mixture over the tenth sheet evenly to the edges. Continue with the next five sheets as before, and spread the fifteenth sheet with the last third of the nut mixture. Finish with the last five sheets of phyllo as before, drizzling any remaining butter over the top of the last sheet.
  6. Bake in a preheated oven at 350° F for 45 minutes. Cover with foil if the top browns too quickly. Remove the pan from the oven and cut immediately. To cut the Metaxas in the traditional diamond pattern, begin by cutting a line from one corner to the opposite corner and repeat to the last corner. Then cut parallel lines to create small diamond slices. Pour the cooled syrup over the hot Metaxas. Allow to stand overnight at room temperature before serving.

Layers of delicious nuts bathed in a luxurious syrup between crunchy sheets of phyllo.

Notes:

  • Remove and separate the orange and lemon rinds and place on a parchment-lined baking sheet. Bake for 10 minutes at 300° F until firm. Eat as a snack.

Read Full Post »

These cookies came about because of two things: the first thing was, one of the items I brought home from England was Treacle, we don’t easily get it here and I was curious about it and secondly, I was cleaning out my baking drawer when I came across a small package of candied ginger so I thought I’d kill two birds with one stone and bake up a batch of these tasty treats. These are not low-carb, they are what they are. Sometimes you just need a treat.

Ginger Snaps

Makes about 36-46 Cookies depending on how big your melon baller is.

Ingredients:

  • 76 g butter
  • 100 g brown sugar
  • 60 mL Lyle’s Golden syrup
  • 60 mL treacle
  • 250 g all-purpose flour
  • 4 g baking powder
  • 4 g baking soda
  • 4 g ground ginger
  • 5 g freshly ground ginger
  • 4 g ground allspice
  • 30 g finely chopped candied ginger tossed in icing sugar

Directions:

  1. Preheat the oven to 350°F.
  2. Line two baking sheets with parchment paper, sprayed with non-stick cooking spray.
  3. In a small saucepan gently melt the butter, brown sugar and both syrups (do not boil unless you want to end up with jawbreakers!). Cool slightly.
  4. Sift dry ingredients together into a medium-sized bowl.
    Make a well in the centre and pour in the syrup mixture. Mix well to make a soft dough.
  5. Using a large melon baller shape into small balls (about the size of a walnut). Place each ball about two inches apart; press down to form even rounds about 1/2 cm thick.
  6. Bake 10-12 minutes or until very very lightly browned. Cool on the cookie sheet for a minute and then remove to fully cool on a wire rack. If you were to err, err on the shorter baking time so they don’t get super hard.
  7. Store in an airtight container or freeze. If they get too hard, add a slice of bread or a moist brown sugar disk for a few hours.

Read Full Post »

As we wait with bated breath for season three of Ted Lasso, I thought it would be fun to recreate his infamous shortbread cookies. These cookies conjured swoons from Rebecca, Ted’s boss! And rightly so, a well-made shortbread biscuit will melt in your mouth with the creamy taste of butter but not choke you to death with a puff of flour.

Years ago, I met a fellow running a shortbread cookie business in Toronto, he made both savoury (my favourite) and sweet and his shortbread was absolutely dreamy. I asked him what his secret was and he said cornstarch! Who knew? So I always like to include a little cornstarch in my shortbread to make them melt in your mouth, although, this is not part of Ted Lasso’s recipe.

A lovely, melt-in-your-mouth shortbread.

Ted Lasso-ish Shortbread Biscuits

This recipe makes one 23 cm x 23 cm (9 inch x 9 inch) pan.

Ingredients:

  • 250 g unsalted butter, room temperature
  • 100 g  icing sugar, sifted
  • 5 mL pure vanilla extract
  • 5 g lemon zest
  • 240 g all-purpose flour
  • 75 g cornstarch
  • Pinch of salt

Directions:

  1. Prepare a 23 cm x 23 cm (9 inch x 9 inch) pan by lining with parchment.
  2. Beat the butter until light and fluffy, add the icing sugar, vanilla, and lemon zest; whip this mixture until fluffy and completely combined.
  3. Sift the flour, cornstarch, and salt together, add it to the butter mixture and beat on low speed, just until combined.
  4. Press the dough into the pan evenly and cut into slices (this will make it easier to cut when baked). Refrigerate for 30 minutes.
  5. Preheat the oven to 300° F. Evenly dock the cookies with a fork and bake the shortbread for 45-60 minutes (mine were perfect at 45) or until just beginning to get golden on the edges. Cool in the pan and retrace the cut marks with a sharp, dry knife. Allow the cookies to cool completely in the pan. When cool, remove the cookies by lifting the parchment out of the pan and gently break the cookies at the cut marks but they should separate easily.

Notes:

  • Ted’s cookies don’t have vanilla or lemon zest but I can’t resist these flavours so I added them. Cornstarch isn’t part of the original recipe either, as I mentioned previously.
  • North American icing sugar already has some cornstarch in it to prevent clumping, but I’ve upped the ante and added more.
  • The cookies are fragile when hot, avoid touching them as you will leave fingerprints all over them.
  • Store the cookies in a cool, dry place or freeze them if they are not being consumed immediately, although they’re probably delicious when frozen too!

Read Full Post »

Back in mid-July, after a full-day of working on our deck project, we needed some appetizers for cocktails one evening. I didn’t want to spend a lot of time making them because I was pooped. I saw local cantaloupe and I immediately thought of the simple, yet tasty cantaloupe wrapped in Proscuitto (we used Serrano ham from Spain). It totally hit the spot. When I was selecting the melon, I wasn’t able to smell it as I usually do because we are still mandated to wear masks so I just picked one and I was lucky, it was wonderful. We had about 1/8th of it, so I had to figure out what to do with the remainder (other than eating it for dessert). I came up with this fresh, tasty recipe to go with some fish I had broiled, it was delicious.

Cantaloupe Salsa

A KitchenInspirations Original Recipe

Makes about 250 mL salsa

Ingredients:

  • 150 g cantaloupe, finely diced
  • 50 g cucumber, finely diced
  • 1/2 small avocado, finely diced
  • 1 green onion, finely sliced
  • Fresh Basil and Mint, in a chiffonade
  • 15-30 mL freshly squeezed lime juice
  • Salt to taste

Directions:

  1. Combine all of the ingredients, tasting and seasoning as required.
  2. Serve chilled with fish or barbeque.


Read Full Post »

This winter we ate a lot. I mean, we ate a lot of soup. Who am I kidding, we did eat a lot, but we also ate a lot of soup. I became quite proficient at some of our ethnic favourites, this Thai Lemongrass Shrimp soup being one of them. I reverted back to an old favourite recipe from an Australian cookbook a friend gave me years ago, Bay Books Cookery Collection, Thai Cooking Class, written by Somi Anuntra Miller and Patricia Lake. It is a well-illustrated cookbook with some great background, techniques and lists of ingredients for successful Thai cooking. In fact, it is my GoTo Thai cookbook. I have tweaked the recipe to resemble that of a favourite Thai restaurant.

Shrimp Lemongrass Soup (Tom Yam Goong)

Makes about 500 mL soup

Ingredients:

  • 500 mL chicken stock
  • 8 pieces fresh galangal
  • 8-12 Fresh Kaffir lime leaves
  • 2 pieces of 2 cm lemongrass, sliced in half lengthwise
  • 60 mL lime juice
  • 15 mL fish sauce
  • 2.5 mL chilli paste
  • 5-10 g of cane sugar
  • 8 fresh shrimp, peeled and deveined (skins reserved)
  • 10 fresh cremini mushrooms, cut into quarters
  • 80 g vermicelli rice noodles
  • 2 Campari tomatoes, cut into 6ths
  • Chiffonade of Cilantro leaves, Thai basil and thinly sliced green onions to garnish

Directions:

  1. Bring the chicken stock, galangal, Kaffir lime leaves and lemongrass along with the shrimp skin to a slow boil and then simmer for 30 to 60 minutes. Strain out the stock so that it is clear and without any bits.
  2. Add the lime juice, fish sauce, chilli paste and cane sugar and continue to simmer until sugar has completely dissolved. Taste for balance and add a bit of lime juice or sugar to balance if required.
  3. Boil water for the noodles, completely cover noodles in the hot water and allow to soak until al dente. Rinse in cold water to stop from cooking further.
  4. Bring the soup to a slow boil and add the mushrooms and shrimp and cook until the internal temperature of the shrimp is 120° F.
  5. Meanwhile, preheat the bowls (it’s winter and they cool down incredibly quickly). Reheat the noodles by running them under super hot water.
  6. Assemble the soup: add half of the heated noodles to each bowl, top with 4 shrimp in each bowl and spoon the hot liquid over the noodles and shrimp, dividing the mushrooms equally between the two. Add a cut tomato into each bowl and garnish with the chiffonade of cilantro and Thai basil and green onions.

Read Full Post »

Thai Basil Eggplant

Mid last month, I made a batch of Mulligatawny Soup and had some leftover eggplant, so I searched for a recipe for Thai Basil Eggplant that reminded me of a delicious dish served by a hole in the wall Ma and Pa shop when I worked in the corporate world. This one fits the bill.

Thai Basil Eggplant

Serves 2

Ingredients:

  • 250 g Japanese or Chinese eggplants
  • 45 mL toasted sesame oil, divided
  • 5 g roasted garlic puréed
  • 5 g toasted sesame seeds
  • Good handful of basil leaves, plus more for serving
  • 30 mL unseasoned rice vinegar
  • 10 mL soy sauce
  • 15 mL Sweet Thai Chili Sauce

Directions:

  1. Chop the eggplant into eighths. Heat 30 mL sesame oil in a large pan and cook the eggplant chunks until slightly golden and somewhat soft in the centre, about 6-8 minutes.
  2. Add the garlic purée and sesame seeds and toss to coat well. Add the basil leaves and cook until wilted.
  3. Stir the vinegar, remaining sesame oil and soy sauce into the sweet Thai chili sauce and mix well. Drizzle half of the sauce into the eggplant and cook stirring often until the eggplant has entirely softened.
  4. Serve hot with the remaining sauce drizzled over it and additional Thai Basil leaves as garnish.

I never said it was authentic Thai.


Read Full Post »

Season 20 of America’s Test Kitchen seems to be reinventing the wheel for the sake of reinventing the wheel. Case in point is this simple, yet flavourful recipe for steamed fish; ATK goes through some gyrations creating a foil sling to hold the fish and then wrapping the pan in even more foil. This presents two problems for me, it uses too much foil and the foil actually creates a barrier to the steaming ingredients. I created this dish the old fashioned way, en papillote, a tried and true envelope made of parchment paper and it worked perfectly. Although steamed fish can be boring, this one really brings it on so I would definitely recommend this as a dinner party main. It’s definitely a keeper.

The foil sling is a bit overkill, in my opinion.

Asian Inspired Steamed Whitefish

Please click here for the original recipe.

Serves 2 as a main.

Ingredients:

  • 15 mL black vinegar
  • 45 mL soy sauce
  • 10 mL Chinese rice wine
  • 7.5 mL toasted sesame oil
  • 7.5 mL sugar
  • 10 mL roasted garlic purée
  • .5 mL ground white pepper
  • 4 scallions
  • 10 cm ginger, divided
  • 200 g firm whitefish (see notes)
  • 2 tablespoons vegetable oil
  • a handful of fresh cilantro leaves

Directions:

  1. Preheat the oven to 450° F.
  2. Combine the black vinegar, soy sauce, rice wine, toasted sesame oil, roasted garlic purée, sugar and white pepper and mix well. Set aside.
  3. Cut two scallions in about 2 cm pieces. Finely slice the other two scallions and set aside. Peel and cut 3/4 of the ginger into about 2 cm pieces and add to the cut scallions. Slice the remaining ginger into matchsticks, set aside.
  4. Line a baking pan large enough to hold the fish in a single layer with parchment (making sure there is enough parchment to enclose the fish). Add the scallions and the roughly chopped ginger to the centre of the parchment paper.
  5. Add the Fish on top of the scallion and ginger base, pour the sauce over the fish, allowing to pool below the fish.
  6. Bring up the sides of the parchment, to form a tent and fold and twist to seal and hold in place.
  7. Place the pan on the middle baking rack and steam until the fish reaches 125° F to 130° F.
  8. Meanwhile, heat 30 mL of vegetable oil in a small saucepan and fry the matchstick ginger until crispy.
  9. Serve on sticky rice garnished with the finely cut scallions and crispy ginger drizzled with the steaming broth.

Notes:

  • Firm whitefish options are haddock, cod, tilapia, monkfish. We used cod in this recipe. It is important to use similarly thick pieces of fish so they steam evenly.
  • I use this awesome wireless thermometer.
  • This recipe would be beautiful sous vide.

Read Full Post »

marmalade_first

My dear friend Lorraine recently launched her new travel company, focussing on unique food and travel experiences, traveling in the style and class that she has grown accustomed to! Her first journey is to Peru, a gastronomical hot-bed, who knew? Do take a gander to her new site Experiential Traveller and check it out.

It so happens that I have had Peruvian cuisine only a couple of times, in New York City, of all places! A few years ago, JT and I were sitting in our hotel lobby waiting for our dear friends Paul & T to arrive when this very animated woman, Melony comes in holding a bag of freshly baked bagels. She comes bounding over to us with such excitement and says, “I bet you’ve never had a Brooklyn bagel!” We said we’ve had bagels in New York but she interrupted and claimed with no uncertainty that they were most likely not authentic Brooklyn bagels and that today was our lucky day because she just bought a bag of the city’s finest and we MUST try them. It’s not like we had a choice, so we followed her into the attached hair salon (she was the manager) and she proceeded to hand us authentic Brooklyn bagels. Well, you can’t just eat someone’s authentic Brooklyn bagels without some small talk, and that’s how we found out about the BEST (THE BEST, Jerry. THE BEST) Peruvian restaurant in the city (Mancora in The Lower East Side)! And on the plus side, it wasn’t a wallet-breaker either! We had one of the best lunches there with our dear friends Paul and T! You see, I did come back around to Peru!

Orange marmalade goes so well with Brooklyn bagels so when I had a few oranges left over from a gig late last summer, I decided to make orange marmalade! I chose an Ina Garten recipe that took two days as we were heading up to the cottage and I didn’t have time to finish it in the city. Having to do it again, I’d probably go with a long cooking jam instead of macerating the fruit as I didn’t feel it gave anything different to the texture. But if you need a jam recipe spanning over two days, this one is for you!

This recipe is roughly based on Ina Garten’s Orange Marmalade

Easy Orange Marmalade

Yields: 500 mL (~2 cups)

Ingredients:

  • 2 large oranges (ends removed and sliced very thinly, yields about 575 g)
  • 2 cups water
  • 300 g sugar
  • 45 mL lemon juice

Directions:

  1. Combine thinly sliced orange slices and the water in a non-reactive pan (I used my Le Creuset). Bring to a boil, stirring often.
  2. Remove from heat and add sugar, stirring until entirely dissolved. Add lemon juice and stir.
  3. Cover and leave overnight.
  4. The following day, bring the mixture back to a boil, stirring often. Reduce to a simmer and simmer uncovered for 2 hours, stirring often. Turn up the heat again and gently boil for an additional 30 minutes, skimming off any foam that forms. Cook the marmalade until it reaches 105° C (220° F) or when a small sample forms wrinkles as you run your finger through it on a very cold plate. At this point, I felt there was too much peel and not enough jam, so I took about half and processed it smoothly with an immersion blender and returned it to the peel and combined. It’s quite a lovely texture.
  5. Pour into sterilized jars and apply lids. Process for 10 minutes in hard boiling water.

marmalade_2

Notes:

  • The sugar was reduced to 300 g  (a little more than the 3:1 ratio).
  • I found the multi-process a bit much for the result, I will find a version that is not so labour intensive next time. You may wish to try Helene’s family recipe.
  • The platter was a gift from my cousin and his wife when they stayed with us for a little more than two weeks, summer 2015. I adore gifts like that, I will always think of them when I use the platter. It’s hand painted Herend Porcelain, a very famous Hungarian porcelain house.

This is a good article on the differences between a Brooklyn Bagel and a Montréal Bagel (my favourite). Updated Jan 10/17.

Read Full Post »

PeaKaffirLime_First

A few months ago, one of my Chef FB peeps posted about a product she received called Mycryo®. I was intrigued, I had never heard of such a product so off I went to research it. The product is powdered cocoa butter and their website touts that it seals in flavour with fewer calories than pan firing in oil! How exciting is that?! I immediately thought of a few applications that release fluids quickly making it difficult to sear: Scallops, mushrooms, potatoes, and the list goes on! I HAD to HAVE it! So off I went to their website to see where I might purchase this unique product, and to my delight, there were quite a few stores. I made the mistake of not calling ahead to see if they had it in stock and I shuffled off to several stores (sigh, you know how I hate going to specialty grocery stores!) to track it down but was sadly disappointed, although I did make some other purchases so my trips were not entirely useless. I returned home, with a sunken heart and proceeded to call and email around but, I was not able to find it. What to do? My desire for this product had not waned, so I tweeted the Canadian company and they immediately responded and the next thing I knew, they sent me a full-size sample! Isn’t that lovely?

Mycryo

I’ve been using Mycryo® in my everyday cooking (I even transferred some to a small bottle to take to the cottage), although I haven’t had a blog worthy recipe before this one, it works just as they claim. I’ve tried Mycryo® with mushrooms, scallops, shrimp, pork shoulder (for pulled pork) and pork tenderloin (roast), oven roasted potatoes and sweet potatoes. It doesn’t splatter as much as oil does and that makes me happy because I don’t need to clean up a mess! Although, I must tell you that I haven’t had as much success with potatoes or sweet potatoes, but that may be due to the fact that I only have a small convection oven at the cottage, where I tried it. This recipe, however, works out perfectly with this unique product, the shrimp did not release any liquid, making a wonderfully crisp coating, just like deep frying but without the excessive calories.

PeaKaffirLime3

That shrimp is either enormous or that’s a very small bowl 😉!

Chilled Pea Soup with Kaffir Lime Coconut Milk garnished with Toasted Coconut Shrimp

A KitchenInspirations Original Recipe

Makes 1.25 L (5.5 cups)

Ingredients:

  • 25 g coconut milk powder (around 4 heaping tbsp)
  • 1 cup milk (I used 2%)
  • 1 cup water
  • 750 g frozen peas (about 1 lb)
  • 10 g dried Kaffir Lime Leaves (a good handful, use less if fresh)
  • 1 tbsp chopped cilantro
  • 10 g grated frozen ginger (about 1 tsp)
  • 2 cups vegetable stock or water
  • 2 tbsp lime juice
  • pinch of sea salt

Directions:

  1. Combine coconut milk powder with milk and water and blend with an immersion blender until well blended.
  2. Add the defrosted peas, dried kaffir lime leaves, cilantro, ginger and 2 cups vegetable stock (or water) to the coconut milk. Blend with an immersion blender until smooth. Strain through a fine sieve and add the lime juice, blend again briefly (see notes below).

PeaKaffirLime2

The soup tastes like summer!

Serving Suggestion, per person:

Ingredients, per person:

  • 1 large shrimp, entirely peeled (I hate to have to fish the shrimp out with my fingers to pull off the tail)
  • 1/2 tbsp AP unbleached flour
  • 1/2 tbsp egg white with a pinch of sugar or honey, whisked
  • 1 tbsp toasted coconut
  • 1/2 tsp Mycryo®*

Directions:

  1. To toast the coconut, Toss with 1/2 tsp Mycryo® and toast lightly in a small frying pan set aside to cool,.
  2. Dredge the shrimp in the flour and coat well. Next coat the shrimp with the egg white mixture. Then back into the flour and dip back into the egg white mixture (see notes). Then lastly,  coat the shrimp well with the toasted coconut, set aside. Continue until you have all of the shrimp prepared.
  3. Preheat the oven to 190° C (375° F). Lay shrimp on their sides onto a baking sheet. Gently sprinkle Mycryo® on side one, then flip the shrimp and sprinkle on side two. Bake for 3-5 minutes or until entirely opaque.
  4. Pour the chilled soup into a soup bowl, gently add the shrimp so that it remains visible (I may have propped said shrimp on an inverted bowl in the soup, food styling trick for photography ONLY!). Serve immediately.

Notes:

  • Obviously, to be vegetarian and vegan, omit the shrimp!
  • Substitute 1 cup coconut milk plus 1 cup water for the coconut milk powder and milk. To reduce calories, reduce the proportion of coconut milk to 1/2 cup plus 1 1/2 cup milk and 1 cup water.
  • To get more out of your soup, blend the remaining pulp from the sieve a few times adding only a little water or vegetable stock, press through a fine sieve each time and add to the main soup. I usually do this 2 or 3 times and the pulp is reduced about 1/2 to 1/4 each time!
  • Pulp broth: do yourself a favour and boil some water (I did about 500 mL or 2 cups) and pour it over the pulp, allow to sit until cooled and then strain it through a fine sieve (like a metal coffee filter) and reserve the liquid for your next soup. It packs a bunch of flavour and now you have stock from something that would have been compost! Compost the remaining pulp.
  • Refrain from adding additional sweetness to the soup until you have tasted the final product, I feel the peas should be sweet enough.
  • Other garnish options are:
    • Whipped coconut milk with toasted coconut.
    • 1 or 2 grilled shrimp per serving (just dust the dry shrimp in Mycryo® on both sides and put on a hot grill)
    • Toast some coconut and chiffonade some mint, dress each bowl.
    • a dollop of crème fraîche with some toasted coconut.

Disclosure:

Eva Taylor/Kitcheninspirations received 550 g container of Mycryo® by Mycryo® Canada free of charge; this recipe was developed by Eva Taylor for Kitcheninspirations, and the opinions expressed in this post are that of Eva Taylor/Kitcheninspirations.

nutrition

Nutritional facts based on 250 mL soup with 1 shrimp, approximately 26 g.

WWnutrition

WW tables based on 250 mL soup with 1 shrimp, approximately 26 g.

Read Full Post »

AppleChutney_First

There is nothing like the push of having extended stay visitors to open your eyes to see all the deficiencies in your home. Case in point, several years ago I filled a few cracks on one of my kitchen walls and then I painted over the patches but since the rest of the wall was about 4 years old, the paint dried a slightly different colour and the wall looked patchy in certain lights. It was on my to do list f o r e v e r! So a couple of weeks ago, after I filled in a few new cracks, bought a new can of paint (when did paint become SO expensive?) I finally repainted the entire wall. A fresh coat of paint really freshens up a room. Of course, once I started filling in cracks all over the house and painting, there was no stopping me…it turned into a two-day project. But then it’s another thing off the list.

Recently we had James, a long-time college friend of JTs over for an Indian dinner and I made my new favourite Jamie Oliver Chicken Tikka Masala recipe along with Palek Paneer, the best Naan ever and a few condiments, pickled carrot and this delightful Apple Chutney. I am certain that James, who is a renovator, was too polite to say anything about my patchy walls but I kept the lighting low anyway!

What are some of the nagging to do’s on your home maintenance list?

AppleChutney

Sweet, tangy with a little bit of heat.

Apple Chutney

A KitchenInspirations Original Recipe

Ingredients:

  • 1 Granny Smith apple (about 165 g)
  • 165 onion, coarsely chopped
  • 80 g dates, coarsely chopped
  • 10 g fresh ginger, grated
  • 3 tbsp white balsamic vinegar
  • 1/8 tsp cloves
  • 70 mL water
  • 1 tbsp Sweet Apricot Chili Sauce
  • 1/4 cup Coconut Sugar

Directions:

  1. Combine all the ingredients in a heavy bottom sauce pan and cook on medium heat until onions have caramelized and the sauce is thick but still have texture.
  2. Cool. Serve at room temperature.
  3. Store in the refrigerator for 1 week or freeze.

Read Full Post »

SweetChiliSauce_First

Has spring arrived where you are? It sure hasn’t over here, in fact there is very little sign of it. Yes, we can be grateful that the snow has finally melted and that it hasn’t snowed in any measurable quantity for a few days, but these temperatures are killing us. Since I’ve begun my morning walks through High Park again (8km most mornings) it’s been so cold that I’m still wearing my long down-filled coat, hat, gloves and a balaclava around my neck at the ready when the howling wind rudely slaps my face. I’m ready for spring. With these cold temperatures, I’m still craving warming foods like my dear friend Sissi’s Dried Apricot and Chili Jelly. If you don’t know Sissi, she is an experienced cook with a passion for the Far East. Her recipes are uncomplicated and her writing style is elegant and beautiful and that’s something because English isn’t even her first language! I’m always drawn to Sissi’s recipes because she combines flavours that hit my palette perfectly. And she enjoys similar foods and textures that I do. Please visit Sissi’s blog for the original recipe because she has generously provided more details than I am providing.

Sweet Chili Sauce with Dried Apricots

Makes 250 mL sweet chili sauce

Ingredients:

  • 175 g dried apricots
  • 150 mL +100 ml cider vinegar
  • 100 g red Thai chili peppers
  • 200 g sugar
  • 50 mL water
  • 1/2 teaspoon salt
  • 1/2 package pectin in powder (25 g)

Directions:

  1. Bring 150 mL vinegar to a boil and add the apricots to soak for 30 minutes.
  2. To a small food processor, add the hot peppers (discard the stalks and seeds) and the soaked apricots and pulse to chop reasonably finely.
  3. Combine the remaining ingredients (including the additional 50 mL vinegar) and boil 20 minutes,stirring constantly.
  4. Sprinkle the pectin over the surface and cook 10 more minutes, mixing well.
  5. Transfer the hot jelly into the sterilised jar or jars and cover with lid(s). Allow the jar to cool and refrigerate. If your jars are smaller (I used one 250 mL jar) you will want to process them as you would any canning project. I popped my single jar into the fridge and will use over the next month or so (or I will freeze for later use).

This is a very hot sauce.

This is a very hot sauce.

Notes:

  • I had intended on reducing the sugar but believe me, it NEEDS the sweetness because these peppers are HOT!
  • This is an excellent condiment but use conservatively as it is VERY HOT.


Read Full Post »

JalopenoCornbread_2215

This is the best Jalopeño Cornbread EVER.

Everyone has a favourite corn bread recipe, this one is mine. It came from an 80’s trendy restaurant called Fred’s Not Here in the theatre district in Toronto. I qualify that it was trendy in the 80’s because although it is still around, I haven’t been to it since the 80’s so I’m not certain it’s ‘trendy’ any more. I do know that the particular strip that this and many other restaurants reside on are fighting for their lives from being re-zoned and torn down to be made into condos. Like Toronto needs more condos; apparently we have the most condos under construction in all of North America, more than New York, Chicago and Boston, believe it or not. Even if you don’t believe that, surely you must believe that this is absolutely the best corn bread recipe EVER! It’s got great texture (thank you cheddar cheese), a slight sweetness and heat. What more can you want?

Originally posted on this blog in 2009 here, I found this recipe in the Toronto Star in the section that people wrote in and asked the Star to print a recipe from a specific restaurant. It wasn’t me who wrote in, obviously someone else also thought it was the best cornbread ever, so you needn’t take my word for it. I still have the original printed recipe. But I’ve immortalized it for you here and reposted it below because the original photo sucked. These are better.

Fred’s Not Here Jalapeño Corn Bread

Makes about 26 small corn-shaped corn breads. I have altered the original recipe, so if you’d prefer the actual Fred’s Not Here version, please click to my original post here.

JalopenoCornbread_2211

OK, you caught me, I didn’t have jalopeños, I only had hot Thai Chilies!

Ingredients:

  • 1  1/4 cups finely ground corn meal (not corn flour)
  • 1  1/4 cups all purpose flour
  • 1/2 cup granulated sugar
  • 1  1/4 tsp baking powder
  • 1 tsp salt
  • 2 eggs, lightly beaten
  • 1  1/2 cups milk
  • 2 tbsp finely diced jalapeños or hot chili peppers (or more if you really like it hot!)
  • 2 finely sliced green onions
  • 1  1/2 cups shredded sharp cheddar cheese

Directions:

  1. Pre heat oven to 400° F.
  2. Sift cornmeal, flour, sugar, baking powder and salt in a bowl. Stir in the shredded cheese.
  3. Blend eggs, milk and oil in another bowl. Add the finely diced jalapeños and green onion.
  4. Make a well in the centre of the dry ingredients and pour in the wet ingredients and stir well to combine.
  5. Spray your cast iron corn shaped pan with non-stick spray and pre-heat until smoking.
  6. Spoon batter into smoking hot moulds and bake for 25 minutes or until firm and golden.
  7. Serve warm or at room temperature with fresh butter.

Notes:

  • In a pinch I’ve used dried chili flakes, it works very well.
  • You can substitute honey for the granulated sugar, but I haven’t tried it.
  • Keep your eye on the baking after the first couple of pans because the pan gets hotter; I had to reduce my baking time by a minute or so by the end.
  • Fill the cavity only to the top, this batter has a lot of leavening and will fill out very nicely.
  • I served it with this Sopa Azteca and it was very successful.

FredsNotHereCornbreadNut

Based on 1 cornbread.

FredsNotHereCornbreadWW

Based on 1 cornbread.

Read Full Post »

Pretzel Bread

I’ve noticed lately that most of our grocery stores are now carrying a variety of extraordinary breads, from focaccia made from an authentic Italian recipe that uses an enormous volume of olive oil to various egg, grain and nut breads; recently I’ve also noticed something I hadn’t seen before, a very beautiful Pretzel Bread! Now pretzel bread has a chewy texture and a salty finish on its chewy crust. It’s a lovely dense bread (if you love egg bread than you will love pretzel bread) that works well as hamburger buns and sandwiches! We’re going to use it for a cheese fondu! I’ve also seen this type of boule used as a soup bowl…perhaps another time!

I scanned the internet for a recipe and came across one from Fleischmann’s yeast that I rather liked, so I made it the first time verbatim and then the second time I made a few adjustments because I wasn’t entirely happy with the first result. There just wasn’t enough liquid to soak up the flour they claimed to need no matter how much I kneaded! My first dough was a little stiff. With some minor adjustments I present to you the slightly modified recipe but please pop on over to the original recipe here.

PretzelBread_1825 This is the first batch I made, the bread was not soft enough to open too much. The finished texture was OK though.

Originally, pretzel bread is boiled in a water and Food Grade Lye solution, but that just seemed a little too dangerous for my taste so I opted to use baking soda instead. Many recipes range for a few tablespoons to 3/4 cup of baking soda which is the most I’ve seen on-line. I’ve even seen some recipes bake the baking soda, but that seemed like too much work! The baking soda or lye creates Maillard reaction which causes the proteins and the sugars react in a certain way that allows the bread to brown at high temperatures much more easily than by just baking; boiling it first gives this bread its signature chewy crust. This bread turned a most beautiful reddish brown colour that normal baking would not have resulted! I was very pleased indeed! The dough comes together very easily and doesn’t take an exorbitant amount of time. Proofing is just 1 hour! Baking is even less! The results are worth the effort. I must warn you though, it’s a good workout if you don’t have a stand mixer, the recipe says to knead for 8-10 minutes and they are not kidding!

PretzelBread_1830 Second attempt: The boules are not huge, so plan on having two on hand for a dinner party.

Prep Time: 20 minutes
Proofing Time: 60 minutes
Boiling Time: per loaf, 2 minutes
Baking Time: 25 to 27 minutes

Pretzel Bread 

Original recipe from Fleischmann’s yeast

PretzelBread_1831 This one opened up nicely.

Makes: 2 (18 cm or 7-inch) loaves or 8 rolls (I will make the rolls for soup bowls another time). For slider buns, form 50 g balls of dough to make 19 buns.

Ingredients for Dough:

  • 1 1/2 to 1 3/4 cups milk (I increased the milk because the original dough was too tough and not soft as indicated in the instructions, but it will change depending on how humid the day is)
  • 2 tablespoons unsalted butter
  • 2 tablespoons brown sugar
  • 1 tbsp bread machine yeast (I prefer to use this because it dissolves faster)
  • 2 teaspoons salt
  • 3 to 3 1/2 cups all-purpose flour (I found 3 cups in the winter months was enough to produce a soft, sticky dough)

Ingredients for the Boiling Solution:

  • 2.8 L or 3 quarts water
  • 3/4 cup baking soda

Ingredients for the Egg Wash:

  • 1 egg
  • 1 teaspoon water

Directions:

  1. Warm the milk and butter to 37.7°C – 43°C (100°F-110°F); the butter will not completely melt.
  2. In the large mixing bowl of your stand mixer, combine the warm milk with room temperature yeast and brown sugar. Stir in the salt and 2 cups flour and beat for 3 minutes (I used my cookie dough blade on my stand mixer, the first time I tried the whisk attachment and it was too sticky).
  3. Gradually add enough of the remaining flour to make a soft dough (I added 1 additional cup, 3 cups in total).
  4. Knead for 8-10 minutes in your stand mixer using the dough hook until smooth and elastic.
  5. Place the dough in a greased bowl, cover and let rise for 1 hour or until doubled in size.
  6. Preheat oven to 204°C (400°F)
  7. Combine boiling solution and bring to a boil.
  8. Punch the dough down and divide into 2 equal portions.
  9. Form each portion into a tight, smooth ball (this will be the shape of your final bread, so if you want more of an oval roll, shape accordingly).
  10. Boil each portion in the solution for a total of 2 minutes; start with the top side down and then flipping it over after 1 minute, top side up.
  11. Remove the dough portions from the pot using a slotted spoon and place on a greased baking sheet (I lined my sheet with parchment). Allow to dry off for a bit (a minute or so).
  12. Brush with the egg wash and cut a cross in the top, make sure you insert blade about 2 mm (1/8″) into the dough.
  13. Bake for 15 minutes at 204°C (400°F), then reduce the temperature to 177°C (350°F) and bake an additional 8-10 minutes until the loaves are evenly browned, you want a nice dark reddish-brown colour and the bread sounds hollow when tapped.
  14. Remove from pan and cool on a wire rack.
PretzelBread_1832 May I cut you a slice or two?
PretzelBread_1828 A delightful chewy texture.

I posted this in January’s Growing Edge group post. Please check it out here.

our-growing-edge-banner

Read Full Post »

I picked up some tamarind paste when we visited Chgo John (from the Bartolini Kitchens) last summer and he took us to his favourite Asian shops. I’m sure this paste can be purchased in any number of Asian stores in Toronto, but the romance of bringing back an exotic ingredient was just too strong to ignore. Everytime I use this paste (and any number of other amazing ingredients I procured during that visit) I think fondly of our visit with John that day.
If you haven’t tried tamarind, I strongly urge you to do so, it is quite a flavour experience unlike anything else you’ve ever tried.
The tamarind paste was used as a sauce for the onion bhajis I made for the recent Indian feast for our neighbours.

Tangy, sour and sweet all at once.

Tangy, sour and sweet all at once.

Tamarind Chutney for Onion Bhajis

Makes about 1/3 cup

  • 1 teaspoon concentrated tamarind paste
  • 2-4 tsp sugar
  • 1/2 tsp red chili powder
  • 3 dried apricots (original recipe called for papaya powder which I did not have)
  • 1 cup water

Directions:

  1. In a small heavy bottom sauce pan, add the tamarind paste, apricot and sugar. Add about 1 cup of hot water to it and heat to a boil until the tamarind paste dissolves and the apricot is mushy. Blend well with an immersion blender. Strain out any hard bits from the tamarind paste.
  2. Add chili powder and mix well. Boil until all of the water evaporates and you are left with a thick rich sauce.

A perfect pairing to the onion bhajis

A perfect pairing to the onion bhajis

Read Full Post »

We survived another Doran weekend; these weekend are full of gluttony, laughter and somewhat excesses but most of all, they are full of friendship, love and stories. And laughter, A lot of laughter. We decided to spend this weekend at the cottage because our dear friends hadn’t been up for quite some time, plus we wanted to share our new found excitment in the renovations with them! September weekend weather can be hit and miss and we had both this time around. Sunny or not, it was damn chilly and we had the heat on more than the windows open. Fall is definitely the the air. And as luck would have it, I forgot my shoes at home, so the majority of the weekend was spent in flip flops and borrowed socks, thank you T!

I always like to serve a little nibbly with cocktails; drinking on an empty stomach can be dangerous so when I came across these flavourful little nibbles, I was all over them. A touch of heat, a touch of sweetness and a lot of texture, these will surprise you with how easy they are to eat!

Spiced Nuts_0930

They are not sticky at all.

Honey-Spiced Almonds

Makes 3 cups (recipe adapted from Epicurious)

Ingredients:

  • 1 tbsp olive oil
  • 3 cups whole almonds, skin on
  • 2 tbsp honey
  • 1 1/2 tsp smoked paprika
  • 1 1/2 tsp cinnamon
  • 1 1/2 tsp cumin
  • pinch of cayenne
  • 2 tsp salt
  • 2 tbsp black and white sesame seeds

Directions:

  1. Pre-heat the oven to 300° F (XXX° C). Line a baking sheet with a silpat® sheet or parchment.
  2. Sift the spices and salt together and set aside.
  3. Heat the oil in a large pan, add the almonds and roast for 2-3 minutes. Remove from heat.
  4. Add the honey and stir well. Sprinkle the spices over the sticky almonds. Add the sesame seeds and stir well to combine.
  5. Turn out the almonds onto the prepared cookie sheet and flatten to one layer of almonds. Bake for approximately 15 minutes (watch so it doesn’t burn), turning at least once in the process.
  6. Cool completely and serve.

Spiced Nuts_0932

The sesame are a nice little touch.

Spiced Nuts_0933

The almonds crisp up very nicely.

Read Full Post »

We are trying to eat more fish these days and I’m constantly cruising the web trying to find delicious and unique ways to present said fish. The internet has been busy with peaches recently as they are in season so I created this recipe to include them. Last week we had a grill Tilapia with quinoa tabouleh (or this one) and I wanted a little something to spice it up, so I came up with a Peach Salsa that was quite tasty so I thought I’d share it with you. I’ll leave the ingredients quantities to your own taste, after all, these recipes are meant to inspire.

The small dice allows it to be used as a garnish, plus I love the way it looks

Peach Salsa

Serves 4-6,

Ingredients:

  • Peaches, finely diced 0.5cm or 1/4″ cubes (I left the skin on for texture, plus I always have a really hard time getting the skin off, no matter what technique I use).
  • Jicama, finely diced 0.5cm or 1/4″ cubes
  • Green chili peppers (seeded), finely diced 0.5cm or 1/4″ cubes
  • Sweet red pepper, finely diced 0.5cm or 1/4″ cubes
  • Garlic, finely minced
  • Green onions, finely minced
  • Thai basil, finely chopped
  • Mint, finely chopped
  • Cilantro, finely chopped
  • Rosa’s Lime Cordial, just to wet and mix everything together
  • Salt to taste

Directions:

  1. Combine everything in a glass bowl and refrigerate, this is much better if it can sit for an hour or so.
  2. Garnish with parsley, mint or Thai basil and serve on top of grilled white fish.

Tasty on crackers too

Read Full Post »

We first had this slaw in NYC about 5 years ago at Susur Lee’s now defunct Shang restaurant in NYC’s LES (Lower East Side). Fortunately, he still serves this incredible dish in Toronto and DC. This is not a new slaw in our household. In fact, a month doesn’t go by without a version of this slaw surfacing (here, here, here, here, here, here and here) offering up left-overs for the entire week. Yes, we love it THAT much! I decided it would make a lovely main course with BBQ’d rib eye slices (the way Lorraine makes the steak here) last weekend for our dinner party. It was a huge success and now I have slaw left overs for the week!

I’ve had a few people ask me for the recipe recently, you can see the original Susur Lee’s recipe on Food Network or in his gorgeous book A Culinary Life; my version below, is my version. Now the ingredient list is daunting, but I beg you not to be put off, it is a recipe worth making. Also, a lot of time can be cut down if you get everything organized “mise en place” before beginning. I will go through some of my time saving techniques in TIPS below and hopefully it will help encourage you to make it. It is one damn good slaw, if I do say so myself.

Despite the overwhelming number of ingredients, it is WORTH making this slaw

It’s not all that time consuming if you have everything ‘mise en place’

It’s such a colourful slaw, that your eyes sing with glee when you first see it. Please click here to see the slaw Chef Lee and his famous slaw.

You can chop your herbs by hand, but I needed a time saver on this day, so I chopped them in my Cuisinart mini processor

It’s all about balance in this slaw, so tasting throughout is very important

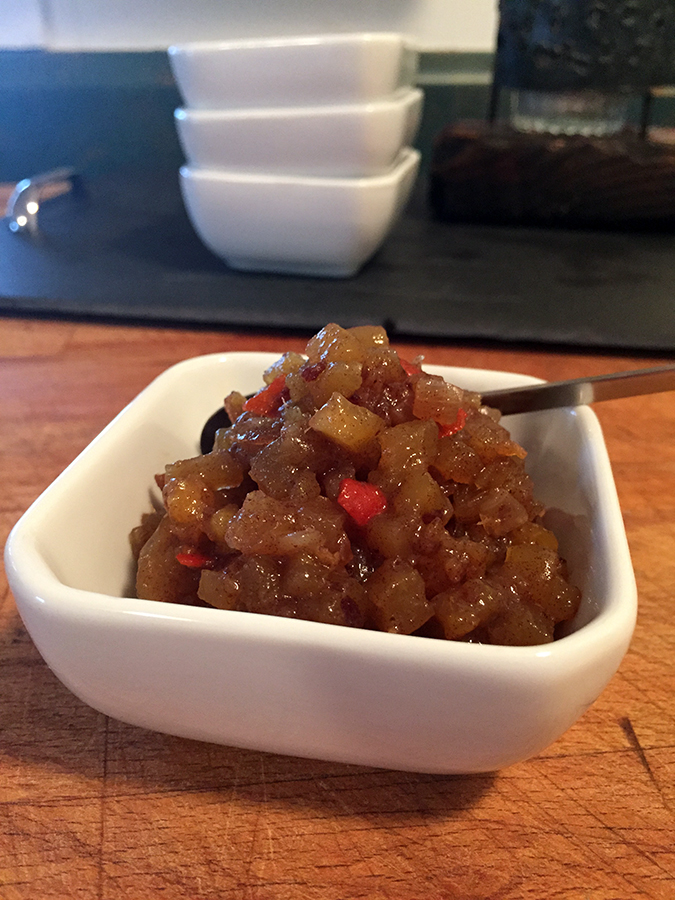
The colourful dry ingredients above.

By keeping the ‘wet’ ingredients separate to the ‘dry’ you will preserve the freshness of this slaw and be able to stretch it out over a week

It’s all about balance of flavours.

The dressing is sweet, tart, tangy and a bit spicy

I had a luncheon of grilled shrimp and the slaw. YUM YUM YUM!

The assembly with the pickled onions, watercress and grilled shrimp

Susur Lee’s Singapore Slaw, AKA 19 Ingredient Slaw

Serve 8-10 (please click here to see the original unadulterated recipe)

Ingredients:

Pickled Red Onion (make 2 days ahead):

  • 1 red onion, sliced thinly on a mandoline
  • 1 cup rice wine vinegar
  • 1 cup water
  • 1/2 teaspoon salt
  • 1/4 teaspoon black peppercorns
  • 1/4 teaspoon fennel seeds
  • 1 bay leaf
  • 1 sprig thyme

Salted Apricot Dressing (make 2 days ahead):

  • 1 cup dried apricot
  • 1/2 cup rice wine vinegar
  • 1 teaspoon mirin
  • 1 1/2 tablespoons onion, finely chopped
  • 1/2 tablespoon peeled and chopped fresh ginger
  • 1/4 teaspoon salt
  • 3 tablespoons sugar (taste and adjust)
  • lime juice (to taste) I find the dressing a little sweet and the lime juice helps cut it, but you must taste it to be sure there is balance.

For the Singapore Slaw Salad:

  • 1 pickled red onion
  • 1 1/2 cups Apricot Dressing
  • 1 large English cucumber, julienned
  • 1 medium sized mango, firm but not soft, peeled and julienned
  • 1 large carrot, peeled and julienned
  • 1 small jicama, peeled and julienned
  • 1 medium sized fennel bulb, julienned (this is my addition)
  • 1/2 head of purple cabbage, julienned (this is my addition)
  • 4 teaspoons toasted sesame seeds (to dress)
  • handful of watercress (to dress)

For the herb mix:

  • 1/2 cup of Thai basil leaves, finely chopped
  • 1/2 cup of mint, finely chopped
  • 1/2 cup of cilantro, leaves only, finely chopped
  • 2 green onions, green and white parts, finely chopped

Directions:

  1. Make the pickled onion and dressing 2 days ahead, so it has time to develop the flavours, plus it will take the pressure off having to do everything in one day. Store both in the refrigerator.

For the Pickled Red Onion:

  1. Peel and julienne red onion and set aside in a medium bowl. In small saucepan, bring vinegar and water to a boil. Season with salt, peppercorns, fennel seeds, bay leaf, and thyme; continue boiling for another 5 minutes. Pour mixture into a heat proof jar while hot and let sit for at least 1 hour or two days in the fridge.

For the Salted Apricot Dressing:

  1. In an immersion blender container, combine the dried apricot, vinegar, mirin, onion, sugar, ginger, and salt. Purée until smooth. Taste and add lime juice and additional sugar if necessary.

TIPS:

  • A mandolin with a fine julienne attachment is a MUST. I use my Borner Roko Vegetable Shredder. Part of the beauty of this slaw is that all the ingredients are julienned uniformly, plus you’ll be standing for a very long time if you have to do this by hand! You need not clean it out between shredding as it all goes into the same pot.
  • Get yourself two large bowls and one medium sized bowl. One large bowl is for your ‘dry’ ingredients and one is for the peelings; the medium sized bowl is for your wet ingredients.

For the Singapore Slaw Salad:

  1. Julienne the wet ingredients first mango and cucumber, as there are only two, combine well and cover with plastic wrap and store in the refrigerator.
  2. Julienne the ‘dry’ ingredients: carrot, jicama, fennel and purple cabbage, combine well and set aside.
  3. Wash and dry all the herbs for the herb mix, including the green onion. Add to a little food processor (I find the fuller it is the better) and processes until all the herbs are finely chopped. Add to the “dry” ingredients and mix well. Cover and refrigerate until serving.

Serving:

  1. In a new bowl, take 2/3 of the “dry” ingredients and 1/3 of the “wet” and combine thoroughly. Dress with about 1/4 of the dressing (start small and increase as required) and combine well. Serve on a platter, piled high in the centre. Sprinkle sesame seeds overall and dress with the watercress leaves. Add the pickled onion over the summit to curl here and there (you don’t need a lot, just a few strands). Serve immediately with grilled chicken, grilled steak (please see Lorraine’s amazing technique for a full flavoured steak here), tofu or shrimp.

Thai Marinated Steak:

Prepare your steak just as Lorraine shows you in her blog here (don’t worry, it works like a charm!). Once it has aged for a couple of days, marinate it in the marinade below for a few hours.

Ingredients:

  • 50 mL lime juice
  • 1/2 tsp sesame oil
  • 1/4 cup cilantro stems and roots
  • 1/2 tsp fish sauce
  • 2 tbsp mirin
  • 1/2 tbsp sugar
  • 2 cloves garlic finely chopped

Directions:

  1. Combine the ingredients in the bowl of an immersion blender and blitz until smooth.
  2. Pour over the aged steak and refrigerate. Turn the steak throughout the day occassionally.
  3. Remove steak from fridge for about 1 hour to bring to room temperature before grilling.
  4. Follow Lorraine’s instructions on grilling.

Read Full Post »

You may recall I posted the hot and cold smoked salmon for our progressive dinner party here and I served it with a Quinoa Tabouleh (leave out the feta and poached egg) and a rather simple Creamy Cole Slaw by Martha Stewart. Since the recipe was basically verbatim, I wasn’t going to post it, but I’m still having the slaw having added more vegetables and made up more dressing, so I thought to my self, “self, this is good enough to post.” And so I shall. The dressing is sweet, tangy and creamy and it is not over the top. I don’t like the creamy slaws they serve in deli’s either as they are just too mayonnaise-y. This one is perfect. I know I will make this again during this summer. Because we had no salmon left over for lunches, on Sunday I had roasted a whole chicken with Herbs en Provence and just shredded it on the slaw. It was delicious.

A tangy but not too creamy slaw.

A Very Simple Creamy Cole Slaw (by Martha Stewart)

Serves 8-12

Ingredients:

  • 1 tablespoon Dijon mustard
  • 1 tablespoon cider vinegar
  • 1 tablespoon freshly squeezed lemon juice
  • 1/2 tablespoon sugar (you may not think this is necessary, but it really smooths out the flavours)
  • 1 teaspoon coarse salt
  • 1/2 cup fat free mayonnaise (this was regular mayo)
  • 1/4 cup fat free Greek Yogurt (this was sour cream)
  • 1 small napa cabbage, (about 1 3/4 pounds), finely shredded
  • 1 medium carrot, finely shredded (this was 2)
  • 1 small celeriac, finely shredded (this is my addition)
  • 1 small chili pepper, diced finely as garnish (thank you Sissi for pointing out that I had missed this).

Directions:

  1. Whisk together mustard, vinegar, lemon juice, sugar, salt, mayonnaise, and sour cream in a small bowl. Refrigerate dressing, covered, until ready to use, or up to 2 days.
  2. Put cabbage, carrots, and celeriac in a large bowl and toss. Reserve dressing until an hour or so before serving.
  3. Pour in dressing over the amount of slaw you will consume and toss thoroughly. Refrigerate, covered, until slaw begins to soften about 1 hour. If not using immediately, refrigerate undressed slaw, covered.

The shredded BBQ’d chicken with the herbs en Provence made it a lovely summertime dinner

Read Full Post »

Years ago we were watching Easy Entertaining with Michael Chiarello and he and a friend had a pizza cook-off. I cannot recall who won, but I do know we came away with the best Onion Confit recipe EVER. I usually make up a couple of batches and freeze; they are perfect for a pizza base, sauce base, dip base, even on a salad with crumbled blue or goats cheese. And because I freeze small quantities, they defrost quite easily. Please click here for Chef Chiarello’s original recipe.

I posted my take on the original recipe here, but I never took a photo of it. Well, you’re in luck because I made some up on the weekend and I was smart enough (wink, wink) to remember to take a gorgeous daylight filled photo of it.

Incredibly sweet and tangy, these onions make an amazing topping to pizza, salads brioche...the possibilities are endless

For additional ideas on how to use these gorgeous sweet onions, please see:

Read Full Post »