For New Year’s Eve, I made several tapas to feed us through the evening and this sauce was one that accompanied some lamb Spiedini that JT barbequed on the Big Green Egg. But it would be equally as delicious with shrimp. It’s not overly minty, which I prefer, it’s just minty enough.
Herbaceous Mint Sauce
A KitchenInspirations Original Recipe
Ingredients:
Makes about 125 mL sauce
10 g fresh parsley
20 g fresh cilantro
5 g mint
10 g roasted garlic purée
Juice of half a lime
45 mL white Balsamic
65 mL EVOO
salt and pepper to taste
Directions:
Combine all of the ingredients in a small food processor and process until the herbs have been chopped up but not puréed.
Notes:
Do not refrigerate if serving the same day. If you wish to make the sauce in advance, refrigerate it covered but remove it from the fridge about 4 hours prior to serving so that the olive oil can come to room temperature otherwise, it congeals and it’s not pretty nor with the herbs have their best flavour.
Our lockdown has been over for a couple of months now and we are in Step 3 which means businesses aren’t limited to a percentage of the allowable persons inside but must limit capacity to the number of people that can still maintain physical distancing of 2 metres. So, other than masks still having to be worn inside (other than if you’re eating and drinking or your own home) things are pretty much back to normal. We have been out for lunches and dinners but are still dining on patios…I’m not ready to go inside just yet. The latest variant of Covid is wreaking havoc on the unvaccinated or just single vaxed but we all in all, are doing well in Ontario where we have 63.62% double-vaxed of the total population (keeping in mind that we are still not vaccinating the under twelve-year-olds). Our borders are also now open to the US without the need of quarantine upon arrival but travellers must prove that they have been double vaccinated and show a negative COVID test within 72 hours of entering. There have already been several Americans arriving with forged vaccination papers and they have each been fined about $20,000 Canadian (about $2 US). It is really disturbing that people are forging vaccination papers, they are really jeopardizing the long-term success of eradicating this hideous virus. So, we are keeping to our ‘bubble’ and still continue to entertain outside. I feel for our Australian friends as they are just beginning the journey but hopefully, they will be better behaved than Ontarians were, keeping us in lockdown for the longest time in the world (over 360 days in total!)! Enough of my rant.
I made this delicious dish for an Indian night with Andy and Mark back in August. I’ve never made Beef Bhuna before and I won’t lie, this recipe is a lot of work, but you can divide the work over a day or two to make it more manageable. For example, make the Base Curry Sauce a day or two in advance and then make the Bhuna curry later. I found the recipe on The Curry Guy’s blog, Great Curry Recipes. I won’t repeat the recipe because I made it verbatim and it really was outstanding. The small-batch Base Curry Sauce made about 3 cups, two of which I used for the Beef Bhuna and one went into the freezer for a later date.
I highly recommend this dish, it will satisfy your craving for Indian food. The best naan recipe can be found here.
Way back in April we had an outdoor Indian evening with a single neighbour and for hors d’œuvres I served Pork Samosas. They were delicious and so moreish. They are not the traditional deep-fried samosa, but they are baked phyllo pastry versions. I can tell you that they didn’t last long.
A delicously flavourful, crispy triangle.
Baked Pork Samosas
A KitchenInspirations Original Recipe
Makes about 16 two-bite samosas
Ingredients:
15 mL vegetable oil
1/2 shallot, finely chopped
200 g ground pork
5 g garam masala
5 g curry powder
10 g cumin
5 g grated ginger
10 g roasted puréed garlic
200 g mix vegetables
50 g frozen peas, thawed
10 g cilantro leaves, chopped, plus extra for garnish
1/2 pack phyllo pastry
150 g unsalted butter, melted
Directions:
Heat the vegetable oil in a frying pan and sweat the shallot until translucent.
Add the pork and cook until no longer pink, mix in the ginger and garlic and stir well.
Sprinkle the garam masala, curry powder and cumin over the cooked pork and stir until fragrant. Remove from heat and mix in the vegetables and cilantro. Allow to cool completely.
Cut each phyllo sheet into 5 cm widths and brush with melted butter.
Starting at one end, dollop a tablespoon of the pork mixture and begin folding in a triangle pattern like illustrated below.
Brush the tops with more melted butter. Bake in a preheated oven for 15-20 minutes or until golden and heated through. Serve with peach chutney.
In mid-July, we were one of five couples invited to a socially responsible BBQ at a friend’s house. They put three tables together outside giving us ample space to distance ourselves. Each couple was asked to bring something and this marvellously flavourful side was one of the dishes someone brought. Everyone asked for the recipe, including me! I chose to make it as a dip for a summer evening cocktail party, socially responsibly distanced, of course. Each couple had their own plate!
The beans and lentils are packed with flavour, the salsa and lime yoghurt just up the ante.
Baja Mexican Beans and Lentil Dip with Lime Sauce and Salsa
From Bowls of Goodness: Vibrant Vegetarian Recipes Full of Nourishment By Nina Olsson
Combine all of the ingredients and mix well. Refrigerate until needed
Ingredients for the Beans:
Olive oil
2 shallots, diced
200 g dried navy beans (400 g cooked)
100 g dried lentils du puy (200 g cooked)
4 cloves garlic, finely minced
1 avocado, finely diced
1 tsp dried oregano
1 1/2 tsp cumin
1 tsp sweet paprika
1 tsp smoked sweet paprika
3/4 tsp salt
Directions:
Cook the beans and lentil until softened, rinse.
Heat oil in a frying pan and add the shallots until caramelized, add the garlic and cooked beans and cook until they can easily be mashed about 5 minutes. Add the remaining ingredients and cook for 2 minutes.
Serve in a bowl or on a plate drizzled with the Baja Sauce and Salsa with baked tortilla chips
I chose blue tortilla chips because they were gluten-free and organic.
Season 20 of America’s Test Kitchen seems to be reinventing the wheel for the sake of reinventing the wheel. Case in point is this simple, yet flavourful recipe for steamed fish; ATK goes through some gyrations creating a foil sling to hold the fish and then wrapping the pan in even more foil. This presents two problems for me, it uses too much foil and the foil actually creates a barrier to the steaming ingredients. I created this dish the old fashioned way, en papillote, a tried and true envelope made of parchment paper and it worked perfectly. Although steamed fish can be boring, this one really brings it on so I would definitely recommend this as a dinner party main. It’s definitely a keeper.
Combine the black vinegar, soy sauce, rice wine, toasted sesame oil, roasted garlic purée, sugar and white pepper and mix well. Set aside.
Cut two scallions in about 2 cm pieces. Finely slice the other two scallions and set aside. Peel and cut 3/4 of the ginger into about 2 cm pieces and add to the cut scallions. Slice the remaining ginger into matchsticks, set aside.
Line a baking pan large enough to hold the fish in a single layer with parchment (making sure there is enough parchment to enclose the fish). Add the scallions and the roughly chopped ginger to the centre of the parchment paper.
Add the Fish on top of the scallion and ginger base, pour the sauce over the fish, allowing to pool below the fish.
Bring up the sides of the parchment, to form a tent and fold and twist to seal and hold in place.
Place the pan on the middle baking rack and steam until the fish reaches 125° F to 130° F.
Meanwhile, heat 30 mL of vegetable oil in a small saucepan and fry the matchstick ginger until crispy.
Serve on sticky rice garnished with the finely cut scallions and crispy ginger drizzled with the steaming broth.
Notes:
Firm whitefish options are haddock, cod, tilapia, monkfish. We used cod in this recipe. It is important to use similarly thick pieces of fish so they steam evenly.
This past July, we traveled to Wisconsin to visit friends at their gorgeous lake house; it was bittersweet because they were selling it to move down to Arizona for good. The weather wasn’t great so we only got in one very short boat ride but we enjoyed every last minute. We shall miss visiting this little gem in Wisconsin. But that just means we’ll be visiting Arizona even more!
While we were in Wisconsin, our dear friends introduced us to an incredible product: Rick Bayless’ Fonterra Grill salsa! It was to die for! The layered flavours of grilled vegetables and fresh cilantro created a complex salsa that was totally unexpected, so of course, I had to try to recreate it upon our return. I used our Big Green Egg which is the ultimate charcoal barbecue! It imparts the most incredible smoky flavours but if you have gas or propane, just fire up some wood chips on the side for a similar experience.
Grilled Vegetable and Cilantro Salsa
A KitchenInspirations Original Recipe
Yields about 1 Litre of salsa (about 4 cups)
Ingredients:
1.5 kg tomatoes, seeded (reserve seeds and pulp for tomato jam)
2 sweet red peppers
4 jalopeño peppers, seeded and veins removed or to taste
2 nora peppers, rehydrated in warm water, skins and seeds removed (yields about 15 mL flesh), optional
1 sweet onion
1/2 garlic bulb, skin on
2.5 mL smoked sweet paprika
Salt
Cilantro leaves, good handful or to taste
juice of 2 limes
Directions:
Remove seeds and pulp from the tomatoes and set cut-side down on a cooling rack lined with parchment paper. Overnight is best, you want to dry out the tomatoes as much as possible.
Roast the tomatoes, peppers, jalapeños and onion on an open flame (I used our Big Green Egg) until softened and slightly charred. Wrap the garlic in parchment and then foil and roast over the open flame until soft.
Remove the skins from the tomatoes, peppers and garlic, discard skins. Add roasted veggies and cilantro leaves to a food processor and chop to desired consistency. Add salt and lime juice and pulse to combine.
Add the scraped flesh from the Nora peppers to the processor and pulse a few more times.
Fill sterilized jars with the salsa. If you are not using right away, you will want to process the jars in the typical canning methods. I processed my salsa for 15 minutes.
Tomato Jam
Yields a scant 250 mL (1 cup) tomato jam
Ingredients:
370 g tomato pulp (all the seeds and pulp from the tomatoes that you plan to roast for the above recipe)
100 g shallots, minced finely
10 g garlic, minced finely
15 mL EVOO
50 mL cooking sherry
15 mL white balsamic vinegar
1.25 mL baking soda
basil, chiffonade
salt, to taste
Directions:
Cook the onions and garlic until caramelized, deglaze the pan with cooking sherry. Add the tomato pulp, basil, season with salt and then add the baking soda, being careful because the baking soda will foam up.
Cook for about an hour until most of the water has cooked off. About half-way through the cooking, add the white balsamic vinegar and stir well.
Notes:
I used a combination of vine-ripened tomatoes and Roma because that is what looked the best to me.
I have mentioned this before, baking soda neutralizes the acidity of the tomato and therefore there is NO NEED TO ADD SUGAR (yes, I yelled that!).
You could do whatever you wish with the pulp, I just don’t like throwing away food!
Since this post was written, I’ve made two additional batches of this salsa and the last batch was rush so I used the entire tomato instead of seeding it, it made for a wetter salsa so I strained it before canning. The seeds added a bit more texture that wasn’t unpleasant. But, I’d still go the extra mile and seed the tomatoes if I have the time.
We had a bunch of dear friends for Superbowl a few weeks ago and I made this vegetarian chili. I know I’m a little late, but I wanted to capture the recipe for next year. It was delicious and it makes a huge amount (1 L or 8 cups). It has a lot of great flavours and textures, I’ll definitely add it to my repertoire for future Superbowl parties.
Vegetarian Butternut Squash Chili
A KitchenInspirations Original Recipe
Makes 1 L (8 cups)
Ingredients:
180 g (1 cup) dried red kidney beans (soaked for 12 hours)
1 small onion, diced (100 g)
1 small carrot, diced (100 g)
1/2 butternut squash, diced (150 g)
2 celery ribs, diced (100 g)
250 mL puréed tomatoes (200 g)
vegetable stock or water, to cover
1 tbsp tomato paste
1 tbsp red pepper paste
2 tsp ground cumin, toasted
1 tsp oregano
1 tsp cocoa powder
1 tsp smoked sweet paprika
1/2 tsp chili powder
1 cup frozen corn
1 cup Pearl Barley, cooked
1 avocado, for garnish
1/2 cup sour cream, for garnish
chopped cilantro, for garnish
Directions:
Put the beans in a pot, cover with 2 inches of water, and bring to a boil. Boil for ten minutes. Drain.
Combine beans with everything but the frozen corn, cooked barley and the garnishes in the bowl of a slow cooker. Add enough water to cover. Cook for 8 hours on low or until beans are tender. Add frozen corn and cooked barley about 30 minutes before serving to allow to heat through.
My Father in Law passed recently. He made his 92nd birthday two-weeks earlier. It was very sad to lose him but to be honest, the last few years have not been kind to him, he simply existed, partly by choice and partly by nature (use it or lose it). That’s all of our parents now and I must tell you that it feels weird being an orphan at my age, both JT and I were very close to each other’s parents. Since Dad lived in Toronto, we made arrangements close to home and our home was the hub, which proved to be a lovely distraction. Our dearest friends Paul and T drove up from Wisconsin to help us and console us. Paul had known JT’s Dad through business so there was a strong connection with him. My newly married nephew and his bride also stayed with us because they live about two and half hours from the city. The house was alive with action! My FIL would have LOVED it!
Everyone came to the city to be at his bedside—I know he would have loved that too, although he didn’t love attention, he loved the buzz of activity. He passed very peacefully during the early hours of the morning of May 28, he didn’t suffer long. That evening, everyone gathered at our home and we had a wonderful family dinner telling stories and being there for each other. We ate rotisserie chicken, a variety of store bought salads and some homemade cookies I had in the freezer (I didn’t have time to throw anything together). We had the visitation on June 2 and the service on the 3rd. At 12pm on the 2nd, I discovered that everyone was coming for dinner just prior to the service the very next day so I sprung into action and made a huge batch of chicken mole out of the leftover rotisserie chicken. Fortunately, I had tried this recipe before and got the thumbs up from JT, so it was an easy decision to make it again.
We had a couple of leftovers that JT and I had for dinner later that week.
The mole sauce can be made in a slow cooker but I did it stove-top this time—I found it therapeutic to be involved in the dish, chopping, stirring and cooking. Like any saucy dish, this definitely tastes better the next day. The rotisserie chicken is an easy addition to the mole, just shred it and stir it into the cooled mole sauce, fill the corn tortillas, refrigerate overnight so the flavours can meld. It was a huge success! Everyone loved it.
JT usually orders a mole when we dine at a Mexican restaurant and I’ve always wanted to try my hand at it. Although there are many recipes handed down generations that take two to three days to make, this one can be made in about an hour. It developes the depth of flavour as it sits overnight. I would not rush it, make it a day or two ahead.
Chicken Mole Enchiladas
Makes 24 Enchiladas (15 cm or 6 inch corn tortillas)
750 mL (3 cups) sodium-free chicken stock (or vegetable stock)
500 mL (2 cups) freshly squeezed orange juice (about 3 good sized oranges)
30 mL (2 tbsp) EVOO
570 g (1 1/4 lb) sweet onions, sliced
55 g (about 1/2 cup) sliced almonds
6 large garlic cloves, finely chopped
8 g (4 tsp) cumin seeds
8 g (4 tsp) coriander seeds
4 g dried pasilla chiles, stemmed, seeded, torn into 1-inch pieces, rinsed*
4 g dried ancho chiles, stemmed, seeded, torn into 1-inch pieces, rinsed*
40 g (about 1/4 cup) raisins
4 8 cm x 1 cm (1/2-inch) strips orange peel (orange part only)
1.5 g (1 1/2 tsp) dried oregano
45 g semi-sweet chocolate, chopped
4 g ground cinnamon (omit if using Mexican chocolate)
Chopped fresh cilantro or green onions
24 corn tortillas
1 rotisserie chicken (or 3 left over), shredded (replace with firm tofu or beans if vegetarian)
200 g (2 cups) Queso de Oaxaca or Mozzarella Cheese, grated
Crème fraîche, sour cream or yogurt as garnish
Sriracha sauce/or chipotle mayo as garnish
Directions:
Heat the EVOO (Extra Virgin Olive Oil) a large Dutch oven, add the sliced onions and sweat them out.
Add the almonds and toast slightly. Add the garlic and cook until they release aroma, then add the cumin, coriander, two types of chilies (*replace with 15 mL (1 tbsp) smoked paprika if you prefer less spicy food) and cook until you can smell the spices.
Add the raisins, orange peel, oregano, chicken stock and orange juice. Mix well. Simmer for 30-40 minutes, stirring occasionally. If using the dry chilis, remove them and discard.
Add the chocolate and cinnamon (or Mexican chocolate) and stir until chocolate has completely melted. Using an emersion blender, blitz the sauce until very smooth. Cool completely. Set aside 2 cups of sauce. Stir in the cold shredded rotisserie chicken.
Fill each corn tortilla with some chicken mole and a little cheese, tuck the rolls into an oven proof pan with the rolled end secured. Repeat until there is no more mole. Pour reserved sauce over the enchiladas, sprinkle with grated cheese. Cover with foil and refrigerate overnight.
1 hour prior to sitting down to eat, preheat oven to 350° F (177° C). Bake enchiladas for 30-40 minutes or until totally heated through (inside temperature should be around 150° F (66° C) and cheese should be melted and bubbling.
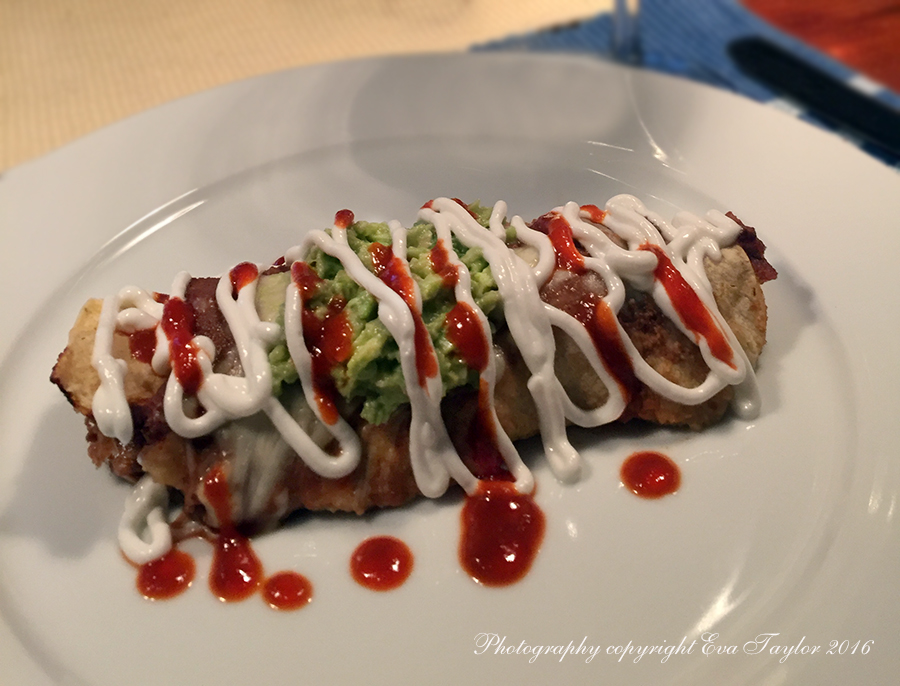
To serve, drizzle with Crème fraîche, sour cream or yogurt and Sriracha sauce or chipotle mayo. Sprinkle with chopped cilantro and/or green onions. Serve over Coconut Cauliflower Rice (recipe to come).
We had these at the cottage a week or so ago. I added a little guacamole for fun. I don’t have many food style tools at the cottage so the garnish is quite rough.
Notes:
The enchiladas freeze well. You may wish to slip a piece of parchment between each enchiladas so you can easily separate them.
*If you are concerned about the dish being too spicy, omit the dried chilis and replace them with 15 mL (1 tbsp) smoked paprika.
1 cup dried red kidney beans, soaked overnight in water
250 g sweet onions, chopped
25 g garlic, finely chopped
300 mL tomato sauce
2 tbsp tomato paste
500 mL water and or chicken stock
900 g ground turkey breast
1 1/2 tbsp cumin
1 tbsp coriander
1/2 tsp smoked paprika
1/2 tsp chili
1/2 tsp sea salt
5 g dried ancho chili (seeds and veins removed)
1 tbsp unsweetened cocoa
30 mL tequila (a nice smokey one)
Garnish:
1 ripe avocado, sliced thinly
10 tbsp Greek Yogurt (approx 150 mL)
10 tbsp mozzarella cheese
handful of Cilantro, or to taste
3-4 Green onions, finely chopped
1 red chili pepper, finely sliced
Directions:
Pre-heat slow cooker on high. Rinse beans and add to the slow cooker along with the onions, garlic, tomato sauce, tomato paste and the water and/or stock and give it a good stir.
Brown the turkey meat in a very hot cast iron pan in batches. Add the browned turkey and juices into the slow cooker in batches. Once you have browned all of the turkey, remove the pan from the heat and deglaze the pan with the tequila, scraping off all the delicious turkey bits from the pan. Add this liquid into the slow cooker.
Give the chili a good stir. Cook on high for 4-5 hours or until the beans are fork tender. If the chili is too liquidy, then remove the lid for the final hour of cooking.
Serve hot garnished with sliced avocado, a tablespoon of yogurt or sour cream, cilantro, chopped green onion, shredded mozzarella cheese and finely sliced peppers.
Based on 10 Servings
It’s heavy on the points but high on flavour.
A delicious Mexican Flavoured Chili
Ladies Night May 2015
I should have set up the tri-pod for an all in shot.
Spring has been slowly emerging, taking its dear sweet time, but today, it’s finally going to be 17°C (62.6°F). Even on Tuesday, the sun was shining and it was actually warm enough to sit outside in the sun with a cup of hot coffee. We’re cautiously hopeful for spring, although there is still some ice in our backyard believe it or not. Stubborn ice that just won’t give up. One of our radio stations has a repeating ad that goes something like this: “April, you have just one job: melt the GD ice so spring can finally show up.” Seriously, just one job! Can it be THAT hard? Yes, we are frustrated! But at least it’s starting…
I’m beginning to think about summer foods, lighter fare and this is a quick and delicious recipe I came up with for lunch about a month ago; I think it may have even been snowing at the time (a month ago). The bright, fresh flavours contrasted against the peppery arugula will make a sensational meal on a super hot, humid day (soon, please be soon). Definitely making this lovely dish for the cottage, it’ll be perfect for eating on the dock, wearing shorts and a light T!
A delightful combination of shrimps and scallops cooked in lime juice
Shrimp and Scallop Ceviche
Makes 1 small serving (to make a meal of it, increase the weight of shrimp and scallop to 100 g in total).
Ingredients:
30 g shrimp*, cubed rather small
20 g scallop*, cubed rather small (similar size to shrimp)
1 tbsp lime juice
1/4 tsp non-calorie sweetener of your choice
1 tbsp cilantro, minced
1 green onion, minced
1 stalk celery, cubed
5 cm (2 inches) English cucumber, cubed
1/4 apple (or Jicama)
5 cm (2 inches) English cucumber, cubed
100 g Arugula
Directions:
Combine the lime juice and the non-calorie sweetener of your choice and mix well.
Make sure you cube your seafood into equal sized cubes so that they ‘cook’ at the same rate. Combine the cubed shrimp, scallop, cilantro and green onion with lime dressing and toss well. Set aside in the refrigerator for 30 minutes to one hour.
When the seafood has become opaque, add the celery, cucumber and apple and toss well. Serve over arugula or lettuce of choice
The apple adds the sweetness that the jicama would have.
*’cooking’ seafood in citrus does not kill off any parasites, so you should be very careful with the choice of seafood — it should be fresh, or boil in water until done and prepare the salad just prior to serving.
I found this clever idea in the latest LCBO magazine. My vases were a little smaller than the idea in the magazine so some of my tulips had to stick out at the top.
Recently, we hosted a dinner party for guests who were doing Weight Watchers and because I don’t like to sabotage anyone’s journey to a healthy weight I decided to make the entire meal WW friendly and that meant putting my thinking cap on. Now I don’t know about you, but I adore guacamole, it’s so creamy, fresh and tangy and it really enhances a few dishes as a condiment but may also be used as a wonderful dip with fresh vegetables!
Now I know what many of you will say, “but wait, avocados are a good fat” and while that is very true, it’s all about balance and budget so if you can save a little here you can spend it there (perhaps on an extra glass of vino?), is all I’m saying!
Before I even searched on line, I had the idea of creating a mockamole from spinach. Why spinach? I chose spinach because #1 it’s a gorgeous green and you can purée it smooth uncooked and #2 it fits well into the WW point system. Once I determined what my basic ingredients would be, I started to search “mockamole” on the net and found that the majority of them are made with green peas. Now green peas are quite healthy but when I did the nutritional calculation using peas, my 1 tablespoon mockamole resulted in 1 WW point whereas my spinach mockamole resulted in 0 points for 1 tablespoon. So that was it.
Guacamole is a simple yet flavourful combination of ingredients and other than subbing out the avocado, I kept it pretty true to form. I used 4 tablespoons of cooked puréed navy beans as my ‘creamy’ ingredient and it worked out great. I loved the bright green colour as well as the bright flavours in this recipe. JT said it was an excellent substitute for real guacamole! It’s quite garlic-y so if it’s date night, you may wish to tone it down a notch or make sure your partner has some too ;-)!
May I interest you in a little dip?
Mockamole (Spinach ‘guacamole’)
Makes about 3/4 cup.
Ingredients:
100 g fresh spinach (may be frozen)
4 tbsp navy bean paste (see notes)
1 clove garlic, finely minced
1 tbsp (15 mL) lime juice
1 tbsp cilantro, chopped
1 tbsp green onion, finely chopped
Cilantro or parsley for garnish
Chopped tomatoes (optional)
Directions:
If using frozen spinach, wring out well. If using fresh spinach, wash and dry well.
Combine the spinach, navy bean paste, garlic, lime juice and cilantro in a small food processor and process until very smooth (I found my immersion blender did this beautifully). Fold in chopped tomatoes if you are adding them.
Add chopped green onion and garnish with a sprig of cilantro. Serve with cucumber slices, celery sticks or cauliflower florets or use in a meal that requires guacamole as a condiment.
Choose vegetables that hold onto the dip like a spoon!
The cooked puréed beans give this dip its creamy texture.
Who are you calling “dip”?
1 tbsp serving
1 tbsp serving.
Notes:
Navy bean purée: I usually make up a batch of plain navy beans for thickening soups, sauces and gravies and then freeze for later use. Cook navy beans in water without salt. Purée and press through a fine sieve. Allow to cool completely and put 1 tbsp portions into an ice cube tray (specifically for savoury things) and freeze. Once frozen, take each cube and put it into a larger ziplock bag and that way you have a creamy gluten-free thickening agent for future recipes.
If you add too much liquid to the puréed spinach mix, strain for a couple of hours in a coffee filter reserved for savoury things before serving.
To blanch spinach quickly, add spinach to a heat proof bowl with about 1/2 cup water and nuke for about 2-4 minutes until soft. Rince with cold water and wring out well.
I always like to serve a salad, particularly when we have a reasonably heavy meal so I came up with this easy Caribbean inspired slaw recipe that hit the spot perfectly when I served it with the Trinidadian Chicken Curry Roti; the coconut cream helped subdue the slight heat from the curry and it was very fresh and delicious. I based the recipe on this slaw that was inspired by Toronto Chef and Food Network Canada celebrity, Susur Lee. Keep the wet and dry ingredients separate until just before serving so that the slaw doesn’t get too sloppy and wet; wet ingredients would be the cucumber and the mango which may be stored together. The beauty of this slaw is the uniformity of each component, so take your time in grating, slicing and chopping.
The coconut milk in the dressing helped subdue the heat from the curry.
Caribbean Inspired Slaw
Makes about 8 cups of slaw
Ingredients:
2 (about 2 cups) carrots, grated
1/2 (give or take 3 cups) savoy cabbage, shredded
1 green onion, finely sliced
1/2 (about 1 cup) English cucumber, grated
1 mango, grated
1/2 cup cilantro, finely chopped
1/2 cup grated unsweetened coconut
1/4 cup coconut cream
1/2 tsp tamarind concentrate
2 tbsp lime juice
1 tbsp honey
Directions:
Combine the shredded cabbage with the green onion, grated carrots, cilantro and grated coconut, toss well to combine. Refrigerate until serving.
Combine the grated cucumber and mango and toss well to combine. Refrigerate until serving.
For the dressing, combine the coconut cream, tamarind, lime juice and honey and mix well. Refrigerate until serving.
When ready to serve, combine the cabbage mixture with the cucumber mixture and toss well to combine. Add the dressing and toss well to combine. Garnish with additional grated coconut and cilantro. Serve immediately.
A wonderful combination of crunch and soft sweet fruits and vegetables.
Today is my dear Mother’s birthday; were she alive, she would have been 78 years young!
Happy Birthday Mom (21 in this photo), I miss you.
Several years ago we dined at Diego, a lovely Mexican restaurant in the MGM Hotel in Las Vegas and I had a wonderful Ceviche that I have not been able to forget. It was an unusual combination of coconut milk and lime juice that just hit my taste buds perfectly. I adore ceviche and order it whenever I see it on a good restaurant’s menu and have not had the pleasure of these flavours together in one since. So, I thought I’d take a stab at it and create an opportunity to use one of my pearls in the process! Clever, don’t you think?
I’ve made ceviche before, the non-cheater kind but I wanted to put this together quickly for an hors d’œuvres recently and I didn’t feel like waiting for the acid to ‘cook’ the shrimp so I came up with this ‘cheater’ version. You can make the ceviche the old fashioned way, but this really worked out well!
I would have liked to add cubed avocado to this dish but sadly forgot to put it on my shopping list! I’ll remember next time, this is a very quick and tasty recipe.
It’s also rather coincidental in this cyber world how we all post about similar things so I can’t go without mentioning my dear Australian Blogging friend Lorraine who just last week posted this gorgeous recipe about real ceviche. Great minds think alike…please don’t finish the last part of this saying, it kinda bursts my bubble!
It’s just as tasty and doesn’t take long to make.
Cheater Shrimp Ceviche
Makes ~200 mL Ceviche (slightly more than 3/4 cup), or 8 single serve Chinese Spoons
Ingredients:
1 tbsp coconut milk powder
1 tsp fresh ginger, grated finely
1 tbsp rosa’s lime cordial
2 tbsp lime juice
80 g cooked cocktail shrimp, chopped
3-4 slices of English Cucumber (0.5 cm or 1/4″ thick) cubed
1 celery rib, cubed
1/4 cup avocado, cubed
1 tbsp cilantro, chopped
1 tbsp green onion, chopped
1 tsp smoked paprika pearls
Directions:
Combine the coconut milk powder, finely grated ginger, lime cordial and lime juice in a measuring cup and blend until smooth with a stick blender.
Combine the chopped shrimp, cubed English cucumber, avocado (if I had some) and celery with the cilantro and green onion, toss with the coconut milk dressing to coat evenly.
Serve immediately garnished with the smoked paprika pearls.
Recently we entertained our lovely neighbours across the street; it was a thank you dinner of sorts because they happened to rescue us on my benchmark birthday party this past summer when we ran out of beer! We asked them what kinds of food they enjoy and Indian was one of the selections. I love cooking Indian food but because there are just the two of us I usually don’t bother but doubling the audience makes it all the more worth-while. It was an extravagant meal so I started cooking a couple of days in advance and it really didn’t seem to be that much trouble; the saucy, stewy dishes of India lend themselves to being made ahead and allowing the flavours to combine over time making them taste so much better than the day they were made. I was very pleased with the results and will definitely make these dishes again in the future.
I also would like to thank Helene DeSouza (Masala Herb) for posting her favourite Palek Paneer recipe this month, if it wasn’t for her I likely would never have made this dish having tasted a restaurant version that was unremarkable. Helene’s recipe has the complex depth of flavours that one expects from Indian food. I urge you to try it.
The menu:
Onion Bhajis (I made this one again and it was extremely tasty) with Tamarind Chutney (recipe to come)
Aloo Papri Chat (please click here for the recipe)
Butter Chicken (please click here for the recipe) NOTE: I used 1 lb fresh roma tomatoes and 2 cups of home made tomato sauce made from raw tomatoes cooked down and blended until smooth WITH oven roasted tomatoes blended and the whole thing run through a very fine sieve to get rid of the skin and seeds).
Palek Paneer (The Palek (spinach) gravy is new from Helene DeSouza who runs Masala Herb in Goya, India; recipe below)
Naan (please click here for the recipe) and Papadums (I bought some very special Papadums in Chicago when we visited with Chgo John of From the Bartolini Kitchens)
Chai Crême Brûlée (please click here for the recipe)
Paneer
The texture turned out perfectly this time.
This firm, unripened Indian cheese makes a rectangle 23 cm x 13 cm x 2 cm (9″ x 5″ x 3/4″).
Heat the milk in a deep and heavy bottom pan at medium heat (this is really important, so the milk doesn’t burn). Allow it come to a gentle boil (around 200 F) and stay there for a minute. Make sure the milk is not vigorously boiling, if it does, immediately reduce the heat and bring the milk back to gentle boil.
Begin by adding the lemon juice a table spoon at a time, stirring gently to incorporate. With each addition you will notice that the milk separating. The final addition of lemon juice will separate the curds from the whey very obviously. Switch off the gas immediately or if you are cooking on electric, remove pan from the element to stop the heat.
Line a sieve with double layered cheesecloth, making sure the cheesecloth is long enough to be bundled up and tied later. Pour the curd and whey through the cheese cloth. Set the whey aside or discard (I tried making ricotta from this whey but there was no more curd to be had. I understand that Whey is healthy so you can search the net to find uses, I did not and trashed it).
Wash the curd in the cheese cloth, by running it through cold water to remove the lemon taste.
Tie up the cheesecloth in a tight bundle and hang it over something to allow it to drain for about 30 minutes.
Line a nice rectangular pan with a double folded cheese cloth making sure you have enough length and width to fold over the top. Add the curd to the pan, pressing it firmly into the pan. I didn’t press my corners and edges well enough and they were a bit crumbly. I used a small glass to help push the curd down and compress it. Place the wrapped cheese between two cutting boards over a sink or a large pan and put a heavy pot on top for 1-2 hours.You don’t want to add too much weight for too long as it can drain out way too much moisture from the cheese making it hard and crumbly. Your cheese should have a slightly elastic texture so when you lightly press your finger into it, it will bounce back.
Wrap it and store it in the fridge for up to a week or cover well with plastic wrap and freeze. Defrost entirely before use. If you find your cheese still is a bit too wet, you can store it LIGHTLY wrapped in the fridge and the chill will dehydrate it further (I did not have to).
Cut the block into small one bite chunks and add to the Palek sauce to warm up. Be very gentle when stirring as to not crumble the cheese too much.
Cubes of firm unripened cheese remind me of firm tofu.
Palek Paneer (Spinach Gravy with Unripened Cheese Cubes)
The lemon juice also helps to preserve the lovely green colour of the spinach.
Wash spinach well and if you’re not using baby spinach, remove all the hard stems.
Blanch the spinach in 100 mL water, set aside.
In 2 tbsp oil, fry the onions until caramelized. Add the garlic paste and stir for a moment. Add the cumin, coriander, cinnamon, Garam Masala and chili powder and allow to develop their aroma. As soon as you smell the herbs, remove from heat. Add the tomato past and combine with the blanched spinach.
Purée with an emersion blender until very smooth, add a splash of lemon juice to brighten the flavours. Press through a fine seive.
At this point you may put the finely puréed spinach mixture into a container and store in the fridge for a day or two.
When you are ready to serve, reheat slowly in a pot, and add the two tablespoons of cream, salt and pepper. Add the Paneer and stir very gently so that the paneer does not break apart. Serve garnished with chopped cilantro and green onions.
The gravy was rather thick, you can loosen it with water, vegetable stock or more cream.
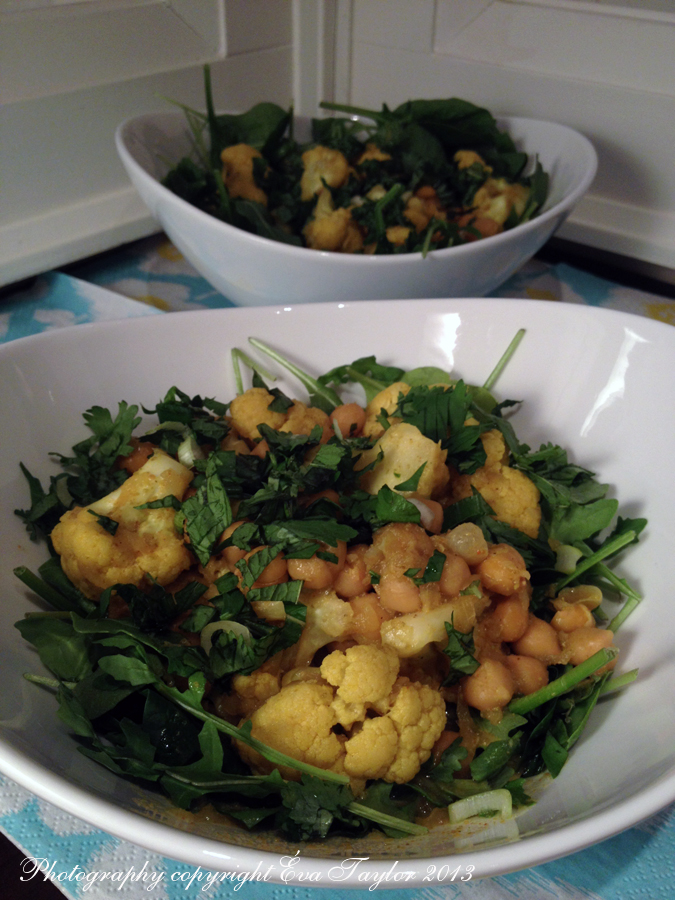
I know I’ve posted a chick pea and cauliflower curry recipe before, but this one has a bit of a twist, it’s Thai and I just couldn’t resist! The fresh flavours that Thai spice combinations brings to this dish is simply mouth watering, and it’s even better the next day (fortunately, I made enough for my lunch at work). You can blanket this beautiful curry over Jasmine rice, perhaps with a little coconut in it, but we just put it over a combo of Arugula and Spinach to manage the waist-line! I found the original recipe here but I made my own changes just because I felt it needed it when I tasted it mid-way.
I don’t know about you, but I am really getting tired of these night-time photos!
Chick Pea and Cauliflower Thai Curry
Serves 4,
Ingredients:
1/2 cup finely chopped sweet onion (I used Vidalia)
3 cloves garlic, finely minced
1 tbsp freshly grated ginger
1/2 tsp turmeric
1/4 tsp cayenne pepper
2+1/2 tsp. ground cumin
1/2 tsp ground coriander
2 tbsp fish sauce
3-4 tbsp coconut milk powder in about 1/4 cup boiling water, dissolved
1 cup vegetable stock
4 kafir lime leaves
12-14 oz can chickpeas
1 generous head of cauliflower
1/4 cup lime cordial
1/2 cup cilantro, lightly chopped for garnish
1 finely sliced scallion for garnish
Directions:
Heat up a wok or frying pan over medium-high heat. Add 2 tbsp. oil plus the onion and garlic. Stir-fry 1 minute.
Add all of the dry spices, plus fish sauce fry together briefly.
Add the cauliflower, stock and dissolved coconut milk powder. Add the kafir lime leaves and cook the cauliflower until it is fork tender but not too soft. Add the chick peas and heat through.
Remove from heat. Stir in the lime cordial and give it a good stir.
Do a taste-test. Adjust the salt level by adding a little more soy or fish sauce if not salty enough. If too salty, add a squeeze of lime juice.
Garnish with chopped coriander and finely sliced scallion and serve hot with either rice or greens.
I’m always looking for something new and different and when I saw a Wheat Berry Salad on my friend Angie’s blog, Taste of Home, I knew I had to try it at least once. Angie cooks with a lot of whole grains, always healthy and always inventive. She is also a master of bread making, her loaves are gorgeous, appetizing and did I say gorgeous?
I had never heard of wheat berries before reading Angie’s post and I am so glad that I did see it and was inspired to make it. Thank you Angie, I know I will make this grain again and again.
Wheat Berries look very similar to pearl barley, but they are darker in colour and apparently have a nuttier taste. They are a very dense grain and therefore many sites suggest pre-soaking. I soaked my berries overnight and it still took about an hour of boiling. They have more of a bite than barley and are a bit chewier, which I liked, but JT did not. I have found that you will need a ratio of 3 or 4 parts water to 1 part wheat berries. You can substitute wheat berries anywhere a grain is used, for example rice pilaf or even risotto!
The avocado and the mango are a nice contrast in textures to the wheat berry
Cook wheat berries in 3-4 cups of water, about 1 hour (at around 45 minutes check to see if you like the texture, and if you do, stop cooking).
Add the cubed avocado, mango and chopped red pepper. Drizzle with the lime juice and salt to taste. Mix in the cilantro. Serve warm or cold as a side to a BBQ’d dish.
I had an incredible ceviche salad some time ago that Sissi of With a Glass reminded me of with her lovely recipe for her Hot & Cold Rice Bowl with Shrimp, Avocado and Cucumber. This salad combined the wonderful creamy avocado with the tangy citrus of the refreshing grapefruit. I decided I needed to serve something a little off the beaten path for a dinner we were having with our good friends Rae and Monica a couple of Saturdays ago and came up with this refreshing and flavourful recipe that was inspired by our recent trip to NYC. Norma (Garden to Wok), that lettuce you see in the photo is home grown.
To keep things on the healthier side, I didn’t use flour tostadas but instead substituted them with whole wheat flax fajita shells, cut into triangles and broiled for a few minutes to make them crisp, like crackers.
Our first lunch in NYC inspired this recipe. The lettuce you see is home grown.
Shrimp Ceviche with Grapefruit, Avocado, Cucumber and Corn
Serves 4 appetizer portions
Ingredients:
150g raw shrimp (20-30 per lb count), shelled, deveined and chopped into equal bite-sized portions
1 small ripe avocado, finely diced with about 3 tbsp lime juice sprinkled on it or you can dice the avocado just before serving
1 grapefruit, peeled and sectioned, seeds removed, juice reserved.
1/4 cup of frozen corn (defrosted)
1/4 cup of finely diced cucumber
2 tbsp toasted unsweetened coconut
1/4 cup freshly squeezed lime juice
1/4 tsp sesame oil
pinch of cayenne pepper
pinch of sugar or honey
1 lime cut into wedges
4 tbsp avocado paste (recipe can be found here) or use guacamole
4 lettuce leaves, washed and stored until serving (we had curly lettuce)
1 small fajita shell (we always have whole grain flax)(use gluten free for a GF version)
2 tbsp cilantro, chopped roughly
1 tsp fresh mint, chiffonade finely
salt to taste
Directions:
Mix the juice from the grapefruit and lime juice in a jar with a lid; taste and add sugar to taste. Add the cut shrimp (raw) pieces and coat well. Refrigerate until the shrimp is entirely opaque (it took my shrimp about 4 hours as I left them in about 1/2″ chunks)
In another covered jar, mix the grapefruit, corn and cucumber. Reserve in the refrigerator.
Preheat the oven to 375°F. Coat the fajita shell lightly in EVOO. Cut into 8 even triangles. Bake each side until the shells are golden, flipping when done. Allow to cool.
When you are ready to serve, add the shrimp (and liquid) to the reserved grapefruit, corn and cucumber and mix; add the sesame oil, cayenne pepper, sugar or honey, salt, cilantro and mint. Stir well.
Place one lettuce leaf on each plate. Spoon equal amounts of the ceviche into each leaf. Garnish with a lime wedge and sprinkle with the toasted coconut. Take two of the toasted fajita shells and smear a bit of the avocado paste on each one and stack one on top of another. Garnish each plate with one stack of two.
Notes:
Ceviche is seafood cooked with acid. It does indeed cook, but it you are squeamish, then pre-cook your shrimp by boiling it until done. Don’t soak it in the grapefruit/lime mix as it will continue to cook and you will have rubbery ceviche. Simply reserve the shrimp in the fridge and dress when you are ready to serve.
This recipe calls for a balance of salty, sweet and sour. I keep my ‘dressing’ separate from the raw shrimp so I can taste it until I am satisfied that it is good.
Firstly, I would like to add a disclaimer that Kristy from Eat, Play, Love Our Family Food Adventures is not paying me to blog about her recipes (unless she wants to, of course ;-)). It’s just that there are some recipes that click for me, and her choices are often those kinds of recipes. Recently she and the kids made a Piri Piri Shrimp, in a post called Heating Things Up that really caught my interest for a few reasons: garlic and lemon juice, heat and shrimp! Of course, JT and I are still on the low carb, sugar, fat diet for another day or so I’ve had to modify the recipe (not that it wasn’t unhealthy to begin with, it just did not fit the chemical profile we are restricted to). So Kristy, I hope you don’t mind, but I did change it up a touch, hopefully not altering the recipe’s taste. Thanks again for a another flavourful dinner (and incredible lunch the next day!).
Roasting the hot peppers doesn’t really take ALL the heat out of them.
Piri Piri Shrimp My Way
Serves 3 (dinner and 1 lunch, each 100 g protein)
Ingredients:
1-2 Serrano chiles
4-5 cloves of garlic
1 tbsp smoked paprika
1/2 cup freshly squeezed lemon juice
1 tbsp vinegar
1/3 cup low sodium vegetable stock (I used vegetable stock as it is slightly sweeter than chicken stock, because I replaced the wine vinegar with white vinegar)
hand full of roughly chopped parsley
hand full of roughly chopped cilantro
300 g (10.5 oz) uncooked, deveined, and peeled shrimp
lemon wedges (oops, I forgot)
I forgot the lemon wedges.
Directions:
Preheat the oven on high broil. Cut the chile peppers in half (don’t bother removing the seeds and stems, they come off easily after roasting). Place the chiles on a lightly sprayed (with fat free cooking spray) baking sheet and roast until blackened, Kristy says about 10 minutes (I didn’t time it).
Trim the stems and remove the seeds (the seeds are the really hot bits)
In your immersion blender container, combine the chiles, garlic, paprika, lemon juice, vinegar, vegetable stock, parsley and cilantro and purée the ingredients until smooth.
Pour 1/4 of the marinade over the shrimp, cover and refrigerate for a minimum of 20 minutes, or up to 24 hours (see note).
Heat a large cast iron grill pan on the BBQ (had to involve JT in the cooking, you know how it is). Spray lightly with fat free cooking spray and when hot enough, cook shrimp until done (pink both sides).
Serve over greens with a few sweet red peppers drizzled with a bit more of the sauce (but reserve the remainder of the sauce because I have a GREAT IDEA for it for Saturday!)
Notes:
Citrus can cook seafood quite easily (ceviche is based on this) so if you do leave the shrimp marinading for more than a few hours, check it to see if it’s cooking (starting to turn pink). Otherwise you may end up with rubbery shrimp.
The Piri Piri sauce was INCREDIBLE — perfect for my taste, JT said it was OK, but perhaps he was just uninspired because the shrimp was served on greens (I live on greens so it was second nature to me) next time, I’ll serve his on Quinoa or Whole Wheat Couscous.
Roasting the peppers did not minimize the heat, so beware. I adore it and JT found it tolerable, but it could be too hot for some.
You may wish to add a teaspoon of agave nectar (or some red pepper coulis) to help subdue the heat, I did for JTs dressing but not for mine.
The sauce is definitely better the next day so you may wish to make it up in advance and let it sit. I used this sauce in a dish I prepared last Saturday for Cinco de Mayo.
This soup was part of a five-course dinner we made for a good friend who recently suffered a heart attack. The theme was heathy, healthy, healthy!
Chilled Cucumber Soup
Serves 4 (1/2 cup servings each)
Ingredients for the Soup:
1 large English cucumber, washed but unpeeled, roughly chopped or grated
4 shallots, peeled and diced finely
3 medium cloves garlic, finely minced
1 cup low sodium stock, either chicken or vegetable
1 cup fat free unflavoured yogurt (or buttermilk)
Splash of freshly squeezed lemon juice
Non-stick spray
Ingredients for the Cilantro Oil:
4 tbsp EVOO
1 tbsp finely chopped cilantro
Pinch of sea salt
Directions for the Soup:
Make this a day or two in advance to allow flavours to combine.
Heat a cast iron pan and spray with non-stick spray lightly.
Sauté shallots until translucent, add the garlic and stir just until you smell it. Remove from heat immediately. Allow to cool completely.
Add cucumbers to a deep bowl, add cooled onion, garlic and yogurt and start blending with an immersion blender. Add stock little by little until the desired consistency is achieved.
Season with sea salt and pepper to taste.
Store in refrigerator for up to 3 days. Stir well before serving.
Directions for the Cilantro oil:
Mix both oil, cilantro and pinch of salt.
Mash cilantro gently with the back of a spoon (I used my gorgeous olive wood mortal and pestle from Provence). Set aside at room temperature until ready to serve.
Pour cucumber soup into serving bowls, drizzle with the cilantro oil, serve chilled.