Feeds:
Posts
Comments

Posts Tagged ‘garlic’

Our dear friends, Andy and Mark invite us to Dim Sum every so often on Sundays. We really look forward to it because many of the dishes are new to us and I haven’t quite figured out how to make them…yet. This shrimp and meat dumpling is a real favourite, they are chuck full of chunky pieces of shrimp in a flavourful mixture of pork.

This is an example from the restaurant. I reheated using my Instant Pot Air Fryer.

I love that they are pan-fried and oh, so crispy on each side, tender and flavourful on the inside. These really hit the spot and freeze very well. They freeze well and it is so easy to pull out a few, steam them up and pan fry in a pinch. I love having a selection of appi’s available in my freezer for last minute additions to a dinner party.

This is an example from the restaurant.


Shrimp & Pork Pan-fried Dumplings

A Kitcheninspirations original recipe

Makes 18 dumplings

Ingredients for dumpling filling:

  • 18 won ton wrappers
  • 175 g pork, finely minced
  • 175 g shrimp, peeled, deveined and roughly chopped
  • 35 g green onions, coarsely chopped
  • 15 g ginger, finely chopped
  • 15 g roasted garlic purée
  • 30 g flour
  • 5 g sugar
  • 15 mL sesame oil
  • 15 mL soy sauce
  • 25 mL egg whites
  • 45 mL high flash-point oil, like peanut oil

Directions:

  1. Combine the pork, shrimp and green onions and mix well.
  2. Combine the ginger, roasted garlic, flour, sesame oil, soy sauce and egg whites and mix well.
  3. Add the ginger mixture to the pork and shrimp and mix well.
  4. Wet all four sides of the square won ton wrappers and place 15 mL of the shrimp mixture into the centre, bring each side up to the centre, and seal to each other.
  5. They may be frozen at this stage.
  6. When ready to serve, steam the dumplings for 7 minutes or until an internal temperature of 165 is reached. Continue until you have steamed all of the dumplings.
  7. Heat the peanut oil in a frying pan and add the dumplings to sear the each side until crispy. Serve warm with the sauce below.

Ingredients for the Dipping Sauce:

  • 15 mL soy sauce
  • 15 mL seasoned rice vinegar
  • 5 g puréed roasted garlic
  • 5 g grated fresh ginger
  • 5 mL toasted sesame oil
  • 5 mL honey
  • 1 green onions, minced

Directions for the Dipping Sauce:

  • Combine all of the ingredients and mix well. Serve with hot dumplings.

Notes:

  • The filling for dumplings are not pre-cooked, so you really need to make sure that steaming them cooks the proteins through.
  • I was pinched for time, otherwise, I would have made my own dumpling wrappers. You can find the recipe here.


Read Full Post »

It’s dinner party and cocktail party season so the team at Kitcheninspirations have been busy making and freezing party food so we are never caught empty handed. The filling for these tasty little bites comes together very quickly and if you don’t have time, store-bought wonton wrappers will do the trick.

Shrimp Gyoza

For original gyoza wrapper recipe, please click here.

Makes 20 gyoza

Ingredients:

  • 120 g AP unbleached flour
  • 65 g water, boiling
  • pinch of salt
  • cornstarch for dusting
  • 5 mL sesame oil
  • 75 g shrimp
  • 2 scallions, finely diced
  • 5 g ginger, finely grated
  • 10 g roasted garlic
  • 20 g carrot, finely grated
  • 10 mL soy sauce
  • 8 g cilantro leaves, finely chopped
  • Butter or grapeseed oil to brown gyoza
  • Sesame seeds and cilantro for garnish

Directions:

  1. Combine flour and salt in a bowl. Add boiling water to the flour and salt mixture slowly to make a dough, turn out to a surface and knead for about 10 minutes until smooth. Wrap the dough in plastic and allow to rest at room temperature for 30 minutes.
  2. Heat the sesame oil in a pan and add the shrimp and stir fry. Stir in the scallions, ginger, roasted garlic, carrot, soy sauce and cook for a minute. Remove from heat and allow to cool thoroughly. When cool, add the cilantro and mix well.
  3. To make the wrappers, roll each sausage out to a manageable thickness and run it through the KitchenAid pasta roller from #1 to #4.
  4. Cut into 7.5 cm (3 inch) rounds. Wet the edges of each round, spoon 5 mL (1 tsp) of the filling into the centre and fold in half and seal the edges. I used a handy pleater like this one to get perfect pleats.
  5. Steam each one for 3-5 minutes. When cooked, melt butter or grapeseed oil in a cast iron pan. Pan-fry each one on one side only so it is golden and crispy. Serve with your choice of dipping sauce.
  6. Freeze uncooked gyoza on a piece of parchment and once frozen add to a ziplock bag for future use. Frozen gyoza will cook in 3-5 minutes!
  7. To serve, melt about 15 g of unsalted butter with 30 mL of grapeseed oil and fry one side of each gyoza. Serve sprinkled with sesame seeds and bits of cilantro.

Serve these tasty treats with a sweet and salty soy sauce.

Read Full Post »

This roasted red pepper dip popped into my life via America’s Test Kitchen, a show we routinely watch to fall asleep to. I was incredibly intrigued when they mentioned that this is a Syrian version of our Spanish favourite, Romesco Sauce. This tasty dip uses Aleppo pepper flakes and sumac which I don’t use regularly in my cooking but had some at home. Like Romesco, it uses a nut to thicken the dip but Instead of almond flour, the recipe calls for toasted walnuts. Boy, what a difference, the walnuts lend a delicious earthy flavour. This dip is definitely going to be in our repertoire.

Muhammara

Makes about 250 mL (1 cup)

Ingredients:

  • 2 red peppers, roasted and peeled
  • 60 mL EVOO, divided (additional may be required)
  • 113 g shelled, toasted walnuts
  • 15 g roasted garlic purée
  • 30 g tomato paste
  • 15 mL pomegranate molasses I used (see notes)
  • 5 g Aleppo pepper flaked
  • 5 g sumac
  • 2-3 g salt

Directions:

  1. Toast the walnuts with a little of the olive oil until golden and you can smell them. Allow to cool.
  2. Combine all of the ingredients in the bowl of your small food processor (I used a magic bullet because I wanted it smooth) and process until smooth. You may wish to add olive oil until the desired consistency is achieved.
  3. Garnish with a few chopped, toasted walnuts.

Notes:

  • The recipe I used had quite a bit of breadcrumb which I have deleted from the recipe because I found it made the dip too thick and thickened it as the dip aged. I prefer a slightly runnier dip.
  • I substituted the balsamic vinegar for the pomegranate molasses because I didn’t have any and it was fine, to be honest, it’s just a building flavour and doesn’t depend on it entirely.
  • We used the dip as a topping for lamb burgers we had and it was OUTSTANDING!


Read Full Post »

I have been following fellow blogger, Lorraine Eliott over at Not-Quite-Nigella on Instagram and in August she posted a photo of the most beautiful bread knots I have ever seen. I knew the moment I saw them, I’d have to give them a go. They are not only beautiful, but they are also very tasty and quite easy to make so I’m sharing the recipe here so that I will remember to make them again.

I made 12 knots but to be honest, they were a little too big so next time, I’ll make 14!

Herbed Bread Knots

Makes about 12 -14 bread knots. For the original recipe please click here.

Ingredients:

  • 6 g instant dried yeast
  • 250 mL warm water (around 110° F)
  • 400 g flour
  • 6 g granulated garlic
  • 3 g Salt
  • 15 mL EVOO
  • 70 g unsalted butter, softened
  • 25 g roasted garlic purée
  • 100 g Parmesan cheese, grated
  • Variety of herbs to make up about 20 g, chopped or julienned
  • Eggwash to glaze

Directions:

  1. Dissolve the yeast in the water, set aside. In the large bowl of your stand mixer, add the flour, garlic and salt and mix well.
  2. Add the yeasty water to the bowl with the flour mixture and knead for 2-3 minutes until it is roughly incorporated. Allow the dough to sit for 20 minutes. Then start the kneader up again and knead until a beautiful shiny dough is achieved (around 10 minutes). Grease the bowl and the dough with the EVOO and allow to proof in a draft-free location for 45 minutes or until doubled in size.
  3. Meanwhile, cream the butter, the roasted garlic, the Parmesan cheese and the herbs until well mixed.
  4. Once the dough has doubled in size, roll out to 35 cm x 50 cm. Spread the butter mixture all on the dough, right to the edge. Fold it length-wise into thirds (like you would making croissants) and lightly roll out to a slightly larger rectangle (careful not to put too much weight in rolling, otherwise the butter mixture will ooze out).
  5. Cut the dough into 12-14 equal widths and make an additional length-wise slit down each width without going right to the edge. Lift by each end and roll into a beautiful knot, carefully twisting each roll so that the cut sides are exposed and you can see the herbs. Tuck each end into the knot and place on a parchment-lined baking sheet. Make all of the knots and allow the knots to rest for 30 minutes covered with a clean cloth.
  6. Preheat the oven to 375° F. Bake the knots for 18-25 minutes or until the centre registers about 200° F. Serve immediately, but they also freeze beautifully. Reheat in a 350° F oven for a few minutes until they are warmed through.

They are a cross between bread and a laminated dough, the layers are scrumptious!

Notes:

  • Any herbs would work, I used basil, parsley and thyme.
  • I may not chop the herbs as finely next time.
  • I can’t wait to try sundried tomatoes and basil with mozzarella cheese or a sweet treat of cinnamon butter and sugar.

Read Full Post »

We totally got sucked into another ATK (America’s Test Kitchen) recipe that we saw as we were trailing off to sleep one night in April: Pastitsio. What got me this time was the way they reinvented cooking the noodles, these reinventions usually turn me off (why mess with a good thing?) but this one totally got me. Get this, you par-cook the noodles in béchamel! Yep, you read that right. Par-cook in Béchamel. I had to try it. Plus I just loved the way the noodles were lined up. Of course, they didn’t use the right noodles for authentic pastitsio, but I just loved the way they lined up. So I gave it a try. It is rich, filling and ever-so-moreish. Particularly if you love Béchamel like I do. I won’t be making this every week, but once in a while, it will be a nice change to the repertoire.

Also known as Greek Lasagna.

Pastitsio

For the original recipe, please click here.

This recipe serves 4-6 people (it freezes well).

Ingredients for the meat sauce:

(this dish may be made up to 5 days before needed and refrigerated):

  • ¾ teaspoon table salt
  • ¼ teaspoon baking soda
  • ½ cup water
  • 8 ounces 93% lean ground beef
  • 1 tablespoon vegetable oil
  • 1/2 sweet onion, finely diced
  • 30 mL pureed roasted garlic
  • 1 ¼ teaspoons ground cinnamon
  • 1 teaspoon dried oregano
  • 1 teaspoon paprika
  • 65 mL red wine
  • 65 mL tomato paste

Directions for the meat sauce:

  1. Sweat the onions in the oil until translucent. Add the garlic and the meat and cook until the meat is no longer pink. Add the spices and cook until fragrant. Turn the heat down to a simmer.
  2. Combine the salt, baking soda, 1/2 cup water, wine and tomato paste and mix well. Add this mixture to the meat, stir well and simmer for 45 minutes. Remove from hear and allow to cool completely.
  3. Meanwhile make the béchamel.

Ingredients for the béchamel and pasta:

  • 30 g unsalted butter
  • 45 g unbleached flour
  • 30 g roasted garlic purée
  • Pinch of nutmeg
  • 1 L whole milk, heated
  • 250 g ziti or penne
  • 250 g kasseri cheese, divided

Directions for the béchamel:

  1. Melt the butter in a large saucepan over medium/low heat. Whisk in the flour and cook for 2 minutes.
  2. Whisk in the garlic and nutmeg until combined. Whisk in the milk and cook until thickened.
  3. Add the pasta and return to a simmer, stirring constantly. Once simmering, remove the pot from the heat and allow to sit, covered for 15 minutes (pasta should not be cooked through).
  4. Preheat the oven to 350F.
  5. Assemble the pasta in straight rows on the bottom of a buttered casserole, reserving the béchamel. Top with half of the cheese and then the meat sauce, cover with remaining béchamel and the remaining cheese.
  6. Bake uncovered for 45 minutes to an hour until cheese has melted and has browned. Allow to sit for 20 minutes. Serve with a lightly dressed green salad.

Notes:

  • If you’re making this in advance, assemble cooled ingredients and refrigerate, covered for a maximum of two days. Allow to come to room temperature before baking.
  • This can be frozen in cooled assembled format or after it’s been baked.
  • Like most casseroles, this gets better the next day.


Read Full Post »

Recently, we have fallen in love with Cholula Green Pepper Hot sauce but it is very difficult to find in Toronto. Sure, everyone carries the original red version, but we can never seem to find the green one. It’s not quite as hot as the red one but it really livens up flavours, like our Huevos Rancheros! I decided I would try and make my own and so I shall share it with you.

Green Pepper Jalopeño Hot Sauce

A KitchenInspirations Original Recipe

Makes 400-500 mL hot sauce

Ingredients:

  • 15 mL olive oil
  • 440 g green peppers (about 355 g cored and seeded)
  • 320 g jalapenos (about 235 g cored and seeded)
  • 1 large shallot (about 65 g)
  • 15 mL puréed garlic
  • 300 mL water
  • 75 mL cider vinegar
  • splash of agave syrup
  • Salt and white pepper

Directions:

  1. Core, seed and remove veins of the peppers (to your taste) and toss with the olive oil.
  2. Roast the peppers until their skin blisters. Peel off the skin as best as you could. Roast the shallot so that it’s almost soft.
  3. Add everything but the agave syrup to a pan and cover with the water and vinegar. Simmer until everything is super soft, about 10-15 minutes.
  4. Purée the pepper mixture until smooth and press through a fine sieve. Add in a splash of the agave syrup, salt and pepper to taste.
  5. Transfer to sterilized jars and refrigerate. Will last a few months in the fridge.

Notes:

  • The quantity will depend on how fine a sieve you have. I generally run it through a fine metal sieve to catch larger bits, then I press it through a very fine, reusable coffee filter. It makes a beautiful, silky sauce.
  • If you prefer a hotter sauce, leave more of the ribs on the Jalopeños. I can’t tolerate the extreme heat so my sauce is only mildly hot.


Read Full Post »

Way back in 2009, I blogged about this recipe from the LCBO magazine, Leek and Mushroom tart but I didn’t have a photo of it. It’s quite a tasty tart, particularly if you use puff pastry as the base. It’s definitely not something we eat often so I thought I’d splurge and reblog about it. It makes a lovely brunch dish.

LCBO’s Leek and Mushroom Tart

Makes one tart 35.5 cm x 11.4 cm x 2.5 cm (14″ x 4.5″ x1″)

For the original recipe, please click here.

Ingredients:

  • 375 mL Evaporated Milk or heavy cream
  • 2 cloves garlic, peeled
  • 1 large egg
  • Salt and freshly ground pepper
  • 30 g unsalted butter
  • 250 g mixed mushrooms (shiitake, porcini, cremini, oyster etc.), stems removed where necessary and thickly sliced
  • 1 medium wild leek cleaned well and cut into thin slices
  • 30 mL white wine
  • 2.5 mL chopped fresh thyme
  • One 35.5 cm x 11.4 cm x 2.5 cm tart shell, partially baked
  • 2 long slices of prosciutto, or 4 small rounds, cut or torn into smaller bits

Directions:

  1. Preheat oven to 350°F (180°C).
  2. Place Evaporated Milk or heavy cream and garlic cloves in a large pot over medium-high heat. Bring to a boil then turn the heat down to low and simmer gently for 25 minutes or until milk is flavoured with the garlic and reduced to 250 mL and garlic is very soft. Set aside to cool. Remove garlic cloves, mash with a fork and return to cream. When cool add egg and beat until uniform. Season with salt and pepper.
  3. Heat 15 g butter in a skillet over medium-high heat. Add mushrooms and sauté for 2 to 3 minutes or until browned. Season with salt and pepper to taste and scrape into a bowl.
  4. Add the remaining 15 g of butter to pan and heat over medium heat. Add leeks and sauté for 1 minute or until they are softened. Add wine and thyme to pan and cook, stirring, for 1 minute more or until leeks are limp and the liquid has evaporated. Remove from heat.
  5. Arrange mushrooms and leeks in the tart shell and pour milk over top (making sure that mushrooms and leeks peep through the cream.
  6. Top with prosciutto (this will get very crispy).
  7. Bake for 30 minutes or until set and lightly golden. Allow to cool 10 minutes before serving.

Read Full Post »

We had a little break from the Christmas rush on boxing day and we made our pilgrimage to Niagara-on-the-Lake. We love to stay at Harbour House because the rooms are nice, the people are wonderful and they have a few perks that we like to take advantage of: a lovely breakfast spread in the morning room, wine and cheese in the lobby between 4-5 every night, free shuttle service to any restaurant within NOTL! During our last night, we dined at The Cannery and I noticed they had a twice-baked soufflé on the menu so I immediately amended our NYE menu to include a twice-baked soufflé.

We had some friends over for New Year’s Eve and I decided to make a tapas evening. We had six courses but were too full so we only had five of them. I spread the evening out as much as possible so we ate from 7:30-10:30. The courses were:

  • Zucchini Fritters with Sriracha Aioli
  • Twice Baked Mushroom Soufflé
  • Coconut Shrimp with Sweet and Sour Dipping Sauce
  • Crab Gyoza with Ginger Soy Dipping Sauce
  • Mussels in a White Wine Broth and Baguette
  • Cheese Course (this is the one we saved for the following day).

It was a nice way to spend the evening, just noshing and chatting away. We hadn’t seen these friends since mid-November so we had a lot to catch up on. But there wasn’t a lot of talking during this course. Just eating!

Twice Baked Mushroom Soufflé

Original recipe by Lorraine Elliot of Not Quite Nigella.

Makes about 500 mL (~15 oz)

Ingredients:

  • 15 g butter, plus additional for buttering ramekins
  • 15 g plain all purpose flour
  • 80 g shiitake mushrooms, sliced medium thickly
  • 40 g chestnuts, roasted and roughly chopped
  • 10 mL roasted garlic purée
  • 125 mL milk, heated
  • 1 egg, separated
  • 40 g goats cheese, crumbled

Directions:

  1. Preheat the oven to 350° F (180° C).
  2. Butter the ramekins well, all the way up the sides. Boil some water.
  3. Dry roast the mushroom slices in a non-stick pan so that they colour a little on both sides and much of their moisture has evaporated. Set aside.
  4. Melt the remaining butter in the pan and add the flour all at once. Cook the flour for a minute without burning it. Add the milk and whisk until smooth, it will be very thick.
  5. Chop the slightly cooled mushrooms and add them with the roasted, chopped chestnuts and roasted garlic purée to the roux and whisk well.
  6. Add the egg yolk and stir well to combine. Set aside to cool.
  7. Meanwhile, beat the egg white until stiff but not dry. Take about 1/4 of the beaten egg whites and stir it into the roux mixture to loosen. Fold in the remaining egg whites until well incorporated but not deflated.
  8. Divide the mixture into the prepared ramekins and bake in a bain-marie (this is why you were boiling the water) for 35-40 minutes or until tops are lightly golden (remember, they will be baked again).
  9. Allow to cool in the ramekins for about 5 minutes (they will deflate a bit), then gently loosen sides with a sharp knife and turn them out onto a cooling rack and cool until room temperature.
  10. Use immediately or store in the refrigerator until needed. If you are not going to use it for a few days, wrap each soufflé individually in plastic wrap and then bag in a large ziplock freezer bag. Freeze until required.
  11. To defrost, remove from the freezer the night before it is required and defrost in the refrigerator. The microwave is not suitable for this step.
  12. Lay the soufflés into individual ovenproof dishes and prepare the béchamel finishing sauce.

Ingredients for Béchamel Finishing Sauce:

  • 5 g unsalted butter
  • 15 g all-purpose flour
  • 250 mL milk
  • Pinch of thyme leaves
  • pinch of nutmeg
  • season to taste.

Directions for Béchamel Finishing Sauce:

  1. Melt butter in a small saucepan, add the flour and cook the roux without burning for about 1 minute.
  2. Slowly add the milk while whisking to create a smooth sauce, cook until thickened.
  3. Flavour with the thyme leaves and nutmeg.
  4. Pour over the defrosted soufflés in an oven-proof bakeware and bake about 25 minutes in a preheated 350° F (180° C), to heat it through.

Read Full Post »

We are knee deep in cocktail party season and I’m going to post a recipe that will keep you on budget! Do you love Boursin? Are you appalled at the price? In Toronto, a little 150 g (a touch more than 1/2 cup) pot could cost $6.00+++!!! So I improvised and created this herb-infused cream cheese spread, it’s equally as good and costs a lot less! Make this a couple of days in advance so the flavours have time to meld, you won’t be sorry.

Herbed Cream Cheese Spread

Makes about 250 mL or 1 cup.

Ingredients:

  • 30 mL olive oil
  • dry or fresh herbs, to taste
  • garlic, minced finely
  • 70 g butter, softened
  • 100 g cream cheese, softened
  • 100 g ricotta
  • salt & pepper, to taste
  • Chives or green onions, finely chopped

Directions:

  1. Heat olive oil over low heat with the fresh herbs and garlic, simmer for 10 minutes to infuse. Allow the infused oil to cool completely.
  2. Pour infused oil through a fine sieve and reserve, discard herbs and garlic.
  3. In a small processor, pulse the cheeses and butter together until light and fluffy. Slowly pour in the cooled olive oil and continue to pulse until it has been entirely incorporated and smooth. Season with salt and pepper.
  4. Serve at room temperature and watch it disappear.

Notes:

  • The first time, I used a combo of fresh lemon thyme, rosemary, tarragon and Greek oregano. This time, I used finely grated Herbes de Provence.
  • I had homemade ricotta, but if you do not, just double the cream cheese, it’s still delicious!
  • Use whipped cream cheese for a similar texture to the actual Boursin.
  • I like to serve this spread in a small glass pot but any container will do. To serve similar to the actual Boursin, line a ramekin with plastic wrap and pack the spread into the plastic wrap and freeze. To serve, Remove from the freezer and invert on a platter and remove plastic wrap. Allow the dome to come to room temperature.
  • Serve with bread, crackers or crudité.

Read Full Post »

This past July, we traveled to Wisconsin to visit friends at their gorgeous lake house; it was bittersweet because they were selling it to move down to Arizona for good. The weather wasn’t great so we only got in one very short boat ride but we enjoyed every last minute. We shall miss visiting this little gem in Wisconsin. But that just means we’ll be visiting Arizona even more!

While we were in Wisconsin, our dear friends introduced us to an incredible product: Rick Bayless’ Fonterra Grill salsa! It was to die for! The layered flavours of grilled vegetables and fresh cilantro created a complex salsa that was totally unexpected, so of course, I had to try to recreate it upon our return. I used our Big Green Egg which is the ultimate charcoal barbecue! It imparts the most incredible smoky flavours but if you have gas or propane, just fire up some wood chips on the side for a similar experience.

Grilled Vegetable and Cilantro Salsa

A KitchenInspirations Original Recipe

Yields about 1 Litre of salsa (about 4 cups)

Ingredients:

  • 1.5 kg tomatoes, seeded (reserve seeds and pulp for tomato jam)
  • 2 sweet red peppers
  • 4 jalopeño peppers, seeded and veins removed or to taste
  • 2 nora peppers, rehydrated in warm water, skins and seeds removed (yields about 15 mL flesh), optional
  • 1 sweet onion
  • 1/2 garlic bulb, skin on
  • 2.5 mL smoked sweet paprika
  • Salt
  • Cilantro leaves, good handful or to taste
  • juice of 2 limes

Directions:

  1. Remove seeds and pulp from the tomatoes and set cut-side down on a cooling rack lined with parchment paper. Overnight is best, you want to dry out the tomatoes as much as possible.
  2. Roast the tomatoes, peppers, jalapeños and onion on an open flame (I used our Big Green Egg) until softened and slightly charred. Wrap the garlic in parchment and then foil and roast over the open flame until soft.
  3. Remove the skins from the tomatoes, peppers and garlic, discard skins. Add roasted veggies and cilantro leaves to a food processor and chop to desired consistency. Add salt and lime juice and pulse to combine.
  4. Add the scraped flesh from the Nora peppers to the processor and pulse a few more times.
  5. Fill sterilized jars with the salsa. If you are not using right away, you will want to process the jars in the typical canning methods. I processed my salsa for 15 minutes.

Tomato Jam

Yields a scant 250 mL (1 cup) tomato jam

Ingredients:

  • 370 g tomato pulp (all the seeds and pulp from the tomatoes that you plan to roast for the above recipe)
  • 100 g shallots, minced finely
  • 10 g garlic, minced finely
  • 15 mL EVOO
  • 50 mL cooking sherry
  • 15 mL white balsamic vinegar
  • 1.25 mL baking soda
  • basil, chiffonade
  • salt, to taste

Directions:

  1. Cook the onions and garlic until caramelized, deglaze the pan with cooking sherry. Add the tomato pulp, basil, season with salt and then add the baking soda, being careful because the baking soda will foam up.
  2. Cook for about an hour until most of the water has cooked off. About half-way through the cooking, add the white balsamic vinegar and stir well.

Notes:

  • I used a combination of vine-ripened tomatoes and Roma because that is what looked the best to me.
  • I have mentioned this before, baking soda neutralizes the acidity of the tomato and therefore there is NO NEED TO ADD SUGAR (yes, I yelled that!).
  • You could do whatever you wish with the pulp, I just don’t like throwing away food!
  • Since this post was written, I’ve made two additional batches of this salsa and the last batch was rush so I used the entire tomato instead of seeding it, it made for a wetter salsa so I strained it before canning. The seeds added a bit more texture that wasn’t unpleasant. But, I’d still go the extra mile and seed the tomatoes if I have the time.

Read Full Post »

In late March/early April, we spent two glorious weeks in Arizona. We stayed with friends for this duration because we had offered to puppy-sit (Jordan) while they took a quick 7 day holiday in Ireland. We had never puppy sat before but their beautiful black lab, Jordan is quite possibly one of the laziest dogs we have ever met so she was really no problem at all. We did get her used to three walks per day, that is, until we bumped into a woman carrying a black light, walking her dog after dark. I had to ask and yes, it was to detect scorpions. That was the end of our after dark walks. Period.

I like to arrive with gifts in hand and these basil Parmesan Straws were the perfect hostess gift because I had a bunch of basil that needed using a couple of days before our departure. Plus they are pretty tasty. Jordan thought so too.

Sun-dried Tomato, Basil and Parmesan Straws

A KitchenInspirations Original Recipe

Makes about 75 pieces

To print this recipe, please click here.

Ingredients:

  • 290 g flour
  • 10 g Fresh Basil, finely chopped
  • 50 g sun-dried tomatoes in oil, roughly chopped
  • 10 g garlic, finely minced
  • 110 g unsalted butter (cold)
  • 30 g  grated Parmesan cheese
  • 2 eggs, beaten separately
  • 15-30 mL water or milk
  • Sea salt

Directions:

  1. Pre-heat oven to 400°F.
  2. Put all dry ingredients into a food processor, including the basil, sun-dried tomatoes and garlic, and process to mix well.
  3. Add the butter and process to coarse granules.
  4. While the blades are running, pour in the egg and process until a soft ball forms. If this does not happen, drizzle little bits of water until a soft ball forms.
  5. Remove from processor and using a small amount of flour, roll out the dough to about 1/2 cm thickness. Cut into 8cm x 7 mm straws and position evenly on a cookie sheet. Brush with second egg and sprinkle with sea salt.
  6. Bake for 12-15 minutes until golden.
  7. Remove and allow to cool. This will store well in a cool, dark place or freeze.

Notes:

  • I like to use a plastic ruler to cut the straws evenly. My ruler is a dedicated food ruler that never is used with pens or pencils or markers!
  • This type of rolling pin gives you evenly thick dough, but as I have mentioned previously, it is a pain to unscrew the disks and I inadvertently have to wash all of the disks each time I use it.
  • This dough is a bit wetter than some of my other recipes because of the sun-dried tomatoes and fresh garlic.

Read Full Post »

In an effort to eat healthier, I developed this recipe for a snack that is flavourful, crunchy and delivers a bit of protein and vitamins! The almond flour helps with the crunch as does the coconut flour, the dehydrated onion and garlic give the flavour this healthy snack delivers.

Kale Chips

A KitchenInspirations Original Recipe

Serves 2 to 4

To print recipe, please click here.

Ingredients:

  • 120 g kale, washed, dried and cut into medium-sized pieces
  • 30 g almond flour
  • 20 g coconut flour
  • 10 g dehydrated onion
  • 5 g dehydrated garlic
  • 30 mL olive oil
  • salt to taste

Directions:

  1. Pre-heat the oven to 93° C (200°F )(I used my convection (fan) setting).
  2. In a dedicated spice/coffee mill, grind the almond flour, coconut flour, onion and garlic until a fine powder. Set aside.
  3. Wash kale and dry as well as possible. Remove thick ribs. Cut into bite-sized pieces keeping in mind that they will shrink to about half their raw size.
  4. Drizzle olive oil over kale and toss to coat evenly. I gave them a quick, light massage to evenly coat each leaf.
  5. Spread kale on a cookie sheet so they are on one layer and not overlapping. Sprinkle lightly with about 7 g of almond flour mixture (I found it easier to sprinkle through a fine sieve).
  6. Bake for 15-20 minutes tossing occasionally until crisp. Sprinkle with salt.
  7. Serve immediately.

Notes:

  • Spice up the finished kale chips with a little cayenne pepper.
  • Instead of olive oil, use chili oil to coat raw chips.
  • Spread the oil-coated chips evenly on a cookie sheet to dry quickly and evenly.
  • A medium to larger cut leaf will dehydrate to a bite-sized chip.
  • Store the leftover coconut flour mix in an air-tight container for future kale chips.

Nutritional facts for kale chips

Read Full Post »

Just prior to Christmas, I did a couple of jobs which had me buying a lot of garlic. When I say a lot, I mean literally dozens of heads! Of course, I gave away as much as I could but the majority came home with me. I am not one to toss perfectly good food in the bin, so I decided to roast the heads and freeze them for quick additions to sauces and soups. Now, I must say that this idea is genius because roasted garlic is so tasty and having some quick at hand makes it easy to add another level of flavour without the harshness of raw garlic. Over the holidays, we got together with our wonderful neighbours and I made this delicious roasted garlic dip.

Now there is that cold winter light!

Roasted Garlic Dip

A KitchenInspirations Original Recipe

Serves 6-8, makes about 300 mL

To print recipe, please click here.

Ingredients:

  • 200 g roasted garlic (about 4 heads)
  • 125 g cream cheese, room temperature
  • 50 g Greek Yogurt
  • Sea salt to taste

Directions:

  1. In a small bowl large enough to accommodate a stick blender, combine all of the ingredients and purée until smooth and silky.
  2. Serve at room temperature.

Notes:

  • I roast garlic by cutting off the bottom of the head (the root end) and setting it in about 30 mL of olive oil. I like to cover the garlic I roast so it steams and roasts at the same time. I roast the garlic in a 350° F oven for about 45 minutes or until they are very soft.
  • To extract the garlic, simply squeeze each clove into a container.
  • Some people add freshly grated Parmesan to this dip but I find it rich enough without it.
  • Save the cut ends of the garlic for soup stock.

This dip would also be a tasty cream sauce for pasta.

Read Full Post »

During the month we spent in Arizona, we had the pleasure of celebrating American Thanksgiving with our dear friends down there. Our dear friends who live there offered to make the turkey (thank goodness, as I did not have any of my special kitchen tools!) so I offered to make a few different sides. We had dear friends visiting from Toronto and they are vegetarian and I wanted to make something special for them for Thanksgiving, so I made this Mushroom, Chestnut and Bean Wellington. I purchased the puff pastry to make it easier but I made everything else. I was surprised to find roasted Italian chestnuts (in the Kosher section, no less!) but sadly the mushrooms were just plain cremini and white mushrooms, not much variety. It’s always a bit of a challenge to cook in a strange kitchen and shop in a different part of the world, but I think this one turned out wonderful and with a variety of mushrooms, it would be amazing! Please excuse the photos, this is the one and only blog post I managed to eak out during our stay in Arizona, I was THAT busy!

Scroll down to the end of this post to see the house we rented. It took us some time to find one that was decorated in light airy colours, most of the rentals are dark and dowdy, filled with ‘granny’s furniture’ and I just couldn’t bear to live in that for a month! Although I might have chosen a slightly lighter tone for the walls, this house made me happy.

Fresh out of the oven.

Mushroom, Chestnut and Bean Wellington

A KitchenInspirations Original Recipe

Makes 1 Wellington about 30 cm x 15 cm (12 inches x 6 inches)

To print recipe, please click here.

Ingredients:

  • 1/4 cup sweet onion, finely chopped
  • 1 tbsp unsalted butter
  • 1 tbsp EVOO
  • 2 cups variety of mushrooms, roughly chopped
  • 1 tbsp garlic, finely minced
  • 1/2 cup carrots, finely cubed
  • 1/2 cup celery, finely cubed
  • 1/2 cup zucchini, finely cubed
  • 1/2 cup roasted chestnuts, roughly chopped
  • 1/2-1 tsp fresh rosemary, finely minced
  • 1/2 cup panko breadcrumbs
  • 1 cup navy beans, soaked
  • 4 cups vegetable stock, divided
  • 1/2 cup port
  • salt
  • pepper
  • 1 puff pastry sheet
  • 2 tbsp Dijon mustard
  • 1 egg yolk, lightly whisked with a little water.

Directions:

  1. Cook the navy beans in 3 cups veggie stock or water, cool.
  2. In a heavy bottom pan, caramelize the onions in the melted butter and olive oil on medium heat (about 20 minutes). Add mushrooms and cook until the mushroom liquid has evaporated. Turn the heat up and caramelize the mushrooms add the port to deglaze the pan.
  3. Add the garlic, carrots, celery, zucchini and roasted chestnuts and sauté until carrots are slightly softened.
  4. Add the rosemary, panko, cooked navy beans, and veggie stock. Season to taste. Remove from heat and cool completely.
  5. On a cold surface, roll out the puff pastry sheet to about 30 cm x 40 cm (12 inches x 16 inches). Brush the Dijon mustard on the pastry and mound the cooled mushroom filling in the centre of the pastry. Turn up each side until they meet in the middle and pinch closed. Pinch the ends closed and trim off excess pastry.
  6. Turn the log onto a parchment lined baking sheet seamed sized down, and brush with the egg yolk. Decorate with leaves from the leftover end pastry and brush with egg wash. Bake in a hot 400° F oven for 35-40 minutes or until golden.
  7. Serve sliced hot out of the oven, or reheat to serve.

A tasty treat wrapped in delicious buttery pastry.

Click on any photo for the slideshow.

Read Full Post »

In October I did some really cool TV jobs! I cooked for the lovely and talented Chef Anjum Anand from her I love India Cookbook for Your Morning (click here to see the segment (about 1 min of commercials)) and Mark Bittman, the original author of the infamous No-Knead Bread! recipe (click here to see the segment (only about 30 seconds of commercials)) and Ocean Wise Executive Chef, Ned Bell from his beautiful new cookbook, Lure!

Ned is awesome! It was indeed a pleasure to work with him. Yes, those are ‘sensible shoes’ as a fellow food stylist recently mentioned on instagram!

Mark was incredibly humble and amazing to work with (although, I wish the camera-man would have said something about the angle of the burgers!)

Mark released his Tenth Anniversary Edition of How to Cook Everything Vegetarian cookbook, simple meatless recipes for great food! The book is enormous, over 700 pages and it’s packed with great info, techniques, and wonderful recipes.  Although Mark is not vegetarian, he believes we should be enjoying a more plant-based diet. What I liked about his recipes is that they are truly vegetarian and not just cop-out vegetarian like spaghetti with tomato sauce that you see on some menus! I cooked tofu, tempeh, seitan and a really interesting beet burger. The recipes were easy to follow and came together quickly without special equipment. I will definitely make a few again and even others from the delicious cookbook.

Although this recipe isn’t from his cookbook, it is indeed vegetarian.

Basil and Sun-dried Tomato Gougières

Makes about 50 gourgières. To print the recipe, please click here.

Ingredients:

  • 250 mL (1 cup) water
  • 128 g (1/2 cup) unsalted butter
  • Pinch salt
  • 128 g (1 cup) all-purpose flour
  • 4 eggs
  • 40 g (~1/4 cup) sun-dried tomatoes (not in oil)
  • 15 g (~3 cloves) garlic cloves, finely minced
  • 7 g  (~10) basil leaves, chiffonade

Directions:

  1. Preheat the oven to 425° F (218° C). Line a baking sheet with wet parchment paper (crumple the parchment into a ball and saturate with cold water and wring out, flatten with your hand on the baking sheet).
  2. In a heavy bottom saucepan, combine the water, butter, salt and garlic and heat until melted. Remove from heat and add the flour all at once, stirring well. Return to heat and cook for a couple of minutes until it comes away from the sides of the pan.
  3. Remove from the heat and beat in one egg at a time until fully incorporated, being careful not to scramble the eggs. Fold in the herbs and chopped sun-dried tomatoes.
  4. Using a small ice cream scoop dipped in water with a splash of oil, scoop out single balls onto the baking sheet about 5 cm (2 inches) apart. Bake for 20 minutes or until tops are golden and the puffs have poofed about double in size.
  5. Cool on a wire rack. Continue to bake until you have exhausted your batter.

A light and delicious cocktail nibble.

Read Full Post »

Bloor West Village (BWV) is really starting to shape up in terms of restaurants. Of course we have more than our share of the usual pubs and sports bars but fine dining and house made food restaurants have had a difficult go at it mainly due to greedy landlords offering absurdly high rents. But in recent times, the restaurant selection has expanded and now we have some excellent choices for good food. One of the more recent places is a Korean BBQ place and although the food is wonderful, the ambiance is not (I think I counted about 21 TVs surrounding the perimeter just below the ceiling, and it’s not a huge place!) so we will reserve our patronage for lunch or take out.

I was immediately intrigued by the spices and flavours of Korean cuisine but my only experience was with Charles (Five Euro Food, in hiatus presently) when we met up in Paris in 2012 and Sissi’s tantalizing recipes for pickles and kimchi. So one afternoon, I decided to explore said cuisine at home. Of course, I was ill-prepared and did not have some of the specific spices (Korean chili paste, Korean red pepper powder) so I had to improvise using ingredients found in my European kitchen. We loved it and, because we have a relatively young Korean palet, did not immediately taste a huge difference compared to the restaurant food we’ve experienced. In general, (in my opinion), Korean food can be rather spicy (hot) and may not be for everyone (they seem to have only one way to make it: really, really hot) so the recipe below is a slightly tempered version. Of course, you may make it as hot as you like.

Korean Pork “Bulgogi”

For the original recipe, please click here.

Print Korean “Bulgogi” Recipe

Makes 2 servings

Ingredients:

  • 200 g Pork Tenderloin, thinly sliced
  • 1/2 large sweet onion, halved and thinly sliced
  • 4 medium garlic cloves, crushed
  • 45 mL (3 tbsp) fresh ginger, finely minced
  • 125 mL (1/2 cup) sweet pimento paste (like this) or Korean chili paste
  • 2 tbsp toasted sesame seed oil
  • 63 mL (1/4 cup) dark soy sauce
  • 30 mL (2 tbsp) Hungarian sweet paprika (or Korean chili powder)
  • 3 mL (1/2 tsp) smoked Spanish paprika
  • 5 mL (1 tsp) hot Hungarian paprika paste (like this), or to taste
  • 30 mL (2 tbsp) honey
  • 30 mL (2 tbsp) mirin
  • 2 medium scallions, white and green parts, finely sliced
  • 10 mL (2 tsp) toasted white and black sesame seeds

Directions:

  1. Combine everything but the pork, scallions and sesame seeds in a blender and blend until smooth.
  2. Toss the pork with the onions; cover with 1/2 of the marinade (reserve the rest for another time) and coat well, refrigerate for 1-4 hours.
  3. Warm a cast iron pan on the grill (or stovetop), add a little oil and cook the marinated meat and onions until the pork is cooked through. Leave the top open to allow the sauce to thicken.
  4. Serve with finely sliced scallions and toasted sesame seeds over sticky rice or cauliflower rice.

This is a richly flavoured Korean inspired dish.

Notes:

  • This version is not an overly spicy dish, but it is richly flavoured with a very slight kick.
  • I modified the ingredient list to suit what I had in my pantry. I cannot say whether the original recipe would be significantly spicier but my guess would be, that it is.
  • Make a double or triple batch of the marinade and reserve for future meals, it really is tasty.

Or you may use chicken, like this and make it a Bulgogi Bowl! I made a quick carrot pickle and topped shredded ice burg lettuce for a lighter dinner, it was wonderful!

Read Full Post »

chickenschnitzel_first

We just got back from a two-week holiday in Arizona. I apologize for not commenting as much as I usually do, but you know the drill on holidays.

Regarding Arizona, I would love to say it was perfect weather, and perhaps it was, for Toronto weather but it was cold, sometimes snowy and rainy. Our time with dear friends more than made up for the lousy weather. Although we did have a few gloriously sunny days before the ugly, rainy days we spent in Sedona. Fortunately, our time at the Grand Canyon was clear, albeit cold (read: two layers of leggings, three long-sleeved Ts and a light winter jacket with hat, mittens and scarf). Once I get our photos sorted, I’ll post a few good ones on the blog, in the meantime, I thought I’d share one of my favourite ‘diet’ dishes, chicken “schnitzel” with roasted garlic cauliflower mash!

Chicken “Schnitzel” with Roasted Garlic Cauliflower Mash

A KitchenInspirations Original Recipe

Serves 2

Ingredients:

  • 460 g cauliflower
  • 2-3 cloves garlic, roasted
  • 1/4 cup water
  • 165 g chicken breast, boneless, skinless
  • 35 g egg white
  • 2 Ryvita whole wheat snack bread
  • 10 g whole wheat flour
  • 1/4 cup Herbes en Provence with granulated onion and garlic
  • few sprays of non-stick spray
  • chopped fresh dill for garnish

Directions:

  1. Pre-heat oven to 425° F.
  2. Break down cauliflower into equal-sized florets and set on a baking sheet lightly sprayed with non-stick spray. Roast until softened. Add a bit of water at the end to steam to perfect tenderness for about 5 minutes.
  3. Add the cauliflower florets into a glass bowl and add the roasted garlic cloves. Blitz with the hand blender until creamy and smooth, adding a bit of water if necessary (I just added the left-over steaming liquid from the roasting pan). Set aside.
  4. Divide the chicken into two equal portions and butterfly each, cover the chicken with plastic and flatten it to about 0.5 cm or 1/4 inch with a kitchen mallet. Put them into the fridge.
  5. Add Ryvita to a small zip lock bag and smash into smaller but coarser bits. Add the Herbes en Provence and mix well.
  6. Add the egg whites into a large flat bowl and beat with a fork.
  7. Remove one chicken cutlet from the fridge and lightly dust each side with the whole wheat flour. Then dip it into the egg whites to cover both sides. Sprinkle each side with the Ryvita mixture to coat evenly. Repeat with second cutlet.
  8. Heat a non-stick frying pan. Spray each side of each cutlet and cook cutlets on both sides until nicely golden and the internal temperature is 185°F. Serve immediately with a slice of lemon and some fresh dill sprinkled onto it.

Notes:

  • The diet I use allows for two 100 g servings of protein per day.
  • If you don’t have roasted garlic on hand, simply put a few unpeeled cloves into a ramekin filled with a little water or stock and sprinkle with sea salt. Bake until softened.
  • Even though the chicken is very thin, it is so tender, it will knock your socks off.

Read Full Post »

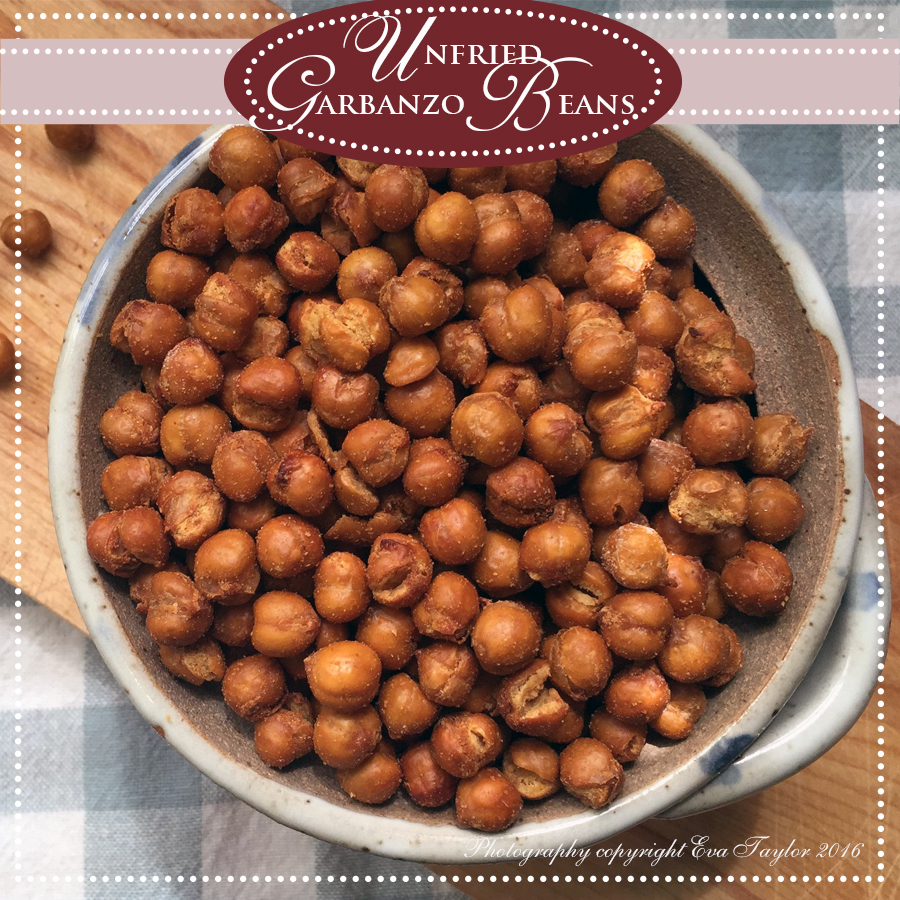
UnfriedGarbonzoBeans_First

This recipe nothing new. You’ve seen it posted a million times on a million blogs (OK, maybe I exaggerate!). And I wasn’t going to post about it, but it turned out SO WELL so I kinda felt like I had to. I’ve made the oven roasted garbanzo beans (chickpeas) before and although they were pretty good, they didn’t have the crispy crunch that I had been lead to believe they would. Sure they were crisp on the exterior but the interior was rather pasty. These beans are crunchy through and through! In fact, if I hadn’t “unfried” them, I would not, could not, have believed that they were not deep fried. Yes, you read that correctly, my dear friend: they are UNFRIED.

Some time back, I cooked for a short testimonial-piece for the T-Fal ActiFry Express XL appliance (not published yet) where I had to cook twelve dishes in advance for an on-location motion shoot with a local celebrity. The great folks at T-fal gave me an ActiFry Express XL for the job. I started cooking at 5am so that food would look fresher than cooking it the night before and left just in the nick of time to get there (far end of town). We got the house at 12:30 and had to be out at 3:30! It was challenging, to say the least, particularly because the kitchen was the commercial set! I had to prep on the floor in the hall, and at one point, in the garage so that I could have access to an electrical outlet! That profession kitchen truck would have come in very handy!

JT and I are not big on fried foods, so this cool appliance is perfect for us and recently I needed a cocktail snack for the cottage and I wanted something healthy with protein and crispy garbanzo beans (chick peas) popped into my head. I thought the beans would be perfect for the ActiFry (see notes). So I purchased two 540 mL (19 oz) cans of low sodium chick peas (garbanzo beans), rinsed and dried them on a clean towel and popped them into the non-stick coated ActiFry. The result was magical, it did not dehydrate the beans (which sometimes makes them a bit leathery), it actually fried them in 1 tbsp oil! They are crunchy through and through! And the next best part? I didn’t have to turn on the oven because it was 30° C (86° F) outside and humid! And cleanup was a cinch (I vacuumed it and wiped it out with a soft cloth).

I know that this recipe will be a repeat for all parties from now on!

UnfriedGarbonzoBeanSnack

“Unfried” Garbonzo Beans (or chick peas)

A KitchenInspirations Original Recipe

Makes ~250 g or 2 cups unfried garbanzo beans (chick peas)

Ingredients:

  • 540 mL (19 oz) cans of low sodium chick peas
  • 1 tbsp dehydrated onion powder (see notes)
  • 1 tbsp granulated garlic (see notes)
  • 1 tsp smoked paprika
  • 1 tsp cumin
  • 1 tsp salt
  • 1 tbsp canola oil
  • dash of sesame oil

Directions:

  1. Combine all of the spices and salt and mix well.
  2. Drain and rinse the garbanzo beans (chick peas) and lay out on a clean towel to dry for 30 minutes).
  3. Add the dried beans to the ActiFry bowl and drizzle in the oils. Set the timer to 45 minutes and close the lid. Start, allow the paddle to rotate a full circle and open the lid and sprinkle about 1/3 of the spice blend onto the beans. Close the lid and allow the paddle to go around twice. Repeat until all of the spice blend is used up. Close the lid and wait for the magic to happen.
  4. Test the beans around 35 minutes and then about 5-minute increments. You want a crunch, much like the crunch you get when you eat potato chips. Keep it going until you achieve a great, crunchy bean.
  5. Pour the beans out onto a clean cookie sheet (with sides) and allow to cool. Store in an air-tight container in the fridge until needed (it was too humid to store in the pantry).

Notes:

  • I keep a container of Kirkland Signatur Chopped Onion and I combine it with Kirkland Signatur Granulated Garlic (not garlic powder) and blitz it in a coffee come spice grinder for this purpose (great on popcorn too!).
  • Be creative and come up with your own blend of spices, like garlic, ginger and sea salt.
  • I did not have time to use dried beans but feel free to soak, dry and ActiFry dried beans, I’m sure the result would be the same.
  • Although the ActiFry paddle moves around at a very slow pace, I find larger things get a bit beat up without the stationery tray but it’s perfect for these beans.

Disclosure:

Eva Taylor/Kitcheninspirations received T-fal ActiFry Express XL from Group SEB, Toronto; this recipe was developed by Eva Taylor for Kitcheninspirations, and the opinions expressed in this post are that of Eva Taylor/Kitcheninspirations.

Read Full Post »

SrirachaSauce_First

Recently, I was given a small basket of a variety of chili peppers. I don’t know about you, but these days I don’t like to tempt fate with overly hot things so incorporating them into a dish was out of the question. In the bunch were scotch bonnets, serranos, poblanos, jalopeños and Thai chilies so it was a basket of epic heat! Since I’ve already made Sweet Chili Sauce with Dried Apricots and Hot Sauce I decided to make a version of the very popular Sriracha Sauce because it is a staple in my pantry.

I love hot sauce, but sadly my innards, not so much so I wanted to  tame the heat without compromising flavour. The solution was grilling the peppers to a blistery/blackened stage, peeling and cleaning the seeds and veins out to temper the heat, the smoke flavour was a bonus! This recipe is roughly based on the link below.

Hot sauce.

Hot sauce.

Homemade Sriracha Sauce

Makes roughly 225 mL sauce.

Adapted from Leite’s Culinaria

Ingredients:

  • 400 g variety of hot peppers
  • 10 g garlic, minced
  • 25 g granulated sugar
  • 5 g sea salt
  • 125 mL white vinegar or to taste

Directions:

  1. Grill the hot peppers until their skin is blistered and black. Set hot chili peppers into a glass bowl and top with a plate to further steam the peppers (this makes peeling much easier, but if you have issues, just microwave them on high for 10-20 seconds). Peel, remove seeds and veins (the sauce will be hot enough even with this step) using gloves to protect your fingers (these are extremely hot peppers).
  2. Combine all ingredients except the white vinegar in a food processor and pulse until you have a paste. Scrape into a glass jar and tightly seal. Allow to sit on the kitchen counter (bench) for 1 week, stirring once daily. The mixture will ferment so if you see bubbling action, it is par for the course.
  3. After one week, transfer the chili mixture to a saucepan over medium heat and add the vinegar and bring to a boil, then lower the heat and simmer 5 minutes. Allow the mixture to cool slightly and then purée it again using an immersion blender. Push through a fine sieve, taste and season with sugar, salt and vinegar as desired.
  4. Store in the refrigerator in a glass jar with a tight lid. The original recipe indicates that this sauce is good for six months.

SrirachaSauce_8696

Perfect timing because I’m going to need a small bottle for the cottage!

Read Full Post »

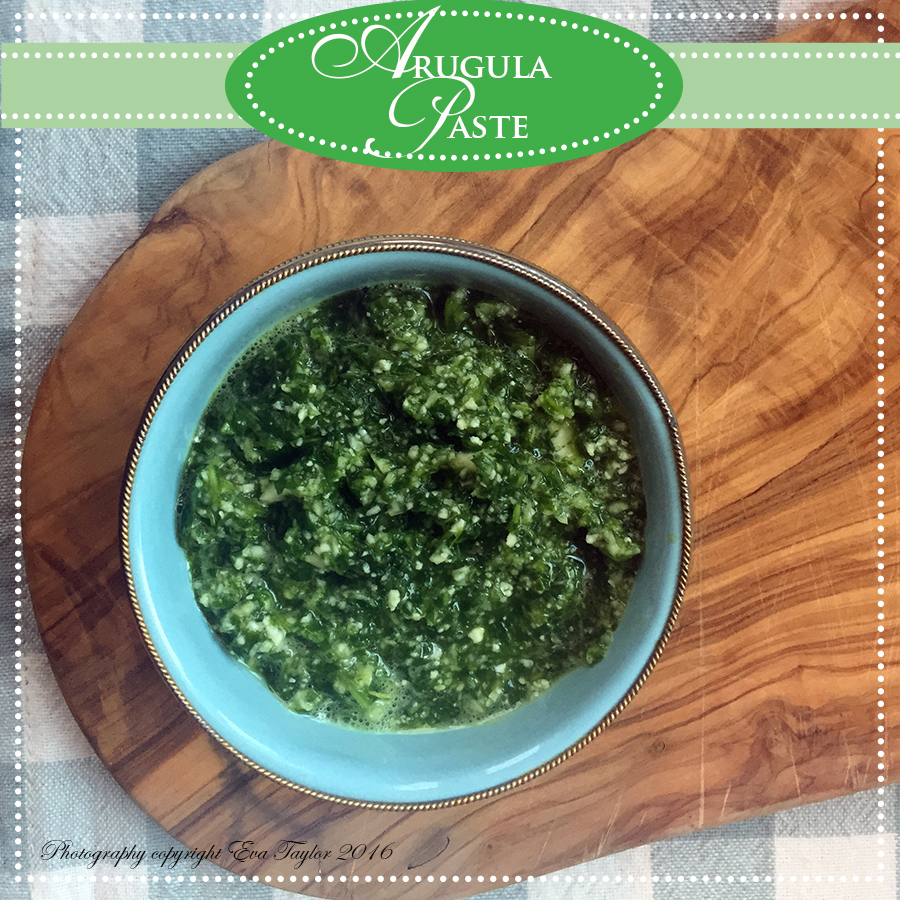
*First ArugulaPaste

So far, winter hasn’t been horrible (dare I say it out loud?). In the last week, we’ve only had a couple of super cold days (-23° C or -9.4° F) but we’ve only had one snow storm and although it was super wet, it wasn’t that bad (shovelling was awful!). The one thing I will complain about is the lack of sunshine November and December was…gloomy, gloomy, gloomy! Although January’s start has been chilly, it has been sunny! So if I have to give up warmth for sun, so be it.

Have you made a New Year’s Resolution? JT and I decided that we need to get back on track and eat more vegetables and limit eating out (oh dear, we do eat out a lot). So, I have determined that the next month or so I will dedicate the blog to super healthy, clean eating, roughly based on a ketogenic diet. I say roughly because I’m going to allow myself one day per week to ‘cheat’ (TBD)! I will comb through your lovely blog pages and get my inspiration there.

We’ve also decided to eat our main meal at noon instead our norm of 6 or 7 in the evening. We’re hoping that these changes will result in some shedding!

This condiment came about as I stared blankly in the refrigerator…so many vegetables but no inspiration! The bag of baby arugula called out to me…pesto, it whispered. Now I know many of you are pesto traditionalists and only basil, garlic, EVOO, pinenuts and parmesan will do…but what if you wish to limit calories? Yes, there is the argument that you should only use a little, but I wanted to start the week off right so I created this unique paste that resembles pesto (notice I didn’t call it pesto?). I received a solid thumbs up from JT, it has texture, a slight kick and it’s bright and beautiful green. A little sunshine on these gloomy winter days.

ArugualPaste_7953

The raw cauliflower gives makes a good substitute for the nuts, providing the slight crunch needed.

Arugula Paste

Makes a 125 mL (1/2 cup) sauce

A Kitchen Inspirations Original Recipe.

Ingredients:

  • 60 g raw cauliflower (either stems or florets or both)
  • 60 g baby arugula
  • 1-2 cloves garlic, finely minced
  • 2 tbsp white wine vinegar
  • 3 tbsp vegetable stock (home made)
  • sea salt to taste

Directions:

  1. Add the raw cauliflower to a small processor bowl, process until it becomes a fine meal.
  2. Add the arugula (may need to be added in smaller portions), garlic, vinegar and stock and process until a desired consistency is achieved (I wanted it relatively fine).
  3. Season with sea salt and process until totally combined.
  4. See serving suggestions in notes.

Notes:

  • Serving suggestions: pasta, sautéed vegetables, zucchini noodles, drizzled on tomatoes, meat or fish.
  • Add a spoonful or two into a simple oil and vinegar salad dressing or greek yogurt for a dip.

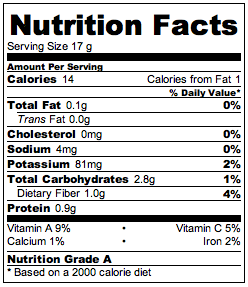
ArugulaPasteNFScreen Shot 2016-01-05 at 4.31.47 PM

Read Full Post »

BBQ Sauce_first

The Hungarians have arrived and the “to do” list is finally complete! Just in the nick of time too. We decided to start their visit off with a little welcome party but we all know it’s just my excuse to cook and feed my kin!!! I was fortunate enough to score a sizeable number of vine ripened tomatoes so I decided to make barbeque sauce because JT made a special request for Pulled Pork. The sauce turned out perfectly, sweet, piquant and zesty — cooking it with the pork tenderloin for 5 hours made the flavours all the more richer and balanced the vinegar very nicely. Like any low and slow cooked meal, I made the pulled pork a day in advance because we all know it tastes better the next day!

I’ve geared up a couple of posts for the following weeks, but I may be AWOL depending on how busy things get, so if I miss to comment on your blog or I don’t post, I apologize in advance. Thanks for understanding.

Barbeque Sauce

Makes 1.25 L (42 oz)

Ingredients:

  • 200 g onions, coarsely chopped
  • 50 g garlic, finely chopped
  • 125 mL white vinegar
  • 1.2 kg tomatoes, chopped
  • 30 mL tomato paste
  • 125 mL molasses
  • 50 g sundried tomatoes (not in oil)
  • 1/2 tsp salt
  • 1/2 cup packed brown sugar
  • 1 tsp smoked paprika
  • 1 tbsp of each sweet paprika, cumin, coriander and cocoa powder

Directions:

  1. In a splash of canola oil, sauté onions and garlic until translucent, add dry spices and stir until fragrant.
  2. Add remaining ingredients and stir well. Simmer for one hour or until dark and thickened.
  3. Purée until smooth and press through a fine sieve.
  4. May be kept in the refrigerator for 3-4 days or freeze for 3 months.

BBQ Sauce

Read Full Post »

The holidays are but a memory and we’re all back to our normal routines but we’re still seeing old and new friends whom we didn’t have time to see over the holidays. Wouldn’t it be nice to have a simple yet flavourful dip to offer? This garlic infused goat’s cheese was an hors d’œuvres I had about 12 years ago at an old friend’s place and it always makes the cut; when I realized I hadn’t posted a recipe for it on the blog, I thought 2015 is the time! It’s really so easy it’s not even a recipe but an inspiration, thinly sliced cloves of garlic with Extra Virgin Olive Oil, fresh aromatic basil leaves and tangy sun-dried tomatoes makes this absolutely irresistible. Mix it up and add some sun dried black olives instead of the sun dried tomatoes. The longer you allow the garlic slices to infuse the goat’s cheese the better and make sure you allow this dip to warm up to room temperature before you serve it. And for heaven’s sake, please don’t forget to count the garlic slices and make sure you remove every single one of them before serving because it could be a rude awakening for some poor soul.

Infused Goats Cheese

Makes about 1/2 cup of goats cheese dip

Ingredients:

  • 4 cloves garlic sliced thinly (about 4-5 slices each, count the slices and take note)
  • 1/4 tsp sea salt
  • 5 basil leaves sliced thinly
  • ~140 g goats cheese
  • 2 tbsp EVOO
  • 3 tbsp sun dried tomatoes in olive oil or chopped sun dried black olives

Directions:

  1. Spread the goats cheese into a resealable container. Spike the thinly sliced garlic into the goat’s cheese so it’s covering most of the cheese.
  2. Spread sliced basil over the cheese and poke them into the cheese. Sprinkle with salt and EVOO. Refrigerate at least 24 hours, longer is better.
  3. Before serving, transfer to a pretty plate and remove the garlic slices (this is why you count them). Dot with the sun dried tomatoes or chopped black olives.
  4. Allow the dip to come to room temperature to serve. Add more fresh basil, if you wish.

    This is the infusing process, the sun dried tomatoes or black olives are added just before serving.

    This is the infusing process, the sun dried tomatoes or black olives are added just before serving.

Read Full Post »

AsianPorkSalad_2379

It’s tangy, crunchy and quite delicious.

I always knew that my blogging would someday parlay into something more but did I ever hope it would be two-fold? Never in a million years! First it was food styling (which I’m still doing) and as luck would have it, I recently reconnected with a colleague and a new opportunity was born: I’ve been social media content! How cool is that? I’ve been very fortunate to have been given this opportunity and I thank my lucky stars every minute! And I thought I was just lucky in love! So if you need food related social media content, I’m your gal! Email me at evataylor at bell dot net  and we’ll ‘talk’!

I know you’re scrolling ahead to see these photos so let me take the suspense out: they were taken on the morning of April 15, 2014 — I kid you NOT! I was hoping to be yearning for light, salad-ie dishes by now but sadly the weather is STILL not cooperating. Yes, we did have a couple of exceptionally warmish days last weekend but for the most part it’s still soup and stew weather. And like my rebellious feet I am holding out and silently switching gears to a more summery palate!

Snow_2420

I took this photo in High Park on my morning walk. Yes indeed it’s pretty…if it were December! Not April 15 for sure.

Snow_2424

It was cold enough that the snow stayed all day.

Snow_2425

It really is rather beautiful.

As I’m sure most of you operate with similar intentions, I cruise blogs particularly when inspiration evades me and this recipe was no different; it was inspired by the lovely Sawsan’s beautiful Sushi Salad. I must confess that I didn’t record or photograph the first attempt of this creation which was a huge mistake (or was it?) so we actually had this tasty dish two nights in a row! And if it were up to me, it would have been three or four!
The volumes are ball-park, use what you like, omit what you don’t! Easy. If you have celery add it, if you don’t, no worries. The beauty of this dish is the crunch and variety of each and every bite.

Sawsan used ‘cauliflower’ rice but the cauliflower was not nice the day I wanted to make this dish so I substituted Napa cabbage. Since we were having this as a dinner course, I added a marinated BBQ’d pork tenderloin as our protein but chicken or fish would be an excellent substitution.

AsianPorkSalad_2378

The avocado adds a certain je ne said quo is, but may be omitted if you’re watching calories.

Asian Inspired Crunchy Spring Salad

Serves 2 as a dinner portion. Please click here for the original recipe.

Ingredients for the pork and marinade:

  • 200 g pork tenderloin
  • 1 tbsp soy sauce
  • 2 tbsp lime juice
  • 1 tbsp finely chopped garlic
  • 1 tbsp grated ginger
  • 1/4 cup mirin
  • 1 tsp toasted sesame oil
  • 1 tbsp hoisin sauce

Directions for the pork and marinade:

  1. Remove all fat and silver skin from the tenderloin. Stab it a few times with a fork, all the way around.
  2. Combine the ingredients for the marinade and roll the prepared tenderloin in it to cover. Let rest in the fridge for a minimum of 20 minutes or overnight.

Ingredients for the dressing:

  • 1 tsp soy sauce
  • 1/4 cup rice vinegar
  • 1 tbsp grated ginger
  • 1 tbsp toasted sesame oil

Directions for the dressing:

  1. Combine all ingredients and mix well. Set aside. (may be prepared the day before)

Ingredients for the salad:

(as suggestions, if you dislike something omit it and if you love something, by all means add more!)

  • 5-6 cups of finely sliced Napa cabbage
  • 1 cup cucumber, cubed
  • 1/2 avocado, cubed
  • 1/2 red pepper, cubed
  • 1/2 medium sized red beet (raw, peeled and julienned)
  • 2 green onions finely chopped
  • a good bunch of cilantro, finely chopped
  • 1 tbsp toasted sesame seeds

Directions for the salad:

  1. BBQ the tenderloin until the internal temperature reads 71° C or 160°F at its thickest part. Allow to rest for 10 minutes before slicing.
  2. Lay a generous bed of the finely sliced Napa cabbage on each plate.
  3. Sprinkle the cubed cucumber, avocado and red pepper along the outer edge of the base. Add the julienned beets to the centre so it just peeks outside the ring (the beets discolour the Napa so I didn’t want it to bleed all over it).
  4. Garnish with the green onions and cilantro.
  5. After the pork rests for 10 minutes, slice into thin slices. Lay 100 g sliced pork onto each plate and garnish with the dressing and the toasted sesame seeds.

AsianPorkSalad_2380

The abundance of colour was no mistake…perfect for a dreary, wet spring day.

Read Full Post »

I found this clever idea in the latest LCBO magazine. My vases were a little smaller than the idea in the magazine so some of my tulips had to stick out at the top.

I found this clever idea in the latest LCBO magazine. My vases were a little smaller than the idea in the magazine so some of my tulips had to stick out at the top.

Recently, we hosted a dinner party for guests who were doing Weight Watchers and because I don’t like to sabotage anyone’s journey to a healthy weight I decided to make the entire meal WW friendly and that meant putting my thinking cap on.  Now I don’t know about you, but I adore guacamole, it’s so creamy, fresh and tangy and it really enhances a few dishes as a condiment but may also be used as a wonderful dip with fresh vegetables!

Now I know what many of you will say, “but wait, avocados are a good fat” and while that is very true, it’s all about balance and budget so if you can save a little here you can spend it there (perhaps on an extra glass of vino?), is all I’m saying!

Before I even searched on line, I had the idea of creating a mockamole from spinach. Why spinach? I chose spinach because #1 it’s a gorgeous green and you can purée it smooth uncooked and #2 it fits well into the WW point system.  Once I determined what my basic ingredients would be, I started to search “mockamole” on the net and found that the majority of them are made with green peas. Now green peas are quite healthy but when I did the nutritional calculation using peas, my 1 tablespoon mockamole resulted in 1 WW point whereas my spinach mockamole resulted in 0 points for 1 tablespoon. So that was it.

Guacamole is a simple yet flavourful combination of ingredients and other than subbing out the avocado, I kept it pretty true to form. I used 4 tablespoons of cooked puréed navy beans as my ‘creamy’ ingredient and it worked out great. I loved the bright green colour as well as the bright flavours in this recipe. JT said it was an excellent substitute for real guacamole! It’s quite garlic-y so if it’s date night, you may wish to tone it down a notch or make sure your partner has some too ;-)!

Mockamole_2308

May I interest you in a little dip?

Mockamole (Spinach ‘guacamole’)

Makes about 3/4 cup.

Ingredients:

  • 100 g fresh spinach (may be frozen)
  • 4 tbsp navy bean paste (see notes)
  • 1 clove garlic, finely minced
  • 1 tbsp (15 mL) lime juice
  • 1 tbsp cilantro, chopped
  • 1 tbsp green onion, finely chopped
  • Cilantro or parsley for garnish
  • Chopped tomatoes (optional)

Directions:

  1. If using frozen spinach, wring out well. If using fresh spinach, wash and dry well.
  2. Combine the spinach, navy bean paste, garlic, lime juice and cilantro in a small food processor and process until very smooth (I found my immersion blender did this beautifully). Fold in chopped tomatoes if you are adding them.
  3. Add chopped green onion and garnish with a sprig of cilantro. Serve with cucumber slices, celery sticks or cauliflower florets or use in a meal that requires guacamole as a condiment.

Mockamole_2310

Choose vegetables that hold onto the dip like a spoon!

Mockamole_2303

The cooked puréed beans give this dip its creamy texture.

Mockamole_2306

Who are you calling “dip”?

Per 1 tbsp serving

1 tbsp serving

Per 1 tbsp per serving.

1 tbsp serving.

Notes:

  • Navy bean purée: I usually make up a batch of plain navy beans for thickening soups, sauces and gravies and then freeze for later use. Cook navy beans in water without salt. Purée and press through a fine sieve. Allow to cool completely and put 1 tbsp portions into an ice cube tray (specifically for savoury things) and freeze. Once frozen, take each cube and put it into a larger ziplock bag and that way you have a creamy gluten-free thickening agent for future recipes.
  • If you add too much liquid to the puréed spinach mix, strain for a couple of hours in a coffee filter reserved for savoury things before serving.
  • To blanch spinach quickly, add spinach to a heat proof bowl with about 1/2 cup water and nuke for about 2-4 minutes until soft. Rince with cold water and wring out well.

Read Full Post »

I have three Indian cookbooks from which I can usually find something I want to make, perhaps with some additional guidance from a cooking site or blog. The one cookbook I bought because every single recipe had a lovely photograph! It’s relatively small 12 cm x 15 cm (5″ x 6″) which makes it even more adorable! It came with a ribbon book mark attached to the spine so you can mark the recipe you are making or the next one since it has lay-flat binding. With all these things going for it, you would think I would love this cookbook, but sadly I don’t. In fact, I have not enjoyed one of the recipes I’ve made from this book without significant changes! I should just chuck the thing but I can’t because I really like the way it looks. I know it’s silly but it is what it is.

This is a recipe I altered after having acquired a Meyer Lemon from a shoot in November and I wanted to make something with it. I puréed the soup to a smooth velvety consistency and I dressed it with a cumin yogurt drizzle with green onion slices, you could also drizzle with a flavour olive oil. The Papadams are from our trip to Chicago when Chgo John took us to his favourite ethnic stores.

Lemon Lentil Soup_1334

The earthy lentils burst with fresh, lively flavour with the lemon

Lemon Lentil Soup

Serves 2 generously (1 cup portions or 250 mL each)

Ingredients:

  • 100 g dahl or yellow lentils
  • 1 tsp fresh ginger, peel and finely chopped
  • 1 tsp fresh garlic, finely chopped
  • 1 tsp chili powder
  • 1/2 tsp turmeric
  • 1 tsp salt
  • 2-4 cups water (depending on how thick you prefer your soup)
  • 3 tbsp lemon juice
  • grated rind of one lemon
  • 1/4 cup yogurt
  • 1 tsp cumin
  • Shopped green onions as garnish
  • papadums

Directions:

  1. Rinse the lentils and cook with the ginger, garlic, chill and turmeric and 2 cups water until soft.
  2. Add the salt, lemon juice and rind and blend with an immersion blender until smooth, adding water to achieve the consistency you prefer.
  3. Press through a fine sieve and set aside.
  4. In a small frying pan add the cumin and toast until fragrant. Cool. Once cool add to the yogurt and mix well. Salt to taste. Transfer to a small plastic squeeze bottle.
  5. Reheat soup and pour into rimmed soup bowls. Begin piping the yogurt from 12 o’clock to 6 o’clock, then 2 to 7 and finally from 9 to 3. Then using a sharp knife beginning in the centre of the bowl, draw a spiral circle culminating at the outer ring (this will make the pattern). Garnish with the chopped green onions and papadums.

Print

Lemon Lentil Soup_1337

It’s super creamy and super filling

Read Full Post »

Happy New Year! Are you doing anything special? JT and I usually go out to our favourite French restaurant but this year we’re having good friends come over — we’ll be snacking tapas-style all evening. I’m really looking forward to our intimate New Year this year.

Although I didn’t make this soup for New Years Eve, I did make it several weeks ago when I needed to use up some kale and wanted a hearty and satisfying lunch. I adore soup, in fact I often say that I love it so much, Soup could be my middle name. JT is not as fond of soup as I am but he still eats without griping too much. My dear friend Kelly (Inspired Edibles) made a gorgeous and colourful version here and although I am posting it a few weeks after her recipe went live, I actually made it last month. The  Original recipe is from Gourmet, 2003, and contained chestnuts but I wanted to keep my version is little lighter in calories so I omitted the chestnuts, but I would encourage you to add them, they would definitely take this warming soup to the next level.

KaleNavyBeanSoup_1315

The kale retains its texture and the beans are creamy in contrast

Kale and Navy Bean Soup

Serves 4

Ingredients:

  • 1/2 pound dried white beans such as cannellini, Great Northern, or navy (about 1 1/4 cups), picked over and rinsed
  • 1/4 pound thinly sliced pancetta, chopped
  • 1 large onion, chopped
  • 3 garlic cloves, finely chopped
  • 3 tablespoons extra-virgin olive oil
  • 3 1/2 cups low-sodium chicken broth (28 fluid ounces)
  • 2 cups water
  • 1 piece Parmigiano-Reggiano rind (roughly 3 by 2 by 1/2 inch)
  • 1 1/2 teaspoons salt
  • 1/4 teaspoon black pepper
  • 1/2 pound cavolo nero or regular green kale, stems and centre ribs discarded and leaves cut into bite-sized pieces
  • 2 teaspoons chopped fresh thyme
  • Optional Garnish: Parmigiano-Reggiano shavings

Directions:

  1. Soak beans overnight by covering them in about two inches of water. Or you can cook the beans relatively quickly in a pressure cooker or make this soup in a slow cooker. Drain well.
  2. Sauté onion and garlic in a pinch of oil large heavy pot over moderate heat. Add the kale and sauté for 5 additional minutes. Add the beans, broth, water, cheese rind, salt and pepper and simmer uncovered, until beans are tender, 45 minutes to 1 hour (or in a slow cooker on high for 4 hours). Discard or eat the cheese rind.

KaleNavyBeanSoup_1314

A deliciously warming soup

Tip:

I usually keep all my parmesan rinds in a zip lock bag in the freezer and use them in various stews and soups because they add so much flavour. I always eat them and never discard them as the instructions indicate, they are really very tasty and I know my friend Sissi (With a Glass) would adore the texture.

Read Full Post »

As you know I’m a free agent at this particular juncture in my life and although I am keeping my ear to the ground and looking actively for work in my field, I am pretty realistic about the prospects out there and I’m keeping an open mind. The support from my blogging peeps is phenomenal and I thank you for your interest and offer to help! I am constantly touched and surprised by the generosity and kindness of, for all intensive purposes, strangers! It is because of you I am keeping my mind open for alternative opportunities, one such opportunity became a reality just two weeks ago.

About a year and a half or so ago, I had the good fortune to be invited to a taping of Top Chef Canada, Season 3 and there I met with Lucie Richard, Toronto-based Food Stylist with whom I chatted extensively about her craft. At that time, she very generously offered to have me ‘assist’ on one of her photo shoots. Two weeks ago it came to fruition and I assisted on a National Brand ice cream shoot. You cannot imagine how excited I was!

Ice cream is one of the most difficult things to shoot because of the very short window of opportunity before it begins to melt. I was thrilled to experience such a challenging product with one of the best in the field; Lucie was kind and generous with her advice and patience and she taught me an incredible volume of information on shooting ice cream. The tricks of the trade tend to be quite personal and what one stylist does may not necessarily be exactly what another does, so experiencing variety is key to coming up with your own tricks of the trade. The client has very specific expectations in what the characteristics of the ice cream should look like so you really need to know what you’re doing.

We used dry ice to super cool the tools, we worked in small batches for short periods of time, constantly re-freezing the ice cream so it doesn’t glaze over in the melting process. And the studio was kept very cool with air conditioning so I brought a sweater and I even brought gloves in case I needed to warm my hands. Of course, the work is fast and furious and there is no time to be cold.

The trends 15-20 years ago was to use ‘fake’ product. Ice cream was a highly guarded secret recipe of shortening, food colourings and inclusions. Today, most companies want the real deal and that in itself presents some interesting opportunities. And then there is Photoshop®, which has at times saved this incredible craft. We even took Photoshop into consideration, shooting slightly brighter and darker versions of the same shot in order to make sure we have what it takes to make the best composite. Of course, the Photoshopers are so skilled and talented, you can’t tell that they have added a little of this and a little of that to make that shot.

The client was very happy with the ice cream photo and we even finished a few minutes early. It was a huge success for me, and gave me the confidence to send out notes to my Food Stylist peeps that I’d love to assist. Who knows, this may become something!

Sadly, blogging is the driver and result of cooking passion; I make recipes for meals that I want to blog about. But we also want to eat the food I blog about. It’s wasteful to make an extra portion just for the blog so either JT or I will suffer with the pretty but stone cold blog version of a dish or eat separately which is what happened with this amazing ‘ravioli’.

uova-da-raviolo_1069

The pasta is relatively thin, so you can see all the good stuff inside!

Some time ago I saw this unique ‘ravioli’ treatment on my friend Celi’s blog (the kitchen’s garden), she was inspired to make this delightful dish after her daughter who works in a very upscale restaurant in Melbourne told her about it. We were at the cottage at the time I read the post and you know how we are unable to divert from plan because of ingredient limitations, so I was itching to make this beautiful dish as soon as we returned to the city.

One thing led to another and it wasn’t until the Friday before Thanksgiving that I finally got it together to make this tasty dish. Thank you Celi, it is exceptional! It’s reasonably fussy so I will have to figure out a way to simplify it so I can make it as a starter for a dinner party. I used John’s recipe (from the Bartolini Kitchen) for the pasta dough (with minor modifications) and Celi’s rough description for the filling. Even JT commented that he would definitely have it again. So it’s a win/win, all the way around. Thank you Celi and John for inspiring me to make this gorgeous dish.

The ravioli is comprised of sautéed spinach, ricotta and parmesan cheese  and the crowning glory is the simple egg yolk enveloped within the light pasta dough. When it is cooked, the yolk is simply warmed so that it becomes thick but remains runny and once it’s broken into, it mixes with the sage brown butter and becomes a delightful sauce over the ricotta, spinach and pasta. This is definitely a winner and will be shared with friends soon.

Ravioli with Egg Yolk and Sage Brown Butter Sauce (uova-da-raviolo)

I forgot to sprinkle additional parmesan on this one, shhhh.

I forgot to sprinkle additional parmesan on this one, shhhh.

Serves 2 with lots of pasta left over (I made additional plain ravioli and filled it with seasoned ricotta and froze them for future use).

Ingredients, for the pasta:

  • 1 scant cup flour
  • 2 egg whites

Directions, for the pasta:

  1. In a food processor, combine the flour and egg whites and process until you achieve a ball of dough.
  2. Allow the dough to rest for 30 minutes.

Ingredients, for the brown butter sauce:

  • 2 tbsp unsalted butter
  • 1 tbsp finely sliced sage
  • 1 clove garlic, finely minced

Directions, for the Brown Butter Sauce:

  1. Melt the butter and cook until it is brown, remove from heat and add the sage and garlic and allow to infuse while making the filling.

Ingredients, for the ravioli filling:

  • 2 whole egg yolks, at room temperature
  • 2 handfuls of spinach
  • 1/4 cup ricotta
  • 1 roasted garlic, puréed (I used a fork)
  • 2 tbsp Parmesan Cheese, and 1 tbsp for garnish

Directions, for the ravioli filling:

  1. In a small frying pan, sauté the spinach with a splash of EVOO until wilted, set aside to cool.
  2. In a small bowl, mix the ricotta, roasted garlic and 2 tbsp parmesan cheese. Taste and season with salt as desired.

Directions, for assembly of the ravioli:

  1. Heat a large deep pan of salted water to a steady boil.
  2. Roll out four thin sheets of pasta about 10-15cm in diameter (4-6″) (I used #5 on my Kitchenaid Pasta Attachment, but I think #6 would have worked very well too).
  3. In the centre of two of the pasta sheets, add a mound of spinach and on top of that add 1/2 the ricotta mix. Make a divot in the centre and add the room temperature, raw egg yolk. Place the second sheet on top and push out any air and seal the edges well. Cut this into a shape or leave it rustic.
  4. In the meantime, reheat the brown butter sauce on low.
  5. Boil the large ravioli for 2-3 minutes or until the pasta is completely cooked but leaving the egg yolk runny. Serve with the hot brown butter sauce and parmesan cheese for garnish. If you have a few extra sage leaves, add them as garnish too.
  6. Enjoy while the yolk is still runny.

uova-da-raviolo_1074

The egg yolk oozes out and mixes with the brown butter very nicely.

uova-da-raviolo_1072

We had these for lunch, for appetizers I will make them smaller and use small egg yolks!

Read Full Post »

My friend Barb made an incredible feast for Chinese New Year, she had so many delicious things it was really difficult to choose just one. But when I saw the Lemon Chicken plated out, I knew I had to try it because, believe it or not, I happen to adore the not so good for you version at Chinese fast food stalls! It turns out that lemon in savoury dishes is not one of JT’s favourite things, although he did say he didn’t hate it. Well, what he actually said was he prefers the taste of lemons in desserts! Go figure. I really enjoyed this recipe because I adore sour and sweet combos. And I have to admit, I reduced the sugar for our dinner and if I were to make it again, I would reduce it even more as I found it a little too sweet for my taste (I have adjusted the recipe below to reduce the sugar). I also baked the skinless, boneless Chicken breasts instead of pan frying to be a little healthier.

Lemony Chicken

Original Recipe from House and Home

Serves 2, 100 g portions

IMG_4153_BLOG Cutting the chicken into strips allows them to cook faster so that the crumbs become crispy but don’t burn.

Ingredients:

  • 1/2 cup water
  • 1 tbsp sugar (I have reduced this from my pictured recipe already)
  • 1 heaping tbsp grated ginger root
  • Juice of 1 lemon
  • 1 tsp lemon zest
  • 1/2 tbsp cornstarch
  • 200 g boneless, skinless chicken breast
  • 3 tbsp flour
  • 1/4 tsp baking powder
  • 1/2 tsp salt
  • 2 egg whites
  • 1/2 tbsp cold water
  • 1/2 tsp soy sauce
  • 1 clove garlic, finely minced
  • 1 cup panko-style bread crumbs
  • 1 tbsp toasted sesame seeds
  • Mix of greens such as shredded romaine lettuce.

Directions:

  1. Preheat oven to 350°F.
  2. Combine water, sugar and ginger in a small saucepan and bring to a boil. Reduce heat and simmer for a few minutes to infuse the water with the ginger.
  3. Stir in the freshly squeezed lemon juice and zest and quickly return to a boil.
  4. Dissolve the cornstarch in about 1 tbsp cold water and stir well into the lemon mixture. Cook on medium neat until thickened, stirring constantly. Remove from heat and set aside.
  5. Remove all residual fat from the chicken. Place in a zip lock bag and pound so that the breasts are even thickness. Cut each breast into similar thickness stips.
  6. Combine flour, baking powder and salt in a bowl, stir well. Set aside.
  7. Whisk egg white, water, soy sauce and garlic in another bowl, set aside.
  8. Pour Panko into a third bowl and mix in the sesame seeds.
  9. Set up your breading stations so that the flour mixture is first, the egg whites second and the panko last.
  10. Dredge the chicken strips in the flour mixture and shake off excess, then dip into the egg whites and lastly coat with panko/sesame mix. Repeat with all the chicken strips until all have been breaded.
  11. Bake on a parchment lined baking sheet for about 12-15 minutes (turning about mid way) or until chicken has an internal temperature of 165°F or 74° C.
  12. Reheat the sauce. Fill a bowl with mixed greens, place chicken strips over the greens and dress with the hot lemony sauce.
  13. Enjoy!

Read Full Post »

I find inspiration in your blogs, thank you! A few weeks ago, my Hungarian friend Zsuzsa prepared a very beautiful Leek and Potato soup that looked so gorgeous and creamy, I knew I wanted to make it for a dinner we had with my nephew Brian. But I was lazy because I didn’t feel like heading out to buy potatoes, so I used what I had which were parsnips (I had three left over from a chicken soup I made to help combat our persistent colds)! When ever I see leeks on sale, I buy a few bunches and slice them into thin slices and freeze on a cookie sheet and then transfer them to a plastic baggy, that way I have leeks when ever I need them, and I needed them for this!

I was surprised at how well the parsnips replaced the potato, adding just a touch of sweetness to the soup (by oven roasting them) and not compromising the creamy texture that potatoes generally add. Parsnips have slightly fewer carbohydrates than potatoes but they also contain fibre, and potatoes do not; they are also effectively lower on the glycemic index (for a similar weights, a potato can be 56-110 where the parsnip is a lowly 10!). I think I have found my new vegetable combo for this traditional soup!

Creamed Leek Parsnip Soup_4244

Crispy fried Chorizo and grated Parmesan add just the right amount of salt to this creamy soup.

Creamed Leek and Parsnip Soup

Makes around 1000 mL or 4 quarts, depending on how thick you want the soup.

Ingredients:

  • 200 g (about 1.5 cups) parsnips, peeled and cut into relatively equal chunks
  • 100 g (about 1 cup) onions, cut into large slices
  • 250 g (about 1 1/2 cups) leeks, finely sliced
  • 4 cloves garlic
  • 2 tbsp EVOO
  • sea salt to taste
  • 4-6 cups low sodium chicken stock (or vegetable stock if you wish to make this vegetarian)
  • non-stick spray
  • 2-3 tbsp crispy fried chopped chorizo (omit for vegetarian version)
  • Parmesan cheese

Directions:

  1. Pre-heat the oven to 177°C or 350°F. Give a small pan a couple of squirts of non-stick spray and roast the parsnips and the onions until soft.
  2. In a small ramekin with 2 tbsp EVOO, add the unpeeled garlic and a good pinch of sea salt. Cover with aluminum foil and roast along side of the parsnips.
  3. Spray a couple of squirts of non-stick spray into a good size soup pot (one that will take at least 1000 mL or 4 quarts). Cook the leeks until softened.
  4. When the garlic is soft enough to easily push a fork through, remove and pop out of the peel (be careful, it’s really hot). The parsnips and onions are done when they are soft enough to push a fork through as well.
  5. Remove the leek pot from heat and add the roasted parsnips, onion and roasted garlic (including the oil) to the leek pot. To start, add 2 cups of stock and begin blending with an immersion blender and blend until smooth. You may need to add more stock until the desired thickness is achieved. Taste and salt as desired, keeping in mind that the chorizo and Parmesan will add a certain amount of saltiness to it.
  6. To ensure a super velvety texture, press the soup through a fine sieve. Take the bits left over in the sieve and put into the immersion blender container and add a cup or two of the strained soup. Blend again for a couple of minutes (you will be surprised at how much additional thick soup you can get out of this). Press through a fine sieve into the soup. The left over pulp can be a tasty treat if you don’t mind the texture!
  7. To crispy fry the Chorizo, chop into small pieces and in about 1 tsp of canola oil, fry the bits until crispy. Blot on paper towel to remove the oil.
  8. Warm the bowls in a low temperature oven and reheat the soup (I usually reheat in my Microwave); run the immersion blender through it one last time before serving (our chef in Lyon suggested this aerates the soup and makes it even lighter in the mouth!).
  9. Ladle the soup into each bowl and grate about 1 tsp of Parmesan cheese onto the centre, add about a tsp of crispy fried Chorizo. Serve while hot.

Leek Parsnip Soup_4245

There is no cream in this soup.

Read Full Post »

Hello everyone! I must apologize that I have missed a couple of posts, not because of anything other than laziness. I thought I had ‘banked’ enough to last me through the weekend but I hadn’t so my blog remained inactive over the weekend. Our wonderful friends Paul and T paid us a visit, arriving on Friday and going back home on Monday. We had a great time, did lots of fun stuff (yes, I’ll blog about that soon) and ate and drank excessively! Now we are recovering until next time!

I’m inspired by many of the blogs I follow, if not for the recipe, but perhaps an ingredient or even a plating, but I know when an inspiration hits me over the stuffed-up head and it resonates throughout the day with a burning desire (no, not THAT!). Kelly over at Inspired Edibles presented this soup at the beginning of the year and it stuck in my head like that song (sorry about that, peeps) and I knew I had to make it, or something like it. I adore the Asian flavours in a soup, add some rice noodles and I’m in Seventh Heaven. It turned out that I didn’t have some of the ingredients for Kelly’s soup, so I had to improvise, but let me tell you it was YUM. That’s Y. U. M. It was like a lemongrass, sweet and sour, vegetable soup, all of the things that make you happy. That’s right, the epitome of Happy Food.

IMG_3823_BLOG

Sweet, sour, tangy, delicious

Asian Inspired Soup

Serves 1  in a large bowl (ingredients are just rough, you can use your own taste to determine your version)

Ingredients:

  • 1 tsp Sesame oil and a splash of canola oil
  • 140 g mushrooms (about 3/4 cup), quartered
  • 100 g shrimps and scallops (3 large shrimp and 1 scallop), cleaned and sliced down the middle
  • 60 g onions, sliced finely (about 1/4 cup)
  • 1 tsp coriander
  • 10 g garlic, roughly chopped (2-3 cloves)
  • 10 g fresh ginger, roughly chopped (about 2-3 tablespoons)
  • 10 g lemongrass, roughly chopped (about 2-3 tables spoons)
  • 5 g Galangal
  • 2 tbsp lime juice
  • 1 tbsp fish sauce
  • 2 tbsp Hoisin sauce
  • 3 Kaffir lime leaves
  • 2 cups vegetable stock
  • 1 cup water
  • 1 roma tomato, quartered
  • handful of rice noodles

Garnish:

  • 1/4 cup finely sliced green onion
  • pepper flakes

Directions:

  1. Heat the water in your kettle until boiling. Pour over the rice noodles and allow to sit until they are totally reconstituted, 10-15 minutes. Do not over soak, you want a bit of a bite to it.
  2. In a large soup pan, heat the two oils until hot but not smoky (the sesame oil has a very low smoke point). Add the onions and stir until slightly translucent. Add the shrimp and scallop and cook lightly. Turn the heat down to a simmer and add the mushrooms. Sprinkle the coriander on the shrimp and onions and stir quickly until aromatic.
  3. Combine the garlic, ginger, lemongrass and galangal in an infuser (mine is like this) and put it into the soup pan. Add all of the stock and water and add the lime juice, fish sauce, and hoisin saucekafir leaves, galangal, fish sauce, lime juice, and hoisin sauce. Stir well.
  4. Bring to a very light boil and allow to simmer for about 5-6 minutes (be careful so your shrimp and scallop don’t over cook). Add the tomatoes but don’t overcook, just heat them up.
  5. Put one third of the cold noodles into a large decorative white bowl. Add ladle-fulls of the soup and garnish with the green onion and pepper flakes. Enjoy.

Cooks tips:

  • Store your fresh ginger knobs in the freezer in a resealable container; grate on a fine micro-plane grater when required, you need not peel it! Keeps indefinitely.
  • I usually buy a large quantity of lemongrass and chop them finely in my food processor, and then I freeze them in a reusable container. I can usually break off what I need.
  • If you are taking the left overs to work, I recommend storing the cooked noodles in a separate container to the soup so that they don’t absorb any more liquid. When you reheat the soup, do so to just before boiling (so the chicken doesn’t cook further) and that way when you put the chilled noodles in, they will cool it down to a palatable level.
  • Fish sauce is used in thai cooking instead of salt.
  • To save time, I have sometimes used Rosa’s Lime Cordial instead of lime juice, but you have to remember NOT to add the hoisin sauce as that is also sweet.

IMG_3827_BLOG

Still tastes the same, just in sheeps clothing

Read Full Post »

Let’s take a moment to remember today.
*From Microsoft Clip art.

Have you ever had a dinner party cancellation at the last minute? We’ve not had them often but every few years it happens. This time it was friends who let us know Friday that the guy came down with a cold but should be OK if we don’t mind. I talked to him and he sounded fine so we said we’re on. But then at 9:25 on Saturday morning he called sounding very bad and very apologetic that he must cancel. You’re probably thinking that at 9:25am we should be OK, but the truth is I start kinda early. It’s my own fault but at that precise moment, I had just finished the gorgeous Cappuccino Panna Cotta I saw yesterday at Smidges, the bread was rising and the Moroccan Braised Beefwas already made and in the fridge (because we all know these stews are better the next day). Oh, and I just finished snapping the pic of this delicious soup. My diligence has screwed me today. I put out some feelers for the last minute stand in’s and came up short (we checked with neighbours and friends with no kids as baby sitters are hard to come by last minute). So now, I have a five course dinner for four ready, but no guests. Fortunately, I hadn’t yet made the hors d’œuvres (in fact, I was just about to get a cup of java and sit down with my new tapas cook book from Barcelona) nor had I set the table. I am sorry most of my blogging friends live so far away, otherwise, you would have received a call from me for sure. So tonight JT and I shall eat like kings and queens with a full five-course dinner and dessert to boot!

Have you ever had a last minute cancellation and how did you solve it?

The earthy golden beet was a nice compliment to the creamy celeriac.
Very tasty indeed.

Roasted Golden Beet Root with Caramelized Onion and Roasted Celeriac with Roasted Garlic Soup

Serves 4 (about 1 1/4 cup or 300 mL portion)

Ingredients:

  • 200 g golden beets
  • 300 g celeriac
  • 30 g garlic
  • 80 g sweet onion
  • Vegetable stock
  • Carnation Evaporated milk or cream
  • crispy fried onion for garnish (I hadn’t prepared it yet)

Directions:

  1. Peel and dice the beets and celeriac, spray with a bit of EVOO and roast separately for about 1 hour or until soft (I didn’t want to bleed the colours into each other). After about 30 minutes add enough water to cover the pan about 0.5cm or 1/4″ and continue roasting.
  2. Roast the garlic in a bit of EVOO and sea salt until soft.
  3. Slice the onion very thinly and caramelize on the stove top on a low setting using a bit of EVOO. This will take about 30 minutes.
  4. Using an immersion blender, combine the golden beats, caramelized onion and vegetable stock and purée until smooth and a consistency of creamed soup. Set aside.
  5. Using an immersion blender, combine the celery root, roasted garlic and evaporated milk and purée until smooth and a consistency of creamed soup. Set aside. Make sure ONE soup is slightly thicker than the other, this will help keep them separate in the bowl.
  6. Prior to serving, reheat both soups. Carefully pour the thicker of the two soups into half of the bowl. You can do this by tipping the bowl up a bit and use a large spoon to help keep that side clear of the other. Then, pour the thinner soup into the other side. Garnish with crispy fried onions.
  7. Cheers!

20121105-042826.jpg
We put a little crispy pancetta on top when we knew no one was looking ;)!

Read Full Post »

You know I’m always trying to jazz up our fish and this was no exception. It was a Tuesday night and I was riding home ‘the better way‘ and trying to figure out what the heck to do with the fish we pulled out of the deep freeze and then it hit me — Grilled Tilapia with Basil Pesto. The pesto would also allow the opportunity to utilize the gorgeous basil growing like weeds on the back deck (I may have planted a few too many plants!).

Tilapia is a firm white fish that is great grilled as long as you don’t over cook it, then it falls apart! I added a bit of hot chili pepper flakes to the top for colour and a bit of punch. It depends if you like heat, like I do. Plus it’s a nice bite with the creamy pesto. I make a classic pesto, but I’m sure you’ve made yours a gazillion times so feel free to improvise, this is, after all for inspiration. Reserve the left over pesto for the dressing for the greens and you’ll notice that I’ve added a little something to make it more like dressing (make sure the spoon you use to spread the pesto on the fish is never put back into the reserved pesto).

This fish is green with pesto, not envy!

Grilled Tilapia with Basil Pesto

Serves 4,

Ingredients:

  • 400 g Tilapia
  • 2-1/2 cups (625 mL) packed fresh, washed basil leaves
  • 1/2 cup (125 mL) freshly grated Parmesan cheese
  • 1/3 cup (75 mL) toasted pine nuts
  • 1/4 tsp (1 mL) salt
  • 1/2 cup (125 mL) EVOO
  • 2 small cloves garlic, finely minced
  • 4 tbsp white balsamic vinegar
  • red chili pepper flakes
  • arugula greens

Directions:

  1. Add basil leaves, Parmesan, pine nuts, salt and garlic to your food processor or immersion blender and blend until you achieve the desired consistency.
  2. Dry the tilapia and spoon 1-2 tbsp of the pesto per side per fish and spread evenly.
  3. Heat your grill to 177°C (350°F), spray with non-stick spray. Lay the thickest parts down first as they will take the longest to cook. Cook until the fish is firm to the touch. Repeat with the thinner bits.
  4. For the dressing, add the white balsamic to the left-over pesto and stir well.
  5. Serve over arugula greens and garnish with the dressing and red pepper flakes
  6. Enjoy!

I’ve also made different types of pesto here and here. My friends who are making pesto:

;

Read Full Post »

Just a quick word about the blog…I just posted my 500th post! Woohoo!

A week or so ago I was intrigued by a recipe at my friend Liz’s blog That Skinny Chick can Bake for Chocolate Meringue Cookies; it’s a meringue cookie for which you need not beat the egg whites. WHAT? How could this be? I had to give it a try! They were EVERY BIT AS GOOD as Liz made them out to be. EVEN BETTER some might say. So chocolatey and chewy with all the texture of a typical meringue cookie without the fuss. Please pop over to Liz’s blog to check out what all the fuss is about this cookie (plus she has some other tasty treats to ogle over).

So that got me thinking (oh oh, this means trouble), if it worked so well for the chocolate version, I wonder if I can work it with an almond version! So I tried and it worked like a charm! The first time too! Although, I did adjust the recipe a teensy tiny bit. I think next time, I will toast the almonds so that that they give the cookie a bit more interest.

Chewy, crunchy and very almondy

Almond “Meringue” Cookie

Makes about 4 dozen small cookies

Ingredients:

  • 3 cups confectioners sugar (icing sugar)
  • 1 cup almond flour
  • 1/4 teaspoon salt
  • 2 1/2 cups sliced almonds
  • 4 egg whites (no need to beat like with a traditional meringue)
  • 1 tablespoon almond essence

Directions:

  1. Preheat oven to 350º F. Line baking sheets with parchment and spray with non-stick cooking spray.
  2. Mix sugar, almond flour and salt in a bowl. Stir in almonds (if you are going to toast the almonds, I would allow them to cool entirely). Add egg whites and almond essence, and mix until just moistened. Do not over-mix batter. The batter should not be runny.
  3. Drop by small teaspoonfuls onto prepared baking sheets. Leave plenty of space between cookies as they spread quite a bit. I got about 12 per sheet in general.
  4. Bake until the bottoms begin to colour, about 12 minutes. Remove the parchment with the cookies from the hot tray and cool briefly before carefully moving to a cooling rack. Cookies are fragile, but I found them easily removed to a cooling rack with a large spatula. Store with parchment between layers.

If you like almonds, this is the cookie for you!

Norma, over at Garden to Wok had asked that I photograph my onion and garlic harvest, and I finally got around to it, sorry it’s been so late. I planted my garlic too early last fall and it sprouted and then proceeded to rot over the winter. I was so disappointed this spring when they didn’t sprout again that I pulled them out and planted more garlic and a few green onions. The garlic was planted too late and the heat, lack of rain did not help so they are a bit stunted. But I will persevere this fall and plant garlic again.

I like the contrast on the Canadian Soapstone counters

Read Full Post »

It’s a week night and even though we like to eat at 7:30-8 on weekends, it just doesn’t work for week nights when I need a couple of hours to blog, and such! I’m always looking for tasty and quick ways to serve fish and Kristy’s delightful Baked Cod Portuguese was a sure winner, but I didn’t have the fire roasted tomatoes, nor the time to make them, so I took her recipe as inspiration. This one is quite low calorie, no butter or olive oil.

Halibut with a Rustic Tomato Sauce

An incredibly filling meal

Makes 3 servings (100g each fish and 200g tomato sauce and greens)

Ingredients:

  • 300 g Halibut
  • 300 g cherry or grape tomatoes, halved
  • 90 g vidalia onion and garlic (the ratio is entirely up to you, I had about 80g onion, 10g garlic)
  • 1/2 tsp smoked paprika
  • salt to taste
  • non-stick cooking spray
  • 300 g mixed greens, including cucumber and green onions
  • 3 tbsp chopped fresh flat leaf parsley

Directions:

  1. Preheat oven to 350°F. Lightly spray a cookie sheet with non-stick cooking spray. Distribute the tomatoes, onion and garlic on the pan evenly. Salt.
  2. Bake for about 30 minutes. Pour the contents into your immersion blender jar and blend until smooth. Add the smoked paprika and blend again. Keep the oven on.
  3. Strain through a fine sieve, discard what is left in the sieve.
  4. In a cast iron pan, sear the fish skin side on high heat for about 4 minutes. Pour the rustic tomato sauce over the hot fish and bake in the hot oven for about 15 minutes (this depends entirely how thick your fish is).
  5. Meanwhile, create a fresh green salad (about 100 g each serving) with the mixed greens (we used spinach and baby arugula), cucumber and green onion.
  6. When the fish is cooked through, remove the skin and place 100 g onto each bed of greens. Add about one third of the sauce to each plate. Garnish with parsley.

The sauce was lovely, not too acidic (I didn’t add sugar because I am no carbing for three weeks!) but you certainly can to taste. And the garlic really added a wonderful nutty flavour of a baked clove. I will definitely make this sauce again, perhaps with chicken or left over turkey, but then I would add chili pepper flakes to heat it up.

Read Full Post »

The weather is incredible and promises to be. I’m thinking shorts and T’s! I’ve already started the tanning cream in hopes that my legs don’t look as pasty white as they have been! And I’ve beefed up my workout schedule. JT got my bike in working order so I’ve been biking the 8 km to and from work! Summer…BRING IT!

In an effort to cut back and hopefully lose a couple of pounds, I decided to eat vegetarian for a week. It’s not as much of a challenge as it would have been 20 years ago, there are so many incredible vegetarian products out there, and one that recently surfaced on my radar again are Sheritaki Noodles. They are low carb, low fat and they have a decent amount of protein. I usually buy this brand of Sheritaki Noodles. I have to admit, one needs a good robust sauce over these noodles because even after they are rinsed well, and heated they still have a bit of a fishy smell (the package calls it uniquely distinct). JT won’t eat them. So I have them for lunch during the week.

Lots of garlic and the basil in the pesto really helped mask the fishy flavour so distinct of this product

Sheritaki Noodles with Tofu Pesto

an original recipe by Kitcheninspirations (serves 1)

Ingredients:

  • a handful of fresh basil
  • 55 g of firm tofu
  • 2 cloves of garlic finely minced
  • 3 tbsp lemon juice
  • salt
  • 1 green onion finely chopped
  • 4 steamed asparagus cut into 3 cm pieces
  • 113g Sharitake Noodles

Directions:

  1. In the bowl of a small food processor, add the basil, tofu, minced garlic, lemon juice and salt, process until it is a smooth paste (like pesto).
  2. Warm the sheritaki noodles as per package directions, toss with the pesto and the asparagus and garnish with the green onions. Enjoy.

Read Full Post »

I know, my super bowl menu listed Honey Garlic Chicken Wings, but while I was grazing my reading list of blogs, I saw that Kay over at Pure Complex recently made Grilled Maple Mustard Chicken Wings and I just knew I had to revise my Honey Garlic CW to Maple Garlic Chicken Wings – yet another tip of the hat to the New England Patriots! Unfortunately, my photos just did not turn out well, so I trashed them. You’ll have to use your imagination on how yummy they were.

Maple Garlic Chicken Wings

Ingredients:

  • whole mess of wings (I like them separated so they bake more evenly)
  • 1/4 cup maple syrup
  • 4-5 cloves garlic, finely minced
  • salt and pepper to taste
  • non-fat cooking spray

Directions:

  1. Dry off the wings and add to a zip lock bag.
  2. Mix all of the remaining ingredients and pour into the bag and close. Rub this mixture into the wings — you can leave in the fridge over night, if you wish.
  3. Pre heat oven to 200° C / 400° F
  4. Line a large baking sheet with parchment (will save a lot of time cleaning up). Spray a bit with the non-stick spray.
  5. Pour wings onto the sheet and bake for about 45 minutes to 1 hour, turning once when the fist side has a nice golden colour to it.
  6. Enjoy with Blue Cheese dipping sauce.

Read Full Post »

Re the tomato post yesterday, I also got a very ripe avocado yesterday from our very generous client (we split the good stuff three ways!) so it got me thinking… what to make? Guacamole, but of course! It’s Friday and we always have a cocktail or two on Fridays, and I never serve booze without some food. Cocktails are usually at 5:30-6 on a Friday, 4-5 on a Saturday!

Easy Guacamole

Ingredients:

  • 1/2 very ripe avocado
  • 2-4 tbsp lime juice
  • 1 tbsp finely grated garlic
  • 1/4 cup chopped cilantro
  • 1/2 finely chopped jalopeño pepper reserve about a 1/2 tsp for garnish)
  • Salt to taste

Directions:

  1. Put everything into the jar of an immersion blender and blend until smooth. Garnish with reserved jalopeño.
  2. Serve with crackers.
  3. Eat. (borrowed this complete direction from Greg)

Read Full Post »

We were down in wine country region in South Western Ontario on the weekend, and I couldn’t resist picking up some fresh corn on the cob. This is really a treat for me as it’s been about four years since I’ve incorporated more-or-less a low-ish carb diet; I’ve limited vegetables that are carbs (such as corn, peas, carrots). I’m not perfect, and I do eat carbs, but when I do, I really want them to be worth it.

Inspired by Tastefood, with her grilled flank steak and Chimichurri sauce that she blogged about on Sunday (another rendition of this popular sauce) I decided to make Chimichurri again. Originally I made the Chimichurri Sauce in early September in 2008 and posted it (it’s funny how I’m making it again, right about the same time!). What goes better with corn on the cob than a good old fashioned steak – we got tenderloin (not quite budgetary, but sure is tasty). And the Chimichuri was great on the steak and a great substitute for butter on the corn.

In searching around the net, I discovered that not all Chimichurri‘s are created equal. Some folks are quite adamant that there is no oil in it (too fancy), they also say that shallots are too fancy! And I’ve found that instead of lemon juice, people feel quite strongly about using red wine vinegar, and there always seems to be oregano added. I’ve always felt a recipe is a guideline, that one is expected to modify to one’s own taste. I ended up switching out the lemon juice for the red wine vinegar…but I used shallots, regular onions would have been too harsh! I also used a freshly picked Jalapeño from my garden instead of the pepper flakes. The parsley and garlic was also harvested from our garden. Very tasty, indeed.

I’ll leave the grilling instruction to my new friend Ann (cookinghealthyforme, she’s lost oodles of weight by simply modifying the way she cooks!) Ann is the true southern grilling expert! Check out her blog, she’s got great photos!

Grilled Ontario Corn, Beef Tenderloin with Chimichurri Sauce

Chimichurri Sauce (adapted from Epicurious.com)


Ingredients:

  • 1/2 cup coarsely chopped fresh flat-leaf parsley
  • 3 tbsp extra-virgin olive oil
  • 3 tbsp fresh lemon juice (I used red wine vinegar)
  • 2 tablespoons minced shallots (about 2 medium)
  • 2 teaspoons minced garlic
  • 1 teaspoon dried hot red-pepper flakes (or 1/2 small Jalapeño Pepper)
  • 1/4 teaspoon salt

Directions:

  1. Add all the ingredients into a small food processor bowl and process until the desired consistency is achieved. Allow the flavours to blend in the refrigerator for about 1 hour (allowing it to set in the fridge for a while also mellows the shallots). Drizzle on corn on the cob, steak, pork or whatever you choose. It’s a fresh, green sauce that goes great with everything!

Read Full Post »

Each day our tomato plants are simply overflowing with fruit! We were at the cottage this weekend so yesterday there were three days of tomatoes to be harvested. Our home grown garlic has finally cured and the basil was looking pretty sweet as well. What to do? Bruschetta, of course! Using the different coloured tomatoes makes me think of jewels!

1 cup cherry tomatoes in various colours cut into eighths.
4-6 basil leaves, chiffonad
1-2 tsp finely minced garlic (I use my micro-plainer for this)
3-4 tbsp EVOO
Salt
6, thinly sliced whole wheat French stick
3-4 tbsp EVOO

Lightly brush EVOO on each side of the French stick. Toast each side gently in your broiler.
Mix the cut tomatoes, garlic, basil and EVOO, salt to taste.
Gently spoon the tomato mix over each toast, drizzling with the extra juices.
Serve immediately.

20110802-064722.jpg

Read Full Post »

I love Tabouleh – absolutely love it. But bulgar is still a carb, so I don’t make it often. Recently I thought of Quinoa, why not? Searching for recipes, I found that I wasn’t the first to think of it. Oh well! I usually add any veg I have in the house, keeping in mind that you eat with your eyes first – I think it looks like jewels! And it’s a delicious, healthy salad – if you’re hungry, add grilled shrimp or tuna!

Serves 4

Quinoa Tabouleh with Lemon Garlic Grilled Shrimp

Ingredients:

  • 1 cup Quinoa
  • 2 cups water
  • 2 tsp sea salt
  • 2 celery stalks
  • 1/3 each red, yellow and orange peppers
  • 2 green onions
  • 10-12 Kalamata olives or sun-dried olives
  • 1 vine ripened tomato, seeded
  • 1/4 cup frozen corn (may be omitted)
  • 1/2 cup chopped fresh parsley
  • 6 mint leaves
  • 4-6 cloves finely minced garlic
  • 1/2 cup lemon juice
  • Sea Salt
  • 10 grilled shrimp seasoned with lemon juice and garlic (juice of 1/2 lemon, 3 finely minced garlic cloves, sea salt to taste, 3 tbsp EVOO, well stirred; marinate shrimp for no more than 1 hour)

Directions:

  1. Add salt to water and boil.
  2. Toast Quinoa for a couple of minutes in a dry pan – moving around so it doesn’t burn (when you hear it pop, count to 5 and remove immediately)
  3. Add Quinoa and cook for 12 minutes on a soft boil, or until all the water is soaked into the Quinoa.
  4. While cooking the Quinoa, add minced garlic to lemon juice, allow to sit.
  5. Remove Quinoa from heat and add lemon juice and garlic mixture, mix well. Allow to absorb and cool.
  6. Chop all veg into similar sized pieces (I like about 1/4″ dice).
  7. Chop parsley and mint finely.
  8. When Quinoa has cooled, mix everything together. Serve with grilled shrimp!

Oh YUM!

Read Full Post »