This is an update of a salad I used to enjoy at one of favourite Italian restaurants in Yorkville. Unfortunately, they took it off the menu so I had to remake it at home.
They roasted the tomato slices in their wood-fired pizza ovens because Toronto tomatoes are brutal, particularly in the winter. I don’t have a wood-fired pizza oven, so I air-fried them with my Instant Pot Air-Fryer lid. You don’t want the tomatoes completely dehydrated, just enough to condense the flavour so it actually tastes like a tomato. Top the slices with a fresh mozzarella or better yet, a burrata and dollop homemade pesto mixed with a little prosecco vinegar and sprinkle some toasted Italian (or Spanish, as I had) pinenuts over the dish. Presto, you have a memorable appetizer.
The tomatoes really pop when you remove some of the moisture, a perfect foil for the rich fresh mozzarella
Fresh Mozzarella Salad
Serves 2-4
Ingredients:
4-6 tomatoes, sliced in half, deseeded and air-fried
1 Fresh Mozzarella or Burrata
60 mL Pesto
30 mL Prosecco vinegar
15 g pinenuts, toasted
1 lemon, zested
Fresh basil leaves
Directions:
With everything at room temperature, lay the dehydrated/roasted tomatoes on the plate(s) and add the sliced mozzarella on top.
Combine the pesto with prosecco vinegar and drizzle on top of the tomatoes and mozzarella. Sprinkle the lemon zest on top and garnish with the toasted pinenut and torn fresh basil leaves.
I wanted to try the newest rage, grated frozen tomato over the fresh mozzarella and although it was enjoyable, it isn’t practical if serving more than 4 people and it’s hot outside, the frozen tomato will melt too quickly.
Merry Christmas! Hope everyone is having a wonderful time.
We spent the month of November in Arizona again, although it might be our last time this time. But we say that. Every. Single. Time. We see our dear American friends and get in a load of sunshine to boot! The weather was beautiful and slightly warmer than last year, we had high twenties (celsius) most of the daytime and mid-teens at night. Perfect for leaving the windows open for sleeping.
We did a lot of walking and hiking. The National Parks have beautiful trails that are reasonably priced and there are many free parks too. We fed our resident bunny and, inadvertently fed our resident Road Runner (sadly a bird crashed into our window and he died on impact and fortunately, the road runner didn’t mind and he scooped up the bird and took him home for a late Thanksgiving Dinner!) At least, we did not have to deal with it.
This slideshow requires JavaScript.
Of course, we always have a party at the end to use up pantry ingredients and this time was no different, I came up with this recipe to use flour, oil, cheese, and herbs.
The oven was gas and baked rather unevenly.
Pantry Clean Out Crackers
A Kitcheninspirations original recipe
This recipe makes about 2 sheets approximately 25 cm x 38 cm (10 x 15 inches)
Ingredients:
125 g “00” flour
40 g cheese, finely grated
30 mL olive oil
80 mL water
Pinch of salt
3-6 g dried herbs
Directions:
Mix all of the ingredients together in a bowl.
Transfer to a clean surface and knead by hand until the dough becomes smooth and everything is evenly distributed. Rest the dough for 20 minutes.
Preheat the oven to 350° F. Line a baking sheet with parchment.
Roll out the dough into a thin sheet about the size of the baking sheet. Transfer to the parchment lined baking sheet and bake for xx minutes or until lightly browned and crisp.
Cool and break into chip-sized fragments. Serve with your favourite dip.
We adore Ramen soup, we have it a few times a month during the cold weather. I used to freeze the actual Ramen soup but since I have downsized my freezer, I am always on the lookout for a more compact way of freezing dishes so I developed this batch Ramen soup base.
This batch Ramen soup base recipe is based on Just One Cookbook’s Miso Ramen recipe; my version gives you 10 single-serve dishes! Batch cooking saves a lot of time for quick meals in the future and it’s not difficult; I’ve figured out a way to freeze only the soup base without the bulk of the liquid! You simply defrost the Ramen base, add your liquid, then you bring it to a boil and you’re done! Easy peasy!
Of course, Ramen is all about the inclusions, roasted chicken, roasted pork etc., and to make it even easier, how about using shredded rotisserie chicken or as I have done below, leftover shredded rib meat! I like to prepare my Ramen egg the night before so it has time to take in the flavours of the marinade but it also works about an hour before you serve. Other inclusions could be grilled corn, peas, edamame, green onions or mushrooms, many of these veggies I have in the freezer ready for use. This time I used ready-made Ramen noodles but if you have the time, whip up a batch of homemade Ramen noodles and dry them out in small batches, and store in an air-tight container for a quick Ramen lunch.
Just pop one of these into a soup pan and add water, boil and you’re done!
Batch Miso Ramen Soup Base
Makes 562 g soup base (enough base for 10, 2-servings of Miso Ramen Soups)
Heat the roasted sesame oil in a large frying pan. Add the pork and shallots and cook until the pork is no longer pink.
Combine the sake, roasted garlic paste, ginger, white sesame seeds, doubangjiang and sugar and mix well. Add this to the cooked pork mixture and mix it into the pork so it is evenly distributed. Cook until the sugar is dissolved.
Combine the bouillon and the miso and mix well. Add this to the pork mixture and stir well until it is evenly distributed in the pork.
Remove the pork mixture from the heat and spread the mixture onto a sheet to cool completely. Once cool, divide the mixture into 10 even single-portion servings and freeze individually. I froze 9 and used one for our meal that evening.
Preparing the Miso Ramen Soup from the soup base:
Remove 1 packet from the freezer and defrost overnight in the refrigerator OR add 600 mL water (see notes) into a soup pot and drop the frozen packet into the water; heat until defrosted completely and hot. Taste for seasoning; the original recipe had additional salt but I find bouillon and Miso salty enough so I don’t add any extra but it’s up to you.
Cook the Ramen noodles as per packet. Add either 1 packet of cooked noodles per bowl (I usually do half a packet per bowl) and top with inclusions of your choice; pictured below is shredded leftover rib meat, half a Ramen egg, grilled corn, green onions and cooked mushrooms. Serve hot.
Ramen Egg directions:
Bring a small pot of water to a soft boil (water should be deep enough to mostly cover the egg). Carefully place the egg (see notes) into the water and set your timer for exactly 7 minutes. Once the 7 minutes is done, remove the egg and place it in an ice bath to immediately stop the cooking process.
Peel the egg.
Add 15 mL soy sauce and 15 mL mirin to a small cup, add the peeled egg and fill the cup with water just enough to cover the egg, stir. Place a spoon on the egg to hold it down in the liquid and refrigerate overnight or at least one hour before serving, left on the counter. Allow the egg to come to room temperature if you have refrigerated it overnight. Cut the egg in half and serve a half per serving.
Notes:
I usually add the raw pork tenderloin with the shallots to my small food processor and I process it until it is finely chopped.
You can use plain water, but I usually use whatever stock I have on hand; today’s soup was made from leftover whey and corn cob broth both adding a lovely depth of flavour to the soup. I also added half a piece of dried kombu into the stock as it defrosted overnight. I removed the kombu before serving.
I was only able to find spicy doubanjiang but I do not find 10 mL overwhelming in 10 portions of soup base but you may use more or less as is your taste.
I use Chef Michael Smith’s handy tip for keeping fresh ginger on hand all the time. He washes the root and allows it to dry, then he simply freezes it in a little zip-lock bag. You can use a fine micro plane to grate the frozen ginger, no need to peel as the peel pulls away from the frozen ginger as you grate it, or it may grate so finely, you won’t even notice it.
To get the hard-boiled egg to peel cleanly, give the raw egg a good tap on each end on the counter until you hear a distinct click (don’t tap to break the shell). That click is the outer membrane coming loose from the shell, it will make it much easier to peel.
Heat the olive oil in a stock pot. Add the leeks and wilt. Add the vegetable stock and corn broth and cook the leeks until they are falling apart.
Blitz with your best blender until smooth and creamy. Push through a fine sieve into a large glass measuring cup and set aside, discard the pulp.
Add the butter and melt, add the celery, zucchini and mushrooms and sauté until fork tender. Add the spinach and oregano and cook until the spinach has wilted. Add the white beans
Serve hot in small cups garnished with a sprinkle of the bocconcini and the chiffonade of basil.
Notes:
I used a combination of corn broth and vegetable stock which gave the soup a beautiful flavour.
You will recall my post about rice paper chips a few weeks ago, these rice paper nori bowls are a logical extension. I needed something to hold some poké salmon mix I was going to serve as quick little bites during cocktails and I thought of this version. The rice paper becomes crispy as does the nori but both will soften up depending on how long your filling sits inside. For simplicity, I used this for my poké filling and it worked out beautifully.
These little bite-sized are flavourful morsels.
Rice Paper Nori Cups
A Kitcheninspirations original recipe
Makes about 16 bite-sized nori cups
Ingredients:
1 sheet square rice paper
1 sheet nori
Directions:
Wet the nori on both sides and shake off excess water. Lay the nori onto the rice paper right to the edge (my nori was a little smaller than the rice paper, I just cut strips to fill in the edges so there is no waste). Roll the nori with a small rolling pin to make sure there are no air bubbles.
Lightly oil the exterior of four microwave-proof pinch bowls (these will give the nori shape). Lay them open-side-down on a microwave-proof plate.
Cut the nori into 16 squares. Lay one square nori-side down onto the outside of the pinch bowls and microwave for 30-40 seconds or until the rice paper has cooked and the squares are shaped like a bowl. Allow them to cool for a minute and then remove them from the bowls and set them open-side-up on a plate. Continue until you have cooked all the squares. Allow the Rice paper nori bowls to cool completely before you fill them with your favourite filling but don’t do it too soon as the moisture may soften the cups.
Notes:
You can make them as large or as small as you wish. The only thing to keep in mind is that they will shrink about 40% of their original size.
You can fill them with dips, cream cheese, deconstructed California rolls, and Steak Tartare, the possibilities are endless.
There are many recipes online but they shallow fry them, I chose to microwave my cups. If you shallow fry them, you would have to figure out how to get them into a cup shape.
I am always on the lookout for easy, freezable appetizer recipes and this zucchini slice hit the spot. The funny story is that the recipe came into my sight on Instagram, it was one of those reels that pop up, it’s no one I was particularly following and as quickly as it came into my sight, it disappeared even quicker! It was late at night so I completely forgot to save it. But I never thought that would be a problem because as soon as I click on something, it comes up so frequently, that I get completely tired of it and wish I had never clicked. Until I tried to find that recipe! It disappeared off the face of the earth. Completely gone. Not even a Google search led me back to it. WTF! I searched for a few days, hoping it would grace my feed but no luck. And I had several zucchinis ready to use so I improvised. This is not the real Italian version of Scarpaccia, you can find that here.
A delicious slice of baked zucchini in a thin cakey base.
Zucchini Slice
A Kitcheninspirations original recipe
Makes 35 cm x 50 cm pan
Ingredients:
700 g zucchini, shredded
3 shallots, thinly sliced
10 g salt
Zucchini water and extra water as needed
150 g All Purpose flour, unbleached
40 g cornmeal
30 mL olive oil, plus more for drizzling
Pepper to taste
Parmesan Cheese, freshly grated
Directions:
I shredded 1/2 of the zucchini, and thinly sliced the remainder. Combine the shredded zucchini and the shallots and sprinkle with half of the salt. Sprinkle the other half of the salt over the zucchini slices. Set aside in a fine sieve over a bowl overnight. Save the liquid that the salt extracts.
Preheat the oven to 380° F.
Squeeze any remaining liquid from the shredded zucchini in cheesecloth into the zucchini liquid bowl. Combine the flour, cornmeal and olive oil in a large bowl and mix to create a relatively liquid batter, adding water as needed. Add the pepper and mix in the grated zucchini well.
Line a large roasting pan (about 35 cm x 50 cm) with parchment and drizzle with olive oil. Turn in the zucchini batter and press into the length and width evenly (I used another sheet of parchment and rolled the zucchini out evenly). Add the zucchini slices to the top. Drizzle with olive oil.
Bake the zucchini for 45 minutes, then sprinkle freshly grated Parmesan cheese over the top and finish baking for an additional 15 minutes or until the bottom becomes crispy.
Notes:
I found that many recipes online had egg in the batter, but just as many did not and because I wanted it crispy, I decided to try it without egg.
My version is less cakey because it does not have egg in the batter.
Drizzling the parchment with olive oil before pressing the zucchini batter into the pan, allows it to crisp up nicely.
Dehydrating the zucchini overnight creates a much drier zucchini so it can crisp up nicely.
Sprinkling with Parmesan does not seem to be original in Italian recipes.
Talk about an easy recipe. And they satisfy the crunch aspect of snacks! Plus they’re not unhealthy! And I usually have a packet of rice paper in my pantry! All winners in my books.
I developed this “recipe” in response to an air-fryer version I saw on my Instagram feed; their version took too long to “fry” and was too fiddly. These Rice paper chips remind me of the mystery shrimp chips you get at Thai restaurants, they’re super crispy and melt-in-your-mouth, just like shrimp chips. But they are not deep-fried! They are microwaved!
Each sheet makes about 36 chips, less than .30g of carbs per chip! Easy AND Healthy? Where do I sign up?
I used square rice paper sheets that are made for Fresh Rolls. They need to be fresh and not brittle so they cut cleanly, but you could snap them into irregular shapes if they’re not fresh (I’m unsure that they’ll all microwave at the same rate though).
Using large kitchen shears, cut each sheet into six even strips, then cut each strip into six even rectangles. Place on a piece of parchment paper (no need to carefully place them, they don’t stick together) and microwave for 30-40 seconds on high. Immediately pour finished chips into a bowl and season with sea salt. Done!
Easy peasy. You can thank me later.
These melt in your mouth without sticking to your teeth (like some rice paper chips do)
We had some dear friends over for a BBQ and I thought I would like to serve potato chips knowing how much they love them but I wanted to treat them to guilt-free chips that are not fried! These little devils are cooked in the Microwave and boy are they good. The secret is to soak them in cold salted water with a little acid, I used vinegar but you could use lemon or lime juice to help prevent oxidization. The salted water actually seasons them so you needn’t add salt after they are cooked (it wouldn’t stick to the chip anyway like it does when they are hot out of the deep fryer).
Unfried Potato Chips (Crisps)
Serves about 3-6 people
Ingredients:
3 good size white or red skin potatoes (large diameter)
30 g sea salt (more if you prefer a saltier chip)
100 mL white vinegar (to prevent oxidation and add a little flavour)
2-3 L very cold water for soaking
Directions:
Wash the potatoes skins well.
Dissolve the sea salt in very cold water (I used an immersion blender to help dissolve the salt). Pour into a large bowl of very cold water, add the vinegar and stir.
Cut the potatoes in half diagonally; then, using a wafer-thin mandolin slicer, slice from the cut end of each potato, tossing the cut slices into the cold salt water bath and allow them to sit in the bath for 5-10 minutes.
Remove slices from the water and lay them in one in a single layer on a clean linen cloth (allow to sit for 15 minutes, this will help with cooking them).
You may spray them with some good quality EVOO or leave them plain like I did.
Lay a layer of clean, unprinted paper towel in the microwave and layer potato slices on the paper towel so they do not touch each other. Microwave on 100% for 2 minutes or until some get a bit of colour. Open the microwave door and allow the hot humid air to escape for at least 1-2 minutes (it will allow the machine to cool down). Then cook for an additional minute on high, if needed, watching carefully as they burn quite easily. I found the slices I placed in the centre of the turntable cooked faster than the outside slices so I moved my larger slices into the centre. The slices will continue to cook a little after you remove them so don’t worry if they are a wee bit wobbly, but they shouldn’t be overly wobbly, they will crisp up.
Remove the slices from the paper towel and cool completely before putting them into an air-tight container. Repeat until all of the slices are “fried”.
When totally cool, store chips in an air tight container.
The weather in Toronto was certainly not as spring-like as we had hoped when we planned to return from our stay in Europe, otherwise, we would have stayed a lot longer! We did have a week of incredible but unseasonably warm weather in early April but that didn’t last long. We are back to grey, overcast, rainy, snowy spring so on such a day, I decided to let the garden inspire me because even though we humans find this weather unacceptable, the garden is in full bloom, bursting with green and colour! I created this simple, yet tasty green soup. Use homemade or good-quality chicken stock (and my secret ingredient) to make a tasty broth and add all the green veggies you have on hand. For me, it was frozen sweet peas, frozen broccoli, leeks, frozen green beans, some shredded kale, celery and some ripe avocado. If you want it a little more filling, add rice or gnocchi or my favourite, Hungarian csipetke (which is just pasta dough, pinched into small dumplings and cooked right in the soup).
A delicious combination of green vegetables in a rich, flavourful broth.
Spring Green Soup
A kitcheninspirations original recipe
Makes about 1.5 litres of soup
Ingredients:
15 mL garlic-infused EVOO
Handful of each green vegetables: frozen sweet peas, frozen broccoli (separate stems), leeks, frozen green beans, some shredded kale, celery and some ripe avocado, all cut into similarly sized pieces.
1.5 litres chicken stock
15 mL white miso paste (secret ingredient)
a splash of fresh lime juice
Directions:
Heat the oil in a large soup pot and sauté the leeks and broccoli stems until soft. Add about half of the kale and wilt. Add the stock with the miso paste and heat until the miso (secret ingredient) has melted and the kale is rather soft. Purée this into a relatively fine soup.
Add the remaining vegetables and heat through. I allowed the soup to steep for a couple of hours and reheated it when ready to serve.
Add the lime juice and stir well just before serving.
Allow the soup to cool completely before freezing leftovers. Do not freeze pasta or rice because it will turn to mush.
As the weather is warming up, we are allowing ourselves to once again dream of patio days sipping on summery cocktails and enjoying the company of friends. These lazy days require some lazy snacks and I have just the tasty and healthy snack for you if you have an air fryer. I have the Instant Pot with the air fryer lid, and let me tell you, it works wonders! We don’t fry a lot so I didn’t want an appliance that just did one thing so this air fryer lid addition to my Instant Pot is the perfect solution.
These spiced chickpeas are so crispy and crunchy, they disintegrate in your mouth like a chip would and then the spice creeps up on you, just a little with tantalizing flavours of cumin, coriander, garlic and smoked paprika with a hint of heat, salt and sweetness. Just perfect for a glass of prosecco or Cava. Cheers!
Air Fried Spiced Chick Peas
Makes enough for 4 as a cocktail snack.
A KitchenInspirations Original Recipe
Ingredients:
1 can 540 mL chickpeas, drained, rinsed and dried
40 g cornstarch
30 mL olive oil
2.5 g cumin
2.5 g coriander
2.5 g granulated garlic
2.5 g smoked paprika
2.5 g sea salt
15 g honey, divided
Directions
Mix the cumin, coriander, garlic, paprika, and sea salt until well combined.
In a large sieve, sprinkle the cornstarch evenly over the chickpeas (I did mine in two batches). Drizzle the olive oil over them and mix well.
Add the chickpeas to your air fryer and fry at 400° F for 15-20 minutes, pausing halfway to stir and separate them. I air-fried the recipe in two batches as my air fryer is not huge and I only wanted one layer so they really crisp up.
Confirm that the chickpeas are crispy (and not creamy in the centre) and pour them into a bowl and sprinkle with half the spice mixture. Drizzle with half of the honey and mix until well-coated. Return the chickpeas to the air fryer and fry for an additional 5 minutes (so the honey caramelizes). Pour onto a cookie sheet to cool completely. Repeat with the second batch.
Notes:
The spice mix is totally up to you. Just plain salt and pepper would be nice too.
This is my ‘”GO-TO” gluten-free cracker, not just because they are so tasty, but because they are super-easy to make and require very little equipment! This recipe is half of my usual recipe because I didn’t want leftovers but because the measurements are metric, it’s super-easy to double or triple. The only thing I would caution you about is that they burn very quickly because of the natural oils in ground almonds and the grapeseed oil but hopefully it won’t deter you from making them, they are worth it.
Almond Sesame Crackers (Gluten Free)
Makes 40 crackers but it depends on how thick you roll them and how large you cut them. This recipe was first posted in 2011 in Imperial measures.
Ingredients:
150 g unblanched ground almonds
5 g sea salt
60 g sesame seeds, I like black and white versions, toasted lightly.
1 egg
15 mL grapeseed oil
Directions:
Preheat the oven to 325° F with the rack set in the middle.
Mix the first three ingredients together in a medium-sized bowl. Whisk the egg with the grapeseed oil together.
Combine the egg mixture with the dry ingredients and stir until well coated and clearly mixed well.
Roll between two sheets of parchment paper to just less than 1 mm thick. Cut into 4-centimetre squares leaving the crackers on the parchment (no need to separate).
Cut off the parchment that is on top and slide the cut crackers onto a baking sheet. Bake for 15-20 checking often near the end as it burns quickly. Remove the baking sheet and slide the parchment off it onto a cooling rack. Cool slightly and snap the crackers apart. Cool completely to store.
These crackers have excellent flavour and texture.
Notes:
Add various nuts (although they should be small) to the batter for a slightly different texture.
The thicker you roll your crackers the sturdier they will be, but just less than 1 mm is sturdy enough for a good thick dip.
These crackers are quite moreish but be careful as they are also very filling so you don’t need as many to satisfy you!
I reduced the baking temperature to 325° F from 350° F because I burnt the first batch!
Happy New Year! Hope your holidays were lovely. We had Christmas Eve with my cousin’s family in their new home. It’s so exciting to have a new home and be able to decorate and start from scratch. The dinner was fabulous and it was a lot of fun opening presents with them.
Just before Christmas, we had another progressive dinner with our neighbours. This time, the theme was Indian and we were charged with the hors d’œuvres and appetizers. I (obviously), made onion bhaji to start and then we had a cup of Mulligatawny soup. These dinners always have too much food so I kept it small. These bhajis turned out so good, I decided I wanted to keep the recipe for the future. I served them with store-bought Date and Tamarind Chutney.
Onion Bhaji Revisited
Makes about 20 bhajis, depending on size. For the original recipe, please click here.
Ingredients:
2 sweet onions, finely sliced
100 g gram flour (chickpea flour)
5 g baking powder
4 g Aleppo chilli flakes
4 g turmeric
100 mL water
1 L vegetable oil for frying
Directions:
Soak the sliced onions in cold water while you make the batter.
Preheat the oil to 350° F.
Add the gram flour, baking powder, Aleppo flakes and turmeric to a large bowl and whisk to combine. Slowly add 90 mL of the water to form a batter and mix well. Strain the onions and add them to the batter, adding about 10 mL of water, if necessary. Mix to coat the onions.
When the oil is 350° F, scoop a generous tablespoon of the bhaji mixture into the hot oil and fry until golden and the internal temperature is 200° F. Remove the bhaji from the oil onto a paper-lined tray and allow to drain the oil. Continue until you’ve fried all of the bhaji batter.
To serve, reheat the bhaji on a sheetpan in a 275° F oven for 12 minutes or until the internal temperature is 125° F.
These were gobbled up in nothing flat. I froze an additional batch I made and they are still fabulous reheated!
It’s dinner party and cocktail party season so the team at Kitcheninspirations have been busy making and freezing party food so we are never caught empty handed. The filling for these tasty little bites comes together very quickly and if you don’t have time, store-bought wonton wrappers will do the trick.
Shrimp Gyoza
For original gyoza wrapper recipe, please click here.
Makes 20 gyoza
Ingredients:
120 g AP unbleached flour
65 g water, boiling
pinch of salt
cornstarch for dusting
5 mL sesame oil
75 g shrimp
2 scallions, finely diced
5 g ginger, finely grated
10 g roasted garlic
20 g carrot, finely grated
10 mL soy sauce
8 g cilantro leaves, finely chopped
Butter or grapeseed oil to brown gyoza
Sesame seeds and cilantro for garnish
Directions:
Combine flour and salt in a bowl. Add boiling water to the flour and salt mixture slowly to make a dough, turn out to a surface and knead for about 10 minutes until smooth. Wrap the dough in plastic and allow to rest at room temperature for 30 minutes.
Heat the sesame oil in a pan and add the shrimp and stir fry. Stir in the scallions, ginger, roasted garlic, carrot, soy sauce and cook for a minute. Remove from heat and allow to cool thoroughly. When cool, add the cilantro and mix well.
To make the wrappers, roll each sausage out to a manageable thickness and run it through the KitchenAid pasta roller from #1 to #4.
Cut into 7.5 cm (3 inch) rounds. Wet the edges of each round, spoon 5 mL (1 tsp) of the filling into the centre and fold in half and seal the edges. I used a handy pleater like this one to get perfect pleats.
Steam each one for 3-5 minutes. When cooked, melt butter or grapeseed oil in a cast iron pan. Pan-fry each one on one side only so it is golden and crispy. Serve with your choice of dipping sauce.
Freeze uncooked gyoza on a piece of parchment and once frozen add to a ziplock bag for future use. Frozen gyoza will cook in 3-5 minutes!
To serve, melt about 15 g of unsalted butter with 30 mL of grapeseed oil and fry one side of each gyoza. Serve sprinkled with sesame seeds and bits of cilantro.
Serve these tasty treats with a sweet and salty soy sauce.
The weather is still lovely in the big smoke so we continue entertaining on our back deck. I’m always looking for something a little different and these scallion pancakes truly fit the bill. I first saw the recipe on Mi Mi’s blog and was immediately intrigued. Mi Mi’s pancakes were more of a thicker bread and she admitted she had forgotten a final step, so I scoured the internet for “my” recipe. The one I posted below is a compilation of several recipes that I read through. The pancake itself is a very thin, but super flavourful. Crispy, chewy and full of flavour a veritable trifecta! We just had them with a simple dipping sauce and they were absolutely delicious. Thank you Mi Mi for drawing my attention to this tasty treat.
These pancakes are crispy and chewy at the same time.
Olive oil (enough to coat the pan about 0.5 cm deep)
Directions:
Combine the flour and the salt and mix well. Add the water into the centre of the flour mixture and mix until the water is absorbed into the flour. Knead the dough with your hands for 5-7 minutes or until quite elastic. Cover lightly with olive oil and allow to rest for 45 minutes to 1 hour.
Divide the dough into two or four equal portions and roll out using the KitchenAid pasta maker to the finest thickness. The dough will be very sticky so flour or grease your surface to prevent sticking.
Sprinkle the sliced scallions (and whatever additional spice, if using) over the rectangle and roll up from the long side. Then, roll the log onto itself like a scroll. Roll the scroll out to about 20 cm diameter. Cook on medium heat until the pancake is golden on both sides. Cut into wedges to serve. Serve with the dipping sauce below.
Dipping sauce ingredients:
15 mL soy sauce
15 mL sesame oil
15 mL Mirin or sweet rice wine
Sesame seeds
Dipping sauce directions:
Mix all of the ingredients together and serve with the cooked pancakes.
Notes:
You can add a variety of other spices like Chinese Five-spice, Aleppo pepper flakes, or mint to name a few.
I used cold water because from what I’ve read, it will make the dough chewy, hot or boiling water will apparently make it crispier. I wanted chewy and figured it would be crispy from the pan frying and I was correct.
The green part of the scallion is apparently softer so it won’t poke through the dough but mine did anyway and it did not alter the flavour or texture.
Use either flour or oil to prevent this very sticky dough from sticking everywhere. I used flour on this one.
To make the rolled dough more manageable, you can roll two smaller lengths and stick them together because when they scroll and you roll them out, you won’t notice a difference.
Most recipes call to roll the dough into a circle at first but I wanted a very thin dough so I just made sheets using my KitchenAid pasta machine and it worked out fantastic.
Upon our return from Spain, I was missing being there so I made the Almond Tuiles of Sevilla (Tejas Dulces de Sevilla). They are delicious but it got me thinking about a savoury version. We had brought home some wonderful cheese called Old Amsterdam and I thought it would make a delicious snack. They are light and airy and crisp. They are strong enough for dip, but tasty on their own. I love how rustic they look from just breaking them apart.
Savoury Cheese Tuiles
Makes about 20 cm x 30 cm sheet
Ingredients:
1 egg
30 g cheese (I used Old Amsterdam)
1 g salt
1 g smoked paprika
50 g flour
Directions:
Beat the egg until it reaches the ribbon stage (about 5 minutes), add the salt and smoked paprika and mix well, then fold in the flour.
Spread evenly on a parchment-lined baking sheet and sprinkle the cheese over it evenly and bake at 275° F for 20-35 minutes or until it has totally dried out and developed a golden colour.
Cool entirely and once cool break into shards. Serve at room temperature.
One of our most memorable meals in Spain was at the beautiful One Star Michelin restaurant in Retama Restaurant within La Caminera Hotel. We should have stayed at the hotel, but we had already booked something in Valdepeñas, a short drive away. We chose The Traditional menu, without wine pairings (I react poorly to some heavier reds and whites aged in oak casks).
As part of a course, we were served a wonderful little bite of Atascaburras, a typical dish of the La Mancha Region. The story goes that two shepherds and their donkeys were isolated after a big snowfall, with only salt cod, potatoes, garlic, and olive oil at hand, and in their desperation, they created this dish to feed themselves and their donkeys over several days until they were rescued. This dish is often eaten during a snowfall and it is said that the water to boil the potatoes and cod in should be freshly fallen snow. Obviously, there was no snow in sight but the story and delicious flavour of these little cod fritters were definitely calling to me. They called them fritters in the restaurant but they were not deep-fried, I suspect the chef used a Takoyaki pan to sear the small balls. We were served one each. Traditionally, this dish is usually served on a platter with bread or crackers. Since I don’t have a Takoyaki pan, I chose to serve it as a dip. In modern times, a boiled egg is used to garnish the dip but it was not traditional. I chose to use a hard-boiled egg yolk, grated on top of the dish as a garnish.
The atascaburras was served as a round ‘fritter’
Atascaburras
Makes about 500 mL dip
Ingredients:
300 g potato (I used Yukon Gold)
300 g salt cod, soaked and rinsed several times over 48 hours
130 mL olive oil
1/2 clove of garlic, finely minced
Salt to taste
1 egg yolk, hard-boiled
Red pepper oil
Directions:
Cook the cleaned but unpeeled potato in water for 15 minutes. After 15 minutes, add the prepared salt cod and cook an additional 10 minutes. Reserve the water.
Add both the cod, potato and garlic to a blender (I used a magic bullet because it really emulsifies beautifully). Add the olive oil and emulsify, adding a little of the reserved water to make a smooth, creamy dip. Taste and salt if necessary.
Place in an oven for 15-20 minutes on 250° F to just warm up. Serve in a low-sided dish with grated egg yolk as garnish and sprinkled with a little red pepper oil.
No, that is not cheese, it’s grated hard-boiled egg yolk.
Sometimes it’s just the simplest things that are the best. While we were in Spain, we had a lot of tapas, they serve tapas every time you order a glass of vino. Sometimes it is as simple as delicious olives, or sometimes it’s a little ham sandwich. While we were in Granada, we slipped into this adorable little bar and ordered a couple of glasses of vino with some tapas. Before we even had our first sip, they brought out a good quantity of homemade potato chips and these little round sandwiches (about 7-10 cm in diameter). If we hadn’t already ordered a selection of cheeses and charcuterie, we would have been done! And they would not have been offended. This is Spain, where a glass of good quality wine is €3.50 (less than $5) AND it comes with food! And there is no expectation of tipping, most restaurants add a small service fee per person so you needn’t worry about it.
We were sitting at home one evening when we decided to have a glass of vino and JT asks what we were having for hors d’œuvres! I had to scramble a bit because I hadn’t pre-made anything for the freezer but I did have some incredible peppers (did I mention how wonderful vegetables taste in Spain?) so I sliced them thinly and sautéed them and presented them with some toasted Spanish pine nuts. They were fantastic! So simple. If you’re serving a crowd, you might want to add a splash of red wine and some sliced chorizo, served with crusty bread of course. This is definitely going into my repertoire because I always have peppers at home.
I haven’t stipulated quantities because it’s what you have on hand. I used about a half of pepper each of the red and yellow and about 1/4 of an onion.
These are some of the sweetest peppers we’ve ever tasted.
Sautéed Peppers with Pine Nuts
A KitchenInspirations Original Recipe
Ingredients:
Red peppers, deveined and seeded, cut into strips
Yellow peppers, deveined and seeded, cut into strips
Onion, thinly sliced
Splash of olive oil
Pine Nuts, toasted
Salt and pepper to taste
Ingredients:
Sauté the onions and peppers in a splash of olive oil. Add the chorizo and red wine, if using
Sprinkle with pine nuts, salt and pepper and serve with crusty bread.
I always create a menu plan for every week and when we arrived in Spain, it was no different. I like to schedule meals out in a restaurant but if they don’t work out, I also like to have something easy to fix on hand, dried cheese tortellini was one of these things. We had been out for lunch at one of our favourite Italian places and the couple at the table next to us ordered the fried cheese tortellini and I was inspired, they looked so delicious. I have made fried pasta before but used North American dried pasta and it wasn’t good, they were too thick and ended up really hard and difficult to eat so I didn’t bother posting about them. These little gems are different, they are crispy, chewy little parcels filled with cheese! They are wonderful. I tested up a batch of 18 and found them quite successful so I fried up the entire package! I froze them for when we reunite with our dear friends Paul and T from Arizona, they came for a visit in early May. Just pop them onto a parchment-lined baking pan and bake at 350° F for about 10-12 minutes. Serve with salsa, romesco sauce or any one of your favourites. Make sure you make a bunch because they are addictive.
They are crispy and chewy little parcels of deliciousness.
Crispy Fried Cheese Tortellini
A KitchenInspirations Original Recipe
Makes as many tortellini as your package has.
Ingredients:
1 package dry cheese-filled tortellini, cooked through
500 mL high flash-point oil
dipping sauce, your choice
Directions:
Heat the oil to 350° F
Fry only 5-6 at a time until golden, place on an absorbant cloth to soak up any excess oil.
Serve warm with your favourite dipping sauce.
Notes:
Cook your pasta to slightly overdone, this will provide the best crunch.
Cook your pasta in advance so that you can totally drain them and allow them to slightly dry out on a paper towel or parchment (this will prevent the oil from splashing when the water hits it).
You may have noticed from my other socials that we have escaped Toronto and finally headed to Spain. Our first trip in February was cancelled by you know what. We are here for 51 days. The sun and relative warmth have been life-altering. I wake up just to see the sunrise on the Mediterranean (it’s not that bad, 7:30-ish during our stay).
This slideshow requires JavaScript.
Our kitchen in the flat (my cousin’s flat) is challenging from a size point. I have fitted it with most of my favourite tools so I can do most things but finding a place to do them can be a challenge. Most people who rent do take away or go out to one of the many restaurants in this little village. The Spaniards like to eat late (9pm would be considered an early dinner) but I find it difficult to eat that late, so we end up going out for lunch and having a light dinner around 7pm. Although the first few attempts to lunch were failures as many places don’t open until at least 1:30 (we don’t eat breakfast) and they close between 2-5pm for Siesta. Don’t get me started on Siesta, it is a beloved ritual in the smaller centres. This little recipe was developed to take us through cocktails one evening.
Retro Olive Balls
A KitchenInspirations Original Recipe
Makes 8 pastry-wrapped olives
Ingredients:
15 g unsalted butter, room temperature
60 g cheese, we used manchego
60 g flour
15 g roasted garlic purée
Salt, pepper to taste
water to bind
8 olives
Directions:
Preheat the oven to 350° F.
Combine everything but the olives in the small bowl of a food processor and process until combined. If the dough still doesn’t come together, add a few drops of water and pulse until it comes together.
Divide the dough into eight equal portions. Roll each portion into a small circle and wrap around each olive, rolling in your hand until it is smooth. Repeat until all of the olives are wrapped.
Bake on a parchment-lined baking sheet until golden, serve warm.
A delicious buttery pastry enveloping a Manzanilla Olive.
Notes:
I used unpitted Spanish Manzanilla Olives because it is what I had at home, black olives or even pimento-stuffed olives would be lovely with this recipe. Make sure you mention to your guests that the olives are with pitts.
Double or triple this recipe for more tasty little balls.
My brother loaned us his cottage for the last week of January. Yes, it is a lot colder up there but it is extremely beautiful with the pristine, sparkling snow and the occasional visit from wildlife. I needed to clean out the fridge before we left and created this tasty and satisfying soup. Pair it with a scone or grilled cheese and you have the perfect winter-time lunch. The measurements are not important here because I was just using up some less-than-perfect produce, it’s just an inspiration for future soups.
JT bought me the KitchenAid Vegetable Sheet Cutter to help me cut down our carbs so I had a lot of zucchini cores leftover which played right into this delicately flavoured soup. I was going to add cream but then I had a very ripe avocado that would meld perfectly into this winter meal.
Celery, Zucchini, and Avocado Cream Soup
A KitchenInspirations Original Recipe
Makes 1.45 L soup
Ingredients:
15 mL EVOO
~ 1/2 a bunch of celery, roughly chopped
~ 1 zucchini, roughly chopped
~ 1 small Vidalia onion, roughly chopped
5-10 sprigs of parsley
1 L chicken stock
1 small Avocado, peeled and pitted
Salt and Pepper to taste
Directions:
In a large pot, heat the EVOO, add the celery, zucchini, onion, and parsley, and cook until softened. Add the stock and simmer for 30 minutes or until all of the vegetables are very soft. Add the avocado.
Blitz with your immersion blender or allow to cool and purée with a Nutri Bullet or VitaMix for a smooth and creamy soup. Strain through a fine sieve to remove the celery ‘hairs’.
I started watching a couple of Ontario-guys on Facebook who try to prove or disprove crazy videos they’ve seen, mostly of food but it can also be science or cleaning and such. They are a bit goofy which makes them rather charming. Their girlfriends sometimes participate in these videos by making some outlandish foods. This traditional Georgian potato, cheese-stuffed bread was one of them. The recipe looked so good, I had to do a little research and make my own. Their recipe was fairly straight forward using baking powder and not yeast bread dough, but the research showed that most of the recipes were yeasted bread dough, so I went with that. Then I found a few that had egg in them which gives the bread a wonderful, chewy texture. Then there is the mashed potato and cheese stuffed inside. OMG, so good. My recipe makes four disks about 20 cm in diametre, cut into eight portions. The bread freezes very well. Remember to put it in the refrigerator overnight to defrost, then allow it to come to room temperature before baking. We went through two bad boys in two days and I sent a third one to a friend who was going to visit her parents! The fourth one is under lock and key in the freezer, I’m saving it for a special time! I will definitely be making this recipe again and again!
Soft, pillowy mashed potatoes with the sharp feta (or goat) and gooey mozzarella makes for a more-ish starter.
Kartofdzhyn (Cheese and Potato Stuffed Bread)
A KitchenInspirations Original Recipe
Makes 4 stuffed bread rounds about 20 cm (8 inches) each
Ingredients for the Bread:
6 g quick yeast
8 g granulated sugar
120 mL milk, at 110F
460 g bread flour
6 g salt
215 g Greek yogurt
2 eggs
Olive oil for the dough
1 egg yolk, whisked for brushing the dough
Directions:
Combine the yeast and sugar with the warm milk and allow to proof for about 10 minutes (it should froth up)
Add the flour and salt to the large bowl of your stand mixer and mix lightly.
Combine the Greek yogurt and eggs with the frothy yeast mixture and whisk until well combined.
Add the liquid ingredients to the flour and knead with the hook for 10 minutes. Stop the mixer and allow the dough to rest for 10 minutes, then resume kneading for about 15 minutes or until the dough comes away from the bowl.
Coat the dough with olive oil and allow to proof for about an hour, or until doubled in size.
Ingredients for the Filling:
2 medium yellow potatoes (about 230 g), boiled
30 g butter
30 g roasted garlic purée
2 scallions, finely chopped
100 g feta cheese or goats cheese
230 g mozzarella
6 g salt
Directions:
Mash the potatoes with butter and roasted garlic, then beat with a whisk beater until light and fluffy. Fold in the scallions, cheeses, and salt and set aside.
Directions for the dough disks:
Divide the dough into four equal portions. Roll out each portion evenly to a circle about 25 cm (10 inches).
Add one-quarter of the filling to the centre of each round and pull in each side to form a sealed disk. Flip over and gently roll out to about 20 cm (8 inches). Pierce the top of the disk with a fork and brush each dough disk with the egg yolk. Set aside while the oven preheats or freeze on a baking sheet and transfer to a plastic zip-lock bag for the future.
If baking at the moment, put a cast-iron pan into the oven and pre-heat the oven to 400° F. Add one disk to the hot pan and bake for 20 minutes. When done, remove from the heat and brush the top with some more olive oil. Serve warm.
It’s been wickedly cold here, and by wickedly cold, I’m talking -21° C or -5.8° F! I have only been able to think about soup. I love brothy soups but JT is not as much of a fan, he prefers creamed soups so I like to mix it up. I had purchased too much broccoli for Christmas day dinner so I had a small crown leftover along with a not-so-perfect-looking romaine, so this recipe was a result of these two leftovers.
Broccoli and Cheddar Soup
A KitchenInspirations Original Recipe
Makes just over a litre of soup
Ingredients:
1/4 Vidalia onion, roughly chopped
15 mL EVOO
1 fist-sized head of broccoli, roughly chopped
1/2 romaine lettuce, shredded
1 L chicken stock
5 cm x 5 cm Parmigiana rind, cut into smaller pieces
30 g of cheddar, shredded
Salt to taste
Directions:
In a hot pan, cook the onion in the olive oil until translucent, add the broccoli and romaine lettuce and cook for about 5 minutes. Add the chicken stock and the Parmigiana rind and simmer for about an hour or until everything has softened.
Blend with an immersion blender until smooth. If using a traditional blender, allow to cool a bit so the steam doesn’t blow off the lid.
Serve with some shredded cheddar sprinkled on top.
Notes:
The romaine didn’t end up adding much flavour but it did help with thickening.
Use vegetable stock if making vegetarian.
The Parmigiana also helps to thicken the soup.
I used both orange and white cheddar because that is what I had.
We had dear friends over for Christmas Day dinner last month. I had made a bunch of regular gyozas and wanted some for my Gluten-Free besty. After much research, I found several recipes and came up with my own. This recipe has the elasticity that steamed gyozas have but it also packs an incredible crunch when fried to a golden brown on one side. JT couldn’t tell that they were gluten-free! I’m thinking they may even make incredible ravioli!
Gluten-Free Gyoza Wrappers
A KitchenInspirations Original Recipe
Make 15 gyoza wrappers
Ingredients:
50 g gluten-free all-purpose flour (I used Bob’s Red Mill)
33 g tapioca flour
4 g xanthan gum
0.1 g salt
40 g boiling water
10 g vegetable oil
Directions:
Combine all of the dry ingredients and mix well.
Combine the boiling water and vegetable oil and pour into the dry ingredients, mix well until it comes together. Set out to a lightly GF floured board and knead for a few minutes. Cover tightly in plastic wrap and allow to rest for about 15 minutes.
Cut the dough into four portions and roll out to about 2 mm thick using the KitchenAid pasta dough attachment, roll the dough and fold it onto itself several times on #1. Then roll the dough out from #1-#4. Use like any gyoza dough being careful to cover it tightly with plastic wrap when not in use.
Steam the GF gyozas for about 3-4 minutes, they should bounce back if you gently poke them.
Notes:
Keep the dough tightly covered with plastic wrap when not in use, it dries out very quickly.
Rub a little water on one side of the seam before closing so that they don’t come apart when steaming.
The gyoza will puff up when you steam them.
The uncooked gyoza feeze well. Freeze on a parchment-lined sheet and for about 30 minutes, drop into a ziplock bag. I wouldn’t leave them for more than 30 minutes on a sheet uncovered because they dry out.
Most recipes did not have the addition of tapioca flour or vegetable oil; I added the tapioca flour to improve the elasticity that gluten-free flour lacks and the vegetable oil was needed to help the dough from drying out.
You will need to roll out the dough by hand to get it through #1, but you’d have to do that with regular pasta dough too.
The gyoza is chewy and crunchy like a real gyoza should be!
I was finishing off making some spanakopita with store-bought phyllo pastry and had run out of the pastry with enough filling to make about 4 additional pieces (don’t you hate that?) so I decided to try my hand at a quick phyllo dough. It worked out extremely well so I thought I’d document the process. It’s getting dark so early these days, so you’ll need to excuse the horrible light in my photos.
Quick Phyllo Pastry
Makes about 4 sheets 15 cm x 30 cm (enough for 4 triangles)
Ingredients:
50 g all-purpose flour (10.5 ounces)
15 mL olive oil
2.5 mL red wine vinegar
1.5 g salt
25 -45 g water
Directions:
Mix all of the ingredients together until you get a uniform, soft dough that does not stick. Knead for a few minutes. Set aside, wrapped in plastic wrap at room temperature for 30 minutes.
Divide into two equal balls and roll out, thin enough to see through. I used my KitchenAid pasta maker to the thinnest setting.
Let me begin by saying that this is not an authentic Thai pumpkin soup but it is a sophisticated blend of Thai flavours that make a super creamy and flavourful dish. I used a small white pumpkin which makes this beautiful lightly pumpkin flavoured, pale celery coloured soup. I garnished it with lightly toasted pumpkin seeds but lightly toasted coconut shavings would be gorgeous as well.
We recently had friends over for brunch and I had expected that it would be cold out and that soup would be a well-received course. We lucked out and had an exceptional November day so we sat outside for hors d’oeuvres and then retreated inside for the main course and back outside for dessert. Even though it wasn’t cold at all, particularly on our heated patio, the soup was very well received. This recipe is a keeper.
Thai-inspired Pumpkin Soup
A KitchenInspirations Original Recipe
Makes about 1.5 L of soup
Ingredients:
430 g pumpkin, roasted and cubed
15 mL roasted garlic purée
1 kaffir lime leaf
5 mL galangal, finely grated
5 cm lemongrass, sliced lengthwise and pounded to release flavours
1 L chicken stock
30 g coconut milk powder
50 g creamed coconut
toasted pumpkin seeds for garnish
Directions:
Combine the roasted pumpkin, garlic purée, kaffir lime leaf, galangal and lemongrass and sauté on medium-low until you can smell the gorgeous aromas. Add the chicken stock and bring to a rolling, gentle boil for about 45 minutes; you are trying to infuse the stock with the Thai aromatics. Taste and continue to boil if necessary to infuse more flavours.
Once the chicken stock has been infused, remove from the heat and blitz the stock with a stick blender until all of the flavourings are puréed. Allow to cool on the counter for 1-2 hours or overnight in the refrigerator.
Strain the soup through a fine sieve, pressing the pulp until you get most of the liquid out, discard the pulp.
Return the highly aromatic stock to a pot and reheat gently. Add the coconut milk powder and blitz with a stick blender until smooth. Continue to heat without bringing it to a boil. Add the creamed coconut and blend well.
Serve with toasted pumpkin seeds as garnish.
Notes:
You may substitute a can of coconut milk including the cream instead of the coconut milk powder and creamed coconut, I forgot to buy it and resorted to things I had in my pantry.
Blitzing the aromatics with the stock is unconventional but it really does impart a sophisticated blend of Thai flavours that is a little more forward than just simmering the flavourings in the stock.
To make this totally vegetarian, substitute vegetable stock for the chicken stock.
As you know, Thai food is a carefully weighted combination of salty, sweet, sour and bitter and this recipe incorporates all of those flavours and imparts a significant amount of umami. Personally, I find coconut milk sweet enough so my recipe does not include sugar but it would be entirely up to you; if you use sugar, I would use cane sugar.
I’m always on the lookout for low-carb options, not that I don’t love my carbs, they are just not as kind to me as alternatives, so I like to balance our intake with some low-carb options. I created this recipe when I had purchased too many zucchini’s and I thought it would make a nice alternative to the potato rösti that we are used to, I was wrong, it was significantly better than I expected. There is only cheese in this, no other binder! Other recipes use egg but it made a frittata-like pancake instead of rösti, which should be crispy on the outside, soft on the inside. This recipe is definitely a keeper!
Zucchini Rösti
A KitchenInspirations Original Recipe
Makes 2 dinner portions or 4 appetizer portions
Ingredients:
250 g zucchini, coarsely grated
50 g Parmigiana, finely grated
50 g Gruyère, coarsely grated
2 g salt, divided
Pepper to taste
Directions:
Place the grated zucchini into a bowl and toss with 2 grams of salt, allow to sit for about 30 minutes.
Strain the zucchini and salt mixture and squeeze out as much water as you can. Taste for seasoning and add a little more salt if necessary, keeping in mind that some cheeses are saltier than others.
Toss the strained zucchini with the cheeses and add pepper to taste.
Heat a seasoned cast iron pan or non-stick frying pan to medium heat, then lower to medium-low.
Add about half or a quarter of the zucchini mix to the pan and press down into a pancake about 1 cm tall. Cook until the edges are golden, gently loosen the cheese all around and beneath the patty, it may have stuck a little on the pan and flip repeat for the other side.
Serve hot as a base for fish, steak, chicken or even a poached egg.
Cheesy delicious goodness in every bite.
Notes:
Other cheese that would work: low moisture Mozzarella, Appenzeller, Cheddar etc. I would avoid feta, cream cheese, brie, etc.
There is no need for oil or butter, the cheese will render and the oils will help fry the Rösti.
If you don’t have time to wait for the salt to squeeze out all of the moisture from the zucchini, you may use it as is, just note that the inside will be much softer than if you had removed most of the moisture.
If you don’t have a seasoned cast iron pan or a non-stick pan, add a piece of parchment to the pan before adding the zucchini mixture, this will allow the cheese to caramelize and release from the pan easily.
I served Serrano ham wrapped cod with a dollop of Greek yogurt.
We were having the Boyz over for a trip down memory lane in May, we had just come out of a 100+ day, hard lockdown and were finally permitted to have less than five people in our backyards so we jumped on it! The Boyz are Andy and Mark, they own a lovely Irish Pub in Leslieville called The Roy. I met Andy many years ago when we both worked at a design firm and have been friends ever since. Andy and Mark love to travel and they love to travel to Spain. Way back in 2020, before the world fell apart, we happened to be in Spain at the same time so we met up in Malaga. We soon realized that our friendship had gotten a lot deeper because of our shared love of Spain. Sadly the last year and a bit has not been kind to restauranteurs and the Boyz are definitely feeling the pinch so when we were allowed people over, I thought I’d create a night of tapas for a trip down memory lane with food. And who doesn’t love an entire night of eating?
Many of the recipes I served have appeared on the blog, but this one is new and so delicious, I had to post it. This is a compilation of several recipes online and my tapas books so I don’t have a reference. When you say croquetas, I immediately think of creamy potatoes but this one is not made with potatoes (although it would have been delicious too), it’s made with a thick béchamel, and you know how I adore béchamel! As you can see from the menu, it was served later in the evening and people were getting pretty full, but not one was left on the plate! Not one.
Selection of Spanish cheeses, crackers, grapes, nuts
Croquetas de Jamon Serrano y Manchego
Makes 16 croquettes, about 26 g each
Ingredients:
80 g serrano ham, finely chopped
50 g shallot, finely chopped
50 g manchego cheese, coarsely grated
30 g butter
15 mL EVOO
60 g all-purpose flour
200 mL milk
Pinch of salt
1 large egg
45 g panko
20 g manchego cheese, finely grated
500 mL peanut oil
Directions:
Heat the butter and olive oil in a pan, add the shallots and cook until translucent.
Add the flour and stir well and cook for a couple of minutes. Whisk in the milk and stir until thickened. Stir in the Serrano ham and 50 g of the coarsely grated cheese.
Spread the mixture onto a parchment-lined baking sheet and allow to cool completely.
Once cool, shape into little ovals about 26 g each. Refrigerate for 30 minutes.
Whip the egg with a fork in a small bowl. In another small bowl, combine the panko and the finely grated Manchego cheese.
Dip each oval into the egg and coat thoroughly, then plunge each one into the panko mixture and coat well, storing each one on a clean parchment-lined pan.
Heat the oil to at least 350 F and fry each croquette until golden. Serve immediately or hold on a baking sheet and reheat in a 350 F oven until warmed through.
This post was inadvertantly published on the same day as another, so we apologise if you’ve already seen/been here. Also, this post was written during our first foray out of lockdown.
We have continued to entertain one couple at a time outdoors, keeping well below the allowed maximum of five (outdoors only). Our space allows for four people socially distanced, any more, we’re less than two metres (six feet) apart and we are not comfortable with that.
I try to make meals that are hearty and warm. This is one such dip I made as an hors d’œuveres for friends who came for lunch (the main was JT’s Bœuff Bourguignon). That day in February was 6° C (43° F) outside but our heater warmed our little area to 15° C (59° F) which made it very comfortable with light coats on (in fact, my friend came seriously over dressed and had to peel layers off to be comfortable).
It’s quite romantic eating outside in the winter, and even my naysayer hubby is loving it. In fact, most of the negativeness has come from the men, the women are all over being outside but once the guys experience our little cozy nook, they are sold. Just like this dip, one taste and you’re sold. I make a similar dip using canned crabmeat but I must tell you that this salmon dip is so much more flavourful.
Warm Salmon Dip
A KitchenInspirations Original Recipe
Makes about 375 mL dip
Ingredients:
250 g Cream Cheese, room temperature
1 tsp dill (dried is fine)
2 tsp horseradish (the original recipe called for horseradish cream, but I never had horseradish cream on hand)
20 g red onion or shallot, finely minced
salt & pepper to taste
25 g celery, finely minced
150 g canned salmon, without skin or bones. It’s about 1/2 cup, or one can give or take.
Directions:
Combine all of the ingredients and mix well (a light-duty hand mixer is perfect for this).
Season with salt and pepper.
If you are making this for the future, line three 125 mL or half-cup ramekins with plastic wrap.
Divide the mixed dip into the three ramekins pressing into the ramekin so it will retain the shape. Try not to have too many folds so that the plastic comes off easily. Carefully twist the plastic wrap to seal. Place the ramekins in the freezer. Once the dip has frozen to the ramekin shape, remove the frozen dip and label it and return the shaped dip to the freezer until needed. Put your ramekins away.
About 30-40 minutes before serving, pre-heat the oven to 375° F. Remove plastic wrap from the frozen dip and pop the shaped-frozen dip into the original ramekin you used to freeze it. Place on a cookie sheet (it may boil over depending on how full your ramekin was) and bake for 30-40 minutes or until dip is bubbling in the centre.
Remove the baked dip, garnish with a smoked salmon rose and serve with papadams, crostini, crackers or even sliced cucumbers.
A warm, boldly flavoured salmon dip that is perfect for outdoor entertaining.
Way back in April we had an outdoor Indian evening with a single neighbour and for hors d’œuvres I served Pork Samosas. They were delicious and so moreish. They are not the traditional deep-fried samosa, but they are baked phyllo pastry versions. I can tell you that they didn’t last long.
A delicously flavourful, crispy triangle.
Baked Pork Samosas
A KitchenInspirations Original Recipe
Makes about 16 two-bite samosas
Ingredients:
15 mL vegetable oil
1/2 shallot, finely chopped
200 g ground pork
5 g garam masala
5 g curry powder
10 g cumin
5 g grated ginger
10 g roasted puréed garlic
200 g mix vegetables
50 g frozen peas, thawed
10 g cilantro leaves, chopped, plus extra for garnish
1/2 pack phyllo pastry
150 g unsalted butter, melted
Directions:
Heat the vegetable oil in a frying pan and sweat the shallot until translucent.
Add the pork and cook until no longer pink, mix in the ginger and garlic and stir well.
Sprinkle the garam masala, curry powder and cumin over the cooked pork and stir until fragrant. Remove from heat and mix in the vegetables and cilantro. Allow to cool completely.
Cut each phyllo sheet into 5 cm widths and brush with melted butter.
Starting at one end, dollop a tablespoon of the pork mixture and begin folding in a triangle pattern like illustrated below.
Brush the tops with more melted butter. Bake in a preheated oven for 15-20 minutes or until golden and heated through. Serve with peach chutney.
Heat the olive oil in a medium-sized pan and sweat the shallots until translucent. Add the zucchini and cook until softened. Add the spinach and wilt completely. Season with the dill and stir well.
Add the cream cheese and stir until it has melted into the vegetables.
Add about three-quarters of the feta and stir well into the warm dip. Reserve one-quarter of the feta for garnish.
Spring came early to Toronto, with warm, sunny days as early as the first week of April! Buds burst on trees and shrubs and we waited with bated breath for the blooms in hopes that we wouldn’t get a spring frost. A good spring always has rain and we’re OK with that as long as we get some sunny days interspersed to keep our mood elevated and this spring was perfect. The rainy days were a touch cooler (still above freezing) but cool enough to crave soup. JT has been a real trouper this winter, eating without complaint, my favourite brothy soups but his true love are creamed soups so I thought I’d create this creamy, tasty soup on a rainy mid-April day. I served this with Cheesy Onion Scones!
Cream of Celery Soup
A KitchenInspirations Original Recipe
Makes about 400 mL soup
Ingredients:
15 mL EVOO
50 g sweet onion
300 g celery hearts, tender leaves included, roughly chopped
50 g cauliflower florets (as a thickener)
400 mL vegetable stock
7.5 mL lemon juice
Salt to taste
30 mL table cream
Directions:
Heat the extra virgin olive oil in a soup pan and sweat out the onions until translucent, add the celery and cook on medium/low for about 3 minutes.
Add the cauliflower florets and vegetable stock and simmer until all of the vegetables are soft.
Purée until smooth and taste for acidity and salt, add as required. Keep warm until ready to serve.
Just prior to serving, add 30 millilitres of table cream, stir well.
Celery in North America doesn’t have a strong anise flavour, it’s very mild.
I am constantly on the lookout for new hors d’oeuvres/finger food that I can insert into my cocktail repertoire. I came across this tasty recipe in early April when I was looking around for something to make with polenta. I loved the crackers because I’ve already made Polenta Fries,Polenta Crisps, and Polenta Choux Pastry. Yotam Ottolenghi’s recipe includes a beautiful tapenade but I didn’t have parsley and I wasn’t going to go out for just one ingredient as we had just stepped into our THIRD State of Emergency Lockdown, so I improvised with baby arugula, and I must say, it’s darn tasty, I may even substitute the parsley with arugula going forward.
Don’t let the dark edges fool you, they are the best part!!!
Makes about 35 little crackers and enough tapenade for about 6 or 8 crackers.
Ingredients for the Polenta Bites:
350 mL chicken stock
15 mL roasted garlic purée
15 EVOO
2.5 g sea salt
75 g fine cornmeal
40 g finely grated parmesan
5 g chopped chives
Directions for the Polenta Bites:
Prepare a large sheet of parchment paper by spraying it with non-stick spray. Set aside.
Heat the chicken stock with the roasted garlic purée, extra virgin olive oil and sea salt until a slow boil.
Slowly pour in the cornmeal and stir vigorously until all has been incorporated into the water and it is beginning to thicken, add the grated parmesan and chives and cook, stirring constantly until very thick.
Pour the hot mixture onto one half of the prepared parchment and fold the other half over it. Using a rolling pin, roll out to about 2mm thick. Even out the edges (cooks treat) and cut into 3 cm squares. Allow to cool completely.
Preheat the oven to 425° F (I used convection) and bake the polenta bites for 20 minutes. Remove the sheet from the oven and flip the crackers over so that the top is the bottom and the bottom is the top and try to separate the crackers and move them around on the parchment so they bake evenly. Bake for an additional 20 minutes. Cool completely.
Green olives, kalamata olives, artichoke hearts and peppery arugula make a very tasty tapenade.
Ingredients for the Mediterranean Tapenade:
5 Green olives (with pimento)
6 Kalamata olives, pitted
4 quarters Marinated Artichoke Hearts
2 small handfuls of baby arugula
1 green onion about 15 cm long, roughly chopped
30 mL EVOO
salt and pepper to taste
Directions for the Mediterranean Tapenade:
Add everything into a small food processor and process until you have achieved the desired consistency.
Serve as a dip or portioned onto each cracker like a canape.
These are super quick and easy to make. They don’t keep well, particularly if your house is a bit humid so plan to bake them just before you want to eat them or if they get a bit soggy, just pop them into the oven to dry them out a bit.
Deliciously crunchy and cheesy crisps.
Cheese Crisps
A KitchenInspirations Original Recipe
Makes about 12-15 crisps
Ingredients:
400 g old cheddar cheese, grated
Directions:
Pre-heat the oven to 400° F. Line a rimmed baking sheet with parchment paper or a silicone matt.
Spread the cheese out on the matt as thinly as possible so that the grated pieces are interlaced.
Bake for 4-6 minutes or until the cheese has entirely rendered and is starting to become golden but not burned.
Carefully remove from the oven and pull the parchment onto a cutting board. With a pizza cutter, cut into wedges. Allow to cool completely. Serve immediately.
Notes:
I use a rimmed baking sheet because the oils from the cheese may slide onto the oven and burn.
Parchment may burn so a silicon matt is preferred.
Several years ago, I replicated some French Onion Soup Pillows from a long-gone, favourite restaurant. They somehow managed to get the delicious French onion soup into a dumpling that exploded when you bit into it. It was unexpected and wonderful. I was thinking about making them again when I discovered some cooked beef gyoza filling in the freezer and I was inspired to make a Japanese version of our beloved French Onion Soup Pillows, and Self-Saucing Gyoza were born. They’re a little more fiddly than normal gyoza because you have to make the sauce and allow it to set overnight, but it’s totally worth it. Now I wish we could have friends over so I could serve them these delightfully explosive bites, damn you Covid.
Soak the gelatin leaf in cold water until soft. Wring out the water and add it to a small saucepan.
In the same saucepan, combine the broth, soy sauce, hoisin Sauce and Mirin and whisk over low heat until the gelatine has melted. Cool and pour into a small rectangular plastic container (container should allow sauce to be a minimum of 70 mm deep). Refrigerate overnight until set. Cut into 25 cubes.
Make up the gyoza as per recipe and add one gelatine cube per gyoza. Freeze gyoza on parchment paper individually, add to a ziplock bag for future use. Cook gyoza as per recipe.
The gelatin melts into a delicious sauce within the gyoza.
Notes:
You may wish to make your gyoza wraps a bit thicker than normal so the sauce doesn’t leak out while cooking.
We had Friends over outside for dinner in early December and they brought this dip as contribution toward dinner, it was wonderful so I asked for the recipe; unfortunately I don’t know where it’s from.
Warm Spinach and Artichoke Dip
Makes about 200 mL
Ingredients:
250 g of cream cheese softened
30 mL mayo
15 g each Parmesan and old cheddar shredded, mixed
15 mL Roasted Garlic
65 g artichoke hearts chopped
60 g blanched spinach drained and chopped
Mix all above and place in lightly greased pan and top with shredded mozzarella. Bake at preheated 350° F for about half an hour.
Over the holidays, I received some lovely sourdough starter and I made sourdough bread (as though we needed it!). I’m always a little distraught discarding some of it so I adapted an old recipe I brought back from Hungary to utilize the discard and a little of the fed starter, it worked out very well. I’ll definitely keep this in mind for future baking.
Sourdough Cheese Sticks
Makes 1 30 cm x 42 cm sheet, cut to whatever size you desire.
100 g discard sourdough starter plus 30 g fed starter
125 g Greek Yogurt
100 g shredded cheese (sharp cheddar works well, freshly grated Parmesan is best)
5 g Salt
20g shredded cheese
Directions:
In the large mixing bowl of your stand mixer with the scraper attachment, blend flour, butter, starters, 100 g cheese and salt until incorporated, then switch to a dough hook and add the Greek yogurt and knead until smooth ball forms.
Allow to rest in a warm dark place for 1 hour.
Preheat the oven to 375° F
On a piece of parchment paper, roll out dough to about 1/2 cm thickness.
Cut into 7-10 cm x 2 cm sticks.
Sprinkle with remaining cheese and allow to rest for 10 minutes.
Slide cheese sticks on the parchment paper onto a baking sheet and bake for 20-25 minutes or until cheese is golden and melted.
Re-cut sticks, if necessary, while still warm. Serve warm or at room temperature.
These are very tasty served warm.
Notes:
Use a flavourful, hard cheese (like cheddar, gruyere or Jarlsberg) is best for this treat.
I use a pizza cutter with a kitchen ruler to cut the sticks, it makes it very easy. If you cut the sticks after you sprinkle with cheese, your cutter will take up most of the cheese!
In the original recipe, there is an egg wash on the top, I omitted this time because I figured the cheese would stick regardless, but it does add a lovely sheen which I will not omit next time.
These cheese sticks freeze well. To reheat, spread in a single layer, cheese side up on a baking sheet and bake at a low 200° F for 10-15 minutes or until defrosted and slightly warm.
Winter means soup weather to me and I’m always trying to change it up from the regular repertoire. This soup was developed to use some excess cilantro before it bit the dust. Cilantro haters, please move along, nothing to see here!
The bright green colour is joyful, don’t you think?
Broccoli, Avocado and Cilantro Soup
A KitchenInspirations Original Recipe
Serves 2-4
Ingredients:
300 g broccoli
70 g sweet onion
30 mL olive oil
1 avocado
15 g cilantro
1 tbsp green curry paste (or to taste)
250 mL coconut milk (not the cream)
250-375 mL chicken stock
15 mL roasted garlic purée
Splash of fresh lime juice
Salt to taste
Directions:
Chop broccoli and onion into medium-small pieces and coat generously with olive oil. Roast at 375° F until tender.
Combine the roasted broccoli, onions, avocado, cilantro, green curry past, coconut milk, about half of chicken stock and roasted garlic puree and blend until very smooth, adding more chicken stock at achieve the desired viscosity for the soup. Push the soup through a fine sieve into a medium-sized pot and re-heat on medium-low.
Season to taste. Serve hot garnished with small roasted broccoli florets and cilantro.
In mid-July, we were one of five couples invited to a socially responsible BBQ at a friend’s house. They put three tables together outside giving us ample space to distance ourselves. Each couple was asked to bring something and this marvellously flavourful side was one of the dishes someone brought. Everyone asked for the recipe, including me! I chose to make it as a dip for a summer evening cocktail party, socially responsibly distanced, of course. Each couple had their own plate!
The beans and lentils are packed with flavour, the salsa and lime yoghurt just up the ante.
Baja Mexican Beans and Lentil Dip with Lime Sauce and Salsa
From Bowls of Goodness: Vibrant Vegetarian Recipes Full of Nourishment By Nina Olsson
Combine all of the ingredients and mix well. Refrigerate until needed
Ingredients for the Beans:
Olive oil
2 shallots, diced
200 g dried navy beans (400 g cooked)
100 g dried lentils du puy (200 g cooked)
4 cloves garlic, finely minced
1 avocado, finely diced
1 tsp dried oregano
1 1/2 tsp cumin
1 tsp sweet paprika
1 tsp smoked sweet paprika
3/4 tsp salt
Directions:
Cook the beans and lentil until softened, rinse.
Heat oil in a frying pan and add the shallots until caramelized, add the garlic and cooked beans and cook until they can easily be mashed about 5 minutes. Add the remaining ingredients and cook for 2 minutes.
Serve in a bowl or on a plate drizzled with the Baja Sauce and Salsa with baked tortilla chips
I chose blue tortilla chips because they were gluten-free and organic.
We enjoyed a lot of seafood in Spain. But this recipe did not come from our time there, it graced our cocktail table soon after we moved back into our newly renovated bedroom. We were watching a little Jamie Oliver before turning out the lights and the recipe that night was this gem: Crispy Squid and Smashed Avocado. It was a hit the first time I made it, and soon after, I was getting requests to make it again. It is a deep-fried recipe, and you all know how much I love deep-frying, but it is quickly fried and on my first measure of the oil used, I was able to get most of it back after it cooled which means the calamari did not absorb much. Cutting the calamari length-wise instead of in rounds will allow the calamari to curl up like a spring which looks super cool. I paired this tapa with Romesco Sauce and Avocado Cream, and they were both awesome!
Our little village in Spain has an awesome Indian restaurant at the far end. We ate there once and even though everything was great (food, service), we decided that going forward it’s a better take-out place because it just didn’t have a cool vibe (overly lit); and a bonus is that it’s far better value as take away, if you don’t order way too much rice, like I inadvertently did!
Even though the rice wasn’t expensive, I really hate throwing away good food so I kept it for something in the future. The future arrived in the form of a tapa! I made a spin on the famous Spanish Tortilla de Patatas but used rice, cauliflower purée and cheese instead of potatoes. It made a very tasty tapa which we later used as breakfast.
The measurements are approximate because I used leftovers.
Tortilla de Arroz, Coliflor y Queso
Makes 1 omelette about 20 cm in diameter (serves 4-6 people)
Ingredients:
2 large eggs
250 g cooked rice
125 mL cauliflower purée
125 mL milk
50 g cheese, finely grated
30 mL pesto
Directions:
Combine all of the ingredients and whisk until smooth. Set aside for 20-30 minutes at room temperature.
Preheat the oven to 350F.
Heat a small 20 cm frying pan on the stove on medium heat and brush generously with olive oil.
Pour the contents of the omelette into the hot frying pan and press evenly in the pan.
Cook uncovered for 10-15 minutes.
Place pan into the oven and finish cooking until a toothpick tester come out clean.
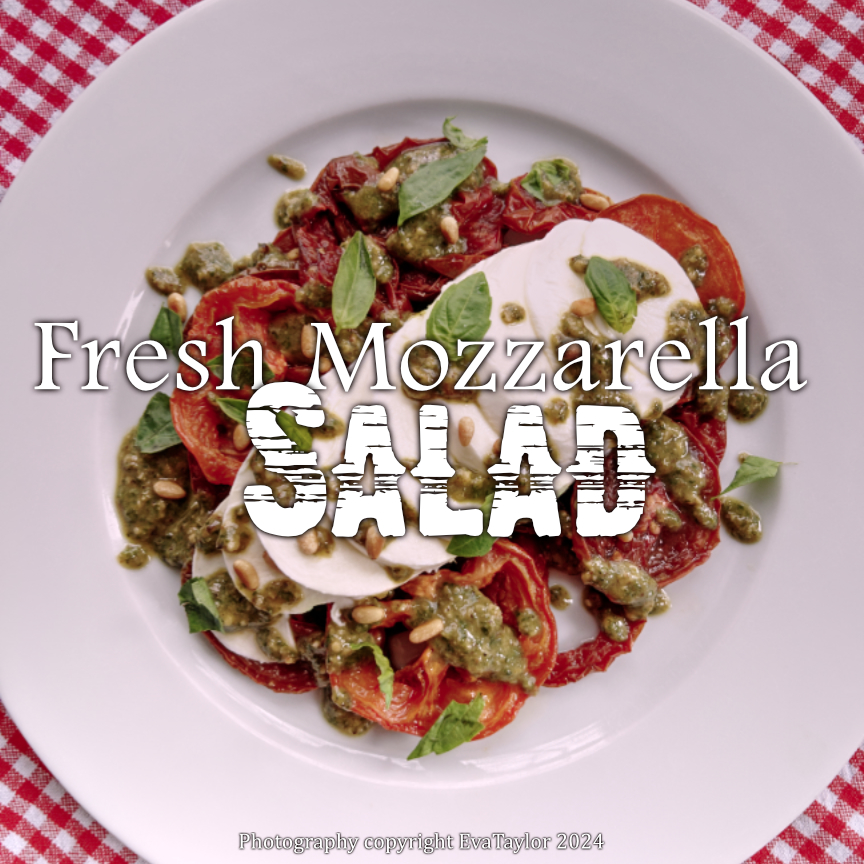

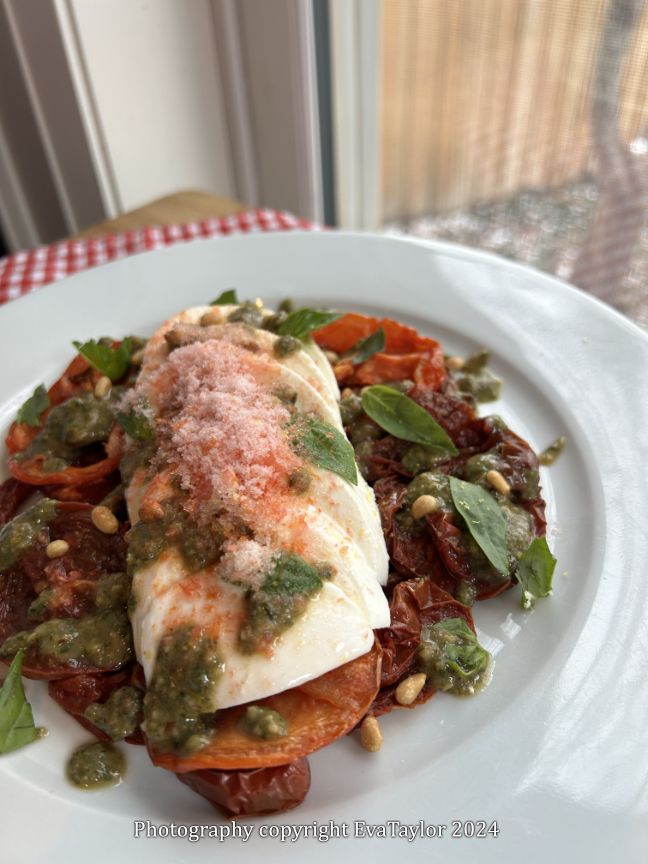


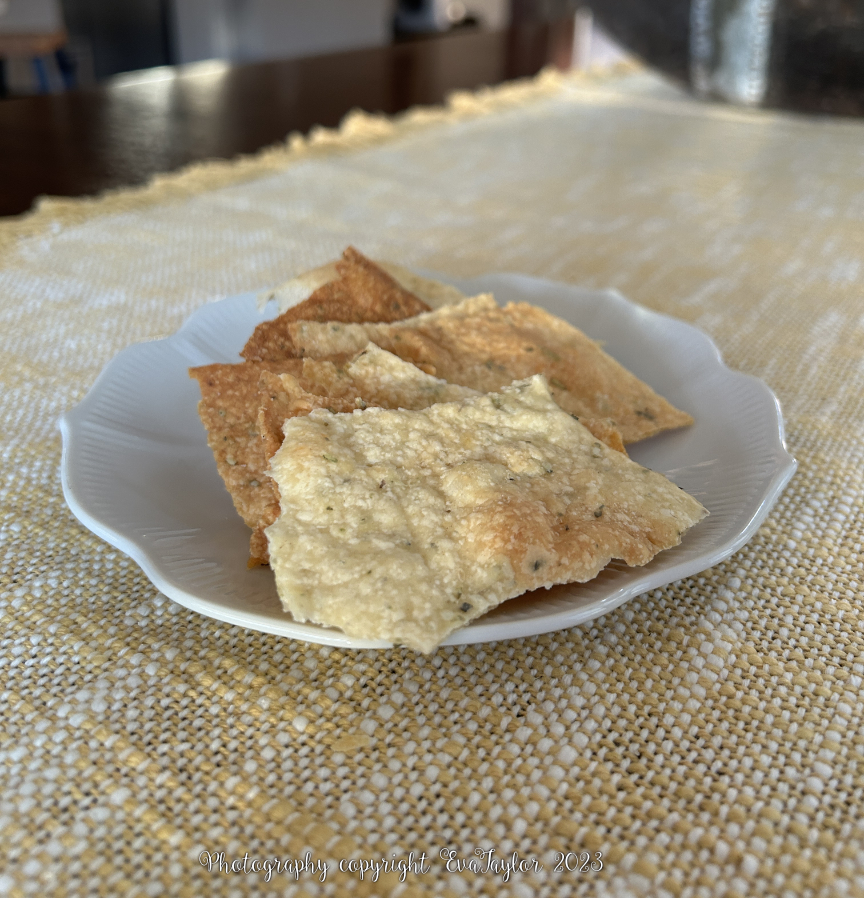

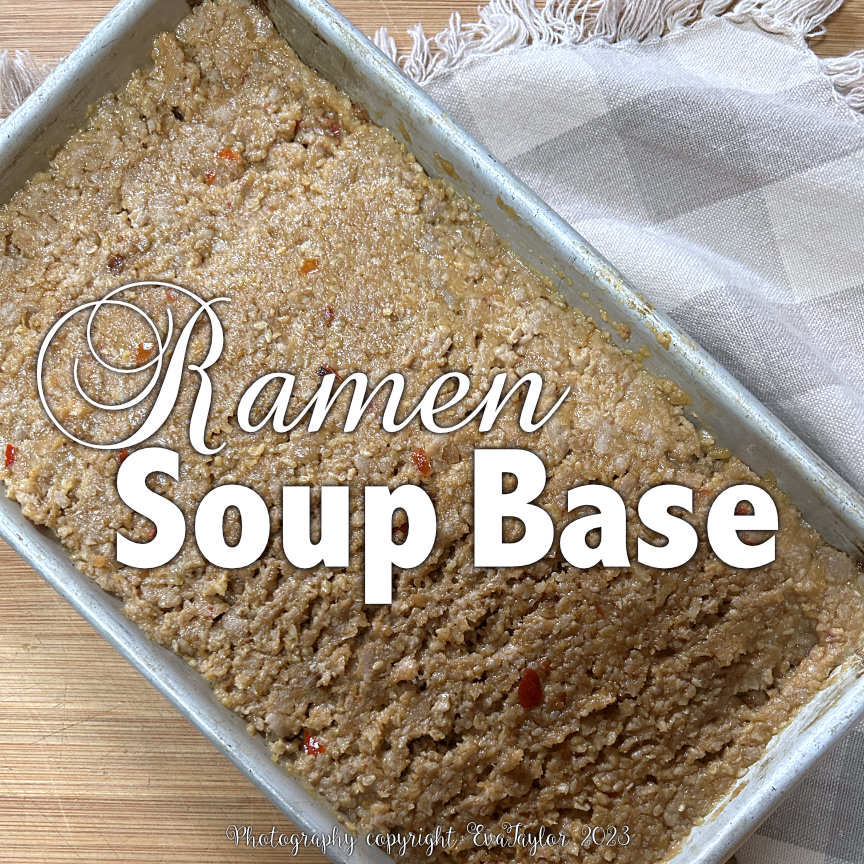
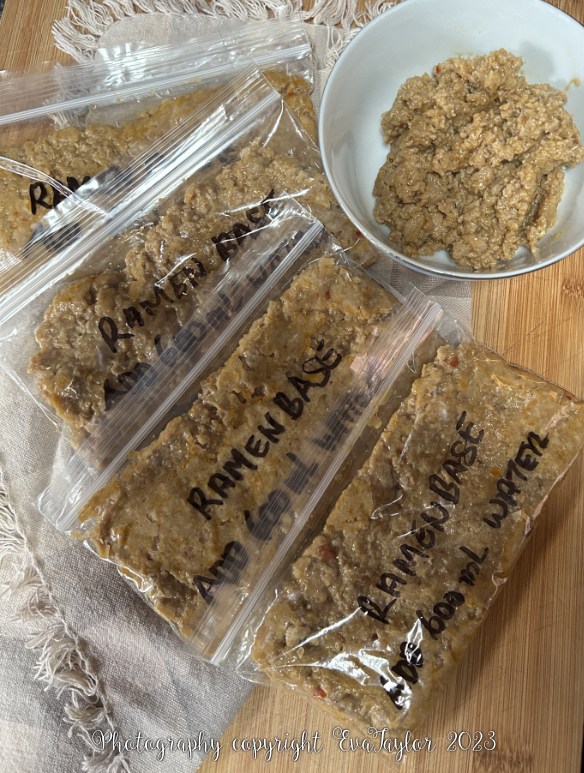


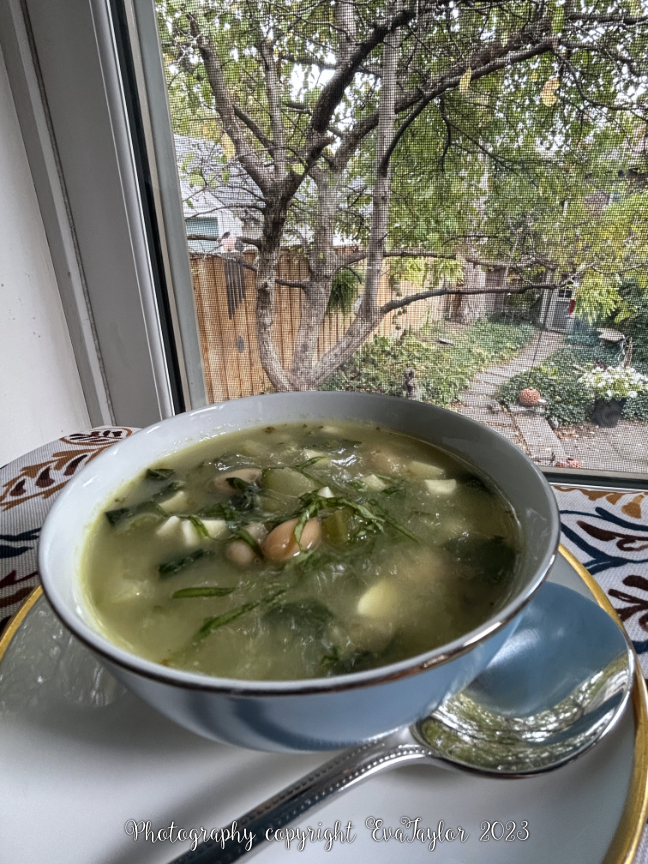

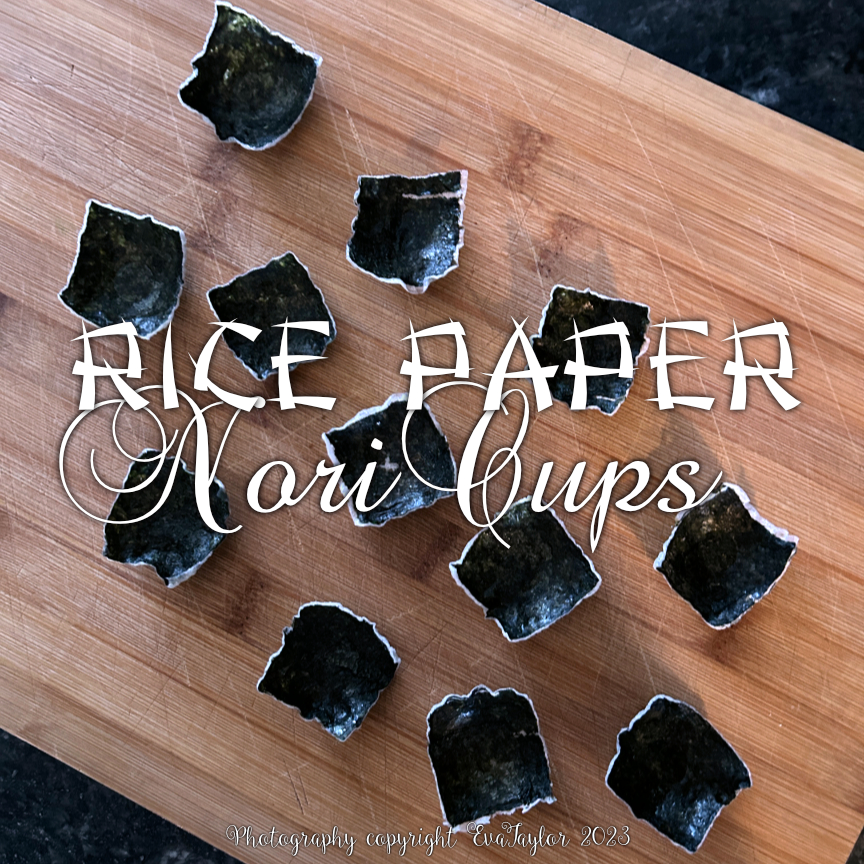


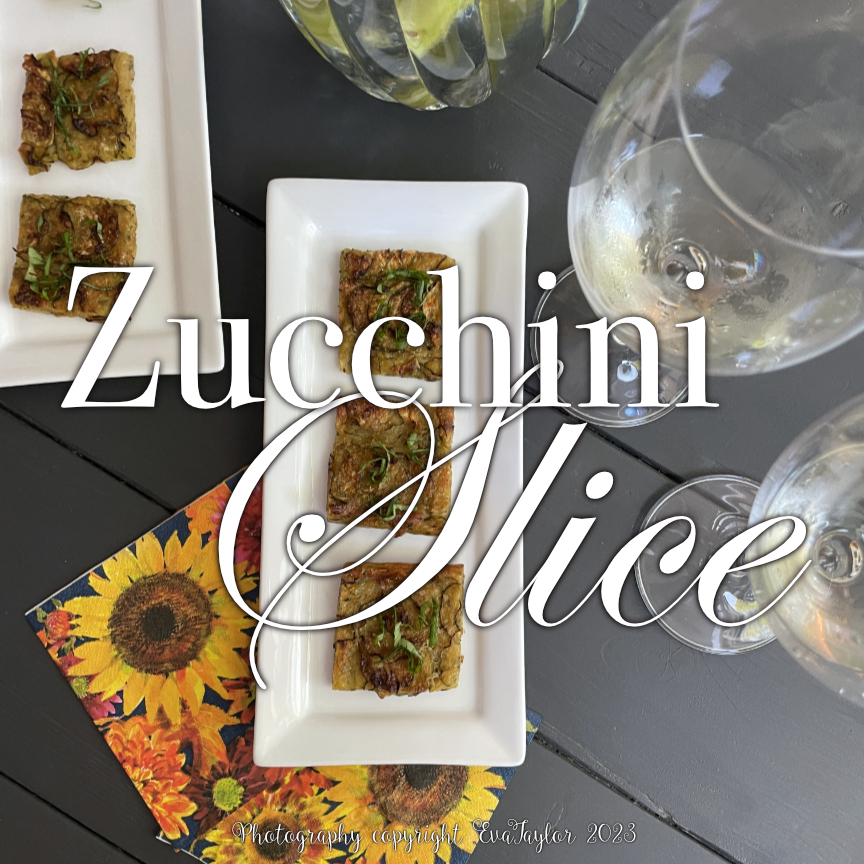
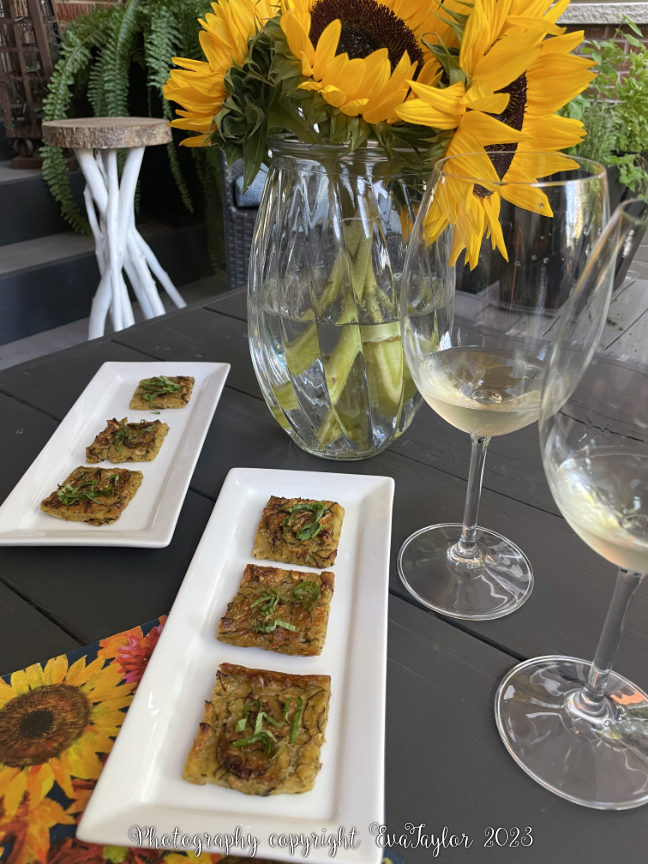


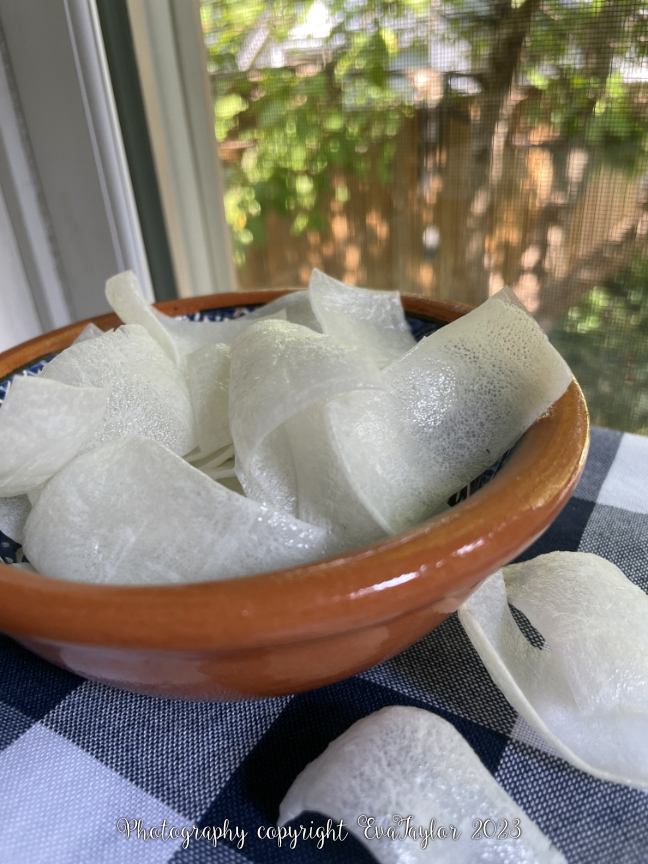

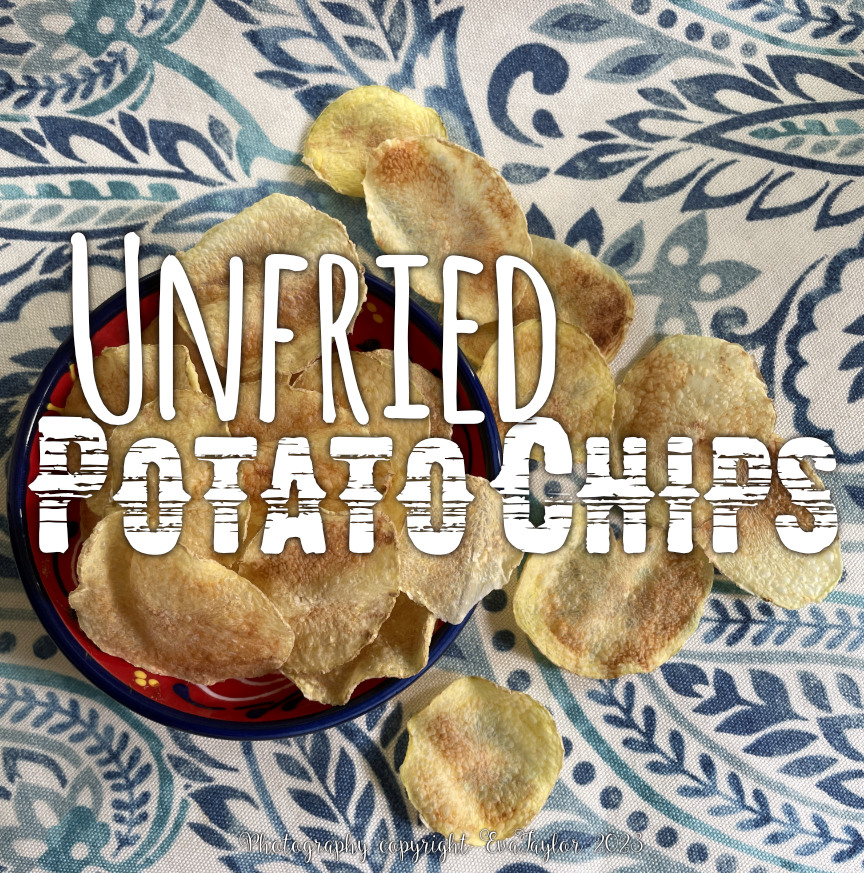
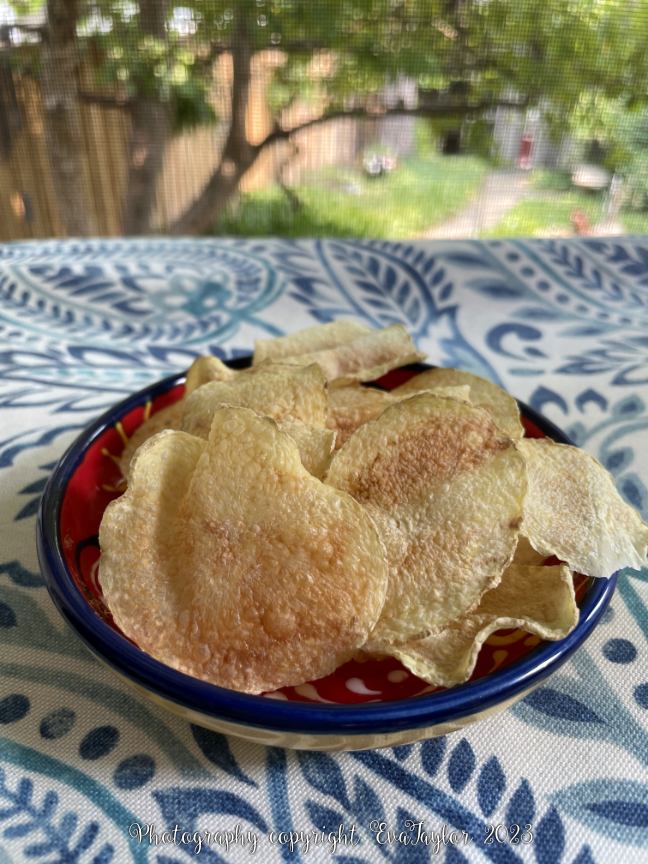


 A delicious combination of green vegetables in a rich, flavourful broth.


 The bright green colour is joyful, don’t you think?


