Feeds:
Posts
Comments

Archive for the ‘Cocktails’ Category

Merry Christmas! Hope everyone is having a wonderful time.

We spent the month of November in Arizona again, although it might be our last time this time. But we say that. Every. Single. Time. We see our dear American friends and get in a load of sunshine to boot! The weather was beautiful and slightly warmer than last year, we had high twenties (celsius) most of the daytime and mid-teens at night. Perfect for leaving the windows open for sleeping.

We did a lot of walking and hiking. The National Parks have beautiful trails that are reasonably priced and there are many free parks too. We fed our resident bunny and, inadvertently fed our resident Road Runner (sadly a bird crashed into our window and he died on impact and fortunately, the road runner didn’t mind and he scooped up the bird and took him home for a late Thanksgiving Dinner!) At least, we did not have to deal with it.

This slideshow requires JavaScript.

Of course, we always have a party at the end to use up pantry ingredients and this time was no different, I came up with this recipe to use flour, oil, cheese, and herbs.

The oven was gas and baked rather unevenly.

Pantry Clean Out Crackers

A Kitcheninspirations original recipe

This recipe makes about 2 sheets approximately 25 cm x 38 cm (10 x 15 inches)

Ingredients:

  • 125 g “00” flour
  • 40 g cheese, finely grated
  • 30 mL olive oil
  • 80 mL water
  • Pinch of salt
  • 3-6 g dried herbs

Directions:

  1. Mix all of the ingredients together in a bowl.
  2. Transfer to a clean surface and knead by hand until the dough becomes smooth and everything is evenly distributed. Rest the dough for 20 minutes.
  3. Preheat the oven to 350° F. Line a baking sheet with parchment.
  4. Roll out the dough into a thin sheet about the size of the baking sheet. Transfer to the parchment lined baking sheet and bake for xx minutes or until lightly browned and crisp.
  5. Cool and break into chip-sized fragments. Serve with your favourite dip.

Read Full Post »

Upon our return from Spain, I was missing being there so I made the Almond Tuiles of Sevilla (Tejas Dulces de Sevilla). They are delicious but it got me thinking about a savoury version. We had brought home some wonderful cheese called Old Amsterdam and I thought it would make a delicious snack. They are light and airy and crisp. They are strong enough for dip, but tasty on their own. I love how rustic they look from just breaking them apart.

Savoury Cheese Tuiles

Makes about 20 cm x 30 cm sheet

Ingredients:

  • 1 egg
  • 30 g cheese (I used Old Amsterdam)
  • 1 g salt
  • 1 g smoked paprika 
  • 50 g flour 

Directions:

  1. Beat the egg until it reaches the ribbon stage (about 5 minutes), add the salt and smoked paprika and mix well, then fold in the flour.
  2. Spread evenly on a parchment-lined baking sheet and sprinkle the cheese over it evenly and bake at 275° F for 20-35 minutes or until it has totally dried out and developed a golden colour.
  3. Cool entirely and once cool break into shards. Serve at room temperature.


Read Full Post »

Sometimes it’s just the simplest things that are the best. While we were in Spain, we had a lot of tapas, they serve tapas every time you order a glass of vino. Sometimes it is as simple as delicious olives, or sometimes it’s a little ham sandwich. While we were in Granada, we slipped into this adorable little bar and ordered a couple of glasses of vino with some tapas. Before we even had our first sip, they brought out a good quantity of homemade potato chips and these little round sandwiches (about 7-10 cm in diameter). If we hadn’t already ordered a selection of cheeses and charcuterie, we would have been done! And they would not have been offended. This is Spain, where a glass of good quality wine is €3.50 (less than $5) AND it comes with food! And there is no expectation of tipping, most restaurants add a small service fee per person so you needn’t worry about it.

We were sitting at home one evening when we decided to have a glass of vino and JT asks what we were having for hors d’œuvres! I had to scramble a bit because I hadn’t pre-made anything for the freezer but I did have some incredible peppers (did I mention how wonderful vegetables taste in Spain?) so I sliced them thinly and sautéed them and presented them with some toasted Spanish pine nuts. They were fantastic! So simple. If you’re serving a crowd, you might want to add a splash of red wine and some sliced chorizo, served with crusty bread of course. This is definitely going into my repertoire because I always have peppers at home.

I haven’t stipulated quantities because it’s what you have on hand. I used about a half of pepper each of the red and yellow and about 1/4 of an onion.

These are some of the sweetest peppers we’ve ever tasted.

Sautéed Peppers with Pine Nuts

A KitchenInspirations Original Recipe

 Ingredients:

  • Red peppers, deveined and seeded, cut into strips
  • Yellow peppers, deveined and seeded, cut into strips
  • Onion, thinly sliced
  • Splash of olive oil
  • Pine Nuts, toasted
  • Salt and pepper to taste

 Ingredients:

  1. Sauté the onions and peppers in a splash of olive oil. Add the chorizo and red wine, if using
  2. Sprinkle with pine nuts, salt and pepper and serve with crusty bread.

Read Full Post »

You may have noticed from my other socials that we have escaped Toronto and finally headed to Spain. Our first trip in February was cancelled by you know what. We are here for 51 days. The sun and relative warmth have been life-altering. I wake up just to see the sunrise on the Mediterranean (it’s not that bad, 7:30-ish during our stay).

This slideshow requires JavaScript.

Our kitchen in the flat (my cousin’s flat) is challenging from a size point. I have fitted it with most of my favourite tools so I can do most things but finding a place to do them can be a challenge. Most people who rent do take away or go out to one of the many restaurants in this little village. The Spaniards like to eat late (9pm would be considered an early dinner) but I find it difficult to eat that late, so we end up going out for lunch and having a light dinner around 7pm. Although the first few attempts to lunch were failures as many places don’t open until at least 1:30 (we don’t eat breakfast) and they close between 2-5pm for Siesta. Don’t get me started on Siesta, it is a beloved ritual in the smaller centres. This little recipe was developed to take us through cocktails one evening. 

Retro Olive Balls

A KitchenInspirations Original Recipe

Makes 8 pastry-wrapped olives

Ingredients:

  • 15 g unsalted butter, room temperature
  • 60 g cheese, we used manchego
  • 60 g flour
  • 15 g roasted garlic purée
  • Salt, pepper to taste
  • water to bind
  • 8 olives

Directions:

  1. Preheat the oven to 350° F.
  2. Combine everything but the olives in the small bowl of a food processor and process until combined. If the dough still doesn’t come together, add a few drops of water and pulse until it comes together.
  3. Divide the dough into eight equal portions. Roll each portion into a small circle and wrap around each olive, rolling in your hand until it is smooth. Repeat until all of the olives are wrapped.
  4. Bake on a parchment-lined baking sheet until golden, serve warm.

A delicious buttery pastry enveloping a Manzanilla Olive.

Notes:

  • I used unpitted Spanish Manzanilla Olives because it is what I had at home, black olives or even pimento-stuffed olives would be lovely with this recipe. Make sure you mention to your guests that the olives are with pitts.
  • Double or triple this recipe for more tasty little balls.


Read Full Post »

It’s quite funny how the universe works, isn’t it? Case in point, we were down in Arizona in March-April and my dear friend Theresa decided to introduce me to a Moscow Mule, a refreshing alcoholic bevy served in a classic copper mug. I had never had one before. It is made with ginger beer and vodka and lime juice, and it is very tasty and refreshing. Fast forward a couple of months, I’m minding my own business and to my surprise, I receive an unsolicited email from a Canadian company out west who imports and sells their very own, wait for it…Moscow Mule mugs! What a coincidence indeed! We spoke on the telephone and I suggested that I could do a post for them, focussing on a recipe that would be served in said mug. Of course, they sent me a couple of their mugs so I can post pics of the recipe in them. The mugs are beautifully hand-hammered by an artisan group in India, but most importantly, they are lined with nickel lining. Apparently, using mugs without nickel can cause a series of serious health issues (so if you have such mugs, check to make sure they have a non-reactive lining and you are not drinking directly from a copper mug). This blog post talks about the importance of nickel lining.

The Moscow Muled mugs are reasonably priced at $16.60 Canadian ($12.50 US) each and would make great hostess gifts or stocking stuffers during the holidays.

I added a couple of cute tea towels, but another great idea would be a gingerbeer kit, complete with vodka, gingerbeer and limes!

Moscow Mules were invented circa 1941 in LA in a British pub called Cock ‘n’ Bull by their head bartender, Wes Price. The story is quite interesting, so if you wish, you may read about it here.

Take the worry out of the mug, Moscow Muled mugs are made with “100% pure high-grade and food-safe copper with an inner layer of high-grade nickel.”* Plus they look awesome and will keep your bevy cool on hot summer nights! I knew I wanted to make the Authentic Ginger Beer recipe on their website, it’s relatively easy (just a bit of time) and you probably already have all of the ingredients at home. The only thing I did to this tasty recipe is half it (there are only two of us and it still made around 4 litres) and I converted it to weights instead of volumes.

Raise a Moscow Muled mug with this tasty and refreshing drink, Cheers guys.

I was gifted with two Moscow Muled Mugs for this post, the opinions listed are my own.

*moscowmuled.com

I made new zippered covers for the sectional in the background, so happy with the way they turned out.

Moscow Muled Ginger Beer

Makes about 4 L of ginger beer.

For the original recipe, please click here.

Ingredients, Step 1 Ginger Bug:

  • 250 mL water
  • 15 g sugar
  • 13 g freshly grated ginger

Directions:

  1. Combine the freshly grated ginger with the sugar and water in a glass jar.
  2. Stir until sugar has entirely dissolved with a non-reactive spoon, like a wooden spoon or silicone spatula.
  3. With a clean tea-towel, cover the glass jar and secure it with rubber bands and allow to sit at room temperature for a total of 5 to 7 days.
  4. During these 5-7 days, every day, add another 13 g of freshly grated ginger and 15 g of sugar and stir until dissolved. Cover the glass jar with a towel or cloth, and secure it with rubber bands.
  5. The mixture will form bubbles around 5-7 days and at 7 days, it should smell sharp with a strong yeast aroma.

Ingredients, Step 2 Ginger Beer:

  • 85 g ginger root, peeled and grated
  • 3.5 L of filtered water
  • 2 g of sea salt
  • 300 g sugar (white or brown, I used white because I wanted a clear ginger beer)
  • 42 mL lemon juice
  • 250 mL of ginger bug

Directions:

  1. on the 5th or 7th day, combine 2 L of water, ginger, sugar and salt in a large non-reactive pot, bring to a boil then allow it to simmer for 5 minutes, stirring periodically to steep the ginger.
  2. Remove from the heat and add the remaining water. Allow this liquid to cool completely. Once cool, use a very fine sieve to strain the ginger to make a clear liquid. Pour the ginger bug into the mixture (make sure that it is room temperature, about 23° C or 74° F, as you will kill the ginger bug if it is hot).
  3. Add the lemon juice and stir well.
  4. Pour into sterilized bottles, making sure they are only about 2/3 full because this ginger beer will actually ferment and produce carbon dioxide.
  5. Store bottles in a warm, dark place away from light and allow it to ferment for about 10 days. Carefully loosen caps from time to time to relieve the pressure from fermentation (I did this once per day).
  6. Refrigerate the ginger beer when it has reached your preferred level of sweetness. Refrigeration causes the fermentation to stall significantly. The longer the fermentation, the less sweet your ginger beer will be. We fermented our lot for 10 days and it produced a gingery, slightly carbonated beer that wasn’t as sweet as I thought it would be.

I know there is no orange in the Moscow Mule recipe, I just wanted a hit of colour.

Notes:

  • I used recycled screw cap wine bottles, properly washed, rinsed and sanitized.
  • Make sure you tighten the screw caps well so the ginger beer can ferment. Also, make sure you release the CO2 every day, by opening the bottles and allowing them to exhale, so the bottles don’t explode.
  • Even after the ginger beer has fermented and is resting in the refrigerator, it contains a lot of effervescence, so be careful. Open bottles over the sink. Don’t say I didn’t warn you.
  • I suspect there is some alcohol in the ginger beer I made, but I don’t know for certain.

Read Full Post »

In late March/early April, we spent two glorious weeks in Arizona. We stayed with friends for this duration because we had offered to puppy-sit (Jordan) while they took a quick 7 day holiday in Ireland. We had never puppy sat before but their beautiful black lab, Jordan is quite possibly one of the laziest dogs we have ever met so she was really no problem at all. We did get her used to three walks per day, that is, until we bumped into a woman carrying a black light, walking her dog after dark. I had to ask and yes, it was to detect scorpions. That was the end of our after dark walks. Period.

I like to arrive with gifts in hand and these basil Parmesan Straws were the perfect hostess gift because I had a bunch of basil that needed using a couple of days before our departure. Plus they are pretty tasty. Jordan thought so too.

Sun-dried Tomato, Basil and Parmesan Straws

A KitchenInspirations Original Recipe

Makes about 75 pieces

To print this recipe, please click here.

Ingredients:

  • 290 g flour
  • 10 g Fresh Basil, finely chopped
  • 50 g sun-dried tomatoes in oil, roughly chopped
  • 10 g garlic, finely minced
  • 110 g unsalted butter (cold)
  • 30 g  grated Parmesan cheese
  • 2 eggs, beaten separately
  • 15-30 mL water or milk
  • Sea salt

Directions:

  1. Pre-heat oven to 400°F.
  2. Put all dry ingredients into a food processor, including the basil, sun-dried tomatoes and garlic, and process to mix well.
  3. Add the butter and process to coarse granules.
  4. While the blades are running, pour in the egg and process until a soft ball forms. If this does not happen, drizzle little bits of water until a soft ball forms.
  5. Remove from processor and using a small amount of flour, roll out the dough to about 1/2 cm thickness. Cut into 8cm x 7 mm straws and position evenly on a cookie sheet. Brush with second egg and sprinkle with sea salt.
  6. Bake for 12-15 minutes until golden.
  7. Remove and allow to cool. This will store well in a cool, dark place or freeze.

Notes:

  • I like to use a plastic ruler to cut the straws evenly. My ruler is a dedicated food ruler that never is used with pens or pencils or markers!
  • This type of rolling pin gives you evenly thick dough, but as I have mentioned previously, it is a pain to unscrew the disks and I inadvertently have to wash all of the disks each time I use it.
  • This dough is a bit wetter than some of my other recipes because of the sun-dried tomatoes and fresh garlic.

Read Full Post »

In mid-March JT and I went to the large National Home Show at the Enercare Centre. I found discounted tickets on Groupon AND I also found a Groupon discount code, which made the two tickets $17.80; that was an awesome deal because the regular price of the tickets are $20 each! These shows are getting more and more expensive and I really don’t understand why, the vendors pay through the nose to exhibit, AND the public pays a hefty entrance fee. The kicker was parking at $21! The Enercare Centre is not located downtown, it is slightly west but still within the city, but there is not much else around it — total money grab! And that completes my rant.

While at the show, there are always a few food vendors exhibiting and one of my favourites is a shortbread company who generously hands out samples. JT and I sampled one of their savoury shortbread cookies and I knew I had to make a batch. On the drive home, we brain-stormed the possible flavours and I knew the moment JT said caramelized onion that it had to be the one. We bought a very special sharp cheddar to accompany the sweet flavour of the caramelized onion, they were absolutely perfect!

Caramelized Onion and Cheddar Shortbread Cookies

A KitchenInspirations Original Recipe

Makes about 75 cookies that are about 3 cm in diameter.

To print recipe, please click here.

Ingredients:

  • 114 g unsalted butter, room temperature
  • 80 mL caramelized onions, slightly dried out, see notes
  • 120 g sharp cheddar, grated
  • 5 g sea salt
  • 120 g “00” flour
  • 90 g cornstarch

Directions:

  1. Preheat the oven to 350° F. Line a baking sheet with parchment paper.
  2. Cream the butter, caramelized onions and grated cheddar until light and fluffy (about 5-8 minutes).
  3. Sift the salt, flour and cornstarch into the creamed butter mixture and mix until well combined but do not overmix.
  4. Create two disks and wrap in plastic wrap and freeze for 15 minutes or refrigerate for 30 minutes.
  5. Turn out to a lightly floured surface and roll about 4 mm thick.
  6. Cut with 3 cm round cookie cutter. Continue until the dough has been used up. Bake for 14-16 minutes or until lightly golden. Cool on a wire rack.
  7. Serve with wine or your favourite cocktail.

Notes:

  • We used the KitchenAid Flex Edge Beater, it creams the cheese, butter and onion beautifully.
  • We always keep caramelized onions in the freezer in ziplock baggies for such uses. I use this recipe.
  • Spread the caramelized onion on a piece of parchment and allow it to sit for 10 minutes, this allows some of the moisture to wick out and will allow the shortbread its melt-in-the-mouthfeel.
  • The cheddar we used today was a Welsh cheddar.
  • The “00” flour we used was an imported Italian flour.
  • The rolling pin we used was this one. To be honest, I don’t love it, it’s a pain to unscrew the disks that are not required but it does roll the dough out evenly.

The flavour of the caramelized onion shines in this delicate little savoury cookie.

Read Full Post »

Limoncello

Limoncello First

A couple of years after JT and I tied the knot we went to Europe together, it was a combination business and pleasure trip. As the business part of our trip, we went to Modena, Italy to see a piece of equipment that JT’s soap-making family business purchased. As you may or may not know, Italy is well known for its soap making equipment. And a little known fact 😉 Modena is the epicentre of balsamic vinegar.

The Italians take their balsamics very seriously, think of the French and champagne. The special thing about the thick, rich vinegar is that it’s aged for several years in a variety of barrels; it is this very aging process that gives this unique condiment its sweet and piquant flavour, rich and luxurious colour and thick, viscous texture.

We drove up from Florence where we were staying a few days during the middle of our trip; it’s a scenic 2 hour drive through the lush Italian countryside. The Italians had been making soap equipment for hundreds of years and at that time, they were some of the best. JTs family already had several Italian pieces in their factory and although they had purchased some pieces from Italy before, this particular machine was a first-time purchase from this vendor, so a visit from ‘the customer’ was a big deal. We met with Mr. Borghi the English speaking Italian representative of the equipment maker. The machine itself was over six figures so you can imagine our surprise when we were taken to a humble rural garage where a few men were busy hand crafting the machine! A very tall, broad, heavily bearded gentleman approached us with visible excitement. He was wearing mechanics coveralls and his hands were covered in machine grease, he didn’t speak a word of English so Mr. Borghi had to translate for us. We had a short tour of the garage (really just one large room) and then we were invited to lunch.

We ate an enormous meal at a humble, family run local restaurant; each dish was prepared with love and respect to its origins. I don’t recall much of the meal (it was 27 years ago!) except that it was lively with conversation and it was my very first introduction to balsamic vinegar. When our host discovered that I had never had balsamic before, he insisted I order a steak that was garnished with 100 year old balsamic table side (and no, they did not leave the bottle), the waiter ceremoniously poured a few drops of the liquid gold onto my perfectly cooked steak. Everyone (yes, everyone in the packed little restaurant) stopped and watched as I carefully cut into the juicy steak and took my first bite. At the time I thought it was odd, after all it’s only vinegar with a dark, thick, chocolate syrup-like colour. But as soon as it hit my tongue I understood how truly special that moment was. The earthy, salty flavour of the rare cook steak against the thick, sweet, pungent and complexly flavoured vinegar was something I had never experienced before, I was in heaven! As my ‘audience’ waited with baited breath, I knew my face revealed the reaction they were hoping for: pure, unadulterated bliss – words were not needed. Then the restaurant resumed the animated conversation and clatter of cutlery against the plates. As an after lunch digestive, our gracious hosts poured some delicious, luciously thick and ice cold limoncello. What a treat that was.

After lunch our lovely translator, Mr. Borghi insisted that he buy me a bottle of balsamic to remember the experience, so in the parking lot after a long and deliciously filling meal, a plan was hatched. We would follow Mr. Borghi a short distance to a reputable shop where he would pop in, buy the vinegar, say our farewells and we would continue our drive to Florence. The “short drive” turned into 45 minutes and was in the complete opposite direction to Florence which meant our two hour trip was now three and a half. Poor JT.  But I had a prized possession: my very first four leaf balsamic vinegar!

I suspect that Italians feel the same way about Limincello and that the process to make it is as revered as the final product itself. Limincello was, of course, invented in Sorrento, Italy some 600 km south of Modena. And although this recipe claims to be originally Italian, this particular version is not. However, I was truly intrigued by the process and it had to be made. Sadly I was not able to source Meyer Lemons (see notes) as the recipe suggests but I did go the extra mile to purchase organic lemons for the main reason suggested in the article: the alcohol evaporates in the enclosed glass, macerating the lemon skin and then falling back to the bottom of the jar as flavoured liquid so you don’t want pesticides contaminating your Limoncello.

LimoncelloMaking_1

Suspended Organic Lemons ready to do their job.

LimoncelloMaking_2

I wondered what the macerated lemons would look and taste like: they were quite pale and had a very strong vodka lemon flavour that was surprisingly unpleasant. I chucked them.

LimoncelloMaking_3

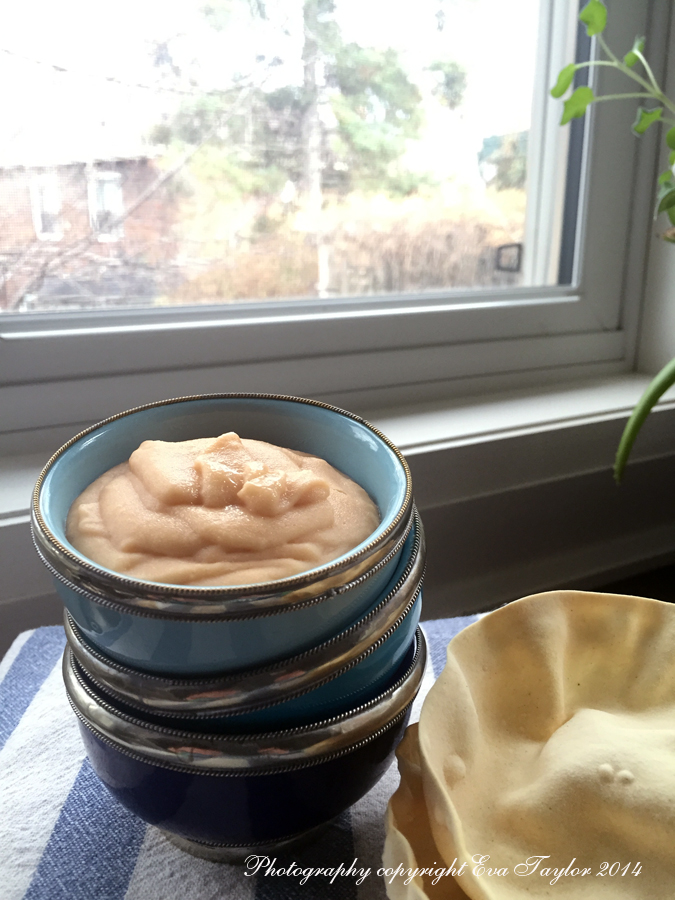
After 4 weeks, the vodka took on a slightly yellowish colour. The gorgeous bottle is from our lovely neighbours.

Limoncello Recipe

Please click here for the “best limoncello recipe you’ve ever tasted”

I followed the recipe with the exception of the organic Meyer lemons, I used ordinary organic lemons.

I also made a simple syrup using the same weight of raw sugar as water and dissolved it by simply stirring for a few minutes and not boiling. Next time I’ll use ordinary sugar but I’ll do the same process, I wasn’t pleased with the amber colour of the simple syrup and its negative effect on the colour of the limoncello, although when poured into a small glass, it was pretty yellow.

I must admit I was pretty pleased with the outcome. Except for the cost. In Ontario, a 750 mL of Skyy vodka is $38.75, the organic lemons were $3.00 and the raw sugar was $4.00. A bottle of commercial limoncello is $18.35.

limoncello

I served the ice cold limoncello in antique glasses on my dear Mom’s needlepoint tray that she made in school.

limoncello2

Notes:

  • I did buy as lovely Meyer Lemon tree that presently has about 15 little lemons growing on it!

Read Full Post »

VeganSpanakopita_4208

In converting a recipe to Vegan, I generally try to keep in mind all the flavours AND the textures in the non-vegan version. When I decided to make Vegan Spanakopita I became very excited until I remembered that there was crumbled feta in my recipe. Crumbled feta is not Vegan, so I began to think…what oh what can I use to replace the flavour and the unique texture this delicious cheese brings to the table. Yes, I could have omitted it altogether, but then it wouldn’t be as delicious!  Some time ago, I’d made a note to marinate tofu in ‘feta’ flavours like lemon juice, apple cider vinegar, salt, oregano and olive oil…so I did a little experimentation and came up with this version. It’s actually pretty tasty on its own, but I needed it for this recipe so there won’t be marinated tofu on the buffet table, but this spanakopita more than makes up for it. I don’t think the non-vegans will mind this version. But there will be pulled pork and bacon wrapped dates just in case ;-)!

Vegan Spanakopita

A kitcheninspirations original recipe.

Makes about 50, 6 cm (about 3 inch) triangles

Ingredients:

  • 1 tbsp canola oil
  • 1 large sweet onion, sliced thinly
  • 5 cloves garlic ~20 g, finely minced
  • 500 g zucchini grated (about 2 medium-sized)
  • 300 g spinach
  • 3-4 tbsp finely chopped fresh dill
  • 2 tbsp chopped fresh oregano
  • 350 g marinated tofu, drained, roughly chopped (recipe below)
  • About 8-10 sheets phyllo
  • 1/4 cup canola oil

Directions:

  1. Heat canola oil in a large dutch oven. Add the sliced onion and sweat it out a bit, add the garlic and cook for about a minute. Add the grated zucchini (click here for some clear steps on making this dish) and cook for 3-4 minutes. Add the spinach and cook until it has totally wilted.
  2. Remove from the heat and add the fresh dill, oregano and roughly chopped marinated tofu. Set into a fine sieve and allow to cool and drain.
  3. Once completely cool, prepare the phyllo sheets by cutting them into 3 cm or 2.5 inch strips and lightly spraying each one with canola oil. Use two strips per triangle. Place one heaping teaspoon of the cooled filling onto one end and start folding into a triangle. Brush or spray lightly all over with the canola oil.

    VeganSpanakopita_4196

    A heaping teaspoon of filling goes at the end.

    VeganSpanakopita_4197

    Begin folding into a triangle and continue until the length is used up.

    VeganSpanakopita_4198

    The nature of the folds covers in the filling very well.

    VeganSpanakopita_4200

    A tidy little triangle.

  4. Bake at 350°F for 12-14 minutes if saving for the freezer or 116-18 minutes to serve immediately.
  5. To reheat, place a single layer of the triangles onto a baking sheet and reheat in 300°F for 10 minutes or until golden.

VeganSpanakopita_4209

The oil makes the phyllo very crispy.

Marinated Tofu

Makes enough for one batch of Spanakopita (prepare 1-2 days ahead to allow tofu to absorb the marinade flavours)

Ingredients:

  • 350 g extra firm tofu
  • 1/4 cup apple cider vinegar
  • 1/4 cup lemon juice
  • 1/4 cup water
  • 1/4 cup EVOO
  • 1 tbsp fresh oregano
  • 1 tbsp plus 1 tsp sea salt
  • 1/2 tsp freshly ground mixed peppercorns

Directions:

  1. Place the drained tofu on a cutting board over a sink so it’s tilting a bit into the sink. Place another cutting board on top and a heavy cast iron pan. Leave for 30 minutes to drain.
  2. Meanwhile, combine the apple cider vinegar, lemon juice, water, EVOO, oregano, sea salt and peppercorns and mix well.
  3. Once drained, dry off the tofu and cut into 1 cm cubes. Place into a glass container and cover with the marinating liquid. Marinate in the refrigerator, shaking the jar intermittently over 1 to 2 days. Drain to use.

Read Full Post »

We’re buried in the chaos of the Christmas holidays and on Wednesday and Thursday we were buried in snow! This was our first real accumulated snow fall and the first has always been my favourite kind — the virgin snow delicately covering our urban landscape like a thick, fluffy duvet. It’s really a perfect backdrop for Christmas and with the company party coming up tomorrow, it’s perfect timing. Hopefully the city mess and dirt will keep at bay so the snow remains perfect for one more day.

Mushrooms have always been a huge favourite at our house, be it fresh, plain button mushrooms or fresh, wild mushrooms like shiitake, portobello, king or cremini, we even have a few recipes for the specialty dried variety. But for this special recipe, I chose fresh wild mushrooms.

I created this vegan recipe (to be enjoyed by all) because I wanted to show-case oven roasting mushrooms because it’s a technique that is relatively new to me (oven roasting vegetables is not new, just oven roasting mushrooms). Oven-roasting mushrooms brings out their sweetness and subdues the strong earthiness that some wild varieties have. Toss in finely chopped, fresh garlic and Extra Virgin Olive Oil from our neighbour’s father’s olive grove in Greece and these tasty fungi make a mouth-watering filling for these classy little tarts. By adding a bit of puréed red lentils AND puréed roasted cauliflower and celeriac mash put these gems over the top flavour-wise and adding a lovely creamy texture that glides into your mouth like a velvet cape.

This is the FLAKIEST pastry EVER!

This is the FLAKIEST pastry EVER!

Vegan Mushroom Tarts

A Kitcheninspirations original recipe.

Makes about 36 little tarts

Ingredients:

  • 600 g variety of wild mushrooms (I used  a combo of white, King, Portobello and Shiitake
  • 20 g garlic, finely chopped
  • 50 mL EVOO
  • 1/2 tsp sea salt
  • 1/3 cup red lentil purée (click here for recipe)
  • 1/4 cup cauliflower and celery root mash (click here for recipe)

Directions:

  1. Pre-heat oven to 450° F (232° F)
  2. Toss roughly chopped mushrooms in garlic, EVOO and salt. Spread out in a large roasting pan  and roast for about 20 minutes or until the released liquid has evaporated and mushrooms are roasted golden. Turn often so the mushrooms don’t stick to the pan.
  3. Cool.
  4. Add mushrooms to a food processor and process until all are relatively small bits. Fold in the red lentil purée and the cauliflower and celery root mash. Season to taste.
  5. You may freeze the mushroom filling at this point to use later. To use later, defrost first.
  6. Fill the baked pastry cups with the mushrooms and reheat at 200° F  (93° C) for 10-12 minutes or until warmed through.

Vegan Thyme Pastry Cups

Vegan tart pastry recipe from Vegan Baking with minor alterations. The links below for vegan butter and shortening are included in case you feel like experimenting. (This is an EXCELLENT Vegan blog with a lot of instruction and science behind the madness).

Ingredients:

  • 2 ½ cups all-purpose flour
  • 1 tbsp sugar
  • 1 teaspoon salt
  • 1 tsp thyme
  • ¾ cup (161 grams) or 1 ½ sticks cold Regular Vegan Butter or non-hydrogenated margarine cut into small pieces
  • ½ cup (108 grams) or 1 stick cold Vegan Shortening or store bought shortening, cut into 4 pieces
  • ¼ cup cold water
  • 3 Tablespoons cold vodka (believe it or not, I did not have any, so I omitted it)

Directions:

  1. Whisk the dry ingredients together. Cut in the vegan butter and shortening just like you would a normal butter pastry, keeping it as cold as you can.
  2. Add the cold water and vodka and work lightly until it forms a ball. Make three disks and refrigerate, wrapped in plastic wrap for 30 minutes or overnight (mine was over night).
  3. Pre-heat the oven to 350° F (177° C).
  4. Roll out the pastry between two sheets of parchment paper to about 1 mm (1/16″) thick. Cut with your favourite cookie cutter and shape into mini muffin cups. Bake for 10-15 minutes or until lightly golden.
  5. Use immediately or freeze until required. No need to defrost before re-heating with filling.

Notes:

  • To help avoid the pastry getting soggy with the filling, I froze the pre-baked pastry and the filling separately and combined and reheated just prior to serving.
  • This pastry is also enough for one 9″ double crust pie. The original recipe serves up a sweet version too. Your should definitely check it out.


Read Full Post »

Hello everyone! I’m posting a bit more frequently for a couple of weeks in case some of my readers are looking for some creative Vegan recipes for the holiday season. I’ll go back to my regular schedule when I’ve exhausted these new recipes!

I adore the flavour and texture of butternut squash and I really wanted to incorporate something with this unique vegetable into our Christmas party but it had to be vegan. I came up with this simple yet very tasty little tart. To give the filling some body, I added a 1/2 cup of the lentil purée, it’s not enough to taste the lentil flavour but it does make the filling a bit thicker. Make sure you serve these tasty morsels warm for the squash to shine!

VeganButterNutSquashTart_4222

Vegan Butternut Squash Tartlettes

An original Kitcheninspirations recipe

Makes about 40 tarts (I netted about 650 mL of filling but it will depend on the size of your squash)

Ingredients for the Filling:

  • 1 butternut squash, peeled and cut into smallish cubes
  • 3 tbsp EVOO
  • Sea salt to taste
  • 1/2 cup red lentil purée (unseasoned)
  • Pepper to taste
  • Thyme for garnish

Directions for the Filling:

  1. Pre heat the oven to 425° F (218° C).
  2. Toss smallish cubes of the butternut squash in the olive oil and salt to taste. Bake for 40 minutes or so, or until fork tender.
  3. Using a stick blender, purée the squash with the red lentil purée, add pepper.
  4. Store filling separately from shells otherwise shells will soften. Just prior to serving, either spoon about 1 tablespoon of the filling into each shell and reheat in a 200° F (93° C) oven

Vegan Cracker Pastry

Ingredients for the Pastry:

Adapted from Elana’s Pantry recipe

  • 1 cup almond flour,
  • 1 1/2 cup white flour
  • 1 tsp sea salt
  • 2 tsp thyme
  • 4 tsp EVOO
  • 1 cup water

Directions for the Pastry:

  1. Combine all of the ingredients except the water. Drop small amounts of water into the pastry until it holds together. Roll out between two sheets of parchment paper. These are quite delicate but hold together well. The squash filling does indeed soften up the shell a bit so don’t be too concerned if it seems a little hard on its own.
  2. Bake for 16-20 minutes or until golden. Freeze until required.

VeganButterNutSquashTart_4224

This tart has body. Vavavavoom!


Read Full Post »

A surprisingly creamy dip

A surprisingly creamy dip

We’re hosting the company Christmas party (the company I write social media content for) and 1/4 of them are vegans and vegetarians! As usual, I really didn’t feel like making two different things so other than 2 fish and 3 meat dishes, everything else is going to be vegan! I’m even testing my skills with some pretty interesting desserts and VEGAN CHEESE! Stay tuned, I’m looking forward to learning to cook gourmet vegan. BTW, thank you to a long-time friend and colleague (and loyal reader) Michela, who offered some excellent suggestions ❤️.

Did you know that purée-ing (with a stick blender) cooked red lentils become so incredibly creamy that it tastes like you’ve added cream or butter to it? It makes an incredible dip and it also could be used as a base for a gluten free, even vegan white sauce! I make a large batch and freeze in an ice cube tray for quick additions to ‘cream’ up a sauce! Recently, we had an incredible cauliflower-lentil ‘Alfredo’ sauce which was TDF! So good. Next time I make it I’ll be sure to jot the ingredients down and actually measure everything!

A few years ago I won the runner-up prize for a photo contest from Roger Mooking (a celebrity chef here in Toronto), the prize was a Crock Pot with a mini heated dip pot. The crock pot croaked last year but the mini dip pot goes on. I don’t know about you, but I have never liked using this unattractive pot on my buffet table, so about a year or so ago I did some testing to see how hot it actually gets and was quite surprised that you could actually cook in it! The temperature gets to around 165F which would be enough to cook meat, but I wouldn’t suggest it. It is however, perfect to make a batch of beans or lentils for dip! I’ve been using it almost every week to make healthy bean or lentil dips. So if you have one sitting on a back shelf gathering dust, bring it out and put it to good use. Put it on before you go to work and when you get home you have a delicious dip or base for a creamy soup or sauce.

Creamy Red Lentil Dip

An original Kitcheninspirations recipe.

Makes about 250 mL (1 cup) of dip

Ingredients:

  • 1/2 c red lentils
  • 1 cup water or vegetable stock
  • 1/2 tsp cumin
  • 1/2 tsp coriander
  • 1/2 tsp sea salt
  • 1 tbsp dehydrated onion flakes
  • 1/2 tsp granulated garlic
  • 1-2 tbsp lemon juice
  • 1/2-1 tsp toasted sesame oil

Directions:

  1. Add all ingredients except lemon juice and toasted sesame oil to a mini dip crock pot, stir and then cover.
  2. Plug it in (only way to turn it on) and cook for 3-4 hours or when lentils are very soft.
  3. Turn hot cooked lentils into a tall container. Purée using a stick blender until smooth and creamy adding lemon juice and toasted sesame oil to taste. Refrigerate until needed.

I drizzled some toasted sesame oil over the top.

I drizzled some toasted sesame oil over the top.

The oven roasted tomatoes are incredibly sweet but still give this dip a piquant flavour.

The oven roasted tomatoes are incredibly sweet but still give this dip a piquant flavour.

RedLenilDipOvenRoastTomato_3984

These little water crackers were the perfect accompaniment to this cream dip.

Additional Flavours:

  • “Hummus”: to the recipe above, add additional finely chopped fresh garlic at the end as you purée to give it more of a hummus flavour.
  • Curry Dip: omit the lemon juice and toasted sesame oil and add 1/2 tsp curry powder with 2 tbsp coconut milk powder at the purée stage.
  • Oven dried tomato dip: Omit the cumin, coriander, lemon juice and sesame oil. Add to cooked lentils, 1 tbsp chopped oven (or sun dried) tomatoes plus 1 or 2 fresh basil leaves and purée until creamy and smooth.

Notes:

  • Other lentils (like green or du puys) don’t turn out as creamy, I’ve tried them and seriously prefer red.
  • I use granulated garlic (not the same as garlic powder) and dehydrated onions in this recipe because we preferred the end taste over cooking fresh cloves and onions in the mini crock pot. For whatever reason, the mini crock gave the garlic a very unusual flavour.
  • To make a base for ‘cream’ sauce, omit everything but the lentils, water and salt. Purée when cooked, allow to cool and freeze in ice cube tray for future use.
  • Note on December 8: Lentils cook in far less time than the prescribed 3-4 hours, it’s just that I’ve left it on for that length and the result was what I wanted, totally mushy and easily puréed lentils. If you’re around and can unplug the little dip warmer when the lentils are first cooked, then be my guest.

Read Full Post »

At the cottage we like to sit back and relax, put up our feet, read a good novel, scan some trashy magazines and on occasion have been known to enjoy a cocktail or two ;-). Simple is usually what I lean toward because of the effort one needs to make to bring everything up for the weekend. I know I’ve posted a guacamole recipe before (here and here) and even got flak for calling this one mocamole, but I thought I’d share a super simple rustic version made with the ripest avocado for a light snack at the cottage. This recipe has only 5 ingredients and you need only one bowl, a fork and a knife to make it. See, I told you it was simple.

Guacamole2

This dip comes together very quickly; I disappeared for less than five minutes to make it, our guests were surprised I made it from scratch so quickly!

Super Simple Guacamole

Makes about 3/4 to 1 cup of dip but it depends entirely how big your avocado is

Ingredients:

  • 1 ripe avocado
  • 1-2 tbsp lime juice
  • 1-2 cloves garlic, finely minced
  • 5 small grape tomatoes, seeded and chopped
  • 1 tbsp chopped cilantro and a sprig or two for garnish

Directions:

  1. Scoop out the flesh from the avocado, no need to be gentle as you will mash it with a fork.
  2. Mash the avocado with a fork (I told you so).
  3. Add the garlic and the lime juice and mix well.
  4. Fold in the chopped tomatoes and cilantro.
  5. Garnish with cilantro.
  6. Serve with celery sticks, cucumber rings, or crackers.

Guacamole

I love that mashing with a fork still leaves you with some lovely, creamy chunks of avocado.

Read Full Post »

I thought I would begin this post with a little spring. I know I’ve been complaining a lot about the weather. A lot. So, in light that this past weekend we finally got some spring-like temperatures and it seemed that everything just burst into bloom, I wanted to share my joy. Yes, spring has sprung in Toronto (about damn time). Here are a few lovely blooms from my morning 8 km or almost 5 mile power walk through High Park.

This is our little Japanese Cherry Tree.

This is our little Japanese Cherry Tree.

JapaneseCherry_2678

These are Japanese Cherry Blossoms in High Park.

JapaneseCherry_2681

There are several places that these beautiful trees are planted so each one has a slightly different time-table depending on how much sun and if they are in the valley like these, they aren’t quite in full bloom yet.

Forsythia_2680

The Forsythia bloomed at the same time as every thing else.

SaucerMagnolias_2674

The Saucer Magnolia, almost there.

Karma. It gets you every time. Case in point: last week I assisted on a national brand motion shoot (video for commercial), two action packed days of sorting through frozen product looking for the ‘perfect’ specimens and then deep frying said specimens. Yes, indeed my friends, deep frying! Now those of you who’ve followed Kitchen Inspirations over 7+ years know that I am not a fan of deep fried foods (yes, I know, it’s blasphemous) so deep frying two days straight was an experience, to say the least. And yes, I did smell like Eau de Frire!

This little recipe can be deep fried but it needn’t be, pan frying does the trick too. I made these for a special celebration coming up this weekend, my father in law turns 90! We’ll be springing him from the long term care facility to bring him to our house to party on. We’ll be breaking out the good china to celebrate! Happy Birthday Dad!

MiniRostiPotatoes_2632

A crisp potato ‘cracker’ with crême fraiche and smoked salmon with a little dill and chives.

Mini Rösti Appetizers

Makes about 60 x 3 cm (~1.25 inch) diametre rounds

Ingredients:

  • 600-800 g (1.3-1.8 lb) Yukon Gold Potatoes (actually, you can use any potato you would use as mashed potatoes)
  • salt and pepper to taste

Directions:

  1. Peel and chop potatoes in half (you want a chunk large enough to grate without grating your knuckles).
  2. Put the potatoes into a pot with cold water and salt (this step was prevalent in many recipes, something to do with cooking evenly) and bring to a boil. Keep on the boil until there is still some resistance when you poke the pieces with a fork or cake tester — you definitely DO NOT want to cook them 100%.
  3. Remove potatoes from the pot and allow to cool completely.
  4. On a large grater, grate the potatoes entirely. Using a 3 cm (~1.25 inch) cookie cutter, sprayed with non-stick cooking oil, press a good tablespoon of grated potato into it and compress slightly. Lift cookie cutter off and repeat until all the potato is used up. Heat a large cast iron skillet with a few tablespoons of oil (err on more than less). Add the little rounds of potatoes and cook until they are crispy and golden on each side. Drain on paper towel, cool and then freeze on a cookie sheet. Once frozen, pack them into a zip lock bag. Use as required.
  5. To reheat: pre heat the oven to 300F and bake frozen potato rounds until warmed through, about 12 minutes.

MiniRostiPotatoes_2621

Using a smallish ice cream scoop, I was able to keep each one about the same size.

MiniRostiPotatoes_2620

Yes indeed, that is a honey wand that was repurposed as a plunger to flatten each disk out.

MiniRostiPotatoes_2622

They made quite a few!

MiniRostiPotatoes_2623

They’ll crisp up again when you reheat them.

MiniRostiPotatoes_2629

Just a bite-sized nibble.

Read Full Post »

We survived another Doran weekend; these weekend are full of gluttony, laughter and somewhat excesses but most of all, they are full of friendship, love and stories. And laughter, A lot of laughter. We decided to spend this weekend at the cottage because our dear friends hadn’t been up for quite some time, plus we wanted to share our new found excitment in the renovations with them! September weekend weather can be hit and miss and we had both this time around. Sunny or not, it was damn chilly and we had the heat on more than the windows open. Fall is definitely the the air. And as luck would have it, I forgot my shoes at home, so the majority of the weekend was spent in flip flops and borrowed socks, thank you T!

I always like to serve a little nibbly with cocktails; drinking on an empty stomach can be dangerous so when I came across these flavourful little nibbles, I was all over them. A touch of heat, a touch of sweetness and a lot of texture, these will surprise you with how easy they are to eat!

Spiced Nuts_0930

They are not sticky at all.

Honey-Spiced Almonds

Makes 3 cups (recipe adapted from Epicurious)

Ingredients:

  • 1 tbsp olive oil
  • 3 cups whole almonds, skin on
  • 2 tbsp honey
  • 1 1/2 tsp smoked paprika
  • 1 1/2 tsp cinnamon
  • 1 1/2 tsp cumin
  • pinch of cayenne
  • 2 tsp salt
  • 2 tbsp black and white sesame seeds

Directions:

  1. Pre-heat the oven to 300° F (XXX° C). Line a baking sheet with a silpat® sheet or parchment.
  2. Sift the spices and salt together and set aside.
  3. Heat the oil in a large pan, add the almonds and roast for 2-3 minutes. Remove from heat.
  4. Add the honey and stir well. Sprinkle the spices over the sticky almonds. Add the sesame seeds and stir well to combine.
  5. Turn out the almonds onto the prepared cookie sheet and flatten to one layer of almonds. Bake for approximately 15 minutes (watch so it doesn’t burn), turning at least once in the process.
  6. Cool completely and serve.

Spiced Nuts_0932

The sesame are a nice little touch.

Spiced Nuts_0933

The almonds crisp up very nicely.

Read Full Post »

We had good friends over for dinner on Saturday night and I wanted to make a light, healthy dinner which we could all feel good about. The couple recently down-sized about 22.6 kg (50lbs) combined total weight and I sure did not want to make them feel bad with a heavy meal. Plus it’s been ridiculously hot in Toronto, with high humidity so a heavy meal isn’t even appealing. I also planned the meal so that we had little kitchen time, other than plating and serving. We served family style to allow each individual to have as much or as little as desired.

Over the following few days, I will document the recipes that I served; here is the menu to give you a little taste:

Cocktails: Home made Ginger Ale (recipe below. I was inspired by The Cook’s Sister with this recipe)

Hors D’œuvres: Bite-sized Caprese Salad with EVOO and Himalayan pink salt.

Appetizer: Chilled Roasted Red Pepper and Tomato Soup with Warm Sesame Encrusted Goats Cheese Balls (Barb at Profiteroles and Ponytails gave me the idea for this recipe, but I did the ol’ switcheroo and made the soup cold and the balls warm)(insert all goats cheese ball jokes here 😉 )

Intermisso: Lemongrass and Thai Basil Granita

Main: Susur Lee’s Singapore Slaw (aka 19 ingredients slaw) with Thai Marinated BBQ Steak (steak prepared as per Lorraine at Not Quite Nigella)

Dessert: Armenian Nutmeg Cake with Hazelnut Frozen Yogurt and Caramel Drizzle (the Armenian Nutmeg Cake was reinvented from a previous post)

Late night snack: Fresh Ontario Strawberries and Cantaloupe bites

Our guests last week were on a sabbatical from drinking alcohol so I wanted to make a special cocktail for the evening, I came across this recipe from The Cook’s Sister recently and bookmarked it for the occasion. I changed it up only to reflect the time I had to spend on the recipe, otherwise it was pretty similar. The ginger was strong enough to be refreshing and the added sugar made it just sweet enough to cut the heat from using fresh ginger. I really enjoyed it, it was a refreshing summer beverage. Of course, you can add booze to it to make it that much more interesting: gin, vodka, amber rum or whiskey seem to be preferred choices to add to ginger ale on the net.

A refreshing cocktail that aids in digestion! What more could you want?

Home made Ginger Ale

Original recipe can be found here

Ingredients:

  • 2 cups water
  • 1/4 cup freshly grated ginger (you will notice this is significantly less than the original recipe, but because it’s grated, it seems to infuse the water with enough flavour)
  • 2-4 tbsp Demerara sugar
  • 1 liter San Pelegrino (this is a lightly carbonated natural spring water)
  • 1 lime, cut into eights

Directions:

  1. To prepare the syrup, place the water, ginger, sugar into a small saucepan and bring to a boil. I allowed it to boil for about 10 minutes to concentrate the flavours and reduce a bit.
  2. Remove from heat, cover with a lid and allow to cool completely. Refrigerate over night.
  3. When ready to serve, strain the ginger bits out of the syrup, pressing as much of the ginger juice out as possible.
  4. To serve, add 4 tbsp (or to taste) of the syrup to each glass mixing in the San Pelegrino. Serve with lime wedges and garnish with mint. Individuals can add as much freshly squeezed lime juice as desired.
  5. Cheers!

Read Full Post »

You may already know this, but I’m a bit slow, so I thought I’d pass along a very cool feature I just discovered in WordPress. You may have noticed that I have finally responded to some comments and responses from quite some time ago (no, I wasn’t being rude, I just never saw them). I have never been able to figure out what is the best place to see all the comments in WordPress, but I think I have finally got it covered. This won’t work on the iPhone app, but it does work on the desktop browser version. If you go to the top right hand side of your screen, you will see this:

See the little bubble directly between “New Post” and “Eva”?

Click on the bubble and you get this:

Click on “View All” and your commenting universe suddenly all makes sense. Sigh.

If you click on Unread, you will see all the comments you have not read through or responded to. See? I wish I had known this 5 years ago. 😦

No more having to scroll down through reams of comments to find that one you haven’t responded to. I’m sure you all know this by now, but if I can save one person from foolishly missing one lovely comment or response to a comment you’ve made on a blog that you follow, then I will be happy. Happier now that I have this cocktail. Surely it must be 4pm somewhere in the world.

I know what you’re thinking: I thought you preferred the traditional martini and since when do you post cocktails? Well, the answer is yes on both counts, but while visiting the cute Lake Geneva, Wisconsin on the weekend, we stopped by a restaurant for cocktails and I, for the first time, tried Effin Cucumber Vodka (OK, I had a sip of Paul’s Bloody Mary). The cucumber flavour was exceptional, it really came through even with all the seasonings a Bloody Mary has. Very impressive indeed. I wanted to get a bottle, but we had already purchased our maximum limit (Smirnoff Triple Distilled 1.75L for $20, this usually sells for $54.95 in Ontario!). So I decided I would try to recreate the flavours captured in this lovely drink for a refreshing summer-time cocktail. After all, it is Thursday.

The greens really pop, don’t they?

Greg over at Rufus’ Food and Spirits Guide showed us how to make Cucumber Gin but since I am not much of a Gin drinker(bad experience at Uni, must have been something I ate ;-)). I decided to re invent it with Vodka.

I’ll serve this cocktail in a martini glass, because it’s so damn sexy, you can serve it over ice in a tall glass like Greg did, or in an old fashioned. I’ll be the one in the summer dress, shocking pink stiletto’s sipping from a martini glass on the outdoor sectional. Cheers!

Oh my, I think the shutter stayed open a bit too long. And oops, we finished them off by the time I noticed! Time for another!

Cucumber Lime Martini

Serves 2

Ingredients:

  • 45 mL (1.5 oz) Vodka
  • 10-12 slices cucumber (I used mini English cucumbers)
  • zest of 1 lime
  • 2-4 tbsp lime cordial

Directions:

  1. A couple of hours before you wish to consume the cocktail, add the cucumber and lime zest to the vodka and refrigerate (or freeze).
  2. When ready to serve, give the vodka a good stir and add the lime cordial; strain into martini glasses and garnish with a fresh slice of lime or cucumber
  3. Cheers!

Read Full Post »