Feeds:
Posts
Comments

Posts Tagged ‘tomato’

This is an update of a salad I used to enjoy at one of favourite Italian restaurants in Yorkville. Unfortunately, they took it off the menu so I had to remake it at home.

They roasted the tomato slices in their wood-fired pizza ovens because Toronto tomatoes are brutal, particularly in the winter. I don’t have a wood-fired pizza oven, so I air-fried them with my Instant Pot Air-Fryer lid. You don’t want the tomatoes completely dehydrated, just enough to condense the flavour so it actually tastes like a tomato. Top the slices with a fresh mozzarella or better yet, a burrata and dollop homemade pesto mixed with a little prosecco vinegar and sprinkle some toasted Italian (or Spanish, as I had) pinenuts over the dish. Presto, you have a memorable appetizer.

The tomatoes really pop when you remove some of the moisture, a perfect foil for the rich fresh mozzarella

Fresh Mozzarella Salad

Serves 2-4

Ingredients:

  • 4-6 tomatoes, sliced in half, deseeded and air-fried
  • 1 Fresh Mozzarella or Burrata
  • 60 mL Pesto
  • 30 mL Prosecco vinegar
  • 15 g pinenuts, toasted
  • 1 lemon, zested
  • Fresh basil leaves

Directions:

  • With everything at room temperature, lay the dehydrated/roasted tomatoes on the plate(s) and add the sliced mozzarella on top.
  • Combine the pesto with prosecco vinegar and drizzle on top of the tomatoes and mozzarella. Sprinkle the lemon zest on top and garnish with the toasted pinenut and torn fresh basil leaves.

I wanted to try the newest rage, grated frozen tomato over the fresh mozzarella and although it was enjoyable, it isn’t practical if serving more than 4 people and it’s hot outside, the frozen tomato will melt too quickly.

Read Full Post »

Our lockdown has been over for a couple of months now and we are in Step 3 which means businesses aren’t limited to a percentage of the allowable persons inside but must limit capacity to the number of people that can still maintain physical distancing of 2 metres. So, other than masks still having to be worn inside (other than if you’re eating and drinking or your own home) things are pretty much back to normal. We have been out for lunches and dinners but are still dining on patios…I’m not ready to go inside just yet. The latest variant of Covid is wreaking havoc on the unvaccinated or just single vaxed but we all in all, are doing well in Ontario where we have 63.62% double-vaxed of the total population (keeping in mind that we are still not vaccinating the under twelve-year-olds). Our borders are also now open to the US without the need of quarantine upon arrival but travellers must prove that they have been double vaccinated and show a negative COVID test within 72 hours of entering. There have already been several Americans arriving with forged vaccination papers and they have each been fined about $20,000 Canadian (about $2 US). It is really disturbing that people are forging vaccination papers, they are really jeopardizing the long-term success of eradicating this hideous virus. So, we are keeping to our ‘bubble’ and still continue to entertain outside. I feel for our Australian friends as they are just beginning the journey but hopefully, they will be better behaved than Ontarians were, keeping us in lockdown for the longest time in the world (over 360 days in total!)! Enough of my rant.

I made this delicious dish for an Indian night with Andy and Mark back in August. I’ve never made Beef Bhuna before and I won’t lie, this recipe is a lot of work, but you can divide the work over a day or two to make it more manageable. For example, make the Base Curry Sauce a day or two in advance and then make the Bhuna curry later. I found the recipe on The Curry Guy’s blog, Great Curry Recipes. I won’t repeat the recipe because I made it verbatim and it really was outstanding. The small-batch Base Curry Sauce made about 3 cups, two of which I used for the Beef Bhuna and one went into the freezer for a later date.

I highly recommend this dish, it will satisfy your craving for Indian food. The best naan recipe can be found here.


Read Full Post »

I have been making this fabulous butter chicken recipe since I first found it in 2009. I love it because it is the closest to our favourite Bombay Palace’s Murgh Makhani. It is a rich, tangy tomato-based sauce that is completely moreish. I made it in mid-March when our weather suddenly turned into spring with temperatures of 14° C to 20° C (57° F to 68° F) and we had friends over two days after we were released for our latest 100-day lockdown. If it weren’t for our cosy heated patio, I would have surely gone mad.

You can easily make this vegetarian by substituting firm tofu for the chicken but I wouldn’t skip the spice rub and marinade, grilling also adds a level of flavour but not absolutely necessary.

Butter Chicken-Murgh Makhani

Serving Size: 6-8

Ingredients:

  • 15 mL olive oil
  • 1 medium sweet onion, roughly chopped
  • 1.6 L stewed tomatoes
  • 43 g roasted garlic
  • 7 g ginger, grated on a Microplane
  • 3.5 g Meat Masala (see recipe below)
  • 3.5 g Garam Masala (see recipe below)
  • 35 mL lemon juice (about half a lemon)
  • Pinch of baking soda
  • Salt to taste
  • 60 g unsalted butter
  • 100 mL cream
  • Cilantro to garnish

Directions for the gravy:

  • In a large Dutch oven, heat the olive oil and cook the onions until golden. Add the stewed tomatoes and simmer until it has reduced to two-thirds of the original volume.
  • Add the roasted garlic, ginger, both masalas, lemon juice and stir well to combine. Add a pinch of baking soda and stir until it has stopped bubbling. Blend this gravy with an emersion blender and run it through a fine sieve (I prefer a smooth, creamy gravy). Add salt to taste. You can hold the gravy overnight in the refrigerator.
  • If you are serving immediately, add the butter and stir so that it melts into the gravy. Add the cream and stir well. Hold the gravy on very low heat (be careful, it bubbles quite furiously) and add the chicken just before serving.

This recipe is restaurant quality without the salt and extra calories!

Tandoori Marinades

  • 1 kg chicken, skinned, deboned, trimmed (I used chicken thighs)

Ingredients for the spice rub:

  • 6 g red chili powder (I used mild)
  • 3 g turmeric
  • pinch of baking soda
  • salt to taste
  • 30 mL lemon juice

Directions:

  1. Combine the ingredients for the spice rub and rub well into the chicken (I would use gloves). Refrigerate for 30 to 60 minutes.

Ingredients for the marinade:

  • 100 g Greek yogurt
  • 6 g red chili powder (I used mild)
  • 7 g ginger, grated on a Microplane
  • 30 g roasted garlic
  • 5 g coriander
  • 5 g cumin
  • 5 g garam masala
  • 15 mL lemon juice
  • 30 mL olive oil

Directions:

  1. Combine all of the ingredients and spread evenly onto the chicken pieces. Refrigerate overnight or for a few hours.
  2. When ready to grill, heat the grill to 350° F.
  3. Brush off a lot of the marinade.
  4. Grill the chicken, basting with the marinade once or twice at the beginning until cooked through, about 165° F.

I always double the batch so that I can freeze leftovers for a quick and delicious meal.

Garam Masala

(recipes for the masalas are from HeartSmart flavours of India by Krishna Jamal, 1998)

Ingredients:

  • 4 tbsp ground cinnamon
  • 1 tbsp ground cloves
  • 1 tbsp ground cardamom
  • 1 tsp ground mace

Directions for the Garam Masala:

  1. Add all of the ingredients into a heavy bottom pan and toast until fragrant.

Meat Masala

Ingredients:

  • 3 tbsp coriander seeds
  • 1 1/2 tbsp cumin seeds
  • 1 black cardamom pods
  • 1/4 star anise
  • 3 cm cinnamon stick
  • 2 cloves
  • 2 bay leaves
  • 3/4 tsp dried cilantro
  • 1/4 tsp mace
  • 3/4 tsp ground turmeric
  • 3/4 tsp red chili

Directions:

  1. In a small pan, toast the coriander, cumin, cardamom, star anise, cinnamon stick and cloves and toast until fragrant. Allow to cool completely.
  2. Add toasted spices to a spice grinder with the remainder of the spices and grind until it is a fine powder. Store in an air-tight container in a cool dark place.

Read Full Post »

My friend David of Fine Dining at Home (blog on hiatus) put me onto this recipe on his instagram; it looked absolutely delicious, so, then and there, I decided I wanted to make it. I renamed the recipe mille-feuille lasagna because the number of layers reminded me of one of my favourite pastries. I won’t lie, this is a labour-intensive recipe, but then again, what lasagna recipe isn’t? I will say that it is well worth the effort. The homemade pasta is so delicious, light and somewhat crispy. The spinach and basil layers against the creamy béchamel and the stringy mozzarella are divine! Don’t skip the resting and searing step, it really makes the recipe.

Mille-Feuille Lasagna

For the original recipe, please click here.

Makes one 21.6 cm x 11.4 cm (4″ x 7″) loaf pan, about 6 servings

Ingredients:

  • 300 g Spinach, blanched
  • ~50 g basil, blanched
  • 125 mL passata
  • 15 mL tomato paste
  • 15 mL roasted garlic, puréed (fresh is fine too)
  • 300 g mozzarella, ground

Directions:

  1. Combine the spinach and basil and wring out the water well. Set aside.
  2. Combine the passata, tomato paste and garlic and mix well. Set aside.

Ingredients for the Béchamel:

  • 30 g butter
  • 40 g flour
  • 500 mL milk, warmed

Directions:

  1. Melt the butter in a medium, heavy-bottom pan. Whisk in the flour and mix well. Cook on medium-heat for 2 minutes.
  2. Slowly add the warm milk and whisk. Whisk the sauce until smooth and creamy. Cool completely.

Ingredients for the Pasta:

  • 1 large egg
  • 125 g Flour (“00”)
  • Salt

Directions:

  1. Add the egg to the small bowl of a food processor and whisk. Add the flour and salt and pulse until it forms into a soft dough.
  2. On a lightly floured surface, knead gently a few times until it comes together into a smooth ball. Cover in plastic wrap and allow to rest in the refrigerator for 30 minutes.
  3. Using a pasta maker, create 12 sheets that are #8 thickness on the kitchenaid pasta maker. Cook the sheets in salted boiling water for 1 minute or less. Cool in an ice bath, remove and dry off.

Ingredients for the Spinach Pesto Sauce:

  • 150 g spinach and arugula
  • 30 g ricotta or cream cheese
  • 30 g pesto
  • 200 mL milk or cream
  • Salt to taste

Directions:

  1. Blanch the spinach and arugula, immerse in ice water to stop the cooking. Wring out as much water as possible.
  2. Place spinach, arugula, cheese, pesto and milk into a bullet and purée until smooth. Season to taste.
  3. Press through a fine sieve into a heatproof container, set aside.

Final Assembly:

1. Line a loaf pan with parchment paper, it will make it easier to pull out.

2. Add one pasta sheet to the base, follow with

    • A thin layer of spinach,
    • Another pasta sheet
    • A layer of passata
    • Another pasta sheet
    • A layer of béchamel
    • Another pasta sheet
    • A layer of cheese
    • Another pasta sheet

3. Repeat until all the ingredients have been exhausted ending with a pasta sheet and cheese on the top.

4. Bake in a 350° F preheated oven for 50 minutes or until cheese has entirely melted and béchamel is bubbling.

5. Allow to cool completely. When cool, wrap tightly with plastic wrap and refrigerate 24 hours.

6. To serve, cut into 5-6 slices and reheat in the oven. Then sear one side on a non-stick frying pan.

7. Serve on a bed of warmed spinach pesto sauce (recipe above) with a little crème fraiche.

The pasta crisps up on the seared side to give you a wonderful crunch against the creamy textures of the cheese and spinach and basil layers. 

Read Full Post »

In late March/early April, we spent two glorious weeks in Arizona. We stayed with friends for this duration because we had offered to puppy-sit (Jordan) while they took a quick 7 day holiday in Ireland. We had never puppy sat before but their beautiful black lab, Jordan is quite possibly one of the laziest dogs we have ever met so she was really no problem at all. We did get her used to three walks per day, that is, until we bumped into a woman carrying a black light, walking her dog after dark. I had to ask and yes, it was to detect scorpions. That was the end of our after dark walks. Period.

I like to arrive with gifts in hand and these basil Parmesan Straws were the perfect hostess gift because I had a bunch of basil that needed using a couple of days before our departure. Plus they are pretty tasty. Jordan thought so too.

Sun-dried Tomato, Basil and Parmesan Straws

A KitchenInspirations Original Recipe

Makes about 75 pieces

To print this recipe, please click here.

Ingredients:

  • 290 g flour
  • 10 g Fresh Basil, finely chopped
  • 50 g sun-dried tomatoes in oil, roughly chopped
  • 10 g garlic, finely minced
  • 110 g unsalted butter (cold)
  • 30 g  grated Parmesan cheese
  • 2 eggs, beaten separately
  • 15-30 mL water or milk
  • Sea salt

Directions:

  1. Pre-heat oven to 400°F.
  2. Put all dry ingredients into a food processor, including the basil, sun-dried tomatoes and garlic, and process to mix well.
  3. Add the butter and process to coarse granules.
  4. While the blades are running, pour in the egg and process until a soft ball forms. If this does not happen, drizzle little bits of water until a soft ball forms.
  5. Remove from processor and using a small amount of flour, roll out the dough to about 1/2 cm thickness. Cut into 8cm x 7 mm straws and position evenly on a cookie sheet. Brush with second egg and sprinkle with sea salt.
  6. Bake for 12-15 minutes until golden.
  7. Remove and allow to cool. This will store well in a cool, dark place or freeze.

Notes:

  • I like to use a plastic ruler to cut the straws evenly. My ruler is a dedicated food ruler that never is used with pens or pencils or markers!
  • This type of rolling pin gives you evenly thick dough, but as I have mentioned previously, it is a pain to unscrew the disks and I inadvertently have to wash all of the disks each time I use it.
  • This dough is a bit wetter than some of my other recipes because of the sun-dried tomatoes and fresh garlic.

Read Full Post »

I wish you all the Merriest Christmas and the Happiest New Year! Thank you for your continued support, you have all made this blogging experience so much richer than I ever could have imagined, thank you.

Our neighbourhood progressive dinner party was scheduled for the Saturday after we returned home from Arizona; I didn’t think it would be a problem since we were responsible for hors d’œuvres and appetizers. Had I read more than the heading of the email from the organizers (the main course couple), I would have realized that things were to get a bit more complicated since one person decided to go vegetarian and dairy free (for health reasons). I love a challenge but I would have liked to experiment a bit more, notwithstanding, it turned out delicious so I documented the recipe for the future. Like most recipes, this tastes better the day after it is made!

South Western Bean Soup

A KitchenInspirations Original Recipe

Serves 6-8 depending on serving size

To print recipe, please click here.

Ingredients:

  • 40 g black beans, soaked overnight
  • 160 g navy beans, soaked overnight
  • 100 g kidney beans, soaked overnight
  • 200 g sweet onion, finely chopped
  • 15 mL olive oil
  • 5 g toasted cumin
  • 2 g toasted coriander
  • pinch of chili powder, or to taste
  • 5 g smoked paprika, or to taste
  • 7 g cocoa powder
  • 10 g garlic, finely minced
  • 40 g tomato paste
  • 2 g puréed chipotle peppers
  • 750 mL vegetable stock
  • 250 mL passata
  • 165 g grilled corn, removed from cob
  • cilantro to garnish
  • sour cream or Greek yogurt to garnish
  • grated cheese to garnish
  • 125 mL creamed lentils (see notes)
  • 1 large avocado, cubed to garnish

Directions:

  1. Caramelize chopped onions in the olive oil. In the meantime, add the vegetable stock, passata, beans to the warm crock pot and put on high for 5 hours.
  2. Add the onions, all of the spices, tomato paste, and enchilada sauce and stir well. Cover and cook for 5 hours.
  3. When the beans are soft, add the creamed lentils and stir into the soup so it is consistent and creamy. Add the grilled corn kernels, and cook for an additional 30 minutes on high, stirring occasionally.
  4. Serve in warmed bowls and top with avocado, a spoonful of Greek yogurt, cilantro, and cheese. Serve immediately with Cornbread.

Notes:

  • I use lentils as a thickener particularly when I make gluten-free recipes. Simply cook lentils until soft and purée with a stick blender until smooth. Freeze the excess in an ice-cube tray and when frozen, pop into a zip lock bag.
  • I buy chipotle peppers in a can, purée and freeze the excess in an ice-cube tray and when frozen, pop into a zip lock bag, same goes for tomato paste.

Read Full Post »

Our dear friends gave me a beautiful cookbook from their last cruise, it is a celebration of courses through the journies of their fleet: Culinary Courses Journeys. Although most of the recipes are quite fancy, the book is amazing inspiration and a week doesn’t go by that I don’t check it for reference!

It was such an occasion that I was leafing through the book that I found a gorgeous representation of a Minestrone Soup and I knew I had to make it for dinner. And then I realized that I did not have a Minestrone on the blog. Gads!

The soup is packed with fresh vegetables in a light tomato and basil scented broth. The protein is navy bean to keep it healthy. You could add a parmesan rind or two to the broth while cooking.

The tuile melts into the soup for a beautiful flavour and textural addition.

Rustic Vegetable Minestrone

A KitchenInspirations Original Recipe

Makes about 1.5 L (6.25 cups) soup.

Please click here to print this recipe.

Ingredients:

  • 1 tbsp EVOO
  • 125 g (~1 cup) sweet onion, diced
  • 10 g (2 – 3 cloves) garlic, finely minced
  • 150 g (~1 cup) zucchini, diced
  • 115 g (~1 cup) celery, diced
  • 120 g (~1 cup) red pepper, diced
  • 75 g (~1 cup) king mushrooms, diced
  • 140 mL (4 oz) puréed tomatoes, juice or sauce
  • 15 mL (1 tbsp) tomato paste
  • 350 mL (1 2/3 cups) chicken stock
  • 2 stems of basil
  • 4 stems of lemon thyme
  • 100 g (1/2 cup) dried beans
  • 35 g (~1 cup) baby spinach
  • 5-8 fresh basil leaves, roughly torn

Directions:

  1. Cook the dried beans according to directions.
  2. Heat Olive Oil in a large pot and sauté onions until translucent, you may need to add a little stock or water. Add the garlic and cook until fragrant.
  3. Add all of the vegetables and cook for about 10-15 minutes.
  4. Combine the puréed tomatoes, tomato paste, and chicken stock. Pour over the vegetables and add the basil and thyme stems and simmer for 10 minutes. Remove stems.
  5. Add the cooked beans and baby spinach, stir and heat through.
  6. Serve garnished with a Parmesan tuile (recipe below) and roughly torn basil leaves.

Basil Cheese Tuile

Makes 1 tuile

Ingredients:

  • 7 g (1/4 oz) hard fatty cheese (like Parmesan or Cheddar), finely grated
  • 1 large basil leaf, chiffonade
  • pinch of granulated garlic

Directions:

  1. Pre-heat the oven on high broil.
  2. Mix cheese, basil and granulated garlic well.
  3. On a parchment lined baking sheet, shape the tuile as desired (I made a tear drop).
  4. Broil until evenly browned (mine took about 4 minutes but it depends on how thick you make your tuile); to prevent burning, you may need to cover part of it with bits of parchment as it bakes.

Notes:

  • I like a little crunch left in my vegetables, so I generally under cook rather than over cook.
  • If you make this in advance, keep the beans separately so they don’t turn to mush.
  • I used Ivanhoe Horseradish Cheddar because I thought it would be a nice zing to the soup.
  • Make as many tuile as you need, just multiply the ingredients by the servings required.

Read Full Post »

gazpachogelato_first

One of the first courses we had at the One Star Michelin Restaurant, Alejandro, just outside of Almeria (in the quiet town of Roquetas de Mar) was a wonderful Gazpacho Sorbet. During our Paella Lesson in Madrid, we discovered that Gazpacho is a staple in most Spanish households. They make a few batches each week, drinking a cup-full when peckish or feeling down. It makes total sense, as it’s packed with raw vegetables and full of vitamins. I, too, have begun to keep a litre or so in the fridge, particularly now, with the seasons changing, and it’s so easy to catch a cold.

gazpachosorbet_alejandro

This is the original Gazpacho Sorbet at Alejandro’s in Spain. I didn’t care for the odd presentation in the glass so mine was more freestyle. It was garnished with a candied lemon slice.

You may use any old Gazpacho recipe, I used the one we made during our Paella Cooking Lesson at Cooking Point. The main difference is that the Spaniards add a slice of bread (for body) and a significant amount of olive oil to balance the acidity. The New York Times published a beautiful description of a good Gazpacho (see original article here), “The texture is always smooth and light, with a mouth feel similar to that of whole milk. It is not the watered-down salsa or grainy sludge often served in the United States under the name of gazpacho, but an emulsion of fat (olive oil) in liquid (vegetable juice and vinegar) that is light and fluffy on the tongue and a fantastic conductor of flavor, just like vinaigrette or hollandaise.”

The recipe below is perfectly balanced, I wouldn’t change a thing. There is just a hint of onion and garlic, you don’t want this to be too oniony or garlicky. And while I would normally shudder at the volume of olive oil in this recipe, you really need it to balance out the acidity and it adds that silky mouthfeel Eric Asimov of the New York Times described above. Turning it into Sorbet is a surprising, yet satisfying dish. Definitely bookmark for the warmer weather.

gazpachogelato_2Authentic Spanish Gazpacho

Serves 4-6

Ingredients:

  • 500 g ripe tomatoes, roughly chopped
  • 50 g green pepper (about 1/2 an ordinary sized pepper)
  • 40 g cucumber, peeled and roughly chopped (English is fine)
  • 30 g onion, roughly chopped
  • 20 g bread, crust removed
  • 1/2 garlic clove, roughly chopped
  • 15 mL sherry or red wine vinegar
  • 5 mL cumin
  • salt, to taste
  • 60 mL EVOO

Directions:

  1. Add all of the ingredients but the Extra Virgin Olive Oil to a blender or a large measuring cup. Blend or use an immersion blender to blend until smooth.
  2. Pass the liquid through a fine sieve. Return the liquid to the blender or large measuring cup and blend in the Olive Oil in a slow, steady stream to emulsify. Refrigerate for 1 hour.
  3. Pour the soup into the bowl of your chilled ice cream maker and turn it on until it has thickened and frozen like sorbet. Serve immediately or store in an airtight freezer container in the freezer for no more than one hour, it will freeze solid.
  4. Garnish with herbs, or finely chopped vegetables. Alejandro served it with a slice of candied lemon.

Read Full Post »

I’ve been thinking about zucchini noodles a lot lately. Both JT and I love them because they maintain a similar texture to traditional flour noodles, yet they are considerably lower in carbohydrates and that, my friends is something I am always on the lookout for! I’ve created this recipe lower in calories than traditional lasagna and it’s absolutely delicious if I do say so myself. I won’t kid you, it does take some planning and some playing in the kitchen but as far as I know, you guys are excellent at both so I urge you to give it a try. Double or triple the recipe and make a large casserole-size version, freeze for a few hours and cut into single serves and bag individually and presto, you have instant lunch or a quick casual dinner. I know I will try the vegetarian version over the summer because I am always on the lookout for interesting vegetarian recipes for our vegetarian friends when they come up to the cottage.

ZucchiniLasagna

Allow this dish to sit for about 15 minutes so that the excess liquid can be reabsorbed. It would be much too hot to eat anyway!

ZucchiniLasagna_plated

Like most things, this is much tastier the second day, if you have any leftovers, that is!

Zucchini Lasagna (Gluten Free and Easy to Convert to Vegetarian or Vegan!)

A KitchenInspirations Original Recipe

Makes 1 cast iron enamel terrine 30 cm long x 11 cm wide x 8 cm high, 6 servings.

Ingredients for noodles and cheese:

  • 2 zucchini, sliced to about 3 mm (1/8″) (leave the ends, first and last slice and any leftovers for your compost broth)
  • 2 roasted red peppers, seeded and peeled, cut into 1 cm (1/2″ slices) (see notes)
  • 180 g (1 cup) mozzarella cheese (omit for vegan)
  • 300 mL ‘Béchamel’ (recipe below)
  • 500 mL (2 cups) Meat Sauce (recipe below, for vegan see notes below)

Ingredients for the ‘Béchamel’:

Makes 300 mL or 1 1/3 cups ‘béchamel’

  • 90 g (a heaping 1/3 cup) red lentils
  • 250 mL (1 cup) vegetable stock or water, plus a bit more to loosen the cooled sauce
  • 50 g (1/2 cup or so) gruyère cheese, shredded (omit for vegan, see notes below)
  • 250 mL (1 cup) milk, plus a little to loosen if required (vegan use vegetable stock or rice milk, see notes below)
  • Pinch of smoked paprika
  • Pinch of sea salt (to taste)

Directions for the Béchamel:

  1. Cook the lentils in water or stock until very soft. Remove from heat and purée until smooth. Add the liquid of choice slowly as you purée until it is extremely smooth and creamy. If you’re making this vegan, stir in the smoked paprika and salt, set aside.
  2. Return to low heat and stir in the cheese all at once and whisk until melted, smooth and thickened (about 2-5 minutes, don’t worry, this WILL thicken as it cools). Remove from heat and stir in the smoked paprika and salt. If the sauce has become grainy (as lentils sometimes do), just blitz it again with the immersion blender. Set aside.

Ingredients for the ‘Meat’ Sauce:

Makes 500 mL (2 cups) Sauce

  • 5 mL (1 tsp) olive oil
  • 1 small yellow onion, finely diced
  • 15 g (about 3 cloves) garlic, finely minced
  • 300 g of lean ground pork (vegans, use your favourite cooked beans or ground tofu)
  • 300 g fresh tomatoes, puréed (or 1 1/2 cups passata)
  • Pinch of sea salt and freshly ground pepper, to taste
  • pinch of baking soda
  • 1 tsp oregano
  • 1 tsp basil
  • pinch of nutmeg
  • 1 piece of parmesan end (omit if vegan)

Directions for the Meat Sauce:

  1. Blitz the fresh tomatoes with an immersion blender until you can no longer feel the seeds and skin (no need to pass through a fine sieve, once incorporated into the lasagna you will not feel any tomato seed or skin texture).
  2. Heat the olive oil in a medium-sized Dutch oven and sauté the onions until soft. Add the minced garlic and stir until fragrant.
  3. Add the ground pork (beans or ground tofu) stirring occasionally, breaking up the larger bits of meat. Add the tomato sauce, baking soda, oregano, basil, nutmeg and Parmesan end and simmer for 15-20 minutes until thickened and not overly liquid.
  4. Remove the parmesan end (chef’s treat!) and transfer the ‘meat sauce’ to another bowl to cool.

Assembly:

  1. Pre-heat the oven to 350° F (177 ° C).
  2. Lightly grease a cast iron enamel terrine pan 30 cm long x 11 cm wide x 8 cm high (12 in long x 4 1/2 in wide x 3 in high).
  3. Lay strips of the thinly sliced zucchini on the bottom of the pan. Add 125 mL (~1/2 cup) of the meat sauce and spread out evenly. Lay strips of the red pepper on top of the meat. Spread 75 mL (~1/3 cup) of the ‘béchamel’ sauce evenly over the pepper layer (if ‘béchamel’ becomes too thick, loosen it by whisking in a little vegetable stock or ‘milk’). Sprinkle with 63 mL (1/4 cup) grated mozzarella cheese (omit if vegan), repeat until the pan is filled or you’ve used everything up. End with the béchamel sauce on top and sprinkle the top with the remainder of the shredded mozzarella (omit if vegan).
  4. Bake for 30-40 minutes or until cheese is bubbly and the zucchinis still have a bit of a bite to them (al dente). The internal temperature should be about 140° F. Broil the cheese version for about 10 minutes to caramelise the top.
  5. Remove from the oven and allow to stand for 10 minutes. Cut into 6 portions and serve with a light salad.

Do NOT omit the roasted red peppers, they ad incredible flavour.

Do NOT omit the roasted red peppers, they add incredible flavour.

ZucchiniLasagna_Unbaked

Just before I popped it into the oven.

Notes to make this a Vegan Lasagna:

  • Béchamel:
    • substitute vegetable stock or rice milk for the “milk” component.
    • leave out the “cheese” component altogether, the lentils make a delightfully flavoured béchamel even without cheese (plus I am skeptical about vegan cheese, what is that?)
  • Almond milk and coconut milk are too strongly flavoured, that is why I didn’t recommend it. On top of everything, I would avoid coconut milk because we are making this an Italian flavoured dish.
  • Want to omit the ‘béchamel’? Add slices of Chinese eggplant, it will add the creaminess mouthfeel we crave with lasagna.
  • Meat Sauce: substitute your favourite cooked beans or ground tofu in similar measures for the ground meat.
  • Want to add even more flavour? BBQ the veg for a few minutes before you assemble, the smokiness adds a lot of flavour.

Notes:

  • I had pork from a previous meal that I ground up fresh for this recipe, use whatever meat or beans you wish.
  • The lentil béchamel will thicken as it cools, just whisk in a bit more milk, rice milk or vegetable stock to loosen.
  • I like the stringiness of mozzarella in lasagna but if you are lactose intolerant, feel free to substitute goats cheese, the tang will be incredible in this dish.
  • Whenever I see beautiful red peppers, particularly if there is a sale, I buy a bunch, roast them on the BBQ and save the slices in the freezer for future pizza’s or in this case, lasagna (freeze on a parchment lined cookie sheet and when frozen, place in a plastic bag. Leave in whole pieces to give you more options in usage). Omitting the roasted red peppers is a mistake because they add incredible flavour and sweetness.

This is the nutritional facts for the meat version of my recipe above, based on 6 servings.

This is the nutritional facts for the meat version of my recipe above, based on 6 servings.

This is the vegan version using navy beans and omitted all cheese.

This is my vegan version using navy beans and omitted all cheese.

This is an epicurious recipe based on 6 servings.

This is a Food Network recipe based on 6 servings.

Read Full Post »

TurkeyChiliFirst

JapaneseCherryBlossoms

The Japanese Sakura Cherry Blossoms in High Park

CherryBlossomTree

Our Cherry Blossom tree in the front yard

Cinco de Mayo Inspired Turkey Chili

A Kitcheninspirations Original Recipe

Serves 8-10

Ingredients:

  • 1 cup dried red kidney beans, soaked overnight in water
  • 250 g sweet onions, chopped
  • 25 g garlic, finely chopped
  • 300 mL tomato sauce
  • 2 tbsp tomato paste
  • 500 mL water and or chicken stock
  • 900 g ground turkey breast
  • 1 1/2 tbsp cumin
  • 1 tbsp coriander
  • 1/2 tsp smoked paprika
  • 1/2 tsp chili
  • 1/2 tsp sea salt
  • 5 g dried ancho chili (seeds and veins removed)
  • 1 tbsp unsweetened cocoa
  • 30 mL tequila (a nice smokey one)

Garnish:

  • 1 ripe avocado, sliced thinly
  • 10 tbsp Greek Yogurt (approx 150 mL)
  • 10 tbsp mozzarella cheese
  • handful of Cilantro, or to taste
  • 3-4 Green onions, finely chopped
  • 1 red chili pepper, finely sliced

Directions:

  1. Pre-heat slow cooker on high. Rinse beans and add to the slow cooker along with the onions, garlic, tomato sauce, tomato paste and the water and/or stock and give it a good stir.
  2. Brown the turkey meat in a very hot cast iron pan in batches. Add the browned turkey and juices into the slow cooker in batches. Once you have browned all of the turkey, remove the pan from the heat and deglaze the pan with the tequila, scraping off all the delicious turkey bits from the pan. Add this liquid into the slow cooker.
  3. Give the chili a good stir. Cook on high for 4-5 hours or until the beans are fork tender. If the chili is too liquidy, then remove the lid for the final hour of cooking.
  4. Serve hot garnished with sliced avocado, a tablespoon of yogurt or sour cream, cilantro, chopped green onion, shredded mozzarella cheese and finely sliced peppers.

Based ib 10 Servings

Based on 10 Servings

It's heavy on the points but high on flavour.

It’s heavy on the points but high on flavour.

TurkeyChili

A delicious Mexican Flavoured Chili

Ladies Night May 2015

Ladies Night May 2015

LadiesNight2

I should have set up the tri-pod for an all in shot.


Read Full Post »

RoastedTomatoSoup

This time of year, those of us who live in the northern hemisphere are not quite as fortunate as those who live in the southern hemisphere; I’m referring to being able to source the best produce, of course. Personally, I think tomatoes are the greatest disappointment by far (next to strawberries). More often than not, I bite into a tomato and taste nothing. Nadda. Mealy. Pasty. Nothing. This time of year, I tend to gravitate toward the best canned tomatoes, knowing that they were picked and packed at their prime. But somehow, when it comes to using the humble tomato as the main ingredient, the STAR as it were, I feel that canned just wouldn’t cut it and alternative measures must be taken.

Some of you who have been on this journey with kitcheninspirations will recall that I posted a rant and a solution about unseasonal tomatoes a few years ago (4 to be exact) and todays post is about a great use for those oven-dried tomatoes. Oven drying is a long procedure but well worth it, particularly because there is little to no effort involved. Just a few clicks on the hydro metre and you’re almost all the way to a delicious tomato recipe.

Roasted Tomato Soup

Serves 4-5 150-175 mL servings

Ingredients:

  • 1 kg (2.2 lbs) tomatoes ~ this doesn’t have to be precise (I used vine ripened)
  • 500 mL to 1 L chicken stock (or vegetable stock)
  • 6 cloves of garlic, roasted
  • 2 tbsp olive oil (or chicken stock stock)
  • 1/2 tsp salt
  • 1/2 tsp baking soda
  • 4 tbsp goats cheese, at room temperature
  • 4 tsp unflavoured yogurt

Directions:

  1. Pre-heat oven to 250° F (121° C).
  2. Remove all loose skin from each garlic clove, leaving the tight skin on. Place the cloves into a small ramekin and add about 2 tbsp olive oil and some sea salt. Cover with foil wrap and tuck into the corner of the oven. If you prefer not to bake the garlic at the same time as the tomatoes, you may roast the garlic in a 350° F (177° C) oven for 40-45 minutes or until soft.
  3. Wash and slice the tomatoes into thirds (believe me, the tomatoes lose a lot of water in the dehydration process so you must leave them THICK). Place cut side down on some paper towel for about a minute.
  4. Rub a cooling rack with a lightly oiled paper towel and place directly over a baking sheet (to catch any drippings).
  5. Arrange the tomatoes cut-side up on the prepared cooling rack and place in the centre of the pre heated oven. “Bake” for 4-5 hours until most of the moisture has been eliminated from the tomato.
  6. Once dehydrated, add all of the tomatoes and the roasted garlic (skin removed), baking soda into a heat-proof bowl and slowly add the stock. Blitz with the immersion (stick) blender until smooth, adding more chicken stock until the desired consistency has been achieved. Season with salt as desired.
  7. Push through a fine sieve and blitz once more for added creaminess.
  8. Combine the goats cheese and the yogurt and whip until fluffy. Set aside for serving.
  9. When ready to serve, heat the soup through and add a dollop of the goats cheese and yogurt into the centre. Serve piping hot.

RoastedTomatoSoup2

This thick, creamy soup is perfect for cold, snowy days. It would also be delicious chilled on a hot summers day.

Notes:

  • The addition of baking soda came from JT, he uses this trick in his delicious Chicken Cacciatore to quell the acidity of the tomatoes. It really brings out the tomatoes’ sweetness — try it instead of adding sugar!
  • I whipped the goats cheese with yogurt to make it easier to melt into the soup, we swirled it in and it was delicious.

Screen Shot 2015-01-25 at 10.05.29 AM Screen Shot 2015-01-25 at 10.06.12 AM

Read Full Post »

September ALREADY? WTF? Where on earth did this summer go? Good luck to all the mini humans going back to school!

I thought I’d share a little info about a food photo shoot that some of you may not know. It’s actually quite amazing at how many people this industry employs — so next time you see a food commercial, ad or packaging with a food photo, consider this (I’ve really simplified this complex process):

A designer designs the packaging or advertising prior to the photo shoot. There are many layers in the design phase and several people involved but it boils down to the art director and client who dictates the look and feel of the photo. The Food Stylist is involved in the design phase if there needs to be special ‘recipes’ or plating requirements (like I was involved in coming up with 8-10 ideas for the products we were shooting last week).

Once a design is established, the Art Director creates a “Pre-Pro” which details the props and “recipes” that will be photographed. The “Pre-Pro” is approved by the client and distributed to:

  • The Prop Stylist (this person is an expert in props, where to find them, rent them or buy them). A prop is anything that may be used in the photo, such as fabric, plates, noise (background items that are out of focus) and cutlery. Props are generally reserved for the photograph and not used in the preparation of the food. Depending on the photo shoot complexity, the Prop Stylist may be required to stay on set to select the exact props to be used in each shot. If they don’t stay, the Art Director makes that decision.
  • The Food Stylist (this person is an expert in food, how to get the best out of food so that the consumer recognizes instantly the message the Art Director and client wishes to convey). The food stylist buys the components to make the ‘recipe’ happen. Contrasting colours and textures are paramount. The Food Stylist may have an assistant depending on the complexity and budget of the shoot.
  • The Photographer (this person is the expert in photography, understands light whether natural or man-made and even how to make man-made light look natural because they have more control over it). The photographer will prepare the lighting set up required to execute the art director’s wishes. The Photographer may have an assistant depending on the complexity and budget of the shoot. And sometimes the Photographer brings a tasty breakfast.
  • The Client: The Boss. The client knows the intricacies of the product and what they feel is important to convey in the photo. The client approves the shot before we move on to the next one. Sometimes the client is off site, but that adds a layer of time to the shoot and we all know that food generally doesn’t last long on set. Things dry out, melt and don’t look appealing. We always prefer the client to be on set.

Shoot day starts early and is busy from the get-go. Photographer, Prop Stylist and Food Stylist are usually the first to arrive. There is a lot of shlepping, but it’s generally a very generous group and everyone helps get everything organized. Of course, the behind the scenes studio team sets everything in motion the day before, food, snacks, coffee/tea, water are all provided generally — the one thing for sure, there is ALWAYS A LOT of food!

Once everything and everyone is set up, we begin to work getting things ready for the first shot (as a Food Stylist, I also keep in mind all of the shots for that day to see if I can consolidate any tasks that will save a bit of time in the long run). The Art Director I recently worked with enjoys shooting with natural light, but that can be challenging since natural light changes all the time so the photographer is constantly tweaking the settings and extra lighting to make the shot perfect.

In terms of food styling, there are many tricks of the trade and the stylists I’ve worked with have been incredibly generous with their advice, but as with anything else, I still have a lot to learn. Apparently, wearing comfortable shoes is something I haven’t learned…but I am trying ;-). I have a couple of pairs of stylish yet comfortable shoes but I still gravitate to stylish over comfort. One of these days, I’ll learn, it’s generally a very long day where the only time I sit is for about 30 minutes at lunch!

So I hope you’ve gained a little appreciation for the energy, people and time involved for food photography; after all, that strawberry on the front of the cereal package was carefully chosen over hundreds of strawberries, deliberated over (with such phrases as “it’s not doing it for me”, or “is it just me..,?”, and “do you see a face in that?”) intentionally placed and oiled for shine and to catch a little sparkle! Who knew?

CapreseSalad_3580

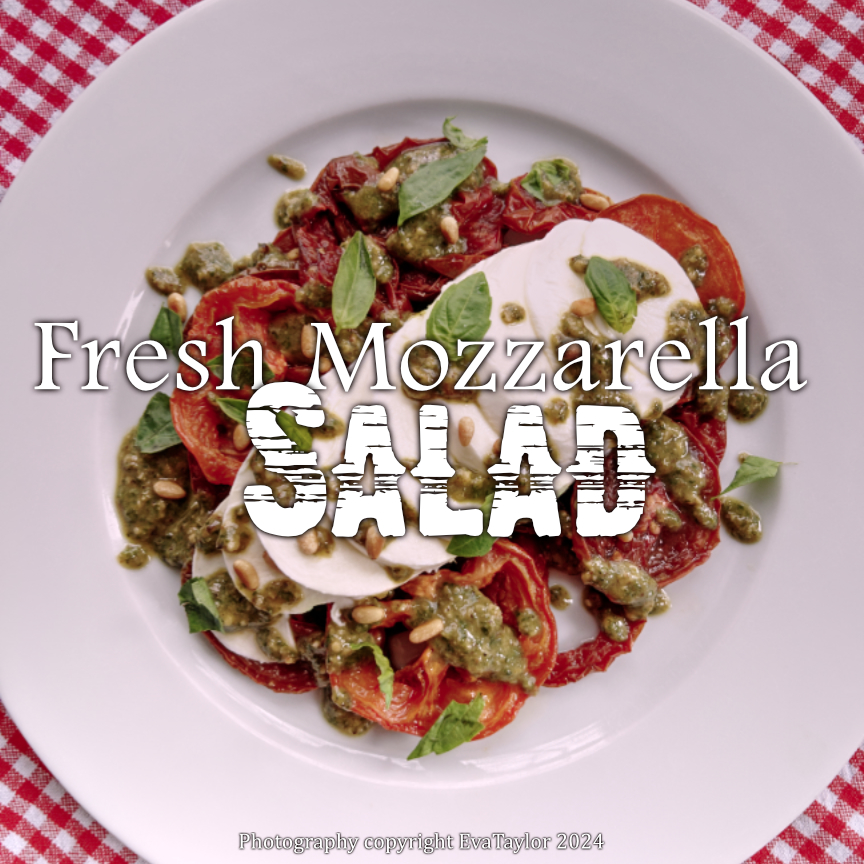
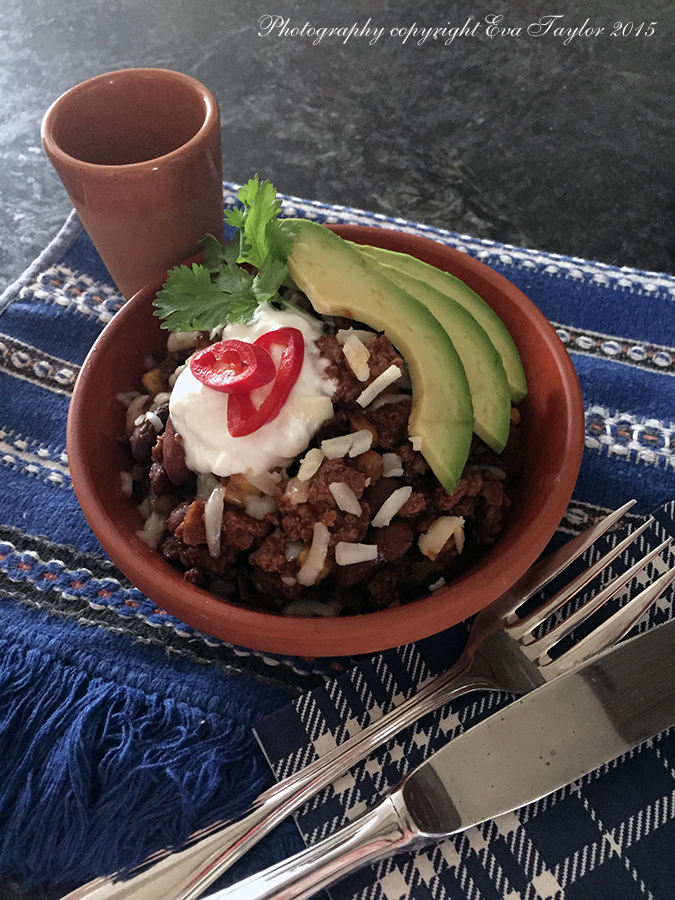
A delicious combination of flavours.

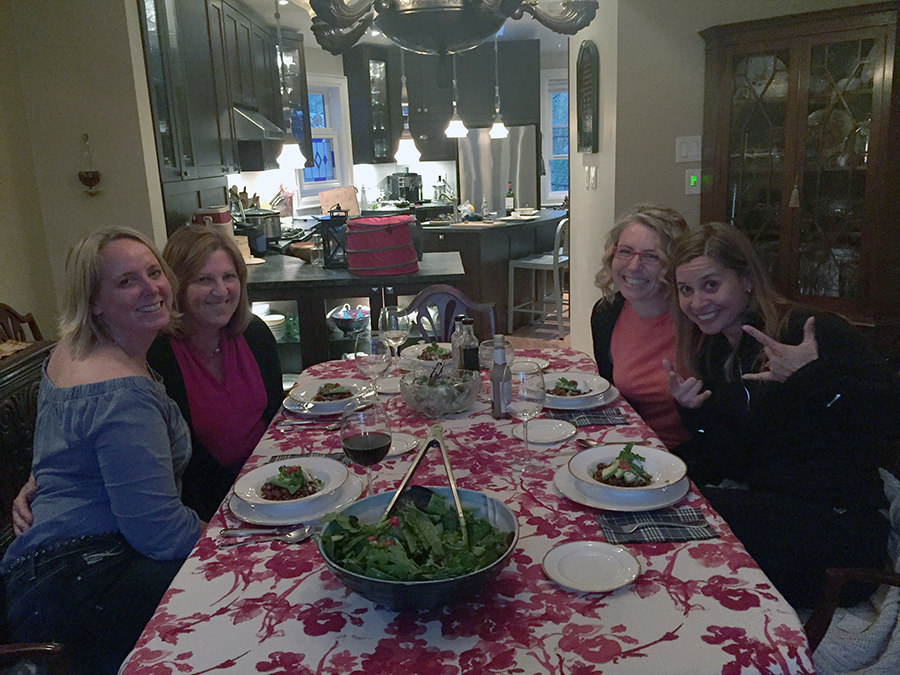
Recently we had my GF BFF and her hubby for brunch and I wanted to serve something that just screamed SUMMER! And for me, there is nothing that screams summer than a Caprese Salad. We searched for a local farmers market but sadly missed the boat because we were too late getting there so I was stuck with grocery store tomatoes. I bought the best, vine ripened variety but was still disappointed. They lacked that great, summer tomato flavour. So I decided to oven roast them to concentrate the flavours and we were not disappointed!

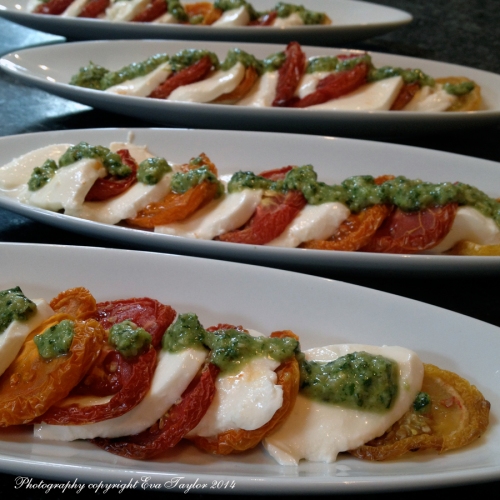
Caprese Salad with a Twist

Serves 4

Ingredients:

Directions:

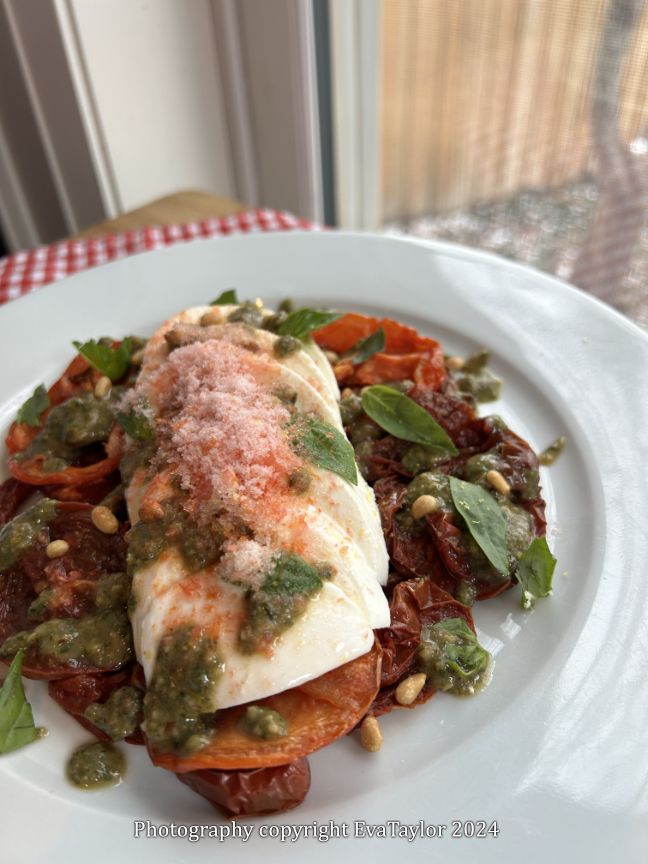
  1. Alternately layer the sliced Bufala Mozzarella with the tomatoes on a plate.
  2. Combine the home made pesto with the white balsamic until a drizzle-able consistency is achieved. Drizzle over the tomatoes and mozzarella. Serve at room temperature.
  3. Enjoy.

CapreseSalad_3578

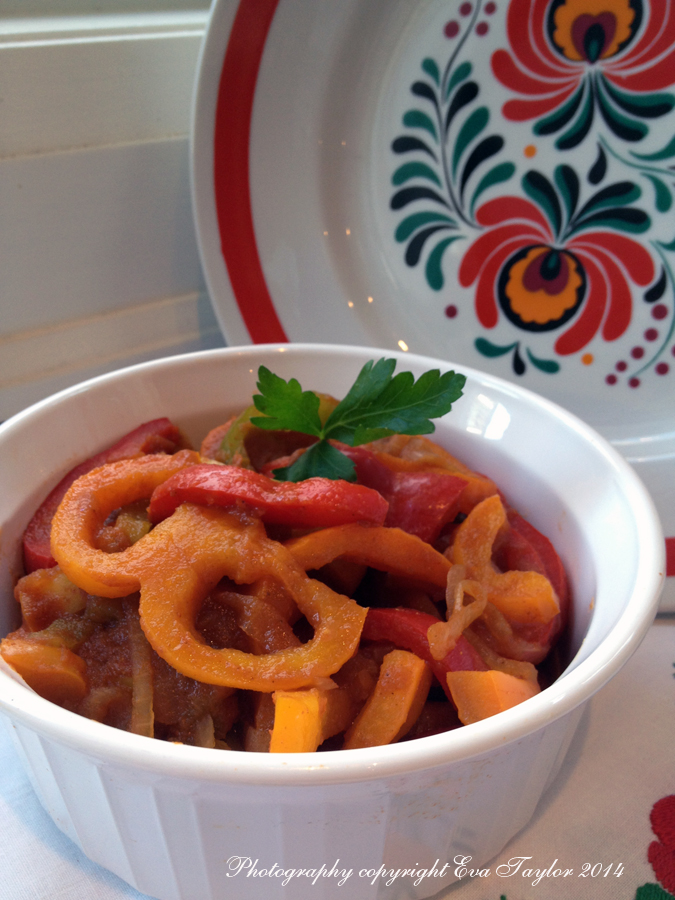
A nice, summer salad.

Notes:

  • I would not substitute sun-dried tomatoes for oven dried tomatoes because they are much stronger in flavour and will over power the subtle flavour of the bufala mozzarella.
  • Bocconcini may be substituted for the Bufala Mozzarella but it is a harder cheese with a slightly stronger flavour.
  • Burrata cheese is a beautiful substitute but you wouldn’t want to cut it because all that delicious cream will pour out. Serve a small Burrata and surround it with the tomato slices and drizzle the pesto over everything.

Read Full Post »

At the cottage we like to sit back and relax, put up our feet, read a good novel, scan some trashy magazines and on occasion have been known to enjoy a cocktail or two ;-). Simple is usually what I lean toward because of the effort one needs to make to bring everything up for the weekend. I know I’ve posted a guacamole recipe before (here and here) and even got flak for calling this one mocamole, but I thought I’d share a super simple rustic version made with the ripest avocado for a light snack at the cottage. This recipe has only 5 ingredients and you need only one bowl, a fork and a knife to make it. See, I told you it was simple.

Guacamole2

This dip comes together very quickly; I disappeared for less than five minutes to make it, our guests were surprised I made it from scratch so quickly!

Super Simple Guacamole

Makes about 3/4 to 1 cup of dip but it depends entirely how big your avocado is

Ingredients:

  • 1 ripe avocado
  • 1-2 tbsp lime juice
  • 1-2 cloves garlic, finely minced
  • 5 small grape tomatoes, seeded and chopped
  • 1 tbsp chopped cilantro and a sprig or two for garnish

Directions:

  1. Scoop out the flesh from the avocado, no need to be gentle as you will mash it with a fork.
  2. Mash the avocado with a fork (I told you so).
  3. Add the garlic and the lime juice and mix well.
  4. Fold in the chopped tomatoes and cilantro.
  5. Garnish with cilantro.
  6. Serve with celery sticks, cucumber rings, or crackers.

Guacamole

I love that mashing with a fork still leaves you with some lovely, creamy chunks of avocado.

Read Full Post »

Happy Easter everyone! Hope you all had a lovely weekend. In Canada we have Good Friday as a holiday. Some things like the LCBO are closed on Sunday as well. Saturday will be a busy day, so better get there early to stock up for the family dinner!

My earliest memory of eating Hungarian Lecsó was when I was about 8 or 9 years old and my father made it for us. We were a typical Eastern European family in that the father virtually never cooked, that was ‘woman’s work’ but my Dad did step up on the occasion that my dear Mom had to go into the hospital and have an operation. I don’t remember much else about this time except that Dad cooked lecsó. One other thing, my 6 or 7 year old brother was beside himself with worry when our parents told us that Mom was going to be away in the hospital for a few days, and through tears a great degree of anxiety he asked, “Who will cook for us?” Our obsession with food runs deep.

160-1974b_IMG

Circa 1974 Edward’s Gardens in Toronto. Dad, my little brother and I. Mom was taking the photo. What the heck is going on with my hair????

My experience has been that Lecsó is to Hungarians what Lasagna is to Americans or Bangers and Mash are to the English, it’s a fairly common staple. It’s easy enough to put together and it’s comforting and satisfying without being overly filling. The Hungarians generally use a Hungarian green pepper which is more like a Cubanelle, longer and lighter in colour with a more subtle flavour than the green peppers we are accustomed to in North America. I switched up this dish by using colourful red, yellow and orange peppers (capsicums) and Vidalia Onions which are much sweeter.

The traditional protein accompaniment in our household was Debreceni Kolbász which is like a thick hot dog, named after the city in which it was made. Most Hungarian sausages are coarsely ground pork seasoned heavily with paprika and garlic where as a Debreceni is subtly seasoned very finely ground pork that has the texture that resembles what you would know as a hot dog. The only difference from North American hot dogs and Hungarian Debreceni is that Debreceni has a very distinct ‘pop’ as you bite through the casing. I haven’t had a Debreceni in many years for the same reasons I haven’t had a hot dog — they are just too unhealthy to be worth it for me. I made poached Cod to eat with this dish and it was exceptional.

Lecso_2296

A delicious and warming brothy sauce with cooked peppers, onions and tomatoes.

Hungarian Lecsó

Serves 4

Ingredients:

  • 2 red peppers, sliced
  • 2 orange peppers, sliced
  • 2 yellow peppers, sliced
  • 2 large tomatoes, chopped (peeled and seeds removed)
  • 1 medium sized Vidalia onion, finely sliced
  • 200 mL home made tomato sauce
  • 1/2 tsp paprika (sweet or hot)
  • 1/4 tsp smoked paprika (sweet or hot)
  • salt and pepper to taste
  • parsley for garnish

Directions:

  • In a light spray of olive oil, cook the onions until translucent.
  • Add the sliced peppers and tomatoes and cook until very slightly softened.
  • Add the tomato sauce and seasonings and cook for about 10 minutes on a medium temperature.

Lecso_2293

Spice it up a notch by adding some hot peppers to the mix.

Notes:

  • Hungarians traditionally use lard as the fat which adds flavour but is extremely unhealthy so I add a pinch of smoked paprika which also adds to the depth of flavour that the debreceni would bring.
  • Traditionally the peppers are cooked until limp but I prefer a little texture to my lecsó so I don’t cook them as much.
  • Like most stewy dishes this is a lot better the second day.
  • Consider adding a poached egg to this dish (Hungarians might eat this with scrambled eggs).
  • Sour cream or yogurt are also used as a garnish to this dish.
  • Cubanelle peppers come in both hot and sweet varieties and look virtually identical. You will want to make sure you buy the right one and not make the same mistake we did for a meal we served at the cottage several years ago — that was a rude awakening!

Read Full Post »

Tomorrow would have been Julia Child’s 100th birthday and this is my post to celebrate this amazing woman. Julia is an American food icon who literally taught American’s how to cook. She was one of the early “foodies” before Food Network was even a thought; even before most of the chefs on Food Network were born! She was the first celebrity chef!

My friend Betsy over at Bits and Breadcrumbs suggested that we post a recipe from a Julia Child cook book to commemorate and celebrate her life and I was all over it! Betsy posted a gorgeous Clafouti recipe that’s been her dear Mother’s favourite. I also wanted to post an authentic Julia Child recipe, but unlike Betsy, I don’t have one of her actual cookbooks. Last Christmas JT gave me Dorie Greenspans Baking with Julia, a wonderful cookbook of mainly sweets, breads and such. But I didn’t want to bake something sweet, so I searched and searched until I came across a gorgeous luncheon dish, a savoury galette. I was sold. Thanks Betsy, this was a lot of fun.

For the galette pastry, you can click here for a very similar recipe, or you can check page 371 in Baking with Julia by Dorie Greenspan. I changed up the filling to suit our tastes and what I had in my pantry. It is an incredible crust, crispy and slightly sweet that can withstand even the wettest filling but it’s also not dry and crumbly. The cornmeal in the pastry recipe adds enough crunch to make it a little more interesting that a standard pasty. It’s really just perfect. In fact, so much so, I’ve had a special request to bake it again, believe it or not. 😉

I divided the pastry into two portions so that I could keep one galette and give the other away. Both were resounding successes. You can keep this very simple or make it a bit more complex as I did. You can serve this room temperature or right out of the oven or even reheated, it is amazing every-which way.

Savoury Oven Roasted Tomatoes, Caramelized Onion and Goats Cheese Galette

Serves 4-6, makes 2, 15 cm galettes

The oven roasted tomatoes and caramelized onions really went well with the goats cheese. The pesto was icing on the cake, I mean galette.

Ingredients:

Directions:

  1. Prepare the pastry as indicated in the recipe. It needs to be refrigerated for a couple of hours, so you’ll want to plan ahead.
  2. Roll the galette on a piece of parchment into a circle about 10 cm larger than the size you want it to be. Spread the sweet onion confit on the bottom leaving the last 5 cm all the way around clear. Add a layer of tomatoes and dot with 1/2 of the total goats cheese.
  3. Fold up the edges and pleat or do some other fancy design. I wanted my galette rustic looking.
  4. Bake as the recipe indicate (I did our’s for 30 minutes at 176°C or 350°F) just until the crust was starting to get golden.
  5. Serve hot, warm or even at room temperature garnished with fresh basil and a little basil pesto drizzle.

The basil pesto was a nice touch.

That was one tasty galette. Photo by my friend, neighbour and boss, Kim with her iPhone 4Gs.

Read Full Post »

I knew I wanted to make a chilled soup for our dinner party last weekend because it’s been so darn hot (not complaining) and I knew I wanted something a little unexpected than the traditional vichyçoissecucumber, avocado or even gazpachio — although all worthy soups in their own right. On top of it all Barb had posted a lovely asparagus soup recipe with a herb crusted goats cheese ball that really intrigued me. What to do, what to do? Off to the internet I went to find an unusual cold soup; my first stop was Epicurious and as luck would have it, there on the summertime meal feature page on my iPhone was a roasted red pepper and tomato soup. Call it kismet, serendipity or fate, this soup and I were meant to be.

The warm goats cheese ball is a nice surprise in the cold soup

The soup is a lovely balance of sweet red peppers and the acidity and sweetness of oven roasted tomatoes (or, in our case, BBQ roasted). There is a little raw green onion and a smidgen of garlic with a delightful earthy undertone of coriander. I also wanted to incorporate Barb’s goats cheese balls but I wanted a little contrast, so I rolled the goats cheese balls in sesame seeds and lightly fried them to brown the sesame seeds but more importantly, to heat up the goats cheese ball. Yup, I did the ole’ switcheroo and made the soup cold and the balls warm. It was a lovely contrast. JTs only comment was that there could have been more soup.

Chilled Roasted Red Pepper and Tomato Soup
with Warm Sesame Crusted Goats Cheese Balls

Recipe adapted from Epicurious

Ingredients:

Serves 8 small bowls (125mL or 1/2 cup) or 4 large dinner sized bowls (250mL or 1 cup)

  • 4 red bell peppers, roasted on the BBQ (or oven), seeded and skinned
  • 3 medium plum tomatoes, cut into 1 cm thick slices and roasted on the BBQ
  • 1/4 red chili pepper, roasted on the BBQ (or oven), seeded and skinned
  • 1 green onion
  • 1 small garlic clove, finely minced
  • 1/2 teaspoon ground coriander
  • water to achieve desired thickness
  • 1 teaspoon fresh lemon juice
  • 1 1/2 teaspoons salt
  • 1/4 teaspoon sugar (check for sweetness, and omit if the soup is sweet enough)

Goats Cheese balls ingredients:

  • 10 g (about 1 1/2 tsps) goats cheese per ball (I did one per serving)
  • 1 tbsp sesame seeds per ball
  • non-stick cooking spray

Directions:

  1. Combine all of the ingredients in a large bowl and blitz with the immersion blender until smooth, adding water until the desired consistency is achieved. You can use chicken stock or vegetable stock, but it’s not necessary as there is a already a plethora of flavours going on.
  2. Strain soup through a fine sieve. Don’t skip this step as it does ensure a very velvety soup without the addition of cream or butter. Refrigerate until serving. (the soup actually gets better if made one day and served the next).
  3. Roll the goats cheese into nice round balls and coat evenly with the sesame seeds (I used black and white). Heat a cast iron pan, spray with non-stick spray and gently fry the balls at medium temperature — you want to brown the sesame seeds and heat the ball through, you don’t want to melt the ball. Brown all sides evenly.
  4. To serve, ladle the soup into bowls and carefully place one (or more) balls onto the soup. My soup was thick enough that the balls did not sink. Serve immediately.

Read Full Post »

It’s a week night and even though we like to eat at 7:30-8 on weekends, it just doesn’t work for week nights when I need a couple of hours to blog, and such! I’m always looking for tasty and quick ways to serve fish and Kristy’s delightful Baked Cod Portuguese was a sure winner, but I didn’t have the fire roasted tomatoes, nor the time to make them, so I took her recipe as inspiration. This one is quite low calorie, no butter or olive oil.

Halibut with a Rustic Tomato Sauce

An incredibly filling meal

Makes 3 servings (100g each fish and 200g tomato sauce and greens)

Ingredients:

  • 300 g Halibut
  • 300 g cherry or grape tomatoes, halved
  • 90 g vidalia onion and garlic (the ratio is entirely up to you, I had about 80g onion, 10g garlic)
  • 1/2 tsp smoked paprika
  • salt to taste
  • non-stick cooking spray
  • 300 g mixed greens, including cucumber and green onions
  • 3 tbsp chopped fresh flat leaf parsley

Directions:

  1. Preheat oven to 350°F. Lightly spray a cookie sheet with non-stick cooking spray. Distribute the tomatoes, onion and garlic on the pan evenly. Salt.
  2. Bake for about 30 minutes. Pour the contents into your immersion blender jar and blend until smooth. Add the smoked paprika and blend again. Keep the oven on.
  3. Strain through a fine sieve, discard what is left in the sieve.
  4. In a cast iron pan, sear the fish skin side on high heat for about 4 minutes. Pour the rustic tomato sauce over the hot fish and bake in the hot oven for about 15 minutes (this depends entirely how thick your fish is).
  5. Meanwhile, create a fresh green salad (about 100 g each serving) with the mixed greens (we used spinach and baby arugula), cucumber and green onion.
  6. When the fish is cooked through, remove the skin and place 100 g onto each bed of greens. Add about one third of the sauce to each plate. Garnish with parsley.

The sauce was lovely, not too acidic (I didn’t add sugar because I am no carbing for three weeks!) but you certainly can to taste. And the garlic really added a wonderful nutty flavour of a baked clove. I will definitely make this sauce again, perhaps with chicken or left over turkey, but then I would add chili pepper flakes to heat it up.

Read Full Post »

I’m always on the look out for new weeknight recipes,  not that I don’t love our repertoire, I just like to spice things up every now and then. When I read Kristy and Mike’s recipe for Spicy Spaghetti Squash and Shrimp, I knew I couldn’t resist. What is even MORE WONDERFUL about this recipe is that it makes itself! Now, you’re probably thinking, OK, she’s finally lost her mind…but wait…

It was Tuesday and I emailed this recipe to JT who kindly picked up the fixin’s on his way home. We were swamped at work that day, I was a little tired and got home later than expected; when I opened the front door the waft of something wonderful filled my soul…WHAT? Who is cooking? You might recall that JT cooks most of our meals during the weekdays, but if it’s something new, he respectfully waits for me and we make it together! But not this time. Dinner was well underway by the time I got home, so I grabbed a glass of vino and pulled up a stool to watch my man cook — it’s such a satisfying site. Believe me, I know how fortunate I am. I am so glad he made this dish, it will become another one of his signature dishes!

No that's not spaghetti, it's spaghetti squash! I didn't realize how 'hot' that photo was...night-time photography really sucks. I apologize for the poor quality.

Now I am told we didn’t stray from Kristy’s recipe, so I won’t bother recounting but I do highly recommend you make it. We used low sodium tomatoes and we did not add the Parmesan, but see nothing wrong with doing so, we just didn’t feel like it. We both had to for lunch the next day and the flavours were incredible. A real winner we will add to the repertoire! Thanks Kristy and Mike, it’s a great tasting dish.

Read Full Post »

Although it has been unseasonably warm this past week in the big smoke, it’s been crazy rainy and windy. It’s a perfect time to stay in and make some healthy comforting food that is great for lunch the next day. I posted this recipe in 2009 because it is an incredibly tasty and easy dish for a week night, but I find myself craving to repost as I really hated the old photo! This is still JTs signature dish so I won’t alter his recipe other than how it has morphed over the years, and it has morphed a touch over the years. But I will say, please make this, it is really, really, really good!

And don’t forget to enter the giveaway! I’m really excited about the give away and what creative things you will make with it and blog about. I did forget to detail the time the draw closes: 12pm Eastern Standard Time, that will give me some time to get the correct entries together and have JT do the draw! As well, the Just a Pinch salts were purchased entirely by ME! It is not linked to any other promo! Time is a tickin’ people, better enter soon!

And did I mention that a couple of the answers are found in more than one post? Oops! Good luck!

A hearty but healthy dinner on a cold winters night

JTs Chicken Cacciatore

Adapted from Fannie Farmer, December 1984 (originally published in 1896!).
Serves 4 (2 dinners and 2 lunches in our case)

Ingredients:

  • 400g chicken breasts, skinless, boneless
  • 2 tbsp olive oil
  • 28g dried mushrooms rehydrated in about 1 cup warm water, set liquid aside (make sure you strain through coffee filter to ensure no sand gets into it)
  • 1 large onion, chopped
  • 1/2 cup dry white wine (or low sodium chicken stock)
  • 1 clove garlic, minced
  • 1/2 red pepper, sliced (we used green this time because that is what we had)
  • 1 tbsp tomato paste (put remaining tomato paste into an extra ice cube tray and freeze, remove from tray into a resealable container and voila, tomato paste as required!)
  • 2 cups canned Roma tomatoes, peeled and chopped
  • 1/2 tsp allspice
  • 1 bay leaves
  • 1/2 tsp thyme
  • Chili peppers to taste
  • Salt to taste
  • Grated Parmesan, if you wish

Directions:

  1. Preheat oven to 350°F (or you could just cook the entire dish stove top with the lid on)
  2. Heat the oil in a large dutch oven and cook the chicken until lightly browned on all sides.
  3. Add the onion and sauté a minute or two and then add the wine and allow to boil up.
  4. Lower the temperature and add the garlic, tomato paste, tomatoes, pepper and the mushrooms.
  5. Add the seasonings, bay leaves and the mushroom liquid.
  6. Cover and bake in the hot oven for about 1 hour, or until chicken is cooked through. If you like a dryer cacciatore, leave the cover off so that some of the liquid evaporates; I prefer mine a bit wet so that it makes a tasty ‘dressing’ for the greens.
  7. Remove bay leaves, taste and season if required.
  8. Serve on a bed of mixed baby spinach and baby arugula leaves. You can also serve with grated Parmesan and a dollop of yogurt or sour cream, but we’re reducing our intake this week, so we omitted it.

Tips: You can also add black olives (chop in half) and crumble some sheeps milk feta on top instead of the Parmesan for a slightly Greek version of the dish.

I had to update this post with a photo I recently took with my iPhone at work. I just loved how rich the sauce looks and how luminous this photos is.

Our studio has amazing light. And yes, that surely is cayenne pepper on the chicken.

Read Full Post »