Feeds:
Posts
Comments

Archive for the ‘Cheese’ Category

Some of you may have noticed that I haven’t been as present in the blogging sphere in February and March, and that is because we spent the month of February and some of March, wintering in Spain this year, and then we enjoyed some adventure. The first part of our trip was in La Carihuela in the Torremolinos neighbourhood of Malaga. We met up with friends for 6 days and soaked in the sunshine. Then, we rented a car and zipped off to my Cousin Lucy’s flat in San José where we spent three weeks, enjoying the sunshine. We had booked a couple of days in Alicante and then we zipped back to Malaga for 11 days, this time we rented a flat in the old centre of Malaga and visited with our friends and their friends, in La Carihuela. From Malaga, we flew to Istanbul, Turkey for a Viking Cruise to Greece. I will do a more detailed post on our Viking experience in the coming weeks. This was our first cruise in 38 years (our honeymoon was a cruise) ! After we landed in Athens, the culmination of our cruise, we flew to London for 4 days and then to Dublin for 3 days and arrived home for the last of winter weather on March 27. It was definitely a whirlwind trip with old friends and new friends and we hope to recreate it again in the coming year.

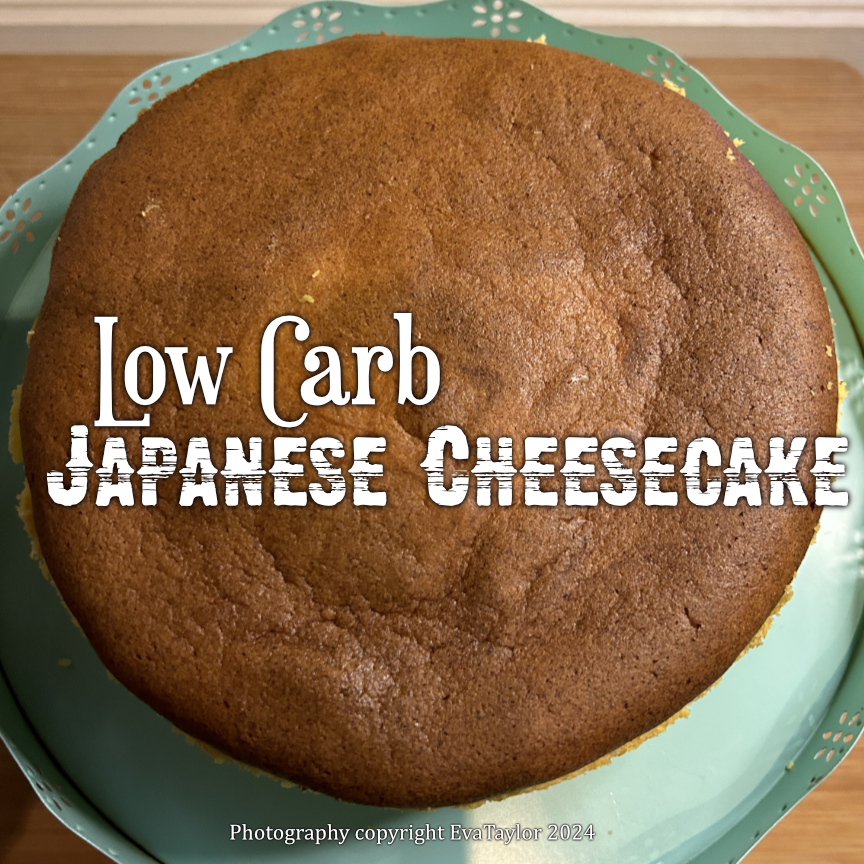
Unfortunately for us, Basque Cheesecake is from the Basque region in Spain, in the far north. Of course, you can find cheesecake everywhere in Spain, but is it authentic Basque Cheesecake? Basque Cheesecake is a slightly burnt, crustless cheesecake. Who needs crust on a cheesecake? I first made the crustless Basque Cheesecake in December 2022 and to be honest, I didn’t miss the crust. Yes, it does add texture but honestly, who needs (or wants) the extra calories? Plus, graham cracker crumbs of late are absolutely awful, they have a strong chemical odour which is definitely a downer for me. Next comes the Japanese Cheesecake. Japanese Cheesecake is also a crustless cheesecake but it is also a lot less dense than the Basque Cheesecake which for me is a plus. You could put a fruit couli on top for colour, but it doesn’t really need it. It’s quite lovely on its own.

Low-Carb Japanese Cheesecake

For the original recipe, please click here.

Makes 1 20 cm pan

Ingredients:

  • unsalted butter (for greasing the pan and parchment paper)
  • 150 g cream cheese
  • 30 g unsalted butter
  • 150 ml heavy (whipping) cream (¾ cup + 4 tsp, to be precise)
  • 100 g Erythritol (for the cream cheese mixture)
  • 3 large eggs
  • 40 g cake flour (I used 20 g lupin flour 20 g vital wheat gluten)
  • 1/4 lemon (for the zest)
  • 15 ml lemon juice (from ½ large lemon)

Directions:

  1. Preheat the oven to 350° F. Prepare your springform pan by lining the bottom with parchment and then rubbing butter on the bottom and the sides. Line the bottom of the exterior with 2 layers of foil (to prevent water leaking into the cake because it will bake in a bain marie). Take a larger pan than the springform pan and fill it halfway with water. Place in the oven to warm.
  2. In the top bowl of a double boiler (or make-shift bain marie) place the cream cheese, butter, heavy cream, and sugar into the bowl and simmer over low heat until everything melts and is cohesive. Separate the eggs and set the egg whites aside in the refrigerator.
  3. Remove the bowl from the heat and whisk in the three egg yolks, one at a time until fully combined.
  4. Sift the flour into the cheese mixture and whisk until fully combined. Pour the mixture through a fine sieve pressing through as much as possible, discarding the larger bits. Set aside.
  5. Beat the egg whites into stiff but not dry peaks. Fold the beaten egg whites into the cheese mixture.
  6. Pour the mixture into the prepared pan. Turn the heat down to 325° F. Set the cheesecake mixture into the ban marie and bake for 70-75 minutes. Lower the temperature to 300° F for an additional 10 minutes to give the top a beautiful golden colour. Turn the heat off and open the door slightly. Allow the cheesecake to cool completely in the oven. The cheesecake will shrink and become denser as it cools.

Read Full Post »

When one is on a low-carb diet, one misses the old favourites like Mac ‘n Cheese. We particularly LOVE the way the cheese caramelizes on the noodles at the edge of the baking dish so they become crispy and slightly chewy. Most low-carb bread crumbs end up being almond flour which really makes the dish very heavy, I solved that problem by using my low-carb bread, toasted and pulsed into breadcrumbs. If you didn’t know this was low-carb, you wouldn’t have had a clue.

The noodles really maintain their shape and the sauce sticks to it nicely.

Classic Low-Carb Mac ‘n Cheese

A Kitcheninspirations original recipe

Serves 2

Ingredients:

  • 100 mL milk, chicken stock, or water
  • 60 g cream cheese
  • 60 g Cheddar, grated
  • 30 g Gruyère, grated
  • 30 g Mozzarella, grated
  • 1 slice of bacon, cooked until crispy
  • 1 scallion, thinly sliced
  • 92 g low-carb Garganelli, uncooked and dry
  • 30 g Parmesan Cheese, grated, divided
  • 30 g low-carb bread crumbs
  • 10 g butter, also a little to coat the pan

Directions:

  1. Preheat the oven to 350° F. Prepare an oven-safe dish by buttering the inside all-over and sprinkling about half the Parmesan cheese all over the bottom.
  2. Begin to heat the milk very slowly over low heat.  Add the cream cheese, cheddar and gruyère and continue to heat until totally melted and incorporated smoothly into the milk. Take it off the heat and fold in the Mozzarella, bacon, and scallions.
  3. Add the warm cheese sauce to the uncooked pasta and stir it so the sauce penetrates all of the hollows of the Garganelli. Pour the coated pasta into the prepared oven-safe dish.
  4. Combine the remaining Parmesan cheese with the bread crumbs and butter and mix until crumbly. Top the pasta with the grated cheese mixture.
  5. Bake for 30-45 minutes or until the pasta has cooked through and has begun to caramelize on the bakeware.


Fresh out of the oven, the cheese was still bubbling!

Read Full Post »

Mac and cheese is a family favourite so it shows up on the meal plan a few times a year, usually when I have some leftover cheese that needs to be used up. This was not such an occasion. Ever since my friend Jeff the Chef over at Make it like a man posted his Cheeseburger Macaroni in an Instant Pot I have been obsessed with creating an authentic “oven-baked” Mac and Cheese in the Instant Pot! We just adore the caramelized edges of the noodles and the crispy panko topping contrasted against the soft-baked cheesy noodles of the center. This version is just as good. You can see from the top-down photo how the panko has toasted and crisped up, as well as some of the noodles that poke through the panko. If you want more crunch, allow more noodles to peak through the panko so that the air-fryer lid and do its magic!

This recipe is only made in the Instant Pot, I usually use 2-3 pots to make my traditional baked Mac and Cheese, one for the cheese sauce, one to cook the noodles and one for baking. So many fewer dishes! Plus, on a warm day, you needn’t heat up the kitchen with the oven. It’s win-win, in my humble opinion.

The crispy topping really adds to the Oven-Baked style.

Instant Pot Mac and Cheese

A kitcheninspirations original recipe

Makes 4 servings (just over 50 g dry pasta per serving)

Ingredients:

  • 213 g dry pasta
  • 325 mL water
  • 3 g salt
  • 100 g old cheddar
  • 50 g mozzarella
  • 125 mL milk
  • 30 g butter
  • 15 g flour
  • Good pinch of smoked paprika
  • 40 g panko
  • 20 g Parmesan
  • 2 slices crispy cooked bacon

Directions:

  1. Add the dry pasta and water to the Instant Pot and mix well, making sure the pasta is mostly submerged in the water. Put the lid on and set Pressure Cook for 5 minutes with the Pressure Release in the up position (closed).
  2. When the cycle has completed, release the steam manually; the noodles should be half-cooked and there will be a little water left in the pot. Set Instant Pot to Sauté on High and stir in butter, sprinkle in the flour and stir to mix well and cook until a roux is formed. Add the milk and stir well and cook stirring until thickened. Add the cheese and stir until melted and thickened. Stir in the bacon. Now leave on Sauté for 5 minutes, not stirring.
  3. Meanwhile, combine the Panko and Parmesan and mix well. Turn the Instant Pot off. Sprinkle the Parmesan and Panko evenly over the top. Set the Air Fryer lid on top and set to Air fry for 4 minutes at 400° F. After the time has been completed, turn off the pot and allow to rest for 5 minutes.

There is bacon in there, trust me.

Notes:

  • While the Instant Pot does create a ‘crispy’ top and somewhat crispy sides, it is not the same as a traditional oven-baked Mac and Cheese with caramelized noodles, although JT said it was quite acceptable.
  • You will need a good metal spatula to get under the caramelized noodles but the resting period should loosen them so you’re not fighting to get a serving out.
  • I generally freeze the 2 extra portions for a quick meal. Just allow it to defrost in the refrigerator and bake in a 350° F oven until warmed through.
  • The Swiss enjoy applesauce with their mac and cheese and that is how we prefer to eat ours too.

The Air-Fryer lid really helps toast up the top of this dish.

Read Full Post »

  • 105 g finely ground corn meal (not corn flour)

  • 100 g all-purpose flour

  • 50 g granulated sugar

  • 3 g baking powder

  • 2 g salt

  • 1 egg, lightly beaten

  • 175 mL milk

  • 2 finely sliced green onions (~30 g)

  • 50 g finely diced jalapeños or hot chili peppers (or more if you really like it hot!)

Directions

  1. Preheat oven to 400° F with your cast iron pan until the pan is smoking.

Read Full Post »

Hearty winter soups are a staple when we are in Canada and I just love to serve soups with scones. This recipe is an old favourite but I had run out of fresh onions so I used my handy dehydrated onion flakes in this easy recipe. There is just a little time to rehydrate the onions and you’re good to go. 

Cheddar Cheese and Onion Kefir Scones

A KitchenInspirations Original Recipe

Makes 9 large scones

Ingredients:

  • 260 g AP flour
  • 15 g sugar
  • 15 g baking powder
  • 5 g salt
  • 2 g cream of tartar
  • 56 g cold butter
  • 155 g frozen, shredded sharp cheddar cheese, plus more for topping
  • 200 mL buttermilk, 15 mL for brushing the tops
  • 30 g dehydrated onion flakes

Directions:

  1. Preheat oven to 450° F. Line a baking sheet with parchment paper.
  2. Rehydrate the onions flakes in the buttermilk for 5 minutes.
  3. Combine the dry ingredients in the large bowl of your food processor with the blades and mix well.
  4. Cut in the cold butter until it resembles a coarse meal. Replace the blade with the plastic dough blade.
  5. Add the buttermilk onion mixture and cheese to the flour and pulse to combine into a ball (cheese should still be frozen or at the very least, extremely cold).
  6. If it’s really warm in your kitchen, it’s best to refrigerate the dough for 30 minutes. With very little flour to prevent sticking, roll the dough into 1 cm thickness and use your favourite cookie cutter to cut even shapes (I used 5 cm squares with scalloped edges.
  7. Place each shape onto the prepared baking sheet about a centimetre apart and brush the tops with the extra buttermilk. Add a pinch of frozen shredded cheese to each top, if desired.
  8. Bake for 10 to 15 minutes or until lightly golden.

So flakey and delicious!

Notes:

  • I buy my cooking/baking cheese on sale in 400 g logs and I grate them into zip-lock bags and freeze them. If you break up the shreds as they freeze, they won’t stick together in clumps.
  • The frozen cheese will help make these flakey.

These are the grey days that just kill me.

Read Full Post »

Upon our return from Spain, I was missing being there so I made the Almond Tuiles of Sevilla (Tejas Dulces de Sevilla). They are delicious but it got me thinking about a savoury version. We had brought home some wonderful cheese called Old Amsterdam and I thought it would make a delicious snack. They are light and airy and crisp. They are strong enough for dip, but tasty on their own. I love how rustic they look from just breaking them apart.

Savoury Cheese Tuiles

Makes about 20 cm x 30 cm sheet

Ingredients:

  • 1 egg
  • 30 g cheese (I used Old Amsterdam)
  • 1 g salt
  • 1 g smoked paprika 
  • 50 g flour 

Directions:

  1. Beat the egg until it reaches the ribbon stage (about 5 minutes), add the salt and smoked paprika and mix well, then fold in the flour.
  2. Spread evenly on a parchment-lined baking sheet and sprinkle the cheese over it evenly and bake at 275° F for 20-35 minutes or until it has totally dried out and developed a golden colour.
  3. Cool entirely and once cool break into shards. Serve at room temperature.


Read Full Post »

You may have noticed from my other socials that we have escaped Toronto and finally headed to Spain. Our first trip in February was cancelled by you know what. We are here for 51 days. The sun and relative warmth have been life-altering. I wake up just to see the sunrise on the Mediterranean (it’s not that bad, 7:30-ish during our stay).

This slideshow requires JavaScript.

Our kitchen in the flat (my cousin’s flat) is challenging from a size point. I have fitted it with most of my favourite tools so I can do most things but finding a place to do them can be a challenge. Most people who rent do take away or go out to one of the many restaurants in this little village. The Spaniards like to eat late (9pm would be considered an early dinner) but I find it difficult to eat that late, so we end up going out for lunch and having a light dinner around 7pm. Although the first few attempts to lunch were failures as many places don’t open until at least 1:30 (we don’t eat breakfast) and they close between 2-5pm for Siesta. Don’t get me started on Siesta, it is a beloved ritual in the smaller centres. This little recipe was developed to take us through cocktails one evening. 

Retro Olive Balls

A KitchenInspirations Original Recipe

Makes 8 pastry-wrapped olives

Ingredients:

  • 15 g unsalted butter, room temperature
  • 60 g cheese, we used manchego
  • 60 g flour
  • 15 g roasted garlic purée
  • Salt, pepper to taste
  • water to bind
  • 8 olives

Directions:

  1. Preheat the oven to 350° F.
  2. Combine everything but the olives in the small bowl of a food processor and process until combined. If the dough still doesn’t come together, add a few drops of water and pulse until it comes together.
  3. Divide the dough into eight equal portions. Roll each portion into a small circle and wrap around each olive, rolling in your hand until it is smooth. Repeat until all of the olives are wrapped.
  4. Bake on a parchment-lined baking sheet until golden, serve warm.

A delicious buttery pastry enveloping a Manzanilla Olive.

Notes:

  • I used unpitted Spanish Manzanilla Olives because it is what I had at home, black olives or even pimento-stuffed olives would be lovely with this recipe. Make sure you mention to your guests that the olives are with pitts.
  • Double or triple this recipe for more tasty little balls.


Read Full Post »

I started watching a couple of Ontario-guys on Facebook who try to prove or disprove crazy videos they’ve seen, mostly of food but it can also be science or cleaning and such. They are a bit goofy which makes them rather charming. Their girlfriends sometimes participate in these videos by making some outlandish foods. This traditional Georgian potato, cheese-stuffed bread was one of them. The recipe looked so good, I had to do a little research and make my own. Their recipe was fairly straight forward using baking powder and not yeast bread dough, but the research showed that most of the recipes were yeasted bread dough, so I went with that. Then I found a few that had egg in them which gives the bread a wonderful, chewy texture. Then there is the mashed potato and cheese stuffed inside. OMG, so good. My recipe makes four disks about 20 cm in diametre, cut into eight portions.  The bread freezes very well. Remember to put it in the refrigerator overnight to defrost, then allow it to come to room temperature before baking. We went through two bad boys in two days and I sent a third one to a friend who was going to visit her parents! The fourth one is under lock and key in the freezer, I’m saving it for a special time! I will definitely be making this recipe again and again!

Soft, pillowy mashed potatoes with the sharp feta (or goat) and gooey mozzarella makes for a more-ish starter.

Kartofdzhyn (Cheese and Potato Stuffed Bread)

A KitchenInspirations Original Recipe

Makes 4 stuffed bread rounds about 20 cm (8 inches) each

Ingredients for the Bread:

  • 6 g quick yeast
  • 8 g granulated sugar
  • 120 mL milk, at 110F
  • 460 g bread flour
  • 6 g salt
  • 215 g Greek yogurt
  • 2 eggs
  • Olive oil for the dough
  • 1 egg yolk, whisked for brushing the dough

Directions:

  1. Combine the yeast and sugar with the warm milk and allow to proof for about 10 minutes (it should froth up)
  2. Add the flour and salt to the large bowl of your stand mixer and mix lightly.
  3. Combine the Greek yogurt and eggs with the frothy yeast mixture and whisk until well combined.
  4. Add the liquid ingredients to the flour and knead with the hook for 10 minutes. Stop the mixer and allow the dough to rest for 10 minutes, then resume kneading for about 15 minutes or until the dough comes away from the bowl.
  5. Coat the dough with olive oil and allow to proof for about an hour, or until doubled in size.

Ingredients for the Filling:

  • 2 medium yellow potatoes (about 230 g), boiled
  • 30 g butter
  • 30 g roasted garlic purée
  • 2 scallions, finely chopped
  • 100 g feta cheese or goats cheese
  • 230 g mozzarella
  • 6 g salt

Directions:

  1. Mash the potatoes with butter and roasted garlic, then beat with a whisk beater until light and fluffy. Fold in the scallions, cheeses, and salt and set aside.

Directions for the dough disks:

  1. Divide the dough into four equal portions. Roll out each portion evenly to a circle about 25 cm (10 inches). 
  2. Add one-quarter of the filling to the centre of each round and pull in each side to form a sealed disk. Flip over and gently roll out to about 20 cm (8 inches). Pierce the top of the disk with a fork and brush each dough disk with the egg yolk. Set aside while the oven preheats or freeze on a baking sheet and transfer to a plastic zip-lock bag for the future.
  3. If baking at the moment, put a cast-iron pan into the oven and pre-heat the oven to 400° F. Add one disk to the hot pan and bake for 20 minutes. When done, remove from the heat and brush the top with some more olive oil. Serve warm.


Read Full Post »

I usually make my scones and biscuits with my handy food processor but I have to say that these freehand scones will change my method for all my future scones. For what I save in time, I sacrifice in cleaning time and most importantly, texture of the scones. These scones are light, airy, filled with gooey cheese and scallions. They are great with soup or a stew. Serve them warm with fresh butter.

This post was created on a blistery, cold day in latter January. We just had received about 50 cm (20 inches) of snow in a period of 24 hours. We must have a VIP living on our street because the damn snowplow came down our street four times, depositing a heavy mess of snow at the end of the driveway. Honestly, the last two times were ridiculous, there was hardly any new snow on the road! This was one of the sunniest days we’ve had so far, the sun reflected in the new white snow and  I just had to take advantage with the photos.

Freehand Kefir, Scallion, and Cheese Scones

Original recipe from Jean Paré’s Company’s Coming Muffins and More cookbook

Makes 8 large wedges

Ingredients:

  • 240 g All-Purpose Flour
  • 16 g baking powder
  • pinch of salt
  • 4 scallions, roughly chopped
  • 150 g cheddar cheese, coarsely grated
  • 57 g cold butter, cut into small cubes
  • 1 egg
  • 100 mL kefir (and extra kefir for brushing tops)
  • Parmesan, finely grated for sprinkling on top

Directions:

  1. Preheat oven to 425° F.
  2. Combine flour, baking powder, salt, with the butter and manually cut like you would pastry dough. When it is slightly smaller than pea-sized bits, add the shallots and cheese and mix.
  3. Combine the kefir and the egg and whisk until frothy. Pour into the dry ingredients and mix well. Turn dough out to a lightly floured surface and knead once or twice, just enough to pull it together. Roll out to a round shape and cut 8 wedges to make. Brush tops with kefir and sprinkle the parmesan on top.
  4. Bake for 15 minutes or until lightly golden. Serve warm with butter.

Tender and delicate scone with lots of cheese and scallions.

Read Full Post »

It’s been wickedly cold here, and by wickedly cold, I’m talking -21° C or -5.8° F! I have only been able to think about soup. I love brothy soups but JT is not as much of a fan, he prefers creamed soups so I like to mix it up. I had purchased too much broccoli for Christmas day dinner so I had a small crown leftover along with a not-so-perfect-looking romaine, so this recipe was a result of these two leftovers.

Broccoli and Cheddar Soup

A KitchenInspirations Original Recipe

Makes just over a litre of soup

Ingredients:

  • 1/4 Vidalia onion, roughly chopped
  • 15 mL EVOO
  • 1 fist-sized head of broccoli, roughly chopped
  • 1/2 romaine lettuce, shredded
  • 1 L chicken stock
  • 5 cm x 5 cm Parmigiana rind, cut into smaller pieces
  • 30 g of cheddar, shredded
  • Salt to taste

Directions:

  1. In a hot pan, cook the onion in the olive oil until translucent, add the broccoli and romaine lettuce and cook for about 5 minutes. Add the chicken stock and the Parmigiana rind and simmer for about an hour or until everything has softened.
  2. Blend with an immersion blender until smooth. If using a traditional blender, allow to cool a bit so the steam doesn’t blow off the lid.
  3. Serve with some shredded cheddar sprinkled on top.

Notes:

  • The romaine didn’t end up adding much flavour but it did help with thickening.
  • Use vegetable stock if making vegetarian.
  • The Parmigiana also helps to thicken the soup.
  • I used both orange and white cheddar because that is what I had.

Read Full Post »

Back in the 80’s, when I was first dating JT, his parents would occasionally invite me to dinner at their home. JT’s Mom didn’t love cooking but she really made an effort. She focussed on areas she could master, like soups, salads, and pies (she made awesome pies). She let the experts deal with the proteins for the most part and one of her favourite proteins was, Chicken Cordon Bleu. She had her local butcher make up these delicious little parcels and she just popped them into the oven and baked them. Honestly, I hadn’t thought about these bundles until about a year ago when I was really trying to make our meals more of an event, since we weren’t doing much else (thanks Covid). They didn’t disappoint!

I created a very easy way to parcel the chicken breasts with the ham and cheese so they would stay together. I didn’t bother putting the little chicken crown over my version but it was still beautiful and delicious.

The trick is to even out the chicken thickness by pounding with a flat pounder, I like to put the chicken into a zip lock bag so that it doesn’t splatter when I’m pounding it. You don’t want it too thin but you do want it even. You can pound it thinner and roll the ham and cheese but I’ve always found that the cheese eventually melts out so I make a pocket the length of the breast without cutting through and stuff the ham and cheese into the pocket. I use a metal skewer to hold the opening shut which will be removed just before slicing.

Flash-back to the 80’s Chicken Cordon Bleu!

A KitchenInspirations Original Recipe

Serves 2 (ingredients may be doubled or tripled easily)

Ingredients:

  • 1 @ 200 g (or 2 @ 100 g) chicken breast, deboned and skinned
  • 100 g Gruyère, grated
  • 1-2 slices of Serano ham
  • 1 egg
  • 1 tsp mayonnaise
  • 80 g AP Unbleached Flour
  • 15 g granulated garlic
  • 15 g dehydrated onion
  • 100 g panko
  • 1/4 tsp salt

Directions:

  1. Place the panko, granulated garlic, onion, and salt into a spice grinder and pulse until it is relatively fine. Toast the panko mixture gently in an oven-proof, dry frying pan until golden. Set aside to cool. Save the pan to cook the chicken in.
  2. Add the flour to a flat pan (I use small baking sheets about 20cm x 30 cm).
  3. Prepare your breading station by combining the egg and mayo and whisking until smooth. Pour into a second flat pan.
  4. Pour the cooled panko mixture into a third flat pan.
  5. Prepare the chicken breast by placing it into a zip lock bag and pounding it until it is relatively even thickness. Remove it from the bag and slice a thin slice through the breast to create a pocket (I try to keep the opening as small as possible to avoid losing the filling during the baking process).
  6. Place the Serano ham into the pocket and spread out as evenly as you can. Fill the pocket with the cheese. Taking a thin metal skewer, “sew” the opening up so that it remains closed during the baking process.
  7. Place the chicken bundle into the first pan, and coat evenly with the flour.
  8. Transfer the bundle to the egg station and roll to coat evenly.
  9. Finally, roll the bundle in the flavoured panko and make sure that it is well coated. Return the bundle to the zip lock bag and fill it with the remaining panko mixture. From the outside of the bag, press the panko into the chicken bundle. Roll tightly and refrigerate until required.
  10. Preheat the oven to 375° F. Heat the oven-proof frying pan (previously used for the panko) with a little oil and fry 3 of the 4 sides of the chicken bundle until golden. When all three sides are golden, place the unfried part of the chicken bundle down onto the pan and place the pan in the oven and bake the chicken until the internal temperature is 165° F at its thickest part.
  11. When the chicken has reached the temperature, place the cooked chicken on a cutting board and cover for 10 minutes. Slice it in even slices and serve with your favourite veggies.


I served the chicken with cauliflower mash.

Notes:

  • I add the mayo into the egg because it really helps to crisp the breading, because it is baked and not fried.

Read Full Post »


Jalopeño Jack Scones

Makes 9 5 cm (2 inch) scones

Ingredients:

  • 280 g AP flour
  • 50 g granulated sugar
  • 15 g baking powder
  • 6 g salt
  • 56 g cold butter, in cubes
  • 1 L egg
  • 120 mL buttermilk
  • 100 g grated sharp cheese (I used jalapeño Monterey Jack)
  • 5 mL milk
  • 10 g Parmesan cheese, finely grated

Directions:

  1. Preheat the oven to 425° F.
  2. In the large bowl of your food processor, add the flour, sugar, baking powder, salt and butter and pulse to combine. 
  3. Whisk to combine the egg and buttermilk and slowly add it to the dry ingredients while running the processor. Change the blade to the plastic blade and add the cheese. Pulse to combine.
  4. On a lightly floured surface, roll out the scone dough to about 1 cm (1/2 inch) thick. Cut into even squares. Lay on a parchment-lined baking sheet, spaced out about 2 cm. Brush the tops with the milk and sprinkle a little Parmesan cheese on the top of each scone. Bake for 10-15 minutes or until golden. Serve warm.

Read Full Post »

We were having the Boyz over for a trip down memory lane in May, we had just come out of a 100+ day, hard lockdown and were finally permitted to have less than five people in our backyards so we jumped on it! The Boyz are Andy and Mark, they own a lovely Irish Pub in Leslieville called The Roy. I met Andy many years ago when we both worked at a design firm and have been friends ever since. Andy and Mark love to travel and they love to travel to Spain. Way back in 2020, before the world fell apart, we happened to be in Spain at the same time so we met up in Malaga. We soon realized that our friendship had gotten a lot deeper because of our shared love of Spain. Sadly the last year and a bit has not been kind to restauranteurs and the Boyz are definitely feeling the pinch so when we were allowed people over, I thought I’d create a night of tapas for a trip down memory lane with food. And who doesn’t love an entire night of eating?

Many of the recipes I served have appeared on the blog, but this one is new and so delicious, I had to post it. This is a compilation of several recipes online and my tapas books so I don’t have a reference. When you say croquetas, I immediately think of creamy potatoes but this one is not made with potatoes (although it would have been delicious too), it’s made with a thick béchamel, and you know how I adore béchamel! As you can see from the menu, it was served later in the evening and people were getting pretty full, but not one was left on the plate! Not one.

The menu for the night:

  1. Crispy Calamari with Romesco Sauce 
  2. Bacon Wrapped Dates
  3. Sautéed chorizo with Bread 
  4. Spanish Potato Omelette 
  5. Tuna Avocado salad in Endive Spoons 
  6. Manchego and Serrano Croquettes (recipe below)
  7. Catalan Tomato Bread with Anchovies
  8. Seared Scallop on Creamed Corn 

Dessert:

  • Selection of Spanish cheeses, crackers, grapes, nuts

Croquetas de Jamon Serrano y Manchego

Makes 16 croquettes, about 26 g each

Ingredients:

  • 80 g serrano ham, finely chopped
  • 50 g shallot, finely chopped
  • 50 g manchego cheese, coarsely grated
  • 30 g butter
  • 15 mL EVOO
  • 60 g all-purpose flour
  • 200 mL milk
  • Pinch of salt
  • 1 large egg
  • 45 g panko
  • 20 g manchego cheese, finely grated
  • 500 mL peanut oil

Directions:

  1. Heat the butter and olive oil in a pan, add the shallots and cook until translucent.
  2. Add the flour and stir well and cook for a couple of minutes. Whisk in the milk and stir until thickened. Stir in the Serrano ham and 50 g of the coarsely grated cheese.
  3. Spread the mixture onto a parchment-lined baking sheet and allow to cool completely.
  4. Once cool, shape into little ovals about 26 g each. Refrigerate for 30 minutes.
  5. Whip the egg with a fork in a small bowl. In another small bowl, combine the panko and the finely grated Manchego cheese.
  6. Dip each oval into the egg and coat thoroughly, then plunge each one into the panko mixture and coat well, storing each one on a clean parchment-lined pan.
  7. Heat the oil to at least 350 F and fry each croquette until golden. Serve immediately or hold on a baking sheet and reheat in a 350 F oven until warmed through.
  8. Serve with Romesco Sauce.

Read Full Post »

These are super quick and easy to make. They don’t keep well, particularly if your house is a bit humid so plan to bake them just before you want to eat them or if they get a bit soggy, just pop them into the oven to dry them out a bit.

Deliciously crunchy and cheesy crisps.

Cheese Crisps

A KitchenInspirations Original Recipe

Makes about 12-15 crisps

Ingredients:

  • 400 g old cheddar cheese, grated

Directions:

  1. Pre-heat the oven to 400° F. Line a rimmed baking sheet with parchment paper or a silicone matt.
  2. Spread the cheese out on the matt as thinly as possible so that the grated pieces are interlaced.
  3. Bake for 4-6 minutes or until the cheese has entirely rendered and is starting to become golden but not burned.
  4. Carefully remove from the oven and pull the parchment onto a cutting board. With a pizza cutter, cut into wedges. Allow to cool completely. Serve immediately.

Notes:

  • I use a rimmed baking sheet because the oils from the cheese may slide onto the oven and burn.
  • Parchment may burn so a silicon matt is preferred.


Read Full Post »


Over the holidays, I received some lovely sourdough starter and I made sourdough bread (as though we needed it!). I’m always a little distraught discarding some of it so I adapted an old recipe I brought back from Hungary to utilize the discard and a little of the fed starter, it worked out very well. I’ll definitely keep this in mind for future baking.

Sourdough Cheese Sticks

Makes 1 30 cm x 42 cm sheet, cut to whatever size you desire.

For the original recipe, please click here.

Ingredients:

  • 300 g all-purpose flour
  • 150 g unsalted butter, room temperature
  • 100 g discard sourdough starter plus 30 g fed starter
  • 125 g Greek Yogurt
  • 100 g shredded cheese (sharp cheddar works well, freshly grated Parmesan is best)
  • 5 g Salt
  • 20g shredded cheese

Directions:

  1. In the large mixing bowl of your stand mixer with the scraper attachment, blend flour, butter, starters, 100 g cheese and salt until incorporated, then switch to a dough hook and add the Greek yogurt and knead until smooth ball forms.
  2. Allow to rest in a warm dark place for 1 hour.
  3. Preheat the oven to 375° F
  4. On a piece of parchment paper, roll out dough to about 1/2 cm thickness.
  5. Cut into 7-10 cm x 2 cm sticks.
  6. Sprinkle with remaining cheese and allow to rest for 10 minutes.
  7. Slide cheese sticks on the parchment paper onto a baking sheet and bake for 20-25 minutes or until cheese is golden and melted.
  8. Re-cut sticks, if necessary, while still warm. Serve warm or at room temperature.

These are very tasty served warm.

Notes:

  • Use a flavourful, hard cheese (like cheddar, gruyere or Jarlsberg) is best for this treat.
  • I use a pizza cutter with a kitchen ruler to cut the sticks, it makes it very easy. If you cut the sticks after you sprinkle with cheese, your cutter will take up most of the cheese!
  • In the original recipe, there is an egg wash on the top, I omitted this time because I figured the cheese would stick regardless, but it does add a lovely sheen which I will not omit next time.
  • These cheese sticks freeze well. To reheat, spread in a single layer, cheese side up on a baking sheet and bake at a low 200° F for 10-15 minutes or until defrosted and slightly warm.

Read Full Post »

We don’t eat much fast food, if any. I can honestly say that the last time I ate a Mickey D burger was when I was 12 years old! I just don’t like them. But I do like Ikea meatballs. Once or twice a year, we treat ourselves to lunch at Ikea and I almost always have the meatballs. Now that things are slowly opening up, we took a trip to Ikea but unfortunately, the restaurant wasn’t open so we treated ourselves with a package of their meatballs. Yes, I can make my own meatballs, but sometimes, even I need an easy, mindless meal. I’ve made this gravy before and it was really good so I thought I’d post about it. Who knew the ingredients were so simple?

Ikea Gravy Copycat

Makes 250 mL gravy

Ingredients:

  • 15 g unsalted butter
  • 15 g flour
  • 250 mL beef stock, warmed
  • 15 mL soy sauce
  • 15 g cream cheese

Directions:

  1. Melt butter and add the flour to make a smooth roux. Cook for about a minute.
  2. Slowly add the warmed beef stock and soy sauce, whisking to make a smooth sauce. Add the cream cheese and whisk to melt and incorporate. Serve hot over your favourite meatballs.

Read Full Post »

My friend David of Fine Dining at Home (blog on hiatus) put me onto this recipe on his instagram; it looked absolutely delicious, so, then and there, I decided I wanted to make it. I renamed the recipe mille-feuille lasagna because the number of layers reminded me of one of my favourite pastries. I won’t lie, this is a labour-intensive recipe, but then again, what lasagna recipe isn’t? I will say that it is well worth the effort. The homemade pasta is so delicious, light and somewhat crispy. The spinach and basil layers against the creamy béchamel and the stringy mozzarella are divine! Don’t skip the resting and searing step, it really makes the recipe.

Mille-Feuille Lasagna

For the original recipe, please click here.

Makes one 21.6 cm x 11.4 cm (4″ x 7″) loaf pan, about 6 servings

Ingredients:

  • 300 g Spinach, blanched
  • ~50 g basil, blanched
  • 125 mL passata
  • 15 mL tomato paste
  • 15 mL roasted garlic, puréed (fresh is fine too)
  • 300 g mozzarella, ground

Directions:

  1. Combine the spinach and basil and wring out the water well. Set aside.
  2. Combine the passata, tomato paste and garlic and mix well. Set aside.

Ingredients for the Béchamel:

  • 30 g butter
  • 40 g flour
  • 500 mL milk, warmed

Directions:

  1. Melt the butter in a medium, heavy-bottom pan. Whisk in the flour and mix well. Cook on medium-heat for 2 minutes.
  2. Slowly add the warm milk and whisk. Whisk the sauce until smooth and creamy. Cool completely.

Ingredients for the Pasta:

  • 1 large egg
  • 125 g Flour (“00”)
  • Salt

Directions:

  1. Add the egg to the small bowl of a food processor and whisk. Add the flour and salt and pulse until it forms into a soft dough.
  2. On a lightly floured surface, knead gently a few times until it comes together into a smooth ball. Cover in plastic wrap and allow to rest in the refrigerator for 30 minutes.
  3. Using a pasta maker, create 12 sheets that are #8 thickness on the kitchenaid pasta maker. Cook the sheets in salted boiling water for 1 minute or less. Cool in an ice bath, remove and dry off.

Ingredients for the Spinach Pesto Sauce:

  • 150 g spinach and arugula
  • 30 g ricotta or cream cheese
  • 30 g pesto
  • 200 mL milk or cream
  • Salt to taste

Directions:

  1. Blanch the spinach and arugula, immerse in ice water to stop the cooking. Wring out as much water as possible.
  2. Place spinach, arugula, cheese, pesto and milk into a bullet and purée until smooth. Season to taste.
  3. Press through a fine sieve into a heatproof container, set aside.

Final Assembly:

1. Line a loaf pan with parchment paper, it will make it easier to pull out.

2. Add one pasta sheet to the base, follow with

    • A thin layer of spinach,
    • Another pasta sheet
    • A layer of passata
    • Another pasta sheet
    • A layer of béchamel
    • Another pasta sheet
    • A layer of cheese
    • Another pasta sheet

3. Repeat until all the ingredients have been exhausted ending with a pasta sheet and cheese on the top.

4. Bake in a 350° F preheated oven for 50 minutes or until cheese has entirely melted and béchamel is bubbling.

5. Allow to cool completely. When cool, wrap tightly with plastic wrap and refrigerate 24 hours.

6. To serve, cut into 5-6 slices and reheat in the oven. Then sear one side on a non-stick frying pan.

7. Serve on a bed of warmed spinach pesto sauce (recipe above) with a little crème fraiche.

The pasta crisps up on the seared side to give you a wonderful crunch against the creamy textures of the cheese and spinach and basil layers. 

Read Full Post »

Caramelized Onion Tart with Brûléed Gruyère

KitchenInspirations Original Recipe

Makes one 20 cm (8 inch) tart. Serves 4 as a main course or 6 as an appetizer course.

Ingredients:

  • 240 g sweet onions, thinly skiced
  • 15 g butter
  • 15 mL cognac
  • 2 large eggs
  • 30 mL milk
  • Pinch of nutmeg
  • 60 g gruyère cheese, grated
  • Salt and pepper
  • 1 single pie crust, blind baked

Directions:

  1. Preheat oven to 375° F.
  2. Heat the butter in a pan until melted, add onions and cook until caramel in colour. Deglaze pan with cognac, set aside.
  3. Whisk to combine eggs, milk, nutmeg and season.
  4. Spread cooked onions into the pie crust evenly, pour in the egg mixture and bake for 10 minutes.
  5. Cover the tart with Gruyère and continue to bake until cheese is melted and somewhat brûléed. Cover crust with foil if getting too dark.
  6. Allow to stand for 5 minutes. Serve hot.

Almond Flour Pie Crust

Makes one 20 cm (8 inch)  pie crust.

Ingredients:

  • 100 g almond flour
  • 8 g psyllium husk, ground
  • 30 g unsalted butter, cold
  • 30 mL egg whites
  • 20 g toasted sesame seeds
  • Salt

Directions:

    1. Preheat the oven to 375° F.
    2. Add everything but the sesame seeds to your food processor and pulse to make a soft dough. Remove and gently kneed in the sesame seeds.
    3. Roll between 2 sheets of parchment paper to fit a 20 cm (8 inch) tart pan. Press into the pan and up the sides evenly. Dock the pastry well.
    4. Blind bake the tart shell for 12-15 minutes, covering the sides if they bake too quickly.

Read Full Post »

My dear friend Lorraine Elliott published this recipe while we were wintering in Spain. It’s not super hot in Spain this time of year and we prefer it that way because we are not fans of extreme heat or crowds. I like to choose simple recipes that can be baked in the oven to warm the kitchen up a bit. The moment I saw this recipe, I knew I had to make it. Unfortunately, I couldn’t source Halloumi in our little village or even the big supermarket in the city so I used a Spanish Manchego. It was delicious! A perfect lunch with a tomato side salad.

It’s similar to Spanakopita but not really.

Spinach, Feta and Manchego Pie

Makes a pie about 12 cm x 25 cm x 3 cm.

Serves 4-6 people

Ingredients:

  • 2 sheets of puff pastry, defrosted in the refrigerator overnight
  • 400 g frozen spinach, defrosted in the refrigerator overnight
  • 100 g sweet onion, finely sliced
  • 20 g roasted garlic, puréed
  • Pinch of nutmeg
  • 120 g Greek feta, crumbled
  • 80 g of Manchego, grated
  • 15 mL milk, divided

Directions:

  1. Once the spinach has defrosted, squeeze out as much moisture as you can.
  2. Preheat the oven to 400° F. Line a loaf pan with parchment paper.
  3. Roll out one sheet of the puff pastry to about 2 times the size of your pan. Insert it into the parchment-lined pan and dock it with a fork.
  4. Press a sheet of foil into the pan to hold the sides of the pastry up. Add some weight to avoid it from rising too much. Bake for 25-30 minutes or until lightly golden.
  5. In the meantime, sauté the onion until translucent, add the spinach and break it up to incorporate the onion evenly. Stir in the roasted garlic purée and nutmeg. Transfer to a bowl.
  6. Add the cheese to the spinach and stir until entirely combined. Season with salt and pepper to taste.
  7. Roll the second sheet of pastry to the size of the pan. Return it to the refrigerator.
  8. Remove the foil from the baked pastry and spoon the spinach mixture pressing it evenly into the pan.
  9. Brush the top part of all four sides of the pastry with milk. Remove the second pastry from the refrigerator and lay it over the spinach-filled pastry. Press the sides of the top pastry into the spinach-filled pastry.
  10. Brush the top of the pastry with the remaining milk and bake for 20-25 minutes or until golden.
  11. Slice the pie into equal portions, serve piping hot with a little salad.

Note:

Read Full Post »

I made this simple breakfast dish for overnight guests in early February. Unfortunately, they had to leave before they could be oven-ready so I popped them into the nuker and presto, done in three minutes! They are super easy to put together the morning of, but I wanted even less kitchen time so I assembled them the night before. To bake quickly, allow them to come to room temperature for an hour before you bake them.

Ham and Cheese Egg Cups

A KitchenInspirations Original Recipe

Serves 4

Ingredients:

  • 6 large eggs
  • 200 g of cooked ham
  • 200 g of grated cheese, divided
  • 50 g of tiny broccoli florets

Directions:

  1. Preheat the oven to 350F.
  2. Spray each ramekin with non-stick spray.
  3. Break the eggs into a medium bowl snd whisk well to break the yolks and combine with the whites.
  4. Add the ham and broccoli florets and mix well. Add the cheese, reserving a small amount to garnish the tops.
  5. Divide the mixture evenly between the four prepped ramekins. Garnish with reserved cheese.
  6. Bake for 25-30 minutes or until an inserted toothpick comes out clean. Or you can nuke them for 3 minutes on high.
  7. Allow ramekins to sit for about 5 minutes before serving. Option to serve: Carefully turn out each egg cup onto a warm plate and turn right-side-up. Serve warm.

Winter has come. But the weather has been really strange because as soon as we have any snow accumulation, it warms up, the rains come and the snow melts.

Notes:

Inclusions are limitless:

  • Smoked salmon, capers, red onion slices, cream cheese.
  • Cooked shredded chicken, roasted red pepper cubes, avocado cubes, sliced onions, roasted corn, shredded jalapeño jack cheese, served with salsa.
  • Roast pork tenderloin, sluced red onions, sliced black olives, roasted red pepper and greek feta served with Tzatziki sauce.

Read Full Post »

The first time we tried gnocchi was in the late 80’s or early 90’s. It may seem a bit odd that it took so long living in a multi-cultural city like Toronto, particularly since Toronto had the largest Italian population of any city outside of Italy (in 2016, we had the fourth largest Italian population), but back then the restaurant scene was really bad. Italian food was more or less American Italian (not to imply that it’s bad food, just limited), serving spaghetti, lasagna or pizza, nothing quite as exotic as gnocchi graced the menus. High-end restaurants were generally decorated in a men’s club style, dark and dingy and the waiters were often grumpy old guys in dark pants, white shirts and short aprons. Then, for some reason it all changed. JT read a lot of real estate articles and one such article was about a restaurant in mid-town that spent a million dollars in creating one of the best Italian restaurants in the city; imported décor, a well-paid chef and a menu that used traditional Italian ingredients described in Italian words. Of course, we had to try it and we were not disappointed. It still took a few more years for the rest of the industry to up its game but we were certainly on the right track.

When I told my Mom that I’d ordered gnocchi and what it cost, she was appalled! She called it peasant food! Of course, my generation had no idea what that was and maybe that’s why the restaurant industry changed, we were willing to pay for it! And we were hooked! Those soft little pillows drenched in a rich sauce were stuff dreams were made of, so I began experimenting with recipes after seeing Biba Caggiano make it (Biba’s Italian Kitchen) on the very early Food Network. She made it look so easy, and it was! JT proclaimed that he would no longer be able to order gnocchi in a restaurant because he would be disappointed after eating mine! Then came the low carb movement and we put those dreamy little pillows on the back burner. Fear not though, they are making a comeback albeit in moderation.

In our effort to eat less animal protein and more plant-based proteins, I created this gnocchi recipe using lentils. I’ve made them a few times because they are quite easy to make and super tasty, and they have the same light, fluffy consistency of traditional gnocchi. We like the contrast of texture by pan-frying the little pillows until one side is crispy, but you don’t have to. This recipe would be quite lovely with a sage and butter sauce or any sauce for that matter.

Pan-Seared Lentil Gnocchi with Blue Cheese Sauce

Makes about 40 gnocchi, about 2-4 servings

Ingredients:

  • 50 g red lentils
  • 90 g “00” flour
  • 10 g freshly grated parmesan cheese
  • 20 g unsalted butter, divided
  • 125 mL milk or cream
  • 50 g gorgonzola, divided (any blue cheese will do)
  • parmesan for serving

Directions:

  1. Cook the lentils until soft (about 1:2 ratio) in enough water to cover. Blend in a processor until very smooth.
  2. Add the flour a little at a time and blend. Add the cheese and pulse to combine, then remove and knead gently with your hands until a smooth dough is achieved. Roll into a 1 cm roll and cut about 1.5-2 cm lengths. Roll each pillow up the tines of a fork or a gnocchi paddle to get the grooves.
  3. Boil water with a little salt and cook the gnocchi until they float to the top. Strain the gnocchi and set aside until ready to serve.
  4. Melt butter in a frying pan and sear the gnocchi until a little crispy on one side. Remove from the pan. Add 5 additional grams of butter to the pan and sprinkle about 10 g of flour on it. Cook the roux and add about 125 mL milk or cream. Add some of the gorgonzola into the roux and allow it to melt (reserve a little gorgonzola for garnish).
  5. Add the gnocchi back to the pan and stir to coat. Serve immediately with freshly grated parmesan and dot each plate with remaining gorgonzola.

Notes:

  • I use my trusted gnocchi paddle that I bought in Florence to make the grooves in the little pillows and recently I discovered that using a very small round measuring spoon to press the gnocchi up the paddle creates perfect groves on one side and a nice little divet on the other (without ruining my mani). The more grooves and divets the more the sauce will stick to it, and who doesn’t love sauce?!
  • I used gorgonzola cheese but you may use any blue cheese. Gorgonzola is slightly milder but creamier than blue cheese.
  • Traditional gorgonzola sauce uses heavy cream instead of a roux, but I prefer to use milk and a roux. You may do it either way.
  • I never add egg to my gnocchi because that is the way Biba Caggiano made it (Biba’s Italian Kitchen). My gnocchi binds well and has never fallen apart in cooking.

JT and I just completed refinishing our kitchen floors, don’t they look lovely? (and yes, that means renting a belt sander and working our ancient butts off!). The best light was on the floor, they are clean!

Read Full Post »

I remember seeing these tasty morsels a few years ago and was intrigued by the tapioca flour ingredient but I soon forgot about them. Recently, we were watching America’s Test Kitchen and by fluke, they were making a batch which reminded me how much I had wanted to make them. These days, more and more of our friends have become gluten intolerant or simply wish to reduce their gluten intake so this recipe comes at the right time. Plus the weather is perfect for cocktails on the back deck while the sun moves across the sky for its exit. I’ve made a few adjustments to the original recipe and have converted it to metric weight measures because that is my preference for baking.

We loved these little cheesy dough balls and you can bet that I will make them again and again. I hope you try them too.

Would you care for a few with your cocktail?

Brazilian Cheese Bread (gluten-free, lactose-reduced)

Makes 50-60 little balls. For the original recipe, please click here.

Ingredients:

  • 390 g tapioca flour (starch)
  • 8 g baking powder
  • 10 g plus 2 g salt, divided
  • 2 eggs, plus 2 egg yolks, divided
  • 200 mL lactose-free milk
  • 25 g unsalted butter
  • 115 mL grapeseed oil (any vegetable oil)
  • 212 g sheep’s milk semi-firm cheese

Directions:

  1. Combine tapioca flour, baking powder and salt and mix well in the large bowl of your stand mixer.
  2. In a small saucepan, heat until just boiling the milk, butter and grapeseed oil.
  3. While mixing the flour on low spead, add the hot milk solution and beat well for about 3 minutes.
  4. Add the eggs one at a time and beat for about 8 minutes or until dough is shiny and smooth.
  5. Add the cheese and mix for about 1 minute.
  6. Preheat the oven to 450° F. Prepare a baking sheet by lining it with damp parchment paper. Put the baking sheet on top of another baking sheet (these little breads tend to burn on the bottom so insulating the bottom will help them bake more evenly).
  7. Scoop out 15 mL spoonfuls the prepared baking sheet. It’s easier if you dip your scoop into water each time. Shape into little balls.
  8. Combine the egg yolk with the 2 g salt and mix well.
  9. Brush the egg yolk mixture on top of each dough ball and bake until tops are golden and crusty 18-20 minutes. Turn the pan around for the last 5 minutes of baking.
  10. Refrigerate the dough while baking the first batch. Repeat making little balls of dough until finished.
  11. Cool for 10 minutes and serve.

Notes:

  • Check the saltiness of the cheese you use, and adjust the salt measurement accordingly. I found America’s Test Kitchen recipe was a little saltier than I like.
  • I used Starkey and Hitch goat’s milk gouda in this recipe.
  • America’s Test Kitchen found the dough too sticky to work with so they rested the dough in the refrigerator for 2 hours before baking. I did not find the dough too sticky so I skipped that step (it’s about the same as choux pastry) .
  • The recipe is as easy as making choux pastry but the texture is quite bready.
  • Freeze in a zip-lock baggy. To reheat frozen balls, bake them at around 275° F until defrosted and warm.

Read Full Post »

You may have noticed that I missed a post last week, I am sorry but things came to a head as the renovation is slowly completing. We have moved in but there are still a few minor things that need finishing and our Contractor is doing relatively well to get them done, at a snail’s pace! Of course, everyone will say that but we are tired. I’d like to get all my clothes into the new closet and wall units. Get’er done, as they say!

Light, cheesy, delicious with a touch of sweet corn.

I saw this awesome recipe in the LCBO’s latest Food and Drink and I really wanted to make it. We invited my SIL over for lunch to show her the reno and what perfect opportunity to make a fancy Al Fresco lunch. I already had everything in my pantry, even the BBQ’d corn kernels (they were in the freezer) and it was so easy. This one was actually my test run and it turned out very well. I think the only thing I’d change is to add a little crispy bacon because who doesn’t love bacon!

Sweet Corn and Gruyère Soufflé

For the original recipe, please click here.

Makes 500 mL of soufflé batter, I used 2x 250 mL ramekins for this shot.

Ingredients:

  • 15 g unsalted butter, plus extra for greasing ramekins
  • 4 g Parmesan, finely grated
  • 60 g cooked sweet corn kernels
  • 60 g bacon, crispy
  • 30 g Gruyère, grated
  • 6 g finely chopped chives (about 1 bunch)
  • 6 g flour
  • 95 mL milk
  • 2 large eggs, separated
  • pinch salt (I forgot this and JT wasn’t the wiser, cheese has a lot of salt and so does Dijon, so be careful)
  • 30 g Dijon mustard

Directions:

  1. Preheat the oven to 400° F. Butter the ramekins and sprinkle the parmesan into it to coat the sides and bottom, knock out excess (save to sprinkle on top). Set aside.
  2. Combine the corn, gruyère and chives and mix well. Set aside.
  3. Melt the butter over low heat and add the flour, whisking until it is lightly toasted. Drizzle in the milk while whisking and cook for 2 minutes to create a smooth sauce. Add the salt.
  4. Remove from the heat and add the egg yolks and Dijon mustard and whisk until smooth.
  5. Pour the hot liquid into the corn mixture and mix well.
  6. Beat the egg whites until stiff and fold about 1/3 into the corn mixture to loosen. Fold in the remainder evenly.
  7. Pour into the prepared ramekins and smooth out the top with an offset spatula (I did not do the latter on first try). Bake in a hot oven for 30-35 minutes or until nicely risen and golden. Serve immediately.

Pull up a chair and dig in.

Read Full Post »

We frequent a French bistro in the city, Le Select, in fact, it’s probably our favourite restaurant in the city! JT alternates from the menu items, but I like my favourites (French Onion Soup, Steak Tartare) and seldom stray from them. We tend to share an appetizer and the last time we were there, the table next to us could not say enough about the Terrine de Poisson Fumé, an airy terrine of smoked Georgian Bay whitefish served with grilled home-baked Foccacia so we had to have it. It was wonderful. Smooth, creamy, full of smoky flavour, we loved it so much, I had to make something like it for a dinner party. 

This is Le Select’s version, our inspiration.

Smoked Salmon Mousse with Dijon Sesame Bark

A KitchenInspirations Original Recipe

Makes about 265 mL mousse

Ingredients for the Salmon Mousse:

  • 65 g smoked salmon, roughly chopped
  • 100 g cream cheese, cubed
  • 2 g anchovy paste
  • 2 g tomato paste
  • 1 g paprika
  • Pinch of smoked paprika
  • 100 mL whole milk
  • 120 mL water (see notes)
  • 2 g agar-agar (see notes)

Directions for the Salmon Mousse:

  1. Dissolve agar-agar in the water and slowly bring to a boil. Boil for 2 minutes or until the agar-agar is completely dissolved. Set aside to cool slightly.
  2. Meanwhile, add the salmon, cream cheese, anchovy paste and whole milk to a food processor (choose one that will emulsify the salmon to a smooth, creamy consistency (my Magic Bullet did a great job).
  3. Once the agar-agar has cooled somewhat, whisk into the salmon mixture until smooth.
  4. Prepare silicon your mould by spraying it lightly with water. Pour the salmon mousse into each mold evenly. Allow to set in the refrigerator.
  5. Serve with gourmet crackers or toasted baguette.

Dijon Sesame Bark

Ingredients:

  • 20 g sugar
  • 5 mL honey
  • 5 mL water
  • 30 g sesame seeds (black and white)
  • 5 g butter
  • 5 mL Dijon mustard

Directions:

  • Mix the sugar with the honey and the water and cook over medium heat until everything has dissolved. Allow to come to a boil and slightly darken.
  • Stir in the sesame seeds and continue to cook until it is about 300° F. Remove from heat and add the butter and Dijon mustard and stir well to incorporate.
  • Pour the content onto a Silpat sheet or buttered baking sheet and spread out thinly. You may wish to cover with parchment and roll with a rolling pin.
  • Allow to cool, break into smallish bits or shards to sprinkle over the salmon mousse.

Assembly of the Smoke Salmon Mousse Plate:

  1. Carefully unmould the salmon mousse and place in the centre of a plate. Sprinkle with the dijon sesame bark (or serve bark in shards as below) and serve with toasted baguette slices or crackers.
This is how I served the mousse for a recent dinner party.

Notes:

  • You may use the traditional smoked salmon that is thinly sliced but I used a Wild Pacific Salmon Side we hot smoked on the Big Green Egg. 
  • Any smoked fish would work, as long as you can purée it smoothly.
  • To replace the agar-agar with gelatine, omit the water. Use one sheet softened in in the mousse liquid, in a saucepan then put on low heat and stir until the gelatine sheet dissolves into the mousse, do not boil. One sheet is good enough for a loose set of 265 mL.


Read Full Post »

A similar, unbelievably moreish dish was the first course that Dave (Fine Dining at Home) served us at his beautiful home in Manchester. It was creamy, full of flavour, and so delicious that my mouth is watering as I think of his dish. You can see his version here.

I really didn’t have a high-brow enough opportunity to serve this dish before our reno started, so I made a version that I used as a dip for a more casual starter. This was the basis of my recipe. Dave generously gifted me with several truffle-y food items and one was a beautiful bottle of truffled olive oil. I used his olive oil for the dip. If you are not a fan of truffle flavour, simply use a good quality olive oil instead.

Deliciously light and dreamy.

Truffled Parmesan Mousse

Makes about 125 mL mousse

Ingredients:

  • 20 g unsalted butter
  • 25 g sweet onion, finely minced
  • 30 mL cognac
  • 125 mL whipping cream
  • 125  g parmesan rinds
  • pinch of rosemary
  • 15 mL white truffle olive oil
  • sea salt to taste

Directions:

  1. Melt the butter in a small saucepan and sweat the onion until translucent. Add the cognac and cook until it has almost evaporated.
  2. To the onion, add the whipping cream, parmesan rinds and rosemary and bring to a slow simmer. Simmer for about 30 minutes stirring often.
  3. Taste and season with salt.
  4. Strain to remove the rinds, onions and rosemary. Allow the liquid to cool to room temperature and then refrigerate for 30 minutes or overnight.
  5. Add the white truffle olive oil and mix well. Whip with a hand mixer until it is somewhere between soft and stiff peaks. Refrigerate until needed.


Notes:

  • This is a very rich dish, so if you serve this as individual appetizers, I would choose smaller glass vessels. Garnish as Dave did with a demiglace and steamed asparagus spears with a parmesan tuile.

Read Full Post »

My facebook feed knows l like to cook/bake. Almost every video that comes up is a recipe video. A few weeks ago, I had woken up in the middle of the night and was having trouble falling back to sleep so I pulled out my phone to see what was happening in cyberspace. A really cool low carb cauliflower recipe video showed up. I thought I had saved it but I didn’t and after scouring the internet for the recipe, I gave up and created my own. We had quite a bit of cheese left over from our New Year’s Day lunch so this recipe was perfect timing.

This was a great success. The bites are soft, flavourful and have great texture from the crispy melted cheese. And the bacon. Who doesn’t love bacon?

Ladies will need two bites, JT needed one!

Low Carb Cheesy Cheddar, Bacon Cauliflower Bites

A KitchenInspirations Original Recipe

Makes about 35 bites.

Ingredients:

  • 250 g cauliflower, riced
  • 120 g of sharp cheddar, grated and divided
  • 20 g shallots, finely chopped
  • 1 clove garlic, finely minced
  • 40 g coconut flour
  • 2 slices bacon, cooked until crisp and crumbled
  • 3 g, each salt and pepper
  • 3 large eggs, beaten

Directions:

  1. Preheat the oven to 350° F. Prepare a mini-muffin cup pan with non-stick spray.
  2. Cook the cauliflower in the microwave for 4-6 minutes and remove as much water as possible by squeezing it in a cheesecloth. Set aside to cool.
  3. Combine the cooled cauliflower, 80 g cheddar, shallots, garlic, coconut flour, bacon and eggs and mix well. Spoon 15 mL (1 tbsp) each into the prepared pans. Top with remaining cheddar.
  4. Bake for 15-20 minutes or until set and cheddar on top has melted. Gently loosen sides and remove from the pan. Cool on a wire rack. Serve warm or room temperature.

Notes:

  • This would be a great recipe to use with flavoured cheddar. The recipe above was made with Peppercorn Cheddar and topped with orange old sharp cheddar.
  • This freezes very well. To reheat, just pop some on a baking sheet and heat at 300° F until defrosted and warm on the inside, about xx minutes.

Nutritional Breakdown:

Per 1 piece

  • Calories: 34
  • Net Carbs: 1 g
  • Protein: 2 g
  • Fat: 3 g

Read Full Post »

We are knee deep in cocktail party season and I’m going to post a recipe that will keep you on budget! Do you love Boursin? Are you appalled at the price? In Toronto, a little 150 g (a touch more than 1/2 cup) pot could cost $6.00+++!!! So I improvised and created this herb-infused cream cheese spread, it’s equally as good and costs a lot less! Make this a couple of days in advance so the flavours have time to meld, you won’t be sorry.

Herbed Cream Cheese Spread

Makes about 250 mL or 1 cup.

Ingredients:

  • 30 mL olive oil
  • dry or fresh herbs, to taste
  • garlic, minced finely
  • 70 g butter, softened
  • 100 g cream cheese, softened
  • 100 g ricotta
  • salt & pepper, to taste
  • Chives or green onions, finely chopped

Directions:

  1. Heat olive oil over low heat with the fresh herbs and garlic, simmer for 10 minutes to infuse. Allow the infused oil to cool completely.
  2. Pour infused oil through a fine sieve and reserve, discard herbs and garlic.
  3. In a small processor, pulse the cheeses and butter together until light and fluffy. Slowly pour in the cooled olive oil and continue to pulse until it has been entirely incorporated and smooth. Season with salt and pepper.
  4. Serve at room temperature and watch it disappear.

Notes:

  • The first time, I used a combo of fresh lemon thyme, rosemary, tarragon and Greek oregano. This time, I used finely grated Herbes de Provence.
  • I had homemade ricotta, but if you do not, just double the cream cheese, it’s still delicious!
  • Use whipped cream cheese for a similar texture to the actual Boursin.
  • I like to serve this spread in a small glass pot but any container will do. To serve similar to the actual Boursin, line a ramekin with plastic wrap and pack the spread into the plastic wrap and freeze. To serve, Remove from the freezer and invert on a platter and remove plastic wrap. Allow the dome to come to room temperature.
  • Serve with bread, crackers or crudité.

Read Full Post »

In my line of work you inevitably garner leftover ingredients that no one else wants that are not standard fare in your pantry. This recipe is one of those happy examples. As you well know, I abhor tossing food so I searched the net for a tasty way to use said ingredients, whole milk, buttermilk and sour cream and found that you can make ricotta! How exciting is that? We were invited to dear friends for dinner, so I made a delicious cheesecake out of the ricotta (recipe to come next week).

Buttermilk and Sour Cream Ricotta

Makes 235 g Ricotta

Ingredients:

  • 500 mL whole milk
  • 500 mL buttermilk
  • 200 mL full fat sour cream

Directions:

  1. Heat the milk, buttermilk and sour cream over a medium heat in an enamel pot to about 82° C (180° F). Allow it to sit, undisturbed for 30 minutes.
  2. Pour into a cheesecloth-lined sieve and strain (covered) until relatively dry (overnight) in the refrigerator.

I would have thought the buttermilk and sour cream would have made a much tarter ricotta but it was fine.

Make additional ricotta out of the whey:

Makes an additional 65 g ricotta!

Ingredients:

  • 750 mL leftover whey from making ricotta above
  • 250 mL milk (higher fat is better, I used 1% because that is what I had)
  • 15 mL vinegar or lemon juice

Directions:

  1. Heat the whey and milk in a non-reactive pan over medium heat until it reaches 91° C (195° F). Remove from heat and stir in the vinegar or lemon juice. Allow it to sit undisturbed for 10 minutes.
  2. Strain through a cheesecloth-lined sieve. Strain for several hours for a firm ricotta.

Notes:

  • Use an unreactive pot like Le Creuset.
  • I did not salt the ricotta because I had a sweet application planned for it.
  • The buttermilk and sour cream curdle naturally when heated, so an acid is not required.
  • Reserve the whey for recipes that call for cooking with stock or water, it is healthy and flavourful.

Dear friends, I have finally made a website of my work. Please feel free to visit evataylorfoodstyle.com. The blog will not change, it will always be my ever growing recipe book, the website is for work. If you know of anyone needing a food stylist in Toronto, please send them to my website. As always, your comments are appreciated more than you can know.

Read Full Post »

In late March/early April, we spent two glorious weeks in Arizona. We stayed with friends for this duration because we had offered to puppy-sit (Jordan) while they took a quick 7 day holiday in Ireland. We had never puppy sat before but their beautiful black lab, Jordan is quite possibly one of the laziest dogs we have ever met so she was really no problem at all. We did get her used to three walks per day, that is, until we bumped into a woman carrying a black light, walking her dog after dark. I had to ask and yes, it was to detect scorpions. That was the end of our after dark walks. Period.

I like to arrive with gifts in hand and these basil Parmesan Straws were the perfect hostess gift because I had a bunch of basil that needed using a couple of days before our departure. Plus they are pretty tasty. Jordan thought so too.

Sun-dried Tomato, Basil and Parmesan Straws

A KitchenInspirations Original Recipe

Makes about 75 pieces

To print this recipe, please click here.

Ingredients:

  • 290 g flour
  • 10 g Fresh Basil, finely chopped
  • 50 g sun-dried tomatoes in oil, roughly chopped
  • 10 g garlic, finely minced
  • 110 g unsalted butter (cold)
  • 30 g  grated Parmesan cheese
  • 2 eggs, beaten separately
  • 15-30 mL water or milk
  • Sea salt

Directions:

  1. Pre-heat oven to 400°F.
  2. Put all dry ingredients into a food processor, including the basil, sun-dried tomatoes and garlic, and process to mix well.
  3. Add the butter and process to coarse granules.
  4. While the blades are running, pour in the egg and process until a soft ball forms. If this does not happen, drizzle little bits of water until a soft ball forms.
  5. Remove from processor and using a small amount of flour, roll out the dough to about 1/2 cm thickness. Cut into 8cm x 7 mm straws and position evenly on a cookie sheet. Brush with second egg and sprinkle with sea salt.
  6. Bake for 12-15 minutes until golden.
  7. Remove and allow to cool. This will store well in a cool, dark place or freeze.

Notes:

  • I like to use a plastic ruler to cut the straws evenly. My ruler is a dedicated food ruler that never is used with pens or pencils or markers!
  • This type of rolling pin gives you evenly thick dough, but as I have mentioned previously, it is a pain to unscrew the disks and I inadvertently have to wash all of the disks each time I use it.
  • This dough is a bit wetter than some of my other recipes because of the sun-dried tomatoes and fresh garlic.

Read Full Post »

In mid-March JT and I went to the large National Home Show at the Enercare Centre. I found discounted tickets on Groupon AND I also found a Groupon discount code, which made the two tickets $17.80; that was an awesome deal because the regular price of the tickets are $20 each! These shows are getting more and more expensive and I really don’t understand why, the vendors pay through the nose to exhibit, AND the public pays a hefty entrance fee. The kicker was parking at $21! The Enercare Centre is not located downtown, it is slightly west but still within the city, but there is not much else around it — total money grab! And that completes my rant.

While at the show, there are always a few food vendors exhibiting and one of my favourites is a shortbread company who generously hands out samples. JT and I sampled one of their savoury shortbread cookies and I knew I had to make a batch. On the drive home, we brain-stormed the possible flavours and I knew the moment JT said caramelized onion that it had to be the one. We bought a very special sharp cheddar to accompany the sweet flavour of the caramelized onion, they were absolutely perfect!

Caramelized Onion and Cheddar Shortbread Cookies

A KitchenInspirations Original Recipe

Makes about 75 cookies that are about 3 cm in diameter.

To print recipe, please click here.

Ingredients:

  • 114 g unsalted butter, room temperature
  • 80 mL caramelized onions, slightly dried out, see notes
  • 120 g sharp cheddar, grated
  • 5 g sea salt
  • 120 g “00” flour
  • 90 g cornstarch

Directions:

  1. Preheat the oven to 350° F. Line a baking sheet with parchment paper.
  2. Cream the butter, caramelized onions and grated cheddar until light and fluffy (about 5-8 minutes).
  3. Sift the salt, flour and cornstarch into the creamed butter mixture and mix until well combined but do not overmix.
  4. Create two disks and wrap in plastic wrap and freeze for 15 minutes or refrigerate for 30 minutes.
  5. Turn out to a lightly floured surface and roll about 4 mm thick.
  6. Cut with 3 cm round cookie cutter. Continue until the dough has been used up. Bake for 14-16 minutes or until lightly golden. Cool on a wire rack.
  7. Serve with wine or your favourite cocktail.

Notes:

  • We used the KitchenAid Flex Edge Beater, it creams the cheese, butter and onion beautifully.
  • We always keep caramelized onions in the freezer in ziplock baggies for such uses. I use this recipe.
  • Spread the caramelized onion on a piece of parchment and allow it to sit for 10 minutes, this allows some of the moisture to wick out and will allow the shortbread its melt-in-the-mouthfeel.
  • The cheddar we used today was a Welsh cheddar.
  • The “00” flour we used was an imported Italian flour.
  • The rolling pin we used was this one. To be honest, I don’t love it, it’s a pain to unscrew the disks that are not required but it does roll the dough out evenly.

The flavour of the caramelized onion shines in this delicate little savoury cookie.

Read Full Post »

I created this recipe in 2012, modeled after an appetizer at an old favourite restaurant which sadly closed down many years prior to 2012. Like many of my old posts, the photos are dark and dreary and deserve an update so here it is. I also threw in a sourdough baguette, the recipe can be found here. I used this starter which, frankly took a long time and was not as sour-doughy as I had hoped but I found the liquid ingredient intriguing so I gave it a go. I will try this starter used in the recipe next time.

It’s still a winter picture, so give me a break!

Sizzling Mushrooms

Serves 2-4 as an hors d’œuvres (about 112 g of cooked mushrooms and onions, without the feta)

Ingredients:

  • 20 g unsalted butter
  • 150 g mushrooms, stems removed and sliced medium thinly
  • 60 g sweet onion, thinly sliced
  • 4 g garlic, finely minced
  • 30-60 g sheep and goats milk feta, crumbled (see notes)
  • 30 mL cognac (optional)
  • 2-4 sprigs of fresh thyme, roughly chopped
  • sea salt to taste

Directions:

  1. In a small frying pan, melt the butter and add the onions, cook until caramelized (about 10-15 minutes).
  2. Add the mushrooms and cook until they are no longer wet (about 5-10 minutes) and have also caramelized. Add the garlic and cook until fragrant. Season with sea salt if using, but remember the feta is also salty so season sparingly.
  3. Deglaze the pan with the cognac, stirring to loosen any of the bits stuck to the pan. Remove from heat and add the fresh thyme and stir. Sprinkle the crumbled feta over the hot mushrooms and serve immediately with thinly sliced sourdough baguette (fresh out of the oven, no less!)

Notes:

  • I used a 50/50 combo of shitake and cremini mushrooms, but feel free to use whatever mushrooms you desire.
  • We prefer actual Greek Feta made in Greece of Sheep and Goats milk, here in Toronto there are many imposters so try to find this one.
  • We typically don’t use pepper, but if you like it, use white pepper to avoid the harsh dark specs on the feta.
  • This recipe cooks beautifully in a cast iron pan, if you have a small one, use it. My small one was a bit too big for this amount.

Read Full Post »

Everyone has busy days, the type of days that you’re too busy to cook and the easy thing to do would be to order in or throw some unhealthy grocery-store frozen dinner into the microwave and be done with it. We’ve all done it and what happens is interesting: you don’t eat for the love of food, you just eat and because it’s fast and easy. But then, it never hits those emotional triggers so we end up feeling awful and regretting our choice. There is nothing I hate more (other than the obvious crap going on in our world) than regretting calories. Fret not dear friends, I have the perfect solution with this slow cooker lasagna, and you need not make enough for an army because this handy hack will have you getting that slow cooker out more often!

This is the one slow cooker hack you’ve been waiting for: Line your slow cooker with a silicon mat and lay your smaller, heat-resistant dish on top of it. Presto, a custom-sized slow cooker.

The Silpat protects the ceramic slow cooker from the metal of the loaf pan.

I made this awesome Lentilles du Puy lasagna this way. I won’t lie, there is some prep work with this dish, but a little pre-planning on the weekend will make it a breeze on that busy weeknight. The recipe was inspired by my LA friend, Greg of Sippity Sup, he had made an incredible Swiss Chard Lasagne with Bechamel that literally had me licking my lips during the entire read through! He used one of my favourite ingredients: béchamel sauce!

Creamy béchamel with eggplant and roasted red peppers just melt in your mouth.

Slow Cooker Lasagna with Eggplant, Roasted Red Pepper and Lentilles du Puy

Recipe inspired by Greg’s Swiss Chard Lasagna

Makes one 12 cm x 22 cm x 10 cm loaf pan, serves 4 to 6

Ingredients:

  • 60 g Lentils du Puys, cooked
  • 100 g onions, chopped
  • 10 g Ice® Mama Mia garlic, finely chopped (see notes)
  • Salt to taste
  • 1 tsp oregano
  • 1 tsp basil
  • 400 mL San Marzano tomatoes, crushed
  • 250 mL béchamel sauce with a pinch of nutmeg (see notes)
  • 4 gluten-free, oven-ready lasagna noodles (I used this brand)
  • 1 Chinese eggplant, sliced into 0.5 cm thickness (about 6 slices)
  • 176 g roasted red peppers (about 6 small roasted red peppers)
  • 150 g Mozzarella cheese, grated

Directions:

  1. In a splash of olive oil, sauté the onions until translucent. Add the garlic and sauté until fragrant. Add the oregano and basil and stir well.  Add the San Marzano tomatoes and cooked lentils, stir well and allow to cool to room temperature. This makes around 500 mL.
  2. Prepare a 12 cm x 22 cm x 10 cm loaf pan with non-stick spray. Spread a couple of spoonfuls of the lentil tomato mixture on the bottom of the prepared pan.
  3. Lay 1 and 1/3 noodles over the lentil-tomato mixture (covering the entire pan area). Top with 1/3 of the lentil-tomato mixture spread evenly over the noodles, then a single layer of 2 roasted red peppers, then lay two slices of the eggplant over the peppers. Top with béchamel and about 1/3 of the cheese. Repeat until everything is layered, making sure you top with the grated cheese.
  4. Lay a silicon mat (like Silpat)  into the slow cooker and place the loaf pan onto it, in the centre (see notes). Cover and turn the slow cooker on high for 3-4 hours or until noodles have cooked through. Relax.
  5. When the noodles have cooked through, pre-heat the broiler in the oven and broil the lasagna on high until cheese is bubbly and caramelized. Serve hot with simply dressed greens.

A nice bubbly, caramelized cheese topping!

Notes:

  • You may have seen me searching for softneck garlic sometime late last year. It was, of course, the wrong time of year for farmer’s market garlic, but that didn’t stop me from trying my best to hunt it down. During this process, a friend on Facebook mentioned Beneli Farms, a Manitoba, 5th generation farming family specializing in garlic for the last 15 years. I reached out to them and they were very quick in getting back to me and eager to help but sadly they were not able to courier me softneck garlic in time, but they did courier a large selection of their specialty garlic! I use garlic a lot but I am still going through my generous stash. For this dish I chose their Mama Mia™ Ice® Garlic for its smooth flavour. It was definitely the right choice as it did not overpower the dish, just provided a smooth, delicate garlic flavour in the tomato sauce. Thank you Garth and Miranda.
  • To make gluten-free béchamel sauce, simply substitute a good gluten-free flour with the all-purpose flour. Don’t forget the pinch of nutmeg.
  • The Silpat mat simply protects the ceramic bowl of the slow cooker from the the metal loaf pan.
  • The Gluten-free noodles I’ve used in this recipe stand up a bit better than regular oven-ready noodles and maintain a good texture in this dish. The liquid proportion I’ve indicated is perfect for cooking the noodles without destroying them, i.e., they still have bite.
  • Leftovers may be frozen for future quick meals, but don’t count on it!

Read Full Post »

Our neighbourly South-Western- themed progressive dinner party was scheduled two days after we returned home from Arizona, I didn’t think it would be a problem because we were only responsible for hors d’œuvres and appetizers, easy-peasy! HA! Had I read more than the heading of the organizer’s email, I would have realized that things would get a bit more complicated since one person decided to go vegetarian, gluten and dairy free (for health reasons). But, you know me, I do love a challenge and as luck would have it, my experiments turned out even better than I expected! So much so, that JT has asked for it several times since, so I documented the recipe for the future use.

This recipe originated from Emeril Lagasse but I tweaked it a little bit. What attracted me to this recipe was, of course, that it was baked an not deep fried, and although deep fried would be awesome, it’s always nice to lower calories whenever possible particularly if you need not sacrifice flavour or texture! I think you will be very happy with the baked version (our group could not get enough of them)! I’ll speak to the vegetarian, gluten-free and dairy- free version in my notes below (no pics, sorry).

You can see how crispy these turned out.

Baked Jalapeño Poppers

Makes about 24 jalapeño poppers

For the original recipe, please click here.

Ingredients:

  • 12 fresh jalapeno peppers, halved lengthwise, stems, seeds and membranes removed
  • 170 g (6 oz) cream cheese, at room temperature
  • 140 g (1 1/2 cups) grated sharp or old cheddar
  • 3 g (1/2 tsp) ground cumin
  • pinch of cayenne, or less, to taste
  • 2 large eggs
  • 30 mL (2 tbsp) milk
  • 8 tsp Essence, divided
  • 1 cup panko crumbs
  • 1/2 cup coconut flour
  • non-stick spray

Directions:

  1. In a small mixing bowl, combine the cream cheese and grated cheddar and mix well.
  2. Toast the cumin until you can smell the aroma, allow to cool and add to the cream cheese mixture and stir well. Set aside.
  3. Prepare your breading station by whisking 2 large eggs with 2 tsp of the Essence and the milk in a shallow bowl. In a second shallow bowl, mix 4 tsp of the Essence with the coconut flour. In the third shallow bowl, add 2 tsp of the Essence to the panko and mix well. Reserve remaining essence for the next time (and believe me, there will be a next time!)
  4. Fill each jalapeño densely with the cream cheese mixture, being careful not to mound it too high; continue filling until you have filled all of the jalapeño halves.
  5. Dredge each jalapeño half in the coconut flour, then dip into the egg mixture and repeat once more. Finally, dip each pepper into the panko and press panko into the jalapeño to coat well. Repeat until all are coated.
  6. Pre-heat the oven to  375° F. Place jalapeño cut side up on a parchment-lined baking sheet. Give each jalapeño a light coating with the non-stick spray. Bake for 30 minutes or until panko is golden and crisp.
  7. Serve warm with sour cream and salsa.

Notes:

  • For the vegetarian, gluten-free and dairy-free version, I simply replaced the cheeses with creamed lentils (about 1/4 cup cooked in vegetable broth and puréed with a stick blender) and the panko with shredded unsweetened coconut. Even the non-vegetarians loved them! (Sorry, no pics).
  • I use coconut flour for baked “fried” foods because the coconut has an unbelievable absorption property which makes the batter so much crispier than all-purpose flour.
  • I used gloves to protect my hands from the jalapeños as I cleaned them, you might consider doing this too.
  • Leftovers? Freeze unbaked jalapeños on a parchment-lined baking sheet and when frozen, pop them into a ziplock bag.To bake frozen jalapeños, no need to defrost, just bake for a little longer to crisp up.

Read Full Post »

I am a crêpe fanatic, I just love them so much. I will choose a savoury crêpe over any sandwich, any day of the week. I particularly love it with béchamel sauce or just plain cheese (and some wonderful filling, of course).

The other day, I had my pans and ingredients all pulled out, ready to make a plain crêpe when it hit me, why not add cheese RIGHT INTO THE BATTER? The more flavourful, the better. It’s not low fat, but boy it is delicious. Imagine a combination of crêpe and grilled cheese, it is so good. It’s true that I’ve done crêpe paninis and delicious ordinary crêpes (like this and this beautiful savoury mushroom crêpe), but when this crept into my head, I just had to try it. I hope you like it too.

Cheese Crêpes

A KitchenInspirations Original Recipe

Recipe is for 2 Crêpes.

Please click here to print this recipe.

Ingredients:

  • 2 egg whites or 1 whole L egg
  • 65 mL (1/4 cup) soda water
  • 15 mL (1 tbsp) oil
  • 35 g (1/4 cup) flour
  • pinch of salt
  • 25 g (1/4 loose cup) sharp cheddar cheese, grated

Directions:

  1. Add all of the ingredients to the container of your immersion blender. Blend until entirely emulsified. Allow to sit for 30 minutes.
  2. Preheat your crêpe pan. Emulsify the crêpe batter one more time. Use half (about 100 mL) for the first crêpe and the remainder for the second.

Notes:

  • This is a delicate, cheesy crêpe.
  • I put sautéed mushrooms and caramelized onions with a lemon thyme scented béchamel with it for a simple lunch, it was delicious.
  • Use sharp flavoured, hard cheese (like cheddar, gruyère, Oka), don’t use anything that will render too easily (like brie or blue cheese).

Read Full Post »

Recently, we had a dinner party and I served a grilled caesar salad as one of the courses. Of course, you MUST have REAL bacon so JT cooked the bacon up on the BBQ (none of that maple crap) and I asked him to save the drippings for the roast potatoes but by the time I got around to tossing the tators in the bacon drippings, I had second thoughts so I used only about a tablespoon and tossed the rest with olive oil. I had about a 65 mL (1/4 cup) bacon drippings sitting in the refrigerator, crying for something creative so I came up with this easy recipe. The drippings have such an amazing flavour, and the bits of bacon add just the right amount of crunch. I think I may have to cook up another batch of bacon just for the drippings so I can bake another batch of these tasty morsels.

Bacon and Parmesan Cheese Puffs

A KitchenInspirations Original Recipe

Makes 42 small puffs

Ingredients:

  • 250 mL (1 cup) water
  • 65 mL (1/4 cup) bacon drippings
  • 5 mL 1/2 tsp salt
  • 145 g (1 cup) all-purpose flour
  • 3 eggs
  • 120 g (1 cup) grated Parmesan Cheese
  • 1 1/2 slices bacon, cooked until crispy and crumbled to small pieces

Directions:

  1. Preheat oven to 200° C (400° F).
  2. Place water, bacon drippings and salt in a medium saucepan and bring to a boil over medium heat.
  3. Remove from heat and add flour, and stir until combined.
  4. Return to heat and stir cooking the flour mixture until it comes away from the sides of the pan and is a shiny ball.
  5. Place in a food processor with plastic blades and process for 15 seconds (give or take).
  6. Add eggs, one at a time and process for 40 seconds (err on the longer side of give or take).
  7. Add the cheese and process for another 5-10 seconds until smooth. Stir in the crumbled bacon.
  8. Dip a spoon or small ice cream scoop into 1 cup cold water with 5 mL (1 tsp) plain vegetable oil, place walnut-sized spoonfuls on a parchment lined cookie sheet about 3 cm (1 1/2 inches) apart.
  9. Bake for 20-25 minutes, until golden brown.
  10. Serve warm or room temperature.

Notes:

  • You may also prepare this recipe with a good quality handheld mixer or stand mixer but I would suggest an immersion blender with the whisk attachment is not strong enough for this pastry.
  • These delightful balls puff up about 12 minutes into baking and are ideal for stuffing with a piping funnel (I bought a really cheap one from a dollar store and it works very well). Stuff with goats cheese, or your own recipe.
  • Unstuffed, they freeze very well, just pop them into a zip lock bag. To use, you need not defrost them, simply put them into a preheated 150° C (300° F) oven for 10-12 minutes, until defrosted and heated through.

The bacon drippings give this treat great flavour and the bacon bits some nice texture.

Read Full Post »

Yesterday, my country celebrated its 150th birthday! The months and days leading up to this grand event have been epic. Sadly, we had planned to be away without even thinking about it. This is where social media really gets to shine because with all the awesome photos and videos everyone posted, it felt like we were right there! Plus, the friendly lake we were visiting decided to have their 4rth of July Celebrations on July 1st, but we really know they were helping us celebrate our 150th birthday! Thank you America!


In early May, I purchased some pears and then immediately forgot that I had them. Then on May 17, my friend Lorraine of Not Quite Nigella, posted that it was Cheese Soufflé Day and linked to her twice baked cheese soufflé recipe, and I immediately knew how I would use one of those pears!

When one reads a “soufflé” recipe, one might back out of the room, ever so slowly, so no one would notice, because cheese soufflées are known to be complicated and finicky. Let me assure you, this one is NOT. This recipe comes together quickly and easily, and I love that they can be frozen and rebaked when required, how easy is that? I also love béchamel sauce (that was my addition) so this is a win/win on all accounts.

Pear, Blue Cheese and Leek Twice-Baked Soufflé

This recipe makes 4 x 200 mL (7 fluid ounces) ramekins. For the original recipe, please click here.

Print Recipe Twice Baked Soufflee

Ingredients:

  • 30 g butter, divided, plus additional for buttering ramekins
  • 30 g/1.5oz plain all purpose flour
  • 250 mL (1 cup) milk, heated
  • 150 g (1 small) pear, finely chopped or cubed
  • 40 g (1/4 cup) leeks, finely chopped
  • 2 eggs, separated
  • 60 g blue cheese, crumbled
  • salt and pepper

Directions:

  1. Preheat the oven to 350° F (180° C).
  2. Butter 4 ramekins well, all the way up the sides. Boil some water.
  3. Melt 10 g of the butter in a saucepan and add the chopped pears and leak and cook on medium heat until softened. Season with salt and pepper. Pour out of the pan and set aside to cool.
  4. Melt the remaining butter in the pan and add the flour all at once. Cook the flour for a minute without burning it. Add the milk and whisk until smooth, it will be very thick.
  5. Add the pear and leek mixture and stir well until combined in the roux. Add the egg yolks and stir well to combine. Set aside to cool.
  6. Meanwhile, beat the egg whites until stiff but not dry. Take about 1/4 of the beaten egg whites and stir it into the roux mixture to loosen. Fold in the remaining egg whites until well incorporated but not deflated.
  7. Divide the mixture into the four ramekins and bake in a bain-marie (this is why you were boiling the water) for 35-40 minutes or until tops are lightly golden (remember, they will be baked again).
  8. Allow to cool in the ramekins for about 5 minutes (they will deflate a bit), then gently loosen sides with a sharp knife and turn them out onto a cooling rack and cool until room temperature.
  9. Wrap each soufflé individually in plastic wrap and then bag in a large zip lock freezer bag. Freeze until required.
  10. To defrost, remove from the freezer the night before it is required and defrost in the refrigerator. The microwave is not suitable for this step.
  11. Prepare the béchamel finishing sauce.
  12. Lay the soufflés into individual oven proof dishes (I used cast iron) and prepare the béchamel finishing sauce.

Ingredients for Béchamel Finishing Sauce:

Serves 4

  • 5 g (1 tsp) duck fat, bacon fat or unsalted butter
  •  (1 tbsp) all-purpose flour
  • 250 mL (1 cup) milk
  • 5 mL (1 tsp) thyme leaves
  • 1 1/2 slices bacon, cooked until crispy, chopped
  • Salt

Directions for Béchamel Finishing Sauce:

  1. Melt butter in a small saucepan, add the flour and cook the roux without burning for about 1 minute.
  2. Slowly add the milk while whisking to creat a smooth sauce, cook until thickened.
  3. Flavour with the thyme leaves, bacon and salt.
  4. Pour over the defrosted soufflés in an oven-proof bakeware and bake about 25 minutes in a preheated 350° F (180° C), to heat it through.

A wonderful combination of sharp blue cheese, salty bacon and sweet pears with creamy baked béchamel. Is your mouth watering yet?

Notes:

  • You may use any cheese you wish, although I would stick to full-flavoured cheeses.
  • If you don’t like leeks, try caramelized onions instead (I always have frozen leeks in my freezer and come to think of it, caramelized onions!).
  • Lorraine poured about 300 mL (1 1/4 cup) heavy cream over her soufflées instead of the béchamel sauce.

Read Full Post »

I’ve been a little busy since we’ve returned from Arizona, you may have noticed my absence commenting and that I didn’t post last week. I was going to fret about it and try and throw together something but decided against it. Life happens.

One of our dear friends sold their home in the burbs and moved into their condo just before we left for holidays. JT and I helped them paint before the move, with the move, and a little organization. You see, their home was around 2,500 square feet and they moved into a 600 square foot condo. To say they down-sized is an understatement. I have to admit, I was a little jealous that they were able to rid themselves of excess, but I had to be honest with myself, and I’m not there yet. This past weekend, we went to visit and you know me, I never go empty handed, so I made these cheese crisps.

When I made the gluten free version of cheez-itz, I rolled them a bit thinner than usual and loved how crisp they baked up, so this time, I adjusted the gluten recipe and rolled them out in my KitchenAid pasta maker and the results were exceptional. Thinner crackers baked up so crispy, I was hooked. If you like cheese tuiles, then you will love these cheese-flavoured, light, crisp crackers, but be warned, they are quite addictive.

I added a little album of our trip to Arizona at the end of this post, if you are interested. Basically, it was the coldest and rainiest time in Arizona this year. We experienced -15°C (59° F) and snow in The Grand Canyon and although the sun did make an appearance from time to time, it never really warmed up. I wore layered leggings and tops, a winter coat, gloves and scarf and ear muffs, most of the time while we were in The Grand Canyon and Sedona. It rained so much in Sedona; Sedona gets about 38 cm (15 inches) of rain a year, in two days we had 4 cm (1.5 inches)! Oh well, it’s another reason to go back!

Cheese Crisps

A KitchenInspirations Original Recipe

Makes about 350 g crackers (about 6 cups)

Ingredients:

  • 240 g full-flavoured, hard cheese, grated (see notes)
  • 45 g unsalted butter
  • 15 g vegetable shortening
  • ½ tsp salt
  • 1/2 tsp smoked paprika (see notes)
  • 1 cup (125 g) flour, plus more for rolling
  • 2 tbsp ice water

Directions:

  1. Combine everything but the water in the large food processor bowl and pulse until fully combined.
  2. Slowly pour in the ice water and process until the dough comes together. It may not look like it will, but it will.
  3. Sprinkle a generous amount of flour on your surface and roll out small bits of the dough thin enough to get through #1 on the KitchenAid Pasta maker attachment. Run each sheet through three times on #1, two-times on #2 and two-times on #3. Return to your work surface and cut with a variety of cookie cutters. I chose smallish ones because I wanted bite-sized nibbles. They shrink to about 65% of the original size.
  4. Preheat oven to 375° F.
  5. Transfer crackers to a baking sheet (I line mine with parchment).
  6. Bake for 8-10 minutes until golden and crispy! Be careful – there’s a fine line with these between golden brown and overdone – and it only takes seconds to burn!

Notes:

  • Use whatever full-flavoured cheese you have. This batch was made with equal quantities of sharp Cheddar, naturally-smoked Cheddar and Beemster.
  • I prefer to use the pasta maker to roll the dough because it guarantees the dough to be the same thickness throughout the batch. I wouldn’t go thinner than #3 though, really thin crackers will burn very quickly before they crisp up.
  • Change up the flavouring from smoked paprika to granulated garlic, finely ground dehydrated onions, finely ground dehydrated mushrooms, but be careful not to have too large chunks as they will get caught in your pasta maker rollers!

This slideshow requires JavaScript.

Read Full Post »


glutenfreecheezitz_first

There are recipes that convert well into gluten free and this happens to be one of them and they freeze incredibly well too, but be warned, it will be unlikely that you’ll have leftovers to freeze! I rolled this recipe thinner than the glutinated recipe and the result was a crispier, cheese bite. I’ll probably do the same for the glutinated version, as I preferred the crisp texture. Plus, a thinner roll gives you more crackers and who doesn’t love more cheese crackers?

Gluten-free Cheez-itz

A KitchenInspirations Original Recipe

Ingredients:

  • 227 g (about 2 cups) sharp cheddar, grated
  • 45 g (3 tbsp) unsalted butter, room temperature
  • 14 g (1 tbsp) vegetable shortening
  • 1 tsp salt
  • 67 g (1/2 cup) brown rice flour and 67 g (1/2 cup)  white corn flour (not corn starch) or 134 g (1 cup) gluten-free flour
  • 30 mL (2 tbsp) ice water

Directions:

  1. Combine all of the ingredients except the ice water in a bowl of a food processor. Pulse for 2 minutes to cream the mixture together.
  2. Slowly add the ice-water while pulsing. At first, it looks like you might need more water, patience grasshopper, patience, the dough will come together in a moment, continue pulsing until it does.
  3. Preheat oven to 375° F.
  4. Using plastic wrap, roll the dough into two logs about 1.5 inches or 4 cm in diameter. Refrigerate for at least 30 minutes or freeze for 15.
  5. Cut log into 1/2 cm or 1/4 inch thick slices and place on a parchment-lined baking sheet leaving about 2.5 cm or 1 inch between each cracker.
  6. Bake for 10-15 minutes until golden brown and crispy! Be careful – there’s a fine line with these between golden brown and overdone – and it only takes seconds to burn!

Alternative instructions:

  1. Cut dough in half and pat the dough down into a disk, cover with plastic wrap. Refrigerate for at least 30 minutes.
  2. Place disk on parchment paper and put the plastic wrap on top and roll each disc to 2mm or 1/8 inch thickness (this is the perfect thickness).
  3. Using a cookie cutter of your choice, cut into shapes. I found that my 2.5cm square cut the perfect size.
  4. Transfer to a baking sheet (I line mine with parchment).
  5. Bake for 10-15 minutes until golden brown and crispy! Be careful – there’s a fine line with these between golden brown and over done – and it only takes seconds to burn!
  6. Remove to cooling rack to cool.

Notes:

  • If the crackers become a bit soggy after you defrost them, toss them in the oven in a single layer on a baking sheet on low heat for 5-10 minutes to crisp them up.

glutenfreecheezitz

Read Full Post »

CheeseOnionSconeFirst

I celebrated a birthday a few months ago. It wasn’t a particularly special birthday other than the many wonderful birthday wishes that my many social media friends bestowed. JT took me to my favourite French restaurant, Le Select Bistro where we are treated like VIPs since we dined there with our good friends and neighbours Tom & Iona (Tom is an architect and designed the interior of the restaurant). 

Several months back, my trusty old food processor’s plastic top broke. It didn’t entirely break, just the little, wee bit broke off that clicks into the special spot to allow the thing to be turned on. I get that it’s a safety feature so that you can’t turn it on without the top clicking in, but honestly, such a crappy little piece of plastic breaks off and my food processor is rendered useless?! Well, kind of useless, because I figured out that I can jam a chopstick into the spot and I had it working for a few additional months. It was all fine and dandy until I had to take it to a photo shoot and we were all jamming the chopstick into the top to get it to work, how embarrassing was that?!?!? So when my birthday rolled along, I decided I wanted a real, grown-up food processor and JT got me the Cuisinart 12-cup!

The 12-Cup version had a little 4-cup insert so you can make small amounts of stuff. The 12-Cup version has a little 4-cup insert so you can make small amounts of stuff.

It’s been brutally hot and humid in Toronto so even though I had a brand new food processor, I just couldn’t bring myself to make anything, particularly something that required the oven! I broke down and baked these delightful cheese and onion scones for a little dinner we had; fortunately, the oven was only on for 15 minutes including the pre-heat time and I had the hood fan on full blast, sucking out the hot air so it didn’t heat up the kitchen too badly. The food processor worked like a dream, I can’t wait to use the little 4-cup bowl insert.

Cheese and Onion Scones

Original recipe from Jean Paré’s Company’s Coming Muffins and More cookbook

Makes 12-16 5 cm (2 inch) scones)

Ingredients:

  • 240 g All Purpose Flour
  • 12 g granulated sugar
  • 16 g baking powder
  • pinch of salt
  • 1 small shallot, finely chopped
  • 150 g grated cheese (we used Gouda)
  • 57 g cold butter, cut into small cubes
  • 1 egg
  • 50 mL milk (and extra milk for brushing tops)

Directions:

  1. Preheat oven to 220° C (425° F).
  2. Combine flour, sugar, baking powder, salt, shallot and cheese in the bowl of a food processor and pulse to combine. Add cubed butter and pulse until crumbly.
  3. Combine, milk and egg and whisk until frothy. Pour into food processor while pulsing to combine well. Turn dough out to a lightly floured surface and knead once or twice. Roll out to about 2.5 cm (1 inch) thick and cut into 5 cm (2 inch) circles. Brush tops with milk.
  4. Bake for 15 minutes or until lightly golden. Serve warm with butter.
CheeseOnionScone_2 Perfect for a light snack or with soup.

Read Full Post »

AdultGrilledCheese_First

Cooking at the cottage means simple recipes using fresh ingredients. I don’t want to be in the kitchen any longer than I have to. Don’t get me wrong, I adore cooking but I also adore this view:

CottageView

This is the view looking out into the lake from our little bay.

Several years ago, our dear friend Barb (Profiteroles and Pony Tails) and her then beau (now hubby) came up to our cottage, The Upper Deck. We traded off days for cooking and for one lunch Barb made this excellent grilled cheese sandwich (Toastie)! We’re not talking about a processed cheese slice slapped between two slices of Mungie-cake white bread. No, this is a serious blend of cheeses with a splash of whiskey or cognac and some delicious green onion thrown in for good measure. Believe me, when I say: once you have this grilled cheese, you will NEVER want any other.

I posted this recipe originally in March 2009 and it was a bit of a sore spot because a named magazine asked to use my photo in a grilled cheese story but since I was relatively new to blogging, I wasn’t paying attention to the comments, so I missed out! Sigh. The flavour of the whiskey or cognac is essential, the cheese blend is entirely up to you, but I suggest hard cheese and not soft like goats cheese.

Adult Grilled Cheese

Serves 2

Ingredients:

  • 125-150 g shredded cheese, in total
  • 1 tbsp butter
  • 2 slices sourdough bread, use this recipe
  • 1 green onion, thinly sliced
  • 2 tbsp cognac or whiskey

Directions:

  1. Combine shredded cheeses, green onion and cognac and mix well.
  2. Butter one side of each bread, lay one slice buttered side down and top with the cheese mixture. Lay the other side of the bread on top, buttered side up.
  3. Heat a grill pan and place sandwich on top, lay a weight over it (I used 3 cast iron pans but I put a piece of parchment on top of the sandwich first).
  4. Grill until cheese has melted. Cut sandwich in half and serve with celery sticks and homemade salsa.

Notes:

  • For this sandwich, we used Applewood Smoked Cheddar, Extra Old Cheddar and Mozzarella.
  • We have also used Mozzarella, Gruyère and white Cheddar, the combinations are endless. It is nice to use a stringy cheese for this type of sandwich.
  • You could also put additional cheese on the exterior (omit butter) and instead of grill, lay a piece of parchment down in a cast iron frying pan and cook, repeat for other side. See instructions from my dear friend Lorraine, here.

Read Full Post »

Older Posts »