Feeds:
Posts
Comments

Archive for the ‘keto’ Category

From La Carihuela we rented a car and drove to my dear cousin Lucy and Larry’s place in San José, about 3.5 hours from La Carihuela. We spent the next three weeks in their beautifully renovated flat overlooking the Mediterranean. They were kind enough to create a beautiful kitchen for us, including my favourite, an induction stovetop. Induction is definitely the way to go in Europe, in fact, it outnumbers gas and electric by more than 70% in the stores. It is far more efficient, and apparently not nearly as bad for the environment as gas. Have you ever cooked on Induction?

Here are a few pics of the flat:

This slideshow requires JavaScript.


We were still trying to maintain a low-carb diet, during our stay in Spain in February-March, but it was a lot more difficult than at home. Ingredients that I have come to rely on like Lupin Flour, vital wheat gluten, and oat fibre were impossible to find so I had to improvise. Flax seeds were readily available so I created a flax seed cracker. It’s similar to the almond flour cracker but not nearly as heavy so you could have a few more without filling up.

Low-Carb Flax Seed Crackers

A Kitcheninspirations original recipe

Makes about 2 x 20 cm x 30 cm sheet (2 x 8 inch x 12 inch sheet)

Ingredients:

  • 150 g flax seeds, ground but some left whole
  • 1 egg, beaten
  • 5 g olive oil
  • 30 g hard cheese, grated
  • 2 g granulated onion, finely ground
  • 2 g ground pepper

Directions:

  1. Preheat the oven to 350° F.
  2. Combine all of the ingredients in a food processor and process until thoroughly combined. 
  3. Spill out the mixture onto a parchment-lined baking sheet. Using a second piece of parchment, roll the dough out until it is approximately 20 cm x 30 cm sheet (8 inch x 12 inch sheet). Remove the top parchment and bake until it is lightly golden (the crackers will stiffen up as they cool).
  4. When cool, break the crackers into bite-sized pieces.

Read Full Post »

La Carihuela is a cute beachside neighbourhood in Torremolinos where we spent our first six days in Spain. We decided to begin wintering there because we have friends there and it is slightly warmer than San José. It also has a lovely pedestrian promenade surrounded by many of restaurants and shops. Although it is rather touristy, you can find good, reasonably priced grocery stores and some cute local shops not far from the promenade. We had a marvellous time with our friends Andy and Mark touring their favourite spots, often walking more than 20,000 steps! 

Spain does not have the variety of ethnic restaurants as Toronto does, so some of our ethnic fav’s had to be put on hold, like crêpes. Crêpes are one of my all-time favourites! They are so versatile from sweet to savoury, but to be perfectly honest, I prefer savoury. And the Croque Madame Crêpes surely hit the spot. These low-carb crêpes are the closest to the real thing I have found. You should not make the batter too far in advance like the traditional crêpe as the lupin flour absorbs too much of the liquid ingredients, ten minutes is just about perfect. These crêpes are a bit more delicate than standard crêpes, you’ll want to use a good non-stick pan lightly oiled on medium to low heat.

Low-Carb Crêpes

Makes 2 crêpes, to make more just multiply the ingredients by the number of crêpes you require.

Ingredients:

  • 2 eggs
  • 45 mL soda water (or more)
  • 2 tbsp oat fibre
  • 2 tbsp lupin flour
  • 2 tbsp vital wheat gluten
  • Salt

Directions:

  1. Combine all of the ingredients in the jar of your blender (I used an immersion blender) and blend until smooth. Allow to sit at room temperature for a maximum of 10 minutes. The batter should coat the back of a spoor lightly, if it’s too thick, add a bit more soda water and blend again. Use immediately.
  2. Use a good non-stick pan lightly oiled on medium to low heat to cook these crêpes. Cook them until the edges shrink away from the pan, and flip and cook another minute longer.  Cover cooked crêpes with a clean tea towel until you are ready to serve them (they dry out rather quickly so if you want to keep them warm, cover with a damp tea towel).

Read Full Post »

Some of you may have noticed that I haven’t been as present in the blogging sphere in February and March, and that is because we spent the month of February and some of March, wintering in Spain this year, and then we enjoyed some adventure. The first part of our trip was in La Carihuela in the Torremolinos neighbourhood of Malaga. We met up with friends for 6 days and soaked in the sunshine. Then, we rented a car and zipped off to my Cousin Lucy’s flat in San José where we spent three weeks, enjoying the sunshine. We had booked a couple of days in Alicante and then we zipped back to Malaga for 11 days, this time we rented a flat in the old centre of Malaga and visited with our friends and their friends, in La Carihuela. From Malaga, we flew to Istanbul, Turkey for a Viking Cruise to Greece. I will do a more detailed post on our Viking experience in the coming weeks. This was our first cruise in 38 years (our honeymoon was a cruise) ! After we landed in Athens, the culmination of our cruise, we flew to London for 4 days and then to Dublin for 3 days and arrived home for the last of winter weather on March 27. It was definitely a whirlwind trip with old friends and new friends and we hope to recreate it again in the coming year.

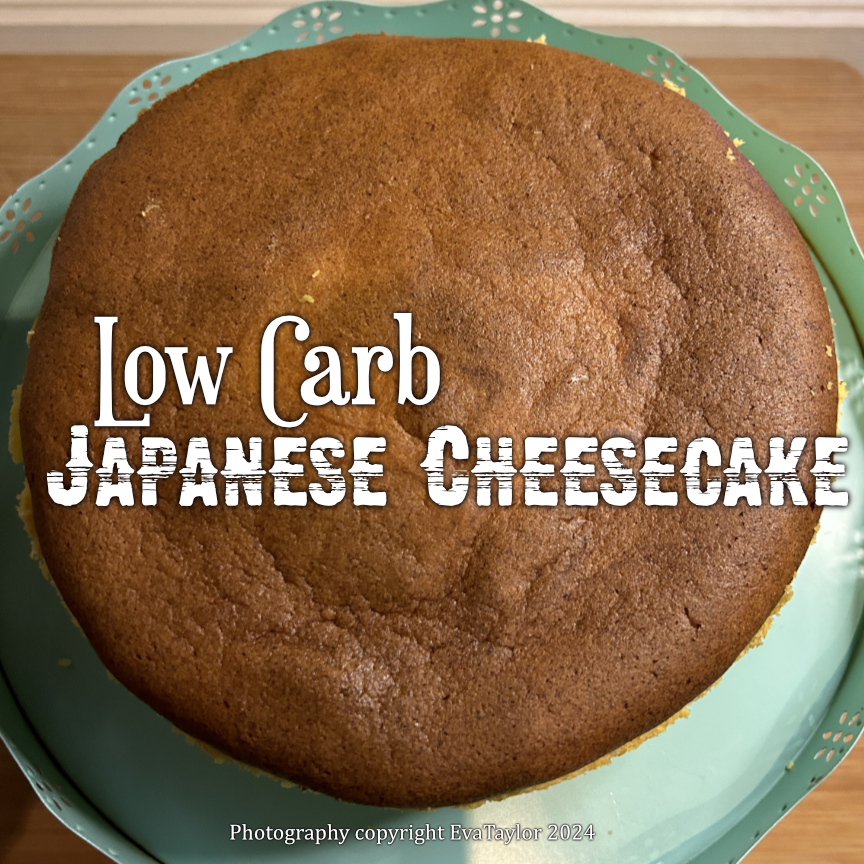
Unfortunately for us, Basque Cheesecake is from the Basque region in Spain, in the far north. Of course, you can find cheesecake everywhere in Spain, but is it authentic Basque Cheesecake? Basque Cheesecake is a slightly burnt, crustless cheesecake. Who needs crust on a cheesecake? I first made the crustless Basque Cheesecake in December 2022 and to be honest, I didn’t miss the crust. Yes, it does add texture but honestly, who needs (or wants) the extra calories? Plus, graham cracker crumbs of late are absolutely awful, they have a strong chemical odour which is definitely a downer for me. Next comes the Japanese Cheesecake. Japanese Cheesecake is also a crustless cheesecake but it is also a lot less dense than the Basque Cheesecake which for me is a plus. You could put a fruit couli on top for colour, but it doesn’t really need it. It’s quite lovely on its own.

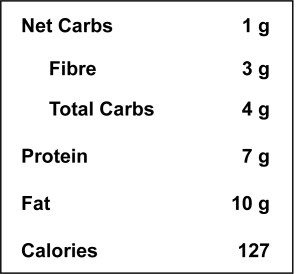
Low-Carb Japanese Cheesecake

For the original recipe, please click here.

Makes 1 20 cm pan

Ingredients:

  • unsalted butter (for greasing the pan and parchment paper)
  • 150 g cream cheese
  • 30 g unsalted butter
  • 150 ml heavy (whipping) cream (¾ cup + 4 tsp, to be precise)
  • 100 g Erythritol (for the cream cheese mixture)
  • 3 large eggs
  • 40 g cake flour (I used 20 g lupin flour 20 g vital wheat gluten)
  • 1/4 lemon (for the zest)
  • 15 ml lemon juice (from ½ large lemon)

Directions:

  1. Preheat the oven to 350° F. Prepare your springform pan by lining the bottom with parchment and then rubbing butter on the bottom and the sides. Line the bottom of the exterior with 2 layers of foil (to prevent water leaking into the cake because it will bake in a bain marie). Take a larger pan than the springform pan and fill it halfway with water. Place in the oven to warm.
  2. In the top bowl of a double boiler (or make-shift bain marie) place the cream cheese, butter, heavy cream, and sugar into the bowl and simmer over low heat until everything melts and is cohesive. Separate the eggs and set the egg whites aside in the refrigerator.
  3. Remove the bowl from the heat and whisk in the three egg yolks, one at a time until fully combined.
  4. Sift the flour into the cheese mixture and whisk until fully combined. Pour the mixture through a fine sieve pressing through as much as possible, discarding the larger bits. Set aside.
  5. Beat the egg whites into stiff but not dry peaks. Fold the beaten egg whites into the cheese mixture.
  6. Pour the mixture into the prepared pan. Turn the heat down to 325° F. Set the cheesecake mixture into the ban marie and bake for 70-75 minutes. Lower the temperature to 300° F for an additional 10 minutes to give the top a beautiful golden colour. Turn the heat off and open the door slightly. Allow the cheesecake to cool completely in the oven. The cheesecake will shrink and become denser as it cools.

Read Full Post »

When one is on a low-carb diet, one misses the old favourites like Mac ‘n Cheese. We particularly LOVE the way the cheese caramelizes on the noodles at the edge of the baking dish so they become crispy and slightly chewy. Most low-carb bread crumbs end up being almond flour which really makes the dish very heavy, I solved that problem by using my low-carb bread, toasted and pulsed into breadcrumbs. If you didn’t know this was low-carb, you wouldn’t have had a clue.

The noodles really maintain their shape and the sauce sticks to it nicely.

Classic Low-Carb Mac ‘n Cheese

A Kitcheninspirations original recipe

Serves 2

Ingredients:

  • 100 mL milk, chicken stock, or water
  • 60 g cream cheese
  • 60 g Cheddar, grated
  • 30 g Gruyère, grated
  • 30 g Mozzarella, grated
  • 1 slice of bacon, cooked until crispy
  • 1 scallion, thinly sliced
  • 92 g low-carb Garganelli, uncooked and dry
  • 30 g Parmesan Cheese, grated, divided
  • 30 g low-carb bread crumbs
  • 10 g butter, also a little to coat the pan

Directions:

  1. Preheat the oven to 350° F. Prepare an oven-safe dish by buttering the inside all-over and sprinkling about half the Parmesan cheese all over the bottom.
  2. Begin to heat the milk very slowly over low heat.  Add the cream cheese, cheddar and gruyère and continue to heat until totally melted and incorporated smoothly into the milk. Take it off the heat and fold in the Mozzarella, bacon, and scallions.
  3. Add the warm cheese sauce to the uncooked pasta and stir it so the sauce penetrates all of the hollows of the Garganelli. Pour the coated pasta into the prepared oven-safe dish.
  4. Combine the remaining Parmesan cheese with the bread crumbs and butter and mix until crumbly. Top the pasta with the grated cheese mixture.
  5. Bake for 30-45 minutes or until the pasta has cooked through and has begun to caramelize on the bakeware.


Fresh out of the oven, the cheese was still bubbling!

Read Full Post »

Stop right now! You have to make this if you are doing a low-carb diet. This is literally the best low-carb flatbread I have ever created. They’re fabulously chewy and springy. They fold perfectly to cradle the kebab and resist cracking or breaking apart. 

This flatbread has been a long and difficult journey. JT has had to endure some pretty bad flat bread samples. True, it’s pretty easy to make a flatbread that is thin and holds your kebab, but the difficulty lies in the chewy and springy texture that the original flatbread has. It’s mandatory for flatbread. This recipe has it all. 

Low-Carb Flatbread

A Kitcheninspirations original recipe

Makes 8 flatbreads

Ingredients:

  • 320 g water, about 60° F
  • 2 g sugar
  • 8 g instant yeast
  • 80  g Lupin Flour
  • 170 g Vital Wheat Gluten
  • 38 g Oat Fibre
  • 30 g psyllium husk, ground
  • 48 g Erythritol
  • 8 g Sea Salt
  • 20 g baking powder

Directions:

  1. Combine the water, and yeast and set aside to allow the yeast to bloom.
  2. In the large bowl of your stand mixer, combine the erythritol with vital wheat gluten, oat fibre, lupin flour, psyllium husk, and salt, and stir to mix well.
  3. Once the yeast has become foamy, add it to the flour mixture and knead with the cookie dough paddle until the dough has come together. Allow to rest for 5 minutes. Sprinkle the salt and baking powder onto the dough and continue to knead for 15 minutes. Form the dough into a ball with your hands and cover to rest for 30 minutes.
  4. Once rested, divide the dough into 8 equal portions, roll out each piece into an oval, rub with EVOO and allow to rest for 10 minutes covered with a clean kitchen towel.
  5. Preheat a cast iron pan on medium heat. Cook each flatbread until golden, flip and continue until all have been cooked. Freeze in an airtight container/bag. Defrost in the refrigerator and reheat, slightly dampened with water on each side.

The kebabs fit into this flatbread perfectly.


Low-Carb Flat Bread Nutrition for 1 flatbread

Notes:

  1. The sugar gets completely eaten by the yeast, although I have included it in the nutitional ingredients.

They are quite foldable, they won’t crack.

Read Full Post »

Well, our journey through low-carb cuisine has not been bad, as attested by JT. I have been slowly converting many of our high-carb recipes to low-carb versions and it’s been rather fun. My latest creation is low-carb gnocchi. It has the chewiness and puffiness that regular flour gnocchi have without the carb-load. JT was impressed.

They are predicting our first really heavy snowstorm for this afternoon. Glad I made a few of these tasty morsels.

Low-Carb Cauliflour, Vital Wheat Gluten and Lupin Flour Gnocchi

A Kitcheninspirations original recipe

This recipe makes 246 g of gnocchi dough about 50 gnocchi. 2-4 servings

Ingredients:

  • 115 g cauliflower mash (see notes)
  • 57.5 g Vital Wheat Gluten
  • 57.5 Lupin Flour
  • 10 g Parmesan Cheese, finely grated
  • 11.5 g egg, beaten

To fry:

  • 15 mL EVOO or butter

Directions:

  1. Combine everything in the large bowl of your food processor and process with the plastic blade until entirely combined (the dough may not come together in a ball, but you will be able to form it into a ball).
  2. Pour it onto a lightly floured* surface and form it into a ball. then divide it into smaller pieces to make into a roll. I weighed mine so they would be more accurate but you don’t have to.
  3. Cook into boiling water immediately or freeze on a baking tray so they don’t touch each other.
  4. Cooking is similar to regular gnocchi, they sink when they are raw and float when they are done.
  5. If you’ve cooked them and wish to crisp them, heat a frying pan with the EVOO or butter and fry each gnocchi so they are golden and crisp on each side.

Low-Carb Gnocchi in a creamy Gorgonzola Sauce sprinkled with lemon zest to freshen it up.

This is a dinner I made with Cod wrapped in Serrano Ham and had gnocchi as a side.

Notes:

  • Cauliflower mash is simply roasted cauliflower with a little EVOO until soft and blended with an immersion blender until smooth, I usually have leftovers so I made gnocchi with the leftovers.
  • *Use Lupin flour or vital wheat gluten to dust your work surface.
  • These are best fresh but do freeze well. I detected a slight change in texture while JT did not.

Read Full Post »

I can honestly tell you that Vital Wheat Gluten and Lupin Flour are a game changer for my low-carb world. The vital wheat gluten gives you the strength and resilience of bread flour and the lupin flour gives a bit of a whole wheat feel and because it’s so high in fibre, it really lowers the net carbs in recipes. I have made a few breads using almond flour but I just find they are far too heavy for my taste. The Lupin Flour and Vital Wheat Gluten are the perfect combo. I found this recipe on Reddit here but I kept losing it, so I thought I would do a post about it so that I can find it whenever I need fajita shells.

These have the same chewy texture that white flour tortillas have with some extra fiber for texture. JT loved them.

Low-Carb Fajita Shells

Makes 8 small fajita shells (about 12 cm (5 inch) diameter

Ingredients:

  • 77 g vital wheat gluten,
  • 32 g oat fibre
  • 25 g lupin flour
  • 15 g coconut flour
  • 2.5 g baking powder
  • 4 g salt
  • 0.75 g xanthan gum
  • 105 g warm water (more or less as needed)
  • 32 g olive oil
  • Olive oil cooking spray

Directions:

  1. Add all of the ingredients to the large bowl of your stand mixer, and using the scraper paddle, start mixing everything together.  Continue with the scraper paddle for 5 minutes. The dough should be slightly sticky but should come away cleanly from the bowl.
  2. Collect the dough and press it into a nice round ball. Wrap the dough in plastic wrap and allow it to rest for 20 minutes at room temperature. This allows the vital gluten to relax so it is easier to roll.
  3. Divide the dough into 4 equal portions and roll out to about 3 mm thick or as close as you can. Run each piece through the pasta maker attachment from “0” to “4” so each ball becomes one long piece of dough. Cut the dough into 12 cm circles using a cookie cutter or a knife and a plate as your form. Re-use the leftover dough to make more fajita shells.
  4. Heat a cast iron pan to medium heat (325° F), spray the pan with the cooking spray, and cook each side for about one minute or less, until they are golden brown. Use immediately or freeze layered with parchment paper. Defrost in the refrigerator, overnight and gently heat to use.

Notes:

  • I like using the scraper paddle for lupin flour dough, it seems to work the dough better than the hook.
  • To cut perfect circles for my fajita shells, I use an inverted bowl that has the same diameter as my pasta maker has width, that way I get the largest fajita shell I can from the sheets.
  • This dough is very difficult to roll out, that is why I used my pasta maker attachment but it does leach oil when it is pressed through so have a cloth under the pasta maker to control the mess.

Read Full Post »

Firstly, I must apologize to my regular followers as I haven’t been able to comment on their blogs in the last week, I was taken down by the stomach flu that is going around and it was brutal! I could barely get out of bed for five days. I’m recovering but it takes time to reintroduce foods into your diet that won’t shock the system.

We are planning an epic adventure in 2024 and for that we need to get in shape so we are cutting back the carbs, cutting out the alcohol and bumping up the exercise. I will adapt as many of our favourite recipes on our journey and I started with this beloved sauce. This recipe isn’t as sweet as traditional hoisin sauce but it definitely has a good punch of umami and the best part is that 15 mL has 2 g net carbs, compared to 44 g! That’s a win-win for me.

It’s super salty but not as sweet as traditional Hoisin Sauce.

Low-Carb Hoisin Sauce

A Kitcheninspirations original recipe

Makes about 150 mL sauce

Ingredients:

  • 200 mL low sodium soy sauce
  • 30 g erythritol
  • 20 g roasted garlic purée
  • 12 g molasses
  • 5 g white miso paste
  • 10 g tahini

Directions:

  1. Combine everything but the tahini in a small saucepan and mix well. Bring to a boil and reduce to about 150 mL.
  2. Using an immersion blender, blend in the tahini. Pour through a fine sieve into a sterilized jar.

Notes:

  • The sauce will thicken when cool.
  • Use as a marinade for chicken or pork or as garnish for phõ as you would regular hoisin sauce.

Read Full Post »

This is one of my Go-To omelettes. It’s not nearly as fussy as a traditional French omelette so it’s easy and relatively quick to put together. And did I mention that it’s delicious? The cheese caramelizes on the bottom of the omelette so that it becomes this incredibly delicious crust, like the end of a fondu! Also, there isn’t much technique involved so it’s super easy to execute.

This is one of those crusty videos that the kids are doing these days. It turned out fantastic!

Crusty Cheese Omelette

Serves 1 or 2, depending on how hungry you are!

Ingredients:

  • 60 g cheese, grated (see notes)
  • 2 large eggs, room temperature
  • 30 g Greek yogurt
  • Salt and Pepper

Directions:

  1. Sprinkle the cheese in a small non-stick pan and set the heat to medium. Melt the cheese slowly (do not allow it to caramelize at this point).
  2. Combine the eggs, yogurt, salt and pepper and whisk until smooth. Once the cheese has begun to render and bubbling a little, carefully pour the egg mixture over the cheese so that it sits on top of the cheese. Cover and cook until the top of the omelette has set at the top. Remove the pan from the heat (turn it off) and allow it to sit covered for a few minutes (the omelette should come away from the pan at the edges and easily slide out).
  3. Serve warm on warm plates.


Read Full Post »

Have you seen the reels of a tablespoon of instant coffee, a tablespoon of sugar and 1 tablespoon of water and they whip it until it is light and creamy like mousse (it’s pretty incredible)? That is Dalgona from Macau, a topping they put on steamed milk. Then, I saw a guy on an Instagram Reel make ice cream from whipped Carnation Evaporated Milk following a recipe from the 1940’s so I figured why not try it with the famous Dolgona Whipped Coffee. We have friends coming for brunch and they are coffee aficionados so I thought the Dalgona Ice Cream might be a nice change for them. The whipped Carnation Evaporated Milk is much lighter than regular ice cream, it’s more like a frozen mousse. I tried it with Erythritol and unfortunately, it never really dissolved so the ice cream was grainy, definitely not the texture I was looking for. As with Dalgona, it is quite coffee-forward so if you’re not in love with coffee flavour, this recipe is not for you.

It’s like eating an espresso.

Dalgona Ice Cream

A Kitcheninspirations original recipe

Makes about 2.5 litres Ice Cream

Ingredients:

  • 20 g instant espresso coffee
  • 60 g sugar (more if you prefer a sweeter coffee)
  • 30 g hot water
  • 250 mL Carnation Evaporated Milk

Directions:

  1. Combine the instant coffee, sugar and hot water in a small bowl and whip until pale in colour and thickened to stand on its own, similar to whipped cream. Set aside.
  2. In the small bowl (2.8 litres or 3 quart) of your KitchenAid stand mixer add the Carnation Evaporated Milk and beat until thickened like whipped cream. Add the thickened coffee cream you prepared in step 1. Beat until entirely incorporated and thickened. 
  3. Pour into a freezer-proof container with a tightly sealing lid, even out the mousse with an offset spatula and seal the lid on tightly. Freeze for 12 hours or until frozen like ice cream.
  4. Serve by scooping out spheres of the frozen Dalgona. Serve immediately.

I wish I had made this in the heat of September.

Read Full Post »

These little biscuits are quick and easy to make and take less than 15 minutes to bake up so you can make them last minute or bake a bunch and freeze them.

They have a nice crumbly texture.

Low-Carb Cheddar Biscuits

This recipe is per buscuit

Ingredients:

  • 30 g lupin flour
  • 15 g vital wheat gluten
  • 1 egg, whisked
  • 2.5 g baking powder
  • 15 g Erythritol
  • 35 g sharp cheddar cheese, grated, Divided
  • Salt

Directions:

  1. Preheat the oven to 350° F. Butter a small ramekin (I used my Le Creuset mini Dutch oven).
  2. Whisk all of the ingredients together until homogenized and smooth. Pour into the ramekin and top with about 10 g of cheddar and bake for 10-15 minutes or until a toothpick inserted comes out clean.
  3. Pop the muffin out of the ramekin and cut it in half horizontally, and toast until golden.

Directions:

  • I found the Le Creuset mini Dutch oven a little too large because the biscuits are very filling so next time I’ll choose a smaller pan

Read Full Post »

One of the reasons I had wanted an Instant Pot was to get rid of a few of my small appliances like the slow cooker, air fryer, and rice maker! This recipe uses the instant pot for the rice as well as the chicken. To cook the rice, please see the notes below.

A KitchenInspirations Original Recipe

Serves 2

Ingredients:

  • 1 200 g chicken Breast, skinless, boneless
  • 30 g Greek yogurt, divided
  • 15 mL roasted garlic purée
  • 2 g oregano
  • 5 g flour
  • Zest of 1/2 a lemon
  • 15 mL olive oil
  • 15 g butter
  • 50 g sweet onion, finely diced
  • 125 mL water
  • 30 mL cooking Sherry
  • 1/2 a sun-dried tomato, cut into small pieces
  • 5 black olives, sliced
  • 1 artichoke heart, chopped
  • Parsley, for garnish
  • Rice for serving, see notes for IP cooking Rice

Directions:

  1. Combine the yogurt, the roasted garlic, oregano and salt and mix well. Spread half of the marinade over the chicken reserving the extra and refrigerate while prepping.
  2. Heat the olive oil & butter on the “Sauté” setting and cook the onions until translucent. Brown the chicken on both sides. Turn off the “Sauté” setting and add the chicken stock with the cooking sherry and the sun-dried tomatoes to release the fond. Put on the Pressure Cooking lid and set the vent to sealing, set the time to 5 minutes. Mix the flour and the lemon zest, into the remaining yogurt mixture. After five minutes, de-pressurize the Instant Pot and add the remaining yogurt mixture with all of the ingredients and mix well.
  3. Secure the pressure lid and vent to sealing, set to Pressure Cook for 5 additional minutes. De-pressurize carefully.
  4. After allowing the chicken to rest, slice it and lay it on a plate over rice. Drizzle the sauce over the chicken serve.

Notes:

  • Rinse 100 g (heaping 1/2 cup) of rice in cold water until it runs clear. Add to the Instant Pot. Add 100 g (about 1/2 cup) of cold water or broth to the Instant Pot, add salt and 15 g (1 tbsp) melted butter, and stir well. Secure the pressure cooker lid and turn the pressure knob to the sealing setting. Use the Pressure cook setting on high for 3 minutes, then allow the steam to release naturally (about 10 minutes). Open by pressing the knob to release any extra steam to allow the lid to easily come off. Remove from the IP and set it aside.
  • Adding the sun-dried tomatoes for the initial cook allows the tomatoes to totally soften into the sauce.

Read Full Post »

I saw this Nigella Lawson recipe on my friend Mimi’s socials and in reading Nigella Lawson’s description of it made me want to try it. I was able to source the Aleppo pepper flakes at my favourite spice store in Kensington Market, Carlos’ House of Spice. I called it Turk-ish because I altered the recipe somewhat but you can click on the original here.

Creamy and tangy against the rich Aleppo butter sauce.

The Aleppo pepper flakes are not burning hot, there is mild heat but even I can take it so it’s pretty mild. It has a lovely fruity taste that comes through in the nutty brown butter. The tangy yogurt is beautifully mellowed by the brown butter sauce. It’s a lovely dish that is totally guest-worthy.

Turk-ish Eggs

Please click here for the original recipe

Serves 2

Ingredients:

  • 200 mL Plain Greek yogurt
  • 10 g roasted garlic purée
  • 2-4 g Sea salt flakes or kosher salt
  • 30 g unsalted butter
  • 15 mL extra virgin olive oil
  • 2-5 g Aleppo pepper/Turkish red pepper flakes
  • 2 large eggs, cold
  • 10 mL lemon juice, divided
  • 1/2 avocado, mashed with a fork
  • Toasted bread

Directions:

  1. Whisk the yogurt and roasted garlic in a bowl over a bain-marie and gently warm the yogurt, set aside.
  2. Warm two bistro bowls.
  3. Melt the butter and gently cook until the milk solids turn golden brown, remove from the heat and stir in the olive oil, Aleppo pepper flakes, and a pinch of salt. Set aside.
  4. Gently bring a low-sided pan, filled with water to a light boil and turn it down so there are no visible bubbles. Meanwhile, crack each egg into a fine-mesh sieve and allow the loose whites to drain away, slide into a ramekin. Add 5 mL lemon juice into each ramekin with the drained egg. Gently lower each egg into the simmering water and cook until desired consistency (we love runny yolks 3-5 minutes).
  5. To serve, divide the yogurt into the two bowls evenly spoon the mashed avocado into the centre. Place a poached egg on top and drizzle with the Aleppo butter sauce. Serve with lots of toast.

Notes:

  • The addition of avocado is not authentic in this recipe, I had a half that needed using. It was a beautiful creamy texture against the yogurt.
  • If you think two slices of toast will do, make two more, you’ll need it to soak up the yogurt-butter-egg sauce!

Read Full Post »

I’m always on the lookout for low-carb options, not that I don’t love my carbs, they are just not as kind to me as alternatives, so I like to balance our intake with some low-carb options. I created this recipe when I had purchased too many zucchini’s and I thought it would make a nice alternative to the potato rösti that we are used to, I was wrong, it was significantly better than I expected. There is only cheese in this, no other binder! Other recipes use egg but it made a frittata-like pancake instead of rösti, which should be crispy on the outside, soft on the inside. This recipe is definitely a keeper! 

Zucchini Rösti

A KitchenInspirations Original Recipe

Makes 2 dinner portions or 4 appetizer portions

Ingredients:

  • 250 g zucchini, coarsely grated
  • 50 g Parmigiana, finely grated
  • 50 g Gruyère, coarsely grated
  • 2 g salt, divided
  • Pepper to taste

Directions:

  1. Place the grated zucchini into a bowl and toss with 2 grams of salt, allow to sit for about 30 minutes.
  2. Strain the zucchini and salt mixture and squeeze out as much water as you can. Taste for seasoning and add a little more salt if necessary, keeping in mind that some cheeses are saltier than others.
  3. Toss the strained zucchini with the cheeses and add pepper to taste.
  4. Heat a seasoned cast iron pan or non-stick frying pan to medium heat, then lower to medium-low.
  5. Add about half or a quarter of the zucchini mix to the pan and press down into a pancake about 1 cm tall. Cook until the edges are golden, gently loosen the cheese all around and beneath the patty, it may have stuck a little on the pan and flip repeat for the other side. 
  6. Serve hot as a base for fish, steak, chicken or even a poached egg.

Cheesy delicious goodness in every bite.

Notes:

  • Other cheese that would work: low moisture Mozzarella, Appenzeller, Cheddar etc. I would avoid feta, cream cheese, brie, etc.
  • There is no need for oil or butter, the cheese will render and the oils will help fry the Rösti.
  • If you don’t have time to wait for the salt to squeeze out all of the moisture from the zucchini, you may use it as is, just note that the inside will be much softer than if you had removed most of the moisture.
  • If you don’t have a seasoned cast iron pan or a non-stick pan, add a piece of parchment to the pan before adding the zucchini mixture, this will allow the cheese to caramelize and release from the pan easily.
  • I served Serrano ham wrapped cod with a dollop of Greek yogurt.

Read Full Post »

These are super quick and easy to make. They don’t keep well, particularly if your house is a bit humid so plan to bake them just before you want to eat them or if they get a bit soggy, just pop them into the oven to dry them out a bit.

Deliciously crunchy and cheesy crisps.

Cheese Crisps

A KitchenInspirations Original Recipe

Makes about 12-15 crisps

Ingredients:

  • 400 g old cheddar cheese, grated

Directions:

  1. Pre-heat the oven to 400° F. Line a rimmed baking sheet with parchment paper or a silicone matt.
  2. Spread the cheese out on the matt as thinly as possible so that the grated pieces are interlaced.
  3. Bake for 4-6 minutes or until the cheese has entirely rendered and is starting to become golden but not burned.
  4. Carefully remove from the oven and pull the parchment onto a cutting board. With a pizza cutter, cut into wedges. Allow to cool completely. Serve immediately.

Notes:

  • I use a rimmed baking sheet because the oils from the cheese may slide onto the oven and burn.
  • Parchment may burn so a silicon matt is preferred.


Read Full Post »

I have wanted a Tamagoyaki pan for the longest time. There are several cheap and cheerful ones on the market but they are all non-stick and to be honest, I just don’t care for the non-stick coating. This past Christmas, JT got me a cast iron Tamagoyaki pan and I love it! Tamagoyaki is described as a sweet yet savoury rolled omelette and it is ever-so moreish! I’ve made quite a few since the day I received this lovely gift and they have all been well received. I used Nami’s recipe over at Just One Cookbook and it’s a keeper. I generally make them for hors d’œuvres but you can easily make a lunch out of them. For Hors D’œuvres, estimate 2-3 pieces per person or about one half of a roll.

Tamagoyaki (Japanese rolled omelette)

Makes one rolled omelette about 5 cm in diameter and 20 cm long (or the width of your pan).

Ingredients:

  • 3 large eggs
  • 30 mL neutral flavor oil (vegetable, canola, etc)
  • 45 mL dashi
  • 5 mL soy sauce
  • 1 tsp sugar (optional)
  • 5 mL mirin
  • slice of cheese

Directions:

  1. Combine the eggs, dashi, sugar (if using) soy sauce and mirin and whisk well.
  2. Bring the Tamagoyaki pan to medium heat. Brush the entire surface with oil. Pour about 30 mLs of the egg mixture into the pan and tilt to spread the egg mixture evenly. Lay a single slice of cheese onto the omelette allow it to melt.
  3. Using a heat resistant spatula, begin rolling the thin layer of egg starting from the sloped end of the Tamagoyaki pan and move it back to the sloped end. Brush the entire Tamagoyaki surface with oil again and repeat pouring and rolling until all of the egg mixture has been used.
  4. Roll the Tamagoyaki in a parchment-line bamboo or plastic sushi mat and hold with elastics for about 5 minutes. Slice into six even slices. Serve warm.

Notes:

  • Nami has a great video to show how to accomplish this task; it’s not difficult at all and it doesn’t take long to become quite expert at achieving the perfect Tamagoyaki!
  • Nami adds about 2 teaspoons of sugar to her recipe but I reduced it to one, then one time, I totally forgot and didn’t miss it. The mirin is sweet enough.
  • To get the cool texture, roll the Tamagoyaki in a bamboo or plastic sushi mat and allow to sit for 5 minutes. I line my bamboo sushi mat with parchment to protect it.
  • Serve with finely shredded daikon radish seasoned with a little rice vinegar.

Read Full Post »

A similar, unbelievably moreish dish was the first course that Dave (Fine Dining at Home) served us at his beautiful home in Manchester. It was creamy, full of flavour, and so delicious that my mouth is watering as I think of his dish. You can see his version here.

I really didn’t have a high-brow enough opportunity to serve this dish before our reno started, so I made a version that I used as a dip for a more casual starter. This was the basis of my recipe. Dave generously gifted me with several truffle-y food items and one was a beautiful bottle of truffled olive oil. I used his olive oil for the dip. If you are not a fan of truffle flavour, simply use a good quality olive oil instead.

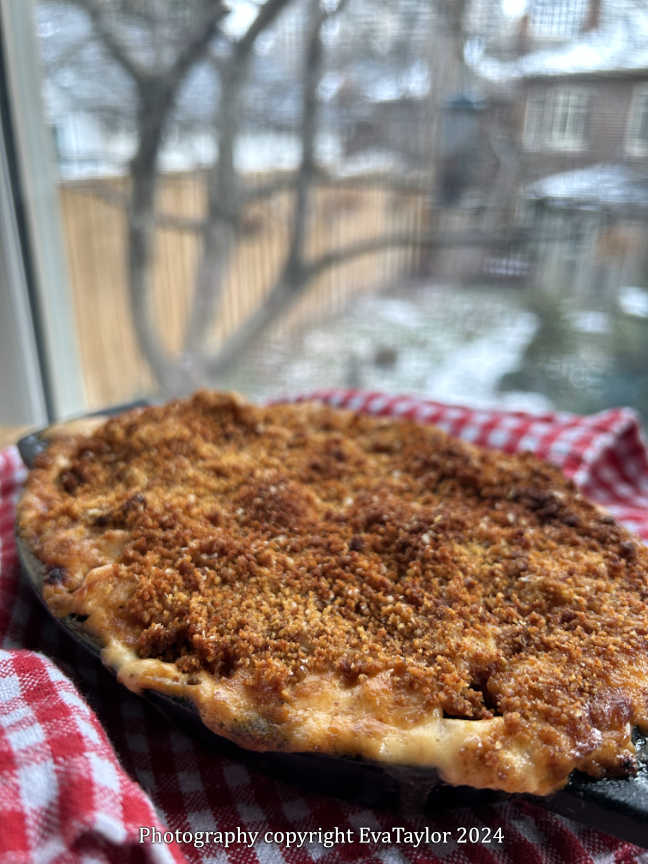
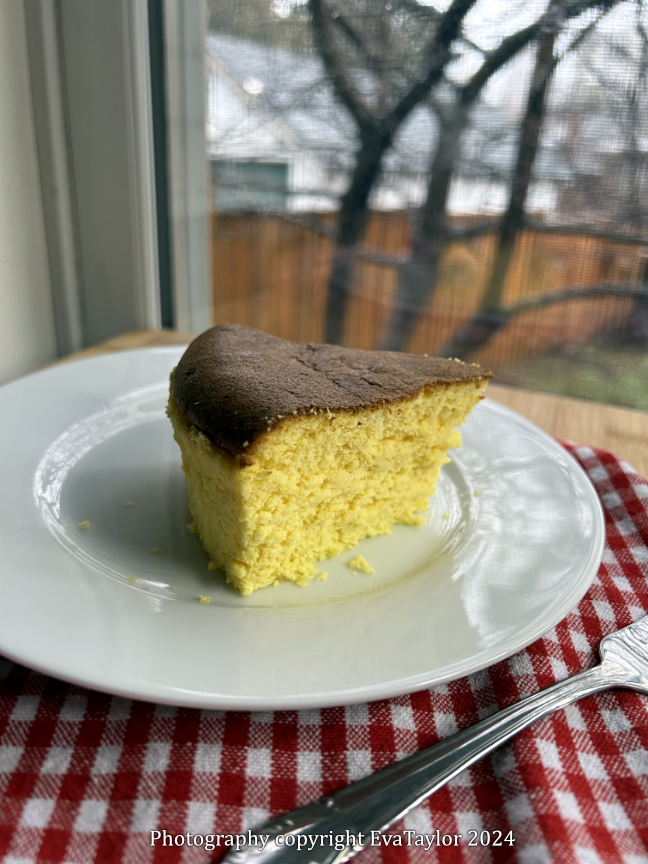
Deliciously light and dreamy.

Truffled Parmesan Mousse

Makes about 125 mL mousse

Ingredients:

  • 20 g unsalted butter
  • 25 g sweet onion, finely minced
  • 30 mL cognac
  • 125 mL whipping cream
  • 125  g parmesan rinds
  • pinch of rosemary
  • 15 mL white truffle olive oil
  • sea salt to taste

Directions:

  1. Melt the butter in a small saucepan and sweat the onion until translucent. Add the cognac and cook until it has almost evaporated.
  2. To the onion, add the whipping cream, parmesan rinds and rosemary and bring to a slow simmer. Simmer for about 30 minutes stirring often.
  3. Taste and season with salt.
  4. Strain to remove the rinds, onions and rosemary. Allow the liquid to cool to room temperature and then refrigerate for 30 minutes or overnight.
  5. Add the white truffle olive oil and mix well. Whip with a hand mixer until it is somewhere between soft and stiff peaks. Refrigerate until needed.


Notes:

  • This is a very rich dish, so if you serve this as individual appetizers, I would choose smaller glass vessels. Garnish as Dave did with a demiglace and steamed asparagus spears with a parmesan tuile.

Read Full Post »

We’ve been making a huge effort to cut out carbs from our diet. The one thing I have been really missing is bread. Not that we ate that much bread, but a sandwich every now and again is a nice treat so I have been trying to make carb-free bread and failing miserably until I came across a delicious keto bun at a local craft sale. It had a similar texture and crumb as flour bread, but made with almond flour and coconut flour. At the time, the lady would not share her recipe, so I made every recipe on the net trying to find her secret, sadly failing. Fast forward to a couple of weeks ago and I get an email from her out of the blue sharing her recipe! How serendipitous! It turned out that it was one of the first recipes I tried but obviously did not get it right so I had abandoned it. She had made a few adjustments to the original recipe and shared them with me, and I made further adjustments to make it my own. It’s easier to make than normal yeasted bread (really is more like quick-bread as you make it) and the result is quite surprising. It’s a lot more expensive to make this bread than it is to make regular flour bread (the recipe below is about $12 for 8 buns).

Those nooks and crannies are like real bread!

Most flour-free buns are usually eggy and super dense because of the nut flours used and the lack of leavening, but these buns are light and have a great spongy texture and fantastic crumb, they never disappoint, time after time! The original recipe had great texture but lacked the flavour that yeast imparts in real bread so I experimented and came up with this augmentation. If you don’t feel like messing with the yeast, just omit it along with the granules of sugar but keep the water the same. You will not be disappointed.

How many would you like?

The Worlds BEST Low Carb Buns

Makes 6 medium-sized buns. For the original recipe, please click here.

Ingredients:

  • 100 g Almond flour (see notes)
  • 30 g Coconut Flour
  • 33 g Psyllium Husk Powder, finely ground (see notes)
  • 10 g Baking Powder
  • 6 g Sea salt
  • 10 g Cider vinegar
  • 100 g Egg whites
  • 8 g Instant Yeast
  • a few granules of sugar
  • 280 g Boiling Water, divided
  • 1 egg yolk
  • Sesame Seeds

Directions:

  1. Preheat oven to 350° F (170° C). Prep a baking sheet by lining with parchment paper. Prepare a hand mixer ready to use and a timer.
  2. Combine the yeast with the sugar in 57 g of warm water (about 43° C or 100° F) and allow to froth.
  3. To a large bowl, add almond flour, coconut flour, psyllium husk powder, baking powder and salt and whisk to combine.
  4. Make a well in the centre of the dry ingredients and add the cider vinegar, egg whites and proofed yeast and mix on low speed, for a short time, to combine evenly.
  5. Boil the remaining water (223 g). Pour the water all at once into the almond flour mixture and blend for 30 seconds to make a smooth dough (do not over blend).
  6. Divide the dough into 6 equal portions (mine worked out to be about 94 g) and roll into a smooth ball with generously wet hands. Slightly flatten each roll so it’s more like the shape of an English muffin (don’t worry, they rise enormously).
  7. Brush each bun with the egg yolk and top with sesame seeds and bake for about 50 minutes or until the internal temperature is 95° C (200° F).
  8. Cool completely on a wire rack, before slicing. Serve toasted or plain with your favourite topping.

Notes:

  • I use Anthony’s Premium Blanched Almond Flour which may be purchased on Amazon. I have heard that the Costco Kirkland brand also works, but I haven’t tried it. I will eventually try the finely ground almond flour Bulk Barn sells because Anthony’s is pretty expensive.
  • I use psyllium husk powder from Bulk Barn, but I grind it to a super fine consistency with my coffee/spice grinder.
  • 100 g of egg whites is more or less 3 large egg whites.
  • Many of these recipes call for room temperature ingredients, I have done both room temperature and right out of the refrigerator and they resulted in more or less the same buns.
  • When working with the dough, generously wet hands are imperative for a nice smooth crust.
  • Mixing the boiling water into the batter with a hand mixer for 30 seconds ensures that it’s entirely blended but not overworked.
  • For Christmas, I received a bottle of Trader Joe’s Everything But the Bagel seasoning and it is awesome on these buns!

Nutritional Breakdown:

Per 1 piece

  • Calories: 178
  • Net Carbs: 5 g
  • Protein: 7 g
  • Fat: 12 g

Read Full Post »