Feeds:
Posts
Comments

Archive for the ‘Bread’ Category

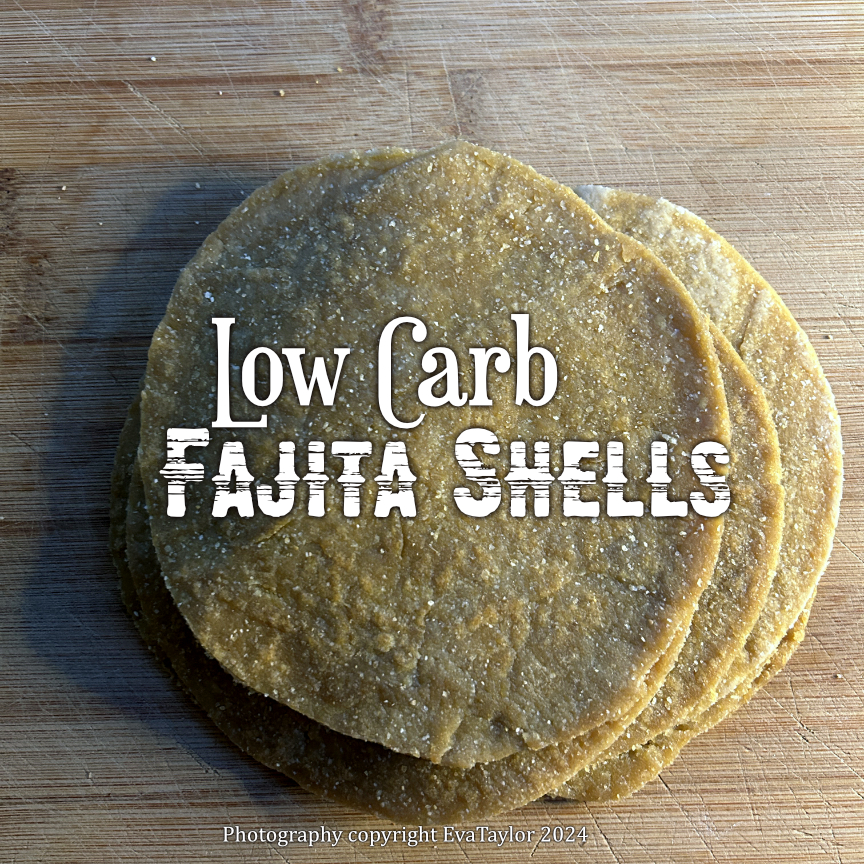
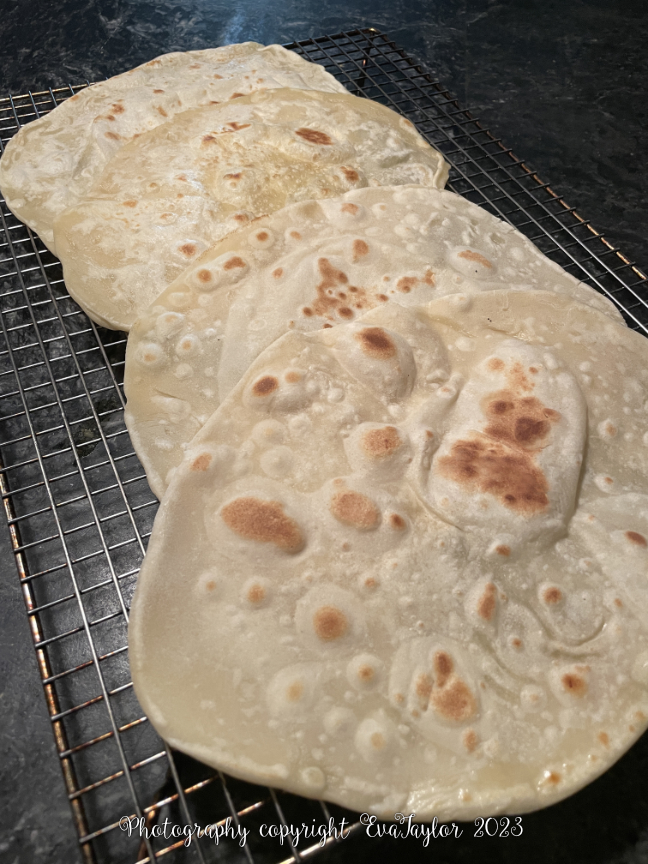
Stop right now! You have to make this if you are doing a low-carb diet. This is literally the best low-carb flatbread I have ever created. They’re fabulously chewy and springy. They fold perfectly to cradle the kebab and resist cracking or breaking apart. 

This flatbread has been a long and difficult journey. JT has had to endure some pretty bad flat bread samples. True, it’s pretty easy to make a flatbread that is thin and holds your kebab, but the difficulty lies in the chewy and springy texture that the original flatbread has. It’s mandatory for flatbread. This recipe has it all. 

Low-Carb Flatbread

A Kitcheninspirations original recipe

Makes 8 flatbreads

Ingredients:

  • 320 g water, about 60° F
  • 2 g sugar
  • 8 g instant yeast
  • 80  g Lupin Flour
  • 170 g Vital Wheat Gluten
  • 38 g Oat Fibre
  • 30 g psyllium husk, ground
  • 48 g Erythritol
  • 8 g Sea Salt
  • 20 g baking powder

Directions:

  1. Combine the water, and yeast and set aside to allow the yeast to bloom.
  2. In the large bowl of your stand mixer, combine the erythritol with vital wheat gluten, oat fibre, lupin flour, psyllium husk, and salt, and stir to mix well.
  3. Once the yeast has become foamy, add it to the flour mixture and knead with the cookie dough paddle until the dough has come together. Allow to rest for 5 minutes. Sprinkle the salt and baking powder onto the dough and continue to knead for 15 minutes. Form the dough into a ball with your hands and cover to rest for 30 minutes.
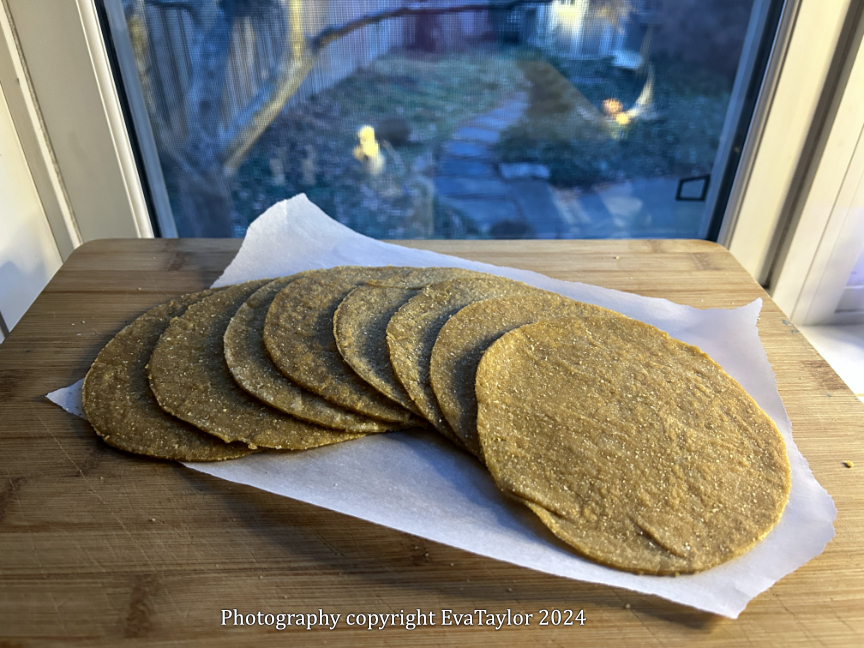
  4. Once rested, divide the dough into 8 equal portions, roll out each piece into an oval, rub with EVOO and allow to rest for 10 minutes covered with a clean kitchen towel.
  5. Preheat a cast iron pan on medium heat. Cook each flatbread until golden, flip and continue until all have been cooked. Freeze in an airtight container/bag. Defrost in the refrigerator and reheat, slightly dampened with water on each side.

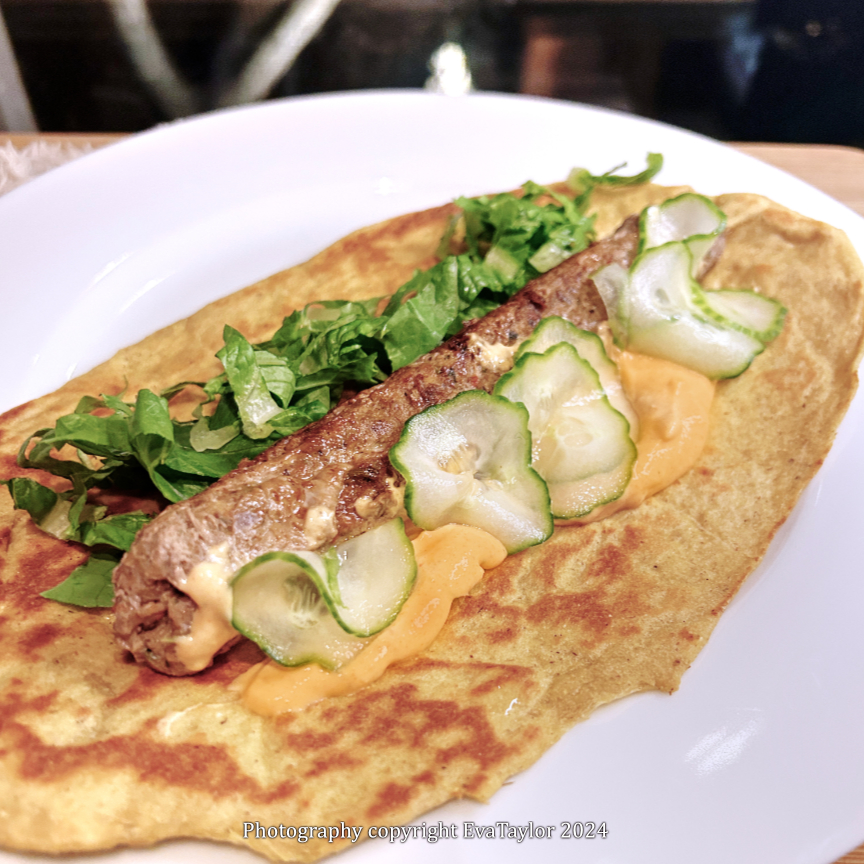
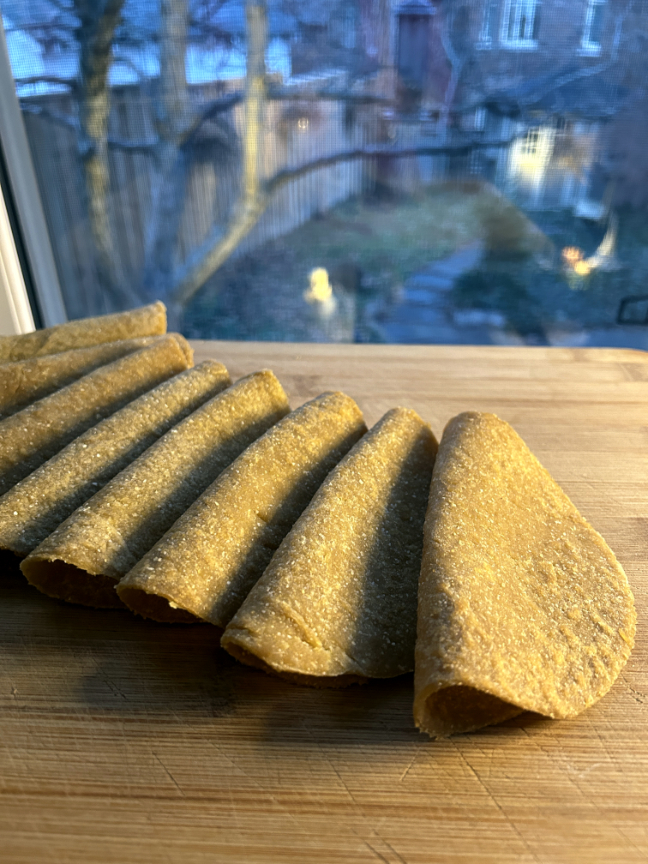
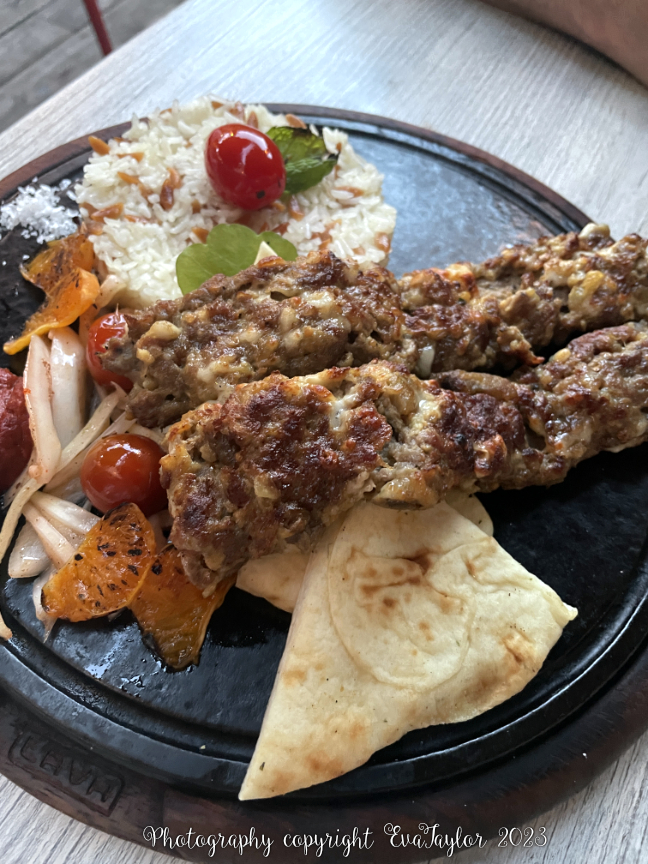
The kebabs fit into this flatbread perfectly.


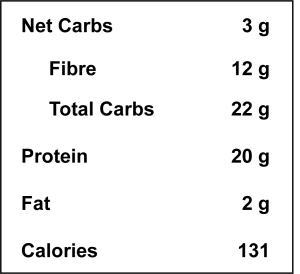
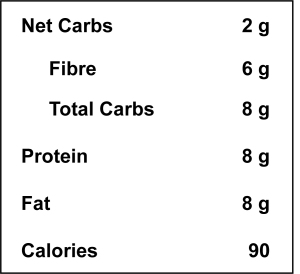
Low-Carb Flat Bread Nutrition for 1 flatbread

Notes:

  1. The sugar gets completely eaten by the yeast, although I have included it in the nutitional ingredients.

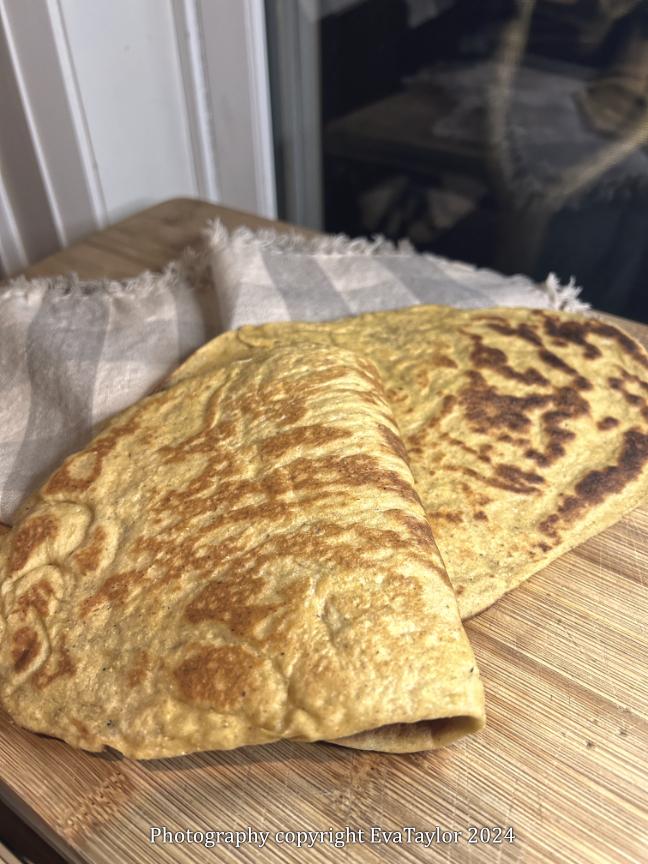
They are quite foldable, they won’t crack.
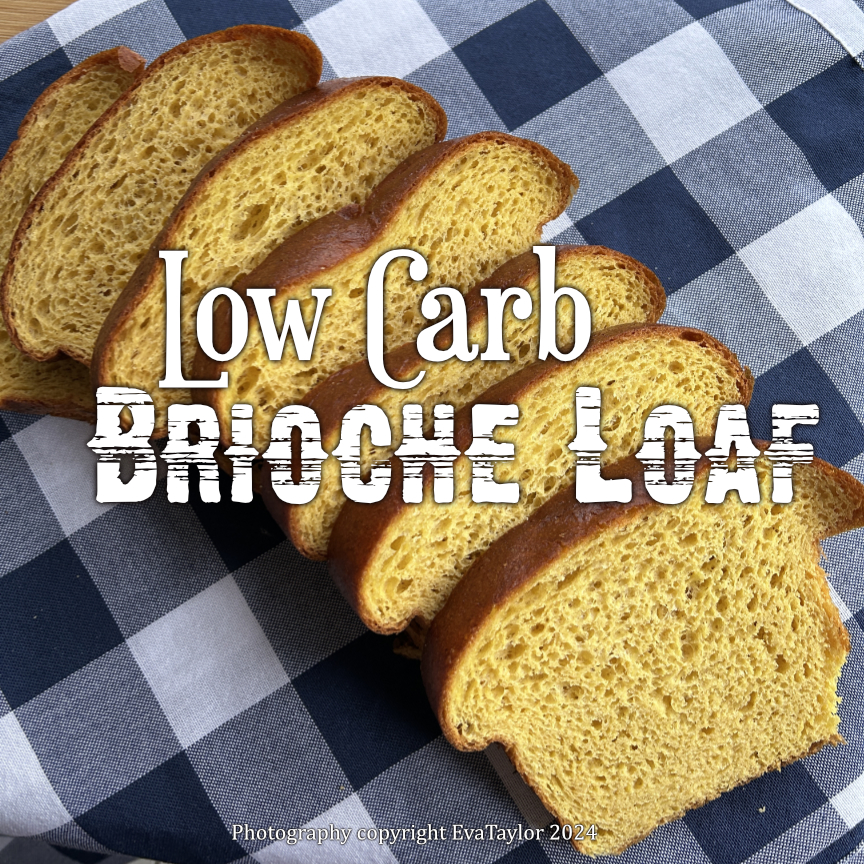
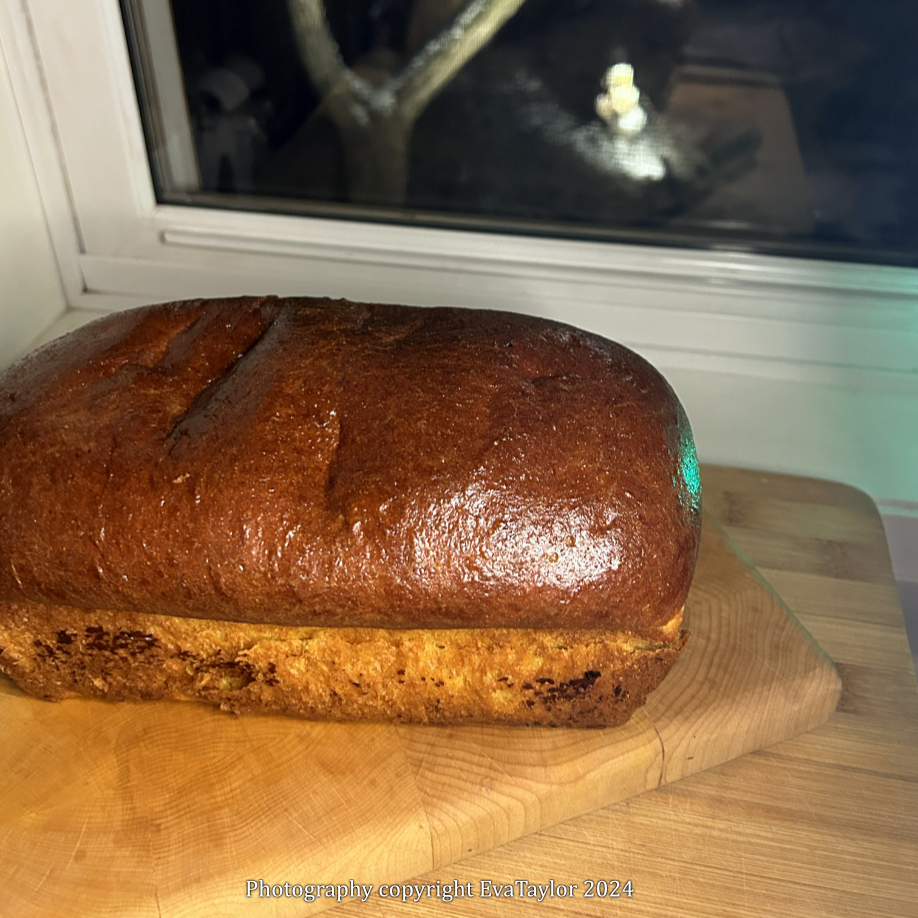
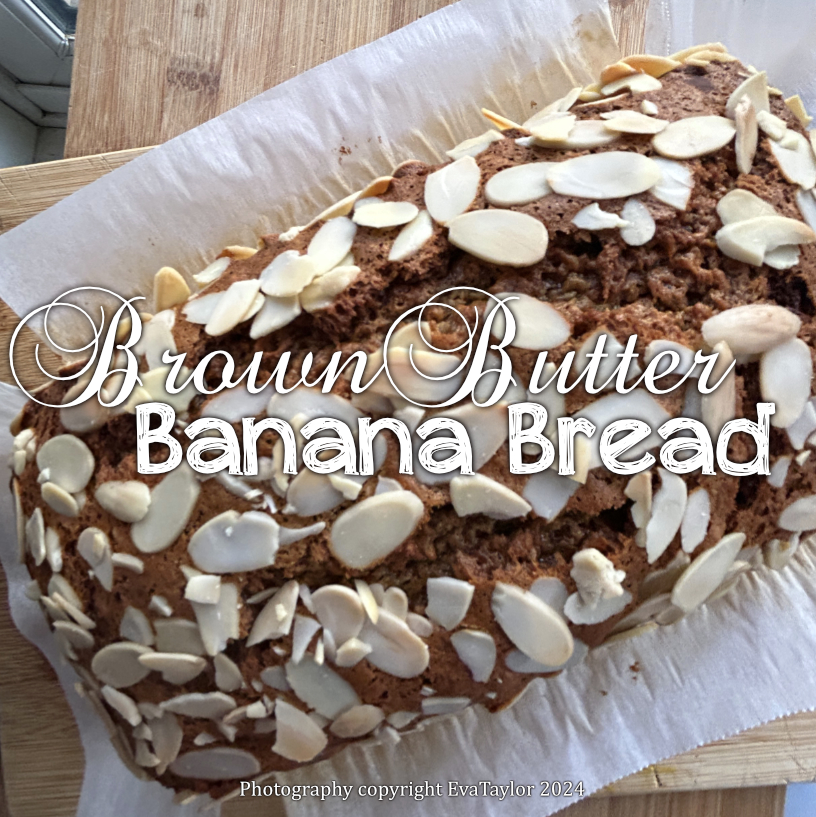
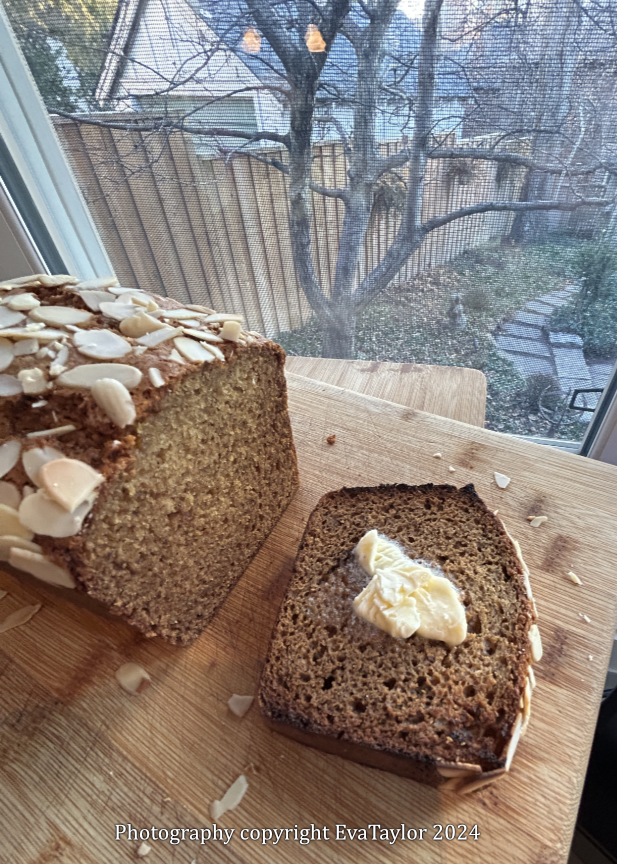
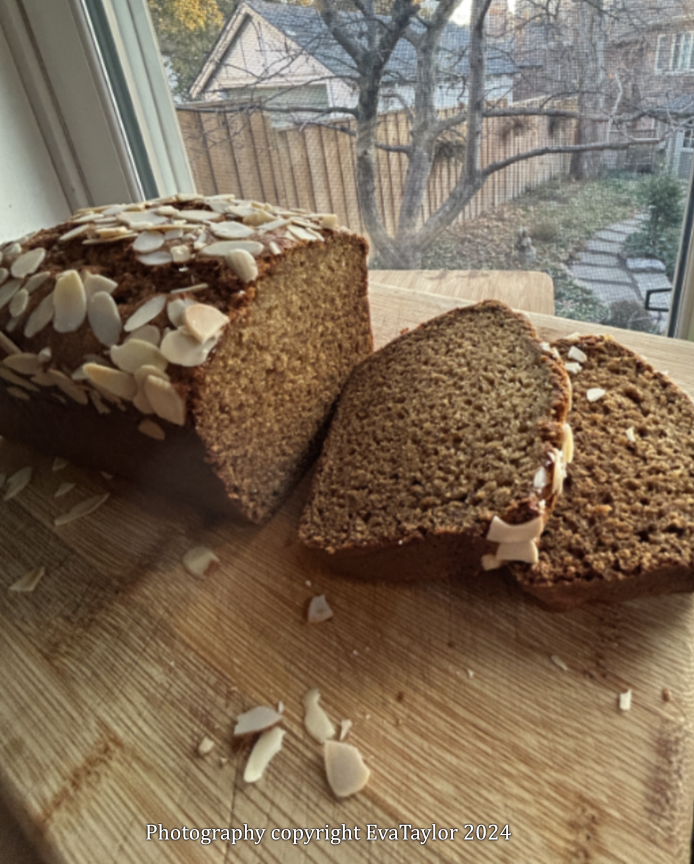
Read Full Post »

Well, our journey through low-carb cuisine has not been bad, as attested by JT. I have been slowly converting many of our high-carb recipes to low-carb versions and it’s been rather fun. My latest creation is low-carb gnocchi. It has the chewiness and puffiness that regular flour gnocchi have without the carb-load. JT was impressed.

They are predicting our first really heavy snowstorm for this afternoon. Glad I made a few of these tasty morsels.

Low-Carb Cauliflour, Vital Wheat Gluten and Lupin Flour Gnocchi

A Kitcheninspirations original recipe

This recipe makes 246 g of gnocchi dough about 50 gnocchi. 2-4 servings

Ingredients:

  • 115 g cauliflower mash (see notes)
  • 57.5 g Vital Wheat Gluten
  • 57.5 Lupin Flour
  • 10 g Parmesan Cheese, finely grated
  • 11.5 g egg, beaten

To fry:

  • 15 mL EVOO or butter

Directions:

  1. Combine everything in the large bowl of your food processor and process with the plastic blade until entirely combined (the dough may not come together in a ball, but you will be able to form it into a ball).
  2. Pour it onto a lightly floured* surface and form it into a ball. then divide it into smaller pieces to make into a roll. I weighed mine so they would be more accurate but you don’t have to.
  3. Cook into boiling water immediately or freeze on a baking tray so they don’t touch each other.
  4. Cooking is similar to regular gnocchi, they sink when they are raw and float when they are done.
  5. If you’ve cooked them and wish to crisp them, heat a frying pan with the EVOO or butter and fry each gnocchi so they are golden and crisp on each side.

Low-Carb Gnocchi in a creamy Gorgonzola Sauce sprinkled with lemon zest to freshen it up.

This is a dinner I made with Cod wrapped in Serrano Ham and had gnocchi as a side.

Notes:

  • Cauliflower mash is simply roasted cauliflower with a little EVOO until soft and blended with an immersion blender until smooth, I usually have leftovers so I made gnocchi with the leftovers.
  • *Use Lupin flour or vital wheat gluten to dust your work surface.
  • These are best fresh but do freeze well. I detected a slight change in texture while JT did not.

Read Full Post »

Low-Carb Brioche Bread

When we do a low-carb diet, one of the major food groups we miss incredibly is bread. Not that we eat a lot of bread (our favourite German seedy loaf lasts over a month) but we do like the occasional grilled cheese, and specialty sandwich. This low-carb brioche hits the spot; it’s slightly chewy and very springy and it’s fantastic toasted. The Lupin flour gives it a slightly nutty flavour and because there’s a lot of fibre, it has a little bit of a whole wheat texture that’s not too much, perfectly acceptable for the lower carb count. I usually bake it in a regular loaf pan but I can hardly wait to make this recipe in a Pullman pan (on my birthday list😉)

Low-Carb Brioche Bread

Makes 1 Brioche Loaf

Ingredients:

  • 236 g water, about 60° F
  • 7 g instant yeast
  • 2 large eggs, room temperature
  • 80 g Lupin Flour
  • 170 g Vital Wheat Gluten
  • 38 g Oat Fibre
  • 48 g Erythritol
  • 3.5 g Sea Salt
  • 30 g unsalted butter, room temperature
  • 1 egg, beaten for egg wash

Directions:

  1. Combine the water, and yeast and set aside to allow the yeast to bloom.
  2. In the large bowl of your stand mixer, combine the erythritol with vital wheat gluten, oat fibre, lupin flour and salt and stir to mix well.
  3. Once the yeast has become foamy, add the eggs and whisk to combine. Add it to the flour mixture with the butter and knead to combine, then continue kneading for 5 minutes. Form the dough into a ball with your hands and cover to rest for 30 minutes.
  4. Once rested, form the dough into a loaf and set inside a buttered loaf pan. Allow to rise covered with a clean cloth for 30-60 minutes or until doubled in bulk.
  5. Preheat the oven 350° F, convection or fan setting. Once the dough has risen, brush with the egg washbake and bake for 20-30 minutes or until the internal temperature is 200° F.

Ah, the gorgeous winter darkness.


This is a grilled cheese I made with the bread. It was delicious.


Read Full Post »

I can honestly tell you that Vital Wheat Gluten and Lupin Flour are a game changer for my low-carb world. The vital wheat gluten gives you the strength and resilience of bread flour and the lupin flour gives a bit of a whole wheat feel and because it’s so high in fibre, it really lowers the net carbs in recipes. I have made a few breads using almond flour but I just find they are far too heavy for my taste. The Lupin Flour and Vital Wheat Gluten are the perfect combo. I found this recipe on Reddit here but I kept losing it, so I thought I would do a post about it so that I can find it whenever I need fajita shells.

These have the same chewy texture that white flour tortillas have with some extra fiber for texture. JT loved them.

Low-Carb Fajita Shells

Makes 8 small fajita shells (about 12 cm (5 inch) diameter

Ingredients:

  • 77 g vital wheat gluten,
  • 32 g oat fibre
  • 25 g lupin flour
  • 15 g coconut flour
  • 2.5 g baking powder
  • 4 g salt
  • 0.75 g xanthan gum
  • 105 g warm water (more or less as needed)
  • 32 g olive oil
  • Olive oil cooking spray

Directions:

  1. Add all of the ingredients to the large bowl of your stand mixer, and using the scraper paddle, start mixing everything together.  Continue with the scraper paddle for 5 minutes. The dough should be slightly sticky but should come away cleanly from the bowl.
  2. Collect the dough and press it into a nice round ball. Wrap the dough in plastic wrap and allow it to rest for 20 minutes at room temperature. This allows the vital gluten to relax so it is easier to roll.
  3. Divide the dough into 4 equal portions and roll out to about 3 mm thick or as close as you can. Run each piece through the pasta maker attachment from “0” to “4” so each ball becomes one long piece of dough. Cut the dough into 12 cm circles using a cookie cutter or a knife and a plate as your form. Re-use the leftover dough to make more fajita shells.
  4. Heat a cast iron pan to medium heat (325° F), spray the pan with the cooking spray, and cook each side for about one minute or less, until they are golden brown. Use immediately or freeze layered with parchment paper. Defrost in the refrigerator, overnight and gently heat to use.

Notes:

  • I like using the scraper paddle for lupin flour dough, it seems to work the dough better than the hook.
  • To cut perfect circles for my fajita shells, I use an inverted bowl that has the same diameter as my pasta maker has width, that way I get the largest fajita shell I can from the sheets.
  • This dough is very difficult to roll out, that is why I used my pasta maker attachment but it does leach oil when it is pressed through so have a cloth under the pasta maker to control the mess.

Read Full Post »

Merry Christmas! Hope everyone is having a wonderful time.

We spent the month of November in Arizona again, although it might be our last time this time. But we say that. Every. Single. Time. We see our dear American friends and get in a load of sunshine to boot! The weather was beautiful and slightly warmer than last year, we had high twenties (celsius) most of the daytime and mid-teens at night. Perfect for leaving the windows open for sleeping.

We did a lot of walking and hiking. The National Parks have beautiful trails that are reasonably priced and there are many free parks too. We fed our resident bunny and, inadvertently fed our resident Road Runner (sadly a bird crashed into our window and he died on impact and fortunately, the road runner didn’t mind and he scooped up the bird and took him home for a late Thanksgiving Dinner!) At least, we did not have to deal with it.

This slideshow requires JavaScript.

Of course, we always have a party at the end to use up pantry ingredients and this time was no different, I came up with this recipe to use flour, oil, cheese, and herbs.

The oven was gas and baked rather unevenly.

Pantry Clean Out Crackers

A Kitcheninspirations original recipe

This recipe makes about 2 sheets approximately 25 cm x 38 cm (10 x 15 inches)

Ingredients:

  • 125 g “00” flour
  • 40 g cheese, finely grated
  • 30 mL olive oil
  • 80 mL water
  • Pinch of salt
  • 3-6 g dried herbs

Directions:

  1. Mix all of the ingredients together in a bowl.
  2. Transfer to a clean surface and knead by hand until the dough becomes smooth and everything is evenly distributed. Rest the dough for 20 minutes.
  3. Preheat the oven to 350° F. Line a baking sheet with parchment.
  4. Roll out the dough into a thin sheet about the size of the baking sheet. Transfer to the parchment lined baking sheet and bake for xx minutes or until lightly browned and crisp.
  5. Cool and break into chip-sized fragments. Serve with your favourite dip.

Read Full Post »

About a week before Christmas, I had lunch with my cousin. I met her at her gorgeous new home in Don Mills. I noticed she had several overly ripe bananas sitting on her counter so I asked what she planned to do with them. She said she already had 16 in her freezer so I suggested I would take three off her hands, and thus was born the following brown butter banana bread!

Nutty brown butter with the flavour and moistness of bananas!

Brown Butter Banana Bread

A Kitcheninspirations original recipe

Makes 1 loaf about 21 cm x 11 cm (~8.25 inches x 4.5 inches)

Ingredients:

  • 113 g butter, melted, browned and cooled
  • 150 g light brown sugar
  • 100 g granulated sugar
  • 2 large eggs, combined and whisked
  • 330 g ripe bananas, mashed
  • 280 g all purpose flour
  • 7 g baking soda
  • 3 g salt
  • 2 g nutmeg
  • Sliced almonds for sprinkling on top

          Directions:

          1. Preheat the oven to 325° F on the convection setting. Prepare a small loaf pan by lining it with parchment paper.
          2. In the small bowl of your food processor, combine the melted, brown butter with the two sugars, process well.
          3. Combine the whisked eggs with the mashed bananas and add it to the sugar mixture while processing. Set aside.
          4. Whisk together the flour, baking soda, salt and nutmeg. Pour the banana mixture into the flour mixture and whisk until no longer lumpy.
          5. Pour it into the prepared pan and sprinkle with the almonds. Bake for 70-80 minutes or until a wooden tester comes out clean. Cool in the pan on a towel on the counter.

          These are amazing toasted.

          Read Full Post »

          Part of our escape from winter next year will be going on a luxury cruise from Istanbul, Turkey to Athens, Greece. I wanted to become more familiar with Turkish food so we went to a Turkish restaurant and loved it so much I thought we should experiment with a few recipes. I made these lavash to go with Adana Kabobs (lamb and beef kabobs) for dinner one night. To say it was a success is an understatement, they were extremely delicious! I can’t wait to try this in Turkey next year.

          Soft and chewy, the perfect texture to wrap a brightly-flavoured Turkish kabab.

          Unleavened Turkish Lavash

          Makes 6 small-medium-sized lavash

          This is a combination of several recipes.

          Ingredients:

          • 250 g bread flour
          • 4 g salt
          • 100 g water
          • 15 g Greek yogurt
          • 30 g EVOO

          Directions:

          1. Combine flour and salt in the bowl of your stand mixer and give it a quick mix.
          2. In another container, mix the water, yogurt, and oil. While the mixer is on low speed, pour in the wet yogurt mixture. Mix until the yogurt mixture is entirely combined with the flour. Allow to sit for 10 minutes.
          3. After 10 minutes, continue to knead the dough until no longer sticky and is firm and smooth (10-15 minutes).
          4. Allow the dough to rest for 30 minutes.
          5. Divide the dough into six equal portions and roll out each one to an oval or a circle adding flour as necessary, if sticky.
          6. Using a cast iron frying pan, on medium-high heat, cook each lavash until golden but not hard.
          7. Serve warm with kabobs.

          These are the kababs we had in a restaurant. I am hoping to get the appropriate kabab skewers in Turkey next year!

          Notes:

          • Freeze lavash in a ziplock bag with most of the air removed. To reheat, slightly dampened from frozen on a medium-heat frying pan.

          Read Full Post »

          Potato Buns

          As 2023 summer came to an end, we started to panic to get in as many BBQs as possible. And what better to BBQ than burgers? A few years ago, we discovered a wonderfully light burger bun made with sweet potatoes! Because who wants a heavy, overpowering bun? I had some leftover mashed potatoes from a recent dinner party and decided to turn them into these buns! What a great way to utilize leftovers! These were plain, ordinary whipped potatoes made with cream and butter and a little salt. They turned into the most delicious, light buns.

          You’ll notice that there is also one egg and some melted butter in this recipe that allows the dough to have that gorgeous brioche structure without being heavy. These are truly the best burger buns.

          These are sturdy enough to hold a burger with condiments but they are light enough that they won’t fill you up too much

          Potato Buns

          Makes  about 11 buns, about 65 g each (unbaked) with a tiny “tester” bun left over.

          Ingredients:

          • 454 g leftover mashed potatoes
          • 65 g all-purpose flour
          • 125 mL warm water
          • 8 g quick-rising yeast
          • 1 large egg
          • 45 mL unsalted butter, melted
          • 10 mL honey
          • 7 g sea salt, finely ground
          • 240 g bread flour, or slightly more as needed

          Egg wash:

          • 1 egg
          • 1 teaspoon water
          • 1 tablespoon sesame seeds, or to taste

          Directions:

          1. In a bowl, mix together the 65 g flour, warm water, and yeast, and whisk until smooth.
          2. When the yeast mixture is frothy (about 10 minutes), pour it into the large bowl of your stand mixer fitted with the creamer paddle. Add the mashed potato, the egg, the melted butter, the honey, and the sea salt and mix until well incorporated. Switch the paddle to the kneading hook and add the 240 g of flour in batches. Knead 4 minutes. If the dough is still too sticky, add an additional 30 g of flour and knead until the dough is soft, elastic, and shiny (about 8 minutes). Stop and allow the dough to rest for 15 minutes. Once rested, knead again with the dough hook for an additional 10 minutes.
          3. Turn the dough out into a well-oiled bowl and cover. Allow to rise until double in size (about 1 hour).
          4. After it has doubled in size, turn the dough out onto a lightly floured surface and stretch and fold a few times. Measure out the dough into 10 equal portions (about 65 g each, with one tiny “tester”) and roll each portion into a smooth ball. Allow to rest for 45 minutes or until doubled in size on a covered baking sheet.
          5. Preheat your oven to 400° F. Combine the remaining egg, and water and mix well. Brush each bun with the egg mixture and sprinkle each with sesame seeds.
          6. Bake in a hot oven until golden or when the internal temperature is 200° F (about 15 minutes).

          Would you like one or two burgers?

          Read Full Post »

          We had dear friends come up from America to stay with us as a layover to help mitigate a long, long travel day and I needed a quick and easy breakfast that we could grab before heading out for a busy day and these did the trick. They freeze well which makes them perfect for a quick grab-and-go snack, just pop them into a microwave and zap them until defrosted and slightly warmed.

          They freeze well and defrost quickly in the microwave.

          Apple Cranberry Bran Muffins

          A Kitcheninspirations Original Recipe. Makes 12 good-sized muffins.

          Ingredients:

          • 150 mL 2% milk
          • 400 g peeled and shredded apple (about 3 apples)
          • 100 g bran buds
          • 50 g cranberries, roughly chopped and rehydrated in hot water for 10 minutes
          • 3 eggs, beaten
          • 70 g plain Greek yogurt
          • 300 g All Purpose Flour
          • 60 g brown sugar
          • 15 g baking powder
          • 2 g salt
          • 5 g cinnamon
          • 60 g walnuts, chopped

          Directions:

          1. Preheat oven to 375° F (190° C). Brush the muffin cups generously with the Secret Release Formula (see notes). Set aside.
          2. Combine the milk, eggs and yogurt and mix well. Layer this liquid with the bran buds, apple and cranberries making sure bran buds are covered in the wet ingredients, and set aside for 20 minutes. In another bowl, combine flour, brown sugar, baking powder, salt, cinnamon and walnuts and set aside.
          3. Stir the bran bud mixture well after 20 minutes of soaking. Fold the flour mixture into the bran bud mixture until just combined.
          4. Divide batter into 12 muffin cups evenly and bake for 20-25 minutes or until toothpick comes clean.

          The apples give them the moisture that oil normally does in muffin recipes.

          Notes:

          • Secret Release Formula: 3 mL unflavoured oil, 15 g vegetable shortening and 15 g flour. Mix well and brush baking tin generously.
          • I will try a recipe without the brown sugar next time but it only adds 19 calories and 5 g carb


          Read Full Post »

          High Hydration Rosemary Focaccia

          Makes one 23-cm x 33-cm pan focaccia

          Ingredients:

          • 50 g EVOO, plus more for drizzling
          • 10 g fresh rosemary leaves
          • 10 g sea salt
          • 400 g All Purpose, unbleached flour
          • 5 g quick-rise yeast
          • 320 g of very cold water
          • 5 g fresh rosemary leaves, plus more for garnish

          Directions:

          1. To make the rosemary-infused olive oil, simmer the rosemary and olive oil for 15 minutes. Set aside to cool completely. Strain well. Top up with more olive oil to make 50 g. Then add the salt and stir well.
          2. Combine the yeast and the flour in the large bowl for your stand mixer and fit with the dough paddle. Run the paddle for 15 seconds to combine.
          3. Keeping the paddle on the lowest setting, slowly spray about two-thirds of the water into the flour, allowing the flour to absorb the water as you spray. Allow it to rest for 10 minutes and then add the strained olive oil and salt mixture very slowly into the dough and mix well. I switched my dough paddle to the scrapper paddle to make sure the oil incorporated well. You will need to speed up the paddle speed to fully incorporate the oil. Then finish spraying the remaining water to make a soft, sticky dough.
          4. Turn off the machine and allow it to rest for another 5 minutes. Then continue to knead the dough on high speed until it pulls away from the bowl and the bowl is pretty clean. The dough is still sticky and soft but not as sticky as before.
          5. Add a little more water to the spray bottle and spray a little water on the counter, the spatula, and your hands and flip the dough out onto the board. Using your hands stretch the dough for a few minutes to develop the gluten. Allow the dough to rest for a couple of minutes. When rested, work the dough again by pulling, stretching and folding it adding the 5 g of fresh rosemary as you stretch and fold. When the dough becomes smooth and the rosemary is well incorporated, make it into a smooth ball, cover it with a little more olive oil and allow it to rest covered with a bowl for 1-2 hours.
          6. When ready to bake your focaccia, stretch the ball into a lightly oiled 23-cm x 33-cm pan right to the edges. If it bounces back, allow the dough to rest a little while longer. Once stretched, make indentations with your fingers or with the end of a wooden spoon and decorate with additional rosemary leaves. Drizzle more olive oil on top, sprinkle with flaked Malden sea salt, and allow to rest while you preheat your oven to 400° F.
          7. Bake the focaccia for 20 minutes or until an instant-read thermometer reads 200° F in its thickest part.

          Drizzle some EVOO on top just before putting it into the oven.

          Deliciously spongey focaccia.

          Notes:

          • This is an adaptation of the High Hydration Pizza Dough posted earlier this month.
          • You may use any other fresh herb for this focaccia.


          Read Full Post »

          We have been searching for a good, homemade pizza dough recipe for a very long time. Since 2017, to be precise when JT and I attended a Neapolitan-Style Pizza-making class at The Carleton Loblaws with Chef Rocco Agostino. You may remember Chef Rocco from the time I cooked his meatball recipe  from the cookbook, Toronto Cooks for one of the local morning shows; Chef Rocco was also is the proprietor and chef of three of Toronto’s best authentic Neapolitan Pizza places, Pizza Libretto! It takes quite the effort to become an authentic Neapolitan pizza maker, in fact, Chef Rocco had to attend a week-long course in California to do so! We were very fortunate to have Chef Rocco’s experience in the cooking class. Did you know you had to be certified to call your pizza authentic Neapolitan? Ontario only has 4 such certifications and two of them are Chef Rocco’s restaurants! The US has a mere 98 certified Neapolitan Pizza restaurants, Canada has 13 but the entire world only has 711! This website will tell you if your favourite pizza joint is certified. Is your favourite pizza place on the list? How picky are you about the pizza you eat?

          Unfortunately, the ovens at the cooking class did not get to the high temperatures that authentic Neapolitan pizza needs so the pies were disappointing but it gave me a quest. It has taken me a very long time to find the best dough recipe because our Big Green Egg doesn’t quite reach the 1,000° F (538° C) that the professional wood-fired pizza ovens do, ours only gets as hot as 600-700° F so we need a bit longer to bake. The professional pizza ovens take about 2-3 minutes to bake whereas ours will take 7-10 minutes. Still not bad in the big picture but our dough needs to be a bit more hydration so it doesn’t dry out as it bakes.

          I found this dough quite by accident while looking at my Facebook feed or shall I say it found me! The author claims the dough is 80% hydration. I found that my flour did not absorb the water as readily as the author’s flour so I adapted the recipe by putting ALL of the water into a spray bottle and spraying it into the flour and yeast while the mixer is on low using the dough paddle. The water takes a few minutes to absorb so patience is required so that you are not left with a sloppy, messy, dough.

          High Hydration Pizza Dough

          Makes two balls of dough which result in two 30 cm or 12″ pizza

          For the original recipe, please click here.

          Ingredients:

          • 400 g “00” flour
          • 5 g quick-rise yeast
          • 320 g of very cold water
          • 10 g sea salt

          Directions:

          1. Combine the yeast and the flour in the large bowl of your stand mixer and fit with the cookie dough paddle. Run the paddle for 30 seconds to combine.
          2. Keeping the motor on the lowest setting, spray about two-thirds of the water into the flour, allowing the flour to absorb the water as you spray. Then allow it to rest for two minutes and add the salt and mix in well.
          3. Increase the paddle speed and finish spraying the remaining water to make a soft, sticky dough (around 5:13 on the video).
          4. Turn off the machine and allow to rest again for about 5 minutes. Then continue to knead the dough on high speed until it pulls away from the bowl. It is still sticky and soft but not as sticky as before.
          5. Add a little more water to the spray bottle and spray a lttle water on the board, the spatula and your hands and pour the dough on the board (5:48 on the video). Using your hands stretch the dough for a few minutes to develop the gluten (5:44 on the video). Allow the dough to rest for a couple of minutes so that it will become smooth. When rested, work the dough again by pulling and stretching it. When the dough becomes smooth, allow it to rest covered with a bowl for 30 minutes.
          6. Divide the dough into two and pull and stretch a few more times and roll it into a ball. Cover and allow to rest for 3-6 hours.
          7. When ready to make your pies, stretch each ball into 30 cm rounds a little thicker at the edges. If it bounces back, allow the dough to rest a little while longer. Once stretched, put your toppings on. Remember that Neapolitan pizza is better with fewer toppings, particularly the sauce or base (less is more).

          Notes:

          • I use a parchment round beneath my pies because I’ve never quite gotten the hang of sliding them off the peel.
          • Pay close attention to the structure of the dough in the original video, it will show you the feel you are looking for.
          • The recipe author used a cookie dough paddle and not the hook, I found it to help incorporate the water into the dough better than the hook would have.

          Read Full Post »

          • 105 g finely ground corn meal (not corn flour)

          • 100 g all-purpose flour

          • 50 g granulated sugar

          • 3 g baking powder

          • 2 g salt

          • 1 egg, lightly beaten

          • 175 mL milk

          • 2 finely sliced green onions (~30 g)

          • 50 g finely diced jalapeños or hot chili peppers (or more if you really like it hot!)

          Directions

          1. Preheat oven to 400° F with your cast iron pan until the pan is smoking.

          Read Full Post »

          We’ve struggled with a low-carb diet, particularly the lack of bread. I’ve tried the almond buns, made with almond flour but they tend to be so heavy, that I find it difficult to eat it like normal bread, you become way too full. The discovery of Lupin flour paired with Vital Wheat Gluten has changed my life. We have gone back to enjoying the foods we’ve loved before low-carb and feeling rather good about it. These dinner rolls are 2 g net carb compared to a regular brioche bun which is 34 g of carbs! 

          As I’ve mentioned in previous posts, Lupin Flour is related to soy and peanuts so if you have an allergy to either or both, you will probably be allergic to Lupin Flour.

          Lupin Flour Low Carb Brioche Buns

          Makes 8 hamburger-size buns or 12 slightly smaller buns or one 24 cm loaf

          Ingredients:

          • 236 g Filtered water, slightly warm
          • 4 g Sugar
          • 6 g Instant yeast
          • 3 Large Eggs, room temperature, divided
          • 55 g Butter, softened
          • 45 g Erythritol
          • 80 g Lupin flour
          • 38 g Oat fiber
          • 170 g Vital wheat gluten
          • 3.5 g Sea salt


          • 10 g Sesame seeds, toasted

          Directions:

          1. Combine the water, sugar, and yeast in a container and allow it to bloom for about 10 minutes.
          2. In a bowl, combine two eggs and Erythritol and whisk until the Erythritol has dissolved.
          3. In the large bowl of your stand mixer, whisk the lupin flour, vital wheat gluten, oat flour and sea salt together. Combine the egg/Erythritol with the bloomed yeast and mix well, add it to the flour mixture and using the scraper paddle, mix until well combined.
          4. Once incorporated, add the softened butter to the dough and mix with the scraper paddle until the butter has been fully incorporated into the dough.
          5. Rest the dough for ten minutes. Then knead it with the kneader hook in the stand mixer for 10-15 minutes to activate the gluten (do not skip this step, it is vital).
          6. Prepare a baking sheet by lining it with parchment paper. Weigh the dough and divide the total weight by 8. Cut the dough into eight equal weights and roll into a nice bun and place it onto the baking sheet. These buns will roughly double in size. Repeat with the remainder of the dough. Cover the buns with a clean cloth and allow them to proof until doubled in size (mine took just shy of 2 hours).
          7. Preheat the oven to 375° F. Whisk the remaining egg and brush the bun tops generously with it, Sprinkle with sesame seeds, if using. Bake the buns for 18-20 minutes or until the internal temperature is 200° F and the tops are golden. Cool completely on a wire rack.

          Notes:

          • If the tops of the buns get too dark while baking, cover lightly with foil to complete baking.
          • The sugar with the yeast gets totally eaten by the yeast, not affecting the carbohydrates.
          • You can make this into a loaf and get about 18 slices of bread, lowering the carb count even more!
          • This dough is easily divided in half, you’ll just need 2 eggs instead of 3!
          • If you’re like me, you’ll want to eliminate the Erythritol or reduce it and I suggest that you don’t. Lupin flour does not taste like wheat flour so the sweetness helps bridge the gap a bit. I have made this recipe without the Erythritol and although the texture is not affected, the taste is and it’s definitely better with the Erythritol.

          Just look at that crumb, it really has a lot of spring to it.

          Just look at that gorgeous crust.

          Read Full Post »

          These little biscuits are quick and easy to make and take less than 15 minutes to bake up so you can make them last minute or bake a bunch and freeze them.

          They have a nice crumbly texture.

          Low-Carb Cheddar Biscuits

          This recipe is per buscuit

          Ingredients:

          • 30 g lupin flour
          • 15 g vital wheat gluten
          • 1 egg, whisked
          • 2.5 g baking powder
          • 15 g Erythritol
          • 35 g sharp cheddar cheese, grated, Divided
          • Salt

          Directions:

          1. Preheat the oven to 350° F. Butter a small ramekin (I used my Le Creuset mini Dutch oven).
          2. Whisk all of the ingredients together until homogenized and smooth. Pour into the ramekin and top with about 10 g of cheddar and bake for 10-15 minutes or until a toothpick inserted comes out clean.
          3. Pop the muffin out of the ramekin and cut it in half horizontally, and toast until golden.

          Directions:

          • I found the Le Creuset mini Dutch oven a little too large because the biscuits are very filling so next time I’ll choose a smaller pan

          Read Full Post »

          Hearty winter soups are a staple when we are in Canada and I just love to serve soups with scones. This recipe is an old favourite but I had run out of fresh onions so I used my handy dehydrated onion flakes in this easy recipe. There is just a little time to rehydrate the onions and you’re good to go. 

          Cheddar Cheese and Onion Kefir Scones

          A KitchenInspirations Original Recipe

          Makes 9 large scones

          Ingredients:

          • 260 g AP flour
          • 15 g sugar
          • 15 g baking powder
          • 5 g salt
          • 2 g cream of tartar
          • 56 g cold butter
          • 155 g frozen, shredded sharp cheddar cheese, plus more for topping
          • 200 mL buttermilk, 15 mL for brushing the tops
          • 30 g dehydrated onion flakes

          Directions:

          1. Preheat oven to 450° F. Line a baking sheet with parchment paper.
          2. Rehydrate the onions flakes in the buttermilk for 5 minutes.
          3. Combine the dry ingredients in the large bowl of your food processor with the blades and mix well.
          4. Cut in the cold butter until it resembles a coarse meal. Replace the blade with the plastic dough blade.
          5. Add the buttermilk onion mixture and cheese to the flour and pulse to combine into a ball (cheese should still be frozen or at the very least, extremely cold).
          6. If it’s really warm in your kitchen, it’s best to refrigerate the dough for 30 minutes. With very little flour to prevent sticking, roll the dough into 1 cm thickness and use your favourite cookie cutter to cut even shapes (I used 5 cm squares with scalloped edges.
          7. Place each shape onto the prepared baking sheet about a centimetre apart and brush the tops with the extra buttermilk. Add a pinch of frozen shredded cheese to each top, if desired.
          8. Bake for 10 to 15 minutes or until lightly golden.

          So flakey and delicious!

          Notes:

          • I buy my cooking/baking cheese on sale in 400 g logs and I grate them into zip-lock bags and freeze them. If you break up the shreds as they freeze, they won’t stick together in clumps.
          • The frozen cheese will help make these flakey.

          These are the grey days that just kill me.

          Read Full Post »

          We had some dear friends over for brunch in early October and I thought I’d make a “Biggy Breakfast” for us. You know the ones on the menu at your local greasy spoon: eggs, bacon, sausage, home fries, and pancakes! Overboard, indeed, but it’s the type of breakfast that is easy to share. These pancakes are my favourite, so light and fluffy. I normally make them with buttermilk but I had some unflavoured Keffir on hand so I thought, why not?

          Super fluffy Keffir Pancakes

          Ingredients:

          • 200 g all-purpose flour
          • 200 mL keffir
          • 100 mL water or milk
          • 2 large eggs, separated
          • 30 g sugar
          • 10 mL vanilla extract
          • 7 g baking powder
          • 7 g baking soda
          • pinch of cream of tartar
          • pinch salt
          • 1 nonstick cooking spray

          Directions:

          1. In a bowl sift flour, baking powder, baking soda and salt together. Set aside.
          2. Beat egg white and cream of tartar on high speed until stiff peaks form but not dry.
          3. Beat the egg yolk with the sugar until creamy, pale yellow and thick; add the keffir and the water or milk, vanilla and beat until smooth on a slow speed.
          4. Fold in the sifted flour mixture gently (don’t over mix as we don’t want the glutens activated).
          5. Fold the beaten egg white into the batter and mix together gently, do not over-mix!
          6. Spray your skillet with non-stick spray set to medium temperature (or 350°F).
          7. Drop about 125 mL of batter on the pan for each pancake and spread out to about 15-20 cm and cook until you see a few bubbles on the surface of the batter. Flip the pancakes and cook for about another 1-2 minutes and the pancake is not too wobbly when you touch the centre with your fingers. Repeat until you have used up all the batter.
          8. Keep warm until you have made all the pancakes and serve warm with butter, maple syrup, fruit, and whipped cream!

          They are the fluffiest!

          Read Full Post »

          The weather is still lovely in the big smoke so we continue entertaining on our back deck. I’m always looking for something a little different and these scallion pancakes truly fit the bill. I first saw the recipe on Mi Mi’s blog and was immediately intrigued. Mi Mi’s pancakes were more of a thicker bread and she admitted she had forgotten a final step, so I scoured the internet for “my” recipe. The one I posted below is a compilation of several recipes that I read through. The pancake itself is a very thin, but super flavourful. Crispy, chewy and full of flavour a veritable trifecta! We just had them with a simple dipping sauce and they were absolutely delicious. Thank you Mi Mi for drawing my attention to this tasty treat.

          These pancakes are crispy and chewy at the same time.

          “Chinese Scallion” Pancakes

          Makes 4 pancakes appetizer-sized portions. Don’t kid yourself, you’ll probable eat two.

          Ingredients:

          • 150 g AP flour
          • 3 g salt
          • 93 g cold water
          • 6 scallions, green parts only, finely sliced
          • Olive oil (enough to coat the pan about 0.5 cm deep)

          Directions:

          1. Combine the flour and the salt and mix well. Add the water into the centre of the flour mixture and mix until the water is absorbed into the flour. Knead the dough with your hands for 5-7 minutes or until quite elastic. Cover lightly with olive oil and allow to rest for 45 minutes to 1 hour.
          2. Divide the dough into two or four equal portions and roll out using the KitchenAid pasta maker to the finest thickness. The dough will be very sticky so flour or grease your surface to prevent sticking.
          3. Sprinkle the sliced scallions (and whatever additional spice, if using) over the rectangle and roll up from the long side. Then, roll the log onto itself like a scroll. Roll the scroll out to about 20 cm diameter. Cook on medium heat until the pancake is golden on both sides. Cut into wedges to serve. Serve with the dipping sauce below.

          Dipping sauce ingredients:

          • 15 mL soy sauce
          • 15 mL sesame oil
          • 15 mL Mirin or sweet rice wine
          • Sesame seeds

          Dipping sauce directions:

          1. Mix all of the ingredients together and serve with the cooked pancakes.

          Notes:

          • You can add a variety of other spices like Chinese Five-spice, Aleppo pepper flakes, or mint to name a few.
          • I used cold water because from what I’ve read, it will make the dough chewy, hot or boiling water will apparently make it crispier. I wanted chewy and figured it would be crispy from the pan frying and I was correct.
          • The green part of the scallion is apparently softer so it won’t poke through the dough but mine did anyway and it did not alter the flavour or texture.
          • Use either flour or oil to prevent this very sticky dough from sticking everywhere. I used flour on this one.
          • To make the rolled dough more manageable, you can roll two smaller lengths and stick them together because when they scroll and you roll them out, you won’t notice a difference.
          • Most recipes call to roll the dough into a circle at first but I wanted a very thin dough so I just made sheets using my KitchenAid pasta machine and it worked out fantastic.

          Read Full Post »

          Just before we left for Spain, I bought the cutest little loaf pan with the sharpest corners but I didn’t have enough time to try it so it was tucked away until our return at the end of May. I was paging through the Early Summer Edition of the LCBO Food and Drink Magazine when I spotted this cornbread recipe. And the ingredients were easy to half plus I had just enough of the ingredients (like only one egg)!

          I have visions of baking nutty crackers in this adorable pan.

          Bacon and onions, are a delicious combination.

          Bacon and Green Onion Cornbread

          Makes about 1 small loaf pan, 75 cm x 180 cm (3 inches x 7 inches)

          Ingredients:

          • 105 g yellow cornmeal
          • 86 g All-purpose flour
          • 25 g granulated sugar
          • 10 mL baking powder
          • 2 mL baking soda
          • 5 mL fine sea salt
          • 1 large egg, at room temperature
          • 188 mL kefir, well shaken
          • 57 g unsalted butter, melted and cooled
          • 15 g green onions, finely chopped
          • 30 g bacon, well cooked and coarsely chopped

          Directions:

          1. Preheat the oven to 350° F. Line a small loaf pan with parchment paper.
          2. Combine the cornmeal, flour, sugar, baking powder and soda, and sea salt and whisk well.
          3. In another bowl, combine the egg, kefir, melted butter, green onions, and bacon, and whisk to combine.
          4. Pour the wet into the dry ingredients and mix just to combine, it will be lumpy.
          5. Tap the pan to remove air bubbles and smooth out the top.
          6. Bake for 30-35 minutes or until a toothpick inserted into the centre comes out clean.

          Read Full Post »

          Upon our return from Spain, I was missing being there so I made the Almond Tuiles of Sevilla (Tejas Dulces de Sevilla). They are delicious but it got me thinking about a savoury version. We had brought home some wonderful cheese called Old Amsterdam and I thought it would make a delicious snack. They are light and airy and crisp. They are strong enough for dip, but tasty on their own. I love how rustic they look from just breaking them apart.

          Savoury Cheese Tuiles

          Makes about 20 cm x 30 cm sheet

          Ingredients:

          • 1 egg
          • 30 g cheese (I used Old Amsterdam)
          • 1 g salt
          • 1 g smoked paprika 
          • 50 g flour 

          Directions:

          1. Beat the egg until it reaches the ribbon stage (about 5 minutes), add the salt and smoked paprika and mix well, then fold in the flour.
          2. Spread evenly on a parchment-lined baking sheet and sprinkle the cheese over it evenly and bake at 275° F for 20-35 minutes or until it has totally dried out and developed a golden colour.
          3. Cool entirely and once cool break into shards. Serve at room temperature.


          Read Full Post »

          I started watching a couple of Ontario-guys on Facebook who try to prove or disprove crazy videos they’ve seen, mostly of food but it can also be science or cleaning and such. They are a bit goofy which makes them rather charming. Their girlfriends sometimes participate in these videos by making some outlandish foods. This traditional Georgian potato, cheese-stuffed bread was one of them. The recipe looked so good, I had to do a little research and make my own. Their recipe was fairly straight forward using baking powder and not yeast bread dough, but the research showed that most of the recipes were yeasted bread dough, so I went with that. Then I found a few that had egg in them which gives the bread a wonderful, chewy texture. Then there is the mashed potato and cheese stuffed inside. OMG, so good. My recipe makes four disks about 20 cm in diametre, cut into eight portions.  The bread freezes very well. Remember to put it in the refrigerator overnight to defrost, then allow it to come to room temperature before baking. We went through two bad boys in two days and I sent a third one to a friend who was going to visit her parents! The fourth one is under lock and key in the freezer, I’m saving it for a special time! I will definitely be making this recipe again and again!

          Soft, pillowy mashed potatoes with the sharp feta (or goat) and gooey mozzarella makes for a more-ish starter.

          Kartofdzhyn (Cheese and Potato Stuffed Bread)

          A KitchenInspirations Original Recipe

          Makes 4 stuffed bread rounds about 20 cm (8 inches) each

          Ingredients for the Bread:

          • 6 g quick yeast
          • 8 g granulated sugar
          • 120 mL milk, at 110F
          • 460 g bread flour
          • 6 g salt
          • 215 g Greek yogurt
          • 2 eggs
          • Olive oil for the dough
          • 1 egg yolk, whisked for brushing the dough

          Directions:

          1. Combine the yeast and sugar with the warm milk and allow to proof for about 10 minutes (it should froth up)
          2. Add the flour and salt to the large bowl of your stand mixer and mix lightly.
          3. Combine the Greek yogurt and eggs with the frothy yeast mixture and whisk until well combined.
          4. Add the liquid ingredients to the flour and knead with the hook for 10 minutes. Stop the mixer and allow the dough to rest for 10 minutes, then resume kneading for about 15 minutes or until the dough comes away from the bowl.
          5. Coat the dough with olive oil and allow to proof for about an hour, or until doubled in size.

          Ingredients for the Filling:

          • 2 medium yellow potatoes (about 230 g), boiled
          • 30 g butter
          • 30 g roasted garlic purée
          • 2 scallions, finely chopped
          • 100 g feta cheese or goats cheese
          • 230 g mozzarella
          • 6 g salt

          Directions:

          1. Mash the potatoes with butter and roasted garlic, then beat with a whisk beater until light and fluffy. Fold in the scallions, cheeses, and salt and set aside.

          Directions for the dough disks:

          1. Divide the dough into four equal portions. Roll out each portion evenly to a circle about 25 cm (10 inches). 
          2. Add one-quarter of the filling to the centre of each round and pull in each side to form a sealed disk. Flip over and gently roll out to about 20 cm (8 inches). Pierce the top of the disk with a fork and brush each dough disk with the egg yolk. Set aside while the oven preheats or freeze on a baking sheet and transfer to a plastic zip-lock bag for the future.
          3. If baking at the moment, put a cast-iron pan into the oven and pre-heat the oven to 400° F. Add one disk to the hot pan and bake for 20 minutes. When done, remove from the heat and brush the top with some more olive oil. Serve warm.


          Read Full Post »

          I usually make my scones and biscuits with my handy food processor but I have to say that these freehand scones will change my method for all my future scones. For what I save in time, I sacrifice in cleaning time and most importantly, texture of the scones. These scones are light, airy, filled with gooey cheese and scallions. They are great with soup or a stew. Serve them warm with fresh butter.

          This post was created on a blistery, cold day in latter January. We just had received about 50 cm (20 inches) of snow in a period of 24 hours. We must have a VIP living on our street because the damn snowplow came down our street four times, depositing a heavy mess of snow at the end of the driveway. Honestly, the last two times were ridiculous, there was hardly any new snow on the road! This was one of the sunniest days we’ve had so far, the sun reflected in the new white snow and  I just had to take advantage with the photos.

          Freehand Kefir, Scallion, and Cheese Scones

          Original recipe from Jean Paré’s Company’s Coming Muffins and More cookbook

          Makes 8 large wedges

          Ingredients:

          • 240 g All-Purpose Flour
          • 16 g baking powder
          • pinch of salt
          • 4 scallions, roughly chopped
          • 150 g cheddar cheese, coarsely grated
          • 57 g cold butter, cut into small cubes
          • 1 egg
          • 100 mL kefir (and extra kefir for brushing tops)
          • Parmesan, finely grated for sprinkling on top

          Directions:

          1. Preheat oven to 425° F.
          2. Combine flour, baking powder, salt, with the butter and manually cut like you would pastry dough. When it is slightly smaller than pea-sized bits, add the shallots and cheese and mix.
          3. Combine the kefir and the egg and whisk until frothy. Pour into the dry ingredients and mix well. Turn dough out to a lightly floured surface and knead once or twice, just enough to pull it together. Roll out to a round shape and cut 8 wedges to make. Brush tops with kefir and sprinkle the parmesan on top.
          4. Bake for 15 minutes or until lightly golden. Serve warm with butter.

          Tender and delicate scone with lots of cheese and scallions.

          Read Full Post »

          I was finishing off making some spanakopita with store-bought phyllo pastry and had run out of the pastry with enough filling to make about 4 additional pieces (don’t you hate that?) so I decided to try my hand at a quick phyllo dough. It worked out extremely well so I thought I’d document the process. It’s getting dark so early these days, so you’ll need to excuse the horrible light in my photos.

          Quick Phyllo Pastry

          Makes about 4 sheets 15 cm x 30 cm (enough for 4 triangles)

          Ingredients:

          • 50 g all-purpose flour (10.5 ounces)
          • 15 mL olive oil
          • 2.5 mL red wine vinegar
          • 1.5 g salt
          • 25 -45 g water

          Directions:

          1. Mix all of the ingredients together until you get a uniform, soft dough that does not stick. Knead for a few minutes. Set aside, wrapped in plastic wrap at room temperature for 30 minutes.
          2. Divide into two equal balls and roll out, thin enough to see through. I used my KitchenAid pasta maker to the thinnest setting.
          3. Use in your favourite phyllo recipe.

          Read Full Post »

          French Baguette

          • 500 g AP flour
          • 4 tbsp Fleishmans’s Bread Booster
          • 10 g salt
          • 360 g warm water
          • 3 g yeast
          • 25 g honey
          • 2 tbsp each flour and rice flour

          Directions:

          1. Whisk together the flour, salt and bread booster.
          2. Dissolve the yeast and the honey in the water.
          3. Make a well in the flour and add all of the water mixture at once, stirring to combine into the flour.
          4. Cover and let rest 15 minutes.
          5. Over the next 1.5 hours, stretch and fold the dough 3 times, placing the seem down each time.
          6. Cover tightly with plastic wrap and refrigerate for 12-15 hours or until double in size. The next morning, remove from the fridge and allow to come to room temperature.
          7. Divide the dough into three equal portions. Roll each into a rectangle and roll up into a baguette shape, stretching to the desired length and placing the seam side down. Sprinkle a clean dish cloth with the flour and rice flour mixture and nestle the baguettes into three separate rows for 30 to 60 minutes.
          8. Meanwhile, preheat the oven to 500° F and add a pan filled with water and a rolled clean dish towel (helps distribute steam evenly). Add a baking stone. Once it reaches 500° F, reduce heat to 475° F.
          9. Cut slits into the baguettes and carefully lay them onto the baking stone and bake for 10-15 minutes or until golden. (Be very careful as the steam may be very hot).
          10. Cool completely and enjoy.

          Read Full Post »


          Jalopeño Jack Scones

          Makes 9 5 cm (2 inch) scones

          Ingredients:

          • 280 g AP flour
          • 50 g granulated sugar
          • 15 g baking powder
          • 6 g salt
          • 56 g cold butter, in cubes
          • 1 L egg
          • 120 mL buttermilk
          • 100 g grated sharp cheese (I used jalapeño Monterey Jack)
          • 5 mL milk
          • 10 g Parmesan cheese, finely grated

          Directions:

          1. Preheat the oven to 425° F.
          2. In the large bowl of your food processor, add the flour, sugar, baking powder, salt and butter and pulse to combine. 
          3. Whisk to combine the egg and buttermilk and slowly add it to the dry ingredients while running the processor. Change the blade to the plastic blade and add the cheese. Pulse to combine.
          4. On a lightly floured surface, roll out the scone dough to about 1 cm (1/2 inch) thick. Cut into even squares. Lay on a parchment-lined baking sheet, spaced out about 2 cm. Brush the tops with the milk and sprinkle a little Parmesan cheese on the top of each scone. Bake for 10-15 minutes or until golden. Serve warm.

          Read Full Post »


          Ingredients:

          • Butter to coat pan
          • 4 large eggs
          • 375 mL milk
          • 2 g sea salt
          • Pinch of nutmeg
          • 180 g sourdough bread cut into largish cubes
          • 1/2 apple, like gala, cored and sliced thinly
          • 100 g ham, cut into ribbons
          • 70+ g Gouda or Gruyère, divided

          Directions:

          1. Brush the melted butter along the bottom and sides of a 9” x 9” decorative baking dish.
          2. Whisk the eggs, milk, salt and nutmeg.
          3. Lay the bread evenly in the prepared baking dish, place the ham and apples evenly throughout, then sprinkle 70g of the cheese over it tucking it into the spaces.
          4. Pour the egg mixture over the bread, ham, apples and cheese evenly. Cover and refrigerate overnight.
          5. The next day, remove the prepared bread pudding from the refrigerator and allow to come to room temperature, about an hour.
          6. Preheat the oven to 350 F. Sprinkle the remaining cheese over the top and bake for 40-45 minutes or until set. All the bread pudding to sit for 10-15 minutes to fully set.
          7. Serve with yogurt and Dijon maple syrup.

          Ingredients

          Read Full Post »

          Not Your Ordinary White Bread

          This loaf came out of a craving for one of those hot chicken sandwiches smothered with brown gravy that you used to get at those Mom and Pop highway diners in the eighties and nineties. They used horrible white bread that disintegrated into gluey pulp under the gravy, but I wanted something sturdier and with flavour, this loaf hit the spot. It’ll make awesome grilled cheese too!

          The butter and egg add structure to the bread so that it doesn’t fall apart with the gravy.

          White Bread

          A KitchenInspirations Original Recipe

          Makes one load about 20 cm (8 inches) long

          Ingredients:

          • 150 mL warm milk
          • 6 g yeast
          • 30 g sugar
          • 1 large egg
          • 40 g unsalted butter
          • 390 g AP Flour
          • 7 g salt

          Directions:

          1. Combine the warm milk, yeast, and sugar in the large bowl of your stand mixer and allow the yeast to proof for about 5-8 minutes or until frothy.
          2. Using the beater attachment, beat in the egg. Add half of the flour and butter and beat until incorporated. Change to kneading hook and add the remaining flour and salt and knead for 8-10 minutes or until smooth. Cover and allow to rise in a warm area for 1.5 hours or until doubled in size.
          3. Butter the sides and bottom of a 20 cm loaf pan. Set aside.
          4. Turn the dough out to a lightly floured surface, punch down and roll out to a 20 cm x 30 cm rectangle. Brush off the excess flour from both sides of the dough. If the dough is not sticky, spray with a little water on both sides. Roll up the dough from the 30 cm side, pinching the ends closed. Lay it flat into the prepared pan and allow to rise again, covered in a warm place until doubled in size, about 2 hours.
          5. Preheat the oven to 350° F. Brush loaf top with a little milk. Bake loaf for 40-45 minutes or until the internal temperature is 200° F. Cool completely on a wire rack. Enjoy.

          An old fashioned hot chicken sandwich smothered with gravy. And that damn winter light is sneaking in.

          Read Full Post »

          I have been following fellow blogger, Lorraine Eliott over at Not-Quite-Nigella on Instagram and in August she posted a photo of the most beautiful bread knots I have ever seen. I knew the moment I saw them, I’d have to give them a go. They are not only beautiful, but they are also very tasty and quite easy to make so I’m sharing the recipe here so that I will remember to make them again.

          I made 12 knots but to be honest, they were a little too big so next time, I’ll make 14!

          Herbed Bread Knots

          Makes about 12 -14 bread knots. For the original recipe please click here.

          Ingredients:

          • 6 g instant dried yeast
          • 250 mL warm water (around 110° F)
          • 400 g flour
          • 6 g granulated garlic
          • 3 g Salt
          • 15 mL EVOO
          • 70 g unsalted butter, softened
          • 25 g roasted garlic purée
          • 100 g Parmesan cheese, grated
          • Variety of herbs to make up about 20 g, chopped or julienned
          • Eggwash to glaze

          Directions:

          1. Dissolve the yeast in the water, set aside. In the large bowl of your stand mixer, add the flour, garlic and salt and mix well.
          2. Add the yeasty water to the bowl with the flour mixture and knead for 2-3 minutes until it is roughly incorporated. Allow the dough to sit for 20 minutes. Then start the kneader up again and knead until a beautiful shiny dough is achieved (around 10 minutes). Grease the bowl and the dough with the EVOO and allow to proof in a draft-free location for 45 minutes or until doubled in size.
          3. Meanwhile, cream the butter, the roasted garlic, the Parmesan cheese and the herbs until well mixed.
          4. Once the dough has doubled in size, roll out to 35 cm x 50 cm. Spread the butter mixture all on the dough, right to the edge. Fold it length-wise into thirds (like you would making croissants) and lightly roll out to a slightly larger rectangle (careful not to put too much weight in rolling, otherwise the butter mixture will ooze out).
          5. Cut the dough into 12-14 equal widths and make an additional length-wise slit down each width without going right to the edge. Lift by each end and roll into a beautiful knot, carefully twisting each roll so that the cut sides are exposed and you can see the herbs. Tuck each end into the knot and place on a parchment-lined baking sheet. Make all of the knots and allow the knots to rest for 30 minutes covered with a clean cloth.
          6. Preheat the oven to 375° F. Bake the knots for 18-25 minutes or until the centre registers about 200° F. Serve immediately, but they also freeze beautifully. Reheat in a 350° F oven for a few minutes until they are warmed through.

          They are a cross between bread and a laminated dough, the layers are scrumptious!

          Notes:

          • Any herbs would work, I used basil, parsley and thyme.
          • I may not chop the herbs as finely next time.
          • I can’t wait to try sundried tomatoes and basil with mozzarella cheese or a sweet treat of cinnamon butter and sugar.

          Read Full Post »

          Buns that are used as a vehicle for other food are a very important part of the equation. You don’t want a bun that is too heavy or dense otherwise it takes over the other food, you don’t want it too light and fluffy because then it falls apart and doesn’t accomplish its primary role of transporting the other food. These buns (originally seen here) are the perfect vehicle for burgers and pulled pork we had recently. They are sturdy enough for the juicy burger with oodles of toppings and saucy pulled pork and yet they don’t overwhelm the dish with bread-y-ness. The Tangzhong roux is supposed to help preserve the rolls for longer than those without, however, they never last that long in my house, so I cannot confirm this theory.

          Tanzghong Brioche Slider Buns

          For the recipe inspiration, please click here.

          Makes 18 slider buns (for 65 g burgers)

          Ingredients:

          • 60 mL warm water
          • 8 g dry yeast
          • 25 g sugar
          • 500 g unbleached, all-purpose flour, divided
          • 125 g milk (yes grams)
          • 3 eggs, room temperature
          • 5 g sea salt
          • 125 g butter, softened
          • 1 egg for egg wash
          • 40 g Sesame seeds

          Directions:

          1. Combine the yeast, sugar and warm water allow to proof for 10-15 minutes.
          2. Combine 50 g of the flour with the water and cook over low heat until a smooth paste is formed. Allow to cool for a bit. Beat in the eggs one at a time until fully incorporated. Set aside.
          3. In the bowl of your stand mixer with the dough hook attachment, combine the remaining 450 g flour, yeast mixture and salt. Pour in the flour paste/egg liquid and knead until the dough comes together. Add the softened butter a little at a time and knead on medium for 30 minutes or until the dough is no longer as sticky and comes away from the sides of the bowl.
          4. Grease a bowl and add the dough, cover and set in a warm, dark place for about 1 hour or until doubled in size.
          5. Shape into 18 buns (about 55 g each) and set on a baking sheet covered with a clean cloth for 1-2 hours or until doubled in size.
          6. Preheat the oven to 400° F.
          7. Brush with the egg wash and sprinkle with sesame seeds. Bake for 25 to 30 minutes or until the internal temperature is about 185° F to 190° F.
          8. Allow to cool before serving.

          Notes:

          • The original recipe called for instant yeast or bread machine yeast but I only had the regular kind so if you choose to substitute with instant yeast, you need not dissolve it in the 60 mL water, just add it to the flour along with the sugar.
          • These buns have excellent structure and would hold up for burgers, pulled pork or anything saucy.

          Read Full Post »

          We have been trying to eat fewer carbs, but sometimes you just need a little carb therapy. These crusty baguettes sure did the trick. We paired them with some wonderful cheese we picked up from our favourite cheesemonger in the city.

          I was searching for vital gluten for another recipe and came across a new product, “Fleischmann’s Bread Booster”, it boasts that it enhances the original yeast in the recipe, so I thought I’d try it. You add about 3 grams per 150 grams of flour.

          Sourdough Baguettes

          Makes 2 baguettes

          Ingredients:

          • 350 g unbleached “00” flour, plus more for the starter
          • 215 g filtered, room temperature water, plus more for the starter
          • 80 g active sourdough starter
          • 9 g booster*
          • 8 g finely ground sea salt

          Directions:

          1. The day before baking, allow your starter to come to room temperature and feed it with 50 g “00” flour and 50 g filtered room temperature water. Set aside for 3-5 hours.
          2. For the bread, combine the remaining flour, booster, room temperature water and starter and mix well until it comes together (about 3 minutes in my stand mixer). Cover and allow to hydrate 1.5 hours.
          3. Knead in the finely ground salt for a couple of minutes. Cover and set in the refrigerator overnight.
          4. Remove dough from the fridge and allow to come to room temperature. Divide it into two by weight and shape into baguettes. Rest on lightly floured parchment for 45 minutes.
          5. Preheat the oven to 500° F. Add a large baking pan with sides to the hot oven. Set your baguette tray over the steamy water.
          6. Slash baguettes and bake immediately for 15 minutes, then lower the temperature to 450° F and continue to bake for an additional 15-20 minutes or until golden brown.
          7. Cool before cutting.

          Crusty on the outside and chewy on the inside, perfectly heavenly.

          Read Full Post »


          Over the holidays, I received some lovely sourdough starter and I made sourdough bread (as though we needed it!). I’m always a little distraught discarding some of it so I adapted an old recipe I brought back from Hungary to utilize the discard and a little of the fed starter, it worked out very well. I’ll definitely keep this in mind for future baking.

          Sourdough Cheese Sticks

          Makes 1 30 cm x 42 cm sheet, cut to whatever size you desire.

          For the original recipe, please click here.

          Ingredients:

          • 300 g all-purpose flour
          • 150 g unsalted butter, room temperature
          • 100 g discard sourdough starter plus 30 g fed starter
          • 125 g Greek Yogurt
          • 100 g shredded cheese (sharp cheddar works well, freshly grated Parmesan is best)
          • 5 g Salt
          • 20g shredded cheese

          Directions:

          1. In the large mixing bowl of your stand mixer with the scraper attachment, blend flour, butter, starters, 100 g cheese and salt until incorporated, then switch to a dough hook and add the Greek yogurt and knead until smooth ball forms.
          2. Allow to rest in a warm dark place for 1 hour.
          3. Preheat the oven to 375° F
          4. On a piece of parchment paper, roll out dough to about 1/2 cm thickness.
          5. Cut into 7-10 cm x 2 cm sticks.
          6. Sprinkle with remaining cheese and allow to rest for 10 minutes.
          7. Slide cheese sticks on the parchment paper onto a baking sheet and bake for 20-25 minutes or until cheese is golden and melted.
          8. Re-cut sticks, if necessary, while still warm. Serve warm or at room temperature.

          These are very tasty served warm.

          Notes:

          • Use a flavourful, hard cheese (like cheddar, gruyere or Jarlsberg) is best for this treat.
          • I use a pizza cutter with a kitchen ruler to cut the sticks, it makes it very easy. If you cut the sticks after you sprinkle with cheese, your cutter will take up most of the cheese!
          • In the original recipe, there is an egg wash on the top, I omitted this time because I figured the cheese would stick regardless, but it does add a lovely sheen which I will not omit next time.
          • These cheese sticks freeze well. To reheat, spread in a single layer, cheese side up on a baking sheet and bake at a low 200° F for 10-15 minutes or until defrosted and slightly warm.

          Read Full Post »

          It’s definitely going to be a very different holiday season this year. We usually escape the drudgery of November by renting a house in a friends’ community in Arizona but, not this year. I’m already dreading February when we usually escape to Spain, thank you COVID19, not this year.

          I usually look forward to all the holiday parties, both throwing and going to them, but not this year.

          Over the last few years, I’ve slowly stopped baking my Christmas goodies to give to friends, but not this year. We deserve a treat. So friends, drop the diet and enjoy!

          We usually entertain friends and family this time of year around our wood-burning fireplace in our living room, but not this year. However, we’ve adapted our outdoor space to include a natural gas heater, and equipped the sectional and chairs with electric blankets, trying to extend our entertaining capacity during these trying times. It’s been very successful at 10° C (50° F) but who knows how cosy it will be when temperatures plummet to -10° C (14° F) in January and February. I’m taking full advantage while I can.

          This recipe was developed for an evening when we socially-distance-entertained friends under the warm heat trapped under the awning and cosy electric blankets.

          These crackers are like biscotti because they are twice-baked. Using an electric slicer gives you excellent control and wonderfully thin slices.

          Fruit and Seed Crackers

          Makes 75 thinly sliced crackers

          For the original recipe, please click here.

          Ingredients:

          • 2 eggs, lightly whisked
          • 300 mL milk
          • 15 mL honey or agave syrup
          • 5 g salt
          • 125 g spelt or whole wheat flour
          • 200 g AP unbleached flour
          • 60 g dried cranberries
          • 70 g raw pumpkin seeds
          • 50 g sesame seeds

          Directions:

          1. Prepare a small terrine pan (like this one) by lining it with parchment paper. Preheat the oven to 350° F.
          2. Combine the eggs, milk and honey and mix well.
          3. Sift the salt and flours together to combine. Stir in the fruit, nuts and seeds. Make a well in the centre and pour the egg mixture into the dried ingredients, stir to combine.
          4. Pour into the prepared pan and bake for 25-35 minutes or until a toothpick comes out clean. Reduce the oven temperature to 300° F.
          5. Tip the loaf out to cool completely and then slice as thinly as possible (I found the electric slicer did a beautiful job). Bake cracker slices until toasty and crisp, about 20-30 minutes, flip if necessary. Cool completely to store.

          Notes:

          • I adapted this recipe from Chef Mimi’s blog. I used the seeds and fruit I had on hand, it’s quite versatile, so use what you have on hand.
          • I made these again in August 2021 and did not have whole wheat or spelt flour so I substituted almond flour and they turned out lovely.


          Read Full Post »

          Happy New Year! Hope everyone has a wonderful holiday season, spoiling your loved ones! Wishing you a new year filled with joy, good health, good friends and good food! Love from Éva

          I do apologize for not being more present with my blogging buddies, but we’ve only just returned from our month-long sojourn in Arizona. We had three sets of dear friends visit us for 5-6 days each during our stay; it was a fun-packed time away, also enjoying our dear friends who currently live in Arizona.

          I made this delicious winter stew for friends just before we left for Arizona. It was a perfect way to begin winter. The stew was filled with succulent seafood drenched in a creamy béchamel. And if you’re super hungry, you can eat the bowl, or part of it!

          Seafood Stew in Sourdough Bread Bowls

          Please click here for the original recipe.

          Serves 4-6 depending on size of bowls.

          Ingredients:

          • 1 tbsp grapeseed oil
          • 1/2 a sweet onion, finely diced
          • 2 celery ribs, diced
          • 1 carrot, diced
          • 8 mini potatoes
          • 3 tbsp unsalted butter
          • 3 tbsp all-purpose flour
          • 1 tsp dried thyme leaves
          • 1 tsp dried tarragon
          • 2 cups whole milk
          • 500 g mixed firm seafood — peeled shrimp, scallops, lobster meat, mussels, calamari or white fish (cubbed)
          • 1 cup shredded flavourful white cheese, like Gruyère and Asiago
          • Kosher salt (to taste)
          • 4 sourdough bread bowls

          Directions:

          1. In a large Dutch oven, heat the oil and sauté the onions until translucent.
          2. Add the potatoes and carrots and sauté until about half-cooked. Add the celery and sauté for about 2-4 minutes.
          3. Lower the heat and add the butter and allow it to melt. Sprinkle the flour into the vegetables and mix well. Cook for a minute or so. Add the dried herbs. Slowly add the milk, stirring to mix into the floured vegetables and bring to a slow simmer, stirring and allowing the mixture to thicken. You may bring this to room temperature and refrigerate until required.
          4. If you have refrigerated the vegetable mixture, simmer on low until the vegetables are thoroughly cooked through. Add the seafood with the longest cooking first (shrimp, scallops, calamari and lastly, mussels). Cook the seafood through.
          5. Add the shredded cheese, mix well and taste for seasoning. Serve piping hot in hollowed out sourdough bread bowls.

          Here is that gorgeous winter light again.

          Notes:

          • I like to spend as much time with our guests instead of stuck in the kitchen cooking dinner so I try to make as much of the dishes in advance as possible so that my time spent in the kitchen is minimal while we have guests. Because I cooked most of the stew earlier that day, I was able to reheat it and cook the raw seafood quickly without missing too much of the evening.
          • I gently warmed the sourdough bread bowls so that they kept the stew warm a little longer, things cool down so quickly in the winter.
          • I used a mixture of Wild Argentinian Shrimp, Bay Scallops, Mussels, and Chopped Calamari for this dish but white fish would also work beautifully.
          • If the thought of adding cheese to a fish dish offends you, please omit it. The original recipe called for cheddar but I did not wish to add red cheese to discolour the sauce. The cheese adds a nice background flavour with a little body, it’s really not enough to make it stringy.
          • The smooth béchamel flavoured with the tarragon and thyme made a lovely background for the seafood. Our guests loved it, the homemade sourdough bread bowls helped! 😉
          • It’s a really heavy meal, I hollowed out the bread bowls so that there was only about 1 cm of the bowl all around, even so, most of us couldn’t finish it!

          Read Full Post »

          This tasty breakfast treat is super easy to make. Assembled the night before and baked for 40 minutes. I used a mini store-bought panettone like this but you can definitely make your own. If you serve them directly from the oven, they puff up like a soufflée, but they deflate just as quickly. Turn them out onto a plate and no one will be the wiser!

          Panettone Breakfast Bake

          Serves 2-4

          Ingredients:

          • 100 g panettone
          • 3 eggs
          • 125 mL milk
          • Pinch of nutmeg

          Directions:

          1. Butter 2 ramekins (about xx mL each)
          2. Cut the panettone into cubes and place into the ramekins evenly.
          3. Whisk the eggs, milk and nutmeg together and pour into the ramekins evenly. Cover and set in the refrigerator overnight.
          4. The following morning, remove the ramekins from the refrigerator and preheat the oven to 350F. Bake for 35-40 minutes or until the eggs have set.
          5. Turn out onto a plate and serve with maple syrup.

          Read Full Post »

          Why do the cold temperatures always surprise me? I’ve been doing this fall thing for a long time and yet, every year when the temperatures plummet, it’s like a cold, hard, slap in the face! It happens from one day to the next; on Saturday, we are lavishing in the sun, cocktailing on the back deck and enjoying al fresco meals and then on Sunday, we are dawning our socks and woolly sweaters to avoid the chill INSIDE, let alone outside! JT and I are typical Canadians, we are stubborn about admitting that its fall and winter is coming; we delay turning on the furnace at all costs because that would mean defeat, we have acknowledged the cold and succumbed to it! But eventually, we give in. I like to rebel and I generally continue to wear sandals until I can no longer feel my toes. My feet understand they don’t like to be encased in socks and shoes…they were meant to be free in flip flops and sandals!

          It was on one such day that I needed a little heat-help in my chilly kitchen that I decided to make scones, and to use up some figs that were leftover from a shoot (what can I say, no one wanted them!), so I came up with this tasty treat. This recipe is very delicate and light. They are best eaten right away with sweet butter but freezing them also works. Use the oven to reheat them, the microwave doesn’t do it justice.

          Fresh Fig Scones

          A KitchenInspirations Original Recipe

          Makes about 10 scones

          Ingredients:

          • 2 cups flour
          • 2 tablespoons sugar
          • 1 teaspoon salt
          • 4 teaspoons baking powder
          • 1/2 teaspoon cream of tartar
          • 1/4 tsp green cardamom, finely grated
          • 1/2 cup unsalted cold butter, cut into small bits
          • 1 cup buttermilk
          • 160 g fresh figs (chopped)
          • 2-3 tbsp milk or yogurt for brushing the tops.

          Directions:

          1. Preheat the oven to 400° F.
          2. Combine the dry ingredients in the large bowl of your food processor and pulse to mix.
          3. Add the cold, cubed butter and pulse until it resembles a coarse meal.
          4. Slowly pour in the buttermilk while pulsing until the dough comes together. Remove and pour into a large bowl.
          5. Fold in the chopped figs carefully.
          6. Place largish spoonfuls onto a parchment-lined baking sheet and brush the tops with yogurt. Bake for 15-17 minutes.
          7. Cool for 10 minutes and serve with sweet butter.

          The light was still good when I shot them.

          Read Full Post »

          I remember seeing these tasty morsels a few years ago and was intrigued by the tapioca flour ingredient but I soon forgot about them. Recently, we were watching America’s Test Kitchen and by fluke, they were making a batch which reminded me how much I had wanted to make them. These days, more and more of our friends have become gluten intolerant or simply wish to reduce their gluten intake so this recipe comes at the right time. Plus the weather is perfect for cocktails on the back deck while the sun moves across the sky for its exit. I’ve made a few adjustments to the original recipe and have converted it to metric weight measures because that is my preference for baking.

          We loved these little cheesy dough balls and you can bet that I will make them again and again. I hope you try them too.

          Would you care for a few with your cocktail?

          Brazilian Cheese Bread (gluten-free, lactose-reduced)

          Makes 50-60 little balls. For the original recipe, please click here.

          Ingredients:

          • 390 g tapioca flour (starch)
          • 8 g baking powder
          • 10 g plus 2 g salt, divided
          • 2 eggs, plus 2 egg yolks, divided
          • 200 mL lactose-free milk
          • 25 g unsalted butter
          • 115 mL grapeseed oil (any vegetable oil)
          • 212 g sheep’s milk semi-firm cheese

          Directions:

          1. Combine tapioca flour, baking powder and salt and mix well in the large bowl of your stand mixer.
          2. In a small saucepan, heat until just boiling the milk, butter and grapeseed oil.
          3. While mixing the flour on low spead, add the hot milk solution and beat well for about 3 minutes.
          4. Add the eggs one at a time and beat for about 8 minutes or until dough is shiny and smooth.
          5. Add the cheese and mix for about 1 minute.
          6. Preheat the oven to 450° F. Prepare a baking sheet by lining it with damp parchment paper. Put the baking sheet on top of another baking sheet (these little breads tend to burn on the bottom so insulating the bottom will help them bake more evenly).
          7. Scoop out 15 mL spoonfuls the prepared baking sheet. It’s easier if you dip your scoop into water each time. Shape into little balls.
          8. Combine the egg yolk with the 2 g salt and mix well.
          9. Brush the egg yolk mixture on top of each dough ball and bake until tops are golden and crusty 18-20 minutes. Turn the pan around for the last 5 minutes of baking.
          10. Refrigerate the dough while baking the first batch. Repeat making little balls of dough until finished.
          11. Cool for 10 minutes and serve.

          Notes:

          • Check the saltiness of the cheese you use, and adjust the salt measurement accordingly. I found America’s Test Kitchen recipe was a little saltier than I like.
          • I used Starkey and Hitch goat’s milk gouda in this recipe.
          • America’s Test Kitchen found the dough too sticky to work with so they rested the dough in the refrigerator for 2 hours before baking. I did not find the dough too sticky so I skipped that step (it’s about the same as choux pastry) .
          • The recipe is as easy as making choux pastry but the texture is quite bready.
          • Freeze in a zip-lock baggy. To reheat frozen balls, bake them at around 275° F until defrosted and warm.

          Read Full Post »

          On March 30, we woke up to snow. Not much, just a light covering, but it still was distressing. Throughout the day, it snowed some more, not enough to shovel, but enough to put a damper on the last Sunday of March. Believe me, we were in dire need of Spring.

          Since it was such a gloomy day, I decided to bake tanzghong brioche burger buns after being inspired by my dear Aussy friend, Lorraine, who was also experiencing some gloom on a rainy fall day in Australia. Hopefully, these buns will inspire the weather to begin behaving as it should in the springtime and not like February.

          It’s May 6 today and we’ve finally had a spring-ish day. Temperatures were around 17C (62F) which is a far cry better than we’ve had. Garden cleanup has begun. Planting in these parts must wait until the Victoria Day weekend (traditionally known as May two-four weekend, which will be May 18-20 this year). It’ll be the official beginning of spring! Roll out the barbecues and burgers! Patio season has begun!

          Tanzghong Brioche Hamburger Buns

          For the recipe inspiration, please click here.

          Makes 8 burgers buns (for 125 g burgers)

          Ingredients:

          • 300 g unbleached, all-purpose flour, divided
          • 125 g water
          • 3 eggs
          • 8 g quick yeast
          • 25 g superfine sugar
          • 5 g sea salt
          • 125 g butter, softened
          • 1 egg for egg wash
          • xx g Sesame seeds

          Directions:

          1. Combine 50 g of the flour with the water and cook over low heat until a smooth paste is formed. Allow to cool for a bit. Beat in the eggs one at a time until fully incorporated. Set aside.
          2. In the bowl of your stand mixer with the dough hook attachment, combine the remaining 250 g flour, yeast, sugar and salt. Pour in the flour paste/egg liquid and knead until the dough comes together. Add the softened butter and knead on medium-high for 30 minutes or until the dough is no longer sticky and comes away from the sides of the bowl.
          3. Grease a bowl and add the dough, cover and set in a warm, dark place for about 1 hour.
          4. Shape into 8 buns (about 93 g each) and set on a baking sheet covered with a clean cloth for 1-2 hours or until doubled in size.
          5. Preheat the oven to 400° F.
          6. Brush with the egg wash and sprinkle with sesame seeds. Bake for 25 to 30 minutes or until the internal temperature is about 185° F to 190° F.
          7. Allow to cool before cutting.


          Read Full Post »

          I was recently awed by some wonderful buns made by my Canadian friend A-Boleyn. Of course, I have seen these beauties on my Australian friend’s blog, Not Quite Nigella, too! I have been wanting to bake these bad boys for a while but have not had an opportunity since we’ve been trying to reduce our carb intake. But, during a particularly grey day in March, with an upcoming brunch ahead, I decided to go for it.

          They don’t take much more effort than a normal bun but OMG, they are so light and fluffy and ever-so-tasty! Many-a-bloggers have indicated that converting a normal bread recipe just takes it to a higher level, so next time I’m looking for a high-carb treat, I’m going to Tangzhong the recipe (is that a thing?).

          Tangzhong Dinner Rolls

          For the original recipe, please click here.

          Makes one 10 rolls about 71 g each (before baking)(see notes)

          Ingredients for the Tangzhong:

          • 20 g “00” flour
          • 100 mL water

          Ingredients for the Dough:

          • 350 g “00” flour
          • 7 g rapid rise yeast
          • 50 g caster sugar
          • 1 tbsp milk powder
          • 125 mL milk (I used 3%)
          • 1 large egg
          • 50 g unsalted butter, room temperature
          • 1 egg for glaze
          • Sesame seeds

          Directions:

          1. Combine the flour and water in a small saucepan to make the Tangzong and cook stirring often until thickened like wallpaper paste. Set aside to cool.
          2. Combine the milk, egg and Tangzong and whisk until smooth. In the bowl of your stand mixer, sift together the flour, yeast, sugar and milk powder. Add the milk mixture and mix on low speed until combined.
          3. Add the room temperature butter and knead on high speed until the dough becomes stretchy and separates from the sides (it is seriously, about 15 minutes).
          4. Lightly oil another bowl and transfer the dough into it. Cover with a clean cloth and allow to rest in a warm, dark area for 2 hours or until doubled in size.
          5. Shape the dough into 10 equal portions, rounding them out like dinner rolls (mine were an even 71 g each, see notes for next time). Cover with a clean cloth and allow to rest another hour.
          6. Preheat the oven to 400° F. Brush the dough balls with the whisked egg and sprinkle with sesame seeds if using.
          7. Bake for 15-20 minutes or until deep golden in colour (internal temperature should be 200° F). Transfer to a wire rack and cool slightly before serving. Store in an airtight container for a day or two or the freezer if storing longer.

          Notes:

          • I will definitely make these significantly smaller next time, even though the original recipe made 8 and I made 10, these rolls are HUGE, perfect for burgers! For dinner rolls, I think I would make them 50-60 g instead of the 71 g each.


          Read Full Post »

          We’ve been making a huge effort to cut out carbs from our diet. The one thing I have been really missing is bread. Not that we ate that much bread, but a sandwich every now and again is a nice treat so I have been trying to make carb-free bread and failing miserably until I came across a delicious keto bun at a local craft sale. It had a similar texture and crumb as flour bread, but made with almond flour and coconut flour. At the time, the lady would not share her recipe, so I made every recipe on the net trying to find her secret, sadly failing. Fast forward to a couple of weeks ago and I get an email from her out of the blue sharing her recipe! How serendipitous! It turned out that it was one of the first recipes I tried but obviously did not get it right so I had abandoned it. She had made a few adjustments to the original recipe and shared them with me, and I made further adjustments to make it my own. It’s easier to make than normal yeasted bread (really is more like quick-bread as you make it) and the result is quite surprising. It’s a lot more expensive to make this bread than it is to make regular flour bread (the recipe below is about $12 for 8 buns).

          Those nooks and crannies are like real bread!

          Most flour-free buns are usually eggy and super dense because of the nut flours used and the lack of leavening, but these buns are light and have a great spongy texture and fantastic crumb, they never disappoint, time after time! The original recipe had great texture but lacked the flavour that yeast imparts in real bread so I experimented and came up with this augmentation. If you don’t feel like messing with the yeast, just omit it along with the granules of sugar but keep the water the same. You will not be disappointed.

          How many would you like?

          The Worlds BEST Low Carb Buns

          Makes 6 medium-sized buns. For the original recipe, please click here.

          Ingredients:

          • 100 g Almond flour (see notes)
          • 30 g Coconut Flour
          • 33 g Psyllium Husk Powder, finely ground (see notes)
          • 10 g Baking Powder
          • 6 g Sea salt
          • 10 g Cider vinegar
          • 100 g Egg whites
          • 8 g Instant Yeast
          • a few granules of sugar
          • 280 g Boiling Water, divided
          • 1 egg yolk
          • Sesame Seeds

          Directions:

          1. Preheat oven to 350° F (170° C). Prep a baking sheet by lining with parchment paper. Prepare a hand mixer ready to use and a timer.
          2. Combine the yeast with the sugar in 57 g of warm water (about 43° C or 100° F) and allow to froth.
          3. To a large bowl, add almond flour, coconut flour, psyllium husk powder, baking powder and salt and whisk to combine.
          4. Make a well in the centre of the dry ingredients and add the cider vinegar, egg whites and proofed yeast and mix on low speed, for a short time, to combine evenly.
          5. Boil the remaining water (223 g). Pour the water all at once into the almond flour mixture and blend for 30 seconds to make a smooth dough (do not over blend).
          6. Divide the dough into 6 equal portions (mine worked out to be about 94 g) and roll into a smooth ball with generously wet hands. Slightly flatten each roll so it’s more like the shape of an English muffin (don’t worry, they rise enormously).
          7. Brush each bun with the egg yolk and top with sesame seeds and bake for about 50 minutes or until the internal temperature is 95° C (200° F).
          8. Cool completely on a wire rack, before slicing. Serve toasted or plain with your favourite topping.

          Notes:

          • I use Anthony’s Premium Blanched Almond Flour which may be purchased on Amazon. I have heard that the Costco Kirkland brand also works, but I haven’t tried it. I will eventually try the finely ground almond flour Bulk Barn sells because Anthony’s is pretty expensive.
          • I use psyllium husk powder from Bulk Barn, but I grind it to a super fine consistency with my coffee/spice grinder.
          • 100 g of egg whites is more or less 3 large egg whites.
          • Many of these recipes call for room temperature ingredients, I have done both room temperature and right out of the refrigerator and they resulted in more or less the same buns.
          • When working with the dough, generously wet hands are imperative for a nice smooth crust.
          • Mixing the boiling water into the batter with a hand mixer for 30 seconds ensures that it’s entirely blended but not overworked.
          • For Christmas, I received a bottle of Trader Joe’s Everything But the Bagel seasoning and it is awesome on these buns!

          Nutritional Breakdown:

          Per 1 piece

          • Calories: 178
          • Net Carbs: 5 g
          • Protein: 7 g
          • Fat: 12 g

          Read Full Post »

          You may have noticed that I’ve been radio silent for much of December and I apologize, we were in Arizona for about a month. Although not quite as warm as our last month in Arizona, it was a far cry warmer than home. I’m so glad I had lined up my blog posts because I literally had no time! I hope you understand. I’m back on schedule notwithstanding the holidays which are going to be busy. I hope you have a wonderful Christmas or whatever you celebrate and a happy and healthy new year.

          I have long wanted to experiment with alternative flours in bread making and a few months ago, the opportunity arose, we were having my BFF from University for brunch and she is gluten intolerant but can tolerate spelt! I did a little research and discovered that spelt was a great bread flour and also discovered that WE LOVE IT! It has a light nutty flavour and a great bread texture. I would say it is more like a Ciabatta than a French stick. I slice it thicker for dinner, but for toast, I use my handy electric slicer for even 6 mm slices.

          This is one sticky dough, but I experimented with varying quantities of spelt flour and always came back to the original. You may not want to proof it in your Banneton (proofing basket) unless it is very heavily floured, even so, one experiment stuck so badly, it took me nearly an hour to clean it out!

          I used a proofing basket for this boule.

          No Knead Spelt Boule

          Makes one 981 g boule.

          Please click here for the original recipe.

          Please click here to print this recipe.

          Ingredients:

          • 565 g spelt flour
          • 450 g water
          • 56 g honey
          • 10 g salt
          • 4 g instant yeast (1/2 packet)
          • good pinch of cornmeal

          Directions:

          1. Combine the ingredients with the exception of the cornmeal (not corn starch), in a large bowl and mix well. The dough will be a bit stickier than regular bread dough and a little firmer (you may need to put a little elbow grease into it to combine the flour entirely). Set aside covered for about 12 hours (this step is best done overnight or if you wish to start earlier, allow it to rest covered in the refrigerator).
          2. If the dough rested in the refrigerator, bring to room temperature. Prepare your proofing bowl with a little spelt flour.
          3. Shape the dough into a nice boule by pulling up the sides into the centre using a spatula and gather them tightly to form the bottom of the boule. Flip the boule so that the pulled area is now at the bottom and roll it into the proofing bowl so the pulled area is now at the top (this will make it easy to flip the boule into the hot pan so that the smooth area is on top). Sprinkle a little spelt flour on top and allow to rest, covered for 60 to 90 minutes.
          4. About 30 minutes into the proofing of the boule, pre-heat the oven with your 23 cm (9 inch) oven-safe cast iron dutch oven to 450° F (the original recipe suggests that you place the pot on a baking sheet to insulate it a bit more so that the base of the boule doesn’t burn).
          5. When the boule has risen, about double in size and the pan has been pre-heating for about 30 minutes, add a parchment circle to the bottom of the pan and sprinkle a little cornmeal over it. Gently roll the proofed boule into the pan. You may make some tension slices into the top so it breaks artistically, or you may let it break on its own. Bake for 35 minutes with the lid on, then remove the lid and bake for additional 10 minutes. The internal temperature should be 195° F to 200° F. Allow to cool and serve sliced with your favourite stew or just with butter.

          There were several versions baked up until I got the best version.

          Notes:

          • This is a very sticky dough. I added the parchment because no matter how much cornmeal I put in the hot pan, it stuck quite badly.
          • I tested this recipe with more flour and it made it too dense, so even though it is a sticky dough, it is the right amount of water and flour.
          • A larger dutch oven will yield a wider and flatter boule, like the first photo.

          Spelt flour can become over-worked quite easily which will make a heavier, denser loaf. The no-knead recipe is a perfect way to get a light texture.

          Read Full Post »

          From the recipes on this blog, you would think that we eat a lot of bread, the reality is that we do not, I make bread when we entertain, but I do love making bread. I was drawn to this recipe from my friend, A Boleyn’s blog, Cooking is fun. She made the most beautiful buns I have seen in some time. They were golden, perfectly round, fluffy and very soft looking AND they had an unusual ingredient: Sweet Potato! This bread’s texture reminded me of Hokkaido milk bread, which I have been meaning to try my hand at, it has a simple roux “starter” technique known as tangzhong that gives it a light, fluffy texture. While this recipe isn’t Hokkaido milk bread, its finished texture reminded me of the technique, plus there is a bit of a starter with flour, water and yeast.

          The buns did not disappoint; this recipe will definitely make my go-to bread recipe repertoire, to be honest, I’ve made three batches by the time this post goes live!

          This is a soft, slightly sweet and quite addictive bun.

          Sweet Potato Buns

          Recipe makes 16 buns, about 60 g each (unbaked)

          For the original recipe please click here.

          To print this recipe, please click here: SweetPotatoBuns_recipe.

          Ingredients:

          • 454 g sweet potato, peeled and cubed
          • 65 g all-purpose flour
          • 125 mL warm water
          • 8 g quick rising yeast
          • 1 large egg
          • 45 mL unsalted butter, melted
          • 10 mL honey
          • 7 g sea salt, finely ground
          • 240 g bread flour, or more as needed

          Egg wash:

          • 1 egg
          • 1 teaspoon water
          • 1 tablespoon sesame seeds, or to taste

          Directions:

          1. Cook sweet potato in salted water, until soft. Strain well (reserve cooking liquid for the yeast) and mash with a fork or potato masher; measure out 260 g and allow to cool completely. Reserve leftovers for another use (like gnocchi).
          2. In another bowl, mix together 65 g flour, warm water (cooking liquid) and yeast, and whisk until smooth.
          3. When yeast is frothy (about 10 minutes), pour it into the large bowl of your stand mixer, add the mashed sweet potato, one egg, melted butter, honey, sea salt and about 210 g of flour. Mix well using the dough hook attachment and knead for 2 to 4 minutes (I needed 4 minutes). If the dough is too sticky (mine was OK the first time but subsequent times it was too wet), add the remaining 30 g (or more) of flour and knead until the dough is soft, elastic and shiny (about 2 minutes).
          4. Turn the dough out into a well-oil the bowl and cover. Allow to rise until double in size (about 1 hour), I did this in an unheated oven.
          5. After it has doubled in size, turn the dough out onto a lightly floured surface and press out the air bubbles. Using your fingers, press the dough into a rectangle about 2 cm thick. Divide the dough into 16 equal portions (about 60 g each) and roll into a smooth ball. Allow to rest for 45 minutes on a covered baking sheet.
          6. Preheat your oven to 400° F. Combine the remaining egg, water and mix well. Brush each bun with the egg mixture and sprinkle each with sesame seeds.
          7. Bake in a hot oven until golden or when the internal temperature is 200° F (about 15 minutes).

          Notes:

          • I used bread flour because I did not have enough All-Purpose flour. I have since made it with all purpose flour and it was equally as delicious.
          • I have made this recipe three times, the last time the dough was much too wet so I had to add more than the 30 g of flour (probably closer to 80 g).
          • Use some of the water you used to boil the sweet potatoes for the yeast because it has flavour and nutrients.
          • The 454-ish gram sweet potato yielded about 330 g. The leftover 70 g of the sweet potato will make a generous amount of gnocchi.
          • The 70 g of sweet potato leftover was mixed with the remaining egg (after I egg washed all the rolls) and enough flour to make a gnocchi dough and some grated Parmesan Cheese. I freeze uncooked gnocchi on parchment on a cookie sheet and then pop them into a ziplock baggy. I got enough gnocchi for about three smallish servings.

          The gnocchi made an excellent lunch with a blue cheese cream sauce.

          Read Full Post »

          Older Posts »