Feeds:
Posts
Comments

Archive for the ‘Kitcheninspirations Original Recipe’ Category

Years ago, back before the internet, I purchased an old Weight Watcher’s cookbook at a garage sale that I’ve long since divested myself of. In this cookbook was a tasty hummus soup that I made a few times at the cottage when we didn’t feel like much for dinner. This is my version of the recipe.

The soup comes together quickly, no need to soak the lentils, they cook within 10 minutes. Don’t salt the water they cook in otherwise the skin will become a bit tough. I puréed the somewhat cooled soup in my Magic Bullet and it made a lovely, velvety-smooth soup. Serve the soup drizzled with really good olive oil and Aleppo peppers.

Lentil Hummus Soup

Makes about 500 mL soup

A kitcheninspirations original recipe

Ingredients:

  • 135 g red lentils, rinsed and picked through
  • water (to cover lentils)
  • 45 g tahini
  • 35 g roasted garlic purée (or fresh garlic to taste
  • 12 g cumin
  • 400 mL chicken stock
  • 30 mL lemon juice
  • Olive oil to serve
  • a sprinkle of Aleppo peppers

Directions:

  1. Add the lentils to a good size soup pot and just cover with cold water. Bring to a soft boil and cook the lentils until softened thoroughly and the water is mostly absorbed.
  2. Add the tahini, roasted garlic purée, and cumin and cook on low for 1 minute.
  3. Add the chicken stock and water and purée until desired thickness is achieved. The lentils will get thicker as they cool, so don’t add too much stock to start because when you reheat it, it will be too runny, add stock little by little until your desired thickness is achieved

Notes:

  • We use roasted garlic because it is a milder, nutty flavour than fresh garlic.
  • Toppings are pretty versatile but we like olive oil with Aleppo peppers for a touch of heat.
  • I would imagine this soup freezes well but it comes together so quickly, I only make enough for one meal.


Read Full Post »

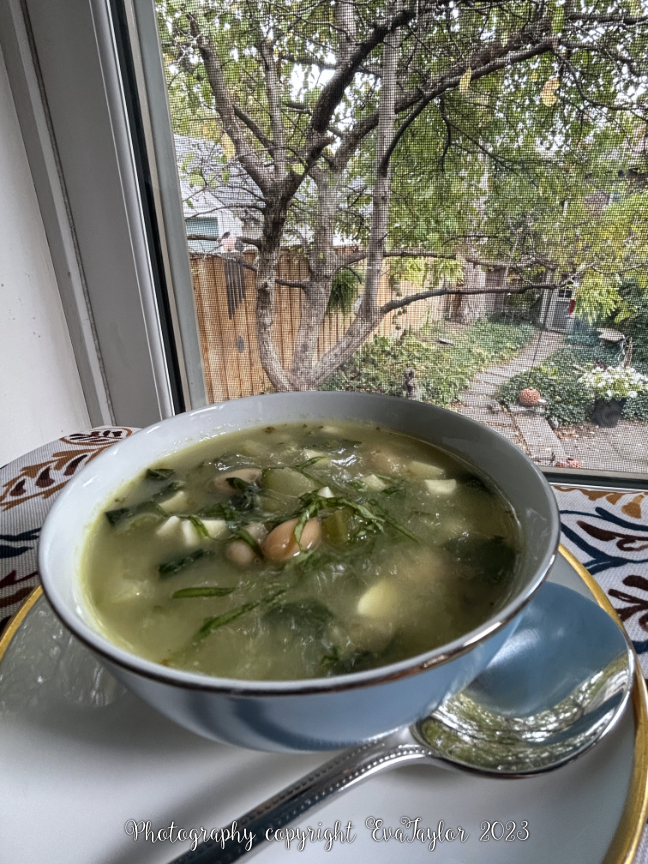
The weather in Toronto was certainly not as spring-like as we had hoped when we planned to return from our stay in Europe, otherwise, we would have stayed a lot longer! We did have a week of incredible but unseasonably warm weather in early April but that didn’t last long. We are back to grey, overcast, rainy, snowy spring so on such a day, I decided to let the garden inspire me because even though we humans find this weather unacceptable, the garden is in full bloom, bursting with green and colour! I created this simple, yet tasty green soup. Use homemade or good-quality chicken stock (and my secret ingredient) to make a tasty broth and add all the green veggies you have on hand. For me, it was frozen sweet peas, frozen broccoli, leeks, frozen green beans, some shredded kale, celery and some ripe avocado. If you want it a little more filling, add rice or gnocchi or my favourite, Hungarian csipetke (which is just pasta dough, pinched into small dumplings and cooked right in the soup).

A delicious combination of green vegetables in a rich, flavourful broth.

Spring Green Soup

A kitcheninspirations original recipe

Makes about 1.5 litres of soup

Ingredients:

  • 15 mL garlic-infused EVOO
  • Handful of each green vegetables: frozen sweet peas, frozen broccoli (separate stems), leeks, frozen green beans, some shredded kale, celery and some ripe avocado, all cut into similarly sized pieces.
  • 1.5 litres chicken stock
  • 15 mL white miso paste (secret ingredient)
  • a splash of fresh lime juice

Directions:

  1. Heat the oil in a large soup pot and sauté the leeks and broccoli stems until soft. Add about half of the kale and wilt. Add the stock with the miso paste and heat until the miso (secret ingredient) has melted and the kale is rather soft. Purée this into a relatively fine soup.
  2. Add the remaining vegetables and heat through. I allowed the soup to steep for a couple of hours and reheated it when ready to serve.
  3. Add the lime juice and stir well just before serving.
  4. Allow the soup to cool completely before freezing leftovers. Do not freeze pasta or rice because it will turn to mush.

Read Full Post »

As the weather is warming up, we are allowing ourselves to once again dream of patio days sipping on summery cocktails and enjoying the company of friends. These lazy days require some lazy snacks and I have just the tasty and healthy snack for you if you have an air fryer. I have the Instant Pot with the air fryer lid, and let me tell you, it works wonders! We don’t fry a lot so I didn’t want an appliance that just did one thing so this air fryer lid addition to my Instant Pot is the perfect solution.

These spiced chickpeas are so crispy and crunchy, they disintegrate in your mouth like a chip would and then the spice creeps up on you, just a little with tantalizing flavours of cumin, coriander, garlic and smoked paprika with a hint of heat, salt and sweetness. Just perfect for a glass of prosecco or Cava. Cheers!

Air Fried Spiced Chick Peas

Makes enough for 4 as a cocktail snack.

A KitchenInspirations Original Recipe

Ingredients:

  • 1 can 540 mL chickpeas, drained, rinsed and dried
  • 40 g cornstarch
  • 30 mL olive oil
  • 2.5 g cumin
  • 2.5 g coriander
  • 2.5 g granulated garlic
  • 2.5 g smoked paprika
  • 2.5 g sea salt
  • 15 g honey, divided

Directions

  1. Mix the cumin, coriander, garlic, paprika, and sea salt until well combined.
  2. In a large sieve, sprinkle the cornstarch evenly over the chickpeas (I did mine in two batches). Drizzle the olive oil over them and mix well.
  3. Add the chickpeas to your air fryer and fry at 400° F for 15-20 minutes, pausing halfway to stir and separate them. I air-fried the recipe in two batches as my air fryer is not huge and I only wanted one layer so they really crisp up.
  4. Confirm that the chickpeas are crispy (and not creamy in the centre) and pour them into a bowl and sprinkle with half the spice mixture. Drizzle with half of the honey and mix until well-coated. Return the chickpeas to the air fryer and fry for an additional 5 minutes (so the honey caramelizes). Pour onto a cookie sheet to cool completely. Repeat with the second batch.

Notes:

  • The spice mix is totally up to you. Just plain salt and pepper would be nice too.

Read Full Post »

These cookies came about because of two things: the first thing was, one of the items I brought home from England was Treacle, we don’t easily get it here and I was curious about it and secondly, I was cleaning out my baking drawer when I came across a small package of candied ginger so I thought I’d kill two birds with one stone and bake up a batch of these tasty treats. These are not low-carb, they are what they are. Sometimes you just need a treat.

Ginger Snaps

Makes about 36-46 Cookies depending on how big your melon baller is.

Ingredients:

  • 76 g butter
  • 100 g brown sugar
  • 60 mL Lyle’s Golden syrup
  • 60 mL treacle
  • 250 g all-purpose flour
  • 4 g baking powder
  • 4 g baking soda
  • 4 g ground ginger
  • 5 g freshly ground ginger
  • 4 g ground allspice
  • 30 g finely chopped candied ginger tossed in icing sugar

Directions:

  1. Preheat the oven to 350°F.
  2. Line two baking sheets with parchment paper, sprayed with non-stick cooking spray.
  3. In a small saucepan gently melt the butter, brown sugar and both syrups (do not boil unless you want to end up with jawbreakers!). Cool slightly.
  4. Sift dry ingredients together into a medium-sized bowl.
    Make a well in the centre and pour in the syrup mixture. Mix well to make a soft dough.
  5. Using a large melon baller shape into small balls (about the size of a walnut). Place each ball about two inches apart; press down to form even rounds about 1/2 cm thick.
  6. Bake 10-12 minutes or until very very lightly browned. Cool on the cookie sheet for a minute and then remove to fully cool on a wire rack. If you were to err, err on the shorter baking time so they don’t get super hard.
  7. Store in an airtight container or freeze. If they get too hard, add a slice of bread or a moist brown sugar disk for a few hours.

Read Full Post »

Hearty winter soups are a staple when we are in Canada and I just love to serve soups with scones. This recipe is an old favourite but I had run out of fresh onions so I used my handy dehydrated onion flakes in this easy recipe. There is just a little time to rehydrate the onions and you’re good to go. 

Cheddar Cheese and Onion Kefir Scones

A KitchenInspirations Original Recipe

Makes 9 large scones

Ingredients:

  • 260 g AP flour
  • 15 g sugar
  • 15 g baking powder
  • 5 g salt
  • 2 g cream of tartar
  • 56 g cold butter
  • 155 g frozen, shredded sharp cheddar cheese, plus more for topping
  • 200 mL buttermilk, 15 mL for brushing the tops
  • 30 g dehydrated onion flakes

Directions:

  1. Preheat oven to 450° F. Line a baking sheet with parchment paper.
  2. Rehydrate the onions flakes in the buttermilk for 5 minutes.
  3. Combine the dry ingredients in the large bowl of your food processor with the blades and mix well.
  4. Cut in the cold butter until it resembles a coarse meal. Replace the blade with the plastic dough blade.
  5. Add the buttermilk onion mixture and cheese to the flour and pulse to combine into a ball (cheese should still be frozen or at the very least, extremely cold).
  6. If it’s really warm in your kitchen, it’s best to refrigerate the dough for 30 minutes. With very little flour to prevent sticking, roll the dough into 1 cm thickness and use your favourite cookie cutter to cut even shapes (I used 5 cm squares with scalloped edges.
  7. Place each shape onto the prepared baking sheet about a centimetre apart and brush the tops with the extra buttermilk. Add a pinch of frozen shredded cheese to each top, if desired.
  8. Bake for 10 to 15 minutes or until lightly golden.

So flakey and delicious!

Notes:

  • I buy my cooking/baking cheese on sale in 400 g logs and I grate them into zip-lock bags and freeze them. If you break up the shreds as they freeze, they won’t stick together in clumps.
  • The frozen cheese will help make these flakey.

These are the grey days that just kill me.

Read Full Post »

The week before Christmas in 2022, we were in full-entertaining mode, trying to see all of our friends before we started travelling again. We have been doing more and more brunches, particularly in the winter months when driving at night can be more treacherous. I was hoping to do a simple brunch dish so I could spend more time with friends but then I saw this interesting pancake called Dutch Baby and I had to try it. It’s actually a German invention (think Deutsch) that was translated to Dutch in the states, this simple popover-like batter makes a grand entrance with its golden puffy sides and a lovely custardy-base that is perfect for brunchy-style meals. You can make them either savoury or sweet. I chose to make individual Dutch Babies to hold eggs bennies for a bunch we had just before Christmas. There is a bit of strategy so that everything remains hot and ready for serving but fear not, I have documented my process for you, easy peasy.

Individual Dutch Baby Bennies for Brunch (logistics and all)

A KitchenInspirations Original Recipe

This recipe makes 1 serving, please multiply by the number of people you are serving for your ingredients.

Ingredients:

  • 1 large egg
  • 63 mL milk
  • 31 g flour
  • 7 g sugar
  • salt
  • A smidge of butter for the cast iron pan

Also required per person:

  • Hollandaise sauce
  • Poached egg
  • about 50 g Ham, shaved, room temperature
  • Half an Avocado

Directions:

  1. Preheat the oven to 425° F convection, with the cast iron pan in the oven (place cast onto a rimmed baking sheet). You need to put the pan on the centre rack in the oven.
  2. In a blender, combine the eggs, milk, flour, sugar and salt and blend until smooth. Set aside while the oven and cast iron preheat. When the pan and oven are heated to temperature, add a smidge of butter to the pan and melt coating the insides.
  3. Pour the egg mixture into the pan and bake for 15 minutes (keep checking from 12-15 so it doesn’t burn).
  4. While baking, make the hollandaise sauce (see notes for my recipe or use your own). Cover the finished sauce and set aside.
  5. During the last 6 minutes of baking the Dutch baby, poach the egg for a minute less than your normal poaching time, turn the heat off and remove the pan from heat source, keep the egg warm in the water they poached in. When you are ready to serve, remove the poached egg and drain it on a paper towel. Gently reheat the hollandaise over the warm poaching water whisking so it doesn’t separate.
  6. Assembly:
    When the Dutch baby is golden (~200° F on an instant read thermometer), remove it from the pan and place it onto a warm plate. Top with a few spoonfuls of mashed avocado, ham and finally the poached eggs. Drizzle the warmed hollandaise sauce over the eggs and serve immediately.

Notes:

  • My oven takes a good 15 minutes to pre-heat to 425° F so plan ahead.
  • I used Betty Crocker mini oval cast iron pans 16 cm x 11.5 cm that were perfect for each serving.
  • My hollandaise is very simple: 30 mL lemon juice, pinch of salt, 80 g butter, 1 egg. In a double boiler (I love Ikea’s KLOCKREN Doubleboiler insert), melt the butter and add the lemon juice and salt and mix well, heat until warm to the touch without boiling the water below. Whisk the egg and slowly temper with the warm butter mixture, whisking well. Return the tempered egg to the double boiler and whisk until thickened. Remove the hollandaise immediately from the heat and set aside. If your sauce has separated, you’ve heated it too fast and too hot; although not kosher, you can blitz the separated hollandaise with an emersion blender to achieve a smooth sauce and avoid having to start over.
  • To get the most professional-looking poached eggs, strain the raw egg through a fine sieve before poaching. Straining removes the excess white which usually just clouds the water and creates a messy, loosely-poached egg. I usually poach for 4 minutes, so for this recipe, poach for 3 minutes and allow the eggs to sit in the hot water, off the heat while you prepare the remainder of the meal.
  • If you are making this for a crowd, poach the eggs in advance for 1-2 minutes and immediately plunge them gently into an ice bath and hold them there until ready to serve. When ready to serve, bring a large enough pot of water to hold all the eggs to a light boil and reheat the eggs and finish poaching them! Serve immediately.

Read Full Post »

It’s dinner party and cocktail party season so the team at Kitcheninspirations have been busy making and freezing party food so we are never caught empty handed. The filling for these tasty little bites comes together very quickly and if you don’t have time, store-bought wonton wrappers will do the trick.

Shrimp Gyoza

For original gyoza wrapper recipe, please click here.

Makes 20 gyoza

Ingredients:

  • 120 g AP unbleached flour
  • 65 g water, boiling
  • pinch of salt
  • cornstarch for dusting
  • 5 mL sesame oil
  • 75 g shrimp
  • 2 scallions, finely diced
  • 5 g ginger, finely grated
  • 10 g roasted garlic
  • 20 g carrot, finely grated
  • 10 mL soy sauce
  • 8 g cilantro leaves, finely chopped
  • Butter or grapeseed oil to brown gyoza
  • Sesame seeds and cilantro for garnish

Directions:

  1. Combine flour and salt in a bowl. Add boiling water to the flour and salt mixture slowly to make a dough, turn out to a surface and knead for about 10 minutes until smooth. Wrap the dough in plastic and allow to rest at room temperature for 30 minutes.
  2. Heat the sesame oil in a pan and add the shrimp and stir fry. Stir in the scallions, ginger, roasted garlic, carrot, soy sauce and cook for a minute. Remove from heat and allow to cool thoroughly. When cool, add the cilantro and mix well.
  3. To make the wrappers, roll each sausage out to a manageable thickness and run it through the KitchenAid pasta roller from #1 to #4.
  4. Cut into 7.5 cm (3 inch) rounds. Wet the edges of each round, spoon 5 mL (1 tsp) of the filling into the centre and fold in half and seal the edges. I used a handy pleater like this one to get perfect pleats.
  5. Steam each one for 3-5 minutes. When cooked, melt butter or grapeseed oil in a cast iron pan. Pan-fry each one on one side only so it is golden and crispy. Serve with your choice of dipping sauce.
  6. Freeze uncooked gyoza on a piece of parchment and once frozen add to a ziplock bag for future use. Frozen gyoza will cook in 3-5 minutes!
  7. To serve, melt about 15 g of unsalted butter with 30 mL of grapeseed oil and fry one side of each gyoza. Serve sprinkled with sesame seeds and bits of cilantro.

Serve these tasty treats with a sweet and salty soy sauce.

Read Full Post »


If it’s a really hot summer’s day and you don’t want to turn on the big oven, this is a great alternative method to roast cauliflower and it’s super easy to clean up. 

Instant Pot Roasted Garlic, Cauliflower Mash

Serves 2

Ingredients:

  • 500 g Cauliflower florets, similar size
  • 15 mL Extra Virgin Olive oil
  • 2-4 cloves garlic, unpeeled
  • Sea salt
  • 250 mL water
  • Butter, cream or chicken stock

Directions:

  1. Drizzle the oil onto the cauliflower so it covers overall. Lay the cauliflower into the air fryer basket, tuck the garlic cloves into the cauliflower. Set the air fryer lid on and choose ‘Roast’, 330° F for 15 minutes. Stir three times during the cooking process.
  2. Pour the cauliflower into the pressure cooking pot and add 1 cup of water. Set the pressure cooking lid on and setting to ‘Pressure Cooking’ for 5 minutes. Depressurize carefully or allow it naturally to depressurize.
  3. When complete, cauliflower should be very soft. Squeeze out the garlic and add to the cauliflower into a glass container. Blend with the immersion blender until smooth adding the remaining water from cooking or butter or cream or stock to achieve the desired consistency. Reheat in the microwave when ready to serve.

A fantastic low-carb alternative to mashed potatoes.

Read Full Post »

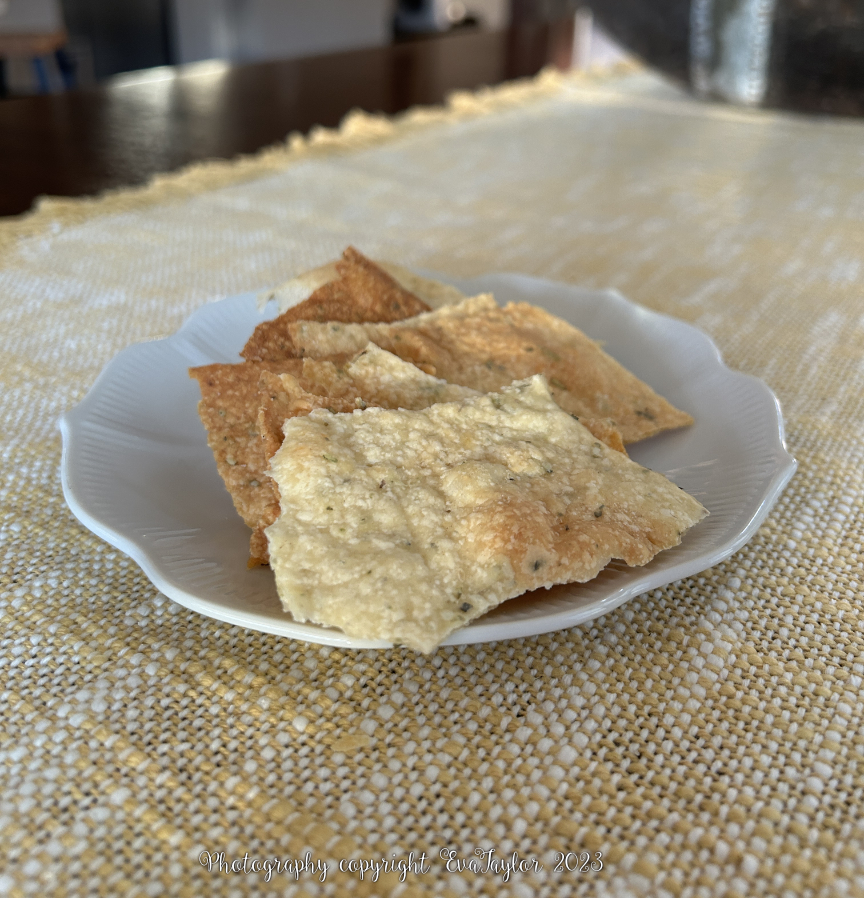
Upon our return from Spain, I was missing being there so I made the Almond Tuiles of Sevilla (Tejas Dulces de Sevilla). They are delicious but it got me thinking about a savoury version. We had brought home some wonderful cheese called Old Amsterdam and I thought it would make a delicious snack. They are light and airy and crisp. They are strong enough for dip, but tasty on their own. I love how rustic they look from just breaking them apart.

Savoury Cheese Tuiles

Makes about 20 cm x 30 cm sheet

Ingredients:

  • 1 egg
  • 30 g cheese (I used Old Amsterdam)
  • 1 g salt
  • 1 g smoked paprika 
  • 50 g flour 

Directions:

  1. Beat the egg until it reaches the ribbon stage (about 5 minutes), add the salt and smoked paprika and mix well, then fold in the flour.
  2. Spread evenly on a parchment-lined baking sheet and sprinkle the cheese over it evenly and bake at 275° F for 20-35 minutes or until it has totally dried out and developed a golden colour.
  3. Cool entirely and once cool break into shards. Serve at room temperature.


Read Full Post »

As our time in Spain was dwindling in late May, I began to think more about using up pantry items. Here is another recipe that was created to use up pantry ingredients I purchased for our time in Spain. I wanted to use up the flour, sugar and a lime that I had sitting around. Unfortunately, I had only a little butter that I needed for the remainder of the week so I improvised and used reduced table cream. I figured if you could make cookies using olive oil, then you should be able to make cookies using cream, but I only had table cream which is generally about 18% fat so I reduced it about half in volume which I was hoping would give me about 36% fat or at least more than 18%. The cookies turned out delicate, not crumbly and slightly chewy. JT thought some coconut would be lovely in them so perhaps I’ll try that next time. I would have liked a little more lime flavour so I upped the zest in the recipe below because I only had one lime, two I think, would be perfect.

A deliscious, chewy cookie.

Lime Sugar Cookies

A KitchenInspirations Original Recipe

Makes about 24 cookies about 5 cm in diameter

Ingredients:

  • 270 g all-purpose flour
  • 5 g baking soda
  • 2.5 g kosher salt
  • 251 g granulated sugar, plus more for rolling
  • 78 g reduced table cream (see notes)
  • 2 large eggs
  • 2.5 mL vanilla extract
  • 15 mL lime juice 
  • Zest of 2 limes

Directions:

  1. Whisk together the flour, baking soda and salt and set aside.
  2. Combine the sugar, table cream, eggs, vanilla, lime juice and zest and mix well.
  3. Pour the dry ingredients into the wet and just fold in so that there is no visible flour. Set in the freezer for 30 minutes.
  4. Preheat the oven to 350° F. Drop about 15 mL cookies (about a tablespoon) onto a parchment-lined sheet bake for 8-10 minutes. Allow to cool completely.

Notes:

  • For the table cream in this recipe, pour 250 mL table cream into a heavy bottom saucepan and reduce on high heat until about half (about 30 minutes), stirring occasionally so it doesn’t over boil. Cool completely.

Read Full Post »

Sometimes it’s just the simplest things that are the best. While we were in Spain, we had a lot of tapas, they serve tapas every time you order a glass of vino. Sometimes it is as simple as delicious olives, or sometimes it’s a little ham sandwich. While we were in Granada, we slipped into this adorable little bar and ordered a couple of glasses of vino with some tapas. Before we even had our first sip, they brought out a good quantity of homemade potato chips and these little round sandwiches (about 7-10 cm in diameter). If we hadn’t already ordered a selection of cheeses and charcuterie, we would have been done! And they would not have been offended. This is Spain, where a glass of good quality wine is €3.50 (less than $5) AND it comes with food! And there is no expectation of tipping, most restaurants add a small service fee per person so you needn’t worry about it.

We were sitting at home one evening when we decided to have a glass of vino and JT asks what we were having for hors d’œuvres! I had to scramble a bit because I hadn’t pre-made anything for the freezer but I did have some incredible peppers (did I mention how wonderful vegetables taste in Spain?) so I sliced them thinly and sautéed them and presented them with some toasted Spanish pine nuts. They were fantastic! So simple. If you’re serving a crowd, you might want to add a splash of red wine and some sliced chorizo, served with crusty bread of course. This is definitely going into my repertoire because I always have peppers at home.

I haven’t stipulated quantities because it’s what you have on hand. I used about a half of pepper each of the red and yellow and about 1/4 of an onion.

These are some of the sweetest peppers we’ve ever tasted.

Sautéed Peppers with Pine Nuts

A KitchenInspirations Original Recipe

 Ingredients:

  • Red peppers, deveined and seeded, cut into strips
  • Yellow peppers, deveined and seeded, cut into strips
  • Onion, thinly sliced
  • Splash of olive oil
  • Pine Nuts, toasted
  • Salt and pepper to taste

 Ingredients:

  1. Sauté the onions and peppers in a splash of olive oil. Add the chorizo and red wine, if using
  2. Sprinkle with pine nuts, salt and pepper and serve with crusty bread.

Read Full Post »

We’re coming up to our last few weeks in Spain and I’m thinking about how to use up all the groceries we bought. I probably shouldn’t have bought a pack of sugar (about 350 g) but it was only about €0.50 so I’m not going to kill myself but I will give an honest go of using some of it. Peanut butter is not a common ingredient in Spain (most likely all of Europe) and is therefore expensive (€6.00 for a 500 g jar) but JT loves the stuff, so we splurged. We’ll be away for about 9 days of the last 18 days in Spain so I wanted to start on my pantry cleanup sooner than later.

I didn’t want to buy another package of butter so I needed a recipe that did not use it. Fortunately, this one is an old favourite, slightly modified to incorporate pantry ingredients. The 30 g portions make a decent size cookie but not large by any stretch of the imagination. The butter is not beaten into the peanut butter (mainly because I didn’t have a mixer) just mixed in well, without too much exertion which makes it an easy cookie recipe. I’ll be definitely keeping this one in my repertoire.

Delicious cookies with just the right amount of chewiness.

Pantry Clean Out Peanut Butter Cookies

A KitchenInspirations Original Recipe

Makes 19 cookies about 30 g each

Ingredients:

  • 250 g crunchy peanut butter (natural, no salt or sugar added)
  • 2 eggs
  • 80 g flour
  • 165 g sugar
  • 3 g salt
  • 50 dark chocolate with sea salt

Directions:

  1. Preheat the oven to 350° F.
  2. Combine the peanut butter and eggs and mix well.
  3. Combine the flour, sugar and salt and mix well.
  4. Add the dry ingredients to the wet and mix well.
  5. Portion out 30 g balls and flatten slightly with your palm. Dot the chocolate pieces onto each one evenly.
  6. Bake for 8-12 minutes at 350° F.

Read Full Post »

I always create a menu plan for every week and when we arrived in Spain, it was no different. I like to schedule meals out in a restaurant but if they don’t work out, I also like to have something easy to fix on hand, dried cheese tortellini was one of these things. We had been out for lunch at one of our favourite Italian places and the couple at the table next to us ordered the fried cheese tortellini and I was inspired, they looked so delicious. I have made fried pasta before but used North American dried pasta and it wasn’t good, they were too thick and ended up really hard and difficult to eat so I didn’t bother posting about them. These little gems are different, they are crispy, chewy little parcels filled with cheese! They are wonderful. I tested up a batch of 18 and found them quite successful so I fried up the entire package! I froze them for when we reunite with our dear friends Paul and T from Arizona, they came for a visit in early May. Just pop them onto a parchment-lined baking pan and bake at 350° F for about 10-12 minutes. Serve with salsa, romesco sauce or any one of your favourites. Make sure you make a bunch because they are addictive.

They are crispy and chewy little parcels of deliciousness.

Crispy Fried Cheese Tortellini

A KitchenInspirations Original Recipe

Makes as many tortellini as your package has.

Ingredients:

  • 1 package dry cheese-filled tortellini, cooked through
  • 500 mL high flash-point oil
  • dipping sauce, your choice

Directions:

  1. Heat the oil to 350° F
  2. Fry only 5-6 at a time until golden, place on an absorbant cloth to soak up any excess oil.
  3. Serve warm with your favourite dipping sauce.

Notes:

  • Cook your pasta to slightly overdone, this will provide the best crunch.
  • Cook your pasta in advance so that you can totally drain them and allow them to slightly dry out on a paper towel or parchment (this will prevent the oil from splashing when the water hits it).

Read Full Post »

You may have noticed from my other socials that we have escaped Toronto and finally headed to Spain. Our first trip in February was cancelled by you know what. We are here for 51 days. The sun and relative warmth have been life-altering. I wake up just to see the sunrise on the Mediterranean (it’s not that bad, 7:30-ish during our stay).

This slideshow requires JavaScript.

Our kitchen in the flat (my cousin’s flat) is challenging from a size point. I have fitted it with most of my favourite tools so I can do most things but finding a place to do them can be a challenge. Most people who rent do take away or go out to one of the many restaurants in this little village. The Spaniards like to eat late (9pm would be considered an early dinner) but I find it difficult to eat that late, so we end up going out for lunch and having a light dinner around 7pm. Although the first few attempts to lunch were failures as many places don’t open until at least 1:30 (we don’t eat breakfast) and they close between 2-5pm for Siesta. Don’t get me started on Siesta, it is a beloved ritual in the smaller centres. This little recipe was developed to take us through cocktails one evening. 

Retro Olive Balls

A KitchenInspirations Original Recipe

Makes 8 pastry-wrapped olives

Ingredients:

  • 15 g unsalted butter, room temperature
  • 60 g cheese, we used manchego
  • 60 g flour
  • 15 g roasted garlic purée
  • Salt, pepper to taste
  • water to bind
  • 8 olives

Directions:

  1. Preheat the oven to 350° F.
  2. Combine everything but the olives in the small bowl of a food processor and process until combined. If the dough still doesn’t come together, add a few drops of water and pulse until it comes together.
  3. Divide the dough into eight equal portions. Roll each portion into a small circle and wrap around each olive, rolling in your hand until it is smooth. Repeat until all of the olives are wrapped.
  4. Bake on a parchment-lined baking sheet until golden, serve warm.

A delicious buttery pastry enveloping a Manzanilla Olive.

Notes:

  • I used unpitted Spanish Manzanilla Olives because it is what I had at home, black olives or even pimento-stuffed olives would be lovely with this recipe. Make sure you mention to your guests that the olives are with pitts.
  • Double or triple this recipe for more tasty little balls.


Read Full Post »

Truth be told, I re-invented some leftover devilled eggs into this deluxe egg salad. The creamy egg yolks made perfectly rich and luscious creamy egg salad. I upped the ante by adding a small, ripe avocado. Winner, winner, egg salad!

I think I’ll make egg salad this way all the time.

Deluxe Egg Salad

A KitchenInspirations Original Recipe

Makes enough for 2 large croissant sandwiches

Ingredients:

  • 4 left over devilled egg halves (see notes on how I jazzed these up), roughly chopped
  • 2 additional hard-boiled egg, roughly chopped
  • 15 mL mayonnaise
  • 5-10 mL lemon juice
  • 2 scallions, finely chopped, plus more for garnish
  • ~10 cm of cucumber, finely diced
  • 1 small, ripe avocado, finely diced
  • Add salt and pepper to taste

Directions:

  1. Combine the devilled egg filling with the additional hard-boiled egg yolk with the mayo and lemon juice, whisk well.
  2. Stir the scallions, cucumber and avocado together, mixing well. Spoon the egg yolk sauce over the eggs and fold in, completely mixing with the eggs.
  3. Serve in a croissant with additional finely chopped scallions as garnish.

Delicious stuffed into a croissant.

Notes:

  • When I made the devilled eggs, I whipped the yolks with mayonnaise, Dijon mustard and room temperature goats cheese and a little finely chopped scallions. Salt and pepper to taste.

Read Full Post »

My brother loaned us his cottage for the last week of January. Yes, it is a lot colder up there but it is extremely beautiful with the pristine, sparkling snow and the occasional visit from wildlife. I needed to clean out the fridge before we left and created this tasty and satisfying soup. Pair it with a scone or grilled cheese and you have the perfect winter-time lunch. The measurements are not important here because I was just using up some less-than-perfect produce, it’s just an inspiration for future soups.

JT bought me the KitchenAid Vegetable Sheet Cutter to help me cut down our carbs so I had a lot of zucchini cores leftover which played right into this delicately flavoured soup. I was going to add cream but then I had a very ripe avocado that would meld perfectly into this winter meal.

Celery, Zucchini, and Avocado Cream Soup

A KitchenInspirations Original Recipe

Makes 1.45 L soup

Ingredients:

  • 15 mL EVOO
  • ~ 1/2 a bunch of celery, roughly chopped
  • ~ 1 zucchini, roughly chopped
  • ~ 1 small Vidalia onion, roughly chopped
  • 5-10 sprigs of parsley
  • 1 L chicken stock
  • 1 small Avocado, peeled and pitted
  • Salt and Pepper to taste

Directions:

  1. In a large pot, heat the EVOO, add the celery, zucchini, onion, and parsley, and cook until softened. Add the stock and simmer for 30 minutes or until all of the vegetables are very soft. Add the avocado.
  2. Blitz with your immersion blender or allow to cool and purée with a Nutri Bullet or VitaMix for a smooth and creamy soup. Strain through a fine sieve to remove the celery ‘hairs’.
  3. Serve hot.

Read Full Post »

I started watching a couple of Ontario-guys on Facebook who try to prove or disprove crazy videos they’ve seen, mostly of food but it can also be science or cleaning and such. They are a bit goofy which makes them rather charming. Their girlfriends sometimes participate in these videos by making some outlandish foods. This traditional Georgian potato, cheese-stuffed bread was one of them. The recipe looked so good, I had to do a little research and make my own. Their recipe was fairly straight forward using baking powder and not yeast bread dough, but the research showed that most of the recipes were yeasted bread dough, so I went with that. Then I found a few that had egg in them which gives the bread a wonderful, chewy texture. Then there is the mashed potato and cheese stuffed inside. OMG, so good. My recipe makes four disks about 20 cm in diametre, cut into eight portions.  The bread freezes very well. Remember to put it in the refrigerator overnight to defrost, then allow it to come to room temperature before baking. We went through two bad boys in two days and I sent a third one to a friend who was going to visit her parents! The fourth one is under lock and key in the freezer, I’m saving it for a special time! I will definitely be making this recipe again and again!

Soft, pillowy mashed potatoes with the sharp feta (or goat) and gooey mozzarella makes for a more-ish starter.

Kartofdzhyn (Cheese and Potato Stuffed Bread)

A KitchenInspirations Original Recipe

Makes 4 stuffed bread rounds about 20 cm (8 inches) each

Ingredients for the Bread:

  • 6 g quick yeast
  • 8 g granulated sugar
  • 120 mL milk, at 110F
  • 460 g bread flour
  • 6 g salt
  • 215 g Greek yogurt
  • 2 eggs
  • Olive oil for the dough
  • 1 egg yolk, whisked for brushing the dough

Directions:

  1. Combine the yeast and sugar with the warm milk and allow to proof for about 10 minutes (it should froth up)
  2. Add the flour and salt to the large bowl of your stand mixer and mix lightly.
  3. Combine the Greek yogurt and eggs with the frothy yeast mixture and whisk until well combined.
  4. Add the liquid ingredients to the flour and knead with the hook for 10 minutes. Stop the mixer and allow the dough to rest for 10 minutes, then resume kneading for about 15 minutes or until the dough comes away from the bowl.
  5. Coat the dough with olive oil and allow to proof for about an hour, or until doubled in size.

Ingredients for the Filling:

  • 2 medium yellow potatoes (about 230 g), boiled
  • 30 g butter
  • 30 g roasted garlic purée
  • 2 scallions, finely chopped
  • 100 g feta cheese or goats cheese
  • 230 g mozzarella
  • 6 g salt

Directions:

  1. Mash the potatoes with butter and roasted garlic, then beat with a whisk beater until light and fluffy. Fold in the scallions, cheeses, and salt and set aside.

Directions for the dough disks:

  1. Divide the dough into four equal portions. Roll out each portion evenly to a circle about 25 cm (10 inches). 
  2. Add one-quarter of the filling to the centre of each round and pull in each side to form a sealed disk. Flip over and gently roll out to about 20 cm (8 inches). Pierce the top of the disk with a fork and brush each dough disk with the egg yolk. Set aside while the oven preheats or freeze on a baking sheet and transfer to a plastic zip-lock bag for the future.
  3. If baking at the moment, put a cast-iron pan into the oven and pre-heat the oven to 400° F. Add one disk to the hot pan and bake for 20 minutes. When done, remove from the heat and brush the top with some more olive oil. Serve warm.


Read Full Post »

We usually have small quantities of a lot of different produce leftover as we approach shopping day, you know, a little of this, a little of that. That is where this bowl came from — it was an inspiration to use up the small portions of veggies before they were past their prime. The recipe is just whatever you have on hand, so I have not posted actual quantities, but there is no denying that this bowl is a keeper! It’s filled with flavour, texture, crunch against the creaminess of the avocado dressing. 

Lots of flavours and textures make up this tasty bowl.

Green Goodness Bowl

A KitchenInspirations Original Recipe

Ingredients:

  • Greens, shredded
  • a handful of Chickpeas, cooked
  • about half a Mango, small dice
  • 1/2 Avocado, small dice 
  • Cheese, small cubes
  • a handful of Pearl barley, cooked
  • a handful of vinegar coleslaw
  • a couple of good pinches of Sunflower Seeds, toasted

Directions:

  1. Place the greens at the base of the bowl and add each ingredient on top, into its own quadrant, leaving the sunflower seeds to garnish after you have dressed your bowl.
  2. Dress with the avocado dressing (recipe below) and garnish with the sunflower seeds. Serve immediately.

A delicious combination that is satisfying.

Green Goodness Dressing

A KitchenInspirations Original Recipe

Makes enough dressing for 2 bowls.

Ingredients:

  • 1/2 Avocado
  • ~ 15 mL mayonnaise
  • ~ 15 mL greek yoghurt
  • ~ 15 mL lemon juice
  • pinch of tarragon
  • water, to thin

Directions:

  1. Add all of the ingredients with the exception of the water to a tall, thin jar made for your immersion blender and blend until smooth adding water, little by little to make it loose enough to pour.

Notes:

  • It is more flavourful to have sweet, salty and savoury things. 
  • I like to toast the barley for a nuttier flavour when cooked.
  • Alternatives to mango: craisins, raisins, grapes.
  • Alternatives to chickpeas: lobster meat, crab meat, tuna, chopped ham, edamame.
  • Alternatives to barley: rice, bulgar, Isreal couscous, couscous.
  • Additions: peas, corn, diced peppers.
  • Alternatives to sunflower seeds: pepitas, roasted walnuts, roasted peanuts.


Read Full Post »

It’s been wickedly cold here, and by wickedly cold, I’m talking -21° C or -5.8° F! I have only been able to think about soup. I love brothy soups but JT is not as much of a fan, he prefers creamed soups so I like to mix it up. I had purchased too much broccoli for Christmas day dinner so I had a small crown leftover along with a not-so-perfect-looking romaine, so this recipe was a result of these two leftovers.

Broccoli and Cheddar Soup

A KitchenInspirations Original Recipe

Makes just over a litre of soup

Ingredients:

  • 1/4 Vidalia onion, roughly chopped
  • 15 mL EVOO
  • 1 fist-sized head of broccoli, roughly chopped
  • 1/2 romaine lettuce, shredded
  • 1 L chicken stock
  • 5 cm x 5 cm Parmigiana rind, cut into smaller pieces
  • 30 g of cheddar, shredded
  • Salt to taste

Directions:

  1. In a hot pan, cook the onion in the olive oil until translucent, add the broccoli and romaine lettuce and cook for about 5 minutes. Add the chicken stock and the Parmigiana rind and simmer for about an hour or until everything has softened.
  2. Blend with an immersion blender until smooth. If using a traditional blender, allow to cool a bit so the steam doesn’t blow off the lid.
  3. Serve with some shredded cheddar sprinkled on top.

Notes:

  • The romaine didn’t end up adding much flavour but it did help with thickening.
  • Use vegetable stock if making vegetarian.
  • The Parmigiana also helps to thicken the soup.
  • I used both orange and white cheddar because that is what I had.

Read Full Post »

My besty from uni is gluten intolerant and allergic to soy! It’s always a bit of a challenge cooking Asian foods because of the soy allergy but I try to be inclusive and make something special for her if she can’t eat my dish. One such occasion was Christmas day, I served Gyoza as the hors d’œuvres and I made her a special gluten-free version. Had I known how good the gluten-free version would turn out, everyone would have had it. The dipping sauce I usually serve with them has soy in it so I wanted to make a special sauce without soy so my friend can enjoy it too. This imposter has the forward saltiness and a bit of sweetness with a finish of umami from the Nori that actual soy sauce has. It turned out very well, in fact, I will make only one sauce with this soyless soy sauce that everyone can enjoy!

Soyless Soy Sauce (soy-free, gluten-free)

A KitchenInspirations Original Recipe

Makes 30 mL sauce

Ingredients:

  • 5 mL molasses
  • 375 ml water
  • 2 g black garlic salt (I used this one)
  • 3.5 dried black fungus
  • 3 g dried shiitake mushrooms
  • 0.5 g Nori Seaweed

Directions:

  1. Combine everything but the Nori in a small saucepan and bring to s boil. Boil for 15-20 minutes or until reduced to about 30 mL.
  2. Remove mushrooms and reserve for another use. Strain the liquid and add salt and pepper to taste. add the nori seaweed and immerse entirely, refrigerate with nori for 1 day.
  3. Strain Nori and the sauce is ready for use.

This imposter has the forward saltiness and a bit of sweetness with a finish of umami from the seaweed that actual soy sauce has.

Read Full Post »

We had dear friends over for Christmas Day dinner last month. I had made a bunch of regular gyozas and wanted some for my Gluten-Free besty. After much research, I found several recipes and came up with my own. This recipe has the elasticity that steamed gyozas have but it also packs an incredible crunch when fried to a golden brown on one side. JT couldn’t tell that they were gluten-free! I’m thinking they may even make incredible ravioli!

Gluten-Free Gyoza Wrappers

A KitchenInspirations Original Recipe

Make 15 gyoza wrappers

Ingredients:

  • 50 g gluten-free all-purpose flour (I used Bob’s Red Mill)
  • 33 g tapioca flour
  • 4 g xanthan gum
  • 0.1  g salt
  • 40 g boiling water
  • 10 g vegetable oil

Directions:

  1. Combine all of the dry ingredients and mix well.
  2. Combine the boiling water and vegetable oil and pour into the dry ingredients, mix well until it comes together. Set out to a lightly GF floured board and knead for a few minutes. Cover tightly in plastic wrap and allow to rest for about 15 minutes.
  3. Cut the dough into four portions and roll out to about 2 mm thick using the KitchenAid pasta dough attachment, roll the dough and fold it onto itself several times on #1. Then roll the dough out from #1-#4. Use like any gyoza dough being careful to cover it tightly with plastic wrap when not in use.
  4. Steam the GF gyozas for about 3-4 minutes, they should bounce back if you gently poke them.

Notes:

  • Keep the dough tightly covered with plastic wrap when not in use, it dries out very quickly.
  • Rub a little water on one side of the seam before closing so that they don’t come apart when steaming.
  • The gyoza will puff up when you steam them.
  • The uncooked gyoza feeze well. Freeze on a parchment-lined sheet and for about 30 minutes, drop into a ziplock bag. I wouldn’t leave them for more than 30 minutes on a sheet uncovered because they dry out.
  • Most recipes did not have the addition of tapioca flour or vegetable oil; I added the tapioca flour to improve the elasticity that gluten-free flour lacks and the vegetable oil was needed to help the dough from drying out.
  • You will need to roll out the dough by hand to get it through #1, but you’d have to do that with regular pasta dough too.

The gyoza is chewy and crunchy like a real gyoza should be!

Read Full Post »

Back in the 80’s, when I was first dating JT, his parents would occasionally invite me to dinner at their home. JT’s Mom didn’t love cooking but she really made an effort. She focussed on areas she could master, like soups, salads, and pies (she made awesome pies). She let the experts deal with the proteins for the most part and one of her favourite proteins was, Chicken Cordon Bleu. She had her local butcher make up these delicious little parcels and she just popped them into the oven and baked them. Honestly, I hadn’t thought about these bundles until about a year ago when I was really trying to make our meals more of an event, since we weren’t doing much else (thanks Covid). They didn’t disappoint!

I created a very easy way to parcel the chicken breasts with the ham and cheese so they would stay together. I didn’t bother putting the little chicken crown over my version but it was still beautiful and delicious.

The trick is to even out the chicken thickness by pounding with a flat pounder, I like to put the chicken into a zip lock bag so that it doesn’t splatter when I’m pounding it. You don’t want it too thin but you do want it even. You can pound it thinner and roll the ham and cheese but I’ve always found that the cheese eventually melts out so I make a pocket the length of the breast without cutting through and stuff the ham and cheese into the pocket. I use a metal skewer to hold the opening shut which will be removed just before slicing.

Flash-back to the 80’s Chicken Cordon Bleu!

A KitchenInspirations Original Recipe

Serves 2 (ingredients may be doubled or tripled easily)

Ingredients:

  • 1 @ 200 g (or 2 @ 100 g) chicken breast, deboned and skinned
  • 100 g Gruyère, grated
  • 1-2 slices of Serano ham
  • 1 egg
  • 1 tsp mayonnaise
  • 80 g AP Unbleached Flour
  • 15 g granulated garlic
  • 15 g dehydrated onion
  • 100 g panko
  • 1/4 tsp salt

Directions:

  1. Place the panko, granulated garlic, onion, and salt into a spice grinder and pulse until it is relatively fine. Toast the panko mixture gently in an oven-proof, dry frying pan until golden. Set aside to cool. Save the pan to cook the chicken in.
  2. Add the flour to a flat pan (I use small baking sheets about 20cm x 30 cm).
  3. Prepare your breading station by combining the egg and mayo and whisking until smooth. Pour into a second flat pan.
  4. Pour the cooled panko mixture into a third flat pan.
  5. Prepare the chicken breast by placing it into a zip lock bag and pounding it until it is relatively even thickness. Remove it from the bag and slice a thin slice through the breast to create a pocket (I try to keep the opening as small as possible to avoid losing the filling during the baking process).
  6. Place the Serano ham into the pocket and spread out as evenly as you can. Fill the pocket with the cheese. Taking a thin metal skewer, “sew” the opening up so that it remains closed during the baking process.
  7. Place the chicken bundle into the first pan, and coat evenly with the flour.
  8. Transfer the bundle to the egg station and roll to coat evenly.
  9. Finally, roll the bundle in the flavoured panko and make sure that it is well coated. Return the bundle to the zip lock bag and fill it with the remaining panko mixture. From the outside of the bag, press the panko into the chicken bundle. Roll tightly and refrigerate until required.
  10. Preheat the oven to 375° F. Heat the oven-proof frying pan (previously used for the panko) with a little oil and fry 3 of the 4 sides of the chicken bundle until golden. When all three sides are golden, place the unfried part of the chicken bundle down onto the pan and place the pan in the oven and bake the chicken until the internal temperature is 165° F at its thickest part.
  11. When the chicken has reached the temperature, place the cooked chicken on a cutting board and cover for 10 minutes. Slice it in even slices and serve with your favourite veggies.


I served the chicken with cauliflower mash.

Notes:

  • I add the mayo into the egg because it really helps to crisp the breading, because it is baked and not fried.

Read Full Post »


Ingredients:

  • Butter to coat pan
  • 4 large eggs
  • 375 mL milk
  • 2 g sea salt
  • Pinch of nutmeg
  • 180 g sourdough bread cut into largish cubes
  • 1/2 apple, like gala, cored and sliced thinly
  • 100 g ham, cut into ribbons
  • 70+ g Gouda or Gruyère, divided

Directions:

  1. Brush the melted butter along the bottom and sides of a 9” x 9” decorative baking dish.
  2. Whisk the eggs, milk, salt and nutmeg.
  3. Lay the bread evenly in the prepared baking dish, place the ham and apples evenly throughout, then sprinkle 70g of the cheese over it tucking it into the spaces.
  4. Pour the egg mixture over the bread, ham, apples and cheese evenly. Cover and refrigerate overnight.
  5. The next day, remove the prepared bread pudding from the refrigerator and allow to come to room temperature, about an hour.
  6. Preheat the oven to 350 F. Sprinkle the remaining cheese over the top and bake for 40-45 minutes or until set. All the bread pudding to sit for 10-15 minutes to fully set.
  7. Serve with yogurt and Dijon maple syrup.

Ingredients

Read Full Post »

I had purchased a small package of sugar snap peas from one of our green grocers in early August for a dish but I really only needed about a dozen of them so I had to find something to make with the leftovers before they expired. I decided to blanch them for a minute or so and dress them with toasted sesame oil, a splash of soy sauce with a splash of rice vinegar to serve with my prized pork Bulgogi recipe, it was lovely.

Quick Sugar Snap Pea Salad

A KitchenInspirations Original Recipe

Serves 2, as a side salad

Ingredients:

  • A handful of sugar snap peas, blanched
  • 15 mL toasted sesame oil
  • a splash of soy sauce
  • a splash of rice wine vinegar (unseasoned)
  • toasted black and white sesame seeds for garnish

Directions:

  1. Combine the dressing and pour over the blanched sugar snap peas and coat well.
  2. Plate and sprinkle sesame seeds over the top.
  3. Serve chilled.

Notes:

  • Sesame oil can be overwhelming, 15mL was enough for this amount of sugar snap peas, if in doubt, start with a small amount and taste.
  • I blanched the sugar snap peas for about 1 minute in boiling, salted water.


Read Full Post »

I’m always on the lookout for low-carb options, not that I don’t love my carbs, they are just not as kind to me as alternatives, so I like to balance our intake with some low-carb options. I created this recipe when I had purchased too many zucchini’s and I thought it would make a nice alternative to the potato rösti that we are used to, I was wrong, it was significantly better than I expected. There is only cheese in this, no other binder! Other recipes use egg but it made a frittata-like pancake instead of rösti, which should be crispy on the outside, soft on the inside. This recipe is definitely a keeper! 

Zucchini Rösti

A KitchenInspirations Original Recipe

Makes 2 dinner portions or 4 appetizer portions

Ingredients:

  • 250 g zucchini, coarsely grated
  • 50 g Parmigiana, finely grated
  • 50 g Gruyère, coarsely grated
  • 2 g salt, divided
  • Pepper to taste

Directions:

  1. Place the grated zucchini into a bowl and toss with 2 grams of salt, allow to sit for about 30 minutes.
  2. Strain the zucchini and salt mixture and squeeze out as much water as you can. Taste for seasoning and add a little more salt if necessary, keeping in mind that some cheeses are saltier than others.
  3. Toss the strained zucchini with the cheeses and add pepper to taste.
  4. Heat a seasoned cast iron pan or non-stick frying pan to medium heat, then lower to medium-low.
  5. Add about half or a quarter of the zucchini mix to the pan and press down into a pancake about 1 cm tall. Cook until the edges are golden, gently loosen the cheese all around and beneath the patty, it may have stuck a little on the pan and flip repeat for the other side. 
  6. Serve hot as a base for fish, steak, chicken or even a poached egg.

Cheesy delicious goodness in every bite.

Notes:

  • Other cheese that would work: low moisture Mozzarella, Appenzeller, Cheddar etc. I would avoid feta, cream cheese, brie, etc.
  • There is no need for oil or butter, the cheese will render and the oils will help fry the Rösti.
  • If you don’t have time to wait for the salt to squeeze out all of the moisture from the zucchini, you may use it as is, just note that the inside will be much softer than if you had removed most of the moisture.
  • If you don’t have a seasoned cast iron pan or a non-stick pan, add a piece of parchment to the pan before adding the zucchini mixture, this will allow the cheese to caramelize and release from the pan easily.
  • I served Serrano ham wrapped cod with a dollop of Greek yogurt.

Read Full Post »

Back in mid-July, after a full-day of working on our deck project, we needed some appetizers for cocktails one evening. I didn’t want to spend a lot of time making them because I was pooped. I saw local cantaloupe and I immediately thought of the simple, yet tasty cantaloupe wrapped in Proscuitto (we used Serrano ham from Spain). It totally hit the spot. When I was selecting the melon, I wasn’t able to smell it as I usually do because we are still mandated to wear masks so I just picked one and I was lucky, it was wonderful. We had about 1/8th of it, so I had to figure out what to do with the remainder (other than eating it for dessert). I came up with this fresh, tasty recipe to go with some fish I had broiled, it was delicious.

Cantaloupe Salsa

A KitchenInspirations Original Recipe

Makes about 250 mL salsa

Ingredients:

  • 150 g cantaloupe, finely diced
  • 50 g cucumber, finely diced
  • 1/2 small avocado, finely diced
  • 1 green onion, finely sliced
  • Fresh Basil and Mint, in a chiffonade
  • 15-30 mL freshly squeezed lime juice
  • Salt to taste

Directions:

  1. Combine all of the ingredients, tasting and seasoning as required.
  2. Serve chilled with fish or barbeque.


Read Full Post »

This post was inadvertantly published on the same day as another, so we apologise if you’ve already seen/been here. Also, this post was written during our first foray out of lockdown.

We have continued to entertain one couple at a time outdoors, keeping well below the allowed maximum of five (outdoors only). Our space allows for four people socially distanced, any more, we’re less than two metres (six feet) apart and we are not comfortable with that.

I try to make meals that are hearty and warm. This is one such dip I made as an hors d’œuveres for friends who came for lunch (the main was JT’s Bœuff Bourguignon). That day in February was 6° C (43° F) outside but our heater warmed our little area to 15° C (59° F) which made it very comfortable with light coats on (in fact, my friend came seriously over dressed and had to peel layers off to be comfortable).

It’s quite romantic eating outside in the winter, and even my naysayer hubby is loving it. In fact, most of the negativeness has come from the men, the women are all over being outside but once the guys experience our little cozy nook, they are sold. Just like this dip, one taste and you’re sold. I make a similar dip using canned crabmeat but I must tell you that this salmon dip is so much more flavourful.

Warm Salmon Dip

A KitchenInspirations Original Recipe

Makes about 375 mL dip

Ingredients:

  • 250 g Cream Cheese, room temperature
  • 1 tsp dill (dried is fine)
  • 2 tsp horseradish (the original recipe called for horseradish cream, but I never had horseradish cream on hand)
  • 20 g red onion or shallot, finely minced
  • salt & pepper to taste
  • 25 g celery, finely minced
  • 150 g canned salmon, without skin or bones. It’s about 1/2 cup, or one can give or take.

Directions:

  1. Combine all of the ingredients and mix well (a light-duty hand mixer is perfect for this).
  2. Season with salt and pepper.
  3. If you are making this for the future, line three 125 mL or half-cup ramekins with plastic wrap.
  4. Divide the mixed dip into the three ramekins pressing into the ramekin so it will retain the shape. Try not to have too many folds so that the plastic comes off easily. Carefully twist the plastic wrap to seal. Place the ramekins in the freezer. Once the dip has frozen to the ramekin shape, remove the frozen dip and label it and return the shaped dip to the freezer until needed. Put your ramekins away.
  5. About 30-40 minutes before serving, pre-heat the oven to 375° F. Remove plastic wrap from the frozen dip and pop the shaped-frozen dip into the original ramekin you used to freeze it. Place on a cookie sheet (it may boil over depending on how full your ramekin was) and bake for 30-40 minutes or until dip is bubbling in the centre.
  6. Remove the baked dip, garnish with a smoked salmon rose and serve with papadams, crostini, crackers or even sliced cucumbers.

A warm, boldly flavoured salmon dip that is perfect for outdoor entertaining.

Read Full Post »

I love to cook Asian flavours, particularly in the warmer weather, it just feels right. One such warm and balmy evening I came up with this interesting twist on an old favourite: Thai Green Curry “Risotto“! It’s definitely not traditional so I’ve omitted the cheese because I didn’t like the flavour combination but I have an alt in the notes if you still want cheese in it. It’s creamy, even though I used Jasmine rice and I kept it monochromatic adding only green veggies. It was a definitely a winner!

Thai Green Curry “Risotto

A KitchenInspirations Original Recipe

Makes 2 dinner-sized servings or 4 appetizer servings

Ingredients:

  • 1 small shallot (about 25 g)
  • 15 mL EVOO
  • 60 mL Green Curry Paste
  • 160 g jasmine rice, rinsed well
  • 2 kaffir lime leaves
  • 300 mL chicken stock
  • 100 mL coconut milk
  • 50 g green beans (cut into 1 cm pieces)
  • 150 g bay scallops
  • 50 g frozen peas
  • 2.5 mL lime juice

Directions:

  1. In a small Dutch oven, heat the oil and add the shallots and cook until translucent. Add the kaffir lime leaves.
  2. Add the rice and toast for a minute or so. Add the green curry paste and cook until fragrant.
  3. Pour in the chicken stock about one-third at a time, stirring occasionally, cooking the rice until all’onda. Add the scallops and cook until they are 125-130F or you can panfry them like I did.
  4. Turn down the element and stir in the coconut milk, add the vegetables and heat through.
  5. Add the lime juice to taste. Remove the kaffir lime leaves to serve.

Deliciously creamy “risotto” with the flavours of Thailand.

Notes:

  • I add the lime juice to brighten the flavours without salt.
  • This is neither an authentic Thai nor Italian recipe. I just thought the green curry and jasmine rice lent itself to the traditional dish. This green curry does not have cheese in it but if you want it creamier, try a little cream cheese stirred into the curry right at the end.
  • Use any protein you wish, chicken or shrimp would be great too.

Bay scallops add the perfect amount of sweetness to this flavourful dish.

Note:

  • Rice portion was updated July 17 to reflect two servings.

Read Full Post »

Spring came early to Toronto, with warm, sunny days as early as the first week of April! Buds burst on trees and shrubs and we waited with bated breath for the blooms in hopes that we wouldn’t get a spring frost. A good spring always has rain and we’re OK with that as long as we get some sunny days interspersed to keep our mood elevated and this spring was perfect. The rainy days were a touch cooler (still above freezing) but cool enough to crave soup. JT has been a real trouper this winter, eating without complaint, my favourite brothy soups but his true love are creamed soups so I thought I’d create this creamy, tasty soup on a rainy mid-April day. I served this with Cheesy Onion Scones!

Cream of Celery Soup

A KitchenInspirations Original Recipe

Makes about 400 mL soup

Ingredients:

  • 15 mL EVOO
  • 50 g sweet onion
  • 300 g celery hearts, tender leaves included, roughly chopped
  • 50 g cauliflower florets (as a thickener)
  • 400 mL vegetable stock
  • 7.5 mL lemon juice
  • Salt to taste
  • 30 mL table cream

Directions:

  1. Heat the extra virgin olive oil in a soup pan and sweat out the onions until translucent, add the celery and cook on medium/low for about 3 minutes.
  2. Add the cauliflower florets and vegetable stock and simmer until all of the vegetables are soft.
  3. Purée until smooth and taste for acidity and salt, add as required. Keep warm until ready to serve.
  4. Just prior to serving, add 30 millilitres of table cream, stir well.

Celery in North America doesn’t have a strong anise flavour, it’s very mild.

Read Full Post »

I used to reserve Thai Green Curry for the times we go out for lunch, but nowadays there is no going out so we’ve had to improvise and make these tasty dishes at home. I’ve tried many a-green curry pastes and some were so hot, I just couldn’t tollerate them. I’ve tried making my own too, but have not found a recipe that reminds me of the restaurant style that I long for. That is until I combined two lovely green curry pastes! This is not a traditional Thai Green curry recipe, but it’s one that works for me and JT is always requesting it.

Thai Green Curry

Serves 2

Ingredients:

  • 2 teaspoons peanut oil
  • 15-30 mL green curry paste (see notes)
  • 200 g protein of your choice (I used chicken)
  • 15 g corn starch
  • 60ml (1/4 cup) chicken stock
  • 5 mL fresh lime juice
  • 5-15 g brown sugar
  • 15 mL fish sauce
  • 200 mL coconut milk
  • 4 kaffir lime leaves
  • 200g frozen green beans, French style
  • 1/3 cup fresh Thai basil leaves
  • Steamed jasmine rice, to serve

Directions:

  1. Cut the chicken into thin-ish, bite-sized pieces. Coat with the corn starch.
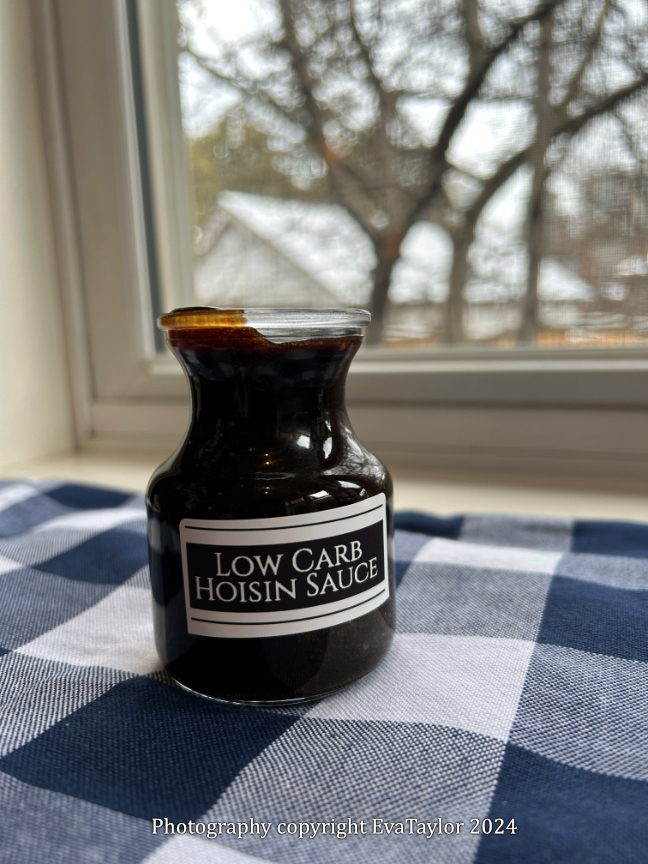
  2. Heat the peanut oil in a small Dutch oven and cook off the green curry paste until fragrant and has become somewhat dry. Add the chicken and cook until it is golden.
  3. Add the chicken stock, lime juice, fish stock and brown sugar and stir until it heats through and the sugar has begun to melt.
  4. Add the coconut milk and stir until smooth and creamy. Do not boil because the coconut milk can separate and it won’t look as good. Add the kaffir lime leaves and simmer until the chicken has cooked entirely through.
  5. Add the frozen green beans (see notes) and stir until heated through. Remove the kaffir lime leaves.
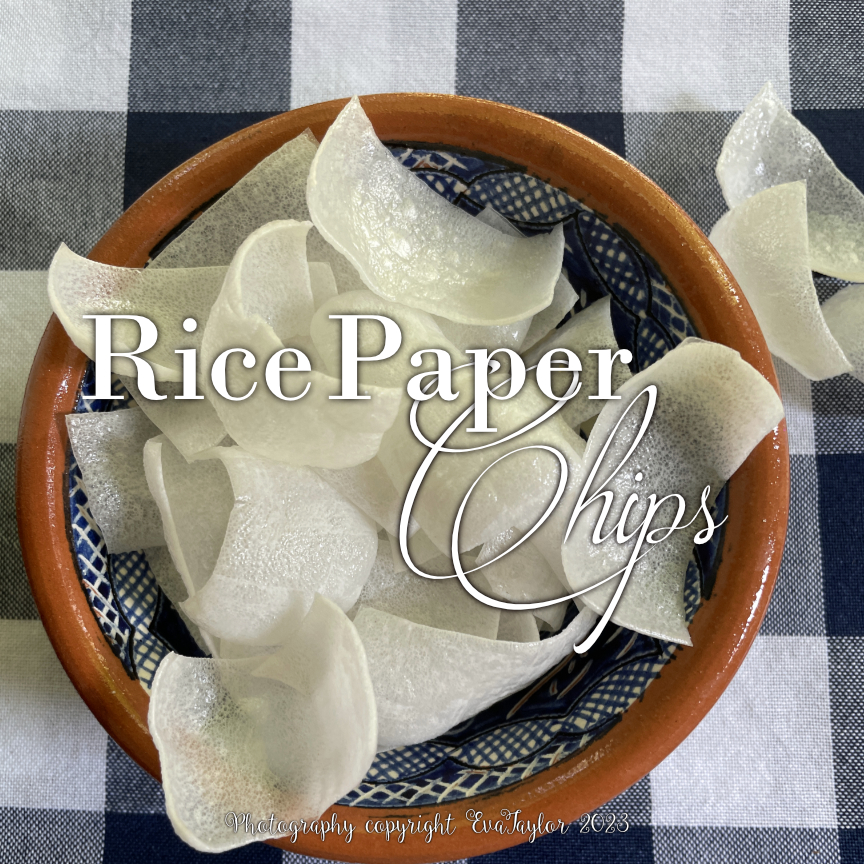
  6. Serve over an inverted bowl of rice, garnish with Thai basil or kaffir lime leaves.
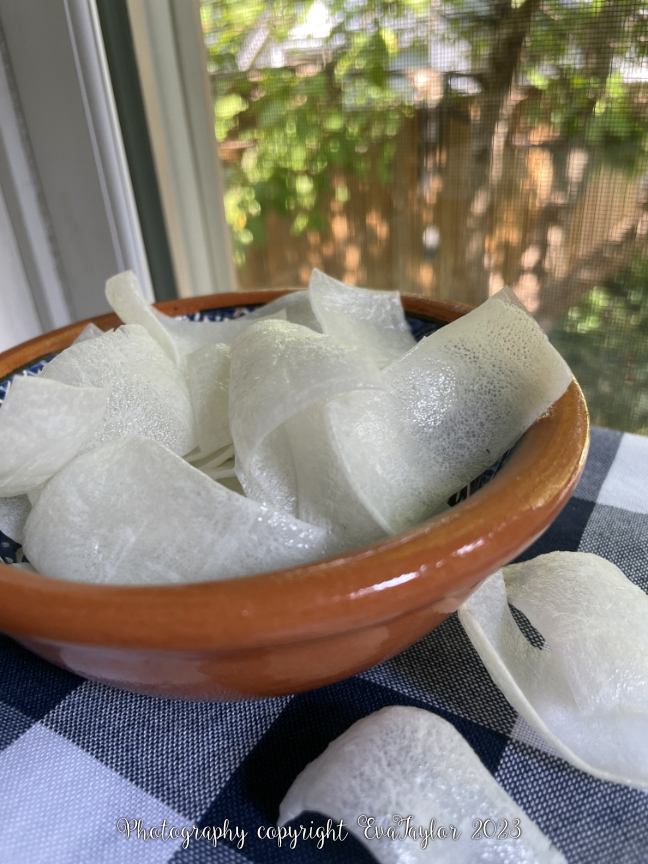
It’s super creamy with a hint of heat. The chicken is velvety soft and delicious in this dish.

Notes:

  • I usually find green curry paste too hot at full strength so I’ve had difficulty finding one I can tolerate. We have an incredible Asian grocer near us with an unusally large compliment of sauces and pastes and I’ve found this one isn’t too hot but I add a little of this one which is super hot. The combination makes a wonderful restaurant-style green curry sauce.
  • I didn’t have green beans so I just added some peas.
  • Thai green curry is traditionally made with Chicken but you can use any protein.
  • The traditional vegetables are eggplant and sugar snap peas but you can use whatever you have on hand. Bamboo shoots would add a lovely crunch to this dish. I prefer to keep my vegetables on the green side because I love it in monochrome.
  • I usually start with a 5 grams of sugar and work my way up to 15 grams, if necessary. Some green curry pastes are already sweet so you’ll need to taste as you go along.

Read Full Post »

These are super quick and easy to make. They don’t keep well, particularly if your house is a bit humid so plan to bake them just before you want to eat them or if they get a bit soggy, just pop them into the oven to dry them out a bit.

Deliciously crunchy and cheesy crisps.

Cheese Crisps

A KitchenInspirations Original Recipe

Makes about 12-15 crisps

Ingredients:

  • 400 g old cheddar cheese, grated

Directions:

  1. Pre-heat the oven to 400° F. Line a rimmed baking sheet with parchment paper or a silicone matt.
  2. Spread the cheese out on the matt as thinly as possible so that the grated pieces are interlaced.
  3. Bake for 4-6 minutes or until the cheese has entirely rendered and is starting to become golden but not burned.
  4. Carefully remove from the oven and pull the parchment onto a cutting board. With a pizza cutter, cut into wedges. Allow to cool completely. Serve immediately.

Notes:

  • I use a rimmed baking sheet because the oils from the cheese may slide onto the oven and burn.
  • Parchment may burn so a silicon matt is preferred.


Read Full Post »

Several years ago, I replicated some French Onion Soup Pillows from a long-gone, favourite restaurant. They somehow managed to get the delicious French onion soup into a dumpling that exploded when you bit into it. It was unexpected and wonderful. I was thinking about making them again when I discovered some cooked beef gyoza filling in the freezer and I was inspired to make a Japanese version of our beloved French Onion Soup Pillows, and Self-Saucing Gyoza were born. They’re a little more fiddly than normal gyoza because you have to make the sauce and allow it to set overnight, but it’s totally worth it. Now I wish we could have friends over so I could serve them these delightfully explosive bites, damn you Covid.

Self-Saucing Gyoza

A KitchenInspirations Original Recipe

Makes enough Sauce for about 25 gyoza

Ingredients for the Sauce:

  • 1 gelatine leaf (agar agar will not work)
  • 100 mL miso broth
  • 20 mL soy sauce
  • 5 mL Hoisin Sauce
  • 30 ml mirin
  • A batch of homemade gyoza, like these

Directions:

  1. Soak the gelatin leaf in cold water until soft. Wring out the water and add it to a small saucepan.
  2. In the same saucepan, combine the broth, soy sauce, hoisin Sauce and Mirin and whisk over low heat until the gelatine has melted. Cool and pour into a small rectangular plastic container (container should allow sauce to be a minimum of 70 mm deep). Refrigerate overnight until set. Cut into 25 cubes.
  3. Make up the gyoza as per recipe and add one gelatine cube per gyoza. Freeze gyoza on parchment paper individually, add to a ziplock bag for future use. Cook gyoza as per recipe.

The gelatin melts into a delicious sauce within the gyoza.

Notes:

  • You may wish to make your gyoza wraps a bit thicker than normal so the sauce doesn’t leak out while cooking.

Read Full Post »

Winter means soup weather to me and I’m always trying to change it up from the regular repertoire. This soup was developed to use some excess cilantro before it bit the dust. Cilantro haters, please move along, nothing to see here!

The bright green colour is joyful, don’t you think?

Broccoli, Avocado and Cilantro Soup

A KitchenInspirations Original Recipe

Serves 2-4

Ingredients:

  • 300 g broccoli
  • 70 g sweet onion
  • 30 mL olive oil
  • 1 avocado
  • 15 g cilantro
  • 1 tbsp green curry paste (or to taste)
  • 250 mL coconut milk (not the cream)
  • 250-375 mL chicken stock
  • 15 mL roasted garlic purée
  • Splash of fresh lime juice
  • Salt to taste

Directions:

  1. Chop broccoli and onion into medium-small pieces and coat generously with olive oil. Roast at 375° F until tender.
  2. Combine the roasted broccoli, onions, avocado, cilantro, green curry past, coconut milk, about half of chicken stock and roasted garlic puree and blend until very smooth, adding more chicken stock at achieve the desired viscosity for the soup. Push the soup through a fine sieve into a medium-sized pot and re-heat on medium-low.
  3. Season to taste. Serve hot garnished with small roasted broccoli florets and cilantro.

Read Full Post »

I have been meaning to create a recipe for a vegetarian Bolognese sauce forever, not because we’re vegetarians but because it’s good to mix it up with a vegetarian meal every so often. JT always asks me what’s for dinner with bated breath so he could look forward to it; when he asked about that day, he looked slightly disappointed. He actually said he was lowering his expectations so he wouldn’t be disappointed because he adores Bolognese and couldn’t imagine a mushroom version would/could be better. Boy was he wrong! Dinner was pretty silent that night, mostly because he couldn’t shovel the food in fast enough! After he finished he said that it was significantly better than he thought it would be. That’s one for the good guys.

If you’re vegetarian or vegan and you’ve been missing the rich, flavourful meaty bolognese, this recipe is for you. The mouth-feel is similar, particularly if you don’t pulverize the mushrooms and walnuts too much. But it’s the slow and low cooking that brings out all of the flavours.

Mushroom Bolognese

Serves 2 generously

Ingredients:

  • 30 mL EVOO
  • 1/2 carrot, finely diced
  • 1/2 celery rib, finely diced
  • 1/2 shallot, finely diced
  • 1 large portobello mushroom cap, finely chopped
  • 2 white mushrooms, finely chopped
  • 50 g walnuts, chopped
  • 125 mL milk or cream
  • 125 mL white wine
  • 10 mL puréed roasted garlic
  • 250 mL passata of San Marzano tomatoes
  • 15 mL tomato paste
  • 15 mL Hungarian Sweet Paprika Paste
  • Pinch of baking soda (see notes)
  • Pinch of sweet smoked paprika
  • Sea salt to taste
  • Pepper to taste
  • Parmigiana

Directions:

  1. Heat the oil in a small, enamel skillet. Add the carrots, celery and shallot and cook until semi-soft.
  2. Add the mushrooms and walnuts and cook until most of the mushroom liquid has evaporated. Add the milk or cream and cook until it has evaporated. Do the same with the wine.
  3. Add the remaining ingredients and stir until well combined. Season with salt and pepper to taste.
  4. Pour into a slow cooker or crockpot and set to high and cook for 2-3 hours.
  5. Serve on al dente (homemade) pasta of choice garnished with freshly grated parmigiana.

Notes:

  • I used portobello and white mushrooms because that is what I had on hand, a mixture of wild mushrooms would be delicious too.
  • Baking soda chemically changes the PH of things, tomatoes become much less acidic (I even throw a pinch into my coffee, it literally changes coffee from acidic to alkaline!), I prefer to use baking soda than to add sugar, which many do.
  • I used a slow cooker because our stove is gas and I prefer not to have an open flame on for a few hours. If you don’t care or have an electric stove, feel free to simmer in the same pot on the stove but do simmer.
  • I’m not sure how non-dairy milk will flavour the dish so if you’re vegan, omit the milk or cream.
  • I used walnuts because I like their meaty texture and earthy flavour, pecans would be a good alternative.
  • I whipped together the pasta using 1 egg and as much flour that it can absorb, then I ran it through the Kitchenaid pasta maker from 1 to 7. Then I hand cut the pasta into irregular widths and lengths. The fresh pasta is really worth the effort, it’s so much lighter than store-bought dry pasta.

Read Full Post »

Way back in November, 2019, I made a version of this cake in Arizona. It seems a life-time ago. We don’t know when we will be able to travel again so it’s nice to have some food memories to be nostalgic about. I made this for an outdoor brunch last July for a gluten-intolerant friend.

Gluten-Free Reduced-Sugar Orange Olive Oil Cake

Makes one 23 cm (9 inch) cake

Please click here for the original recipe

Ingredients:

  • 2 eggs, room temperature
  • 100 g coconut sugar, divided
  • 80 mL EVOO
  • 5 mL vanilla
  • Zest of 2 oranges
  • Juice of 2 oranges, divided
  • 150 g all-purpose gluten-free flour
  • 1 tsp baking powder
  • 1/2 tsp baking soda
  • 1/2 tsp salt
  • Icing sugar for dusting

Directions:

  1. Preheat the oven to 350° F
  2. Spray a 23 cm pan with non-stick spray and line bottom with parchment paper.
  3. Combine the eggs and 95 g coconut sugar and beat until light, fluffy and smooth.
  4. Slowly drizzle in the olive oil and vanilla while beating.
  5. Add all of the zest and 45 mL of the freshly squeezed orange juice and beat until well combined.
  6. In a separate bowl combine the gluten free flour, baking powder, baking soda and salt and mix well.
  7. Add the flour mixture to the egg mixture and beat only until combined.
  8. Pour into the prepared 23 cm pan and bake for 25-30 minutes or until toothpick tests clean. Allow to cool.
  9. Meanwhile, combine the remaining juice and sugar and bring to a boil until the sugar has melted into the juice. Cool and add the Grand Marnier.
  10. Turn out the cooled cake onto a decorative plate and slowly spoon the orange juice mixture onto the cake allowing it to be absorbed.
  11. Decorate with sprinkled icing sugar just before serving.

The lovely syrup makes this cake lusciously moist.

Read Full Post »

Some time ago, the wee menu on Facebook on my iPhone changed to include videos and a whole bunch of other garbage I wasn’t interested in. I figured out a way to customize it but I left in the videos because it made me look at suggested videos on my feed which was advantageous because I would have never come across Nigella Lawson’s recipe for Kedgeree. The ingredients and origin of the dish enticed me.

“According to “Larousse Gastronomique”, what we call kedgeree originated from a concoction of spiced lentils, rice, fried onions and ginger known as khichiri dating back to the 14th century and eaten across India. The early colonists developed a taste for it, as it reminded them of nursery food” (from The Economist, please click here for the link).

Nigella’s version was made with rice and some simple spices such as curry. On perusing the internet, I discovered that many recipes did not include curry powder but a variety of spices to make the flavours more interesting. We love cumin, coriander and turmeric so those were my spices of choice. I also found a few recipes to include raisins which brought me right back to Morocco. I thought I’d give the dish a go and it was very successful with the exception that it was a bit dry. I have amended my ingredients to include a little extra chicken stock to give it a bit more wetness, not quite like risotto but just this side of it.

The recipe is full of flavour and works well as a quick weeknight meal.

Kedgeree

A KitchenInspirations Original Recipe

Serves 2

Ingredients:

  • 150 g hot smoked salmon
  • 2 hard-boiled eggs, quartered
  • 100 g sweet onions, finely chopped
  • 30 g butter
  • 5 g cumin
  • 5 g coriander
  • 5 g turmeric
  • 130 g basmati rice, rinsed
  • 300 mL chicken stock, plus more for wetness
  • 8 g puréed roasted garlic
  • 10 mL fish sauce
  • 25 g sultana raisins
  • Cilantro, roughly chopped
  • 1 lime, zested and juiced

Directions:

  1. In a medium sauce-pan, sauté the onions in the butter until translucent, add the spices and cook until fragrant. Rinse the rice and strain. Toast the rice with the onions and spices until it’s fairly dry.
  2. Combine the chicken stock with the roasted garlic and fish sauce and add it to the rice cooker, mix in the sautéed onions, rice and raisins and cook as directed by the manufacturer. When cooked, stir in a little additional chicken stock to achieve the desired wetness in the rice.
  3. Flake the salmon and toss it with the cooked rice on a serving platter. Sprinkle with the cilantro and lime zest and juice. Garnish with the hard-boiled eggs. Serve at any temperature you wish.

Notes:

  • This is not an authentic kedgeree recipe, it is my version of several recipes after I discovered this dish on the web.
  • Most recipes use curry powder but I prefer the flavours of cumin, coriander and turmeric in this recipe.
  • As with many Indian foods, this is likely an English bastardization.
  • To make this dish vegetarian, or vegan, use coconut oil instead of butter, vegetable stock instead of chicken and tofu or beans instead of salmon.
  • We grilled our Pacific Salmon on the Big Green Egg which provided enough smoky flavour to the dish. If it’s not enough, add a little smoked paprika to achieve a slightly smokier flavour.
  • It seems that this dish can be eaten at any time at any temperature but we prefer it warm for lunch or dinner.

Read Full Post »

Recently, we have fallen in love with Cholula Green Pepper Hot sauce but it is very difficult to find in Toronto. Sure, everyone carries the original red version, but we can never seem to find the green one. It’s not quite as hot as the red one but it really livens up flavours, like our Huevos Rancheros! I decided I would try and make my own and so I shall share it with you.

Green Pepper Jalopeño Hot Sauce

A KitchenInspirations Original Recipe

Makes 400-500 mL hot sauce

Ingredients:

  • 15 mL olive oil
  • 440 g green peppers (about 355 g cored and seeded)
  • 320 g jalapenos (about 235 g cored and seeded)
  • 1 large shallot (about 65 g)
  • 15 mL puréed garlic
  • 300 mL water
  • 75 mL cider vinegar
  • splash of agave syrup
  • Salt and white pepper

Directions:

  1. Core, seed and remove veins of the peppers (to your taste) and toss with the olive oil.
  2. Roast the peppers until their skin blisters. Peel off the skin as best as you could. Roast the shallot so that it’s almost soft.
  3. Add everything but the agave syrup to a pan and cover with the water and vinegar. Simmer until everything is super soft, about 10-15 minutes.
  4. Purée the pepper mixture until smooth and press through a fine sieve. Add in a splash of the agave syrup, salt and pepper to taste.
  5. Transfer to sterilized jars and refrigerate. Will last a few months in the fridge.

Notes:

  • The quantity will depend on how fine a sieve you have. I generally run it through a fine metal sieve to catch larger bits, then I press it through a very fine, reusable coffee filter. It makes a beautiful, silky sauce.
  • If you prefer a hotter sauce, leave more of the ribs on the Jalopeños. I can’t tolerate the extreme heat so my sauce is only mildly hot.


Read Full Post »

We have been eating a lot more ice cream this year than any other year. In fact, I bet if I added up all the gelato and ice cream we have eaten since May, it will exceed my lifetime consumption! In one summer! JT has never been a big fan but for some reason, this year he is ravenous for it! I generally don’t like to keep ice cream or gelato in my freezer because it literally calls my name at all hours. Anyway, it doesn’t count if you eat it directly out of the container, standing up with the freezer door open. That’s my story and I’m sticking to it.

Vanilla Bean Gelato

A KitchenInspirations Original Recipe

Makes about 550 mL gelato

Ingredients:

  • 250 mL 2% milk
  • 250 mL 35% cream
  • 1 large egg yolk
  • 65 g sugar
  • 16 g cornstarch
  • 10 g skim milk powder
  • 5 mL vanilla bean paste

Directions:

  1. Begin by mixing the milk and cream together. Reserve 65 mL of the milk mixture and make a slurry with the cornstarch, mixing until the starch is dissolved and the mixture is smooth.
  2. Combine remainder of the milk in a medium-sized saucepan with the egg yolk, sugar and the milk powder and heat slowly until it almost comes to a boil making sure the sugar and milk powder have completely dissolved.
  3. Stir in the cornstarch slurry and continue to cook on medium-low heat for 3 minutes, stirring continuously until thickened.
  4. Remove the pan from the heat and transfer the cream to a bowl to chill overnight in the refrigerator.
  5. The day you wish to make the gelato, fold in the vanilla bean paste until thoroughly incorporated.
  6. Freeze the gelato according to directions on your ice cream maker.

Read Full Post »

When I was first dating JT, back in the eighties, his dear Mom would make a version of this salad for lunch. She wasn’t into cooking so this type of dish was perfect, few ingredients and easy to assemble. She would poach the chicken where I prefer to use leftover BBQ’d chicken because of the additional flavours the smoke of a charcoal BBQ adds, but leftover rotisserie chicken works wonderfully as well. The original recipe was heavy in mayonnaise, I like to lighten it up with a little yoghurt and a splash of lemon juice. The flavours and textures really hit the spot.

Waldorf Salad was created by Oscar Tschirky, in the Waldorf-Astoria in New York City in 1896. The original Waldorf was made with only apples, celery, and mayonnaise, it did not contain a protein or nuts. The latter two were additions made in the 20th century. I like to make this salad with chicken or canned tuna, both are equally satisfying.

Chicken Waldorf Salad

A KitchenInspirations Original Recipe

Makes 2 portions for lunch or a light dinner

Ingredients:

  • 100 g BBQ’d or rotisserie chicken, cubed or 1 tin albacore chunk tuna in water or stock 
  • 1/2 cup diced celery (dice all items similar size)
  • 1/2 green onion finely chopped
  • 1/2 apple, diced 
  • 2 tbsp walnuts pieces, toasted
  • squirt of lemon juice, more for taste 
  • 15 mL mayo (I used full strength)
  • 15 mL yoghurt (I used an Icelandic style)
  • Salt and Pepper to taste

Directions:

  1. Drain the tuna and set aside, if using.
  2. Add the apple to a small bowl and squirt a bit of lemon juice on it to prevent it from oxidizing.
  3. Add the celery, green onion, walnuts and apple to a bowl and combine well.
  4. Combine the mayo and yogurt with a squirt of lemon juice, salt and pepper and stir well. Add it to the vegetable fruit mix and coat evenly.
  5. Add the cubed chicken or chunk tuna and stir until equally distributed.
  6. Serve on a bed of salad greens, butter lettuce is particularly nice.


Read Full Post »

We don’t eat much fast food, if any. I can honestly say that the last time I ate a Mickey D burger was when I was 12 years old! I just don’t like them. But I do like Ikea meatballs. Once or twice a year, we treat ourselves to lunch at Ikea and I almost always have the meatballs. Now that things are slowly opening up, we took a trip to Ikea but unfortunately, the restaurant wasn’t open so we treated ourselves with a package of their meatballs. Yes, I can make my own meatballs, but sometimes, even I need an easy, mindless meal. I’ve made this gravy before and it was really good so I thought I’d post about it. Who knew the ingredients were so simple?

Ikea Gravy Copycat

Makes 250 mL gravy

Ingredients:

  • 15 g unsalted butter
  • 15 g flour
  • 250 mL beef stock, warmed
  • 15 mL soy sauce
  • 15 g cream cheese

Directions:

  1. Melt butter and add the flour to make a smooth roux. Cook for about a minute.
  2. Slowly add the warmed beef stock and soy sauce, whisking to make a smooth sauce. Add the cream cheese and whisk to melt and incorporate. Serve hot over your favourite meatballs.

Read Full Post »

Older Posts »

%d bloggers like this: