Feeds:
Posts
Comments

Archive for the ‘Cakes’ Category

We were having friends over just before they went away for a quick holiday and I needed a dessert. These friends love fruit-filled desserts so when I came across this interesting Italian recipe, I thought, why not? I was ready to make my Normandy Apple Tart but to be honest, it’s a lot of work (pastry, custard, apples, topping) so when I saw how easy this recipe is, it was a no-brainer. There are sooo many versions online and so many different methods but I like the method below, it works well and it’s not a lot of work. You can mix it by hand, but it just makes it easier if you use the stand mixer. 

Balzano Apple Cake

Makes one 23 cm (9 inch) round apple cake

Ingredients:

  • 2 large eggs
  • 95 g Erythritol
  • 125 mL milk
  • 65 g unsalted butter, melted and cooled
  • 15 mL pure vanilla extract
  • 60 g flour
  • 8 g baking powder
  • 4 g salt
  • 4 McIntosh apples, peeled and thinly sliced

Directions:

  • Preheat the oven to 350° F.
  • Prepare a 23 cm springform round pan by lining it with parchment and generously buttering it all over.
  • Beat the eggs and sugar until they reach the ribbon stage, and beat in the vanilla.
  • Combine the melted butter with the milk, then pour the milk mixture into the batter and beat well.
  • In a separate bowl, whisk the dry ingredients together and fold them into the wet ingredients. Gently stir in the apples. Pour the mixture into the prepared pan and bake for 55-60 minutes or until a wooden cake tester comes out clean.
  • Serve at room temperature.

The batter turns into a wonderful, velvety custard interlaced between the thinly sliced apples.

Read Full Post »

It was my SIL’s 70th birthday last month and she came down to stay with us one night. We took her out for dinner and came home to have this celebratory cake. When I asked her what type of cake she would like for her special birthday, she asked for vanilla. You know I couldn’t just do vanilla, so I pulled out all the stops and created this masterpiece. The cake layers come from Recipe Tin Eats and while the method for this cake is slightly odd the result is pretty darn good. I’ve simplified her method and cut the recipe in half (because we prefer small desserts).

The crunch in this cake comes from a layer of almond meringue that is baked until crispy and when assembled in the cake, with a layer of buttercream and seedless raspberry jam, it results in a crunchy and chewy texture, similar to macarons. It is really wonderful.

Vanilla Almond Crunch Cake

Makes one 18 cm (7 inch) cake that may serve 8-10 people.

Ingredients for the cake:

  • 150 g AP flour
  • 7 g baking powder
  • pinch of salt
  • 58 g unsalted butter, melted and cooled
  • 125 mL milk
  • 10 mL pure vanilla extract
  • 1 vanilla bean pod
  • 10 mL unflavoured oil
  • 2 large eggs, room temp
  • 150 g granulated sugar
  • 125 mL seedless raspberry jam (for assembly)

Directions:

  1. Prepare an 18 cm (7 inch) spring-form pan by lining the bottom with parchment and brushing the bottom and sides with quick-release mixture (see notes below).
  2. Preheat the oven to 350° F.
  3. Sift the flour, baking powder and salt together into a bowl and set aside.
  4. Scrape out the vanilla seeds from the pod and set it aside.
  5. In a microwave-proof container, melt the butter with the milk but do not boil the milk, add the oil and vanilla pod (not seeds at this point). Cool completely. Remove the vanilla pod and discard. Add the vanilla extract and vanilla bean seeds and mix well to separate all of the seeds (I found a quick blitz with my immersion blender did the trick). Set aside.
  6. Combine the eggs and the sugar and beat on medium speed for 7-10 minutes until light and fluffy and doubled in size.
  7. Slowly add the flour on 1 or 2 speed until you have incorporated all of the dry ingredients. Scoop out a couple of spoonfuls of the batter, add it to the milk and butter mixture, and whisk well. Pour this mixture into the batter and beat for a minute or less until entirely incorporated. Pour the batter into the prepared pan and tap vigorously on the counter to help remove air bubbles. Bake for 30 minutes or until a wooden cake tester comes out clean. Cool completely before completing the cake.

Ingredients for the crunchy layer:

  • 50 g egg white
  • 100 g sugar
  • 2.5 mL almond extract
  • 20 g ground almonds, toasted
  • 16 g AP flour

Directions for the crunchy layer:

  1. Preheat the oven to 325° F.
  2. Beat the egg whites until soft peaks form. Add the sugar and beat until it is stiff and shiny. Beat in the almond extract.
  3. Combine the ground almonds and flour and mix well, fold in small portions into the beaten egg whites until completely incorporated.
  4. Spread a circle of the meringue the diameter of the cake on a piece of parchment and bake for 30-45 minutes at 325° F until golden and firm to the touch. Cool completely.

This is the Buttercream recipe that I always use.

  • The quantity in the recipe is perfect for lightly coating the cake including a crumb coat, but if you want extra decor, I would add an extra 50 g of butter and 25 g of icing sugar. If you wish to pipe rosettes on top, separate about 125 mL buttercream and beat in 2.5 mL almond extract.


Assembly:

  • Allow the cake to cool completely. Insert toothpicks around the cake at the height halfway point. Using a serrated knife, cut directly above the toothpicks all the way around.
  • Lay the first layer of the cake on the cake stand protected with parchment paper. Heat the seedless raspberry jam so that it’s liquid and spread half of it on the cut side of the cake layer. Add the meringue layer directly on top and spread about 250 mL of the buttercream across the meringue surface evenly.
  • Spread the other half of the raspberry jam over the cut side of the cake and lay it over the buttercream raspberry side down.
  • Spread a thin layer of the buttercream over the entire cake and refrigerate, covered for a few hours or overnight.
  • Spread the remaining buttercream over the entire surface of the cake to even it out. If you wish to pipe rosettes as decoration, please see the note under the buttercream recipe link.
  • If you have excess meringue, pulse it in a spice grinder to a relatively fine powder. Decorate the cake with it as desired. Using the remaining 125 mL buttercream, dot the top of the cake with rosettes as desired. Cake may be refrigerated but I would suggest bringing it to room temperature to serve it.

Notes:

  • Quick-release mixture: 2.5 mL vegetable shortening, 2.5 mL vegetable oil and 2.5 g AP flour. Mix all the ingredients together so it is homogeneous and brush onto the cake pan surface.
  • If you are planning on eating the cake a day after you bake it, you may use stabilized whipped cream instead of buttercream. But if the cake needs longevity, then use buttercream.
  • My Crunchy layer ended up spreading out a bit more than the diameter of the cake, so I cut off the excess and ground it up and used it as texture and decoration on the cake.
  • The cake may be made in several steps over a couple of days to limit the amount of time in the kitchen at once. Day 1, bake the cake. Wrap the cake in plastic and freeze. Bake the meringue layer. Day 2, make the buttercream. Set aside at room temperature. Day 3 Assemble the cake and add the buttercream.
  • I am not a professional baker and I don’t have the patience to decorate a cake with much more than what I did with this one, just sayin’.

Read Full Post »

I am always on the lookout for easy, freezable appetizer recipes and this zucchini slice hit the spot. The funny story is that the recipe came into my sight on Instagram, it was one of those reels that pop up, it’s no one I was particularly following and as quickly as it came into my sight, it disappeared even quicker! It was late at night so I completely forgot to save it. But I never thought that would be a problem because as soon as I click on something, it comes up so frequently, that I get completely tired of it and wish I had never clicked. Until I tried to find that recipe! It disappeared off the face of the earth. Completely gone. Not even a Google search led me back to it. WTF! I searched for a few days, hoping it would grace my feed but no luck. And I had several zucchinis ready to use so I improvised. This is not the real Italian version of Scarpaccia, you can find that here.

A delicious slice of baked zucchini in a thin cakey base.

Zucchini Slice

A Kitcheninspirations original recipe

Makes 35 cm x 50 cm pan

Ingredients:

  • 700 g zucchini, shredded
  • 3 shallots, thinly sliced
  • 10 g salt
  • Zucchini water and extra water as needed
  • 150 g All Purpose flour, unbleached
  • 40 g cornmeal
  • 30 mL olive oil, plus more for drizzling
  • Pepper to taste
  • Parmesan Cheese, freshly grated

Directions:

  1. I shredded 1/2 of the zucchini, and thinly sliced the remainder. Combine the shredded zucchini and the shallots and sprinkle with half of the salt. Sprinkle the other half of the salt over the zucchini slices. Set aside in a fine sieve over a bowl overnight. Save the liquid that the salt extracts.
  2. Preheat the oven to 380° F.
  3. Squeeze any remaining liquid from the shredded zucchini in cheesecloth into the zucchini liquid bowl. Combine the flour, cornmeal and olive oil in a large bowl and mix to create a relatively liquid batter, adding water as needed. Add the pepper and mix in the grated zucchini well.
  4. Line a large roasting pan (about 35 cm x 50 cm) with parchment and drizzle with olive oil. Turn in the zucchini batter and press into the length and width evenly (I used another sheet of parchment and rolled the zucchini out evenly). Add the zucchini slices to the top. Drizzle with olive oil.
  5. Bake the zucchini for 45 minutes, then sprinkle freshly grated Parmesan cheese over the top and finish baking for an additional 15 minutes or until the bottom becomes crispy.

Notes:

  • I found that many recipes online had egg in the batter, but just as many did not and because I wanted it crispy, I decided to try it without egg.
  • My version is less cakey because it does not have egg in the batter.
  • Drizzling the parchment with olive oil before pressing the zucchini batter into the pan, allows it to crisp up nicely.
  • Dehydrating the zucchini overnight creates a much drier zucchini so it can crisp up nicely.
  • Sprinkling with Parmesan does not seem to be original in Italian recipes.


Read Full Post »

My dear friend/neighbour invited us for dinner one night and I offered to bring dessert. I spotted some frozen cherries at our grocery store and picked them up thinking they would be a good ingredient for dessert in a pinch, not thinking that pinch would be sooner than later. I’ve made these squares before, without the chocolate ribbons so I wanted to update the recipe, and because, as JT said, “What could possibly be wrong with cherries and chocolate?” You be the judge.

Chocolate Cherry Squares

A Kitcheninspirations original recipe

Makes one pan 23 cm x  33 cm (9” x 13”) about 20 squares

Ingredients:

  • 300 g frozen cherries, defrosted and drained
  • 3 eggs separated
  • 120 g unsalted butter (room temperature)
  • 125 g caster sugar
  • 250 g flour
  • 25 g baking powder
  • ½ tsp salt
  • 1 tsp vanilla
  • 125 mL cream
  • 150 g Belgian milk chocolate
  • 50 mL cream

Directions:

  • Grease and flour 9” x 13” x 2” baking pan (22cm x 33cm x 5cm).
  • Preheat oven to 350° F (175°C)
  • Heat the cream until almost boiling and pour over the chocolate and stir until entirely melted. Allow to cool.
  • Whip the egg whites until stiff but not dry (should be able to stand in a peak) – no need to wash the beater if you do it in this order, if you cream the yolks first, then you must wash the beater and dry thoroughly).
  • Cream the egg yolks with butter and sugar until light and fluffy (should be a lighter shade of yellow).
  • Sift flour, baking powder and salt – dry ingredients.
  • Alternating dry ingredients with the milk, fold into egg yolk mixture.
  • Gently fold beaten egg whites into the mixture.
  • Spoon  about half of the batter into greased pan. Note the batter is quite thick, you will have to spread it into the cake pan with an offset spatula. Drizzle the milk chocolate ganache over the batter and spoon the remaining batter on top, speading evenly with the offset spatula.
  • Dot with the cherries throughout (you may want to give each cherry a squeeze as you dot so ensure there are no pits!).
  • Bake in preheated oven for about 20 to 30 minutes (test with a toothpick to make sure it’s done).
  • Cool in the pan (don’t cut until it is entirely cool otherwise it will become ‘bacony’ or szalonás, as the Hungarians put it).

Read Full Post »

Back in October, we were seeing friends more than usual as we were going to spend the month of November in Arizona; there is always a feeling of urgency to see our peeps just before we go away for a significant period of time. For one such get-together, I finally baked a Basque Cheesecake! I say finally because it’s been on my list for years! I chose the Serious Eats recipe because it was in grams and easy to half as I only needed about half of the size.

Basque Cheesecake

For the original recipe, please click here. This recipe makes one 23 cm (8 inch) cheese cake.

Ingredients:

  • 450 g full-fat cream cheese, brought to 21°C
  • 135 g and 15g sugar, divided
  • 137.5 g egg (~3 whole eggs)
  • 15 g egg yolk (~1 yolk)
  • 115 g heavy cream
  • 10 g all-purpose flour
  • 5 g vanilla extract
  • 1.5 g salt
  • 2 g lemon zest, finely grated

Directions:

  1. Prep the pan by lining it with 2 square sheets of parchment paper (see notes).
  2. In the bowl of your stand mixer, combine the cream cheese and 135 g of sugar and beat with the paddle attachment, scraping the sides frequently, until there are no more lumps and the sugar has dissolved (3-4 minutes).
  3. Add the eggs one at a time, beating for about 10 second on each addition, scraping the sides of the bowl between additions.
  4. Add the remaining ingredients and beat until smooth.
  5. Pour the batter into the prepared parchment-lined pan and refrigerate for 30 minutes to one hour.
  6. Pre-heat the oven to 425° F with the oven rack in the middle.
  7. Remove the cake pan from the refrigerator and set on a rimmed baking sheet. Sprinkle the remaining 15 g of sugar over the top of the pan and bake until the cheesecake is lightly browned on top.
  8. Increase the temperature to 450° and bake until the top is darker brown without burning (see notes). The cheesecake will be done when centre registers between 150° F and 155° F (65.5° C to 68° C). Or when the centre only jiggles a little bit.
  9. Allow the cheesecake to cool at room temperature for at least 4 hours. To remove from the pan, use the overhang of the parchment to pull the cheesecake straight out and set on an even surface, remove the parchment carefully, prying it away gently or with a small knife. Serve at room temperature or store in the fridge for no more than 3 days, covered to avoid it drying out.

This is a super-rich cheesecake that really doesn’t need any accompaniments.

Notes:

  • The easiest way to line a round pan with parchment is to thoroughly wet the parchment and wring it out. Now press it into the round pan, leaving the excess to overlap the rim of the pan. Set it in a warm oven to dry out (doesn’t have to be 100% dry, just dry enough so that the batter doesn’t stick to it). Cool completely. If you have two same-sized pans, you can insert the second one into the parchment-lined pan to push the parchment into the edges.
  • Your baking temperature may need to be reduced, on my first attempt, the timing in the original recipe was off because and I burnt the cheesecake. I reduced the temperatures to suit my oven.
  • You really don’t need a spring-form pan to make this cake, the parchment does all the work.

Read Full Post »

I really wanted to class-up these lovely little single-bite gingerbread cakes, so I called them Petit Fours, if it’s not a celebration you want to serve them at, just call them two-bite Gingerbread Cakes. They are warmly spiced, light, somewhat chewy, little gingerbread cakes with a slightly crispy exterior which makes them perfect for ganache. They are always a hit. I made them for a few dinners over the holidays because the meals are always so filling, it’s nice to have a little something to choose one or four of (see what I did there?)!

Gingerbread Petit Fours

Makes about 36 mini muffins-sized cakes

Ingredients:

  • 37 g unsalted butter, room temperature, plus more for pan
  • 125 g all-purpose flour, plus more for pan
  • 3 g baking soda
  • 75 mL boiling water
  • 4 g baking powder
  • 1 g ground ginger
  • 2 g ground cinnamon
  • Pinch of ground cloves
  • Pinch of ground nutmeg
  • Pinch of salt
  • 72 g dark-brown sugar
  • 25 g egg
  • 80 mL un-sulfured molasses
  • 9 g finely grated peeled fresh ginger
  • 2 pieces crystallized ginger, thinly sliced lengthwise, for garnish
  • Chocolate Ganache

Directions:

  1. Preheat the oven to 350°F. Generously butter and flour a mini 12-cup muffin pan, tapping out excess flour; set aside. In a small bowl, stir together the baking soda and boiling water; set aside. In a medium bowl, sift together the flour, baking powder, ground ginger, cinnamon, cloves, nutmeg, and salt; set aside.
  2. In the bowl of an electric mixer fitted with the paddle attachment, beat the butter and brown sugar on medium speed until light and fluffy, 2 to 3 minutes. Add the egg, and beat until combined. Add molasses, fresh ginger, and reserved baking soda mixture; beat until combined. (The batter will look curdled but will come together once the flour is added.) Add the flour mixture, and beat until well combined.
  3. Divide batter evenly among prepared muffin cups, filling each halfway. Bake, rotating pan halfway through until a cake tester inserted in the centre of a cake comes out clean, about 10-11 minutes. Transfer pan to a wire rack to cool for 15 minutes. Invert cakes onto rack to cool completely.
  4. Set rack over a parchment-lined rimmed baking sheet. Spoon about 1 tablespoon of Chocolate Ganache over each cake, letting some drip down the sides. Garnish with a couple of strips of crystallized ginger. Once glazed, cakes can refrigerated, in air-tight containers, for up to 3 days; bring to room temperature before serving.

Adding a little silver ball on top really classes them up.

Notes:

  • You can visit the original recipe here, it makes 12 regular-sized muffin cup cakes.
  • These cakes absolutely require the buttering and flouring the pans, without this step, the cakes will stick. I was lazy about 2 months ago and only sprayed the pans and they stuck.
  • Seriously only add enough batter to fill half of the mini muffin cups, they will rise beautifully. You don’t want them overflowing on the top of the muffin pan because they will stick.
  • These little cakes freeze well before you cover them in Ganache.

Read Full Post »

Plum Cake

I was laying in bed one morning, waiting for the alarm to come on, looking through all the events of the day on my iPhone when my dear friend Barb (Profiteroles and Ponytails, blog on hiatus) text me this plum cake recipe. She had made it with peaches and was quite impressed and thought I might like it too. I really appreciate recommendations like this because as it happened, I was on the lookout for a dessert for friends coming for a patio dinner that Saturday, perfect timing! It turns out, the recipe is excellent with plums. They totally caramelized and sweetened up, it was a hug transformation as the raw plums were quite tart. I converted the recipe to metric measures but you can find the original imperical measures here.

The recipe has 200 grams of sugar which seems like a lot, but our plums were quite tart so they really helped balance the large amount of sugar. 

Truth be told, I forgot to take a photo until it was too late. Guests took half home.

Plum Cake

Makes 1 23 cm cake (9 inch)

Ingredients:

  • 145 g unsalted butter, at room temperature
  • 200 g granulated sugar
  • 2 eggs, at room temperature
  • 125 mL whole milk, at room temperature
  • 5 mL vanilla extract
  • 60 g almond flour
  • 3 g lemon zest
  • 170 g all-purpose flour
  • 1 teaspoon baking powder
  • 2 g salt
  • 8-10 plums, cut in half

Ingredients for the topping:

  • 30 g granulated sugar
  • 3 g cinnamon
  • 30 g unsalted butter, cut into 0.5 cm cubes

Directions:

  1. Preheat your oven to 375° F. Prepare a 23 cm (9 inch) springform pan by buttering all the sides and bottom, add a circle of parchment to the bottom.
  2. Combine the butter, sugar, eggs, milk, vanilla extract, almond flour and lemon zest in the large bowl of your food processor. Process until smooth. 
  3. Sift the flour, baking powder and salt and add to the smooth batter and process only until combined. 
  4. Pour the batter into the prepared pan and spread evenly in the pan. Add the plums, cut-side up, pressing down slightly, in a circular pattern until the pan is filled with the plums.
  5. Bake for 45 minutes. Meanwhile, combine the sugar and cinnamon and mix well.
  6. At 45 minutes, sprinkle the sugar mixture over the cake, making sure to get some onto each plum. Dot with the butter. Return to the oven and continue to bake for an additional 20 minutes or until a toothpick comes our clean. Allow to cool completely in the pan.
  7. To remove from the pan, loosen the sides with a sharp knife and spring the cake from the pan. Serve at room temperature.

Notes:

  • I added the lemon zest. Also the original recipe used some whole wheat flour which I didn’t have. 
  • The plums release a lot of liquid so my baking took a lot longer than expected, keep testing with the toothpick for doneness. The timing above is what the recipe called for, I baked my cake for an additional 40 minutes after I added the topping.


Read Full Post »

We were having a friend over (outside) during lockdown (you’re permitted to responsibly socialize with one single (meaning they are single) friend, outside) and I needed a relatively quick dessert. This recipe came across my Insta feed and I was immediately taken with it. You use two whole oranges, skin, pith and all! Sounds intriguing, doesn’t it? You boil the oranges for 10 minutes three times, each time discarding the water to rinse away the bitterness. There is a lot of sugar but I didn’t reduce it like I normally do because I was concerned about the bitterness and it was fine. In fact, it was more than just fine, it was great! Not too sweet, I’d definitely make it again, in fact, I’ve made it three times! And because it is made with almond flour, you put the whole thing together in a food processor! It is super moist, orangy and delicious. And you needn’t make a syrup, like other orange cakes, because it is plenty moist from the two boiled oranges.

Gluten-Free Whole Orange Cake

For the original recipe, please click here.

Makes one 23 cm (9 inch) round cake

Ingredients:

  • 2 medium oranges, fresh whole with the rind on about 300 g each
  • 6 g baking powder
  • 6 large eggs, room temp
  • 250 g white sugar
  • 250 g almond flour

Directions:

  1. Preheat the oven to 350° F Convection. Prepare a 23 cm (9 inch) springform pan by lining the bottom with parchment and spraying the insides with non-stick spray.
  2. If you are not using organic oranges, scrub the exterior with hot water and a little soap and rinse well.
  3. Boil the whole oranges 3 times for 10 minutes, each time, changing out the water.
  4. Chop the oranges up into eighths and blitz until smooth with the Nutribullet (I was able to get the two oranges into my large Nutribullet container).
  5. Transfer to a large food processor and add the remaining ingredients, processing until fully incorporated and smooth.
  6. Pour the batter into the prepared pan and place on a cookie sheet into the preheated oven and set the timer for 60 minutes.
  7. Allow it to cool in the pan, then carefully remove and plate.

Notes:

  • I blitzed the boiled oranges in my Nutribullet and transferred them to my large food processor to complete the cake. The Nutribullet makes a very smooth paste.
  • I used a 23 cm (9 inch) springform pan, lined with parchment.
  • My oven baked it a bit quickly so check at 50 and 55 minutes for doneness with the wooden toothpick test. It won’t dry out like an ordinary cake so a little overbaking won’t kill it.
  • The cake stands on its own, no need for any garnish or cream but the author suggests serving it with a little Greek yogurt, I didn’t feel it needed it at all.
  • To make it extra special, you can pour a Belgian dark chocolate ganache over it. 100 mL Table Cream, 100 g Belgian dark chocolate chips, 45 mL white corn syrup. Heat cream to almost boiling, pour over chocolate chips, let stand a few minutes, stir until melted and stir in the corn syrup. Cool to thicken, pour over cake.


Read Full Post »

Way back in November, 2019, I made a version of this cake in Arizona. It seems a life-time ago. We don’t know when we will be able to travel again so it’s nice to have some food memories to be nostalgic about. I made this for an outdoor brunch last July for a gluten-intolerant friend.

Gluten-Free Reduced-Sugar Orange Olive Oil Cake

Makes one 23 cm (9 inch) cake

Please click here for the original recipe

Ingredients:

  • 2 eggs, room temperature
  • 100 g coconut sugar, divided
  • 80 mL EVOO
  • 5 mL vanilla
  • Zest of 2 oranges
  • Juice of 2 oranges, divided
  • 150 g all-purpose gluten-free flour
  • 1 tsp baking powder
  • 1/2 tsp baking soda
  • 1/2 tsp salt
  • Icing sugar for dusting

Directions:

  1. Preheat the oven to 350° F
  2. Spray a 23 cm pan with non-stick spray and line bottom with parchment paper.
  3. Combine the eggs and 95 g coconut sugar and beat until light, fluffy and smooth.
  4. Slowly drizzle in the olive oil and vanilla while beating.
  5. Add all of the zest and 45 mL of the freshly squeezed orange juice and beat until well combined.
  6. In a separate bowl combine the gluten free flour, baking powder, baking soda and salt and mix well.
  7. Add the flour mixture to the egg mixture and beat only until combined.
  8. Pour into the prepared 23 cm pan and bake for 25-30 minutes or until toothpick tests clean. Allow to cool.
  9. Meanwhile, combine the remaining juice and sugar and bring to a boil until the sugar has melted into the juice. Cool and add the Grand Marnier.
  10. Turn out the cooled cake onto a decorative plate and slowly spoon the orange juice mixture onto the cake allowing it to be absorbed.
  11. Decorate with sprinkled icing sugar just before serving.

The lovely syrup makes this cake lusciously moist.

Read Full Post »

I am not a huge pumpkin fan. There I said it. I was around 19 years old when I first tried pumpkin pie and I just never got into it. Don’t get me started on the pumpkin spice craze! So pumpkin type desserts are never high on my list during the holidays. We had our Thanksgiving on October 12 and I wanted a dessert I could make in smaller portions (because, let’s not kid ourselves, stretchy pants can only stretch so far!) so I made this spice cake in very shallow muffin cups. If someone was still hungry, they could have two, and believe it or not, they did!

Our awning and natural gas heater have had some good use as the temperatures become more fall-like. Unfortunately, the combination of the heat and sun has dried out the awning; at one point after a good rainfall, as we were pushing the water off the awning, a fist went through it. I was able to glue the small hole together with a glue gun, but now we were aware that the awning is precariously brittle. Too bad that fat raccoon never got the memo. Sometime during the night, an 18 kg (40 lb) beast was climbing across said awning and unfortunately fell through it, causing a 50 cm (20 inches) hole. Poor thing must have broken its neck on the fall because I, unfortunately, found him dead as a doornail the next morning. We’ve never had to dispose of any dead animals before so I called the information number of the city. After a 20 minute conversation, which resulted with NO HELP what-so-ever, we decided to discard him ourselves (the city was backlogged 20 days for pickup so they suggested we dispose of him in our next garbage collection which happened to be 2 weeks from the date!) I found a company online who came out and did the dirty deed for us. JT was perfectly willing to do it, but I didn’t want him to, plus we had nowhere to dump the guy. UGH! A good bleach washing of the deck and 24 hours drying time in the sun, and no one was the wiser.

We lucked out for weather that weekend, as the temperatures progressively became warmer and warmer and Saturday October 12 turned out to be around 25° C (77° F)! The evening cooled off a bit, but our natural gas heater did the trick to keep us warm. We had the dinner with two, socially distanced friends and the evening was wonderful. I was so relieved it was warm enough for an outdoor dinner because our COVID numbers are on the rise again and I’m just not comfortable entertaining indoors.

These cakes are a remake from a blog post from 2010.

Ginger Spice Cakes Revisted

Makes about 24 mini spice cakes (60 mL (1/4 cup) muffin pans or 12 standard muffin-sized spice cakes

For the original recipe, please click here

Ingredients:

  • 75 g unsalted butter, room temperature, plus more for pan
  • 200 g all-purpose flour, plus more for pan
  • 1 teaspoon baking soda
  • 160 mL boiling water
  • 1 teaspoon baking powder
  • 1 teaspoon ground ginger
  • 3/4 teaspoon ground cinnamon
  • 1/4 teaspoon ground cloves
  • 1/4 teaspoon ground nutmeg
  • 1/4 teaspoon salt
  • 85 g packed dark-brown sugar
  • 1 large egg (if halving the recipe, use a small egg)
  • 160 mL un-sulfured molasses
  • 1 1/2 teaspoons finely grated peeled fresh ginger
  • Crystallized ginger, thinly sliced lengthwise, for garnish
  • Chocolate Ganache

Directions:

  1. Preheat the oven to 350°F. Prepare a 60 mL (1/4 cup) muffin pan by generously buttering and flouring it*, tapping out excess flour, set aside.
  2. Carefully stir together the baking soda and boiling water (this will bubble up, so be careful), set aside to cool.
  3. In a medium bowl, sift together the flour, baking powder, ground ginger, cinnamon, cloves, nutmeg, and salt, set aside.
  4. In the bowl of an electric mixer fitted with the paddle attachment, beat the butter and brown sugar on medium speed until light and fluffy, 2 to 3 minutes. Add the egg, and beat until combined. Add the molasses, fresh ginger, and reserved baking soda mixture; beat until combined. (The batter will look curdled but will come together once the flour is added.) Add the flour mixture, and beat until well combined.
  5. Divide batter evenly among prepared muffin cups, filling each about halfway. Bake, rotating pan halfway through until a cake tester inserted in the centre of a cake comes out clean, about 20-25 minutes. Transfer pan to a wire rack to cool for 15 minutes. Invert cakes onto rack to cool completely. Place a piece of parchment under the wire rack while cooling
  6. Spoon about 1 tablespoon of Chocolate Ganache over each cake, allowing some drip down the sides. Garnish with a small chunk of crystallized ginger. Cakes may refrigerated, in air-tight containers, for up to 3 days; we suggest you bring them to room temperature before serving.

Silicon Muffin Cups 60 mL or 1/4 cup size.

Notes:

  • You may wish to save time and just spray the muffin pans with non-stick spray but I warn you, half of your cakes will stick to the pan. Buttering and flouring is the only way to go.
  • These have a very rich molasses flavour, which we like but some will find it too strong.
  • I made a semi-sweet chocolate ganache for these cakes and it was just the right foil for the rich, sticky cake.

Read Full Post »

For special occasion desserts, I like to pop over to my long-time blogging-friend Liz, Skinny Chick Can Bake. Liz has the most beautifully presented desserts that I have seen from a home cook. Most of Liz’s recipes are also unfamiliar to me as I grew up in a European household. A dear friend was turning 70 in September and I wanted to make a special dessert to celebrate the occasion and this beauty did not disappoint. It has a lovely banana flavour but the pineapple isn’t flavour-forward other than providing some added moisture. It reminded me of banana bread but it was much moister than the standard quickbread. And that cream cheese frosting is one that dreams are made of.

Hummingbird Cake

For the original recipe, please click here.

Makes one 20 cm cake, about 16 servings

Ingredients for the cake:

  • 400 g flour
  • 300 g sugar
  • 6 g cinnamon
  • 6 g salt
  • 5 baking soda
  • 3 eggs, lightly beaten
  • 375 mL vegetable oil
  • 7 vanilla extract
  • 540 g mashed bananas (use ripe bananas)
  • 228 g crushed pineapple, drained (about 1/2 a container)
  • 120 g chopped pecans, toasted for about 5 minutes at 350 degrees

Ingredients for the Frosting:

  • 500 g cream cheese, room temperature
  • 40 g butter, room temperature
  • 10 mL vanilla
  • 1/2 lemon, juiced
  • 500 g icing sugar, sifted
  • Pecans, for garnish

Directions:

  1. Begin by preheating the oven to 350° F and prepare three 20 cm round cake pans by lining with parchment paper and spraying with a non-stick spray.
  2. Sift the flour, sugar, cinnamon, salt and baking soda together in a large bowl, set aside.
  3. Combine the eggs, vegetable oil, vanilla, mashed bananas and crushed pineapple and fold into the flour to make a smooth batter. Pour evenly into the three prepared baking pans.
  4. Bake for 35-40 minutes or until a toothpick inserted in the centre comes out clean. Allow to cool in the pan on a wire rack.
  5. Meanwhile, cream the cream cheese and butter together until light and fluffy. Add the vanilla and lemon juice and beat well until incorporated. Add the sugar a little at a time, scraping down the sides of the bowl frequently until all of the sugar has been incorporated.
  6. When the cakes are thoroughly cool, cut the dome off the top is there was one. Lay the first cake on a serving platting protected by parchment (in short rectangles so that they are easy to remove). Spread a thin layer of the icing over the first layer, place the next cake on top and spread again, add the final layer to the top. Crumb-coat the entire cake in a thin layer and refrigerate for 2 hours to set. When the frosting is firm, finish the cake with the remaining frosting or as desired.
  7. Decorate the cake with more pecans that have been toasted.

Notes:

  • Although the cake has a whopping 300 g of sugar, it is not excessively sweet, it’s the frosting that takes it over the top! I won’t kid you, it is sweet but not as sweet as it was in the original recipe.
  • I reduced the butter to about one-quarter of the original recipe, it still made a super-rich frosting.
  • Neither our friends nor we like super-sweet desserts so I opted to reduce the sugar from 6 cups to 4 cups in the frosting and added the juice of half a lemon to help cut it even more. The resulting frosting was still sweet but it didn’t make your teeth tingle. If you prefer an even less sweet frosting, I suggest you reduce the cream cheese by one quarter so that you require less the icing sugar thicken it up. As it was, 4 cups of icing sugar to 500 g cream cheese and 40 grams of butter made a light fluffy frosting but it needed refrigeration to keep stiff. It was a hot and humid day when I served this cake and my version of frosting didn’t melt but it wasn’t as stiff as frosting usually is.
  • I baked the three layers in a 20 cm (8-inch) round pans because I did not have 9-inch pans as Liz’s recipe calls for (hence the slightly longer baking time as they turned out somewhat thicker.
  • The original cake had coconut but I omitted it because our friends do not like coconut.

Read Full Post »

Several of our friends have July birthdays, as do I. We were invited to brunch (outdoors, of course) in early July and I offered to bake the birthday cake. This particular friend is not a traditional cake lover, no super-sweet icing or frosting for this guy, so I decided to find a nice European cake recipe with fruit, because they are always a hit!

This French Apple cake is made with rum and butter and is so delectable and moist, even though it has only 1 apple! I will definitely make this cake again for the non-cake lovers!

Super moist cake with little bits of apple and the lovely flavour of buttered rum.

French Apple Cake

For the original recipe, please click here. Note that I converted the recipe to metric measures and modified it a bit.

Makes 1 23 cm (9-inch) cake

Ingredients:

  • 114 g unsalted butter, at room temperature
  • 130 g granulated sugar
  • 5 mL vanilla extract
  • 45 mL dark rum
  • 15 mL milk
  • 2 large eggs
  • Zest of one lemon
  • 140 g AP flour
  • 3 g baking powder
  • 3 g salt
  • 150 g baking apple, peeled, cored and cut into 1 cm cubes
  • Sanding sugar

Directions:

  1. Preheat the oven to 350° F. Prepare a 23 cm (9 inch) round pan by lining the bottom with parchment and buttering the sides.
  2. Cream the butter and the sugar until light and fluffy.
  3. Add vanilla, rum and milk and mix well. Add the eggs one at a time and mix well.
  4. Whisk the flour, baking powder and salt together. Add to the butter batter and mix until combined.
  5. Fold in the apples.
  6. Pour into the prepared pan and dust with the sanding sugar. Bake for 30-35 minutes or until a toothpick comes out clean.
  7. Cool the cake on a wire rack. When cool, run a thin knife along the sides to loosen and turn onto a plate. Flip right side up (sugar-side up).
  8. Serve slightly warm or at room temperature sprinkled with powdered sugar with whipped cream or Crême Fraiche.

Read Full Post »

We rented a different house this year in Arizona and the kitchen was much better equipped so I had a lot more fun with it. Needless to say, we entertained a lot; three sets of friends came down from Toronto and of course, our two sets of friends in Encantarra were repeated guests. I’m guessing I was the first one to give the kitchen a good workout, even the BBQ had not been used in the two years the house had been rented!

I made this cake the first week we were in Arizona. I found the recipe in a very outdated Phoenix magazine. The recipe was created by a 14-year-old boy. I loved the use of olive oil in it, plus I just adore orange cake. I modified the recipe a bit so that it better reminded me of a cake my dear Mom used to make.

Orange Olive Oil Cake

This recipe originated in the Phoenix magazine, May 2015 but I couldn’t find it online. I’ve converted it to metric and made some alterations.

Makes one 23 cm cake

Ingredients:

  • 2 eggs
  • 155 g sugar, divided
  • 80 mL EVOO
  • 5 mL vanilla
  • Zest of 2 oranges
  • Juice of 2 oranges, divided
  • 150 g all-purpose flour
  • 1 tsp baking powder
  • 1/2 tsp baking soda
  • 1/2 tsp salt
  • 50 mL Grand Marnier
  • Icing sugar for dusting

Directions:

  1. Preheat the oven to 350° F
  2. Spray a 23 cm pan with non-stick spray
  3. Combine the eggs and 135 g sugar and beat until light, fluffy and smooth.
  4. Slowly drizzle in the olive oil and vanilla.
  5. Add all of the zest and 45 mL of the freshly squeezed orange juice and beat until well combined.
  6. In a separate bowl combine the flour, baking powder, baking soda and salt and mix well.
  7. Add the flour mixture to the egg mixture and beat only until combined.
  8. Pour into the prepared 23 cm pan and bake for 25-30 minutes or until toothpick tests clean. Allow to cool.
  9. Meanwhile, combine the remaining juice and sugar and bring to a boil until the sugar has melted into the juice. Cool and add the Grand Marnier.
  10. Turn out the cooled cake onto a decorative plate and slowly spoon the orange juice mixture onto the cake allowing it to be absorbed.
  11. Decorate with icing sugar.

This is a highly flavoured and scented cake that is kept moist by a delicious orangy syrup.

Would you care for a slice?

Read Full Post »

This unusual cake was a contribution of a dear neighbour we had over recently for a dinner party. We were so blown away with the use of quinoa that we had to give it a try ourselves. The recipe is super easy and oh-so-chocolatey! The original recipe isn’t vegan or dairy-free but I did substitute melted coconut oil for the butter and lactose-free milk for the milk. For Vegan, you could use soaked chia seeds for the eggs. Let me know how it turns out if you try the vegan version.

Be ready to hand out the recipe, this cake is that good. I was pleasantly surprised with the frosting, very rich and chocolatey; the mild avocado flavour was not off-putting (unless you hate avocados).

Care for a slice?

Chocolate Quinoa Cake

For the original recipe, click here.

Makes a double layer 20 cm cake

Ingredients:

  • 300 g cooked quinoa (135 g or 3/4 cup dry yields about 300 g cooked)
  • 120 mL whole milk
  • 4 eggs
  • 5 mL pure vanilla extract
  • 170 g unsalted butter, melted
  • 140 g coconut sugar
  • 90 g unsweetened cocoa powder
  • 2 tsp baking powder
  • 1/2 teaspoon salt

Directions:

  1. Preheat the oven to 350F. Line 2 20cm round baking pans with parchment and spray with non-stick spray.
  2. Add all of the wet ingredients, quinoa, eggs, vanilla, milk with sugar, salt and cocoa to your large food processor and process until smooth and creamy. Add the baking powder snd blend until combined.
  3. Turn into prepared pans in equal portions and bake for 30 minutes-or until a cake tester comes out cleanly.
  4. Cool. Turn out of pans and frost with the frosting below.

Chocolate Avocado frosting

Click here for the original recipe.

Makes about 250 mL, plenty to frost the cake above

Ingredients:

  • 2 very ripe avocados
  • 45 g unsweetened cocoa powder
  • 90-120 mL pure maple syrup
  • Splash of pure vanilla extract
  • Pinch of sea salt

Directions:

  1. Add all of the ingredients into the cup of your immersion blender and blend repeatedly until entirely smooth.
  2. Frost cake as soon as it has cooled. Store covered in the refrigerator.

Notes:

  • If you blend all of the cake ingredients together for too long, you’ll get a brownie-like texture.
  • Flegg (vegan egg substitute) is ground flaxseed with water mixed until gelatinous.
  • For the frosting, I used 90 mL Maple syrup and it was sweet enough.
  • The original recipe suggests the icing will discolour if made too soon before serving but we didn’t think leaving it for a couple of days impacted the colour to a great degree after all it’s pretty chocolate-brown anyway!
  • Avocados must be super ripe to get the creamy texture of a buttercream. You may use frozen avocados.
  • The second time I made this recipe I used coconut oil instead of butter and it was lovely.

Well, the renovation is complete. What should have taken 4-6 weeks ended up almost 5 months! This was a better experience than the first; our contractor was younger and had excellent communication skills which made the process much smoother. Basically, we took about 1/3 of our master bedroom and added an ensuite and walk-in closet and we also updated the main bathroom. We contracted the cabinet maker to make the built-ins on the wall across from the bed. JT and I installed the crown moulding. The master bath has all the amenities: fog-free mirror, heated floor, heated towel rack, flush-mount rain shower and so on. I am still on the hunt for a carpet for the bedroom. Here is a short video of the project.

Read Full Post »

Spring has been avoiding us in Toronto. We have had a few nice days of sunshine and relative warmth but for the most part it’s been rainy and unseasonably cold. It is depressing. If it weren’t for the gorgeous greenery exploding in anticipation of summer, you would think it is November.

I haven’t baked madeleines in a very long time and I thought the orange flavour would mentally transport us to more summer-like weather and JT loves orange and chocolate. Sadly, they were not a big hit with the construction crew but that made JT happy because he was able to keep them for himself (it’s been a bit of struggle keeping JT from munching on the treats that I’ve made for the crew, wink wink). These baked up beautifully and without that strange little bump in the centre, which is a win for me.

Orange & Almond Scented Madeleines

Ingredients:

  • 4 large eggs
  • 100 g granulated sugar
  • 1/2 tsp almond extract
  • 1/2 tsp orange extract
  • 1 1/2 tsp freshly grated orange zest (about 2 small oranges)
  • 128 g all-purpose flour
  • 48 g almond flour (finely ground blanched almonds)
  • 145 g unsalted butter, melted and cooled slightly, divided
  • 80 g semi-sweet chocolate, melted

Directions:

  1. Preheat oven to 375°F.
  2. With about 30 g of the butter, generously butter the Madeleine moulds and put it into the freezer.
  3. Melt the remainder of the butter in the microwave or small saucepan. Set aside to cool.
  4. Put about 2 tbsp of the melted butter in a frying pan and toast the almond flour (carefully, this burns quickly). Set aside to cool.
  5. In a bowl of an electric mixer, beat the whole eggs with the granulated sugar until the mixture is thick and pale and forms a ribbon when the beaters are lifted (15-20 minutes).
  6. Beat in the toasted almond flour and mix well so no lumps remain.
  7. Beat in the almond and orange extracts and the zest.
  8. Sift in the flour in 4 batches over the mixture, folding it in gently after each addition.
  9. Put about 250 mL of the batter into the cooled melted butter and incorporate well.
  10. Gently fold this butter-batter mixture into the remaining batter.
  11. Spoon the batter into twenty-four buttered Madeleine moulds and bake the Madeleines in the lower third of a preheated 375°F oven for 10 minutes, or until the edges are golden.
  12. Turn the Madeleines out on a rack, let them cool.
  13. Once cooled, dip into the chocolate if using right away, if not, Madeleines freeze well.

Read Full Post »

I’ve been baking like a mad woman for our contractor and team. They seem to really like it. I know that JT does! I’ve made tangzhong cinnamon rolls, rice crispy squares, carrot cake, pineapple upside down cake, chewy lime squares cherry squares, chocolate chunk cookies and so on. We put our Keurig just outside the construction zone with fresh Timmy’s coffee but I don’t think they drink coffee! So I added tea, still no takers! The younger guys don’t even smoke! Go figure!

The demo had moved along at a good pace, uncovering a mess of previous badly done renos. Fortunately, not difficult to fix, just annoying that it was done so poorly! The next weeks will tell if we will finish by the deadline of June 1, as we were hoping to have overnight guests on the 5th! Fingers crossed.

Just before we hunkered down, I had my gluten intolerant BFF and picky-eater hubby for brunch. I’d always wanted to make a cornmeal cake so I figured why not now! This one had a gritty texture but not entirely unappealing. I think next time I’ll use a finer texture or I’ll soak the cornmeal a bit.

Gluten-Free Lemony Cornmeal Cake

Makes one 20 cm (8 inch) cake

Ingredients:

  • 140 g cornmeal
  • 50 g almond flour
  • 50 g unsalted butter
  • zest from 1 lemon
  • 30 mL fresh lemon juice
  • 150 g granulated sugar
  • 2 eggs
  • 120 mL Greek yoghurt
  • 5 mL pure vanilla extract
  • 120 mL lemon juice
  • 70 g sugar

Directions:

  1. Line a 20 cm (8 inch) round cake pan with parchment, buttered lightly. Preheat the oven to 350° F.
  2. Whip the butter until light and fluffy add the lemon zest. Slowly add the granulated sugar and beat until light and fluffy, scraping down the sides.
  3. Add the eggs one at a time and beat well. Add 30 mL lemon juice, yoghurt and vanilla extract and beat until incorporated.
  4. Fold in the dry ingredients and pour into the prepped pan. Bake for 20-25 minutes or until a toothpick comes out clean.
  5. Meanwhile, combine 120 mL lemon juice and remaining sugar and cook on a slow boil until slightly thickened and sugar is completely dissolved. Reserve for cake.
  6. When cake is done, allow to rest for 10 minutes, then pour the lemon syrup over the cake.

Notes:

  • This cake has a lot of texture, similar to cornbread, it’s not bad, just different.
  • The lemon syrup adds a nice amount of moisture and lemony flavour to this simple dessert.

Read Full Post »

I spied this spectacular dessert on my dear friend Liz, That Skinny Chick Can Bake social media account at the end of January and was immediately impressed. Flourless and full of chocolatey goodness, this cake ticked off so many boxes, I absolutely had to make it. Get out your pocketbooks because this cake has an enormous amount of chocolate (500 g plus the ganache!). Pull out all the stops and use the best chocolate you can afford.

This is an extremely rich cake. In fact, it is like eating a giant truffle. I would portion the slices a wee bit thinner but this made for a prettier picture.

My first attempt, I reduced the recipe to make two very small tarts. I went full-out low-carb, which meant replacing the sugar with erythritol and using unsweetened chocolate. It was actually fine for my taste but JT suggested a bit more sweetness would satisfy our dinner guests. My attempt at making a simple syrup from erythritol and water proved successful for a pomegranate syrup I had made (but had forgotten to photograph) so I applied the same formula to this recipe, increasing the water to accommodate the large amount of erythritol. I boiled down the syrup to 1 cup and I wouldn’t try boiling it down any more as it had begun to crystallize on the top.

The semi-sweet chocolate sacrificed much of the low carb aspect so I won’t even do the analysis. I may try increasing the erythritol and going back to unsweetened chocolate to see if that might bring the carbs back to a reasonable level, but I’m going to wait with that experiment until we recover from this version of this decadent dessert. If you have a special dinner, this dessert definitely fits the bill and the splurge. Thanks, Liz, I can always count on you for a decadent dessert.

La Bete Noir (Flourless Chocolate Cake)

For the original recipe, please click here.

Serves about 20 people

Ingredients for the cake:

  • 375 mL water
  • 150 g Erythritol
  • 128 g butter, diced
  • 388  g semisweet chocolate, chopped
  • 112 g unsweetened chocolate, chopped
  • 6 eggs

Ingredients for the ganache:

  • 200 mL heavy cream
  • 226 g semisweet chocolate, chopped

Topping, as shown:

  • 25-30 g Pistachios, roughly chopped
  • 125 mL whipping cream

Directions:

  1. Preheat the oven to 350° F. Prepare a 25 cm springform pan by covering the bottom and all the way up the sides with two layers of foil paper. Cut a circle from parchment and place it in the inside bottom of the pan. Place the pan into a large, higher-sided pan and set aside.
  2. Combine the water and erythritol in a small saucepan and heat until boiling, whisking until the erythritol has completely dissolved into the water. Continue to boil and reduce the volume to 250 mL. Set aside to cool slightly.
  3. Combine the butter with all of the chocolate and heat gently in the microwave until it is melted and smooth. Stir in the erythritol simple syrup. Cool slightly.
  4. Place all of the eggs into another bowl and beat until fully combined. Pour the eggs all at once into the chocolate mixture and whisk until smooth.
  5. Pour the chocolate mixture into the prepared springform pan. Fill the larger pan with boiling water to about 3/4 the way up. Bake on the centre rack for about 50 minutes or until centre has set.
  6. When ready, remove from the oven and allow to cool on a wire rack. When sufficiently cooled, run a sharp knife along the inside edge to release the cake from the pan. Carefully remove it from the pan and allow to cool completely.
  7. Place an inverted glass on top of a clean piece of parchment and place a wire rack on top of the glass, set aside.
  8. Remove the bottom of the springform pan as well as the parchment from the cake and place it on the wire rack that is resting directly on the inverted glass.
  9. Make the ganache by heating the cream to almost boiling and pour over the chocolate. Mix until the chocolate is completely melted and smoothly combined with the cream.
  10. Pour the ganache over the cake and allow to flow over the top and sides evenly. Allow this to set at room temperature or in the refrigerator.
  11. Decorate the top with the chopped pistachios and serve with a dollop of whipped cream. Be prepared for guest requesting a take-away box for later (at least our’s did). It’s that good!!!

Notes:

  • This cake is extremely rich, so I increased the serving size from 16 to 20.
  • The original recipe did not mix semi-sweet with unsweetened chocolate, it was all semi-sweet.

Read Full Post »

I’m always trying to find ways to eat healthier and desserts are always a good place to start, particularly after the holidays when we may have overindulged (wink, wink). This is an old recipe from my friend Charles who isn’t blogging as much these days, it’s a lovely Swedish almond cake that is packed with almond flavour and texture. It’s almost like eating a marzipan cake!

There is that darn winter light.


Sugar-Free, Gluten-Free Almond Cake

Ingredients:

  • 225 g Erythritol, ground finely
  • 150g Almond Flour (ground finer than meal)
  • 50 g Coconut Flour
  • 60 g Butter
  • 2 Eggs
  • 125 mL water
  • 1 tsp almond flavouring
  • zest of one lemon
  • 30g Flaked Almonds

Directions:

  1. Preheat the oven to 375° F. Prepare your spring-form tart pan with non-stick cooking spray.
  2. Add the Erythrital, almond flour and coconut flour to the large bowl of your food processor and process to combine well.
  3. Melt the butter and allow to cool to room temperature.
  4. Combine the eggs, cooled butter, water, almond flavouring and lemon zest and mix well.
  5. While processing the flours, slowly drizzle in the wet ingredients until well combined (it will be more like marzipan than batter). Press into the prepared cooking pan and sprinkle the flaked almonds evenly all over the top of the mixture.
  6. Place carefully into the oven and bake for about 30-35 minutes. Take it out of the oven and set aside to cool before removing from the pan to slice up.

Notes:

  • Erythritol (or monkfruit) is not new, it’s been around since the 1800’s. Sadly it has an unfortunate name because it sounds like a horrible chemical. In fact, it is a sugar alcohol that occurs naturally in fermented fruit and is 60-70% as sweet as sugar, but will not cause tooth decay or spike blood sugar levels and is only partly absorbed by the body but mostly discarded in the obvious ways. A Scottish chemist named John Stenhouse discovered it in 1848. The down-side is that it’s ridiculously expensive! It’s nearly $10 per kilo! (About $5 a pound!) Here in Toronto (traditionally more expensive than the burbs and smaller cities) sugar is $1.25 per kilo, $0.63 per pound so I can see why this might not catch on.
  • Erythritol is sold in crystal format, I prefer to grind it super finely in my coffee/spice grinder to avoid a crunchy texture. The strange thing about it is that although it does melt, it eventually goes back to the crystal structure. Your baked goods will be a little grainier than with normal sugar.
  • Some people don’t find erythritol sweet enough, so often it is paired with stevia but stevia has been known to have an aftertaste. 
  • You can use Erythritol 1:1 for sugar.

Read Full Post »

Black Forest Cake is JT’s favourite cake. It’s been his favourite since he was a little kid. In fact, it was our wedding cake! We didn’t have that traditional fruit cake, it was Black Forest Cake all the way. In late February, we were invited to dinner at friends’ and I offered to bring dessert so JT asked me to bake a Black Forest Cake. I chose this recipe because of the unusual cake recipe, to be honest, it turned out a bit dry because I did not soak the layers in the cherry kirschwasser syrup as indicated;  I didn’t want to use the full strength Kirschwasser as there was a teenager but I would definitely do it if I were to bake this cake again, I might even omit the kirschwasser so it’s not as boozy. Or maybe I’ll double it!

Black Forest Cake

For the original recipe, please click here.

Ingredients:

  • 70 g unsalted butter, melted and cooled
  • 200 g sugar
  • 6 eggs
  • 150 g flour
  • 105 g cornstarch
  • 45 g cocoa powder
  • 5 g salt
  • 250 mL jarred, canned or frozen (see notes) sour cherries, drained, reserving 12 cup cherry juice from jar, plus 16 cherries, to garnish
  • 125 mL Kirschwasser

Directions:

  1. Preheat the oven to 350° F (I used the convection setting).
  2. Prepare two spring-form pans about 20 cm (8 inches) diameter by buttering and flouring the bottom and sides. Cust a piece of parchment to fit the bottom and butter and flour it too.
  3. Combine sugar and eggs in the large bowl of your stand mixer fitted with the whisk attachment and whisk on medium speed for about 8 minutes or until tripled in volume.
  4. Combine the flour, cornstarch, cocoa powder and salt and whisk. Sift into the egg and sugar mixture and fold until combined. Pour in the cooled melted butter and stir until just combined.
  5. Pour about half of the batter into each pan and bake for 30-45 minutes or until a cake tester comes out clean.
  6. Cool completely.

Kirschwasser syrup:

Ingredients:

  • 250 mL  jarred, canned or frozen sour cherries, drained, reserving 125 mL cherry juice and 12 cherries for garnish
  • 30-75 mL kirschwasser (I was making this kid-friendly so I barely used any)
  • 100 g sugar

Directions:

  1. Combine cherries with the kirschwasser and allow to macerate for 30 minutes. If using frozen cherries, just marinate the cherries in the kirschwasser until defrosted and reserve the liquid as indicated in the ingredients.
  2. Meanwhile, combine the reserved cherry juice with the sugar and bring to a boil until sugar dissolves.
  3. Drain macerated cherries and add the liquid to the cherry syrup. Set aside. If using frozen cherries, skip this step.

Whipped Cream Frosting:

Ingredients:

  • 10 g unflavored powdered gelatin
  • 250 mL milk, divided
  • 65 g 1/2 cup cornstarch
  • 45 g sugar
  • 500 mL 2 cups heavy cream, chilled
  • 5 mL 1 tsp. vanilla extract
  • 50-60 g dark chocolate, melted and piped onto paper, see notes below.

Directions:

  1. Sprinkle gelatin over 90 mL milk in a bowl; let sit until gelatin softens, about 5 minutes. Whisk cornstarch and sugar in a medium saucepan and add remaining milk, heat over medium heat. Cook, stirring constantly to thicken the mixture.
  2. Using a stick blender, blend this thick mixture with the softened gelatin and blend until very smooth (if you choose to skip this step, your whipped cream will be lumpy. You can also press it through a fine seive if you don’t want to blend). Set aside to cool a bit.
  3. Beat the whipping cream with the vanilla in the bowl of a stand mixer fitted with a whisk until soft peaks form.
  4. Add about 13 of the whipped cream to the gelatin mixture and stir until smooth.
  5. Add gelatin mixture to the remaining whipping cream in the stand mixer bowl and whip until smooth.

Assembly Instructions:

  1. Crumb-coat the cake with the whipped cream mixture. Place in the freezer for 10-15 minutes. Meanwhile, melt the chocolate and drizzle onto parchment like this. Refrigerate the drizzled chocolate on a flat surface until set (you don’t want it super stiff).
  2. Add a thicker coating of the whipped cream to the cake and smooth out. Leave enough whipped cream to decorate with cherry florets.
  3. Decorate the top of the cake with the remaining chocolate and then add florets, press one cherry into each floret.
  4. Lift the hardened drizzled chocolate from the base parchment and carefully wrap all-the-way around the cake; remove the outside parchment slowly. Refrigerate until required.

Notes:

  • The whipped cream is a bit like French Pastry cream but not as rich. It is far thicker and richer than stabilized whipped cream. I loved the whipped cream.
  • This is not a sweet cake by any stretch of the imagination, but it is flavourful and our friends loved that it wasn’t sweet.
  • For the chocolate drizzles, measure the diameter of the iced cake and not the pan, I measured the exterior of the pan and came out too short because I didn’t account for the extra thickness of the frosting. It was easy to fix but why fix if you can do it right the first time.
  • Do not skip soaking the cake layers in the syrup, otherwise, the cake is very dry.
  • If I were to do this cake again, I would make fewer drizzles on the chocolate wrap so that the creamy texture of the cake below it comes through.

Read Full Post »

Orange Cake

Several years ago I had a conversation with a long-time blogger friend, A-Boelyn about our Mothers’ orange cake, it was a recipe I had been searching for, for many years. You see, I had lost my dear Mother’s recipe and sadly it had been my favourite cake. I am certain Mom clipped the recipe from the newspaper (so many of our favourites were found this way) but alas it has been lost for many decades. This recipe was my birthday cake request, time and time again. Its moist crumb and delicious flavour was void of heavy icing, it just showcased the beautiful orange in its glory, and a bit of booze, should you wish to indulge! I no longer recall the exact flavours of my dear Mother’s cake but if I had to guess, this recipe comes pretty close, we Europeans love the use of ground nuts in our cakes! And the flavour of this cake brings me back to my childhood, memories of Christmas marzipan! The texture is not light and airy like a sponge but rich and thick like marzipan. It’s not a cake you want a huge slice of, a small slice will satisfy your sweet tooth and leave you wanting more, and that is exactly what I want of a cake.

Orange Cake

Original recipe by David Lebovitz

Makes one 25 cm (10 inch) cake

Ingredients:

  • 3 oranges, zested
  • 300 g sugar
  • 200 g unsalted butter, room temperature
  • 240 g almond flour
  • 110 g AP flour
  • 4 large eggs, at room temperature
  • pinch of salt

Directions:

  1. Pre-heat the oven to 350° F. Prepare a 25 cm (10 inch) springform pan by buttering all sides and lining the bottom with parchment paper.
  2. Add the sugar and orange zest into the large bowl of your food processor and process until zest is chopped into tiny bits and thoroughly incorporated into the sugar. Leave the processor because you will use it again later.
  3. Beat the butter and sugar-orange mixture until light and fluffy, scraping down the sides of the bowl often. Add the eggs one at a time and beat thoroughly.
  4. Add the flour, almond flour and salt into the food processor and pulse until well mixed.
  5. Add half of the flour mixture to the egg and butter mixture and mix until well incorporated. Add the remainder of the flour mixture and mix only until well incorporated. It will be thick.
  6. Turn the batter into the prepared pan and using a spatula, spread out evenly.
  7. Bake for 40-45 minutes or until a cake tester comes out clean. Spoon the orange syrup mixture over the hot cake until it is all absorbed. Cool in the pan.

Ingredients for the syrup:

  • 180 mL orange juice, from the zested oranges
  • 75 g sugar

Directions for the syrup:

  1. Combine the orange juice and sugar and bring to a boil in a non-reactive pan until the sugar has entirely melted. See step 7 above for directions.

This is an extremely moist and dense cake, it reminded me of orange marzipan.

Read Full Post »

Is it a cake, fruit custard or pie?

I was invited to a BBQ at the marketing firm I work with and, of course, I couldn’t go empty handed! I spotted Lorraine’s recipe for an apple cake she made for Mr. NQN’s birthday and was immediately intrigued. Everyone loves cake and everyone loves apples (I hope) so I dove in head first and made her lovely cake. I modified the recipe to be gluten free (I didn’t know everyone at the BBQ and wanted to be safe and inclusive) and I used coconut sugar instead of superfine white sugar and increased the apple volume because I bought 5!

Thanks Lorraine for this tasty inspiration.

One of those peeler gizmos would have come in handy.

It’s really more apples than cake.

I made JT a tester.

The Imposter Apple Cake with Salted Coconut Caramel Sauce

For the original recipe on Lorraine Elliot’s beautiful blog, please click here.

Makes 1 cake, 20 cm (8 inch) diametre. Serves 6-8.

Please click here to print this recipe.

Ingredients:

  • 5 medium apples (about 750 g, I used Galas)
  • 3 eggs, room temperature
  • 100 g (2/3 cup) super fine coconut sugar
  • 150 mL (5 oz) milk
  • 30 g (2 tbsp) butter, melted and cooled
  • 120 g (3/4 cup) gluten free flour
  • 1 tsp cinnamon
  • Pinch of salt
  • 50 g (1/2 cup) slivered almonds, toasted (reserve until ready to serve).

Directions:

  1. Preheat the oven to 350° F (170° C).
  2. Line the bottom of a 20 cm (8 inch) round cake pan with parchment and spray generously with non-stick spray.
  3. Prepare a bowl with cold water and 2 tbsp lemon juice, set aside.
  4. Peel the apples and slice very thinly using a mandoline. Immerse the slices into the cold lemony water.
  5. Combine the eggs and sugar and beat until thick. Add the milk and melted butter and beat until well combined.
  6. Sift the flour, cinnamon and salt and add to the wet ingredients. Beat just until combined and lumps are gone.
  7. Drain the sliced apples and dry slightly. Fold the apple slices into the batter to coat well.
  8. Pour into the prepared pan and bake uncovered for 50-55 minutes or when a cake tester comes out clean.
  9. Cool completely before serving.
  10. Top with toasted almonds when serving.

Ingredients for Salted Caramel Sauce

Makes 200 mL (3/4 cup) caramel sauce

  • 90 g  (3/4 cup) coconut sugar
  • 1/4 tsp lemon juice
  • 5 mL (1 tsp) water
  • Good pinch of sea salt
  • 125 mL (1/2 cup) 18% cream
  • 20 g (heaping tablespoon ) butter

Directions:

  1. Heat cream and salt in a microwave proof container until very hot but not boiling, set aside.
  2. Combine coconut sugar, lemon juice and water in a microwave safe container and mix well (I used a 250 mL (2 cup) glass measuring cup).
  3. Microwave sugar mixture for 1-3 minutes in 15-second intervals (45 seconds did it for me) until sugar bubbles up but does NOT BURN, sugar crystals should be completely dissolved and you should begin to see it turn to a darker amber colour.
  4. Remove and set on a dishcloth for 30 seconds or until it reaches the colour of dark caramel.
  5. Slowly pour in the hot milk, being VERY careful as this will bubble up, whisking to incorporate.
  6. Stir well and then add the butter and stir until completely dissolved. Serve warm or at room temperature.

The caramel sauce really makes this dessert.

Notes:

  • This is not a very sweet cake and therefore, the coconut sugar caramel sauce is perfect for it.
  • Want to jazz it up even more? Add a dollop of cream fraiche or whipped cream on top.
  • The original recipe put the almonds on top of the raw batter and bake it altogether, but I found that almonds went soggy after 1 day in the refrigerator so next time I make this tasty cake, I will not add the amonds until I am ready to serve (recipe has been amended with this change).

Read Full Post »

It was somebody’s birthday last month and I wanted to bake a special birthday cake that was not too sweet or too heavy because it’s been ridiculously hot and humid in these parts. I had also just finished baking a mess of macarons so I was still in the meringue-making kinda mood. I found this recipe from Ricardo Larrivée’s of Food Network Canada and was intrigued. Years ago, a dear friend had brought a La Rocca Caramel Crunch Cake to the cottage and it was made with meringue instead of cake and I’ve never quite forgotten how moreish the texture was (think giant macaron!) so I modified Ricardo’s recipe a bit and came up with this decadent Chocolate, Chestnut, Coffee, Crunch Cake.

Decadent Chocolate, Chestnut, Coffee Crunch Cake

Makes one 20 cm (8 inch) layered cake.

Original recipe may be found here.

The Cake

Ingredients for the light cake:

  • 40 g (1/2 cup) almond flour
  • 65 g (1/2 cup) all-purpose flour
  • 30 g (1/4 cup) icing sugar
  • 2 egg whites
  • 95 g (1/2 cup) granulated sugar

Directions:

  1. Pre-heat the oven to 325° F (170° C).
  2. Cut four parchment paper circles, about 20 cm (8 inches) in diameter. Spray circles with non-stick spray.
  3. Combine almond flour, all-purpose flour and icing sugar in a bowl and mix well. Set aside.
  4. Beat egg whites until soft peaks form, then add the granulated sugar one tablespoon at a time until stiff peaks form.
  5. Add the almond flour mixture all at once and fold into the beaten egg whites, macrophage-style.
  6. Spread 2 circles with the batter right to the edge and bake for 30 minutes or until lightly golden and firm to the touch. If the batter sticks too much to your spatula, spray it with non-stick spray.
  7. Cool completely.

Ingredients for the chocolate cake:

  • 40 g (1/2 cup) almond flour
  • 65 g (1/2 cup) all-purpose flour
  • 25 g (scant 1/4 cup) icing sugar
  • 5 g (1 tbsp) cocoa, sifted
  • 2 egg whites
  • 95 g (1/2 cup) granulated sugar

Directions:

  1. Combine almond flour, all-purpose flour, cocoa powder and icing sugar in a bowl and mix well. Set aside.
  2. Beat egg whites until soft peaks form, then add the granulated sugar one tablespoon at a time until stiff peaks form.
  3. Add the almond flour mixture all at once and fold into the beaten egg whites, macronage-style.
  4. Spread 2 remaining circles with the batter right to the edge and bake for 30 minutes or until lightly golden and firm to the touch. If the batter sticks too much to your spatula, spray it with non-stick spray.
  5. Cool completely.

Chestnut filling:

Ingredients:

  • 100 g (3.5 oz) peeled chestnuts*, roasted
  • 30 mL (2 tbsp) milk or cream
  • pinch of salt

Directions:

  1. In a small, narrow container blend the chestnuts with the milk and pinch of salt with a stick blender, until smooth and creamy. Set aside.

Cake assembly:

Ingredients:

  • 125 mL (1/2 cup) Chocolate Buttercream
  • 125 mL (1/2 cup) Coffee Buttercream
  • 200 g (7 oz) Belgian chocolate wafers
  • 30 mL (2 tbsp) heavy cream

Directions:

  1. Place the chocolate layer first and spread the entire quantity of the chestnut cream on top. Add the white layer and spread the coffee buttercream on it. Add the chocolate layer again and spread the chocolate buttercream on it. Finish the cake with the white layer but place it upside-down so the smooth side is up.
  2. Melt the Belgian chocolate wafers the heavy cream to make a ganache, pour over the cake and spread out on top and sides evenly.
  3. Refrigerate. Decorate with chocolate curls. Serve chilled (it’s been extremely warm in these parts and the buttercream would melt if served at room temperature!)

Like a Macaron, this cake is best if filled a day or two before serving so that the buttercream has time to soften the meringue cake.

Notes:

  • For buttercream, I always use this recipe.
  • For roasted chestnuts, I usually buy this brand.
  • Use a serated knife to make a clean cut of the meringue.

Read Full Post »

Swedish Apple Cake

Due to the overwhelming response on social media last Saturday, I am re-posting the recipe for this show stopper apple cake (plus I made a few changes since the first time I made it in 2013). I originally found this cake on my friend Charles’ blog, Five Euro Food (in hiatus right now), I had made it for Easter dinner for the outlaws. It was quite the success the first time, so I’m not really sure why I haven’t made it since. Way back in 2013 I had to alter the original recipe because we had diabetic and hypo-glycemic guests and you know how I hate to make two different things, so I was happy to convert Charles’ recipe to fit the circumstance. Last Saturday did not present such issues, so I revised the recipe again and liked it even better.

The recipe depends on the sweetness and flavour of the apples and I must say that the humble Macintosh really shined. As you read the recipe, you will notice that it has exactly 17 g (1 tbsp) brown sugar so don’t expect a super sweet cake, but those of you who like dessert, but not overwhelmingly sweet, will love this version. Of course, the Skor bits add sweetness and a touch of caramel flavour within the sliced apples, in the topping adds some lovely texture. Of course, you may omit them if you cannot find them (or you could buy them on Amazon).

Swedish Apple cake

This is all about the apples.

Appelkaka Remake, A Swedish Apple Cake

Makes one 16.5 cm (6.5 inch) cake, serves 4-6, depending on the slice size
To make a 23 cm (9 inch) cake, double the recipe

Ingredients:

  • 800 g (1 3/4 lb), about 8 small Macintosh Apples, peeled and thinly sliced
  • lemon juice
  • 17 g (1 tbsp) brown sugar
  • 120 g (1 1/4 cup) oats
  • 50 g (1/2 cup) almond flour or meal
  • 2 g (1 tbsp) cinnamon
  • 35 g (1/4 cup) Skor bits, divided
  • 60 g (2 tbsp) unsalted butter

Directions:

  1. Pre heat the oven to 395° F (200° C).
  2. Line a 16.5 cm (6.5 inch) spring form pan with parchment.
  3. To the small bowl of a food processor add, brown sugar, oats, almond flour, cinnamon, 1 tbsp of the Skor bits and butter; pulse until it resembles a coarse meal.
  4. Take about 1/2 of the oat mix and press firmly into the bottom of the prepared springform pan.
  5. Peel and finely slice the apples, a splash of lemon juice will prevent them from discolouring.
  6. Carefully arrange about half of the apples on the oat mixture, sprinkle with half of the remaining Skor bits, then finish layering the remaining apples and press down firmly.
  7. Sprinkle the remainder of the oat mix with the remainder of the Skor bits on top, just like a crumble.
  8. Bake for about 30-40 minutes or until the apples are luciously soft (test with a toothpick).
  9. Serve warm or at room temperature.

Notes (updated):

  • I used macintosh apples (sold in a bag) from no frills, they are the perfect baking apples.
  • Slice the apples using a mandolin, believe me, it makes it a lot quicker and far less tedious (but watch your fingers!).
  • I used large oats which were not instant, instant would probably work as they are used to absorbed the liquid the apples release.
  • If you don’t use Skor bits, try a squeeze of organic honey!

Read Full Post »

MagicalCustardCake_FIRST

Yesterday, December 6th was Hungarian Mikulásnap (Santa’s Day). This date was very important in our house because it was the date that Mikulás visited our home to pick up the letters we would write to him…the Christmas wish list! It was always our tradition to put the letters into freshly polished, shiny boots on the windowsill just before we went to bed. In the morning, we would find our boots filled with European chocolates (if we were good) or the dreaded virgács (thin branches that our parents could use to slap our bottoms with, if we were bad). To the best of my memory, we only received the virgács once; that’s my story and I’m sticking to it. I am always nostalgic this time of year, particularly in my neighbourhood of European delis that stock the same delicious chocolates we used to receive as kids.

Although chocolate treats in the form of Santa (or Mikulás) would be a lovely dessert, recently I decided to make an unusual cake that has been making the rounds on the blog-o-sphere for some time. Surprisingly, there is nothing unusual about the ingredients and the recipe is pretty much like a jelly roll or genoise sponge, but what’s really unusual is that the cake separates into a custard portion and a cake portion during baking. I suspect this recipe came about as a mistake someone made a long time ago and it baked into this amazing and delicious surprise (like so many recipes out there). The history really doesn’t matter, it is a delicious cake that is a cross between a custard and a cake and I think you should try it.

Since I’m not much of Pinterest person, I only saw this cake on the blogs I follow and the very first one was Bizzy Lizzy, my Hungarian bogging friend down under and then Lorraine of Not Quite Nigella made a pumpkin version — I knew I had to make this unusual dessert. We loved the Hungarian Custard Squares (Krémes Szelet) so I suspected that this recipe would be a winner too. I used Liz’s recipe but I halved it because there were only four of us for brunch; I topped it with baked pears (I scored the pears at $1.96 for 10 because they were not perfect specimens!) and a drizzle of coconut sugar caramel sauce. The dessert received rave reviews and as a bonus, it stores well in the fridge for a couple of days (unassembled). It’s definitely going into my dessert repertoire…now to figure out a gluten free version!

What Christmas/holiday traditions do you have?

MagicalCustardCake_7587

Soft custard, baked pears, fluffy cake and sweet earthy caramel sauce garnished with a toasted walnut. May I cut you a slice?

Magical Custard Cake with Baked Pears and Coconut Caramel Sauce

Original Recipe from Bizzy Lizzy’s Good Things

Serves 4

Ingredients for the Magical Custard Cake:

  • 60 g unsalted butter
  • 240 mL low fat milk
  • 1/2 teaspoon vanilla
  • 2 eggs, room temperature, separated
  • 60 g icing sugar, sifted
  • pinch, cream of tartar
  • 57 g unbleached AP flour, sifted
  • 4 walnut halves for garnish, toasted

Directions:

  1. Pre-heat the oven to 330° F (165° C).
  2. Prepare a 21 cm x 11 cm(4″ x 8″) loaf pan by lining it with parchment paper.
  3. Melt the butter and cool to room temperature.
  4. Warm the milk combined with vanilla until lukewarm (should not be hot).
  5. Beat the egg whites with a pinch of cream of tartar until stiff but not dry, set aside.
  6. Beat the egg yolks with the icing sugar until light and fluffy (about 5 – 7 minutes). Set the mixer speed to the lowest and slowly drizzle in the melted butter until entirely combined.
  7. Slowly fold in the flour alternating with the warm milk until it is fully combined.
  8. Fold in the beaten egg whites a spoon at a time until fully incorporated but not deflated. This is quite a runny batter, so don’t worry.
  9. Bake for 40 minutes or until a tester comes out clean. Allow to cool completely and then refrigerate for 2 hours or overnight.

Ingredients for the baked pears:

  • 10 small pears, peeled, cored and cut into cubes
  • 1 tbsp coconut sugar
  • 1/2 tsp cinnamon
  • pinch of salt

Directions for the baked pears:

  1. Pre-heat the oven to 350° F (171° C).
  2. Toss cubed pears with sugar, cinnamon and salt and pour into a casserole dish. Bake for 20-30 minutes or until soft. Set aside.

Ingredients for Coconut Sugar Caramel Sauce:

  • 1/4 cup Grace coconut sugar (or regular granulated sugar)
  • 1 tbsp water
  • 1/8 tsp lemon juice
  • 1/4 cup hot cream
  • 1 tbsp unsalted butter

Directions for Coconut Sugar Caramel Sauce:

  1. Heat cream in a microwave proof container until very hot but not boiling, set aside.
  2. Mix sugar, water and lemon juice in a 2 cup pyrex measuring cup.
  3. Microwave for 15-60 seconds (note that in 2016 I doubled the recipe and it took 3 minutes 25 seconds of microwaving to get the amber colour I was looking for), until sugar bubbles up but does NOT BURN, sugar crystals should be completely dissolved and you should begin to see it turn to a light amber colour. Remove and set on a dishcloth for 30 seconds and slowly pour in the hot cream, being careful as this will bubble up.
  4. Stir well and then add the butter  and stir until completely incorporated. Serve warm or at room temperature.

Assembly Directions:

  1. Remove cold ‘cake’ from the fridge and set on a cutting board. Cut into 4 slices and set each slice on the centre of a plate.
  2. Reheat the baked pear cubes until steamy (microwave for a minute or so on high).
  3. Spoon equal amounts of the pears onto each slice, then drizzle with the coconut caramel. Garnish with a toasted walnut half.

Read Full Post »

ChocolateAlmondCake_First

I was recently reminded of a project I completed in anticipation of family arriving from overseas. The project wasn’t imperative for their comfort or enjoyment, it was just the impetus I needed to “git ‘er done” as they say!

We’ve lived in our present home for almost 15 years, and ever since the first day we moved in, I’ve wanted curtains on both windows in our living room (or lounge) but we already had perfectly good, and totally lovely curtains on the back sliding doors. To replace perfectly good (and well made, I might add) curtains seemed excessive to me, so we lived with them. For 14+ years. Until I did some math and to my utmost delight , I discovered I could get two for the price of one, out of the generous fabric that the original curtains had. I wanted the dated tabs replaced with a more contemporary and clean look (for the sewers out there, I simply folded the tabs down, behind the top and stitched across. Pull the rod through the tabs to hang. I also added recycled toilet tissue rolls to help hold  the role). The sliding door curtains are functional and we do close them down on the very cold days, but the front ones are just for show! I am just so happy every time I look at them. Of course, I had to do the dining room next…it’s really never ending. While hemming the new dining room curtains, I started thinking about the Indonesian Spekkoek Lapis Legit cakes I made a couple of years ago (here and here), specifically about how I can change it up. My FILs birthday was in mid-May so making a cake for him was the perfect opportunity to experiment. We all love Charles’ Kladdkaka and Tuppkaka so I wondered if I could combine the two delicious cakes using the Spekkoek Lapis Legit technique. It was a huge success and the two flavours went together famously. I made the cake again for JTs birthday in June, by special request.

What project have you put off only to get it done for guests?

OldCurtains

These are the very generous old curtains

I changed the rod to something a little more in style with the Craftsman home. I’ve also fixed the hem since this photo!

Kladdkaka

Ingredients:

  • 200 g Caster Sugar
  • 140 g unbleached Flour
  • 50 g Cocoa Powder
  • 2 tsp Baking Powder
  • 2 tsp Vanilla
  • 120 g Butter
  • 2 eggs
  • 1/4 cup water

Directions:

  1. Prepare your spring-form tart pan with non-stick cooking spray. Line the bottom with parchment paper.
  2. Add the sugar, flour, cocoa powder and baking powder to the bowl of your food processor. Plus few times to incorporate evenly.
  3. In the microwave, melt the butter slowly so it doesn’t overheat. Combine the cooled melted butter, eggs, vanilla and water. Slowly pour the melted butter mixture in an even stream while processing. Mix well, scraping down the sides as required. 
  4. Lightly grease a round tin about 20cm in diametre (I used a spring form tin). Spoon the batter into the tin and smooth out to the edges (it is rather thick). Resist the urge to try this batter, it’s seriously good and you will not be able to stop.
  5. Set aside while you make the Tuppkaka layer.

Tuppkaka

Ingredients:

  • 300g Caster Sugar
  • 200g Plain Flour
  • 74g Butter
  • 2 Eggs, separated
  • 2 tsp almond flavouring
  • 1/4 cup water

Directions:

  1. Melt butter and allow to cool to room temperature.
  2. Combine the eggs with the sugar and beat well (until thick and very pale yellow). Combine the melted butter with the almond flavouring and water and and mix well.
  3. Sift in the flour and stir until entirely incorporated.

Making the layered cake:

  1. The first layer is chocolate, use about 1/2 cup of chocolate batter for the first layer.
  2. Broil for 2-4 minutes watching carefully so it doesn’t burn. Once it is set and your tester comes out clean, pour 1/2 cup of the almond batter on top and spread evenly (the heat from the chocolate will begin cooking the batter so you’ll need to work fast.
  3. Broil for 2-4 minutes until it is set and your cake tester comes out clean. Repeat alternating the flavours until you have used up both almond and chocolate batters, broiling each layer individually.
  4. Allow to cool completely before layering the ganache on the cake.

Chocolate Ganache Ingredients:

  • 114 g dark semi-sweet chocolate
  • 125 mL (1/2 cup) heavy cream

Ganache Directions:

  1. Heat cream to almost boiling, pour over chocolate and stir until melted and entirely incorporated and smooth.
  2. Pour over cake and smooth top and sides.
  3. Refrigerate until set.

Notes:

  • Set your oven rack 2nd highest from the top.
  • As the cake becomes taller you may need to reduce the broil to low so it doesn’t burn.
  • I baked the final layer in a 350°F oven for 10 minutes because it just got too close to my boiler and I was concerned it would burn.

ChocolateAlmondCake

It’s a little like eating chocolate marzipan!

ChocolateAlmondCakeCut

I still need to work on my layers but it tasted darn good!

Read Full Post »

StickyToffeeAppleCake_First

You must be thinking, “why on earth would I want to bake a cake in a rice cooker?” There are a few reasons I can easily think of:

  • Maybe your oven is in use and you need dessert.
  • Perhaps it’s 40°C inside and you don’t want any more heat in the house.
  • Because you can.

I am usually not one who purchases a one trick pony but I received my rice cooker as a gift from my SIL one Christmas many years ago and to be honest it really does make the best rice ever (The Best, Jerry, The Best). But I really do hate the thought of an appliance that only does one thing, taking up space in my already over-crowded kitchen. I’ve seen these rice-cooker cake recipes in the blog-o-sphere for quite some time and have been intrigued by them to the point of almost making one, but never got around to it. But recently I saw something that renewed my interest and during one of our city weekends, I got down to experimenting.

I chose a traditional Génoise batter and apples (because I had an apple in the fridge!). My first experiment was a double portion of the batter, using 4 eggs. Needless to say, it overflowed so I reduced the ingredients by half. Also, for my first experiment I carefully laid thinly sliced apples in a floral pattern in the base of the rice cooker, but the cooking process disrupted the beautiful design so I altered my process. The cake is sponge-like, light and airy. It’s got a very nice texture that would work beautifully with a Crème Anglais or a dollop of whipped cream or vanilla ice cream. Also, I kept the brown sugar caramel volumes the same as the larger overflowing recipe because even though the cake is delicious, it would be even more delicious with some of the melted butter and brown sugar drizzled throughout it.

So next time it’s 1000 degrees and you don’t want the oven on, this 15 minute cake cooked in the rice cooker is for you.

Rice Cooker Sticky Toffee Apple Cake

StickyToffeeAppleCake

The brown sugar caramelized into a delicious toffee.


An Original KitchenInspirations Recipe

Serves 4-6

Ingredients:

  • 2 large eggs, separated
  • 60 g sugar
  • 1 tsp vanilla
  • 60 g all purpose flour
  • 1 tsp cinnamon
  • pinch of salt
  • 1 royal gala apple, cubed
  • 112 g brown sugar
  • 40 g butter, melted
  • 1 tbsp heavy cream

Directions:

  1. Combine the melted butter and heavy cream with the brown sugar, pour about half into rice cooker and spread out evenly in the bottom of the pan.
  2. Arrange half of the cubed apples in the brown sugar pushing down to spread the brown sugar out. 
  3. Sift the dry ingredients together, set aside.
  4. Beat the egg whites until stiff peaks form. Set aside.
  5. Beat the egg yolks with the sugar until pale and creamy and falls in a thick ribbon.
  6. Fold in 1/3 of the egg whites into the egg yolk mixture.
  7. Sift about 1/3 of the flour into the egg yolk mixture, then fold in the remainder alternately with the egg whites, being careful not to deflate the batter.
  8. Once all of the egg whites and flour have been folded in, carefully pour about half the batter into your prepared rice cooker bowl and spread out evenly over the apples and brown sugar. Top with remaining apples and then drizzle the remaining brown sugar mixture over the apples. Finish by spreading the remaining cake batter on the previous layer. Close the lid.
  9. Bake for 7-8 minutes on the cook setting (mine defaulted to “keep warm” after 8 minutes). Continue on “keep warm” for about 5 minutes and then press the “cook setting” again. Mine reverted back to “keep warm” after 4 minutes. Continue on “keep warm” until your cake tester comes out clean.
  10. Carefully remove the rice cooker bowl and allow to cool for 5 minutes. Turn onto a decorative plate. Serve with vanilla ice cream or whipped cream.

Notes:

  • I have this simple 3-cup rice cooker

May I offer you a slice?

May I offer you a slice?

Read Full Post »

BourbonStreetMudPie_1

We had another Progressive Dinner a short time ago and because it was in such close proximity to Mardi Gras, we decided it would be a perfect theme! JT and I had dessert so I experimented with King’s Cake, a brioche style pastry roll with pecans and sugar, decorated with yellow, green and purple sanding sugars, but honestly it tasted like breakfast to me and not dessert (sorry Southerners), so back to the drawing board I went. JT suggested Mississippi Mud Pie and after a little research I agreed. Definitely decadent enough for a Mardi Gras dessert and it can be classed up, restaurant style. I found a delightful warm chocolate tart recipe on Anna Olson’s website and altered it a bit to include some of the warm spices reminiscent of King’s Cake. OK, I am fully aware that mud pie is usually made from ice cream and whipped cream, but hey, I’m taking artistic licence!

This was our 9th progressive dinner, we’ve been having them since 2012! It’s the BEST group of neighbours and everyone gives it their all to make the evening fantastic, which often lasts until the wee hours of the morning…

Here is the menu from this time around, everything was incredibly DELICIOUS!

House #1 Appetizers:

  • Spicy Cajun Shrimp
  • Fried Andouille Sausage
  • Crab Cakes

House #2 Main Course:

  • Blackened Chicken Thighs
  • Corn Maque Choux
  • Rice and Beans

House #3 Dessert:

  • Bourbon Street Mud Pie with Bourbon Whipped Cream
  • Limoncello
  • Late night snack: homemade potato chips with sour cream (Greek yogurt) and onion dip

BoubonStMudPie_2687

It’s a tasty, chocolate tart.

Bourbon Street Mud Pie

Makes 8 servings of 10 cm or 4 inch mini tarts. Original recipe can be found here.

Ingredients for the pastry:

  • 1/2 cup unsalted butter, at room temperature
  • 80 g icing sugar, sifted
  • 3 large egg yolks
  • 160 g cake & pastry flour
  • 24 g Dutch Process cocoa powder
  • 20 g cornstarch
  • 1/4 tsp salt
  • 1 tsp bourbon

Directions for the pastry:

  1. Cream the icing sugar and butter until smooth, then add the yolks and bourbon all at once and beat until fully encorporated.
  2. Sift the dry ingredients (flour, cocoa powder, cornstarch and salt) into the butter mixture and stir by hand until evenly combined. The dough is much looser than most pastries. Shape the dough into a disc, wrap and freeze for 30 minutes.
  3. Roll out the dough between two sheets of parchment until just less than 2mm (¼” thick). Cut circles of the pastry to line eight 10 cm (4-inch) fluted tart shells with a  removable bottom, pressing the dough into the shells and trimming away any excess. If the dough softens, just pop it back into the freezer to harden up for a few minutes. Prick the pastry with a fork. Chill the tart shells for at least 20 minutes.
  4. Preheat the oven to 350°F. Place the chilled tart shells onto a baking sheet and bake them for about 15-18minutes, until you see that the pastry has an even, dull finish. Allow to cool while preparing the filling.

Ingredients for the filling:

  1. 3 large egg separated
  2. 112 g sugar, divided
  3. 1 tsp finely grated orange zest
  4. 1 tsp cinnamon
  5. 1 tsp vanilla extract
  6. 12 g Dutch Process cocoa powder, sifted
  7. 86 g bittersweet chocolate, melted (but still warm)
  8. 30 bourbon

Directions for the filling:

  1. Whip the remaining 3 egg whites until foamy then slowly add ¼ cup of the sugar and continue whipping on high speed until the whites hold a soft peak. Set aside.
  2. Whip the 3 egg yolks with the remaining ¼ cup (112 g) of sugar, the vanilla and orange zest until pale and thick. Fold in the egg whites and gently whisk in the cocoa powder, melted chocolate and bourbon. You may refrigerate this overnight (I did for 1 night and 1 full day and it was fine).
  3. Pour the filling into the cooled tart shells and bake for about 8-12 minutes at 350°F until the tarts just begin to lose their shine around the edges, but the centre is still dark and glossy. Allow the tarts to cool 2 minutes, before carefully removing them from their shells to serve warm or allow to come to room temperature. Serve with whipped cream.

BourbonStreetMudPie

You may have noticed that this one has ganache on top…we determined was a bit excessive as it’s a very chocolatey tarte.

BoubonStMudPie_3 copy

This was my first try for a friend’s dinner but it turned out way too rich.


Read Full Post »

CrackPie_Blog1

I forgot to take powdered sugar to the cottage to decorate the top.

It’s not what you think. At the very least, it’s not the crack that Toronto has become famous for (didn’t you know?). It’s the other crack that Chef David Chang and Christina Tosi’s Milkbar in NYC that has this crack elevated to the highest of honors, it’s Crack Pie. If you have never heard of Crack Pie, it’s a decadent combination of butter, sugars (brown and white), eggs and oats. It’s incredibly rich and moreish. But I warn you, a slice of this pie will cost you dearly (and I’m not even going to talk about the $44 price tag for whole pie sold at Milkbar in NYC). Is it worth it? The calories and the time to make it? I’ll let you be the judge. If you ask me if I’ll make it again, I’m going to say probably not. It’s not that it wasn’t good, that it was, but there are a lot of other desserts that are equally as good without being as caloric (Bon Appetite’s recipe details the nutritional facts as: 1 slice (a pie serves 12 people) 350.8 Calories,  53.8 g Fat (21.0 g Saturated Fat)). Some of my dear readers will swoon over this recipe and some will be appalled because it’s not something that generally fits into this blog. To those who are appalled I apologize, it’s not often I make something so outlandishly bad for you. To those who swoon, tread lightly, it is as dangerous as the illegal kind (crack, that is!)

I cannot take credit for this pie on my radar because it was my dear fellow blogger Lorraine, over at Not Quite Nigella who introduced me to it in June last year. It was part of the Daring Bakers Challenge (I do not participate) but I saw it pop up all over the place in the blogs I follow. I filed this recipe in a spot I file many recipes that are not as healthy, most likely never to be made, but we were at a fund raiser for one of the Photographer’s wives who was doing a hike to Machu Picchu to raise money for breast cancer research and awareness and one of the food stylists made Crack Pie (she made it in a slab and cut it into tiny squares). I knew I had to try it. JT loved it, so when we had my nephew over for dinner in late August, I took the plunge and made it.

CrackPie_Blog2

If I had to describe this pie, it’s like a decadent blondie.

Momofuku’s Crack Pie

Makes 1 pie about 25 cm diameter

Ingredients for Oat Cookie Crust:

  • 9 tbsp unsalted butter at room temperature, divided (6 & 3 tbsp)
  • 5 1/2 tbsp packed light brown sugar, divided (4 & 1½ tbsp)
  • 2 tbsp white sugar
  • 1 large egg
  • 3/4 cup plus 2 tablespoons old-fashioned oats
  • 1/2 cup all-purpose flour
  • 1/8 tsp baking powder
  • 1/8 teaspoon baking soda
  • 1/4 tsp salt

Directions for oatmeal cookie crust:

  1. Pre-heat the oven to 350° F (180° C). Line a 13″ x 9″ sheet with parchment and spray lightly with cooking spray.
  2. Using a mixer, beat  6 tbsp butter with 4 tbsp brown sugar and white sugar until light and fluffy (about 2-3 minutes).
  3. Add the egg and beat again until pale and fluffy, about 1 minute.
  4. Fold in the oats, flour, baking powder, baking soda, and salt and stir until well blended.
  5. Turn out the oat mixture into prepared baking pan and press out evenly to edges of pan or close enough.
  6. Bake until lightly golden about 18 minutes.
  7. Lift parchment with cookie onto a wire rack and cool completely, about an hour.
  8. Once cool, crumble the cookie into a large bowl and add the remaining 3 tbsp (45 gm) butter and 1-1/2 tbsp brown sugar and mix well until the mixture is moist and will stick together when pressed between your fingers (think graham cracker crust).
  9. Pour the cookie crust mixture to a 25 cm spring-form pan and press into the bottom and sides using your fingers and/or anything that will press it firmly. Set aside.

Ingredients for filling:

  • 3/4 cup white sugar
  • 1/2 cup packed light brown sugar
  • 1 tbsp dry milk powder
  • 1/4 tsp salt
  • 1/2 cup unsalted butter, melted and cooled slightly
  • 6 1/2 tbsp table cream (recipe called for whipping cream but I had table cream on hand so I used it instead)
  • 4 large egg yolks
  • 1 tsp pure vanilla extract
  • (Powdered sugar for dusting) – I forgot

Directions for filling:

  1. Preheat to  350° F (180° C). Spray a 25 cm spring-form pan with baking spray.
  2. Whisk sugars, milk powder, and salt together in a medium bowl and add melted butter and whisk until blended.
  3. Add the cream, egg yolks and vanilla and whisk until well blended.
  4. Pour the filling into the crust.
  5. Bake for 30 minutes (filling might bubble up) then reduce oven temperature to 325° F (160°C) and continue to bake until filling is golden on top and set around edges (20 minutes longer).
  6. Cool pie completely on a wire rack. Chill uncovered overnight. Carefully glide a knife around the edges to loosen and remove the sides of the spring-form pan and slide the sides off. Position on a serving plate.
  7. Sift powdered sugar lightly over top of pie. Cut pie into thin wedges. Serve cold with a drizzle of caramel and a dollop of whipped cream.

CrackPie_Blog3

Would you like some crack with that?

Read Full Post »

It was someone’s birthday recently and a very specific request for cake was made: Black Forest Kirschtorte! I haven’t made this cake in quite some time and had forgotten which was my GOTO recipe. So I sat down with my favourite pastry cookbook, Barbara Maher’s Traditional Cakes and Pastries, published by Burlington Books in 1984. Coincidentally, this book was a gift from one of my dearest friends, University Kim (I have two Kim’s so I’ve differentiated this way for years!) she signed it “a friend forever” and she sure is!

I’ve made many successful recipes from this cookbook from the Normandy Apple Tart to Profiteroles (and some that I haven’t even blogged about) and for the most part the recipes were detailed and correct. Not this one.

I usually read through the ingredients to make sure I have everything I need and I skim the directions to make sure I know what I’m doing, which I also did. But when I actually got down to the nitty gritty to make the cake (well into it, to be exact), I noticed that they completely forgot to include the flour in the instructions (actually, in this case it was the almond mix). So I had to improvise and it seems to have worked. The cake is a genoise-style with strong chocolate flavouring from both melted good quality chocolate (I used this one) and cocoa powder. It’s light enough that you don’t squeeze out all the whipped cream when you cut it, but it’s got enough body to hold the drunken cherries. All in all, quite a tasty recipe and it’s Gluten Free! I stabilized the whipped cream so that it lasts a few days, otherwise it will just make the cake soggy.

I cut the recipe down to 1/3 size because we didn’t want a large cake and I added the cocoa powder because we like chocolate and removed flour and bread crumbs ingredients, you can definitely check the original recipe on page 93 in her cookbook. The recipe is a bit different that what you might be used to in North America as the cinnamon really flavours the chocolate beautifully, if you’re not a fan, leave it out!

BlackForestCake_3147

A deliciously boozy cake

Black Forest Kirschtorte

Original recipe by Barbara Maher’s Traditional Cakes and Pastries, published by Burlington Books in 1984.

Makes one small cake, about 2 cups of batter. Serves 4-7 people.

Ingredients for the cake:

  • 42 g ground almonds (not blanched, coarsely ground)
  • 1/3 tsp cinnamon
  • 1/3 tsp ground cloves
  • 10 mL kirsch
  • 47 g caster sugar
  • 3 egg yolks
  • 1/2 tsp orange extract
  • 2 tbsp crême fraiche or sour cream
  • 33 g good quality chocolate, melted and cooled slightly
  • 2 tbsp good quality cocoa powder
  • 2 egg whites

Directions for the cake:

  1. Pre-heat your oven to 350° F (180° C).
  2. Prepare your pan by coating all over with butter and dredge with sugar.
  3. Combine the almonds, cinnamon, cloves and moisten with kirsch.
  4. In a separate bowl, beat the egg whites until stiff but not dry. Set aside.
  5. In another bowl, combine the sugar and egg yolks and beat until thick, creamy and pale in colour. Add the orange extract, melted chocolate, crême fraiche and lastly the cocoa powder and mix well.
  6. Fold in the beaten egg whites.
  7. Pour evenly into your prepared pan and bake for 25-30 minutes until a tester comes out clean and the cake has shrunken for the sides a little bit.
  8. Cool for 10 minutes in the pan, then turn out to a cooling rack.

Ingredients for the cherry syrup and whipped cream:

  • about 20 fresh cherries with stems and pits (around 330 g or 3/4 lb). Reserve 7 cherries for decoration, set aside.
  • 33 g (1 oz) granulated sugar
  • 85 mL (3 oz) red wine
  • 85 mL (3 oz) water
  • 1 cinnamon stick
  • 30 mL (5 oz) kirsch
  • 1/2 cup whipping cream (35%)
  • 1 tsp gelatin

Directions the cherry syrup and whipped cream:

  1. While the cake is baking wash, pit and stem the cherries; cut them in half.
  2. In a small sauce pan add the sugar, red wine, water, cinnamon stick. Simmer for 20 minutes, add the halved cherries and poach lightly for 10 minutes.
  3. Remove the cherries and allow to drain into a dish. To thicken the syrup, bring to a boil and cook down for about 3-4 minutes. Remove from the heat and allow to cool completely. Remove the cinnamon stick and add the kirsch, stir well.
  4. Soften the gelatin in a very little bit of water (2 tbsp) set aside while you whip cream.
  5. In a very cold bowl, whip the cream until stiff peaks form, add the softened gelatin and whip to combine evenly.

Directions to decorate the cake:

  1. Cut the cooled cake in half. Drizzle the cherry syrup onto the bottom and top layers and allow to absorb. Spread an even layer of whipped cream and dot with poached cherries. Add a bit more whipped cream on top.
  2. Place the top layer down on the bottom layer and drizzle with the cherry syrup (reserve some syrup and poached cherries for serving). Spread the remaining whipped cream on top and decorate with the seven cherries that were reserved at the onset.
  3. Serve with cherry syrup drizzled on the plate and some of the reserved cherries.

Happy Birthday!

Happy Birthday!

Read Full Post »

The days are getting shorter and the nights chillier, fall is definitely upon us in Ontario; you can feel it, see it and even smell it. We had a fire last night in our wood burning fire place! I even put closed toe shoes on today. I say it every year: I’M NOT READY!!! Is it just me or do you also feel that time is even a bit faster these days — where did the summer go?
Several friends and family have now gone gluten free, some by choice and some by necessity. Even at our house we try to limit our Gluten intake, so I’m always on the lookout for new gluten free, beautiful and tasty dessert recipes.
My friend Charlie at Hotly Spiced made this wonderful Gluten Free Sour Cherry Cake a while back and I knew I had to make it as soon as I saw her post! Thanks Charlie! The cake is moist, and the texture is perfect. It reminded me a little of a semolina cake, but with a finer texture. I usually have a dislike to the flavour of gluten free flours, so I made a few alterations which worked out famously; I added lemon rind, lemon essence and because I was short on butter, substituted cream cheese for the missing weight — I hope you don’t mind Charlie! It was absolutely wonderful and it’s going on my list of ‘Go-To’ Gluten Free desserts!

GFCherryCake_0925

I only put 1/2 cup of cherries into my cake, next time it will be a full cup (recipe is adjusted already).

Gluten Free Cherry Cake

Serves 6-8 from an 20 cm or 8″ spring form pan

Ingredients:

  • 75 g softened butter
  • 25 g softened cream cheese
  • 1/2 cup castor sugar (super fine sugar, but not icing sugar)
  • 1/2 tsp vanilla extract
  • 1/2 lemon rind
  • 1/2 tsp lemon essence
  • 2 free-range eggs at room temperature
  • 1/2 cup GF flour
  • 3/4 tsp GF baking powder
  • Pinch of salt
  • 37 g almond meal
  • 1 tbsp buttermilk (or cow’s milk)
  • 1 cup cherries

Directions:

  1. Pre-heat your oven to 180° C (375° F).
  2. Prepare a 20 cm (8 inch) spring form pan by spraying with non-stick cooking spray and lining the bottom with parchment paper.
  3. Beat the butter and cream cheese together until they are as white and fluffy as can be (this takes several minutes). Once you’ve reach the light fluffy consistency, gradually add sugar. then add the vanilla and continue to beat until incorporated.  Add the egg and beat in until well combined.
  4. Sift the flour, baking powder and salt together and using a wooden spoon, mix into the butter fluff. Then fold in the almond meal and buttermilk.
  5. Pour the batter into the prepared tin and smooth the surface.
  6. Drain the cherries then scatter across the top of the cake.  (No need to be decorative as they will sink during the cooking process).
  7. Place in the oven for 30-40 minutes or when your cake tester comes out clean.
  8. Remove the cake from the oven and allow to cool in the tin.
  9. Serve with dusted icing sugar and cherry sauce (or ice cream, whipped cream etc.

GFCherryCake_0924

It’s a delicately flavoured moist cake, the sauce isn’t really necessary,
but it’s darn nice!

Read Full Post »

Thank you all for your lovely words and kind wishes to JT for his recent birthday in June. It was fairly low key because it landed on a Tuesday, but we still went out for a very nice dinner (review to come). The Monday before JTs birthday, he’d made plans with a friend to go out for dinner, which left me with some private time in the kitchen and I knew exactly what I wanted to do: Bake a cake as a surprise for his birthday! But I only had a small window of opportunity to bake, cool and ice it.

JT had walked up to a local place to meet this friend, so he was gone by the time I got home. Good, but I was home a little later than expected having to finish off a few things at work and ride my bike the 8 km home. As soon as I got in, I was immediately racing around in record time to bake this cake. But first I had to find a recipe! Without much time (I was expecting JT back around 8-9) I found this recipe which was called fastest fudge cake (just what I needed) and I was able to easily half the recipe so that I can bake it in a small spring form pan. Just as I was cleaning up and waiting for the cake and ganache to cool, I get a text from JT at 7:30 that he’s one his way home. That means I’ve got 10 minutes tops. Even with this easy recipe, I just barely squeaked by, dumping the barely cooled ganache onto the barely cooled cake and hiding it in the living room credenza! It was a very nice surprise.

ChocFugdeCake_0363

A very special little cake. Night pictures suck.

Fast and Easy Fudge Cake

Makes one 13 cm or 5″ cake plus a muffin-sized cake

Ingredients:

  • 1/2 cup all-purpose flour
  • 4 tbsp unsweetened natural cocoa powder (not Dutch processed)
  • 1/4 tsp baking soda
  • pinch table salt
  • 1/4 cup  unsalted butter, melted and warm
  • 3/4 cups packed light brown sugar
  • 1 large egg
  • 1/2 tsp pure vanilla extract
  • pinch of cayenne
  • 1/4 cup orange liquor
  • 1/2 cup Ganache

Directions:

  1. Preheat the oven to 350°F  (177°C). Grease the bottom of an 13 cm spring form cake pan and line it with parchment.
  2. In a small bowl sift the flour, cocoa powder, baking soda, cayenne and salt.
  3. In a large bowl, combine the melted butter and brown sugar and stir with a wooden spoon or rubber spatula. Add the egg and vanilla and stir until well blended.
  4. Add the flour mixture all at once and stir just until all the flour is moistened. Scrape the batter into the prepared pan.
  5. Bake until a toothpick inserted in the center comes out clean, about 35-40 minutes for a 13 cm (5″) spring form pan. Let cool in the pan on a rack for 10 min. Run a thin knife around the edge and invert the cake (peel off the parchment). Pour the orange liquor over the cake and allow to saturate. Allow to cool completely (or mostly as in my case!).
  6. Once cool, set the rack over a baking sheet or foil. Pour the warm ganache over the cake and use an icing spatula to spread it over the top of the cake and down the sides. Let set for about an hour before serving.

Ganache Ingredients:

  • 4 oz of dark semi-sweet chocolate, finely chopped
  • 1/2 cup of 18% cream

Ganache Directions:

  1. Warm the cream just before boiling point. Pour the hot cream over the finely chopped chocolate and stir until it’s all melted.
  2. Allow to thicken (or not) and pour over cooled (or not) cake (place cake on a piece of parchment). Even out. Allow to cool in a cool dark place (like a credenza!).
  3. Serve with a sprig of mint over a small puddle of orange liquor.

ChocFugdeCake_0366

Would you like a little cake with your mint?

Notes:

  • The batter was a bit too much for the pan, it did bubble over a bit, so I was glad I put a cookie sheet under the spring form.
  • The cake has a rich, chewy texture with a nice crunchy crust (like brownies).
  • The ganache would have been better if it had been allowed to thicken a bit more, but it was still super tasty.
  • Recipe updated (May 2016) to reflect correct pan size. To make a slightly larger cake (22 cm or 8″), double the recipe.
  • The original recipe in the link makes 600 mL of batter (using only 1/4 cup hot water), the perfect size for an 22 cm or 8″ spring form pan (updated December 2016).

Read Full Post »

Happy Independence Day! Since it’s Thursday, do you take Friday off and make it an extra long holiday? How do you celebrate? Last year we were in Wisconsin at our friend’s lake house (Paul & Ts) and at around 9pm we boated out to the middle of the lake and watched the most amazing fireworks–it was awesome!
Speaking of awesome, if you want your guests to see fireworks in their heads, THIS is the dessert to serve. It’s a perfect summer dessert combining popular tropical flavours: pineapple, rum and coconut. You can’t go wrong, and it’s very impressive making it the perfect dessert to serve on such an important holiday.

Happy Fourth of July!

Happy Fourth of July!

The first time I saw this recipe was at Jed, the Sports Glutton’s blog and I knew I would make it, I just didn’t realize how soon! We were entertaining my uni BFF and her hubby a while back and I needed a gluten free desert (she is gluten intolerant) and I wanted something that wasn’t too bad for you…so I chose fruit but even better it was sweet, caramelized Pineapple. I loved the grilled pineapple salsa we made for the grilled shrimp so I knew this dessert would be a hit; it turned out so well, JT suggested that I make it for our next progressive dinner, so I did! What was super cool about the latest progressive dinner was that each course had to be made on the BBQ! This is the perfect summertime dessert, not having to heat the house up by turning on the oven — there are better ways to heat things up ;)!

This is the version I served to my BFF for brunch, no cake!

This is the version I served to my BFF for brunch, sadly there was no cake!

So, I present to you, an inspired version of Los Angeles Angels of Anaheim.

Since we sliced the pineapple thinner, they didn't hold their shape, I suggest skewering them as well.

Since we sliced the pineapple thinner, they didn’t hold their shape, I suggest skewering them as well.

Deconstructed Piña Colada: Grilled Buttered Rum Pineapple with Grilled Coconut Pound Cake

Serves 8 (1 cm or 1/2″ slices of cake, with lots left over)

Ingredients:

  • 1 cup fat free Greek yogurt
  • 1 tbsp vanilla
  • 3 tbsp powdered sugar
  • the rind of one lemon

I

  • 1 /4 cup of unsalted butter
  • 1/8 cup dark rum
  • 1/2 tbsp brown sugar
  • pinch of salt
  • 2 pineapples, peeled and cored and cut into 8 spears each
  • 24 smallish strawberries
  • 1 Coconut pound cake (recipe can be found here).
  • pineapple sage finely julienned (or mint)

Directions:

  1. Combine the Greek yogurt, vanilla, powdered sugar and lemon rind and stir well. Refrigerate.
  2. In a small saucepan, melt the butter and then add the rum, brown sugar and salt and give it a good boil (to burn off the alcohol).
  3. Using the buttered rum sauce, baste the pineapple spears and grill until you have achieved grill marks, you can baste throughout the grilling process but make sure you reserve some sauce for drizzling. Keep the grilled pineapple spears warm.
  4. Slice the coconut pound cake into 1-2 cm (1/2″-3/4″) slices, brush lightly with the buttered rum sauce and grill until you have achieved grill marks.

Assembly:

  1. Place the slice of grilled coconut pound cake on the plate, arrange the spears so that they overlap the pound cake and each other.
  2. Add three washed strawberries clustered together.
  3. Add a dollop of the Greek Yogurt sauce and finally drizzle with the remaining buttered rum.
  4. Garnish with the pineapple sage julienne. Serve immediately.

*Clip art from Microsoft Clip Art.

Read Full Post »

Happy Canada Day! Today is Canada’s birthday and she’s a whopping 146 (now my birthday won’t seem half bad!). How are you celebrating this auspicious holiday?

Happy Canada Day!

Happy Canada Day!*

We’re at the cottage, spending a long overdue weekend with good friends. The redecorating has taken a bit of a back seat due to being crazy busy at work and not being able to take a little extra time up north, so it’ll just get done later. Being at the cottage means everything slows down and it forces you to enjoy the quiet. I usually bring a craft to do or read, which I don’t often get to do in the city. It also forces you to reflect and in reflection I remember some really good times; one in particular is this:

A couple of months ago I received an email from my friend Kristy (Eat, Play, Love, Our family food adventures) that she was coming up to Toronto and did I want to meet her? WHAT? Of course I want to meet her, who wouldn’t? Kristy and Mike have an incredible blog where they actively involve their two beautiful children, Mr. N and Miss. A; I particularly love that they do that because it’s how I became interested in cooking.

At first I was going to keep Kristy all to myself and not share the adventure, but then I felt that would be selfish so I emailed Barb (Profiteroles and Ponytails) and that got me thinking…what about Kelly (Inspired Edibles), she’s not far from Toronto and she might also be interested, and that’s where it all started. You already know that I’ve known Barb for many years and we’re very good friends with she and her husband — Barb’s blog is a lovely presentation of easy, family friendly recipes. Kelly is a fellow Ontarian, up in Ottawa (only a four hour drive away) and she runs a fantastic blog focusing on health and nutrition. Kelly and I have emailed once or twice before so I didn’t feel awkward in presenting the invitation. Without hesitation both ladies jumped (and I mean JUMPED) at the offer and boy am I glad because it was an incredible night of camaraderie, friendship, good conversation and few very hearty laughs! Thank you ladies for making the evening.

We started at a the classy Roof Lounge at the top of the Park Hyatt in Yorkville; it was as if we’d known one another a lifetime, the conversation just flowed and it was so easy to talk to everyone. We then made our way to Bar Mercurio our favourite Italian restaurant. JT and I have been dining at Bar Mercurio for quite some time and they know us by name so I knew were would get the royal treatment, and we weren’t disappointed. We had a complimentary dessert platter of biscotti and complimentary Lemoncello. Of course, I forgot to take photos early in the evening when there was still daylight, but fortunately Barb and Kristy both brought their iPhone 5s and the very lovely Omar obliged us with a photo. Thank you ladies again for a wonderful evening, I hope we can do it again soon.

It's a shame you can't see our lovely shoes!

It’s a shame you can’t see our lovely shoes!

Complimentary Biscotti always hits the spot.

Complimentary Biscotti always hits the spot.

Of course, one very popular topic of conversation was food and I happened to mention that we’re doing another progressive dinner on our street and that this time our theme is the BBQ, which means that every part of this meal must be grilled. I volunteered for dessert, because I love the challenge. This Coconut Pound Cake is one component to this very delicious dessert, but I won’t spoil the surprise!
I did alter this recipe to make it slightly healthier, by cutting the butter in half and replacing it with puréed apple (or you can use store bought unsweetened apple sauce). It worked out very well indeed!

PoundCakePan_0263

Preparing the cast iron pan for the BBQ

PoundCakeBatter_0264

I photographed the batter so you could see that the apple purée did not affect the texture

PoundCakeBBQ_0268

Baking on the BBQ

PoundCake_0272

Cooling the pound cake. Or do I call it the kilo cake?

Coconut Pound Cake

Serves 10-12

Original recipe from Epicurious, I made some adjustments to make it a bit healthier (original recipe had 1 cup butter in it)

Ingredients:

  • 2 cups all-purpose flour plus additional for dusting
  • 1 teaspoon baking powder
  • 1/2 teaspoon salt
  • 1 stick (1/2 cup) unsalted butter, softened
  • 2/3 cup of apple purée – see note below
  • 1 cup sugar (reduced from 1 1/2 cups)
  • 4 large eggs
  • 1 teaspoon vanilla extract
  • 1/2 teaspoon coconut extract
  • 1 1/2 cups unsweetened flaked coconut (6 oz) (original used sweetened)

Directions:

  1. Preheat the BBQ to 325°F. Turn off 1 burner completely.
  2. Prepare1.4L pâte terrine enamelled cast iron pan with non-stick cooking spray (or you can use a 9″ by 5″ by 3″ loaf pan) and line it with parchment leaving ‘handles’ on the long sides.
  3. Sift together the flour, baking powder, and salt in a bowl, set aside.
  4. Beat together butter and sugar in a large bowl with an electric mixer at medium-high speed until pale and fluffy, about 5 minutes with a stand mixer or 8 to 10 minutes with a handheld. In small increments, add the apple purée and beat an additional minute it two until full incorporated (don’t worry if it looks separated, just beat a little longer on a higher speed and it will smooth out).
  5. Add eggs 1 at a time, beating well after each addition, then beat in extracts. Reduce speed to low and mix in flour mixture until just combined. Fold in coconut gently but thoroughly with a rubber spatula.
  6. Spoon batter evenly into the prepared loaf pan, smoothing top. Bake in a BBQ on a warming rack in the back with the burner directly below turned off until golden and a wooden pick or skewer inserted into center comes out clean, 1 1/4 to 1 1/2hours.
  7. Cool cake in pan on a rack 15 minutes. Run a thin knife around edge of cake, then invert onto rack and cool completely.

Notes:

  • In order to reduce the butter, I used baked and puréed apples. Peel and core two apples, cut into small cubes, microwave in a heat proof glass bowl with 2-3 tbsp of water until very soft. Purée with an immersion blender until smooth. Push through a fine sieve. Cool and use as directed in recipe above.
  • Cake may be made in advance and stored in an air tight container in the refrigerator until required.
  • Cut slices may be frozen for future use (this is what I did)

Read Full Post »

Hello Spring

Spring has finally sprung in The Big Smoke so I thought I would run some lovely signs of spring first. I’m always surprised at how elated I am when I see the first buds on the trees and then somehow, it seems that from one minute to the next BOOM, we have blooms. It’s like spring explodes into nature; trees go from no leaves to full leaves, bulbs spring up, lilacs bloom and everything is glad to be alive. Finally.

Azaleas_4633

The Azaleas are one of the first to bloom

Cardinal_4628

A visiting Cardinal. He is just too big for our feeder, so he eats the dregs.

Flowering Tree_4626

Our new Japanese Cherry Tree just loves its new home.

Flowering Tree_4627

Completely covered in blooms

HeatLight_4632

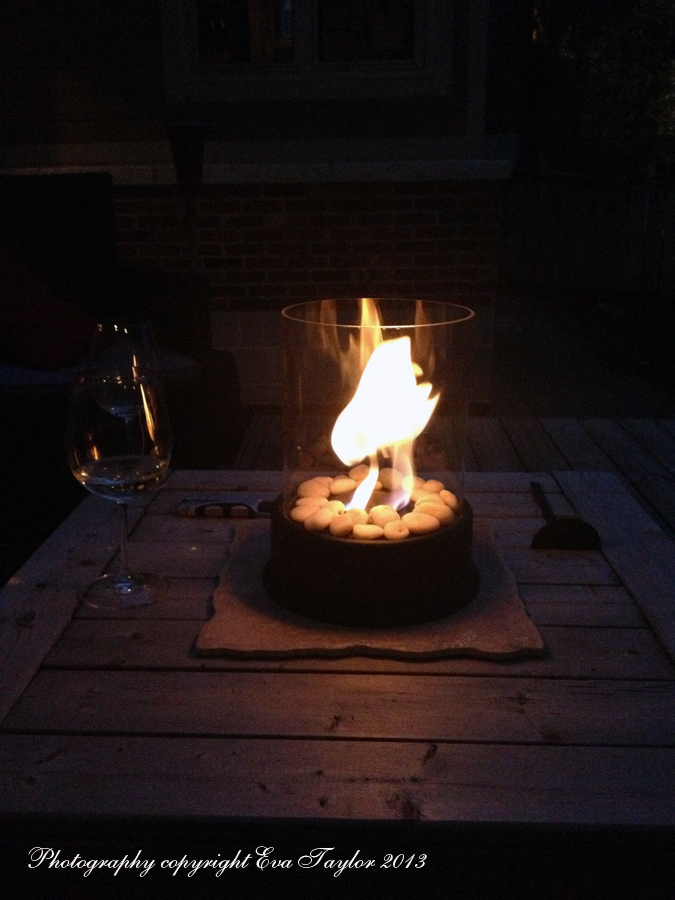
Even sitting on the back deck is quite pleasant with a little fire and heat.

Trillium_4656

Our lovely trillium returned in the back 20.

Lilac_4642

And last but not least, this 7 year old lilac FINALLY bloomed this year. Ironically, this was the year I had planned to replace it with a Rose of Sharon.

JapaneseCherryBlossoms_4636

A drive through High Park to showcase the beautiful Japanese Cherry trees just prior to their peak.

JapaneseCherryBlossoms_4637

It’s a lovely fresh aroma

JapaneseCherryBlossoms_4638

There were tour buses on the weekend

JapaneseCherryBlossoms_4639

The trees are dispersed throughout the park, but there are also gorgeous clumps of them.

CherryBlossoms_4644

I took these pictures on Saturday; the trees were definitely at their peak.

CherryBlossoms_4646

Such gorgeous delicate blossoms.

CherryBlossoms_4647

I wish they bloomed all year round; that would make me very happy.

We had my family Easter dinner in mid-April because my brother and family always have other plans on Easter Weekend. I don’t mind having these holiday dinners at a different time, things are generally cheaper, it’s fun to have the festivities again (we had an Easter Egg Hunt) and it gives a good excuse to get together regardless of missing the holiday. Win-win.

We made a couple of BBQ’d Herbes of Provence chickens which always turn out exceptionally well, even though we remove every bit of skin it’s super moist and flavourful (I can’t believe I haven’t done a post about this flavourfull chicken, but here is a photo of the bird on the BBQ). And of course, this wonderful dish pairs so well with Susur Lee’s Singapore Slaw (aka 19 Ingredient Slaw) that I made it again. We also had some lovely roasted sweet potatoes.

Angel Food Cake_4479

My first Angel Food Cake from scratch. Who knew it would be so easy?

And of course, the dessert: Strawberry Shortcake made with a lovely Angel Food Cake. My very first scratch Angel Food Cake. I always hesitated to make this cake because my MIL warned me about how difficult and finicky it was. So as she did, I used a mix. Strange but true. I hadn’t thought about an Angel Food Cake in a lot of years (she’s been gone for more than 15 years) but I wanted a light cake with little to no fat and this fit the bill. Now to find a recipe which doesn’t use 14 or 16 egg whites! I found this recipe created by Anna Olson for a light chiffon cake using 8 egg whites. Perfect.

Now you know me by now that I generally don’t have a lot of dessert eaters, so when I chose a dessert (whether it be slightly better for you than ordinary) I always make it smaller. Who needs left overs? So I figured out the volume of the 10″ tube pan Anna used and cut it in half to fit my 8″ spring form pan! Clever? I must warn you, that the tube pan is used to help bake this light, airy meringue-like cake through the centre; my small spring form was just the right size and it baked relatively evenly. I would not recommend going larger as your edges will dry out and your insides will be runny. Anyway, food for thought!

I got a nice crumb on the cake, the bottom of the spring form had a harder time releasing due to the little dimples in it, so next time, I will line it with a piece of ungreased parchment, that should do the trick. Oh, and it’s really important not to jump around the oven like a mad dance, or even open the oven door during the first 20 minutes of baking. Also note that although this pan is smaller, it did take a bit longer to bake through, probably because there wasn’t the chimney effect heating the centre through. And having said that, I’d do it again in an instant, it’s a lovely light-feeling dessert.

Strawberry Shortcake_4489

A cake slathered in stabilized whipped cream and way too many strawberries.

You’re probably wondering “what the heck is stabilized whipped cream?” Well, maybe only some of you. I was looking for a way to make this cake up a few hours in advance and not have the whipped cream fall flat and runny on me. It’s really rather easy, 1 tsp of gelatin in about 3 tbsp cold water, nuked until gelatin melts complete, cooled down but not set and drizzled into the whipped cream with (1 tbsp icing sugar and 1/2 tsp pure vanilla extract) as you’re whipping. So easy and it sets the whipped cream ever so slightly so it won’t go all sloppy and meltie. You can’t taste the difference.

Strawberry Shortcake_4490

It just looked so yummy, I had to take another photo.

Ingredients:

Serves 4-6 from an 20 cm or 8″ spring form pan

  • 1/2 cup cake and pastry flour (less protein than bread flour)
  • 1/2 cup granulated sugar
  • 4 large egg whites, room temperature
  • 1/4 teaspoon cream of tartar
  • pinch of salt
  • 1/4 cup icing sugar, sifted
  • 1/4 teaspoon vanilla extract
  • 236 mL (1/2 pint) whipping cream, stabilized as above
  • Strawberries, to serve

Directions

  1. Preheat the oven to 163° C or 325° F.
  2. Sift the flour and granulated sugar twice and set aside.
  3. Whip the egg whites with the cream of tartar and salt until foamy, then gradually add the icing sugar, whipping until the whites hold a medium peak when the beaters are lifted. Stir in the vanilla.
  4. Sift in the flour and sugar mixture to the whipped whites in 2 additions and using a whisk to fold in the flour evenly and easily. Scrape the batter into a 8-inch ungreased spring form pan, spread it to level and bake the cake for 40-45 minutes, until it springs back when gently pressed (try not to open the oven before 25 minutes).
  5. Cool upside down (this is apparently important so the cake doesn’t deflate and fall). Wait until it is thoroughly cook (I’m not kidding) to remove from pan (you must cut it out with a clean knife). To slice the cake in half, use an unserated blade and cut with short delft strokes until full severed.
  6. Serve the cake with whipped cream and berries, if you wish. The cake will keep, well wrapped (not refrigerated – it will dry it out) for up to 3 days.

Strawberry Shortcake_4491

It’s only about 20 cm or 8″ wide. My 13 year old nephew had half of it.

Read Full Post »

Chocolate Hazelnut Lapis_4266

I still have to work on getting my layers more even.

I knew when I made this cake before that I wanted to try it again with different flavours. I made this version for a dinner we had for our nephew Brian some weeks back. Hazelnut and chocolate are a great combo, think Nutella and I figured it would make a wonderful layer cake!

Chocolate Hazelnut Lapis_4264

I actually got 16 layers out of the batter because I used less per layer.

Hazelnut and Chocolate Spekkoek Lapis Legit with Chocolate Ganache Topping (Thousand-Layer Spice Cake)

Serves 4-6 depending on how thick you slice it

Ingredients:

  • 170 g (1 1/2 sticks) unsalted butter, softened
  • 1/2 cup granulated sugar
  • 1/2 tsp pure vanilla extract
  • 1/4 tsp salt
  • 6 large eggs, separated
  • 2/3 cups all-purpose flour
  • 2 tbsp confectioners’ sugar
  • 1/4 cup hazelnut butter
  • 1 tsp hazelnut essence
  • 1/4 cup sifted unsweetened cocoa powder
  • 1/4 cup chocolate chips
  • 1/4 cup whipping cream
  • 1 tbsp hazelnut butter
  • 1/4 cup whipping cream

Directions:

  1. Preheat the broiler (I have this range with two ovens, this time I used the smaller oven and it still took 2 minutes per layer and did not burn).
  2. Butter the bottom and sides of a 4″ x 6.7″ loaf pan and line with buttered parchment paper. I left enough of the parchment to go past the top of the pan, so I could use it to lift the cake out when it was done.
  3. Weigh your empty bowl, write down the measurement. In this bowl, cream the softened butter, 1/4 cup of sugar, vanilla, and salt. Add the egg yolks one at a time and beat until smooth. Fold the flour into the batter with a rubber spatula.
  4. In a clean bowl with clean beaters, beat the egg whites with the remaining 1/4 cup of sugar until stiff and shiny but not dry. With about 1/3 of the beaten whites, loosen the batter by mixing it in with a wooden spoon. Fold the remaining whites into the loosened batter, being careful not to over-mix.
  5. Weigh your bowl with the cake batter. Subtract this new weight from the old weight so you know how much your batter weighs and divide this weight in half. Put a second bowl on a scale that can tare and zero it out. Pour half the batter into this bowl (you can see exactly when you reach half on the scale).
  6. Into one half of the batter, gently fold in the 1/4 cup hazelnut butter and the essence. Into the other batter, gently fold in the 1/4 cup sifted cocoa powder.
  7. Pre-heat the pan (this makes the batter easier to spread out). Pour 2 tablespoons of the hazelnut batter into the bottom of the pan and spread out evenly.
  8. Bake in a hot broiler for 2 minutes. Watch carefully. Mine is exactly two minutes.
  9. Pour 3 tablespoons of the chocolate batter, spreading it over the first layer to form a thin second layer. Place the pan under the preheated broiler for 2 minutes, or until the layer is firm. Continue until you have exhausted both batters. Emeril noted that the cake typically has between 12 and 15 layers — I ended up with 16, not bad for a second timer!
  10. Allow the cake cool on a wire rack, turn out onto a cutting board and even up the sides by cutting clean new edges.
  11. To make the ganache, heat 1/4 cup of whipping cream until it almost boils. Pour over the chocolate chips and stir until melted. Allow to almost cool and pour over the cooled cake (you can allow it to drip down the sides, I didn’t want to).
  12. To make the hazelnut whipped cream, beat 1/4 cup of whipping cream until stiff, add 1 tbsp hazelnut butter and whip until entirely incorporated and smooth.
  13. Slice thinly and serve at room temperature with a dollop of the hazelnut whipped cream.

Chocolate Hazelnut Lapis_4271

A nice delicate hazelnut flavour in the whipped cream balances the chocolate ganache on the cake.

Read Full Post »

I just noticed that WordPress is adding advertising into my content in links which are not mine. How to tell the difference is that my links have a dotted underline and the ad links are solid and dotted together. Not cool at all.

Last week I was blown-away flattered by my Hungarian friend Zsuzsa (Zsuzsa is in the kitchen) when she invited me to participate in a blogging event to post your Easter Menu! You can read about Zsuzsa’s Easter here; she grew up very close to where my Mom grew up in Budapest. It’s really just a round up of past post recipes and a little bit about your Easter memories. How could I say no?  Thank you Zsuzsa, I would be honoured. Zsuzsa is taking part with the following Hungarian ladies: The author of this event, Éva from Takarekos Konyha (this blog is in Hungarian) and Elizabeth from Food and Thrift.

Growing up, Easter was always about bunnies for me. Yes, we went to church and all that but let’s be honest, it was about the bunnies! At eight years old, my very first pet bunny was an albino Dutch whom we called Boom Boom (he was called Boom Boom because he stomped his hind feet loudly). Sadly good old Boom Boom only lasted 3 years, but he made such an impression on me that I’ve only ever had bunnies as pets! I cried so much when he died that my Dad swore he would never let me have another pet because losing them made me too sad and he just couldn’t bear it. I was sixteen before I was permitted to have Boon, another albino Dutch but smaller than Boom Boom (no, we weren’t very imaginative with the names!). But I digress, back to Easter.

Mom and Dad in Edmonton with the Chrysler Tour in 1960

Mom and Dad in Edmonton with the Chrysler Tour in 1960

You already know that my Dad was a Puppeteer (and if you don’t, you can read about it here) and we had a family business with the puppet shows. Easter was a big time for us, these holidays meant that the malls, schools (note that this link is NOT mine) and some companies needed entertainment for their events and what’s not to like about a puppet show? So many of our Easters were on the road with the show. In fact, Boom Boom was first adopted because my Dad needed a live bunny for the show (he was the star, don’t worry, it was all very humane).

Believe it or not, the Show was about Bunnies.

Believe it or not, the Show was about Bunnies.

TheEasterShow_BLOG

And there were singing Eggs too

But Easter also had a serious side: FOOD! Chocolates, coloured eggs and of course, ham. I don’t have many of the recipes that we had at Easter but I’ve gathered a bunch I am going to have this weekend when we have JTs family for Easter Sunday lunch. I hope you enjoy them.

My Mom only used Canada Grade A Large size eggs

My Mom only used Canada Grade A Large size eggs

Hors D’œuvres were usually Deviled Eggs (here and here) and French Salad (Francia Saláta). I don’t have a post about Francia Saláta, but you can see Zsuzsa’s recipe here (my Mom never put potatoes in her version). I may do a new hors d’œuvres recipe I saw on my friend Lorraine’s blog of her recent trip to Amman, Jordan. It involves cheese and phyllo pastry, that’s all I can give you!

A wonderful addition to any Easter table

A wonderful addition to any Easter table

We usually had an Easter kalács (Zsuzsa made a gorgeous one here) but I’m making John’s Easter Cheese Bread instead.

The most succulent tenderloin ever

The most succulent tenderloin ever

We’ve decided to go nontraditional and have a beef tenderloin for lunch. This recipe is my favourite way to serve this special cut of meat.

The only place you'll miss the potatoes is on your waist-line!

The only place you’ll miss the potatoes is on your waist-line!

I’m going to serve it with my traditional Celeriac Cauliflower Mash. And a wonderful lemony Asparagus from my friend Greg’s Rufus’ Guide.

It's a symphony of colours

It’s a symphony of colours

And a little tangy German Purple Cabbage Slaw.

Now if you had any room for dessert, I’m going to make Charle’s Sweedish Apple Cake (from Five Euro Food), which totally looks like the perfect ending to a rich and heavy meal. It’s really just all apples and then there’s more apples. The only flour in this is the use of the breadcrumbs as the base, thickener and likely adds a little texture. I love that I can make it sugar free too, since I have a diabetic and a hypo-glycemic in the house — I like to make only one dessert that everyone can enjoy and not make the person feel odd that they have something else.

I may not be able to comment on your blogs for the next few days but I’ll definitely read up when I get back into civilization with internet. Thank you for reading my blog and leaving comments, you really, really make my day. Thank you to every one of the blogs I read, you provide me with the inspiration for my blog and it really wouldn’t be the same without you!

Happy Easter to All!

Read Full Post »

A mildly spiced layered cake

A mildly spiced layered cake

My friend Genie (Bunny. Eats. Design) in New Zealand very kindly invited me to participate in a new forum called Our Growing Edge which will be held monthly. It’s content will be defined by our cooking bucket list, so to speak — things that we want to conquer or need to conquer and upon our success (or failure!) we will create a post and link it to her page for the month. This is rather exciting because we all have our arch nemesis in cooking. Please click on over to Genie’s lovely blog (particularly on Tofu Tuesday’s when she showcases her most adorable flop eared bunny).

our-growing-edge-badge

In early January, my friend Sam (Sweet Samsations) posted a recipe for an Indonesian cake I had never heard of, which is not rare in this very large world of ours, but what caught my eye was the huge quantity of eggs used in this cake, Sweet Samsations uses 30 – THIRTY; I even found one that used 45 eggs! I just can’t imagine buying that many eggs for one recipe. But it is a beloved cake that’s for sure so I knew I had to look around and find a recipe with a more reasonable egg content because I HAD to make it. Fast forward to late January when Genie asked me to participate in Our Growing Edge, I knew what I wanted to make: Indonesian Spekkoek Lapis Legit. Now to find the time to bake it because it’s quite labourious as you bake each layer individually over the other in the same pan.

I landed on Food Network’s Emeril Lagasse’s recipe (didn’t make sense to me either) because his cake only used 12 eggs, and 12 is easily divided into two; I found my recipe, only 6 eggs! I did a quick assessment of the baking container that Emeril’s recipe used and determined that if I halved his recipe it would fit snugly into my 4″ x 6.7″ loaf pan. I didn’t get as many layers as I had hoped, but it still looked nice and it still had good flavour. Emeril suggests to decorate with powered sugar, and I added candied orange peel as garnish. I will serve it with the orange syrup that was the left over from candying the peel.

Indonesian Spekkoek Lapis Legit (Thousand-Layer Spice Cake)

Serves 4-6 depending on how thick you slice it

Ingredients:

  • 1 tsp ground nutmeg
  • 1 tsp ground cinnamon
  • 1 tsp ground allspice
  • 1 tsp ground mace
  • 1 tsp ground ginger
  • 1 tsp anise extract
  • 170 g (1 1/2 sticks) unsalted butter, softened
  • 1/2 cup granulated sugar
  • 1/2 tsp pure vanilla extract
  • 1/4 tsp salt
  • 6 large eggs, separated
  • 2/3 cups all-purpose flour
  • 2 tbsp confectioners’ sugar
  • Candied orange peel as garnish

Directions:

  1. Preheat the broiler (I have this range with two ovens, I used the larger oven with the rack in the lower middle so it’s not too close to the broiler).
  2. Butter the bottom and sides of a 4″ x 6.7″ loaf pan and line with buttered parchment paper. I left enough of the parchment to go past the top of the pan, so I could use it to lift the cake out when it was done.
  3. Combine the nutmeg, cinnamon, allspice, mace and ginger and set aside.
  4. Weigh your empty bowl, write down the measurement. In this bowl, cream the softened butter, 1/4 cup of sugar, vanilla, and salt. Add the egg yolks one at a time and beat until smooth. Fold the flour into the batter with a rubber spatula.
  5. In a clean bowl with clean beaters, beat the egg whites with the remaining 1/4 cup of sugar until stiff and shiny but not dry. Fold the whites into the egg yolk mixture, being careful not to over-mix. Divide the batter between 2 bowls. Add combined spices to 1 bowl and stir well.
  6. Weigh your bowl with the cake batter. Subtract this new weight from the old weight so you know how much your batter weighs and divide in half. Put your second bowl on a scale that can tare and zero it out. Pour half the batter into this bowl (you can see exactly when you reach half on the scale).
  7. Mix the spices into the second batter along with the anise extract.
  8. Pour 4-6 tablespoons of the batter into the bottom of the pan and spread out evenly. Sammy suggests to pre-heat the pan, which I didn’t do, but I suspect it makes spreading the batter much easier since my subsequent layers spread easier on the hot layer.
  9. Bake in a hot broiler for 2 minutes. Watch carefully.
  10. Pour 4-6 tablespoons of the spiced batter, spreading it over the first layer to form a thin second layer. Place the pan under the preheated broiler for 2 minutes, or until the layer is firm and very lightly browned. Continue until you have exhausted both batters. Emeril noted that the cake typically has between 12 and 15 layers — I ended up with 10, not bad for a first timer!
  11. Allow  the cake cool on a wire rack, turn out onto a cutting board and even up the sides by cutting clean new edges.
  12. Sprinkle with confectioners’ sugar and garnish with candied orange rind.
  13. Slice thinly and serve warm or at room temperature with additional orange syrup, if you so desire.

IMG_4167_BLOG

I should have made the layers much thinner

It's quite a show stopper!

It’s quite a show stopper!

My notes:

  • It’s a mildly spiced cake with a predominant butter flavour, I think I might increase the spices a bit more if I make it again because I thought it tasted a bit greasy.
  • The butter really does need to be soft so it makes a lovely smooth batter.
  • Many Indonesian bakers suggest to press down each layer after you bake it, although I did that, mine bounced right back.
  • It’s a very rich cake so you needn’t cut large pieces.
  • Next time I may try chocolate and vanilla layers or even vanilla and espresso flavour!

Read Full Post »

It’s not a swear word. I swear. It just sounds like one. “What the Ebelskiver were you thinking?” or “Where in the ebelskiver were you for two and half hours?” You see? But I can assure you, it’s much more delicious than a swear word. It’s actually a little spherical pancake! I know you’ve seen this over at my friend Barb’s when she posted about it last May but I just had to write about my experience because this pan was her wonderful, thoughtful Christmas present to me!

My first attempt was half of Barb’s recipe for the ebelskivers was Christmas day, a few hours after I brought it home and I kept them simple. But as you can see by my deformed little ‘balls’, it takes some skill to be able to prepare them as perfect little balls of joy. I had some practicing to do.

First attempt Christmas Morning

First attempt Christmas Morning

Still no where near perfect, my second attempt I added blue berries to the batter. Still some practicing to do before I could serve them to guests.

Second attempt when we returned from NOTL.

Second attempt when we returned from NOTL. Poor JT had to be the guinea pig for the second batch too. A very sunny day indeed!

IMG_3814_BLOG

After practice, I was able to make more perfect little balls of joy.

Batch numbers 3, 4 and 5 were much better. In fact, most of them turned out very well. And I had the opportunity to experiment with some additional flavours. I did cruise the net to see other recipes and they varied quite a bit, but since I had some experience with Barb’s lovely recipe, I decided to stick to it, with minor modifications. I found this recipe on squidoo and the batter was much thicker (if you scroll down, there is a video of a young lady successfully making ebelskivers one Christmas Eve), so I decided to add a bit more flour to Barb’s version to thicken it up. They were much easier to flip or turn without the batter running out from the centre of the ebelskiver.

IMG_3815_BLOG

Brown sugar, cinnamon and butter are swirled into the batter

If you pile them while they are hot, you will cause indentations. Mind you, I doubt your tummy will care either way.

IMG_3811_BLOG

A little twist Ham, Cheese and Dijon but still breakfast food

Ebelskivers

Original recipe from Barb at Profiteroles and Ponytails

Each batch makes about 24 ebelskivers, I divided the batter into two portions for the ham, cheese and cinnamon bun versions. If you wish to make the entire batch for one flavour, double the flavour ingredients but not the basic batter.

Basic Batter Ingredients:

  • 1 1/2 cups all-purpose flour
  • 1-½ teaspoons sugar
  • ½ teaspoon baking powder
  • 2 large eggs, separated
  • 1 cup milk
  • 2 tbsp unsalted butter, melted and slightly cooled
  • ½ tsp pure vanilla extract (omit for savory ebelskivers)

Directions:

  • In a large bowl, whisk together the flour, sugar, baking powder and salt, set aside.
  • In a small bowl, lightly whisk the egg yolks, then whisk in the milk, melted butter and vanilla extract (if using). Add the yolk mixture to the flour mixture and, using a wooden spoon, stir until well blended. The batter will be lumpy.
  • In a clean bowl, using an electric mixer on high speed, beat the egg whites until stiff, but not dry, peaks form. Using a spatula, fold about one-third of the egg whites into the batter to lighten it, then fold in the rest just until no white streaks remain.
  • Use the batter right away.

Ham, Cheese and Dijon Ebelskiver Ingredients:

  • 1 tbsp Dijon mustard
  • 1/2 finely diced ham
  • 1/2 cup old cheddar, shredded

Directions:

  • For the savoury Ebelskiver, whisk in the Dijon and then gently fold in the diced Ham and cheddar cheese, cook using your lovely ebelskiver pan.

Cinnamon Bun Ebelskiver Ingredients:

  • 2 tbsp brown sugar
  • 1 tsp unsalted butter, melted
  • 1 tsp cinnamon
  • 40 g chopped walnuts

Directions:

  • Mix the brown sugar, butter and cinnamon well. Fold in the walnuts into the basic ebelskiver batter, then drizzle in the brown sugar mix into the batter and fold gently. Since the batter is quite cold, it will seize the butter/sugar mixture allowing you to fold in the swirls. You don’t want to entirely incorporate the butter/sugar mixture, you want swirls throughout the batter. Continue until you have used up all of the mixture.

Ebelskiver cooking directions:

  1. Spray the ebelskiver pan with a good squirt of non-stick spray and place over medium heat. Add about 1/4 cup batter to each round as soon as the pan is quite hot. Maintain the heat at medium, you don’t want to burn the ebelskiver edges before the insides get a chance to cook.
  2. Cook until the bottoms of the pancakes are lightly browned and crisp, 3-5 minutes. Using a fork, lightly push the ebelskiver until it entirely turns around in the pan and the uncooked portion is now facing the bottom.
  3. Transfer the finished pancakes to a platter and keep warm in the oven while you repeat to finish the batter.
  4. Serving suggestions: dust the warm pancakes with the confectioners’ sugar and serve right away. Or serve with warmed maple syrup and fruit.

Read Full Post »

We invited my friend Kim and her hubby for coffee and cake after seeing Cloud Atlas at the TIFF film festival. I was hoping to have a great discussion about the film (and there was a lot to discuss) but unfortunately, they hated the film so instead of prolonging their misery, I served coffee and cake.

I started the recipe and was committed to it when I realized I didn’t have quite enough GF Flour, so I improvised and added the remainder as finely ground corn meal. It added a very nice texture to the cake and no body threw it back at me!

Original recipe can be found here.

A lovely honey and ginger taste, it’s garnished with fresh figs, candied ginger slices, candied walnuts and edible rose petals.

Gluten Free Honey & Ginger Cake

Ingredients:

  • 3 oz liquid honey
  • 6 oz gluten-free flour
  • 2 oz of fine cornmeal (just run regular cornmeal through a coffee grinder to get a fine powder)
  • 1 tsp gluten-free baking powder
  • 1 tsp ground ginger
  • 2 tsp ground cinnamon
  • 1/4 tsp allspice
  • 3 oz of sugar
  • 1/2 tsp orange essence
  • 1/2 tsp lemon essence
  • 4 oz butter
  • 1 egg (the cake was very crumbly, I might add another egg next time)
  • 1 tsp baking soda
  • 1 oz finely grated fresh ginger

Directions:

  1. Preheat the oven to 350°F (170°C).
  2. Sift the flour, baking powder and spices into a large bowl and add the sugar and zest. Rub the butter in (you can do this in a food processor with plastic blades)
  3. Warm the honey slightly, and beat it with the egg. Mix into the flour mixture.
  4. Mix the baking soda with 3 tbsps of water until dissolved, then process it into the flour mixture.
  5. Stir in the finely minced ginger pour into a greased or lined 8″ square pan.
  6. Bake for about 50 minutes (mine was ready in about 40 minutes). Cool it in the pan for about 10 minutes then turn it onto a cooling rack until cold.

A very tasty but crumbly cake

I garnished the cake with additional warmed honey, fresh figs cut into quarters, honey walnuts, slices of candied ginger and edible rose petals.

Read Full Post »

My friend Sissi from With a Glass posted this recipe late last month and I knew the moment I saw it that I had to make it. Why you ask? Well, two reasons: 1) almonds and 2) super easy. There I said it. I did not slave for hours baking these tasty treats; but if JT asks, then I’ll throw some flour on my face and spray a little ‘sweat’ on for effect and claim it took hours and hours. 😉

Sissi went into great detail on why these wonderful, light little cakes are called Financiers (a financial person). I’ll tell you the Reader’s Digest version, but I would urge you to check out Sissi’s blog for the real deal. Apparently first baked by Nuns of the Visitation of Mary in the middle ages and were not called Financiers and had an oval shape. Sadly they were forgotten until 1890 when a Parisian pastry chef revived the recipe. His pastry shop was located in the financial district in Paris and many of his customers were from that sect, so he named these little pastries Financiers. There you have it. I did not have the lovely gold bar shaped rectangles that Sissi had, but I did have some very nice little square muffin tins. I also doubled the recipe so that I would yield 12, but in reality I should have quadrupled it, since I just baked them last night and by this morning, there were only 6 left and I didn’t even have one. We must have mice in the house ;-)!

Note: My little cakes did not brown as nicely as Sissi’s and that is because I decided to bake them on convection (with a fan); I should have done them traditionally and they would be golden and beautiful. But I’m told they tasted darned good. If you like almonds, this one is for you. For a gluten free version, substitute the regular flour for gluten free flour.

A pillowy texture with great almond flavour

Financiers with Ontario Cherries

Makes 12 5 cm x 5 cm (2″ x 2″) square cakes

Ingredients:

  • 100 g powdered almonds (Sissi suggested that you run your almond flour through a fine sieve and this worked perfectly for me)
  • 140 g sugar
  • 100 g butter
  • 4 egg whites
  • 2 heaping tbsp flour
  • a pinch of salt
  • 12 large cherries, pitted

Directions:

  1. Preheat the oven to 375°F (190°C)
  2. Prepare your muffin tins by spraying with non-stick cooking spray.
  3. Prepare the brown butter: heat the butter in a pan on a low heat and observe the milk solids, which will separate at the bottom. When they become light brown (hazelnut colour), put the pan aside (they will continue to brown in the pan).
  4. Combine the egg whites, sugar, almond powder, salt and the flour in a medium sized bowl (I chose a large Pyrex measuring cup so that it’s easy to pour). Gradually whisk in the butter until combined.
  5. Pour the batter into the prepared muffin tins (or other small cakes forms) 2/3 full.
  6. Place one pitted cherry in the centre of each cake.
  7. Bake for about 15 – 20 minutes until golden.
  8. Allow to cool thoroughly before taking out of the muffin tin.

Read Full Post »

Older Posts »