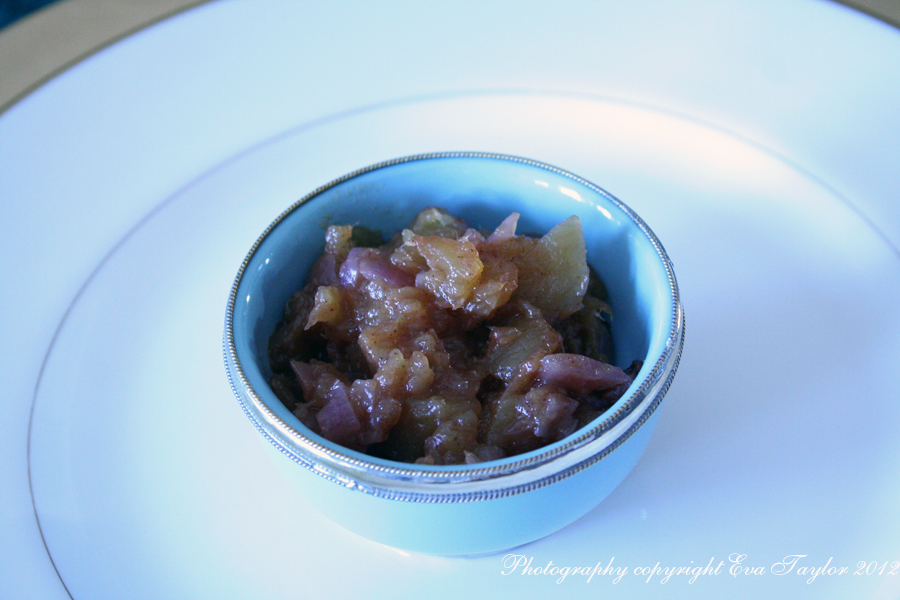
Feeds:
Posts
Comments

Archive for the ‘Sauces’ Category

Sometimes, you just need a simple little sauce for a fish dish and this one fits the bill.

Lemon Caper Sauce

A Kitcheninspirations original recipe

Makes about 200 mL sauce

Ingredients:

  • 20 g shallots, finely chopped
  • 15 mL EVOO
  • 20 g capers, finely chopped
  • 150 mL chicken broth
  • 20 mL lemon juice, freshly squeezed
  • 30 g parsley, finely chopped
  • 5 g tarragon, finely chopped
  • zest of 1 lemon

Directions:

  1. Heat the EVOO in a small pan and cook the shallots until translucent. Add the capers, and chicken broth, and boil for 3 minutes.
  2. Remove from the heat and cool slightly. Stir in the herbs, lemon juice, and zest.
  3. Serve warm.


A beautiful sauce to compliment fish, we had it on salmon.


Read Full Post »

Firstly, I must apologize to my regular followers as I haven’t been able to comment on their blogs in the last week, I was taken down by the stomach flu that is going around and it was brutal! I could barely get out of bed for five days. I’m recovering but it takes time to reintroduce foods into your diet that won’t shock the system.

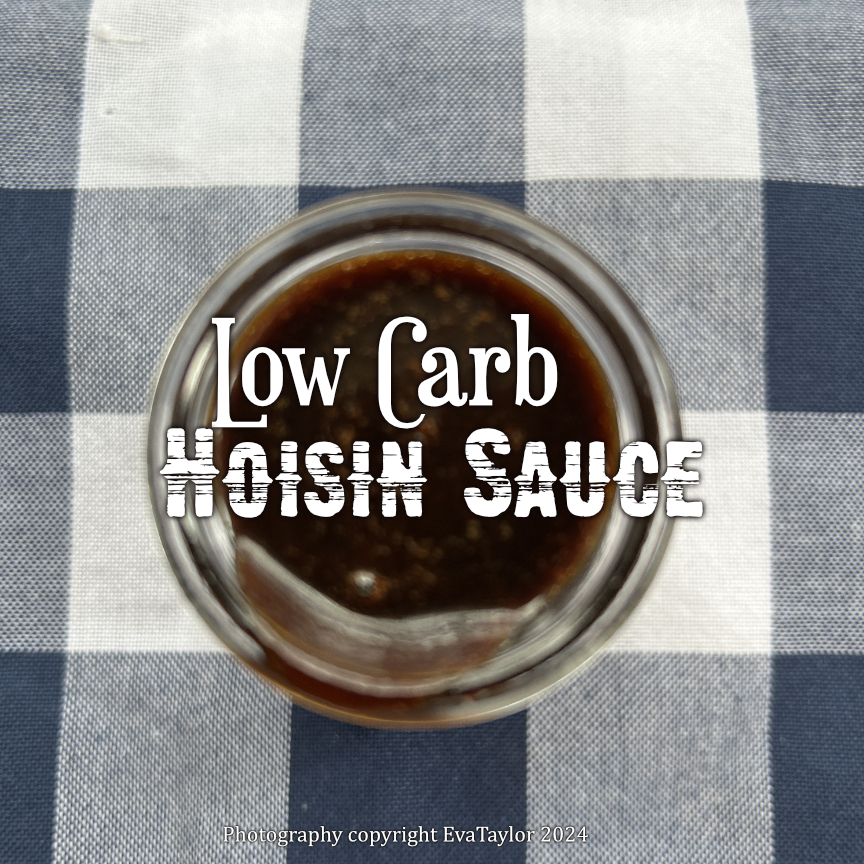
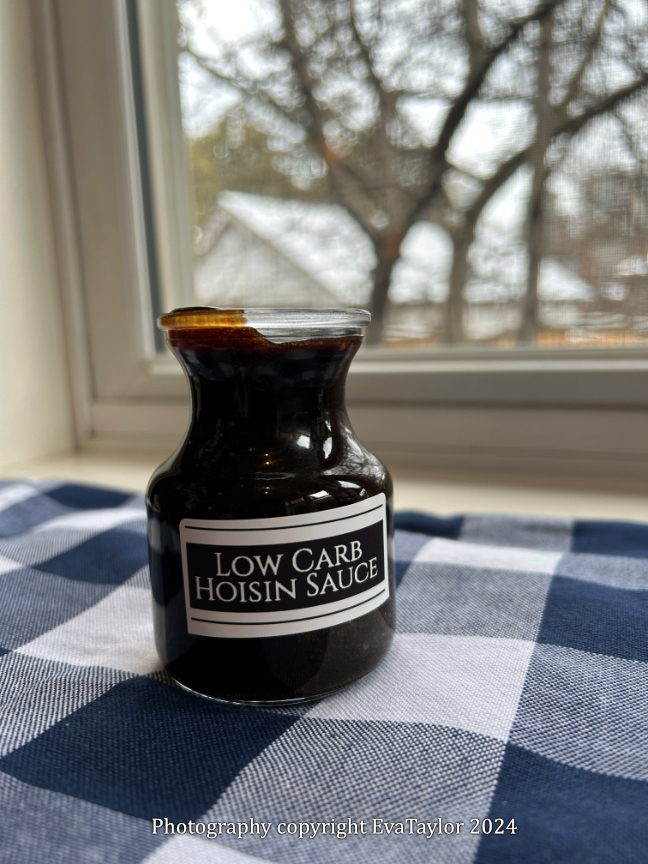
We are planning an epic adventure in 2024 and for that we need to get in shape so we are cutting back the carbs, cutting out the alcohol and bumping up the exercise. I will adapt as many of our favourite recipes on our journey and I started with this beloved sauce. This recipe isn’t as sweet as traditional hoisin sauce but it definitely has a good punch of umami and the best part is that 15 mL has 2 g net carbs, compared to 44 g! That’s a win-win for me.

It’s super salty but not as sweet as traditional Hoisin Sauce.

Low-Carb Hoisin Sauce

A Kitcheninspirations original recipe

Makes about 150 mL sauce

Ingredients:

  • 200 mL low sodium soy sauce
  • 30 g erythritol
  • 20 g roasted garlic purée
  • 12 g molasses
  • 5 g white miso paste
  • 10 g tahini

Directions:

  1. Combine everything but the tahini in a small saucepan and mix well. Bring to a boil and reduce to about 150 mL.
  2. Using an immersion blender, blend in the tahini. Pour through a fine sieve into a sterilized jar.

Notes:

  • The sauce will thicken when cool.
  • Use as a marinade for chicken or pork or as garnish for phõ as you would regular hoisin sauce.

Read Full Post »

Shishito Hot Sauce

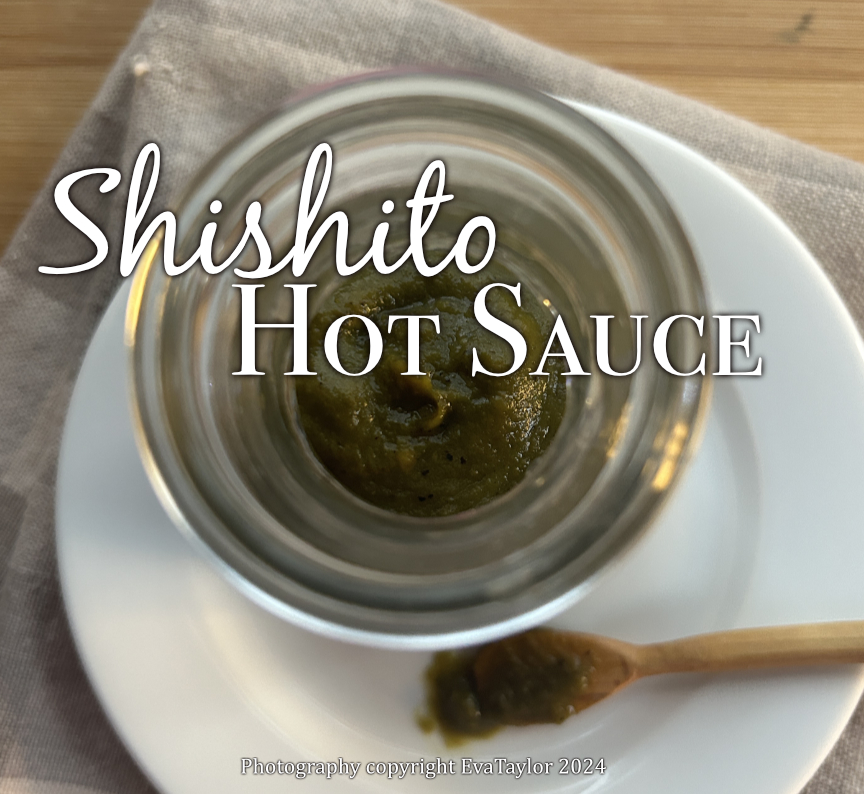
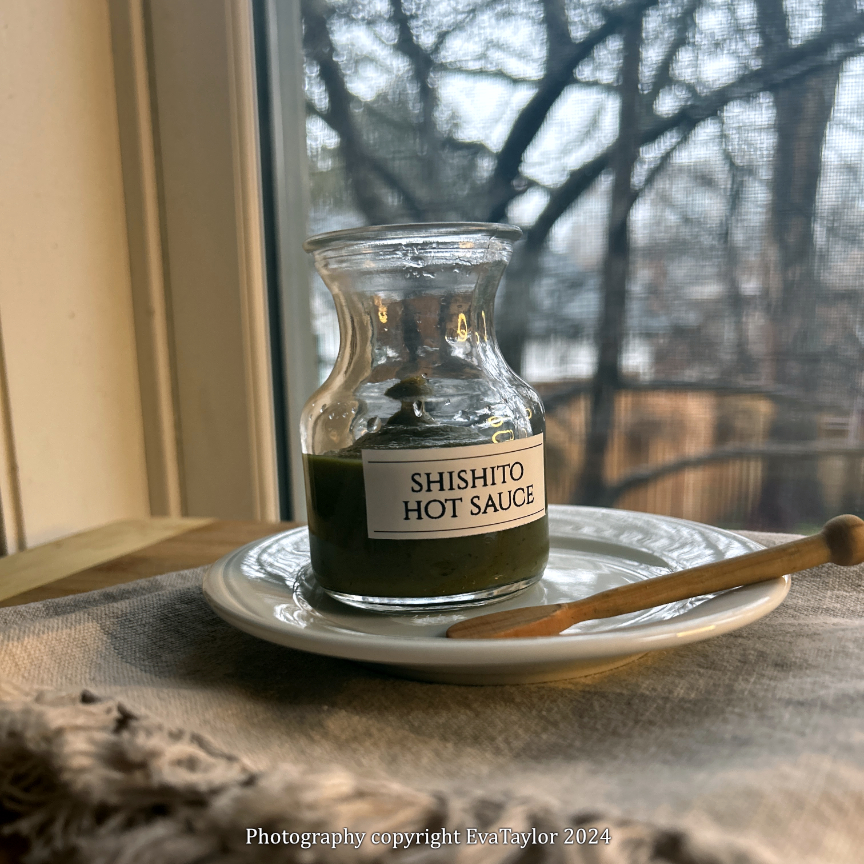
Just before Christmas, we entertained some dear friends and one of the appetizers I made was a favourite: blistered Shishito Peppers. The peppers are sweet and sometimes hot little bites. On the average, you might get one in ten too hot to eat. Unfortunately, this package wasn’t average and the peppers were outrageously hot! The one JT consumed had him running into the kitchen for a glass of milk to sooth his burning mouth (hehehehehe)! Needless to say, we had leftovers! I whipped up this easy hot sauce to avoid tossing them. I removed the seeds and veins to avoid extreme heat, and the sauce still packs a punch. It tastes green, slightly sweet with the heat that comes from behind and surprises you, but it’s manageable.

The heat kinda creeps up on you, so use sparingly.

Shishito Hot Sauce

A Kitcheninspirations original recipe

Makes about 200 mL sauce (but it depends on how much water you add and how much you cook it down)

Ingredients:

  • 200 g Shishito peppers, blistered
  • 20 g brown sugar
  • 5 g roasted garlic purée (or finely minced raw garlic)
  • 3 g salt
  • Water

Directions:

  1. Split shishito peppers lengthwise and scrape out as many seeds as you can.
  2. Place seeded peppers into the Magic Bullet container. Continue until all peppers have been seeded.
  3. Add the sugar, garlic, salt and about 100 mL water to the peppers and blend until smooth, adding water to make a nice sauce. Taste and season as necessary.
  4. Cook the sauce down to about 3/4 of the original volume. Strain through a fine sieve into a sterilized container. Cool, cover tightly and refrigerate until needed. This sauce will last about 2 weeks in the refrigerator or you can freeze.


Read Full Post »

My besty from uni is gluten intolerant and allergic to soy! It’s always a bit of a challenge cooking Asian foods because of the soy allergy but I try to be inclusive and make something special for her if she can’t eat my dish. One such occasion was Christmas day, I served Gyoza as the hors d’œuvres and I made her a special gluten-free version. Had I known how good the gluten-free version would turn out, everyone would have had it. The dipping sauce I usually serve with them has soy in it so I wanted to make a special sauce without soy so my friend can enjoy it too. This imposter has the forward saltiness and a bit of sweetness with a finish of umami from the Nori that actual soy sauce has. It turned out very well, in fact, I will make only one sauce with this soyless soy sauce that everyone can enjoy!

Soyless Soy Sauce (soy-free, gluten-free)

A KitchenInspirations Original Recipe

Makes 30 mL sauce

Ingredients:

  • 5 mL molasses
  • 375 ml water
  • 2 g black garlic salt (I used this one)
  • 3.5 dried black fungus
  • 3 g dried shiitake mushrooms
  • 0.5 g Nori Seaweed

Directions:

  1. Combine everything but the Nori in a small saucepan and bring to s boil. Boil for 15-20 minutes or until reduced to about 30 mL.
  2. Remove mushrooms and reserve for another use. Strain the liquid and add salt and pepper to taste. add the nori seaweed and immerse entirely, refrigerate with nori for 1 day.
  3. Strain Nori and the sauce is ready for use.

This imposter has the forward saltiness and a bit of sweetness with a finish of umami from the seaweed that actual soy sauce has.

Read Full Post »

I have been making this fabulous butter chicken recipe since I first found it in 2009. I love it because it is the closest to our favourite Bombay Palace’s Murgh Makhani. It is a rich, tangy tomato-based sauce that is completely moreish. I made it in mid-March when our weather suddenly turned into spring with temperatures of 14° C to 20° C (57° F to 68° F) and we had friends over two days after we were released for our latest 100-day lockdown. If it weren’t for our cosy heated patio, I would have surely gone mad.

You can easily make this vegetarian by substituting firm tofu for the chicken but I wouldn’t skip the spice rub and marinade, grilling also adds a level of flavour but not absolutely necessary.

Butter Chicken-Murgh Makhani

Serving Size: 6-8

Ingredients:

  • 15 mL olive oil
  • 1 medium sweet onion, roughly chopped
  • 1.6 L stewed tomatoes
  • 43 g roasted garlic
  • 7 g ginger, grated on a Microplane
  • 3.5 g Meat Masala (see recipe below)
  • 3.5 g Garam Masala (see recipe below)
  • 35 mL lemon juice (about half a lemon)
  • Pinch of baking soda
  • Salt to taste
  • 60 g unsalted butter
  • 100 mL cream
  • Cilantro to garnish

Directions for the gravy:

  • In a large Dutch oven, heat the olive oil and cook the onions until golden. Add the stewed tomatoes and simmer until it has reduced to two-thirds of the original volume.
  • Add the roasted garlic, ginger, both masalas, lemon juice and stir well to combine. Add a pinch of baking soda and stir until it has stopped bubbling. Blend this gravy with an emersion blender and run it through a fine sieve (I prefer a smooth, creamy gravy). Add salt to taste. You can hold the gravy overnight in the refrigerator.
  • If you are serving immediately, add the butter and stir so that it melts into the gravy. Add the cream and stir well. Hold the gravy on very low heat (be careful, it bubbles quite furiously) and add the chicken just before serving.

This recipe is restaurant quality without the salt and extra calories!

Tandoori Marinades

  • 1 kg chicken, skinned, deboned, trimmed (I used chicken thighs)

Ingredients for the spice rub:

  • 6 g red chili powder (I used mild)
  • 3 g turmeric
  • pinch of baking soda
  • salt to taste
  • 30 mL lemon juice

Directions:

  1. Combine the ingredients for the spice rub and rub well into the chicken (I would use gloves). Refrigerate for 30 to 60 minutes.

Ingredients for the marinade:

  • 100 g Greek yogurt
  • 6 g red chili powder (I used mild)
  • 7 g ginger, grated on a Microplane
  • 30 g roasted garlic
  • 5 g coriander
  • 5 g cumin
  • 5 g garam masala
  • 15 mL lemon juice
  • 30 mL olive oil

Directions:

  1. Combine all of the ingredients and spread evenly onto the chicken pieces. Refrigerate overnight or for a few hours.
  2. When ready to grill, heat the grill to 350° F.
  3. Brush off a lot of the marinade.
  4. Grill the chicken, basting with the marinade once or twice at the beginning until cooked through, about 165° F.

I always double the batch so that I can freeze leftovers for a quick and delicious meal.

Garam Masala

(recipes for the masalas are from HeartSmart flavours of India by Krishna Jamal, 1998)

Ingredients:

  • 4 tbsp ground cinnamon
  • 1 tbsp ground cloves
  • 1 tbsp ground cardamom
  • 1 tsp ground mace

Directions for the Garam Masala:

  1. Add all of the ingredients into a heavy bottom pan and toast until fragrant.

Meat Masala

Ingredients:

  • 3 tbsp coriander seeds
  • 1 1/2 tbsp cumin seeds
  • 1 black cardamom pods
  • 1/4 star anise
  • 3 cm cinnamon stick
  • 2 cloves
  • 2 bay leaves
  • 3/4 tsp dried cilantro
  • 1/4 tsp mace
  • 3/4 tsp ground turmeric
  • 3/4 tsp red chili

Directions:

  1. In a small pan, toast the coriander, cumin, cardamom, star anise, cinnamon stick and cloves and toast until fragrant. Allow to cool completely.
  2. Add toasted spices to a spice grinder with the remainder of the spices and grind until it is a fine powder. Store in an air-tight container in a cool dark place.

Read Full Post »

This recipe made its first appearance on the blog in 2012. I thought it was time for an update.

This is a surprising recipe that uses pork tenderloin instead of pork shoulder which is the traditional cut for pulled pork. The tenderloin is significantly less fatty than the shoulder so it makes a healthier dish. I’ve reduced the sugar considerably in the Barbeque sauce which is traditionally made with ketchup (about 90% sugar) and includes 110 g of brown sugar; I’ve used passata with a dash of balsamic and only 45 g of sugar. It’s still sweet but not sickly sweet. The baking soda helps reduce the acidity in the passata which in turn makes the tomato sauce taste sweeter. It was well balanced. JT couldn’t stop eating it. I’ve served this dish at parties and die-hard pulled pork aficionados couldn’t tell it was tenderloin!

This is the pork pulled after I removed it from the sauce. It moistens up considerably after it is re-entered into the sauce.

Ingredients for the Barbeque Sauce:

  • 250 mL San Marzano passata
  • 60 mL balsamic vinegar
  • 45 g erythritol or sugar
  • 125 g finely chopped onion
  • 15 mL soy sauce
  • 15 mL Worcestershire sauce
  • 15 mL prepared mustard
  • 15 mL roasted puréed garlic
  • 8 g espresso coffee powder
  • 2.5 mL baking soda

Pulled Pork Ingredients:

  • 600 g pork loin or tenderloin with silver skin and excess fat removed and cut into manageable chunks.
  • 1-2 tbsp canola oil (or an oil with a high flash point)
  • About 350 mL BBQ sauce from above
  • 1 cup water

Directions:

  1. Sear the pork on all sides in a heavy cast iron pan. Add the pork to the slow cooker set on high.
  2. In the same cast iron pan with a splash of oil, caramelize the onions. Add the remaining BBQ sauce ingredients with the exception of the baking soda and cook until the sugar has melted and everything is hot. Add the water and mix well, then add the baking soda and stir until the fizzing has subsided.
  3. Add the sauce and water to the slow cooker and set the timer for 1 hour, then reduce the temperature to low and cook, stirring occasionally for 6 hours or until pork can be pulled apart with a fork.
  4. Remove the pork from the sauce and allow to rest for 10-15 minutes. Pull the pork apart with a fork.
  5. Serve on slider buns, topped with your favourite coleslaw.

We had the pulled pork on homemade tangzhong brioche buns that were slightly toasted and topped with a lovely vinegary coleslaw. It was pretty good even though the lighting sucked.

Read Full Post »

In mid-July, we were one of five couples invited to a socially responsible BBQ at a friend’s house. They put three tables together outside giving us ample space to distance ourselves. Each couple was asked to bring something and this marvellously flavourful side was one of the dishes someone brought. Everyone asked for the recipe, including me! I chose to make it as a dip for a summer evening cocktail party, socially responsibly distanced, of course. Each couple had their own plate!

The beans and lentils are packed with flavour, the salsa and lime yoghurt just up the ante.

Baja Mexican Beans and Lentil Dip with Lime Sauce and Salsa

From Bowls of Goodness: Vibrant Vegetarian Recipes Full of Nourishment By Nina Olsson

For the original recipe please click here

  1. Combine all of the ingredients and set aside.
  1. Combine all of the ingredients and mix well. Refrigerate until needed
  • Olive oil
  • 2 shallots, diced
  • 200 g dried navy beans (400 g cooked)
  • 100 g dried lentils du puy (200 g cooked)
  • 4 cloves garlic, finely minced
  • 1 avocado, finely diced
  • 1 tsp dried oregano
  • 1 1/2 tsp cumin
  • 1 tsp sweet paprika
  • 1 tsp smoked sweet paprika
  • 3/4 tsp salt
  1. Cook the beans and lentil until softened, rinse.
  2. Heat oil in a frying pan and add the shallots until caramelized, add the garlic and cooked beans and cook until they can easily be mashed about 5 minutes. Add the remaining ingredients and cook for 2 minutes.
  3. Serve in a bowl or on a plate drizzled with the Baja Sauce and Salsa with baked tortilla chips

I chose blue tortilla chips because they were gluten-free and organic.

Read Full Post »

We are always looking for ways to eat healthier, reduce the amount of sugar and carbs in our diet. I cook a lot of Asian flavours, particularly in the summertime, but unfortunately many of the store-bought sauces have a lot of sugar. Case in point, a popular brand begins its ingredient listing with, wait for it, SUGAR! So in an effort to be healthier, I came up with this recipe.

Low Carb Hoisin Sauce

Makes about 125 mL sauce.

Ingredients:

  • 30 mL Low Sodium Soy Sauce
  • 9 g almond flour (see notes)
  • 10 g erythritol (see notes)
  • 2.5 mL rice vinegar
  • 2.5 mL toasted sesame oil
  • 2 g white soybean paste
  • 2 g garlic
  • 15-30 mL water

Directions:

  1. Combine everything but the water in an immersion blender and blend until smooth.
  2. Transfer to a small saucepan and cook over low heat until it has thickened and darkened. Whisk in the water to the desired consistency.

Notes:

  • Instead of almond flour, you may use tahini (reduce or omit sesame oil) or smooth peanut butter.
  • Erythritol is a sugar substitute that apparently does not spike blood sugar levels. See this article.

Read Full Post »

We don’t eat much fast food, if any. I can honestly say that the last time I ate a Mickey D burger was when I was 12 years old! I just don’t like them. But I do like Ikea meatballs. Once or twice a year, we treat ourselves to lunch at Ikea and I almost always have the meatballs. Now that things are slowly opening up, we took a trip to Ikea but unfortunately, the restaurant wasn’t open so we treated ourselves with a package of their meatballs. Yes, I can make my own meatballs, but sometimes, even I need an easy, mindless meal. I’ve made this gravy before and it was really good so I thought I’d post about it. Who knew the ingredients were so simple?

Ikea Gravy Copycat

Makes 250 mL gravy

Ingredients:

  • 15 g unsalted butter
  • 15 g flour
  • 250 mL beef stock, warmed
  • 15 mL soy sauce
  • 15 g cream cheese

Directions:

  1. Melt butter and add the flour to make a smooth roux. Cook for about a minute.
  2. Slowly add the warmed beef stock and soy sauce, whisking to make a smooth sauce. Add the cream cheese and whisk to melt and incorporate. Serve hot over your favourite meatballs.

Read Full Post »

Béarnaise Sauce

Happy Canada Day!

JT celebrated a birthday in mid-June and we always do something special. This year, instead of going out for dinner, he requested a Steak Dinner with a Baked Potato, Grilled Caesar Salad and Béarnaise Sauce; I also I baked him flourless chocolate cake with cherry sauce and whipped cream. JT cooked up the steak on the Big Green Egg while I made the baked potato, Caesar Dressing and Béarnaise sauce. It was a huge success and the Béarnaise was so tasty against the earthy meat.

Béarnaise Sauce

Ingredients:

114 g unsalted butter, cut into 1/2″ cubes
30 g minced shallots
Kosher salt and freshly ground black pepper
30 mL Champagne vinegar or white wine vinegar
2 large egg yolks
15 mL (or more) fresh lemon juice (we used 25 mL)
15 mL finely chopped fresh tarragon

Directions:

  1. In a small, heavy bottom saucepan, melt 15 g butter and add the shallots, a small amount of salt and stir to coat. Add the vinegar and reduce heat and cook until the vinegar has evaporated (about 3-4 minutes). Reduce the heat and continue to cook until the shallots have softened (about 5 minutes). Transfer shallots to another vessel and allow to cool.
  2. Warm the blender vessel with hot water and set aside.
  3. In a small saucepan, melt the butter and heat until foamy. Transfer to an easily pourable vessel, like a measuring cup.
  4. Pour the water out of the blender and dry well. Add the egg yolks, lemon juice and about 15 mL water and purée the mixture until it is smooth. Continue to run the blender and slowly pour in the hot, melted butter in a thin stream, omitting the milk solids at the bottom of the container. Blend until you get a smooth, creamy sauce (about 2-3 minutes). Taste for seasoning, I added more lemon at this point and blended a bit more.
  5. Pour the sauce into the shallot reduction and stir well. Serve at room temperature.

Note:

  • The egg yolks cook somewhat with the hot butter but to avoid any issues, it’s best to use pasteurized eggs.

German Chocolate Cake, isn’t German at all!!

Later that week, we had dear friends for dinner so I baked a cake for JTs birthday. I saw this German Chocolate Cake on my friend Liz’s blog and knew I had to make it. It has a lot of ingredients but the recipe is easy to follow and it’s delicious. But be warned, it has 3.5 cups of sugar and 3/4 lb of chocolate, so you really need a crowd to share it with.

Read Full Post »

Recently I purchased too many strawberries because they were 3 packages for three dollars! We ate most of them, but I had one package left over that I needed to do something with. My dear cousin and her family were scheduled to come for dinner and they had requested vanilla ice cream for dessert so I decided to make a strawberry sauce as a garnish; who doesn’t love home-made strawberry sauce?

Strawberry Sauce

A KitchenInspirations Original Recipe

Makes 300 mL

To print the recipe, please click here.

Ingredients:

  • 340 g strawberries, hulled and roughly chopped
  • 47 g coconut sugar
  • 3 mL freshly squeezed lemon juice

Directions:

  1. Stir the ingredients together in a heavy saucepan. Cook over medium heat until sugar dissolves, then bring to a boil. Reduce heat to a simmer and simmer for 3 minutes.
  2. Lightly blend with an immersion blender, leaving some bits. Cool. Refrigerate or freeze until required, bring to room temperature before use.

A quick and easy recipe if you have too many strawberries.

The bits of strawberries in this sauce, sets it apart from the store-bought strawberry sauces.

Read Full Post »

Is it a cake, fruit custard or pie?

I was invited to a BBQ at the marketing firm I work with and, of course, I couldn’t go empty handed! I spotted Lorraine’s recipe for an apple cake she made for Mr. NQN’s birthday and was immediately intrigued. Everyone loves cake and everyone loves apples (I hope) so I dove in head first and made her lovely cake. I modified the recipe to be gluten free (I didn’t know everyone at the BBQ and wanted to be safe and inclusive) and I used coconut sugar instead of superfine white sugar and increased the apple volume because I bought 5!

Thanks Lorraine for this tasty inspiration.

One of those peeler gizmos would have come in handy.

It’s really more apples than cake.

I made JT a tester.

The Imposter Apple Cake with Salted Coconut Caramel Sauce

For the original recipe on Lorraine Elliot’s beautiful blog, please click here.

Makes 1 cake, 20 cm (8 inch) diametre. Serves 6-8.

Please click here to print this recipe.

Ingredients:

  • 5 medium apples (about 750 g, I used Galas)
  • 3 eggs, room temperature
  • 100 g (2/3 cup) super fine coconut sugar
  • 150 mL (5 oz) milk
  • 30 g (2 tbsp) butter, melted and cooled
  • 120 g (3/4 cup) gluten free flour
  • 1 tsp cinnamon
  • Pinch of salt
  • 50 g (1/2 cup) slivered almonds, toasted (reserve until ready to serve).

Directions:

  1. Preheat the oven to 350° F (170° C).
  2. Line the bottom of a 20 cm (8 inch) round cake pan with parchment and spray generously with non-stick spray.
  3. Prepare a bowl with cold water and 2 tbsp lemon juice, set aside.
  4. Peel the apples and slice very thinly using a mandoline. Immerse the slices into the cold lemony water.
  5. Combine the eggs and sugar and beat until thick. Add the milk and melted butter and beat until well combined.
  6. Sift the flour, cinnamon and salt and add to the wet ingredients. Beat just until combined and lumps are gone.
  7. Drain the sliced apples and dry slightly. Fold the apple slices into the batter to coat well.
  8. Pour into the prepared pan and bake uncovered for 50-55 minutes or when a cake tester comes out clean.
  9. Cool completely before serving.
  10. Top with toasted almonds when serving.

Ingredients for Salted Caramel Sauce

Makes 200 mL (3/4 cup) caramel sauce

  • 90 g  (3/4 cup) coconut sugar
  • 1/4 tsp lemon juice
  • 5 mL (1 tsp) water
  • Good pinch of sea salt
  • 125 mL (1/2 cup) 18% cream
  • 20 g (heaping tablespoon ) butter

Directions:

  1. Heat cream and salt in a microwave proof container until very hot but not boiling, set aside.
  2. Combine coconut sugar, lemon juice and water in a microwave safe container and mix well (I used a 250 mL (2 cup) glass measuring cup).
  3. Microwave sugar mixture for 1-3 minutes in 15-second intervals (45 seconds did it for me) until sugar bubbles up but does NOT BURN, sugar crystals should be completely dissolved and you should begin to see it turn to a darker amber colour.
  4. Remove and set on a dishcloth for 30 seconds or until it reaches the colour of dark caramel.
  5. Slowly pour in the hot milk, being VERY careful as this will bubble up, whisking to incorporate.
  6. Stir well and then add the butter and stir until completely dissolved. Serve warm or at room temperature.

The caramel sauce really makes this dessert.

Notes:

  • This is not a very sweet cake and therefore, the coconut sugar caramel sauce is perfect for it.
  • Want to jazz it up even more? Add a dollop of cream fraiche or whipped cream on top.
  • The original recipe put the almonds on top of the raw batter and bake it altogether, but I found that almonds went soggy after 1 day in the refrigerator so next time I make this tasty cake, I will not add the amonds until I am ready to serve (recipe has been amended with this change).

Read Full Post »

I have seen this beautiful sauce pop up over a couple of blogs I follow, like Karen of Back Road Journal and Maureen of Orgasmic Chef and since I was making a Spanish potato omelet for an appetizer for a recent dinner party, I knew I had to pair it with this luxurious sauce. Spaniards sure know how to make beautiful raw dishes like Gazpacho, this sauce is smooth and perfectly balanced, making it an amazing addition to chicken or fish or even a simple pasta or gnocchi dish. The toasted almonds become the thickener and the olive oil emulsifies everything to a smooth, creamy sauce. I omitted the bread because I wanted to make it gluten free and because our dinner party had two kids, I went light on the smoked paprika and garlic, feel free to ramp it up if you’re in the mood.

Spanish Romesco Sauce

Makes 375 mL  (1 1/2 cups) sauce

Original recipe, please click here

Ingredients:

  • 1 large fire roasted red pepper, skin removed
  • 1 garlic clove, finely chopped
  • 1/2 cup almond flour, toasted
  • 3 Campari tomatoes (see notes)
  • 2 tbsp Red Wine vinegar
  • Pinch of smoked paprika
  • 1/2 cup extra-virgin olive oil
  • Mediterranean Sea Salt*, to taste
  • Freshly ground black pepper, to taste
  • Parsley, finely chopped

Directions:

  1. Add everything but the parsley to your immersion blender container and blend until creamy and smooth.
  2. Stir in the finely chopped parsley.
  3. Serve warm or room temperature over fish, chicken or pasta. You can even use it as a dip for raw veggies or crackers.

*This is the sea salt I used. I purchased it San José, Spain last year.

Notes:

  • You may use 1/2 cup passata if you don’t have campari tomatoes
  • I always forget the parsley so it’s not a big deal if you miss it.
  • I have also used smoked sea salt and it’s heavenly
  • I generally use roasted garlic purée which I have on hand because our stomachs can’t take raw garlic

Read Full Post »

Mediterranean Sriracha Fish

Recently, I worked on an on-location two-day motion shoot. I was one of four food stylist employed for the two days. We worked from the compact, professional, mobile kitchen called Maindish, it was rather cosy! They were 15 hour days with few opportunities to sit down (who said food styling was glamorous?). I’m always amazed at the shear number of people it takes to make a commercial happen, 60, in this case! By the way, on location also means cramped, because you’re having to squeeze in everyone and everything into relatively small spaces, it really is quite the orchestration! 

I found this recipe on Epicurious; I chose it because I had most of the ingredients at home (along with an inordinate amount of sun-dried tomatoes). It was absolutely delicious, so I decided to document it for the future, plus, I made a few changes.

Mediterranean Fish in a Tomato Sriracha Sauce

Serves 2

Ingredients:

  • splash of EVOO
  • 70 g (1/2 medium) sweet onion, peeled and finely sliced
  • 90 g (~1/2 medium) fennel bulb, finely sliced
  • 1/2 tsp sriracha sauce (add more if you like heat)
  • 250 mL (1 cup) tomato purée from fresh or canned tomatoes (I used homemade)
  • 30 g (~1/4 cup) sun-dried tomatoes, chopped
  • 2oo g white fish fillets
  • Sea salt and freshly ground pepper
  • A handful of baby spinach
  • Black olives (I used Niçoisse)

Ingredients for the topping:

  • 2 tbsp flat-leaf parsley
  • Small handful of spinach
  • 2 tbsp sun-dried tomatoes
  • 1 small clove of garlic, peeled and finely chopped or grated
  • Zest of 1 lemon, plus a squeeze of juice

Directions:

  1. In a medium-sized, frying pan (I used cast iron), heat a splash of olive oil and sauté the onion, fennel and sun-dried tomatoes for 2 to 3 minutes.
  2. Combine the tomato purée with the sriracha sauce and stir well. Add the tomato purée to the frying pan and simmer for 4 to 5 additional minutes. Season to taste with a little salt and pepper.
  3. Place the fish on top of the tomato mixture, spooning a little of the sauce over the fish. Cover and simmer on medium-low for 8 to 10 minutes, or until the fish is fully cooked.
  4. Meanwhile, in the small bowl of a food processor combine the parsley, spinach, sundried tomatoes, garlic, lemon zest and juice and process until chopped and well mixed. Set aside.
  5. When the fish is completely cooked, carefully stir in the olives (putted and sliced, if you’re using larger olives) and baby spinach and warm through (spinach should wilt).
  6. To serve, place the fish on a spoonful or two of cauliflower mash or polenta and dollop the tomato sauce over the hot fish. Dot the herb topping over the fish and sauce to finish.

Notes:

  • This combination of vegetables and tomatoes would work very well with chicken, but you’ll need to increase your cooking time.
  • I used Tilapia for this particular recipe, but haddock, cod, sea bass or monkfish would also work well.
  • The first time I made this recipe, I did not have fennel so I substituted 2 stalks of celery, it was equally as delicious.
  • I used sun-dried tomatoes in olive oil, you may use dry but you might need to soak them in water so they are not chewy.
  • To reduce calories, omit the olives and use non-stick spray instead of olive oil.
  • If you use ordinary black olives, pit them and cut them into thirds.
  • The weights I suggest in the recipe are not carved in stone, just gives you an idea of proportions for two.


Read Full Post »

pomegranatesyrup_firstRecently, JT and I spent three wonderful weeks touring through London, Almeria, San José, Granada, Sevilla, Madrid and finally Paris. It was awesome. I will recount some wonderful meals and memories in future posts but I wanted to share a quick and easy recipe to make pomegranate syrup because my dear friend Sissi (With A Glass) recently posted a beautiful salad which included pomegranate seeds and the dressing was created with pomegranate molasses, a slightly sweet and sour syrup.

Sissi’s post went live around the time we had just spent the day in Granada, a large, historical city in the south of Spain. We did a wonderful walking tour of the city with Panchotours with Registered Tour Guide, Veronica and at one point she mentioned that the word Granada in Spanish means pomegranate! What a coincidence! The name is appropriate because the streets are lined with gorgeous pomegranate trees. Yes, you could just reach up and grab a fresh pomegranate, how cool is that? Sadly, they were not quite ripe enough, otherwise, you know I would have!

granada-pomegranate

ourtourguide

Our lovely tour guide, Veronica.

Several weeks prior to our departure, we purchased something and for some unknown reason were given a 473 mL bottle of Pom Pomegranate Cherry Juice for free. We don’t normally drink juice as it is far better to eat your fruit than drink it so it sat in the refrigerator until now! Making the syrup is so easy, I won’t even list it as a recipe. Simply pour the entire content of the bottle into a non-reactive pan and boil it on medium-high for about 30 -40 minutes or until it reduces to about 100 mL. I didn’t want an overly thick syrup (the viscosity is about the same as maple syrup) so you could boil it down even more — but be very careful, after a very short time, it can burn very easily! Allow to cool and pour into a sterilized bottle. Store in a cool, dark location.

pomegranate-syrup

It’s a thick, sweet and slightly sour syrup. that is delicious on chunks of Parmesan.

alhambra

The view of the Alhambra.

granadaview_new

Panoramic View of Granada.

Read Full Post »

SrirachaSauce_First

Recently, I was given a small basket of a variety of chili peppers. I don’t know about you, but these days I don’t like to tempt fate with overly hot things so incorporating them into a dish was out of the question. In the bunch were scotch bonnets, serranos, poblanos, jalopeños and Thai chilies so it was a basket of epic heat! Since I’ve already made Sweet Chili Sauce with Dried Apricots and Hot Sauce I decided to make a version of the very popular Sriracha Sauce because it is a staple in my pantry.

I love hot sauce, but sadly my innards, not so much so I wanted to  tame the heat without compromising flavour. The solution was grilling the peppers to a blistery/blackened stage, peeling and cleaning the seeds and veins out to temper the heat, the smoke flavour was a bonus! This recipe is roughly based on the link below.

Hot sauce.

Hot sauce.

Homemade Sriracha Sauce

Makes roughly 225 mL sauce.

Adapted from Leite’s Culinaria

Ingredients:

  • 400 g variety of hot peppers
  • 10 g garlic, minced
  • 25 g granulated sugar
  • 5 g sea salt
  • 125 mL white vinegar or to taste

Directions:

  1. Grill the hot peppers until their skin is blistered and black. Set hot chili peppers into a glass bowl and top with a plate to further steam the peppers (this makes peeling much easier, but if you have issues, just microwave them on high for 10-20 seconds). Peel, remove seeds and veins (the sauce will be hot enough even with this step) using gloves to protect your fingers (these are extremely hot peppers).
  2. Combine all ingredients except the white vinegar in a food processor and pulse until you have a paste. Scrape into a glass jar and tightly seal. Allow to sit on the kitchen counter (bench) for 1 week, stirring once daily. The mixture will ferment so if you see bubbling action, it is par for the course.
  3. After one week, transfer the chili mixture to a saucepan over medium heat and add the vinegar and bring to a boil, then lower the heat and simmer 5 minutes. Allow the mixture to cool slightly and then purée it again using an immersion blender. Push through a fine sieve, taste and season with sugar, salt and vinegar as desired.
  4. Store in the refrigerator in a glass jar with a tight lid. The original recipe indicates that this sauce is good for six months.

SrirachaSauce_8696

Perfect timing because I’m going to need a small bottle for the cottage!

Read Full Post »

MagicalCustardCake_FIRST

Yesterday, December 6th was Hungarian Mikulásnap (Santa’s Day). This date was very important in our house because it was the date that Mikulás visited our home to pick up the letters we would write to him…the Christmas wish list! It was always our tradition to put the letters into freshly polished, shiny boots on the windowsill just before we went to bed. In the morning, we would find our boots filled with European chocolates (if we were good) or the dreaded virgács (thin branches that our parents could use to slap our bottoms with, if we were bad). To the best of my memory, we only received the virgács once; that’s my story and I’m sticking to it. I am always nostalgic this time of year, particularly in my neighbourhood of European delis that stock the same delicious chocolates we used to receive as kids.

Although chocolate treats in the form of Santa (or Mikulás) would be a lovely dessert, recently I decided to make an unusual cake that has been making the rounds on the blog-o-sphere for some time. Surprisingly, there is nothing unusual about the ingredients and the recipe is pretty much like a jelly roll or genoise sponge, but what’s really unusual is that the cake separates into a custard portion and a cake portion during baking. I suspect this recipe came about as a mistake someone made a long time ago and it baked into this amazing and delicious surprise (like so many recipes out there). The history really doesn’t matter, it is a delicious cake that is a cross between a custard and a cake and I think you should try it.

Since I’m not much of Pinterest person, I only saw this cake on the blogs I follow and the very first one was Bizzy Lizzy, my Hungarian bogging friend down under and then Lorraine of Not Quite Nigella made a pumpkin version — I knew I had to make this unusual dessert. We loved the Hungarian Custard Squares (Krémes Szelet) so I suspected that this recipe would be a winner too. I used Liz’s recipe but I halved it because there were only four of us for brunch; I topped it with baked pears (I scored the pears at $1.96 for 10 because they were not perfect specimens!) and a drizzle of coconut sugar caramel sauce. The dessert received rave reviews and as a bonus, it stores well in the fridge for a couple of days (unassembled). It’s definitely going into my dessert repertoire…now to figure out a gluten free version!

What Christmas/holiday traditions do you have?

MagicalCustardCake_7587

Soft custard, baked pears, fluffy cake and sweet earthy caramel sauce garnished with a toasted walnut. May I cut you a slice?

Magical Custard Cake with Baked Pears and Coconut Caramel Sauce

Original Recipe from Bizzy Lizzy’s Good Things

Serves 4

Ingredients for the Magical Custard Cake:

  • 60 g unsalted butter
  • 240 mL low fat milk
  • 1/2 teaspoon vanilla
  • 2 eggs, room temperature, separated
  • 60 g icing sugar, sifted
  • pinch, cream of tartar
  • 57 g unbleached AP flour, sifted
  • 4 walnut halves for garnish, toasted

Directions:

  1. Pre-heat the oven to 330° F (165° C).
  2. Prepare a 21 cm x 11 cm(4″ x 8″) loaf pan by lining it with parchment paper.
  3. Melt the butter and cool to room temperature.
  4. Warm the milk combined with vanilla until lukewarm (should not be hot).
  5. Beat the egg whites with a pinch of cream of tartar until stiff but not dry, set aside.
  6. Beat the egg yolks with the icing sugar until light and fluffy (about 5 – 7 minutes). Set the mixer speed to the lowest and slowly drizzle in the melted butter until entirely combined.
  7. Slowly fold in the flour alternating with the warm milk until it is fully combined.
  8. Fold in the beaten egg whites a spoon at a time until fully incorporated but not deflated. This is quite a runny batter, so don’t worry.
  9. Bake for 40 minutes or until a tester comes out clean. Allow to cool completely and then refrigerate for 2 hours or overnight.

Ingredients for the baked pears:

  • 10 small pears, peeled, cored and cut into cubes
  • 1 tbsp coconut sugar
  • 1/2 tsp cinnamon
  • pinch of salt

Directions for the baked pears:

  1. Pre-heat the oven to 350° F (171° C).
  2. Toss cubed pears with sugar, cinnamon and salt and pour into a casserole dish. Bake for 20-30 minutes or until soft. Set aside.

Ingredients for Coconut Sugar Caramel Sauce:

  • 1/4 cup Grace coconut sugar (or regular granulated sugar)
  • 1 tbsp water
  • 1/8 tsp lemon juice
  • 1/4 cup hot cream
  • 1 tbsp unsalted butter

Directions for Coconut Sugar Caramel Sauce:

  1. Heat cream in a microwave proof container until very hot but not boiling, set aside.
  2. Mix sugar, water and lemon juice in a 2 cup pyrex measuring cup.
  3. Microwave for 15-60 seconds (note that in 2016 I doubled the recipe and it took 3 minutes 25 seconds of microwaving to get the amber colour I was looking for), until sugar bubbles up but does NOT BURN, sugar crystals should be completely dissolved and you should begin to see it turn to a light amber colour. Remove and set on a dishcloth for 30 seconds and slowly pour in the hot cream, being careful as this will bubble up.
  4. Stir well and then add the butter  and stir until completely incorporated. Serve warm or at room temperature.

Assembly Directions:

  1. Remove cold ‘cake’ from the fridge and set on a cutting board. Cut into 4 slices and set each slice on the centre of a plate.
  2. Reheat the baked pear cubes until steamy (microwave for a minute or so on high).
  3. Spoon equal amounts of the pears onto each slice, then drizzle with the coconut caramel. Garnish with a toasted walnut half.

Read Full Post »

AvocadoHollandaise_First

Last week I had the pleasure of meeting Lorraine Elliott of Not Quite Nigella, in Toronto. We’ve been following each other for four years now and when we met in person it was like we’d known one another for ever. I wanted to do something special with her so I contacted an acquaintance who produces several Food Network Canada shows and she made it happen – we spent the morning on the set of Chopped Canada, Season 3. But you’ll just have to wait to hear all about it in the new year (don’t worry, it’ll be here before you know it!).

Eva & Lorraine behind the scenes!

Eva & Lorraine behind the scenes!

Lorraine was in Toronto with the Canadian Tourism Commission and made a special request to come to Toronto to meet me! I was flattered beyond belief. For Lunch, we met up with my dear friend Barb (Profiteroles & Ponytales) and a new friend, Trudy Bloem, a Personal Chef from Ottawa (the DIL of a lovely neighbour) at one of my favourite Italian restaurants, Bar Mercurio. We shared a number of tasty dishes that I’m sure Lorraine will blog about. The CTC sure kept her busy and she saw many of the Food significant parts of TO, but not everything so I’ve invited her back! And one of these days, we’ll travel to Australia to visit her (and Charlie, Maureen & Liz)!

Lorraine wasn’t the first positive experience with an Aussie I’ve ever had, after all there was the “gravy boat incident”.

About 12 or 13 years ago, I was trying to finish off some stray pieces to our wedding China. I checked our local supplier and as I suspected it was unaffordable, so I checked eBay. I’ve purchased many things over the years from eBay and my experiences have always been exceptional. I found the exact gravy boat, you guessed it, in Australia. It was a young couple recently married and for some strange reason were given a gravy boat to a set that they didn’t want, so she was selling it for a very reasonable price on eBay. I contacted her to make sure she would ship it to Canada and she said she would. She was not registered on PayPal so she asked for a money order. No problem, but I needed an address. She gave me an address and off we went to get a money order. We don’t often need money orders so we were inexperienced (this will make sense later in the story). The money order was mailed and we waited. And waited. Weeks went by and the girl didn’t receive it. I called the post office and asked how long a letter from Toronto should take to travel to Australia and they said six to eight weeks. So we waited in the meantime corresponding with said girl almost weekly. At 10 weeks she still hadn’t received the money order but she was tired of the game so she said she would mail the gravy boat to me anyway and hope to receive the money order. I felt bad about it, so we got another money order but when we went to cancel the first one, we discovered that we had included the receipt in the original envelope so we couldn’t cancel it (read inexperienced)! I bit the bullet and got another money order anyway (still marginally cheaper than buying the gravy boat in Toronto). I wanted to make sure I had her correct address so I asked her to confirm. You guessed it, she had given me the wrong address the first time (sweet girl but…) so the new money order was mailed and within a week the gravy boat arrived! Then two days later the girl wrote to say the second money order arrived and that she would destroy the first one if it ever arrived. I’m not kidding you, a day later we received back the first money order (with receipt) marked “unknown address, return to sender”! This drama took over three months! We were able to get a refund with the original money order, I got a deal on the gravy boat and a great story out of it! Do you have any cool stories like this? Share in the comments.

If I were serving this avocado hollandaise at home, I would have definitely used the Australian gravy boat, but I served it at the cottage for a tasty vegetarian breakfast!

Ready4Hike_6259

It’s still quite buggy in Canada’s north so we were well prepared with our bug shirts!

Vegan Avocado ‘Hollandaise’ Sauce

Makes about 3/4 cup of ‘hollandaise’ sauce

Ingredients:

  • 2 small very ripe avocados
  • 1/2-3/4 cup water
  • 2 tbsp lemon juice
  • 1 tsp white vinegar
  • 1 tbsp Dijon mustard
  • salt and pepper to taste

Directions:

  1. Purée everything together until very smooth adding water until desired consistency is achieved, season with salt and pepper.
  2. Serve warm or room temperature.

Notes:

  • This is a much ‘lighter’ feeling sauce than the traditional eggyolk-butter-based version.
  • I didn’t want to add more lemon juice as I feared it might make the sauce bitter so instead I added a teaspoon of white vinegar and a tablespoon of Dijon, it was a flavourful sauce.
  • Add only as much water to the sauce to achieve the consistency that you want. I wanted mine pourable and I almost used the entire 3/4 cup, just a hair less.

AvocadoHollanadaise

I served this on Asparagus and Spinach bennies one weekend.

Screen Shot 2015-08-02 at 1.42.27 PM

This is 1/4 of the total yield of sauce

This is traditional Hollandaise Sauce made with 4 eggs and 1/2 cup of unsalted butter. Although the calories are fewer than the avocado version, take a look at the fat and cholesterol!

Read Full Post »

BBQ Sauce_first

The Hungarians have arrived and the “to do” list is finally complete! Just in the nick of time too. We decided to start their visit off with a little welcome party but we all know it’s just my excuse to cook and feed my kin!!! I was fortunate enough to score a sizeable number of vine ripened tomatoes so I decided to make barbeque sauce because JT made a special request for Pulled Pork. The sauce turned out perfectly, sweet, piquant and zesty — cooking it with the pork tenderloin for 5 hours made the flavours all the more richer and balanced the vinegar very nicely. Like any low and slow cooked meal, I made the pulled pork a day in advance because we all know it tastes better the next day!

I’ve geared up a couple of posts for the following weeks, but I may be AWOL depending on how busy things get, so if I miss to comment on your blog or I don’t post, I apologize in advance. Thanks for understanding.

Barbeque Sauce

Makes 1.25 L (42 oz)

Ingredients:

  • 200 g onions, coarsely chopped
  • 50 g garlic, finely chopped
  • 125 mL white vinegar
  • 1.2 kg tomatoes, chopped
  • 30 mL tomato paste
  • 125 mL molasses
  • 50 g sundried tomatoes (not in oil)
  • 1/2 tsp salt
  • 1/2 cup packed brown sugar
  • 1 tsp smoked paprika
  • 1 tbsp of each sweet paprika, cumin, coriander and cocoa powder

Directions:

  1. In a splash of canola oil, sauté onions and garlic until translucent, add dry spices and stir until fragrant.
  2. Add remaining ingredients and stir well. Simmer for one hour or until dark and thickened.
  3. Purée until smooth and press through a fine sieve.
  4. May be kept in the refrigerator for 3-4 days or freeze for 3 months.

BBQ Sauce

Read Full Post »

AppleChutney_First

There is nothing like the push of having extended stay visitors to open your eyes to see all the deficiencies in your home. Case in point, several years ago I filled a few cracks on one of my kitchen walls and then I painted over the patches but since the rest of the wall was about 4 years old, the paint dried a slightly different colour and the wall looked patchy in certain lights. It was on my to do list f o r e v e r! So a couple of weeks ago, after I filled in a few new cracks, bought a new can of paint (when did paint become SO expensive?) I finally repainted the entire wall. A fresh coat of paint really freshens up a room. Of course, once I started filling in cracks all over the house and painting, there was no stopping me…it turned into a two-day project. But then it’s another thing off the list.

Recently we had James, a long-time college friend of JTs over for an Indian dinner and I made my new favourite Jamie Oliver Chicken Tikka Masala recipe along with Palek Paneer, the best Naan ever and a few condiments, pickled carrot and this delightful Apple Chutney. I am certain that James, who is a renovator, was too polite to say anything about my patchy walls but I kept the lighting low anyway!

What are some of the nagging to do’s on your home maintenance list?

AppleChutney

Sweet, tangy with a little bit of heat.

Apple Chutney

A KitchenInspirations Original Recipe

Ingredients:

  • 1 Granny Smith apple (about 165 g)
  • 165 onion, coarsely chopped
  • 80 g dates, coarsely chopped
  • 10 g fresh ginger, grated
  • 3 tbsp white balsamic vinegar
  • 1/8 tsp cloves
  • 70 mL water
  • 1 tbsp Sweet Apricot Chili Sauce
  • 1/4 cup Coconut Sugar

Directions:

  1. Combine all the ingredients in a heavy bottom sauce pan and cook on medium heat until onions have caramelized and the sauce is thick but still have texture.
  2. Cool. Serve at room temperature.
  3. Store in the refrigerator for 1 week or freeze.

Read Full Post »

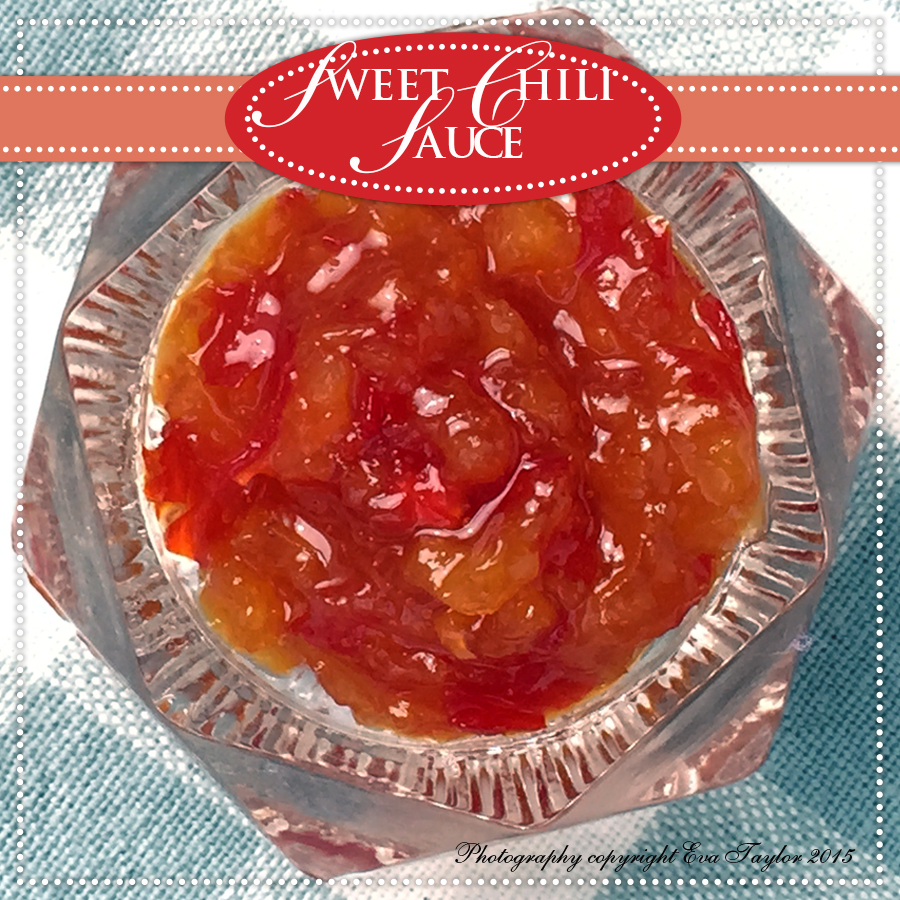
SweetChiliSauce_First

Has spring arrived where you are? It sure hasn’t over here, in fact there is very little sign of it. Yes, we can be grateful that the snow has finally melted and that it hasn’t snowed in any measurable quantity for a few days, but these temperatures are killing us. Since I’ve begun my morning walks through High Park again (8km most mornings) it’s been so cold that I’m still wearing my long down-filled coat, hat, gloves and a balaclava around my neck at the ready when the howling wind rudely slaps my face. I’m ready for spring. With these cold temperatures, I’m still craving warming foods like my dear friend Sissi’s Dried Apricot and Chili Jelly. If you don’t know Sissi, she is an experienced cook with a passion for the Far East. Her recipes are uncomplicated and her writing style is elegant and beautiful and that’s something because English isn’t even her first language! I’m always drawn to Sissi’s recipes because she combines flavours that hit my palette perfectly. And she enjoys similar foods and textures that I do. Please visit Sissi’s blog for the original recipe because she has generously provided more details than I am providing.

Sweet Chili Sauce with Dried Apricots

Makes 250 mL sweet chili sauce

Ingredients:

  • 175 g dried apricots
  • 150 mL +100 ml cider vinegar
  • 100 g red Thai chili peppers
  • 200 g sugar
  • 50 mL water
  • 1/2 teaspoon salt
  • 1/2 package pectin in powder (25 g)

Directions:

  1. Bring 150 mL vinegar to a boil and add the apricots to soak for 30 minutes.
  2. To a small food processor, add the hot peppers (discard the stalks and seeds) and the soaked apricots and pulse to chop reasonably finely.
  3. Combine the remaining ingredients (including the additional 50 mL vinegar) and boil 20 minutes,stirring constantly.
  4. Sprinkle the pectin over the surface and cook 10 more minutes, mixing well.
  5. Transfer the hot jelly into the sterilised jar or jars and cover with lid(s). Allow the jar to cool and refrigerate. If your jars are smaller (I used one 250 mL jar) you will want to process them as you would any canning project. I popped my single jar into the fridge and will use over the next month or so (or I will freeze for later use).

This is a very hot sauce.

This is a very hot sauce.

Notes:

  • I had intended on reducing the sugar but believe me, it NEEDS the sweetness because these peppers are HOT!
  • This is an excellent condiment but use conservatively as it is VERY HOT.


Read Full Post »

GlutenFreeCheeseSauce_1

Whether you’re gluten intolerant, just want to cut back or perhaps you have friends who are — this is a perfect sauce to have in your back pocket. Toss it on some pasta, zucchini ‘pasta’ or dress up some steamed cauliflower, you’ll be surprised at how good it is! I’m using my tried and true lentil purée for the thickener and boy does it thicken! And the cheese creams up with it perfectly — I used cheddar, but you can use whatever cheese you prefer. You’ll have to watch this sauce because it thickens very quickly and can become too thick when it cools down, so serve it hot. I hope you love this sauce as much as I do.

Gluten Free Cheddar Cheese Sauce

Ingredients:

  • 1/2 cup cooked puréed lentils
  • 1/2 cup skim milk
  • 60 g grated sharp cheddar cheese
  • 1/4-1/2 tsp salt to taste
  • Pinch of cayenne pepper (optional)

Directions:

  1. Cook milk and puréed lentils until smooth, thick and creamy.
  2. Add cheese and stir until smooth and melted.
  3. Season with salt, pepper and cayenne to taste.

GlutenFreeCheeseSauce

This is a really creamy sauce

Serving suggestions:

  • Serve over cooked macaroni garnish with Parmesan and broil for a minute until cheese is melted and bubbly. Garnish with chopped green onions and enjoy!
  • Pour over steamed broccoli or cauliflower.
  • Use as a base on pizza.
  • Make this into cheddar soup (although that would be very decadent!)

Screen Shot 2015-03-13 at 11.16.26 AM

Based on 4 servings

Screen Shot 2015-03-13 at 11.17.40 AM

Read Full Post »

MeatlessBalls_intro

You may recall that several months ago I did some food prep for the Global Morning Show showcasing a new cookbook Toronto Cooks; 50 Toronto Restauranteur chefs gave up their signature recipes for this beautifully photographed cookbook and they are the actual recipes that they serve in their restaurants without any intentional omissions! I had the privilege of making Chef Rocco Agostino’s Spicy Meatballs and although the meatballs were out of this world, they were slightly on the heavier side than I like to eat so when I saw Lorraine’s Vegetarian Bean and Quinoa Meatballs recipe, I was all over it! Because I wanted an Italian flavoured ball I used only her base ingredients and the flavourings from Chef Rocco’s incredible recipe. Thank you Lorraine, you’ve come up with another winner! The meatless balls are tender with great texture from the bulgur (a swap I made due to an over processing error on my first test).

One of the key, flavour-building ingredients is Chef Rocco’s Bomba. Sadly I was not able to find the recipe online, so I am not going to post it. Bomba is a combination of raw vegetables, brined artichokes, Italian chili peppers as well as a few other flavourful ingredients, ready-made can be purchased at specialty stores or better yet, buy the Toronto Cooks cookbook, it’s the best Toronto Restaurant cookbook you’ll find!

Spicy Vegetarian Meatballs with a Rich Tomato Sauce

For the original recipe, please click here,

Ingredients, Tomato Sauce:

  • 15 mL (1 tbsp) olive oil
  • 200 g (1 small sweet onion) onion, finely diced
  • 10 g (3-4 cloves) finely chopped garlic
  • 680 mL puréed San Marzano tomatoes, with a little water to rinse out the jar
  • 1/2 tsp baking soda
  • 1/4 cup chopped fresh basil leaves
  • 125 mL (1/4 cup) Bomba
  • salt to taste (be careful because the Bomba can be salty)

Directions, Tomato Sauce:

  1. Heat a large dutch oven with 15 mL olive oil.
  2. Add the onions and sauté until translucent. Add the garlic and cook for about 1 minute. Add the tomato purée, baking soda and simmer for five minutes.
  3. Add the chopped basil, Bomba and simmer until dark and thick. You may cool and refrigerate at this point.

Ingredients, Meatless Balls:

  • 15 mL olive oil
  • 130 g onion, peeled and chopped
  • 1 clove garlic, finely chopped
  • 2 tsp dried oregano
  • 10 g dried wild dehydrated mushroom powder
  • 125 mL roasted red pepper, puréed
  • 45 mL (3 tbsp) Bomba
  • 1 cup grated Parmesan grams?
  • 30 g (1/4 cup) ground almonds
  • 2 eggs
  • 124 g 1 cup breadcrumbs
  • 136 g raw bulgur (yields 2 cups cooked) 170 g bulgur yields
  • 65 g dry red kidney beans, cooked as per package directions and chopped roughly
  • Salt and pepper to taste
  • 1/4 cup fresh parsley, chopped finely
  • 1/4 cup fresh chives, chopped finely
  • 1/4 cup fresh basil, chopped finely

Directions, meatless balls:

  1. Add oil to a hot frying pan and cook the onions until translucent. Add the garlic and cook 1 minute. Cool completely.
  2. In a large bowl, add the cooked bulgar, chopped cooked beans and onion mixture and mix with a fork. Add the roasted red pepper purée, Bomba, Parmesan, ground almond and bread crumbs and mix in well with the fork. Taste for seasoning (taste now because you won’t be able to when you add the eggs) and add salt and pepper as required.
  3. Slightly whisk two eggs and incorporate into the mix.
  4. Fold in the fresh parsley, chives and basil.
  5. Refrigerate for 30 minutes.
  6. Preheat oven to 400F. Bake meatless balls for 30 minutes, turning occasionally.
  7. Cool completely and refrigerate until required.
  8. Reheat sauce. Reheat meatless balls for 20 minutes at 300F..

BakingMeatlessBalls

These are the little guys baking.

MeatlessBalls_1

Don’t let them fool you, these are very filling meatless balls.

SobeysCardinalMeatsBunker

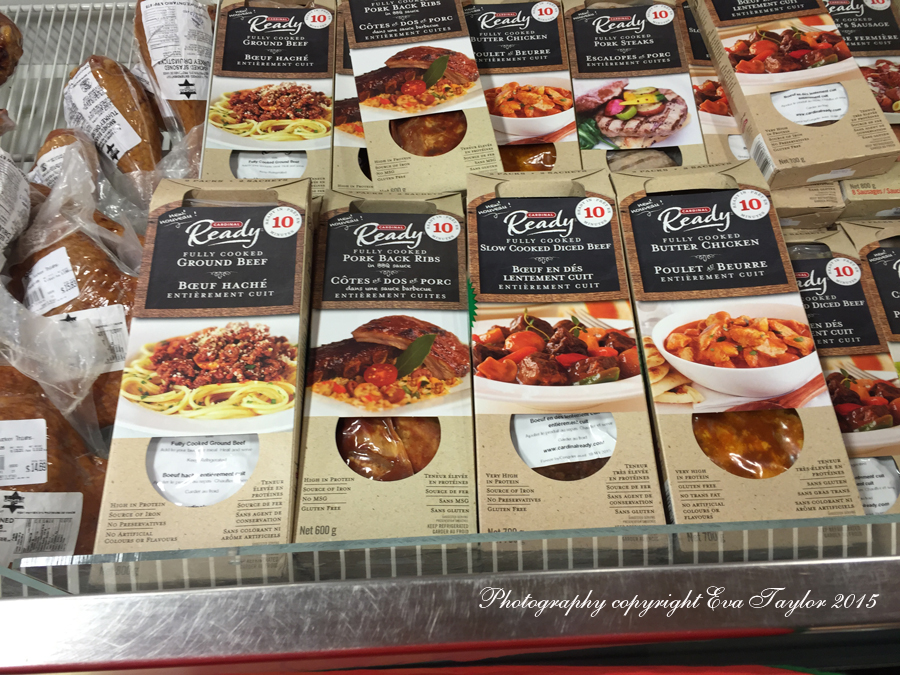
I was so pleasantly surprised the other day at the grocery store when I saw my own work on the packaging! I worked a full week on these easy to assemble, ready made foods.

Notes:

  • Although I do love quinoa, I substituted bulgur here because I had over processed my first recipe test and it resulted in a pasty texture so instead of chucking the whole thing, I added bulgur. My husband loved the texture so when I made the second batch I simply substituted it altogether.
  • This recipe is about texture as much as it is about flavour, although it’s not meat, the texture has a great bite to it.
    I found reheating the meatless balls in the sauce softened them up too much so I heated them in the oven 300F for 15-20 minutes.
    As most dishes like this, it’s best the next day so I always make it one day before I needed it.

Read Full Post »

Baked Onion_3

It’s like a globe of caramelized deliciousness.

I’ve been having so much fun and yes, it’s work and it’s wonderful. I even have a real styling gig booked and I’m super excited about it…5-6 solid days. It’ll be grueling  because we’re shooting around 50 shots in a week! I’ve already practiced some of the dishes to make sure the day goes smoothly. It’s for a line-up of proteins for home meal replacements using 9  fully cooked products in 4-5 applications each. I had to come up with the usage suggestions based on the client’s parameters (I actually had to come up with 10 each – 90 in total and from the 10, they selected 4-5 that I’m making during that week). It was fun but challenging in coming up with the ideas because I didn’t want just ordinary options. They all had to be relatively easy to put together, few ingredients that “Mom” would have easy access to and meals that come together in less than 30 minutes because “Mom” is super busy.

In the meantime, I thought I’d share a couple of photos that although I was assisting, the wonderful stylist allowed me to style entirely on my own. They were published this past spring by Viva Magazine Online.

Foodfeature_viva_spring2014-2

Rustic Breakfast Pizza

Foodfeature_viva_spring2014-7

These were incredibly delicious.

This is a pdf of the Foodfeature_viva_spring2014, we did all the food in this issue. I cooked most of it and the food stylist plated it, the only one I had next to nothing to do with was the duck confit. The photographer is Arash Moallemi, please click here to see his work.

I don’t often get the pleasure of watching specialty cable channels like Food Network Canada because we cancelled our cable service 2 years ago and now use a digital antenna. I could go on line to watch, but many of these channels now put advertising into the shows and you are unable to fast forward like the old VCRs and I no longer have the patience to watch it through. About 2 weeks ago, I was at someone’s house with cable TV and we watched Laura Calder’s French Food at Home. She made a few recipes that I would consider ‘keepers’ but this one really stood out for me so I made it at the cottage as a light lunch and rest assured I will be making this beautiful dish again and again. Next time, it’ll be an appetizer for a dinner party. I hope you enjoy it, it infuses the house with a gorgeous fragrance as it bakes and because it bakes on such a low setting, it won’t warm up your house in the middle of the summer. I hope you enjoy it too. Please click here for the original recipe because I made some alterations.

Baked Onions with Dijon Tarragon Vinaigrette

Makes 4 whole onions, serves 4.

Ingredients:

  • 4 ordinary cooking onions
  • 1/4 cup EVOO
  • 1/4 cup white wine vinegar
  • 1 tbsp mayo
  • 1 tsp Dijon mustard
  • 2 tbsp olive oil from roasting the onions
  • 1 tsp finely chopped tarragon
  • Good grind each of pepper and sea salt

Directions:

  1.  Pre-heat the oven to 425 F.
  2. Add 1/4 cup Extra Virgin Olive Oil to a small Dutch oven.
  3. Remove only the exterior skin of each onion and cut the stem side flat. You want some skin left on the onion for presentation. Sprinkle with sea salt.
  4. Nestle the onions into the olive oil and bake uncovered  for 15 minutes at 425 F.
  5. Lower the oven temperature to 250F and cover the dutch oven with a lid or foil. Continue to bake for 2-3 hours or until the onion is extremely soft.
  6. Combine the white wine vinegar, mayo, Dijon mustard and olive oil and whisk well. Stir in the chopped tarragon and a good grinding of salt and pepper.
  7. Spoon a little bit of the baked olive oil in the centre of a plate. Put each onion on top of the baked olive oil.
  8. Cut the onion skins in about 4 places and peel back to reveal the creamy goodness. Drizzle the tarragon dressing over each serving.
  9. Serve warm with Crostini or just as is and wait for the accolades!

Baked Onion_1

The onion breaks down and becomes wonderfully soft and sweet.


Baked Onion_2

We were at the lake when I made them.

Notes:

  • Laura cautioned against using olive oil because she didn’t want the flavour to over power the delicate sweetness of the onion, I did not find that it did.
  • Laura placed her onions on little piles of sea salt, I didn’t have any so I did not employ that method.
  • Laura used a raw egg in her dressing, I used a tablespoon of mayo instead.
  • The baked olive oil is packed with flavour so save the left overs to make a very yummy salad dressing.
  • An additional serving suggestion is to serve it with a Gruyère crisp but I didn’t have Gruyère  at the lake.

Read Full Post »

Our Easter menu included a traditional ham and I’m always looking for ways to jazz up the same-old, same old so when I discovered I had a good nub of fresh horse radish in the refrigerator, I knew it was destined for glory on the Easter Table! I found this recipe from Food Network Canada and it really was as easy as it reads! I just eyeballed the vinegar, added a pinch of sugar and pulsed until I got a nice consistency for the horse radish. This is not a sauce, it is your typical grated horse radish.

Horseradish_2495

Don’t let being home made deceive you, this is one powerful condiment!

Home-made Horseradish

Ingredients:

  • 1 nub of fresh horse radish root (mine was about 10 cm around 4 inches), peeled and chopped into smallish cubes
  • 3-5 tbsp Cider vinegar
  • 1 tsp Sugar

Directions:

  1. Add the chopped horse radish to your mini food processor and pulse to get a coarse grate.
  2. Add Cider vinegar and white sugar and pulse further, adding a bit more cider vinegar until you achieve a nice fine grate for the horse radish.
  3. Serve immediately or store in the fridge.

Read Full Post »

BalsamicPearls_1867

Perfectly formed balsamic spheres

Are you an experimental cook? What I mean by that is, do you instinctively gravitate toward unusual recipes, perhaps ones that push you out of your comfort zone? Using ingredients and techniques that are new to you and perhaps don’t always work out the first, second or even third time you try it? You may have guessed that I am, to a fault. Like a dog with a bone. I won’t stop until I get it right and even then, I may likely never make that recipe ever again! You will wonder why and to that I say, why not? I simple check it off my list and move on. This might be such a recipe.

I cannot recall where or when was the first time I saw Balsamic Pearls or caviar but I do recall being instantly smitten, my only problem was that I was not able to find the jelling ingredient Agar Agar, until recently! And I found it in the most unlikely place, my local health food store! It was an arm and leg to purchase, but fortunately it’s a big enough bag that I can make several batches.

What reminded me of these little gems was one of my shopping trips for Food Styling Assisting at a very fancy (read expensive) organic food store in north Toronto called Harvest Wagon; they temptingly have the most gorgeous display of vinegars and oils directly beside the cash desk…no time to even give it a second thought, unless you look at the prices! I suspect people who shop there really don’t look at the prices anyway! It is there that I spotted the balsamic pearls and it was there and then I decided that I HAD to make them!

My dear friend and Inspiration of All Asian foods, Sissy from With a Glass has used Agar Agar for many desserts she allures us with over the years. It is a seaweed based jelling agent that does not liquify when heated up (unless it’s boiled); unlike gelatine which melts (like in my French Onion Soup Pillows).

Pre-directions for all flavours:

  1. At least 30 minutes (but not overnight) before you wish to start making your pearls, fill a tall, thin glass with vegetable oil and put into the freezer to cool. It’s best to have a tall glass so that when you drop the pearls into it, the pearls have a long way to fall through the super cooled oil before they hit the bottom. This is very important because if the pearls don’t have sufficient time to cool down, they will fall to a puddle at the bottom of the glass. Trust me. You can strain the oil and reuse it, so don’t worry about tossing it.

Slightly larger than caviar, these tiny pearls pack a to of flavour.

Slightly larger than caviar, these tiny Balsamic pearls pack a lot of flavour.

Balsamic Pearls

Makes a generous table spoon or more of tangy balsamic pearls.

Ingredients:

  • 2 tbsp water
  • 3 tbsp balsamic vinegar (not glaze)
  • 1 tsp agar agar
  • 1-2 cups of vegetable oil in a tall glass

Directions for balsamic pearls:

  1. In a small saucepan mix the water with the balsamic vinegar then add the agar agar and place on medium to medium low heat, stirring constantly until it comes to a boil.
  2. Cook this mixture on a very gentle boil for 4 minutes, stirring often.
  3. When the 4 minutes are up, remove the pan from heat and allow the liquid to cool to about  50° C (122° F), but try not to let it fall below 41° C (105°F), if it does, you can reheat, stirring constantly until it melts again.
  4. Remove the chilling oil from the freezer and place in a comfortable working area. Using the culinary syringe, draw up the balsamic liquid (try to get most of it), and drop by single droplets into the chilled oil. They will sit slightly suspended on the surface and then fall gently through the chilled oil to the bottom. If the pearls are cooled enough, they will have set and be beautiful little pearly jewels, if they did not set you will have a puddle at the bottom of the glass; strain the puddle out, put the oil back in the freezer and re-melt the puddle in the saucepan.
  5. When you have used up the liquid, strain the pearls out of the oil into a fine sieve and rinse with cold water. It’s best to store the pearls in the liquid that they were originally made from, so top off the storage jar with balsamic vinegar.

These Wasabi pearls are not as green as I had hoped.

Wasabi Pearls

Makes a generous table spoon or more of wasabi pearls.

Ingredients:

  • 1/4 cup water
  • 1 tsp agar agar
  • 1 tsp wasabi paste (the powder does not work well in this case)
  • 1-2 cups of vegetable oil in a tall glass

Directions for wasabi pearls:

  1. In a small saucepan mix the water with the agar agar and place on medium to medium low heat, stirring constantly until it comes to a boil.
  2. Add the wasabi paste and mix well (try not to breath too close, it’s a very strong and stinging smell).
  3. Cook this mixture on a very gentle boil for 4 minutes, stirring often.
  4. When the 4 minutes are up, remove the pan from heat and allow the liquid to cool to about  50° C (122° F), but try not to let it fall below 41° C (105°F), if it does, you can reheat, stirring constantly until it melts again.
  5. Remove the chilling oil from the freezer and place in a comfortable working area. Using the culinary syringe, draw up the wasabi liquid (try to get most of it), and drop by single droplets into the chilled oil. They will sit slightly suspended on the surface and then fall gently through the chilled oil to the bottom. If the pearls are cooled enough, they will have set and be beautiful little pearly jewels, if they did not set, you will have a puddle at the bottom of the glass; strain the puddle out, put the oil back in the freezer and re-melt the puddle in the saucepan.
  6. When you have used up the liquid, strain the pearls out of the oil into a fine sieve and rinse with cold water. It’s best to store the pearls in the liquid that they were originally made so mix a scant teaspoon of the wasabi paste with water and store the pearls in it.

A lovely sweet flavoured pearl.

A lovely sweet flavoured pearl.

Pomegranate Pearls

Makes a generous table spoon or more of pomegranate pearls.

Ingredients:

  • 1/4 cup pure pomegranate juice (don’t use syrup here)
  • 1 tsp agar agar
  • 1-2 cups of vegetable oil in a tall glass

Directions for pomegranate pearls:

  1. In a small saucepan mix the pomegranate juice with the agar agar and place on medium to medium low heat, stirring constantly until it comes to a boil.
  2. Cook this mixture on a very gentle boil for 4 minutes, stirring often.
  3. When the 4 minutes are up, remove the pan from heat and allow the liquid to cool to about  50° C (122° F), but try not to let it fall below 41° C (105°F), if it does, you can reheat, stirring constantly until it melts again.
  4. Remove the chilling oil from the freezer and place in a comfortable working area. Using the culinary syringe, draw up the pomegranate liquid (try to get most of it), and drop by single droplets into the chilled oil. They will sit slightly suspended on the surface and then fall gently through the chilled oil to the bottom. If the pearls are cooled enough, they will have set and be beautiful little pearly jewels, if they did not set you will have a puddle at the bottom of the glass; strain the puddle out, put the oil back in the freezer and re-melt the puddle in the saucepan.
  5. When you have used up the liquid, strain the pearls out of the oil into a fine sieve and rinse with cold water. It’s best to store the pearls in the liquid that they were originally made from, so use pomegranate juice.

These are very smoky indeed. I wish I had given them a bit of heat with sriachi

These smoked paprika pearls are very smoky indeed.
I wish I had given them a bit of heat.

Smoked Paprika Pearls

Makes 2 table spoons or more of smoked paprika pearls.

Ingredients:

  • 1/4 cup water
  • 1 tbsp red pepper paste (I used sweet)
  • 3/4 tsp liquid mesquite smoke
  • 1 tsp agar agar
  • 1-2 cups of vegetable oil in a tall glass

Directions for smoked paprika pearls:

  1. In a small saucepan mix the water with red pepper paste and smoke, then add the agar agar and place on medium to medium low heat, stirring constantly until it comes to a boil.
  2. Cook this mixture on a very gentle boil for 4 minutes, stirring often.
  3. When the 4 minutes are up, remove the pan from heat and allow the liquid to cool to about  50° C (122° F), but try not to let it fall below 41° C (105°F), if it does, you can reheat, stirring constantly until it melts again.
  4. Remove the chilling oil from the freezer and place in a comfortable working area. Using the culinary syringe, draw up the red pepper liquid (try to get most of it), and drop by single droplets into the chilled oil. They will sit slightly suspended on the surface and then fall gently through the chilled oil to the bottom. If the pearls are cooled enough, they will have set and be beautiful little pearly jewels, if they did not set you will have a puddle at the bottom of the glass; strain the puddle out, put the oil back in the freezer and re-melt the puddle in the saucepan.
  5. When you have used up the liquid, strain the pearls out of the oil into a fine sieve and rinse with cold water. It’s best to store the pearls in the liquid that they were originally made from, so mix a small amount of water and smoke (2 tbsp water and splash of liquid smoke).

Tips:

  • I used Mitoku, Kanten Flakes (Agar); the package instructions indicate that 1 tablespoon will set 1 cup of liquid. As fyi, I also tried 2 tsp of Agar Agar into 1/4 cup liquid and found the pearls way too stiff, reducing the Agar Agar to 1 tsp worked out perfectly.
  • The Agar Agar binds with your liquid only when it is added to a boiling liquid and for the pearls to cool sufficiently you must wait until the temperature falls to  50° C (122° F) and then you must act quickly because it starts to set at 41° C (105°F) so there isn’t much time to drop the little droplets (it sets at room temperature, refrigeration is not required). Work in small batches so that your liquid doesn’t set before you have time to use it up to make the pearls.
  • I used a culinary syringe, but an icing bag fitted with a very small end could work too, although I did not try it.
  • Not every liquid can be turned into pearls because there are other things to consider which are far beyond my chemical knowledge so if you are interested in turning something not listed here into pearls, I would do some research.
  • It’s important to follow the directions closely otherwise your experiment will fail, I tested each one to make sure it works. This was my third attempt with Balsamic, second attempt with wasabi and on from there with the other flavours.
  • Don’t drop too large pearls because they won’t have time to set in the oil. My best pearls were about 2 mm (1/8 inch) in diametre, ones that ended up being about 5 mm (1/4 inch) became deformed because they didn’t have time to set as a pearl.
  • My glass was was 12 cm (4.5 inches) high with about 10 cm (4 inches) of oil, so if you have a taller glass with more oil, your pearls can be larger.

Aren't you curious about how I plan to use these little pearls?

Aren’t you curious about how I plan to use these little pearls?

our-growing-edge-badge

My friend and fellow bunny lover Genie from over at Bunny, Eats, Design suggested I post this in Our Growing Edge, a monthly blogging event to encourage us to try new food related things. Kindra from California Cavegirl Kindra is the host for this month’s event. If you have a blog and you are eating or cooking something new this month, click here to join.

Read Full Post »

Several years ago we dined in a lovely bistro in the heart of the financial district downtown Toronto called Forte Bistro and Lounge. JT had read about Chef Greg Argent in one of our foodie magazines and he knew right away we had to experience his cooking! Sadly, the restaurant is no longer around but the delicious memories of Chef Argent’s cuisine still lingers on.

A delightful combination of rich broth and caramelized onions in a perfectly bite-sized pillow.

A delightful combination of rich broth and caramelized onions in a perfectly bite-sized pillow.

One such dish was the unique French Onion Soup Dumplings ($11): a tender pasta dumpling filled with braised veal broth and gruyère cheese; what made this tasty dumpling so unusual was the surprise of the explosion of veal glacé that would fill you mouth with flavour after biting into the tender pasta, immediately reminding you of French Onion Soup! I have tried many times to recreate this wonderful dish without success and then Chef Argent revealed his ‘secret’ when I asked how he does it. Today I will share with you the secret of the tasty, unassuming little dumpling, but you must swear never to speak of it again! Although the recipe is laborious, I urge you to make a batch to serve as an amuse bouche or little hors d’œuvres at your next Super Bowl party (you may freeze uncooked dumplings on a parchment lined sheet lightly dusted with flour and then put them into a zip-lock bag), you will not only thank me for the wonderful compliments your lucky guests bestow upon you, you may even wish to send me gifts! 😉

Did you figure out the 'secret'?

Did you figure out the ‘secret’?

French Onion Soup Pillows

makes 60 single bite pillows

Ingredients for the broth:

  • 0.5 kg (about 1 pound) Beef bones or oxtail bones
  • 130 g (about 4.5 oz) sweet onion, thinly sliced
  • 1 tsp merlot salt (from my friend Kristy at Eat, play, love; our family food adventures)
  • 600 mL water, divided
  • 1 bay leaf
  • 1 tbsp cooking sherry
  • 3 g (a scant teaspoon) powdered gelatine (agar agar will not work here)
  • 1 cup caramelized onions (please click here for a great recipe)
  • Home made pasta dough or 60 square won ton wrappers (for a great pasta dough recipe, please check out Chicago John’s kitchen)
  • Gruyère cheese to garnish

Directions for the broth:

  1. Preheat oven to 350°F 177°C. Put a 11.5 cm x 21.5 cm (4 1/2″ x 8 1/2″) metal loaf pan into the freezer.
  2. Sear the beef bones well on high heat. Remove from pan and set aside. Deglaze the pan with 1 tbsp cooking sherry or port. Add the onions to the pan and sauté for a minute or so on the residual heat from searing. Spread the onions out evenly on the bottom of the pan. Return the beef bones to the pan and nestle into the onions, add the merlot salt, bay leaf and 300 mL water. Cover with tin foil and roast in the oven for about 1 hour, checking occasionally to make sure the water hasn’t evaporated, top up as needed.
  3. Remove pan from oven and remove tin foil. Add an additional 200 mL water and boil on the stove top until liquid is reduced to about 150 mL (about 5 oz). Strain through a fine sieve and press as much liquid out of the cooked onions as possible.
  4. Set aside about 60 mL (1/4 cup) of the stock and cool. Keep the remainder stock on a soft boil.
  5. Stir the gelatine into the cooled stock until melted. Add the boiling stock and stir well. Allow to cool to room temperature and pour into the super cooled loaf pan. Refrigerate until set.

FrenchOnionSoupPillows_1960

You can develop a little assembly line to speed up the process!

An unexpected, rich, delicious soup explodes in your mouth when you bite into each pillow.

An unexpected, rich, delicious broth explodes in your mouth when you bite into each pillow.

Directions for assembling the pillows:

  1. Roll out the pasta dough to #4 thickness on the Kitchenaid Pasta roller (less than 1 mm or 0.125 inch). Using a 6-7cm (2.5″ -2.75″) oval cookie cutter, cut out the ovals to make both sides of the pillows.
  2. Remove the jelled broth from the fridge and cut into 0.5-1cm (0.25″-0.5″) rectangles.
  3. Onto each oval, more or less centred, add one jelled broth rectangle and about 1/4 tsp caramelized onion. Wet your finger and run a wet bead along the outer edge of the pasta oval. Turn up both sides of the oval and squeeze the edges together to bind — you don’t want these pillows to burst open when boiling.
  4. Lightly flour a parchment lined baking sheet and add each finished pillow to it so as not to touch each other. Freeze and bag frozen pillows into a zip lock bag or container. Use as many as needed.
  5. Bring an appropriate  amount of salted water to a boil. Add frozen pillows and boil until they float to the surface. Remove with a slotted spoon onto a clean dish cloth to drain off water. Present on a Chinese soup spoon and garnish with a small amount of finely grated gruyère cheese. Brûlée the cheese until it is golden and crispy. Serve immediately.

FrenchOnionSoupPillows_1950

The Brûléed Gruyère cheese taste just like the burnt bits on a French Onion soup bowl.

Read Full Post »

Last fall we had my lovely niece and her beaux for the weekend; Laura recently graduated from Western University with her degree in Law and she is articling in Toronto. I wanted to make a traditional Hungarian dinner because they had never had Hungarian food. I had intended to follow the recipe verbatim, but I just couldn’t help myself and did end up changing it a slight bit. The result was wonderful and JT thought I finally got it right, the way he remembered my dear Mom to make this tasty dish. The original recipe is from Ilona Horváth’s “The Traditional Hungarian Kitchen” cookbook, published originally in 1996.

Although this recipe takes 2-3 days to prepare, there is little kitchen time as most of it is in the marinade. The finishing is relatively easy. The original recipe was made entirely in a dutch oven but I’ve modified it to a slow cooker because I was not able to be at home the day we wanted to have it. The gravy is a tangy, creamy gravy balanced with the addition of caramelized sugar, but it is NOT SWEET. The julienned carrots and parsnips add texture and natural sweetness. The meat comes out fork tender and you really don’t even need a knife to eat it.

HungarianVadasHus_1176

The tangy gravy goes perfectly with the sweet carrots and parsnips. Sorry the photo is so hot, it was night when I shot this.

Vadas Hus; Hungarian Wild Meat revisited

Serves 4-6. This recipe takes 2-3 days to prepare.

Ingredients:

  • 800 g (1 3/4lb) eye of round or good stewing beef, whole
  • 50 g  bacon (pancetta works)
  • 2 tbsp canola oil (the Hungarians would use lard here)
  • 2 tbsp all purpose flour
  • 10 g (scant tablespoon) sugar
  • 1 tsp white vinegar
  • 2 tsp dijon mustard
  • 3/4 Non-fat Greek yogurt (or sour cream)
  • 100 g (about 1 cup) julienned carrots
  • 100 g (about 1 cup) julienned parsnips
  • 1-2 tbsp cold water

Ingredients for the marinade:

  • 50 g (about 1/2 cup) grated carrots
  • 50 g (about 1/2 cup) grated parsnips
  • 1 small onion chopped roughly
  • 1 L  (about 4 cups) water
  • 5-6 black peppercorns
  • 2 bay leaves
  • salt to taste
  • 2 tsp white vinegar

Directions:

  1. Tidy up the meat by removing any excess fat and membranes. Allow to come to room temperature.
  2. To prepare the marinade, cook the carrots, parsnips and onion in 1 L water with black pepper, bay leaves and salt until half cooked. Add the vinegar and cool to room temperature. Pour over the meat and refrigerate 2-3 days turning every so often. Remove the black peppercorns.
  3. Remove the meat from the marinade and dry completely, bring to room temperature. In a large dutch oven, heat the canola oil and cook the bacon and reserve, add the meat  to the bacon oil and sear each side well.
  4. In the meantime, pre heat the slow cooker on high and add the original marinade, reserved bacon and bay leaves. Once it is warm add the seared beef and cook until beef is tender (3-4 hours) turning often.
  5. Remove the meat from the slow cooker and allow to rest. Discard the bay leaves. Strain the vegetables from the slow cooker (reserve the liquid) and add to the dutch oven, sprinkle with flour and fry to brown lightly. Slowly add the reserved marinade liquid and stir to thicken.
  6. In a small sauce pan, melt the sugar until it is golden in colour (not dark) and then mix with a couple of tablespoons of cold water, pour into the thickened vegetables in the dutch oven. Simmer for 5 minutes and add the remaining 2 tsp vinegar and Dijon mustard. Purée the entire gravy adding the yogurt or sour cream with an immersion blender until very smooth. You can run this through a fine sieve for a very smooth gravy. Keep warm.
  7. Boil the remaining julienned carrots and parsnips until cooked but there is still a slight bite to them. Strain and keep warm.
  8. Slice the meat into 1 cm or 1/2″ slices and plate over the puréed gravy, top with the julienne parsnips and carrots. Garnish with flat leaf parsley.
  9. Serve with Hungarian Bread Dumplings.

HungarianVadasHus_1179

JT loves it when I pan sear the gombocz in butter and it becomes crispy and delicious!

Read Full Post »

As you know I’m a free agent at this particular juncture in my life and although I am keeping my ear to the ground and looking actively for work in my field, I am pretty realistic about the prospects out there and I’m keeping an open mind. The support from my blogging peeps is phenomenal and I thank you for your interest and offer to help! I am constantly touched and surprised by the generosity and kindness of, for all intensive purposes, strangers! It is because of you I am keeping my mind open for alternative opportunities, one such opportunity became a reality just two weeks ago.

About a year and a half or so ago, I had the good fortune to be invited to a taping of Top Chef Canada, Season 3 and there I met with Lucie Richard, Toronto-based Food Stylist with whom I chatted extensively about her craft. At that time, she very generously offered to have me ‘assist’ on one of her photo shoots. Two weeks ago it came to fruition and I assisted on a National Brand ice cream shoot. You cannot imagine how excited I was!

Ice cream is one of the most difficult things to shoot because of the very short window of opportunity before it begins to melt. I was thrilled to experience such a challenging product with one of the best in the field; Lucie was kind and generous with her advice and patience and she taught me an incredible volume of information on shooting ice cream. The tricks of the trade tend to be quite personal and what one stylist does may not necessarily be exactly what another does, so experiencing variety is key to coming up with your own tricks of the trade. The client has very specific expectations in what the characteristics of the ice cream should look like so you really need to know what you’re doing.

We used dry ice to super cool the tools, we worked in small batches for short periods of time, constantly re-freezing the ice cream so it doesn’t glaze over in the melting process. And the studio was kept very cool with air conditioning so I brought a sweater and I even brought gloves in case I needed to warm my hands. Of course, the work is fast and furious and there is no time to be cold.

The trends 15-20 years ago was to use ‘fake’ product. Ice cream was a highly guarded secret recipe of shortening, food colourings and inclusions. Today, most companies want the real deal and that in itself presents some interesting opportunities. And then there is Photoshop®, which has at times saved this incredible craft. We even took Photoshop into consideration, shooting slightly brighter and darker versions of the same shot in order to make sure we have what it takes to make the best composite. Of course, the Photoshopers are so skilled and talented, you can’t tell that they have added a little of this and a little of that to make that shot.

The client was very happy with the ice cream photo and we even finished a few minutes early. It was a huge success for me, and gave me the confidence to send out notes to my Food Stylist peeps that I’d love to assist. Who knows, this may become something!

Sadly, blogging is the driver and result of cooking passion; I make recipes for meals that I want to blog about. But we also want to eat the food I blog about. It’s wasteful to make an extra portion just for the blog so either JT or I will suffer with the pretty but stone cold blog version of a dish or eat separately which is what happened with this amazing ‘ravioli’.

uova-da-raviolo_1069

The pasta is relatively thin, so you can see all the good stuff inside!

Some time ago I saw this unique ‘ravioli’ treatment on my friend Celi’s blog (the kitchen’s garden), she was inspired to make this delightful dish after her daughter who works in a very upscale restaurant in Melbourne told her about it. We were at the cottage at the time I read the post and you know how we are unable to divert from plan because of ingredient limitations, so I was itching to make this beautiful dish as soon as we returned to the city.

One thing led to another and it wasn’t until the Friday before Thanksgiving that I finally got it together to make this tasty dish. Thank you Celi, it is exceptional! It’s reasonably fussy so I will have to figure out a way to simplify it so I can make it as a starter for a dinner party. I used John’s recipe (from the Bartolini Kitchen) for the pasta dough (with minor modifications) and Celi’s rough description for the filling. Even JT commented that he would definitely have it again. So it’s a win/win, all the way around. Thank you Celi and John for inspiring me to make this gorgeous dish.

The ravioli is comprised of sautéed spinach, ricotta and parmesan cheese  and the crowning glory is the simple egg yolk enveloped within the light pasta dough. When it is cooked, the yolk is simply warmed so that it becomes thick but remains runny and once it’s broken into, it mixes with the sage brown butter and becomes a delightful sauce over the ricotta, spinach and pasta. This is definitely a winner and will be shared with friends soon.

Ravioli with Egg Yolk and Sage Brown Butter Sauce (uova-da-raviolo)

I forgot to sprinkle additional parmesan on this one, shhhh.

I forgot to sprinkle additional parmesan on this one, shhhh.

Serves 2 with lots of pasta left over (I made additional plain ravioli and filled it with seasoned ricotta and froze them for future use).

Ingredients, for the pasta:

  • 1 scant cup flour
  • 2 egg whites

Directions, for the pasta:

  1. In a food processor, combine the flour and egg whites and process until you achieve a ball of dough.
  2. Allow the dough to rest for 30 minutes.

Ingredients, for the brown butter sauce:

  • 2 tbsp unsalted butter
  • 1 tbsp finely sliced sage
  • 1 clove garlic, finely minced

Directions, for the Brown Butter Sauce:

  1. Melt the butter and cook until it is brown, remove from heat and add the sage and garlic and allow to infuse while making the filling.

Ingredients, for the ravioli filling:

  • 2 whole egg yolks, at room temperature
  • 2 handfuls of spinach
  • 1/4 cup ricotta
  • 1 roasted garlic, puréed (I used a fork)
  • 2 tbsp Parmesan Cheese, and 1 tbsp for garnish

Directions, for the ravioli filling:

  1. In a small frying pan, sauté the spinach with a splash of EVOO until wilted, set aside to cool.
  2. In a small bowl, mix the ricotta, roasted garlic and 2 tbsp parmesan cheese. Taste and season with salt as desired.

Directions, for assembly of the ravioli:

  1. Heat a large deep pan of salted water to a steady boil.
  2. Roll out four thin sheets of pasta about 10-15cm in diameter (4-6″) (I used #5 on my Kitchenaid Pasta Attachment, but I think #6 would have worked very well too).
  3. In the centre of two of the pasta sheets, add a mound of spinach and on top of that add 1/2 the ricotta mix. Make a divot in the centre and add the room temperature, raw egg yolk. Place the second sheet on top and push out any air and seal the edges well. Cut this into a shape or leave it rustic.
  4. In the meantime, reheat the brown butter sauce on low.
  5. Boil the large ravioli for 2-3 minutes or until the pasta is completely cooked but leaving the egg yolk runny. Serve with the hot brown butter sauce and parmesan cheese for garnish. If you have a few extra sage leaves, add them as garnish too.
  6. Enjoy while the yolk is still runny.

uova-da-raviolo_1074

The egg yolk oozes out and mixes with the brown butter very nicely.

uova-da-raviolo_1072

We had these for lunch, for appetizers I will make them smaller and use small egg yolks!

Read Full Post »

Our dear friends Rae and Monica dropped in the day before my birthday party to share a little bubbly with us to celebrate! It was such a lovely gesture since they live about 50 minutes away. They dropped their three girls and some friends off on Bloor Street in our hood because we have such lovely shops to browse through; our local Chapters is a great visit because its a converted theatre with beautiful architectural features not to mention the cool stuff to buy! And then there is Sweet Flour where you can get a custom-baked fresh cookie in about a minute (they have a variety of raw doughs and a whole mess of inclusions, you pick the dough and inclusions and presto, a freshly baked cookie!). Definitely worth visiting. They also shopped the trendy clothing stores while we visited with Rae and Mon and a couple of hours and bottles later their girls dropped in! It was such a lovely visit; we’ve known the girls since they were born, so it was nice to have adult conversations. The girls very kindly and generously bought us a box of red currants! How nice is that? With everything going on, my big bash the next day and leaving in a couple of days for a short vaycay, I knew I had to do something very special with these delicate berries, but what? Then I remembered my dear friend Sissi makes the most incredible hot and sweet jellies so I took a little trip to her beautiful blog With a Glass to see what kinds of jellies she has made and boy, what a selection. Sadly their were no jellies for red currants, so I expanded my search on the web and found this lovely jelly recipe by David Lebovitz’s Red Currant Jam recipe, with some artistic license! Thank you Sissi for the inspiration.

RedCurrantJelly_0581

it’s a perfect accompaniment to cheese

The jelly is slightly sweet with some smokey heat right at the very end, nothing unpleasant, and if I were to make it again, I would likely add a bit more heat to it.

DinnerwRedCurrentJelly_0561 copy

We had this jelly with left over cheeses and fruits from my birthday bash!

Red Current Jelly

based on David Lebovitz’s Red Current Jam

Ingredients:

  • 1 part currents (150g)
  • 1/2 part sugar
  • 1/2 guajillo pepper
  • 1/4 ancho pepper
  • 1/8 haberno pepper

Directions:

  1. Finely chop the three varieties of peppers, including the seed if you prefer a more robust heat.
  2. Remove the large stems from the currants, rinse. Add the currents and the chopped peppers to a pot large enough to be able to add enough water just so that it covers the currents and the peppers.
  3. Cook the currants and the peppers stirring frequently until they’re soft and wilted (like you would in making cranberry sauce).
  4. Weigh the glass container you will transfer the purée into. Press the purée through a fine sieve to remove the seeds, stems and pepper bits into the weighed glass container. (or if you have a scales which tares, simply put the glass container on top, tare it and press the currant pepper mix into it.
  5. Now weigh the purée in the glass container, subtract the first weight from the second weight and divide it by four (if you have a scale that tares, this is much easier).
  6. For each pound (kilo), add the 1/4 of the amount of sugar to the pot.
  7. Mix the purée and the sugar and cook over medium-high heat, stirring until the sugar is completely dissolved. Once the mixture is at a rolling boil, let it boil for five minutes undisturbed.
  8. After five minutes, turn off the heat and skim off any scum.
  9. Pour into sterilized jars up to the top and screw on the lids firmly. Turn the jars upside down and let cool completely (this is Lebovitz method to can, it worked for me!).

Speaking of the big bash, here is the photo book I created so I can remember the wonderful day everyone made for me (any references to age were intentionally left out, so don’t be rude and ask me how old I am ;-)!):

Click here to view this photo book larger

Shutterfly offers exclusive layouts and designs so you can make your book just the way you want.

Read Full Post »

We’ve all made pesto, right? Well, maybe not everyone, so here I will share my favourite recipe. You can use this mix as a dip, on toasts, as a base for pizza, a sandwich or even a dollop in the middle of a lovely creamed soup. It’s quite flavourful so you don’t need a lot of it. I usually just eyeball this recipe, but this time I got out the scale and measuring cups so I could have tangible measurements.

A delicious combo of flavours

A delicious combo of flavours

Traditional Pesto

Makes about 1/2 cup

Ingredients:

  • 30 g fresh basil, leaves removed, washed and dried
  • 40 g (1/3 cup) toasted pine nuts
  • 35 g (1/3 cup) freshly grated Parmesan
  • 3 cloves of garlic (about 10 g) or to taste
  • EVOO (Extra Virgin Olive Oil)
  • salt to taste

Directions:

  1. In a food processor with metal blades combine the basil, pine nuts (make sure they are cool), Parmesan and garlic. Pulse adding a slow stream of EVOO to the consistency desired (I like my Pesto a little chunky and not too wet).
  2. Add salt to taste, but remember that the Parmesan is rather salty.
  3. Serve mixed into warm pasta with quartered grape tomatoes and shaved parmesan.

IMG_4188_BLOG

Quartered Grape Tomatoes add a lovely acidity to the dish.


Read Full Post »

The same restaurant that I mentioned in a previous post, Bombay Palace serves a pickled carrot that I just can’t get enough of. It’s sweet, tangy and crunchy and delicious. Their version is very red because they put food colouring into it, I omitted the colouring.

Lightly crunchy and packed full of flavour

Carrot Pickle

Original recipe from here, but I changed it up.

Serves 4-6

Ingredients:

  • 1 medium carrot, about 200 g cut into cubes
  • 1/2 tbsp mustard powder
  • 1/4 tsp chili powder
  • a pinch each ground cloves and cardamom
  • 1 tsp salt
  • 1/2 cup rice vinegar
  • 1/4 cup olive oil

Directions:

  1. Blanche the carrots and stop the cooking in an ice bath. Drain well.
  2. Mix remaining ingredients in a seal-able container, add the carrot and refrigerate for 1-2 days.
  3. To serve, drain and rinse.

Sweet Mango Chutney

Ingredients:

  • Mango, not too ripe
  • 1/4 cup chopped red onion
  • 1 clove garlic, finely minced
  • 1 tbsp freshly grated ginger
  • 1/2 tsp ground cinnamon
  • pinch of ground cloves
  • 1/2 tsp salt
  • 1/2 cup cider vinegar
  • 1/4 tsp chili paste
  • water

Directions:

  1. Peel and seed the mangos and chop into 5-10 mm cubes.
  2. Place all ingredients into a non-aluminum saucepan and bring to a boil, reduce heat and simmer for 1 hour or until fruit and onion is very soft. Lightly mash with a fork. Allow to cool and place in a clean glass jar. Store in the refrigerator

Read Full Post »

Good day everyone, I’m still in Lyon (figuratively speaking, of course) and cooking with Chef Villard and his lovely recipes. This is a condiment that he paired with lightly cooked snow peas and a little goats cheese and boy was it good. I particularly loved the colour, unfortunately when you add the goats cheese it lightens up quite a bit, but by then you’re starving for having enjoyed the aromas of the meal all afternoon long!

That sure is green

To be honest, JT wasn’t in love with the pesto which was originally Rocket (arugula), pine nuts and Parmesan cheese so I decided to be inspired by Chef Villard and not follow the recipe 100% (of course you did, says JT). The rocket tends to get a touch bitter when processed, although I do enjoy the peppery taste I wanted to temper the bitterness so I used the same amount of spinach as the rocket. Then I was thinking of the entire meal and wanted to repeat some flavours for consistency, so instead of pine nuts, I used roasted hazelnuts (the pumpkin soup has a drizzle of hazelnut oil to finish it). So in the essence of our meal in Lyon, here is the pesto recipe.

Rocket and Spinach Pesto with Hazelnuts (on Snow Peas with Goats Cheese — not shown)

Serves 6 (I had enough pesto left over for some hors d’œuvres the next day),

Ingredients:

  • 35 g roasted hazelnuts
  • 35 g combined baby rocket (arugula) and baby spinach
  • 1 clove garlic, finely minced
  • 1 tbsp parmesan cheese
  • 2-4 tbsp EVOO
  • Salt to taste
  • 60 g snow peas
  • 20 g goats cheese

Directions:

  1. In a small food processor add the hazelnuts, rocket, spinach, finely minced garlic and Parmesan cheese and drizzle a small amount of EVOO to get the chopping going adding a little bit to allow the purée to happen with ease (you don’t want this too runny). Taste and salt as desired.
  2. When you have achieved the consistency desired set aside (this is actually quite good if you make it in advance and the flavours have time to really develop).
  3. Cook the snap peas and as soon as they are done, immerse them into ice cold water to stop the cooking quickly. Simmer water on the stove to reheat just prior to serving.
  4. To serve, add a few tablespoons of the pesto to the hot, drained snow peas and crumble the goats cheese into it, stir lightly to distribute evenly.
  5. Enjoy warm.

Read Full Post »

Whilst in Lyon I also bought some dark mustard seeds (now I know I’m not the only one who buys food as souvenirs). Apparently the darker the seeds the hotter the mustard, I didn’t know this then, but as it turns out, dark is good because I LOVE a hot mustard. Another thing I didn’t know in making mustard is that you can tame the heat by cooking the mustard, the longer you cook it, the less hot it will be. Go figure.

I mixed in my yellow mustard seeds for good measure

I didn’t cook mine at all.

If you’re wondering, I made the label! The jar came from a trip out to Whistler, BC about 20 years ago. We ‘needed‘ Dijon mustard for a dinner in our condo and the one I bought came with this adorable little jar (you knew I was gonna buy that jar whether we needed mustard for our dinner or not!). Anyway, I loved the jar and the little wooden spoon, and it’s perfect for my home made mustard.

I remember seeing a post from my friend Lorraine at Not Quite Nigella and she made home made mustard from scratch. I know my Mom used to make it from time to time, but sadly I never got the recipe and when Lorraine made it a few months ago, I knew I had to give it a try. I won’t be buying grainy mustard again. It’s easy to make and the taste totally rocks. You have to leave it for a couple of days otherwise the seeds are quite bitter, but once it ages, it is lovely.

I made this batch to take to my brother’s cottage for Thanksgiving weekend. I served it with Turkey Sausages with the Fluffy Buttermilk Cakes of Pan breakfast JT and I made.

Grainy French Mustard

Makes about 125 mL or 1/2 cup

Ingredients:

  • 6 tablespoons mustard seeds (I used 1 tbsp yellow mustard seeds and 5 tbsps brown French mustard seeds)
  • 1/2 cup mustard powder
  • 2 teaspoons salt
  • 3 tablespoons white wine vinegar
  • 3 teaspoons honey (this simply smooths out the heat, it doesn’t actually make the mustard sweet)
  • 1/3 cup water (use cold water if you like your mustard hot and spicy or use warm or hot water if you like your mustard mild)

Directions:

  1. In your dedicated spice grinder or mortar and pestle, grind about 1/3 of the total seeds. s
  2. In a small bowl, combine the ground and whole seeds, mustard powder and water; stir to combine.
  3. Rest this mixture for 15 minutes, then add salt, white wine vinegar and honey (for a milder mustard, you can gently heat this mixture in a saucepan for a few minutes).
  4. Pour this mixture into a sterilized glass jar (the longer it stands the thicker it gets) and allow to age for at least 12 hours or overnight to settle the flavour (it is very bitter to use immediately, the flavour really smooth out over time).
  5. You need not store mustard in the refrigerator, but I do.

Read Full Post »

Mango BBQ Sauce

I wanted to come up with an alternative to adding sugar to my BBQ sauce for the pulled pork, after all, we reduced the fat by using the Tenderloin and I thought of Mango. Mango pairs really well with savoury dishes so I cam up with this recipe and tried it out tonight, slow cooking my tenderloin until it literally falls apart.

Tangy and naturally sweet, a perfect accompaniment to any meat, particularly Pork.

Mango BBQ Sauce

Makes about 250 mL

Ingredients:

  • 100 g mango (you could use more, but I didn’t want it too sweet)
  • 50 g chopped onions
  • 120 g tomatoes (I just used vine ripened because our lovely neighbours gave us some)
  • 3 large cloves garlic, finely minced
  • 1 tbsp Éva’s Hot Sauce
  • 1 tbsp balsamic vinegar
  • 1 tsp salt
  • water

Directions:

  1. Put everything into the container of your immersion blender and blend until smooth, adding water until you reach your desired consistency.
  2. Press through a fine sieve to get rid of the lumps, tomato seeds and such.
  3. You can can cook this down for about 30 minutes or just use it in your recipe as is (I did for my pulled pork as it cooks for several hours on the BBQ and cooks down anyway).

Read Full Post »

Eva’s Hot Sauce

This was an unexpected surprise in the spring

It has more tomatoes than I would have thought

We’ll likely have enough for one salad

This year I was too late in getting tomato plants but nature gifted me with a sprout from last year. Now it is about 90cm (36″) tall and has a good lot of tomatoes growing on it.

But I was able to get some chili pepper plants in and now I have a lot of chili peppers, more chili peppers than JT and I would eat. So I got to thinking, what can I do with chili peppers? Hot sauce, of course.

This hot sauce turned out quite complex with a good amount of heat, but also a great flavour. It’s uncooked, so it won’t last forever in the fridge, but hot sauce rarely lasts in my house anyway.

I would totally spread this over my Heuvos Rancheros, Shakshuka or even in Pulled Pork. Or add it to a BBQ sauce for the pulled pork to make it even more awesome than you would ever imagine. The possibilities are endless.

Careful, it’s hotter than it looks!

Éva’s Hot Sauce

Makes enough to fill a 250 mL bottle

Ingredients:

  • 20 g fresh red chilis
  • 20 g smoked Morita Chilis (I got these when we were down in Wisconsin visiting our friends Paul and T)
  • 20 g garlic, minced finely
  • 2 cloves
  • 1/2 tsp dried oregano
  • 1/8 tsp cumin
  • 1/2 tsp salt
  • 5 pink pepper corns
  • 1/8 tsp fennels seeds
  • 1/4 cup puréed tomatoes
  • 1/4 cup puréed sweet red peppers
  • 1 tbsp cider vinegar
  • 2 tbsp tahini paste

Directions:

  1. Rehydrate the Morita Chilis in about 250 mL water, remove seeds and reserve hydrating liquid.
  2. Clean and remove seeds from the fresh red chilis.
  3. Put everything into the jar of an immersion blender and blend until you achieve a smooth paste, adding a little of the reserved hydrating liquid to achieve your desired consistency. You’ll want to taste for seasonings, but remember, it won’t really come alive until at least 24 hours in the fridge.
  4. Press through a fine sieve and pour into a clean container. Refrigerate for 24 hours. Taste again and adjust salt and vinegar to taste.
  5. Enjoy with hamburgers, hot dogs, steak or use as a flavouring in other sauces or stews.

A little dab will do you

Notes:

  • The Morita Chilis lend a smoky flavour to the sauce.
  • Rick Bayless uses sesame and pumpkin seeds puréed to cut some of the heat in a couple of his hot sauce recipes, so I thought, why not tahini paste? It does make the sauce more caloric and thick, but it also smooths out the heat.
  • I added the spices that I thought would work in the hot sauce, you can adjust to your taste or even choose entirely different combos!

;

Read Full Post »

We are trying to eat more fish these days and I’m constantly cruising the web trying to find delicious and unique ways to present said fish. The internet has been busy with peaches recently as they are in season so I created this recipe to include them. Last week we had a grill Tilapia with quinoa tabouleh (or this one) and I wanted a little something to spice it up, so I came up with a Peach Salsa that was quite tasty so I thought I’d share it with you. I’ll leave the ingredients quantities to your own taste, after all, these recipes are meant to inspire.

The small dice allows it to be used as a garnish, plus I love the way it looks

Peach Salsa

Serves 4-6,

Ingredients:

  • Peaches, finely diced 0.5cm or 1/4″ cubes (I left the skin on for texture, plus I always have a really hard time getting the skin off, no matter what technique I use).
  • Jicama, finely diced 0.5cm or 1/4″ cubes
  • Green chili peppers (seeded), finely diced 0.5cm or 1/4″ cubes
  • Sweet red pepper, finely diced 0.5cm or 1/4″ cubes
  • Garlic, finely minced
  • Green onions, finely minced
  • Thai basil, finely chopped
  • Mint, finely chopped
  • Cilantro, finely chopped
  • Rosa’s Lime Cordial, just to wet and mix everything together
  • Salt to taste

Directions:

  1. Combine everything in a glass bowl and refrigerate, this is much better if it can sit for an hour or so.
  2. Garnish with parsley, mint or Thai basil and serve on top of grilled white fish.

Tasty on crackers too

Read Full Post »

I was over at Sissi’s blog last week and was intrigued by her Korean Pancake with Shrimp and Scallop. It really wasn’t the recipe that intrigued me, but her description of this unusual dish: “I was literally spellbound by this extraordinary snack” and as many of you commented I was curious to see why such a simple dish could possibly spellbind a sophisticated cook, like Sissi. So I had to make it.

When I mentioned to JT that we were having this pancake for dinner, he was skeptical, but he is open minded and will try anything once. After he finished 2/3’s of the dish, he turns to me and says “I would like you to make this again”. Now THAT is success in my books.

My first attempt was Sissi’s recipe verbatim (with the exception of the sauce, to which I added a bit of fresh ginger), but sadly the pancake broke in half and was an unco-operative subject for a photo, so of course, I had to make it again, with a twist! The texture of this pancake is really nothing like a North American pancake at all, so if you are expecting light and fluffy batter, you will be disappointed. It is dense (as if you overworked a North American pancake and the gluten’s were invigorated!), slightly chewy with a nice firm texture. There is a touch of sweetness from the corn flour. The sauce is really incredible and I would recommend it for anything, not just this dish (such as scallops on a bed of greens!).

Gluten Free South Western Korean-inspired Pancake

I didn’t notice any taste difference using the chick pea flour. Even the texture was relatively similar.

Recipe adapted from Sissi’s blog With a Glass (click here for original recipe)

Serves 2

Sauce Ingredients:

  • 3 tbsp soy sauce
  • 1 tbsp rice vinegar
  • 1 stalk of green onion finely cut
  • 1 clove garlic, finely grated
  • 1/2 tsp fresh ginger, finely grated
  • 1/2 tsp sesame oil
  • 1/2 tsp toasted sesame seeds

Directions:

  1. It’s best to make the sauce first so it has a little time to blend and allow the flavours to meld together. You can even do it a day ahead, adding the green onions and sesame seeds just when you are ready to serve so they remain crisp.
  2. Combine all ingredients and set aside.

Pancake Ingredients:

  • 3 spring onion stalks, sliced thinly
  • 1/2 medium hot green chili, finely chopped
  • 1/2 medium hot red chili, finely chopped
  • 1 clove garlic, finely grated
  • 50 g chorizo sausage, finely chopped
  • 30 g fresh or frozen corn
  • 40 g red pepper (capiscum)
  • 40 g crimini mushrooms

Batter Ingredients:

  • 56 g chickpea flour
  • 20 g corn flour (take fine cornmeal and run it through a food processor until it resembles the texture of regular flour)
  • 200 mL ice cold water
  • 1/3 tsp salt
  • 1/2 tsp sugar
  • 2 egg whites, beaten

A very tasty lunch, indeed

Directions:

  1. Combine all the batter ingredients and mix well with a whisk.
  2. Heat a cast iron skillet to medium and lightly spray with non-stick spray or olive oil.
  3. Pour about 1/3 of the pancake batter onto the pan, allowing it to fill the entire diametre of the pan.
  4. Add the pancake ingredients, distributing everything evenly so you can get a small taste of everything in every bite.
  5. Pour the remainder of the batter over the the pancake and allow it to cook through. You will see the batter become quite a bit denser looking as it cooks. Carefully flip the pancake so that both sides are golden.
  6. Serve with the previously prepared dipping sauce.

Read Full Post »

We’re having Walnut, Porcini and Morel Crusted Tilapia later this week and I needed a dressing to help jazz up the greens. There is nothing like a good warm dressing over greens, it just wilts the greens ever so slightly making it a delicious meal. The miso paste goes very well with mushroom, emulating the creaminess that some butter would bring to it (I was trying to keep it healthier). I hope you enjoy this Kitcheninspirations original dressing.

Lemon Thyme goes so well with Mushrooms. The sprigs are from the garden.

Warm White Balsamic and Mushroom Dressing

a Kitcheninspirations original recipe

Serves 4

Ingredients:

  • 75 g sweet onions finely sliced
  • 100 g crimini mushrooms finely sliced
  • 15 g light miso dissolved in 120 mL water
  • 50 mL white balsamic vinegar
  • 1 clove garlic finely minced
  • 1 tsp canola oil

Directions:

  1. Heat oil in a small pan, cook the onions until translucent. You may need to add a little bit of the miso liquid. Add mushrooms and cook down so they are quite wilted, add garlic and cook just until you can smell it. Add remaining liquid and white balsamic vinegar. Stir to combine and remove from heat.
  2. Serve hot over greens or Walnut, Porcini and Morel Crusted Tilapia.

Read Full Post »

Ann at Cooking Healthy for Me and Kelly at Inspired Edibles have proven time and time again, that you need not suffer eating healthy, just a few smart choices in the kitchen will take your recipe from high in fat, to low in fat and full of flavour. Today’s recipe chooses a pork loin over pork chops because the loin is far less fatty and the fat that it does have can be easily removed before cooking. It can also be easily measured for portion control (we are using 100g (3 ounces) for a portion size). Today we are using the vegetables as thickeners so that we need not add a roux, or cream or butter saving you oodles of fat intensive calories (you should actually try writing down everything you put in your mouth over one day, and you would be surprised! and then you’ll thank me for this recipe).

That's not butter chicken, it's Pork Medallions in a Sweet Red Pepper and Caramelized Onion Coulis

Pork Medallions in a Sweet Red Pepper and Caramalized Onion Coulis

Serves 4

Ingredients:

  • 400g loin of Pork, all fat removed, cut into medallions about 25g each
  • 1 yellow pepper, roasted, skin removed (see notes and tips)
  • 1 red pepper, roasted, skin removed (see notes and tips)
  • 4 shallots, finely sliced
  • 1/2 sweet onion, finely sliced
  • 2 tbsp white vinegar
  • 1/2 cup low sodium vegetable stock (I like to use Pacific)
  • around 1 1/2 cups water
  • 1 tbsp Dijon mustard (or slightly more to taste)
  • 1/2 tsp salt
  • Non-stick cooking spray
  • 1 green onion and jalopeño pepper finely diced as garnish.

Directions:

  1. Lightly spray a medium sauce pan (large enough for the onions to be about 3 cm thick on the bottom). Add the onions and shallots and cook over medium heat until they are golden, add the white vinegar to deglaze the pan. Add the vegetable stock as required so that the onions and shallots don’t burn or stick to the bottom of the pan.
  2. When the onions and shallots are caramelized, add the roasted peppers and heat through.
  3. With an immersion blender, blend very well until silky smooth. Add the Dijon, salt and blend. If the consistency is too thick, add water until you have your desired consistency (should be the thickness of butter chicken sauce).
  4. Pre heat the oven to 350°F.
  5. In another pan lightly sprayed with non-stick cooking spray, sear the pork until you get a nice caramelization on the crust. Once done, add to the sauce and bake for about 10-12 minutes or until the desired done-ness of the pork (in Canada you can have pink pork as they have bread the salmonella out of it).
  6. Serve over greens or rice or use a flat bread to scoop it up. We’re keeping this on the healthy side, so we’ve put it on greens.

Notes and Tips:

  • If you were not able to peel your peppers, push the finished coulis through a fine sieve to remove the tough skin bits of the peppers.
  • By adding a bit more stock or water, this would make a lovely soup, perhaps with a dollop of fat free Greek Yogurt.
  • We roasted our peppers on the BBQ for a nice smokey flavour.
  • I added smoked paprika to the sauce for my lunch the next day…YUM!
  • As an alternative flavour, I think one tbsp of garam masala and one tsp of meat masala would be fantastic in this sauce.
  • If you’re down right convinced this is not a good sauce, then add a 1/2 cup of cream or a 1/4 cup of butter and be done with it.

Read Full Post »

Older Posts »