Feeds:
Posts
Comments

Archive for the ‘Breakfast/Brunch’ Category

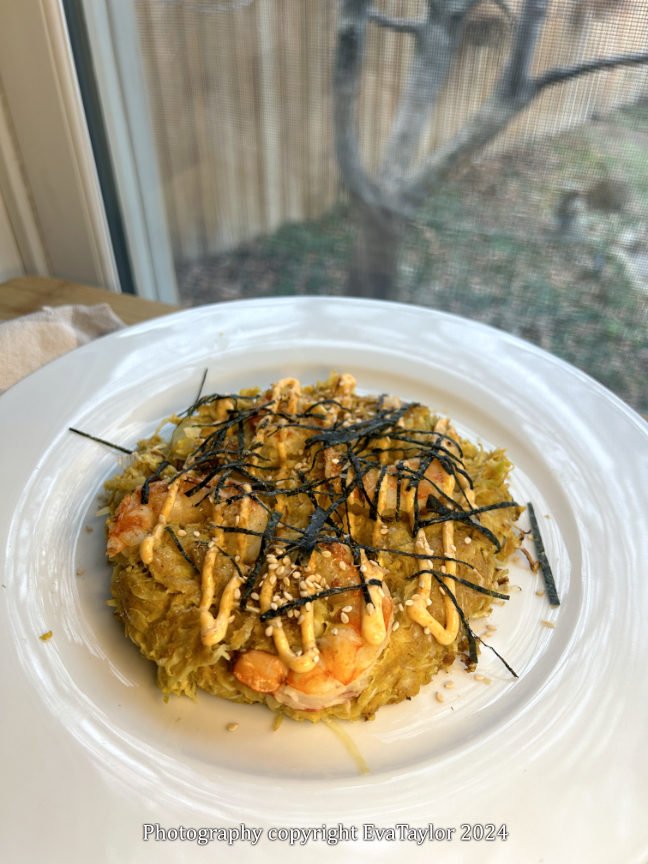
I first began making these delectable dishes in 2019 after seeing them on my friend’s blog (in hiatus at the moment).  But now that we are doing a low-carb diet I still wanted to make them so I came up with this alternate recipe. The flavours are still there but the carb quotient is far less. We enjoy a variety of ethnic foods so this version will be on our menu plan.

Low-Carb Okonomiyaki (Savoury Japanese Pancake)

Serves 2

Ingredients:

  • 15 g butter, room temperature
  • 15 g cream cheese, room temperature
  • 30 g lupin flour
  • 15 g flaxmeal
  • 2.5 g baking powder
  • 1 g salt
  • 1 large egg
  • 15 mL water
  • 15 mL soy sauce
  • 10 g monk fruit/ Erythritol
  • 200 g cabbage, finely shredded
  • 30 g Parmesan cheese, shredded
  • 100 g shrimp, peeled and deveined

Directions:

  1. Combine all of the ingredients but the shredded cabbage and Parmesan cheese and mix well.
  2. Add the shredded cabbage to the cheese mixture, and mix well to coat evenly.
  3. Preheat a cast iron or nonstick skillet to medium heat. Line the bottom of the pan with a parchment circle that is larger than the pancake. Sprinkle the cheese on the parchment and allow it to melt and begin to render. Then evenly distribute the cabbage mixture over the cheese, nestle the shrimp into the cabbage evenly. Cook, covered for 5-7 minutes.
  4. Flip and cook and additional 5-7 minutes or until the shrimp are cooked. You may need to flip one more time to crisp up the cheese on the bottom.
  5. Serve hot with a drizzle of mayo, a sprinkle of bonito flakes, toasted sesame seeds and julienned nori.

Notes:

  1. I used the cheese to help crisp up the bottom crust and it worked out well.
  2. To make it easier to flip, place a piece of parchment under the pancake so you can easily lift and flip it.

The winter light has finally hit us and it ain’t pretty.

Read Full Post »

This is one of my Go-To omelettes. It’s not nearly as fussy as a traditional French omelette so it’s easy and relatively quick to put together. And did I mention that it’s delicious? The cheese caramelizes on the bottom of the omelette so that it becomes this incredibly delicious crust, like the end of a fondu! Also, there isn’t much technique involved so it’s super easy to execute.

This is one of those crusty videos that the kids are doing these days. It turned out fantastic!

Crusty Cheese Omelette

Serves 1 or 2, depending on how hungry you are!

Ingredients:

  • 60 g cheese, grated (see notes)
  • 2 large eggs, room temperature
  • 30 g Greek yogurt
  • Salt and Pepper

Directions:

  1. Sprinkle the cheese in a small non-stick pan and set the heat to medium. Melt the cheese slowly (do not allow it to caramelize at this point).
  2. Combine the eggs, yogurt, salt and pepper and whisk until smooth. Once the cheese has begun to render and bubbling a little, carefully pour the egg mixture over the cheese so that it sits on top of the cheese. Cover and cook until the top of the omelette has set at the top. Remove the pan from the heat (turn it off) and allow it to sit covered for a few minutes (the omelette should come away from the pan at the edges and easily slide out).
  3. Serve warm on warm plates.


Read Full Post »

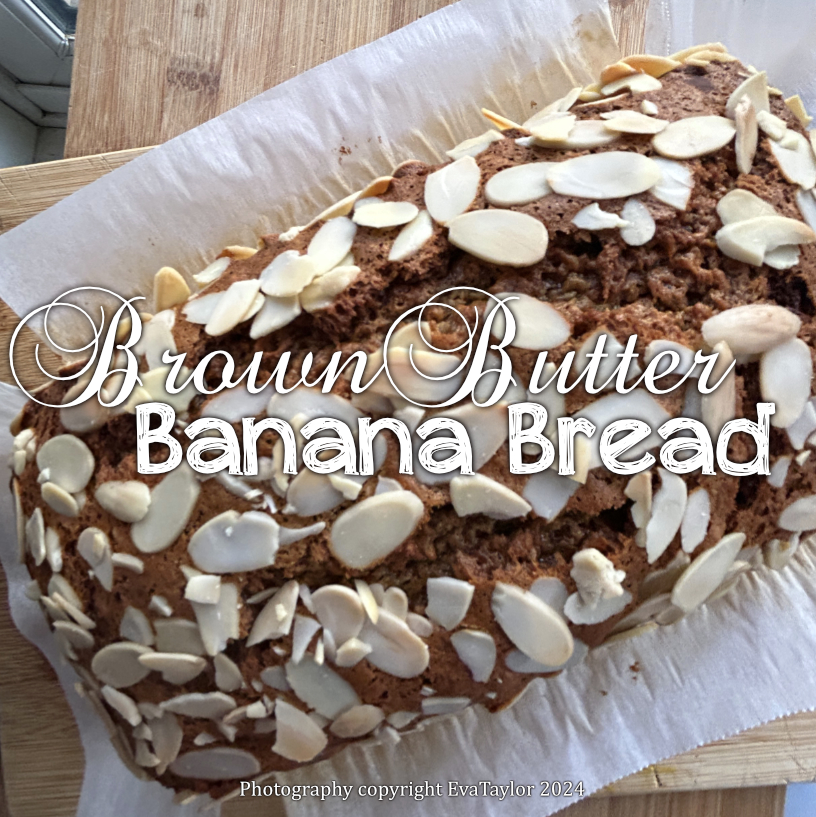
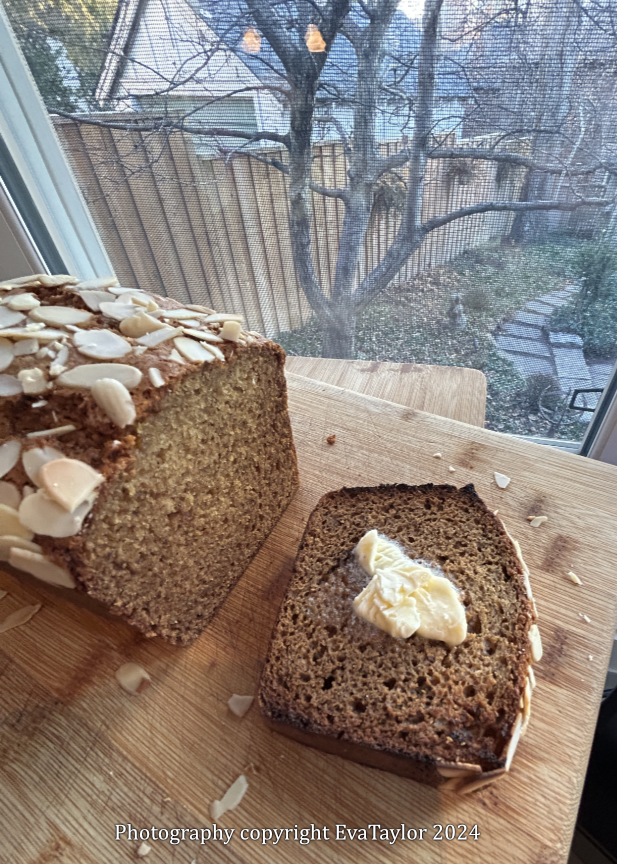
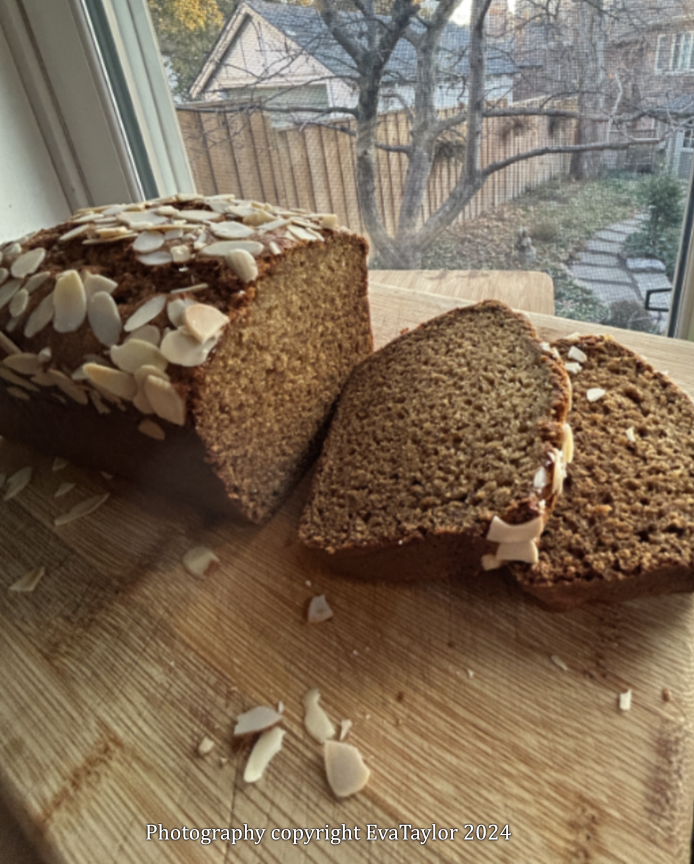
About a week before Christmas, I had lunch with my cousin. I met her at her gorgeous new home in Don Mills. I noticed she had several overly ripe bananas sitting on her counter so I asked what she planned to do with them. She said she already had 16 in her freezer so I suggested I would take three off her hands, and thus was born the following brown butter banana bread!

Nutty brown butter with the flavour and moistness of bananas!

Brown Butter Banana Bread

A Kitcheninspirations original recipe

Makes 1 loaf about 21 cm x 11 cm (~8.25 inches x 4.5 inches)

Ingredients:

  • 113 g butter, melted, browned and cooled
  • 150 g light brown sugar
  • 100 g granulated sugar
  • 2 large eggs, combined and whisked
  • 330 g ripe bananas, mashed
  • 280 g all purpose flour
  • 7 g baking soda
  • 3 g salt
  • 2 g nutmeg
  • Sliced almonds for sprinkling on top

          Directions:

          1. Preheat the oven to 325° F on the convection setting. Prepare a small loaf pan by lining it with parchment paper.
          2. In the small bowl of your food processor, combine the melted, brown butter with the two sugars, process well.
          3. Combine the whisked eggs with the mashed bananas and add it to the sugar mixture while processing. Set aside.
          4. Whisk together the flour, baking soda, salt and nutmeg. Pour the banana mixture into the flour mixture and whisk until no longer lumpy.
          5. Pour it into the prepared pan and sprinkle with the almonds. Bake for 70-80 minutes or until a wooden tester comes out clean. Cool in the pan on a towel on the counter.

          These are amazing toasted.

          Read Full Post »

          These little biscuits are quick and easy to make and take less than 15 minutes to bake up so you can make them last minute or bake a bunch and freeze them.

          They have a nice crumbly texture.

          Low-Carb Cheddar Biscuits

          This recipe is per buscuit

          Ingredients:

          • 30 g lupin flour
          • 15 g vital wheat gluten
          • 1 egg, whisked
          • 2.5 g baking powder
          • 15 g Erythritol
          • 35 g sharp cheddar cheese, grated, Divided
          • Salt

          Directions:

          1. Preheat the oven to 350° F. Butter a small ramekin (I used my Le Creuset mini Dutch oven).
          2. Whisk all of the ingredients together until homogenized and smooth. Pour into the ramekin and top with about 10 g of cheddar and bake for 10-15 minutes or until a toothpick inserted comes out clean.
          3. Pop the muffin out of the ramekin and cut it in half horizontally, and toast until golden.

          Directions:

          • I found the Le Creuset mini Dutch oven a little too large because the biscuits are very filling so next time I’ll choose a smaller pan

          Read Full Post »

          The week before Christmas in 2022, we were in full-entertaining mode, trying to see all of our friends before we started travelling again. We have been doing more and more brunches, particularly in the winter months when driving at night can be more treacherous. I was hoping to do a simple brunch dish so I could spend more time with friends but then I saw this interesting pancake called Dutch Baby and I had to try it. It’s actually a German invention (think Deutsch) that was translated to Dutch in the states, this simple popover-like batter makes a grand entrance with its golden puffy sides and a lovely custardy-base that is perfect for brunchy-style meals. You can make them either savoury or sweet. I chose to make individual Dutch Babies to hold eggs bennies for a bunch we had just before Christmas. There is a bit of strategy so that everything remains hot and ready for serving but fear not, I have documented my process for you, easy peasy.

          Individual Dutch Baby Bennies for Brunch (logistics and all)

          A KitchenInspirations Original Recipe

          This recipe makes 1 serving, please multiply by the number of people you are serving for your ingredients.

          Ingredients:

          • 1 large egg
          • 63 mL milk
          • 31 g flour
          • 7 g sugar
          • salt
          • A smidge of butter for the cast iron pan

          Also required per person:

          • Hollandaise sauce
          • Poached egg
          • about 50 g Ham, shaved, room temperature
          • Half an Avocado

          Directions:

          1. Preheat the oven to 425° F convection, with the cast iron pan in the oven (place cast onto a rimmed baking sheet). You need to put the pan on the centre rack in the oven.
          2. In a blender, combine the eggs, milk, flour, sugar and salt and blend until smooth. Set aside while the oven and cast iron preheat. When the pan and oven are heated to temperature, add a smidge of butter to the pan and melt coating the insides.
          3. Pour the egg mixture into the pan and bake for 15 minutes (keep checking from 12-15 so it doesn’t burn).
          4. While baking, make the hollandaise sauce (see notes for my recipe or use your own). Cover the finished sauce and set aside.
          5. During the last 6 minutes of baking the Dutch baby, poach the egg for a minute less than your normal poaching time, turn the heat off and remove the pan from heat source, keep the egg warm in the water they poached in. When you are ready to serve, remove the poached egg and drain it on a paper towel. Gently reheat the hollandaise over the warm poaching water whisking so it doesn’t separate.
          6. Assembly:
            When the Dutch baby is golden (~200° F on an instant read thermometer), remove it from the pan and place it onto a warm plate. Top with a few spoonfuls of mashed avocado, ham and finally the poached eggs. Drizzle the warmed hollandaise sauce over the eggs and serve immediately.

          Notes:

          • My oven takes a good 15 minutes to pre-heat to 425° F so plan ahead.
          • I used Betty Crocker mini oval cast iron pans 16 cm x 11.5 cm that were perfect for each serving.
          • My hollandaise is very simple: 30 mL lemon juice, pinch of salt, 80 g butter, 1 egg. In a double boiler (I love Ikea’s KLOCKREN Doubleboiler insert), melt the butter and add the lemon juice and salt and mix well, heat until warm to the touch without boiling the water below. Whisk the egg and slowly temper with the warm butter mixture, whisking well. Return the tempered egg to the double boiler and whisk until thickened. Remove the hollandaise immediately from the heat and set aside. If your sauce has separated, you’ve heated it too fast and too hot; although not kosher, you can blitz the separated hollandaise with an emersion blender to achieve a smooth sauce and avoid having to start over.
          • To get the most professional-looking poached eggs, strain the raw egg through a fine sieve before poaching. Straining removes the excess white which usually just clouds the water and creates a messy, loosely-poached egg. I usually poach for 4 minutes, so for this recipe, poach for 3 minutes and allow the eggs to sit in the hot water, off the heat while you prepare the remainder of the meal.
          • If you are making this for a crowd, poach the eggs in advance for 1-2 minutes and immediately plunge them gently into an ice bath and hold them there until ready to serve. When ready to serve, bring a large enough pot of water to hold all the eggs to a light boil and reheat the eggs and finish poaching them! Serve immediately.

          Read Full Post »

          We had some dear friends over for brunch in early October and I thought I’d make a “Biggy Breakfast” for us. You know the ones on the menu at your local greasy spoon: eggs, bacon, sausage, home fries, and pancakes! Overboard, indeed, but it’s the type of breakfast that is easy to share. These pancakes are my favourite, so light and fluffy. I normally make them with buttermilk but I had some unflavoured Keffir on hand so I thought, why not?

          Super fluffy Keffir Pancakes

          Ingredients:

          • 200 g all-purpose flour
          • 200 mL keffir
          • 100 mL water or milk
          • 2 large eggs, separated
          • 30 g sugar
          • 10 mL vanilla extract
          • 7 g baking powder
          • 7 g baking soda
          • pinch of cream of tartar
          • pinch salt
          • 1 nonstick cooking spray

          Directions:

          1. In a bowl sift flour, baking powder, baking soda and salt together. Set aside.
          2. Beat egg white and cream of tartar on high speed until stiff peaks form but not dry.
          3. Beat the egg yolk with the sugar until creamy, pale yellow and thick; add the keffir and the water or milk, vanilla and beat until smooth on a slow speed.
          4. Fold in the sifted flour mixture gently (don’t over mix as we don’t want the glutens activated).
          5. Fold the beaten egg white into the batter and mix together gently, do not over-mix!
          6. Spray your skillet with non-stick spray set to medium temperature (or 350°F).
          7. Drop about 125 mL of batter on the pan for each pancake and spread out to about 15-20 cm and cook until you see a few bubbles on the surface of the batter. Flip the pancakes and cook for about another 1-2 minutes and the pancake is not too wobbly when you touch the centre with your fingers. Repeat until you have used up all the batter.
          8. Keep warm until you have made all the pancakes and serve warm with butter, maple syrup, fruit, and whipped cream!

          They are the fluffiest!

          Read Full Post »

          I saw this Nigella Lawson recipe on my friend Mimi’s socials and in reading Nigella Lawson’s description of it made me want to try it. I was able to source the Aleppo pepper flakes at my favourite spice store in Kensington Market, Carlos’ House of Spice. I called it Turk-ish because I altered the recipe somewhat but you can click on the original here.

          Creamy and tangy against the rich Aleppo butter sauce.

          The Aleppo pepper flakes are not burning hot, there is mild heat but even I can take it so it’s pretty mild. It has a lovely fruity taste that comes through in the nutty brown butter. The tangy yogurt is beautifully mellowed by the brown butter sauce. It’s a lovely dish that is totally guest-worthy.

          Turk-ish Eggs

          Please click here for the original recipe

          Serves 2

          Ingredients:

          • 200 mL Plain Greek yogurt
          • 10 g roasted garlic purée
          • 2-4 g Sea salt flakes or kosher salt
          • 30 g unsalted butter
          • 15 mL extra virgin olive oil
          • 2-5 g Aleppo pepper/Turkish red pepper flakes
          • 2 large eggs, cold
          • 10 mL lemon juice, divided
          • 1/2 avocado, mashed with a fork
          • Toasted bread

          Directions:

          1. Whisk the yogurt and roasted garlic in a bowl over a bain-marie and gently warm the yogurt, set aside.
          2. Warm two bistro bowls.
          3. Melt the butter and gently cook until the milk solids turn golden brown, remove from the heat and stir in the olive oil, Aleppo pepper flakes, and a pinch of salt. Set aside.
          4. Gently bring a low-sided pan, filled with water to a light boil and turn it down so there are no visible bubbles. Meanwhile, crack each egg into a fine-mesh sieve and allow the loose whites to drain away, slide into a ramekin. Add 5 mL lemon juice into each ramekin with the drained egg. Gently lower each egg into the simmering water and cook until desired consistency (we love runny yolks 3-5 minutes).
          5. To serve, divide the yogurt into the two bowls evenly spoon the mashed avocado into the centre. Place a poached egg on top and drizzle with the Aleppo butter sauce. Serve with lots of toast.

          Notes:

          • The addition of avocado is not authentic in this recipe, I had a half that needed using. It was a beautiful creamy texture against the yogurt.
          • If you think two slices of toast will do, make two more, you’ll need it to soak up the yogurt-butter-egg sauce!

          Read Full Post »

          I usually make my scones and biscuits with my handy food processor but I have to say that these freehand scones will change my method for all my future scones. For what I save in time, I sacrifice in cleaning time and most importantly, texture of the scones. These scones are light, airy, filled with gooey cheese and scallions. They are great with soup or a stew. Serve them warm with fresh butter.

          This post was created on a blistery, cold day in latter January. We just had received about 50 cm (20 inches) of snow in a period of 24 hours. We must have a VIP living on our street because the damn snowplow came down our street four times, depositing a heavy mess of snow at the end of the driveway. Honestly, the last two times were ridiculous, there was hardly any new snow on the road! This was one of the sunniest days we’ve had so far, the sun reflected in the new white snow and  I just had to take advantage with the photos.

          Freehand Kefir, Scallion, and Cheese Scones

          Original recipe from Jean Paré’s Company’s Coming Muffins and More cookbook

          Makes 8 large wedges

          Ingredients:

          • 240 g All-Purpose Flour
          • 16 g baking powder
          • pinch of salt
          • 4 scallions, roughly chopped
          • 150 g cheddar cheese, coarsely grated
          • 57 g cold butter, cut into small cubes
          • 1 egg
          • 100 mL kefir (and extra kefir for brushing tops)
          • Parmesan, finely grated for sprinkling on top

          Directions:

          1. Preheat oven to 425° F.
          2. Combine flour, baking powder, salt, with the butter and manually cut like you would pastry dough. When it is slightly smaller than pea-sized bits, add the shallots and cheese and mix.
          3. Combine the kefir and the egg and whisk until frothy. Pour into the dry ingredients and mix well. Turn dough out to a lightly floured surface and knead once or twice, just enough to pull it together. Roll out to a round shape and cut 8 wedges to make. Brush tops with kefir and sprinkle the parmesan on top.
          4. Bake for 15 minutes or until lightly golden. Serve warm with butter.

          Tender and delicate scone with lots of cheese and scallions.

          Read Full Post »

          We are trying to get back into “normal” life. Restaurants and event venues (except strip clubs and dance clubs) have been permitted to return to 100% capacity since October 16. We have ventured to restaurants, dining in but we are still rather uncomfortable in going to an event. Masks are supposed to be worn, but who is policing that? It will be quite some time before I even want to attend a large event.

          Century Park Tavern is an upscale tavern that we tried for Brunch a few weeks ago. It is situated in a gorgeous century-old foundry in Davenport Village, not too far from Bloor West Village. The beautifully restored building is the perfect venue for a gastropub.

          The brunch service is relatively new for Century Park Tavern and they were still waiting on their coffee machines when we dined there, but they definitely have the food part down! We ate one course and it was delicious enough to want to go back and sample a few more items.

          JT had the Porchetta Hash, house porchetta, crispy potatoes, tomato, cilantro, green onion, poached egg, smoked chili hollandaise.

          I had the Smoked Salmon Benny, toasted English muffin, herb hollandaise, pickled onions, fried capers, fresh greens. Both dishes were outstanding. The porchetta was perfectly crisp and quite moreish. The smoked salmon was lovely and to be honest, I would have been happy with one. We didn’t eat dinner that night.

          Read Full Post »


          Ingredients:

          • Butter to coat pan
          • 4 large eggs
          • 375 mL milk
          • 2 g sea salt
          • Pinch of nutmeg
          • 180 g sourdough bread cut into largish cubes
          • 1/2 apple, like gala, cored and sliced thinly
          • 100 g ham, cut into ribbons
          • 70+ g Gouda or Gruyère, divided

          Directions:

          1. Brush the melted butter along the bottom and sides of a 9” x 9” decorative baking dish.
          2. Whisk the eggs, milk, salt and nutmeg.
          3. Lay the bread evenly in the prepared baking dish, place the ham and apples evenly throughout, then sprinkle 70g of the cheese over it tucking it into the spaces.
          4. Pour the egg mixture over the bread, ham, apples and cheese evenly. Cover and refrigerate overnight.
          5. The next day, remove the prepared bread pudding from the refrigerator and allow to come to room temperature, about an hour.
          6. Preheat the oven to 350 F. Sprinkle the remaining cheese over the top and bake for 40-45 minutes or until set. All the bread pudding to sit for 10-15 minutes to fully set.
          7. Serve with yogurt and Dijon maple syrup.

          Ingredients

          Read Full Post »

          I’ll never forget the Croque Monsieur sandwich that JT ordered at the Café du Parc at the Intercontinental Willard Hotel in Washington, DC in 2013. It was incredible, but soooo filling. I adore the components of this sandwich but I find that the whole thing is just too much so I like to lighten it a bit by replacing the bread with a crêpe. It still has a generous layer of béchamel, with a slice of ham, gruyère cheese and a slather of mustard, the only difference is the crêpe! This recipe was for a brunch we had so I added the egg and it changed it to a Croque Madame!

          Croque Madame Crêpe

          A KitchenInspirations Original Recipe

          Serves 2

          Ingredients:

          • 2 Crêpes
          • 125 mL béchamel sauce
          • 50 g gruyère cheese, shredded
          • 2 slices ham
          • 15 mL Dijon mustard
          • 2 eggs, fried

          Directions:

          1. Spread half of the béchamel in the centre of each crêpe and top with the grated cheese. Put into a preheated oven to slightly melt the cheese.
          2. Heat the ham in a frying pan on both sides. Spread half the Dijon mustard on each slice and put it on top of the melted cheese, keep it warm.
          3. Add the fried eggs in the centre and fold each side in, leaving the yolk exposed.
          4. Serve with some lightly dressed greens.


          Notes:

          • Traditionally, the egg is baked in the crêpe but I didn’t like how crispy the crêpe became so I changed the directions.

          Read Full Post »

          A good friend received a Pullman loaf pan for Christmas, it had been on her list for many years. I had no idea what it was so I researched it and found that it was a loaf pan that makes a perfectly square slice of bread! Click here for a little history on the loaf. And of course, I fell down the rabbit hole on what this specific loaf can be utilized in and discovered that Croque-Monsieur can be one such recipe! I looked at a number of videos creating this delectable treat but landed on Binging with Babish’s Brooklyn Nine Nine recipe. Babish had made the leap and used a beautiful brioche for one of his renditions so I thought I’d pull two recipes together and made a Pullman Brioche loaf. Of course, I don’t have a Pullman loaf pan, but it’s easy to adapt your existing loaf pan (as Babish does in his video, however, I used a flat sheet sprayed with non-stick spray inverted onto the top of the loaf pan with a weight (small, cast iron frying pan) placed on the top). My loaf didn’t turn out quite square but I saved myself close to $50 in buying a pan for sandwich bread. The brioche recipe I chose wasn’t particularly good so I won’t list it here but the overall inspiration is exceptional. This is definitely not a calorie-reduced sandwich but if you feel like splurging, it’s totally worth it.

          Here is the Brooklyn Nine Nine Croque Monsieur moment (the croque monsieur moment goes only to 49 seconds so you needn’t watch the entire clip).

          A deliciously cheesy, hammy mess of a sandwich.

          Croque-Monsieur taken up a notch!

          Makes 2 Sandwiches

          Ingredients:

          • 4 thickly sliced brioche bread
          • 120 mL béchamel sauce
          • 10 mL Dijon mustard
          • 2 slices of good quality, thinly sliced ham (I used an Italian ham)
          • Grated cheese (traditionally Gruyère)
          • Butter

          Directions:

          1. Toast the brioche slices on one side. Butter the on untoasted side of each slice.
          2. Add about 30 mL of béchamel to each toasted side of the bread. Add some cheese to both sides of the béchamel and press down.
          3. Spread about 5 mL mustard on each piece of ham. Fold each piece of ham to fit onto the bread and place on top. Add the second piece of bread on top of the ham, cheese side down. Place into a pre-heated cast iron pan.
          4. Press down on the sandwiches to compress slightly. Cover and cook each side until golden and cheese has melted.
          5. Cut each sandwich into two and serve with a dill pickle.

          Read Full Post »

          Way back in 2009, I blogged about this recipe from the LCBO magazine, Leek and Mushroom tart but I didn’t have a photo of it. It’s quite a tasty tart, particularly if you use puff pastry as the base. It’s definitely not something we eat often so I thought I’d splurge and reblog about it. It makes a lovely brunch dish.

          LCBO’s Leek and Mushroom Tart

          Makes one tart 35.5 cm x 11.4 cm x 2.5 cm (14″ x 4.5″ x1″)

          For the original recipe, please click here.

          Ingredients:

          • 375 mL Evaporated Milk or heavy cream
          • 2 cloves garlic, peeled
          • 1 large egg
          • Salt and freshly ground pepper
          • 30 g unsalted butter
          • 250 g mixed mushrooms (shiitake, porcini, cremini, oyster etc.), stems removed where necessary and thickly sliced
          • 1 medium wild leek cleaned well and cut into thin slices
          • 30 mL white wine
          • 2.5 mL chopped fresh thyme
          • One 35.5 cm x 11.4 cm x 2.5 cm tart shell, partially baked
          • 2 long slices of prosciutto, or 4 small rounds, cut or torn into smaller bits

          Directions:

          1. Preheat oven to 350°F (180°C).
          2. Place Evaporated Milk or heavy cream and garlic cloves in a large pot over medium-high heat. Bring to a boil then turn the heat down to low and simmer gently for 25 minutes or until milk is flavoured with the garlic and reduced to 250 mL and garlic is very soft. Set aside to cool. Remove garlic cloves, mash with a fork and return to cream. When cool add egg and beat until uniform. Season with salt and pepper.
          3. Heat 15 g butter in a skillet over medium-high heat. Add mushrooms and sauté for 2 to 3 minutes or until browned. Season with salt and pepper to taste and scrape into a bowl.
          4. Add the remaining 15 g of butter to pan and heat over medium heat. Add leeks and sauté for 1 minute or until they are softened. Add wine and thyme to pan and cook, stirring, for 1 minute more or until leeks are limp and the liquid has evaporated. Remove from heat.
          5. Arrange mushrooms and leeks in the tart shell and pour milk over top (making sure that mushrooms and leeks peep through the cream.
          6. Top with prosciutto (this will get very crispy).
          7. Bake for 30 minutes or until set and lightly golden. Allow to cool 10 minutes before serving.

          Read Full Post »

          Covid has forced us to try to reinvent our favourite restaurant meals. Not because we’d rather not get take-out, because we’ve been trying to support our local restaurants at least once per week, but it’s because some of our favourite places don’t offer take out right now! 

          Some restaurants (who are not offering take out) are offering online demos of some of their popular dishes; my favourite French Bistro has two recipes on IGTV, French Onion Soup and their delectable Tart au Citron. The French onion soup takes about three days to make and the tart au Citron takes two days! They are a lot of work! I am happy to wait until I can go and order these in person because I don’t have the patience to wait three days for my soup to be ready. 

          This is half of Playa Cabana Cantina’s huevos rancheros. It ain’t pretty but it’s damn good.

          The Mexican chorizo recipe was in response to not being able to find it locally (yes, there are places downtown but I wanted to stay close to home in these unusual circumstances). We just love this Mexican place, because their Huevos Rancheros is simply TDF! We literally dreamt about this dish while we were in Spain, it was going to be one of our first restaurant meals back home. Then the sh%$ hit the fan and you know the rest. The first layer is made of rice and beans, then a warm, soft flour tortilla, then some wonderful flank steak with crispy chorizo and finally topped with a perfectly fried egg. Warm, smokey, earthy spices make this dish moreish. The dish is literally enough for two, we always share, getting a second egg for an extra dollar. I created the chorizo recipe for this dish and to be honest, it really hit the spot.

          This is a version of the Huevos Ranchero we made about a month ago.

          Home Made Mexican Chorizo

          A KitchenInspirations Original Recipe

          Makes 400 g of raw, loose chorizo

          Ingredients:

          • 350 g ground lean pork
          • 60 g bacon, finely chopped
          • 5 g ancho chilli powder
          • 2 g smoked paprika
          • 1 g Mexican oregano
          • Pinch of cloves
          • 4 g salt
          • 5 g sweet paprika
          • 13 g roasted garlic

          Directions:

          1. Mix all of the ingredients together and form into 80 g patties. Freeze in patty form, defrost in the refrigerator before use (you can also cook from frozen, it just takes longer).

          Notes:

          • I’ve been watching a lot of cooking demos and one I recently saw was Chef Michael Simon from Food Network cooking ground meat as a patty. He wasn’t making patties, just searing them on both sides and breaking them apart as they cooked. It’s a fantastic method, you get even browning on both sides and the meat is very easily broken up.
          • I have made this recipe with Beyond Ground Meat and it works out very well; don’t add the bacon if you are cooking vegetarian but you may wish to increase the smoked paprika to 3 g to get a smokier flavour. 

          Read Full Post »

          Caramelized Onion Tart with Brûléed Gruyère

          KitchenInspirations Original Recipe

          Makes one 20 cm (8 inch) tart. Serves 4 as a main course or 6 as an appetizer course.

          Ingredients:

          • 240 g sweet onions, thinly skiced
          • 15 g butter
          • 15 mL cognac
          • 2 large eggs
          • 30 mL milk
          • Pinch of nutmeg
          • 60 g gruyère cheese, grated
          • Salt and pepper
          • 1 single pie crust, blind baked

          Directions:

          1. Preheat oven to 375° F.
          2. Heat the butter in a pan until melted, add onions and cook until caramel in colour. Deglaze pan with cognac, set aside.
          3. Whisk to combine eggs, milk, nutmeg and season.
          4. Spread cooked onions into the pie crust evenly, pour in the egg mixture and bake for 10 minutes.
          5. Cover the tart with Gruyère and continue to bake until cheese is melted and somewhat brûléed. Cover crust with foil if getting too dark.
          6. Allow to stand for 5 minutes. Serve hot.

          Almond Flour Pie Crust

          Makes one 20 cm (8 inch)  pie crust.

          Ingredients:

          • 100 g almond flour
          • 8 g psyllium husk, ground
          • 30 g unsalted butter, cold
          • 30 mL egg whites
          • 20 g toasted sesame seeds
          • Salt

          Directions:

            1. Preheat the oven to 375° F.
            2. Add everything but the sesame seeds to your food processor and pulse to make a soft dough. Remove and gently kneed in the sesame seeds.
            3. Roll between 2 sheets of parchment paper to fit a 20 cm (8 inch) tart pan. Press into the pan and up the sides evenly. Dock the pastry well.
            4. Blind bake the tart shell for 12-15 minutes, covering the sides if they bake too quickly.

          Read Full Post »

          This is one of the last recipes I developed in Spain, before we returned to reality on March 12. We’re already talking about two months next year, provided things settle down and the world becomes safe again. JT and I left on the second last plane to Gatwick from Almeria, they cancelled the flights the next day! We are so fortunate in so many ways. We hope everyone is doing well under the circumstances.

          I was inspired by Chef David Rocco’s Instagram post but didn’t have some of the spices he used so I improvised, in addition , this was the culmination of my kitchen clean-out. It turned out exceptionally well and can be eaten as breakfast, brunch or lunch. Heck, you can even have it for dinner. It’s quite easy to prep and you can use whatever vegetables you have on hand, perfect for veg that may not be at their best.

          Eggs in Purgatory Indian-style

          A KitchenInspirations Original Recipe

          Serves 2

          Ingredients:

          • 90 g onions, diced
          • 15 mL EVOO
          • 2 g garam masala
          • 2.5 g cumin
          • 1.5 g meat masala
          • 5 g curry powder
          • 250 mL passata
          • 125 mL water
          • 3 g freshly grated ginger
          • 5 mL roasted, puréed garlic
          • 230 g frozen vegetables, defrosted and drained
          • 50 g grilled peppers, diced
          • 2 g fresh Cilantro, minced
          • Salt and pepper to taste
          • 2 eggs

          Directions:

          1. Heat olive oil in a frying pan and sauté onions until golden. Add the spices and cook until fragrant. Add the passata and water and mix well. Add the vegetables and cilantro and mix until combined.
          2. Prepare an oven proof dish by rubbing with olive oil or butter. Pour in the vegetables and spread out evenly. Make two large divets in the vegetables and crack on egg into each one.
          3. Bake in a 200C preheated oven for 8-10 minutes or until eggs are cooked to your taste.

          Read Full Post »

          My dear friend Lorraine Elliott published this recipe while we were wintering in Spain. It’s not super hot in Spain this time of year and we prefer it that way because we are not fans of extreme heat or crowds. I like to choose simple recipes that can be baked in the oven to warm the kitchen up a bit. The moment I saw this recipe, I knew I had to make it. Unfortunately, I couldn’t source Halloumi in our little village or even the big supermarket in the city so I used a Spanish Manchego. It was delicious! A perfect lunch with a tomato side salad.

          It’s similar to Spanakopita but not really.

          Spinach, Feta and Manchego Pie

          Makes a pie about 12 cm x 25 cm x 3 cm.

          Serves 4-6 people

          Ingredients:

          • 2 sheets of puff pastry, defrosted in the refrigerator overnight
          • 400 g frozen spinach, defrosted in the refrigerator overnight
          • 100 g sweet onion, finely sliced
          • 20 g roasted garlic, puréed
          • Pinch of nutmeg
          • 120 g Greek feta, crumbled
          • 80 g of Manchego, grated
          • 15 mL milk, divided

          Directions:

          1. Once the spinach has defrosted, squeeze out as much moisture as you can.
          2. Preheat the oven to 400° F. Line a loaf pan with parchment paper.
          3. Roll out one sheet of the puff pastry to about 2 times the size of your pan. Insert it into the parchment-lined pan and dock it with a fork.
          4. Press a sheet of foil into the pan to hold the sides of the pastry up. Add some weight to avoid it from rising too much. Bake for 25-30 minutes or until lightly golden.
          5. In the meantime, sauté the onion until translucent, add the spinach and break it up to incorporate the onion evenly. Stir in the roasted garlic purée and nutmeg. Transfer to a bowl.
          6. Add the cheese to the spinach and stir until entirely combined. Season with salt and pepper to taste.
          7. Roll the second sheet of pastry to the size of the pan. Return it to the refrigerator.
          8. Remove the foil from the baked pastry and spoon the spinach mixture pressing it evenly into the pan.
          9. Brush the top part of all four sides of the pastry with milk. Remove the second pastry from the refrigerator and lay it over the spinach-filled pastry. Press the sides of the top pastry into the spinach-filled pastry.
          10. Brush the top of the pastry with the remaining milk and bake for 20-25 minutes or until golden.
          11. Slice the pie into equal portions, serve piping hot with a little salad.

          Note:

          Read Full Post »

          This tasty breakfast treat is super easy to make. Assembled the night before and baked for 40 minutes. I used a mini store-bought panettone like this but you can definitely make your own. If you serve them directly from the oven, they puff up like a soufflée, but they deflate just as quickly. Turn them out onto a plate and no one will be the wiser!

          Panettone Breakfast Bake

          Serves 2-4

          Ingredients:

          • 100 g panettone
          • 3 eggs
          • 125 mL milk
          • Pinch of nutmeg

          Directions:

          1. Butter 2 ramekins (about xx mL each)
          2. Cut the panettone into cubes and place into the ramekins evenly.
          3. Whisk the eggs, milk and nutmeg together and pour into the ramekins evenly. Cover and set in the refrigerator overnight.
          4. The following morning, remove the ramekins from the refrigerator and preheat the oven to 350F. Bake for 35-40 minutes or until the eggs have set.
          5. Turn out onto a plate and serve with maple syrup.

          Read Full Post »

          Why do the cold temperatures always surprise me? I’ve been doing this fall thing for a long time and yet, every year when the temperatures plummet, it’s like a cold, hard, slap in the face! It happens from one day to the next; on Saturday, we are lavishing in the sun, cocktailing on the back deck and enjoying al fresco meals and then on Sunday, we are dawning our socks and woolly sweaters to avoid the chill INSIDE, let alone outside! JT and I are typical Canadians, we are stubborn about admitting that its fall and winter is coming; we delay turning on the furnace at all costs because that would mean defeat, we have acknowledged the cold and succumbed to it! But eventually, we give in. I like to rebel and I generally continue to wear sandals until I can no longer feel my toes. My feet understand they don’t like to be encased in socks and shoes…they were meant to be free in flip flops and sandals!

          It was on one such day that I needed a little heat-help in my chilly kitchen that I decided to make scones, and to use up some figs that were leftover from a shoot (what can I say, no one wanted them!), so I came up with this tasty treat. This recipe is very delicate and light. They are best eaten right away with sweet butter but freezing them also works. Use the oven to reheat them, the microwave doesn’t do it justice.

          Fresh Fig Scones

          A KitchenInspirations Original Recipe

          Makes about 10 scones

          Ingredients:

          • 2 cups flour
          • 2 tablespoons sugar
          • 1 teaspoon salt
          • 4 teaspoons baking powder
          • 1/2 teaspoon cream of tartar
          • 1/4 tsp green cardamom, finely grated
          • 1/2 cup unsalted cold butter, cut into small bits
          • 1 cup buttermilk
          • 160 g fresh figs (chopped)
          • 2-3 tbsp milk or yogurt for brushing the tops.

          Directions:

          1. Preheat the oven to 400° F.
          2. Combine the dry ingredients in the large bowl of your food processor and pulse to mix.
          3. Add the cold, cubed butter and pulse until it resembles a coarse meal.
          4. Slowly pour in the buttermilk while pulsing until the dough comes together. Remove and pour into a large bowl.
          5. Fold in the chopped figs carefully.
          6. Place largish spoonfuls onto a parchment-lined baking sheet and brush the tops with yogurt. Bake for 15-17 minutes.
          7. Cool for 10 minutes and serve with sweet butter.

          The light was still good when I shot them.

          Read Full Post »

          You caught me: I made hot cross buns at Easter while we were visiting our friends in Arizona but sadly their pantry did not contain icing sugar, so I was forced to skip the “cross” on the buns. They were exceptionally tasty (even without the icing cross), flavoured with warming spices and some rum-soaked currents.

          Hot Cross-less Buns

          For the original recipe, please click here.

          To print this recipe, please click here.

          This recipe makes 12 large, soft, pillowy buns.

          Ingredients:

          • 125 mL rum
          • 100 g dried currants
          • 375 mL milk, room temperature
          • 2 large eggs, plus 1 egg yolk (save the white for the topping)
          • 2 teaspoons instant yeast
          • 53 g light brown sugar
          • 550-600 g Unbleached All-Purpose Flour
          • 1 tsp ground cinnamon
          • 1/4 tsp ground cloves or allspice
          • 1/4 tsp ground nutmeg
          • 1 3/4 tsp salt
          • 1 tbsp baking powder
          • 85 g butter, room temperature
          • 15 mL milk

          Directions:

          1. Soak the currents in the rum for about 20 minutes.
          2. Meanwhile, combine the milk, eggs, yeast, brown sugar and whisk to combine. In the large bowl of your stand mixer, combine the flour, cinnamon, nutmeg, salt and baking powder, whisk to combine.
          3. Add the softened butter to the flour mixture and mix until the butter is well combined (you may also do this with your fingers). Add the liquid ingredients to the flour mixture and beat until a soft dough has formed (if it is too soft, add a bit more flour to it and beat). Meanwhile, strain the currents and add them to the dough and beat well. This is a very soft and sticky dough.
          4. Place in a well-greased bowl and allow to proof for 1 hour or until doubled in size.
          5. Prepare a large, high sided baking pan by buttering the base and all sides.
          6. When the dough has doubled in size, make about 112 g balls out of them. Place in the prepared pan and allow to rest with a clean cloth covering it for 1 hour.
          7. Pre-heat the oven to 375° F.
          8. Combine the left-over egg white with 15 mL milk and beat well. Brush the tops of the rolls with the mixture. Bake for 20 minutes or until the internal temperature reads 190° F. Allow to cool slightly before serving.

          Fresh out of the oven, these pillowy-soft buns are fragrant and delicious.

          Notes:

          • The original recipe called for 50% more currents but I felt it was a little too much so I reduced it.
          • My dough was quite soft and sticky with the originally called-for flour, so I added a bit more flour.
          • The original recipe wanted the leftover rum to be incorporated into the dough, but my dough was already too soft and sticky so I skipped it.
          • This tip from King Arthur flour sounds quite interesting and I will try it next time I make this tasty recipe:
            “Want to make these buns a day or so ahead of time? Try the tangzhong technique, a Japanese method for increasing the softness and shelf life of yeast rolls. Begin by measuring out the flour and milk you’ll be using in the recipe. Now take 3 tablespoons of the measured flour and 1/2 cup of the measured milk; put them in a saucepan set over medium-high heat. Cook the mixture, whisking constantly, until it thickens and forms a thick slurry; this will take about 1 1/2 to 2 1/2 minutes. Transfer the cooked mixture to a bowl, let it cool to lukewarm, then combine it with the remaining flour, milk, and other dough ingredients. Proceed with the recipe as directed. Well-wrapped and stored at room temperature, your finished hot cross buns should stay soft and fresh for several days.”

          Would you care to try one?

          Read Full Post »

          Winter is not giving up easily in these parts. At least the days are sunny even if they are still nippy. It’s the grey days with endless overcast that really pull me into the dumpers, so I bake to make me happy; plus the ambient heat the oven gives off doesn’t hurt. I created this tasty scone recipe when I discovered a couple of rogue oranges in the refrigerator. The flavour combination may sound strange but it works, plus it’s delicious straight from the hot oven with a generous pat of butter.

          Cheddar Orange Scones

          A KitchenInspirations Original Recipe

          Makes 8 large scones

          Ingredients:

          • 270 g AP flour
          • 25 g coconut sugar
          • 20 g baking powder
          • 1 g salt
          • 56 g cold, unsalted butter, cut into small chunks
          • 150 g sharp cheddar
          • 1 egg, lightly beaten
          • 125 mL orange juice (about 1 navel orange)
          • zest of 2 navel oranges
          • Yogurt for brushing tops

          Directions:

          1. Pre-heat the oven to 425° F.
          2. In the large bowl of your food processor, combine flour, sugar, baking powder, salt and pulse a few times to mix well.
          3. Add the butter and pulse until well incorporated but not softened.
          4. Combine the egg, orange juice and zest and mix well.
          5. Pour into the food processor while pulsing and pulse until well mixed. If your kitchen is on the warmer-side, allow the dough to rest in the refrigerator for a bit here or if it’s on the chilly-side, proceed to next step.
          6. Roll out to about 2 cm thick and cut with your favourite cookie cutter. Continue until you’ve used all of the dough. Brush tops with yogurt and bake 15-17 minutes or until lightly golden on top and baked through. Cool slightly on a wire rack and serve warm with butter.

          Read Full Post »

          Apple Buttermilk Pancakes for 2

          Delicious, apple pancakes

          Every so often I buy fruit and it goes unnoticed. Not sure why because we love fruit, but it does. And every time I open the vegetable crisper drawer (and it is often), I am sorely reminded of the neglected fruit. This recipe is one way I used said neglected fruit one wintery weekend morning.

          Apple Buttermilk Pancakes

          Makes about 5 pancakes about 13 cm wide and 2 cm thick!

          The original recipe can be found here.

          Ingredients:

          • 1/2 cup all-purpose flour
          • 1/2 cup buttermilk (or 1/2 cup skim milk with 1/2 tbsp lemon juice)
          • 1 egg, separated
          • 1/2 tbsp coconut sugar
          • 1/2 tsp vanilla extract
          • 1/2 tsp baking powder
          • 1/2 tsp baking soda
          • pinch of cream of tartar
          • 1/4 teaspoon salt
          • 1/2 tsp cinnamon
          • pinch of allspice
          • 1 apple, roughly grated
          • 1 nonstick cooking spray

          Directions:

          1. In a small bowl sift flour, baking powder, baking soda, salt and spices together. Set aside.
          2. Beat egg white and cream of tartar on high speed until stiff peaks form but not dry.
          3. Beat the egg yolk with the sugar until creamy, pale yellow and thick; add the buttermilk, vanilla and beat until smooth on a slow speed.
          4. Fold in the sifted flour mixture gently into the egg yolk mixture (don’t over mix as we don’t want the glutens activated).
          5. Fold the beaten egg white into the batter and mix together gently, do not over mix! Gently fold in the grated apple.
          6. Spray your skillet with non-stick spray and set to medium temperature.
          7. Drop about 1/3 cup of batter on pan for each pancake and spread out to about 13 cm and cook until you see a few bubbles on the surface of the batter. Flip the pancakes and cook for about another 2-4 minutes. Repeat until you have used up all the batter.
          8. Keep warm until you have made all the pancakes and serve warm with butter, maple syrup, and yogurt!

          Read Full Post »

          Is anyone else’s mind-blown that it is 2018? Wasn’t it just yesterday that we were freaking out for Y2K? Now 18 years later, we are still here and I’m approaching my 11th year of blogging! Thank you all for your continued support, I feel so grateful to call all of you friends, all over the world. Heartfelt thank you.

          Last summer, we visited our dear friends at their Wisconsin home. While we were there, one of the breakfasts we had were some delicious Sausage Crescent Roll Bombs, made super-easy by using regular store-bought crescent rolls! Their version had sausage, scrambled eggs, and cheese, so good. I have to admit, I haven’t had or made a crescent roll for more years than I wish to count but the breakfast idea stuck with me and I knew I wanted to make it for a special occasion. Fast forward to New Years Eve 2017 and we were having friends over for the night, but they are vegetarian so making the crescent rolls as our other friends’ recipe was out of the question, so I improvised and came up with this delicious alternative! Same store-bought crescent roll pastry, but with a twist: I used goats cheese, smoked salmon, caramelized onions, wilted spinach and scrambled eggs, topped off with a creamy Dijon and Dill béchamel sauce. Yup, it’s definitely a winner. And you can freeze them for future breakfasts or brunch! Easy-peasy!

          A delicious combination of flavours that are so good, I’ve had the request to make them again and again!

          You see how bright the eggs are, they are that way because of the gorgeous yolks!

          Smoked Salmon Roll-ups

          A KitchenInspirations Original Recipe

          Serves 8

          To print recipe, please click here.

          Ingredients:

          • Olive oil
          • few handfuls of baby spinach
          • 1/2 sweet onion, like vidalia
          • 2 L eggs
          • 15 mL Greek Yogurt
          • 1 package crescent rolls ~235 g (I used this one)
          • 150 g goats cheese, room temperature, loosened with a bit of milk
          • 140 g smoked salmon
          • 5 g butter
          • 5 g flour
          • 125 mL milk
          • pinch of dill
          • 15 mL Dijon Mustard
          • splash of white vinegar

          Directions:

          1. Pre-heat the oven to 375°F.
          2. Caramelize the onions in a splash of olive oil. Add the spinach and wilt. Remove from hot pan to cool.
          3. Combine eggs and yogurt and mix well. Add another splash of olive oil to the pan and heat, add the eggs and scramble until softly set. Remove from pan to cool.
          4. Open the crescent roll package according to directions (this was a bit of a challenge for me) and roll out flat. Ignoring the angled pre-cut lines, cut into 8 even strips.
          5. Spread equal amounts of goats cheese on each strip, top with smoked salmon, then the spinach and onion mixture and finally the eggs. Roll-up the strip.
          6. Spray 8-muffin cups with non-stick spray and place one roll into each cup. Repeat until all eight cups are filled. Bake for 15-20 minutes or until golden and pastry is baked through.
          7. Meanwhile, melt the butter in a small saucepan, whisk in the flour and slowly pour in the milk whilst whisking to create a smooth sauce. Whisk in the dill and the Dijon and a splash of white vinegar and cook the sauce until thick and creamy.
          8. Serve the baked roll-up on a warm plate drizzled with the Dijon-Dill Béchamel sauce.

          The pastry is slightly sweet which balanced the slightly tart bechamel sauce.

          You’ll just have to take my word for it that the recipe makes 8! I freeze them in muffin cups and later transfer them to a zip-lock bag.

          Notes:

          • We buy these eggs because they have had the most consistently orange (note pale yellow) yolks with great flavour.
          • For New Years’ Day, I served them on a bed of butter-wilted spinach and garnished with finely chopped green onion.
          • This is a versatile recipe, you can easily make your own version like the original or with ham and cheese, philly steak, etc., you get the drift!
          • Freeze extra roll-ups unbaked in a lightly sprayed muffin tin and when frozen, transfer to a zip-lock bag. To bake, no need to defrost, simply return to a lightly sprayed muffin tin and bake at 375° F in a preheated oven for about 30-40 minutes (or until internal temperature is around 180° F).
          • Have a large group for brunch? Make the roll-ups the night before and store in the refrigerator. Bake in a preheated oven as per instructions.

          This is the actual dish I served for breakfast on New Years Day. I put the roll-up on a bed of butter-wilted spinach.

          Read Full Post »
          It has been beyond cold in these parts. Entirely opposite to what Australia is experiencing. Our windchills (and humidity) take the cold over the top, for example last week it was -13C with 30% humidity and a windchill that makes it feel like -25C at 8am! That’s wild. Your skin can freeze in 10 minutes. It’s a battle of being chilled and too hot at the same time; imagine having to take literally 10 minutes to put all your outdoor gear on, you’re already sweating because you’re inside, then going outside, walking – expanding energy, getting warm in your coat, and then popping into a warmly heated shop! You just can’t undress fast enough! It’s brutal. Staying home is easy, you just don’t feel like the battle.

          Having the oven on makes the kitchen a wee bit cozier during this deep freeze so I baked this old favourite. Plus the aroma is intoxicating. It is an old recipe that I posted in 2012 here but I remade it with a small addition and reduced it to one loaf so I thought I’d post the revised version. The biggest change was that I added about 50 mL of melted Belgian chocolate to the chocolate part which really enhanced the flavour without making it too doughy. I also brushed the dough with an egg yolk to make it gorgeous and shiny. We had it for New Year’s Day breakfast along the side of the Smoked Salmon Roll-ups. It was delicious.

          The chocolate flavour was richer using the melted Belgium Chocolate with the cocoa powder.

          Chocolate Brioche

          Makes 1 relatively good sized braid. Original recipe was modified from Baking with Julia.

          To print this recipe, please click here.

          Ingredients:

          • 7 g dry yeast
          • 65 mL tepid water (80°F to 90°F)
          • 30 g granulated sugar + a pinch, divided
          • 50 g unsalted butter, cut into smallish cubes
          • 125 mL whole milk
          • 10 g salt
          • 2 large eggs, room temperature
          • 420 g all-purpose, unbleached flour, divided
          • 14 g unsweetened cocoa powder, sifted
          • 30 g icing sugar
          • 50 mL Belgian chocolate, melted and cooled
          • non-stick cooking spray or olive oil

          Ingredients for the glaze:

          • 1 large egg yolk
          • splash of water

          Directions:

          1. Spray two large mixing bowls with non-stick cooking spray, or rub with butter or olive oil and set aside.
          2. Whisk the yeast into the water with a pinch of sugar in a measuring cup and allow to proof, about 5 minutes.
          3. Heat the milk with 1/3 cup granulated sugar and the cubed butter until warm to touch and the butter has entirely melted. Stir in the salt until melted. Allow this mixture to cool to 110°F.
          4. Once cooled, pour the milk mixture into the large stand mixer bowl attached with a whisk and add the eggs one at a time, mixing well to combine. You should have about 1 litre of liquid. Divide into two portions of about 500 mL each and set one portion aside.
          5. Put the cookie paddle onto your stand mixer. To one portion, add about 100 g of the flour and beat on low for about 3 minutes or until it comes together. Now switch to the bread dough paddle and add the remaining flour or as much as needed, kneading on medium-low speed to make a soft dough that is clean off the sides of the bowl. Now knead for 8-10 minutes until smooth and elastic. Transfer to one of the bowls that has been prepared. Cover with plastic wrap and place in a warm dark place to double in size (1 or 1 1/2 hours).
          6. For the chocolate portion, sift 210 g of flour with the unsweetened cocoa and icing sugar.
          7. Retrieve the second portion of the liquid and add the cooled melted Belgian chocolate and mix well.
          8. Add about 100 g of the sifted flour, cocoa and icing sugar and beat on low for about 3 minutes or until it comes together. Add the remaining flour or as much flour as needed kneading on medium-low speed to make a soft dough that is clean off the sides of the bowl. Now knead for 8-10 minutes until smooth and elastic. Transfer to the other bowl that has been prepared. Cover with plastic wrap and place in a warm dark place to double in size (1 or 1 1/2 hours).
          9. When dough has doubled in size (both the chocolate and the plain versions) punch down and deflate them. Cover again and allow to rise until doubled in size (about 45 minutes to 1 hour).
          10. Line a large baking sheet with parchment. Divide the plain, white dough in 2 equal portions (I find a scale very helpful) and roll into approximately 16″ lengths. Divide the chocolate dough into 2 equal portions. Combine the four ropes on a lightly floured surface and braid. Press together the ends and fold under the braid. Place on lined baking sheet and allow to rest for 40 minutes.
          11. Preheat the oven to 375° F. Combine the egg and cold water or heavy cream and mix well. Brush the braid with the glaze and bake for 20 minutes. Remove from the oven and brush the expansion joints of the braid and return to bake for an additional 15 to 20 minutes or until the internal temperature is about 200°F. If they brown too quickly, cover browning parts with a little piece of foil.
          12. Cool before slicing. This can be frozen in an airtight plastic bag for about 1 month.

          Note:

          • Stale slices of this bread makes excellent French toast or Bread Pudding!

          Read Full Post »

          I am a fatalist, which means I believe in fate. There are too many things in this world that seem like coincidences but were totally intended by the universe. Case in point: on more than one occasion, I have decided to make something with the intent of searching for a recipe and before I can even open Google, up pops a recipe a blogging friend has posted on Facebook or Instagram! The very thing I had decided I would make! Coincidence? I think not, it’s fate!

          That is my story of the English Muffins. I was walking back from getting a mani-pedi in our hood, thinking about the upcoming weekend visit with our dear friends from Wisconsin/Arizona (they have two homes) and I realized that I didn’t have a breakfast planned for one of the days and I remember wanting to try baking English Muffins, so on my walk home, I decided that I would bake English Muffins!

          Upon my return, I sat down at my kitchen desk to catch up on Facebook and low and behold, dear Lorraine has reposted her recipe for…wait for it…English Muffins! That is fate! I was destined to bake English Muffins that afternoon.

          Home Made English Muffins

          Makes 6-8 English Muffins.

          Please click here for the original recipe.

          Please click here to print this recipe.

          Ingredients:

          • 200 mL (7 oz) milk
          • 5 g (1 tsp) sugar
          • 3 g (1 tsp) instant dry yeast
          • 20 g (1 oz) butter
          • 320 g (2  1/2 cups) AP unbleached flour
          • 2 g (1/2 tsp) salt
          • 2 g (1/2 tsp) baking powder
          • 1 small egg
          • cornmeal for dusting

          Directions:

          1. Heat the milk to 37° C (100° F), sprinkle in the sugar and yeast and mix well. Allow to proof for 10 minutes or until frothy.
          2. Melt the butter and set aside to cool a bit. Add the butter to the milky yeast (once proofed) stir in the egg and mix well and set aside.
          3. Mix the flour, salt and baking powder together in the large bowl of your stand mixer, add the liquid all at once and beat/knead for about 10 minutes or until smooth and silky.
          4. Lightly cover with oil and set aside in a draft free spot for about 1 hour.
          5. Preheat the oven to 325° F (160° C).
          6. On a lightly floured board, turn out the dough and roll out to about 1 cm (1/2 inch) thickness. Cut 8-10 cm (3 1/4″ to 4″) rounds. Dust with cornmeal (brush off any excess) and cook over a low heat in a cast iron frying pan for about 3 minutes each side (do not oil). Finish baking in the preheated oven 20-25 minutes or until the internal temperature is 199° F (93° C). Allow to cool slightly, and then separate each into two using a fork to maximize the nooks and crannies!

          The top one is perfect!

          Notes:

          • If you cannot get small eggs, then take 1 large egg and whisk it to incorporate both yolk and whites, weigh it and divide by 2. Use half in this recipe and save the other half for something else.
          • In hindsight, my English Muffins pictured puffed up way too tall, so I have modified the instruction to roll out to half of the original thickness. Plus you should get a few more that way.

          Like Lorraine, I like a little English Muffin with my butter.

          Read Full Post »

          In early September, our dear friends came for a visit and JT and I planned a full schedule of fun activities! We went hiking at a conservation area, saw King Lear in High Park (which turned out to be reimagined from a female perspective, Queen Lear), we traveled to Montreal for a few days with a stop in Kingston to visit the newly refurbished Kingston Penitentiary. The time went quickly and a much-needed fix with special friends. Our days were packed, so I made these Banana Bran Muffins for a breakfast on the morning we went hiking, as we were also having lunch at an adorable little cafe near the conservation area. Scroll down to see a few pics of Kingston Pen.

          Banana Bran Muffins with Belgian Milk Chocolate Chunks

          Original recipe from Company’s Coming, Muffins and More by Jean Paré.

          Makes about 10-12 medium-sized muffins

          Please click here to print this recipe.

          Ingredients:

          • 128 g (1 cup) flour
          • 60 g (1 cup) all bran cereal
          • 1 tsp baking powder
          • 1 tsp baking soda
          • 1/2 tsp salt
          • 1/2 cup milk chocolate chips or chunks (I used Belgian milk chocolate chunks)
          • 60 g (1/4 cup) coconut oil
          • 75 g (1/2 cup) coconut sugar
          • 2 eggs, room temperature
          • 65 mL (1/4 cup) sour milk (milk with 1/4 tsp lemon juice)
          • 250 mL (3 medium or 1 cup) bananas, mashed

          Directions:

          1. Pre-heat the oven to 400° F (200° C). Prepare muffin pans by spraying with non-stick spray.
          2. Combine flour, bran, baking powder and soda and salt in a bowl and mix.
          3. Cream coconut oil and sugar with 1 egg until well blended and add the other egg and beat well. Combine the soured milk and mashed bananas and mix well.
          4. Pour into the dry mixture and mix well. Stir in the chocolate chips.
          5. Pour batter into prepared muffin cups to about 3/4 full.
          6. Bake for 20-25 minutes or until cake tester comes out clean.
          7. Cool slightly and serve.

          These muffins have excellent texture from the moistness of the bananas and the bran cereal.

          Notes:

          • These muffins are not nearly as sweet using coconut sugar as using regular white sugar.

          Read Full Post »

          On a recent trip to visit friends in Delavan, we traveled to New Glarus, a very Swiss town in central north Wisconsin. After visiting the New Glarus Brewery (which was very cool), we were quite hungry for some lunch, so we went into town and had a very delicious lunch at Glarner Stube. They make a Rösti potato dish that is out of this world: they stuff it with Swiss cheese (something like Appenzeller) and it was awesome! I knew I wanted to recreate this dish at home, but I really needed to get back to healthy eating, so I parked the idea for another time.

          We had a dear friend and her hubby for brunch at the house and I wanted to make a healthier meal so I decided to experiment in making zucchini rösti (similar to rösti potatoes, a traditional Swiss treat). My dear friend is gluten intolerant so I decided to use coconut flour instead of the gluten free flour mix as I was also trying to keep the carbs low. This is a very flavourful dish, however, I would be lying if I said it was like rösti potatoes because the zucchini does not crisp up like potatoes do, but it is still quite tasty (although, it might if you pan fried it in a small amount of oil instead of non-stick spray). I know I will make this alternative for myself when I make the potato version for the carb lovers!

          A tasty alternative to Rösti Potatoes.

          Zucchini Rösti

          A KitchenInspirations Original Recipe

          Makes one Rösti about 20 cm or 8″ diametre.
          Click here to print the recipe.

          Ingredients:

          • 430 g zucchini, grated (all the liquid squeezed out to about 350 g zucchini)
          • 80 g sweet onion, thinly sliced
          • 20 g coconut flour
          • 5 g salt
          • 3 tbsp egg white (or 1 egg)
          • 1 clove garlic, minced

          Directions:

          1. Combine grated and drained zucchini with the sliced onion and sprinkle with the coconut flour. Mix well.
          2. Combine salt, egg and minced garlic and mix well. Pour this mixture over the zucchini and combine well.
          3. Prepare a small frying pan with oil (or non-stick spray) and heat. Add the entire zucchini mixture into the hot frying pan and cook over medium heat, about 15 minutes. Flip and continue to cook for an additional 10-15 minutes until cooked through and golden on the edges.

          Here are a few pics of our trip to New Glarus and the New Glarus Brewery.

          Read Full Post »

          I enjoy a slice of bread with my breakfast of hard boiled egg whites, a half of a smashed avocado, but I like to manage my carbs so often I go without the bread. Our local German bakery recently released a high protein/low carb bread so we bought some for the inconceivable price of $7.99 Canadian; it had about 8 thin slices! I didn’t mind the texture at first but then it really ragged on me, it was a dense, cardboard-like texture that was difficult to cut and chew. I started hating one of my favourite meals of the day! So I searched the net and found that there are several high protein/low carb bread options out there, starting with cloud bread (meh, it’s really just a fluffy egg white pancake) and then I found this recipe and I was intrigued.

          Firstly, I had never baked with protein whey powder and the bread had so few ingredients, I really wanted to experiment. Of course, the first round, I stayed fairly true to the original recipe and it was fine but the second time I added herbs and sesame seeds and it was even better. This version has a bit more body to it with the addition of sunflower seeds and flax seeds.

          What I like about this “bread” is that it slices like bread, toasts like bread and can be used for sandwiches but I like mine first thing in the morning, lightly toasted with 3 hard boiled egg whites and a tablespoon of salsa.

          The bread has enough body to make a sandwich. But if you don’t like the taste of eggs, this bread is not for you.

          High Protein “Bread”

          Print High Protein Bread Recipe

          For the Original Recipe, please click here.

          Makes 1 loaf, about 10 slices.

          Ingredients:

          • 6 large eggs, separated
          • Pinch of cream of tartar
          • 50 g (1/2 cup) protein whey powder (unflavoured)
          • 3 g (1/2 tsp) salt
          • 20 g (2 tbsp) sunflower seeds
          • 10 g (1 tbsp) flax seeds
          • 10 g (1 heaping tbsp) sesame seeds (I used black and white)
          • non-stick spray

          Directions:

          1. Preheat the oven to 200° C (400° F).
          2. Prepare a 4″ x 8″ pan by lining it with parchment paper and spraying with non-stick spray.
          3. Beat the egg whites and cream of tartar until fluffy and stiff but not dry.
          4. Add the egg yolks, whey protein and salt, beat for about 30 seconds or until well combined.
          5. Fold in the sunflower and flax seeds.
          6. Pour into the prepared pan and sprinkle with the sesame seeds on top. Bake for 20-30 minutes or until cake tester comes out clean.
          7. Cool for 5 minutes in the pan, remove from pan and cool completely on rack. Slice into 10 slices. Freeze in a piece of parchment and store in a ziplock Baggy until needed.

          Notes:

          • This ‘bread’ reminds me of a Genoise cake, it has body but is light and fluffy.
          • The bread toasts very nicely.
          • JT feels it is a bit eggy tasting to have with poached eggs but I like it.
          • Add a handful of chopped herbs as a flavour option.
          • I freeze this ‘bread’ because storing it in a ziplock bag in the refrigerator makes it a little soggy.
          • It’s important to line the pan with parchment and spray the parchment with non-stick spray because in my experience the batter sticks otherwise.

          Read Full Post »

          When I was down in Florida with my dear friend, Kimberley from University, I mentioned that I had recently baked some killer cinnamon buns and she sighed. She is gluten intolerant but will splurge every couple of years on a Cinnabon with dire results, she explained that it’s never really as good to warrant the pain afterward. That is the precise moment I decided to create a gluten-free cinnamon bun that she would be happy to eat AND digest! This is the result of several tests, I hope you love them as much as we did!

          Gluten Free Cinnamon Sticky Rolls

          Print GF Cinnamon Rolls Recipe

          Makes about 6 small cinnamon buns.

          Ingredients:

          • 230 g (1 1/4 cup) gluten-free flour (I used this one)
          • 15 mL (1 tbsp) coconut sugar
          • 5 mL (1 tsp) cinnamon
          • 5 mL (1 tsp) baking powder
          • pinch baking soda
          • pinch salt
          • 30 mL (2 tbsp) cold butter
          • 125 mL (1/2 cup) buttermilk

          Directions:

          1. Combine gluten-free flour, coconut sugar, cinnamon, baking powder, baking soda and salt and mix well.
          2. Using a fork or pastry blender, cut in the cold butter to distribute evenly (may be done in a food processor).
          3. Sprinkle in the buttermilk and using a fork, bring the pastry together quickly to get a sticky ball of dough. On a lightly floured (with GF flour) board, knead a few times, but not enough to heat up the dough. Pat into a rectangle about 23 x 20 cm (9 inches x 8 inches).
          4. Preheat the oven to 400° F (200° C). See directions for the filling.

          Ingredients for the filling:

          • 30 g (2 tbsp) unsalted butter, softened
          • 40 g (2 tbsp) brown sugar
          • 2 tbsp cinnamon

          Directions for the filling:

          1. Combine the butter, sugar, cinnamon and mix well.
          2. Spread the filling over the rectangle to all four sides.
          3. Roll up the rectangle into a tight roll. Cut into 6 small rolls.
          4. Place cut sides down into a lightly greased oven proof pan. Bake for 15 to 20 minutes or until lightly golden. Cool slightly and remove with a spatula to a cooling rack.
          5. Drizzle with a little icing sugar and water mix. Serve warm or at room temperature.

          A more biscuit-like pastry, these strongly-flavoured cinnamon rolls heat up beautifully and satisfy a cinnamon roll craving.

          Read Full Post »

          Yesterday, my country celebrated its 150th birthday! The months and days leading up to this grand event have been epic. Sadly, we had planned to be away without even thinking about it. This is where social media really gets to shine because with all the awesome photos and videos everyone posted, it felt like we were right there! Plus, the friendly lake we were visiting decided to have their 4rth of July Celebrations on July 1st, but we really know they were helping us celebrate our 150th birthday! Thank you America!


          In early May, I purchased some pears and then immediately forgot that I had them. Then on May 17, my friend Lorraine of Not Quite Nigella, posted that it was Cheese Soufflé Day and linked to her twice baked cheese soufflé recipe, and I immediately knew how I would use one of those pears!

          When one reads a “soufflé” recipe, one might back out of the room, ever so slowly, so no one would notice, because cheese soufflées are known to be complicated and finicky. Let me assure you, this one is NOT. This recipe comes together quickly and easily, and I love that they can be frozen and rebaked when required, how easy is that? I also love béchamel sauce (that was my addition) so this is a win/win on all accounts.

          Pear, Blue Cheese and Leek Twice-Baked Soufflé

          This recipe makes 4 x 200 mL (7 fluid ounces) ramekins. For the original recipe, please click here.

          Print Recipe Twice Baked Soufflee

          Ingredients:

          • 30 g butter, divided, plus additional for buttering ramekins
          • 30 g/1.5oz plain all purpose flour
          • 250 mL (1 cup) milk, heated
          • 150 g (1 small) pear, finely chopped or cubed
          • 40 g (1/4 cup) leeks, finely chopped
          • 2 eggs, separated
          • 60 g blue cheese, crumbled
          • salt and pepper

          Directions:

          1. Preheat the oven to 350° F (180° C).
          2. Butter 4 ramekins well, all the way up the sides. Boil some water.
          3. Melt 10 g of the butter in a saucepan and add the chopped pears and leak and cook on medium heat until softened. Season with salt and pepper. Pour out of the pan and set aside to cool.
          4. Melt the remaining butter in the pan and add the flour all at once. Cook the flour for a minute without burning it. Add the milk and whisk until smooth, it will be very thick.
          5. Add the pear and leek mixture and stir well until combined in the roux. Add the egg yolks and stir well to combine. Set aside to cool.
          6. Meanwhile, beat the egg whites until stiff but not dry. Take about 1/4 of the beaten egg whites and stir it into the roux mixture to loosen. Fold in the remaining egg whites until well incorporated but not deflated.
          7. Divide the mixture into the four ramekins and bake in a bain-marie (this is why you were boiling the water) for 35-40 minutes or until tops are lightly golden (remember, they will be baked again).
          8. Allow to cool in the ramekins for about 5 minutes (they will deflate a bit), then gently loosen sides with a sharp knife and turn them out onto a cooling rack and cool until room temperature.
          9. Wrap each soufflé individually in plastic wrap and then bag in a large zip lock freezer bag. Freeze until required.
          10. To defrost, remove from the freezer the night before it is required and defrost in the refrigerator. The microwave is not suitable for this step.
          11. Prepare the béchamel finishing sauce.
          12. Lay the soufflés into individual oven proof dishes (I used cast iron) and prepare the béchamel finishing sauce.

          Ingredients for Béchamel Finishing Sauce:

          Serves 4

          • 5 g (1 tsp) duck fat, bacon fat or unsalted butter
          •  (1 tbsp) all-purpose flour
          • 250 mL (1 cup) milk
          • 5 mL (1 tsp) thyme leaves
          • 1 1/2 slices bacon, cooked until crispy, chopped
          • Salt

          Directions for Béchamel Finishing Sauce:

          1. Melt butter in a small saucepan, add the flour and cook the roux without burning for about 1 minute.
          2. Slowly add the milk while whisking to creat a smooth sauce, cook until thickened.
          3. Flavour with the thyme leaves, bacon and salt.
          4. Pour over the defrosted soufflés in an oven-proof bakeware and bake about 25 minutes in a preheated 350° F (180° C), to heat it through.

          A wonderful combination of sharp blue cheese, salty bacon and sweet pears with creamy baked béchamel. Is your mouth watering yet?

          Notes:

          • You may use any cheese you wish, although I would stick to full-flavoured cheeses.
          • If you don’t like leeks, try caramelized onions instead (I always have frozen leeks in my freezer and come to think of it, caramelized onions!).
          • Lorraine poured about 300 mL (1 1/4 cup) heavy cream over her soufflées instead of the béchamel sauce.

          Read Full Post »

          When JT and I were first married, we lived in our first home in Stouffville, a bedroom community Northeast of Toronto. JT would drive 30 minutes to an hour to work and I would take the hour long GO Train (Government of Ontario commuter train) downtown. Fortunately, the downtown train station was connected to an intricate underground system called PATH, Toronto’s Downtown Pedestrian Walkway that I would take all the way to work in the Financial District. Of course, these underground paths were always lined with stores, tempting you to buy, buy, buy!! There may have been one or two instances when I may have picked up a new outfit on the way to work, and I would change into it at the fitness club after my workout!

          There were also several food courts along the way, so if one became a little famished from the long journey to work, one might pick up a nibble or two along the way! That is when I became addicted to Bran Date Muffins. These overly processed, moist and sticky muffins were sold at a “healthy” eatery along my walk to work. I usually don’t go for the ready made treats but there was something so moreish about these muffins (texture and taste) that I bought one or two every week (that’s when I had a metabolism!). These days, I wouldn’t dare eat that type of muffin, knowing what I know about the ingredients they use to make them so moreish so that is why I decided to try to recreate my obsession using healthy ingredients. I also decided to make them mini so that I could have a small treat without committing to a regular-sized muffin.

          They are not the same as the ones I had so many years ago, but they are quite tasty and not nearly as bad for you so I’m pretty happy with the outcome. The bran and nuts provide great texture, the apples and the dates give it some moistness. Next time, I think I will reduce the flour component and increase the apples and fruit juice.

          JT was quite surprised that there is no processed sugar in these babies, just dates, apples and fruit juice to sweeten.

          Apple, Bran and Date Mini-Muffins revamped

          A KitchenInspirations Original Recipe

          Makes 30 mini-muffins

          Ingredients:

          • 250 mL (1 cup) fruit juice
          • 1 egg
          • 2 egg whites
          • 375 mL (1 1/2 cup) peeled and shredded apple
          • 125 mL (1/2 cup) chopped dates
          • 250 mL (1 cup) bran buds
          • 125 mL (1/2 cup) chopped pecans
          • 2 cups All Purpose Flour
          • 3 tsp baking powder
          • 30 mL (2 tsp) cinnamon
          • Pinch of salt

          Directions:

          1. Preheat oven to 375° F (190° C). Spray 24 mini-muffin pan with non-stick spray. Set aside.
          2. Combine the whole egg and the egg white and beat until well mixed, add the milk and stir to combine.
          3. In a large bowl, add the bran buds, shredded apple and dates, stir until combined. Pour the egg mixture over the top, stirring it in. Allow to stand 5 minutes.
          4. Sift the flour with the baking powder, cinnamon and salt.
          5. Fold the flour mixture into the bran mixture until everything is combined. Stir in the chopped pecans.
          6. Divide batter into 30 mini-muffin cups evenly (24 first, then 6). Bake for 20-22 minutes or until cake tester comes clean.

          Notes:

          • If you’d rather make regular-sized muffins, this recipe will produce 12.
          • The bran buds I use are rather hard so soaking is important, your bran cereal may be loser and not need as much time to break down. I like a little bran texture so I didn’t soak my bran very long.
          • I used fruit juice instead of milk so that I could eliminate the 1/4 cup sugar from the recipe. I used Mango because I had it on hand, use whatever you wish, apple juice would work equally as well.
          • You may use 3 whole eggs instead of 1 whole egg and 2 egg whites, someone over here used up the whole eggs and forgot to write it on the shopping list. I wonder who that was?
          • These were pretty moist, even without the use of oil. Next time, I will reduce the flour to 1 1/2 cups and increase the fruit juice and shredded apple by 1/4 cup each.

          Read Full Post »

          Warning: there is nothing healthy about this.

          Ok, sometimes it happens: I make a totally unhealthy recipe. We had a friend stay overnight because he and JT were heading down to Buffalo first thing in the morning, to see a hockey game so I made cinnamon buns. We had some for tasters and one each for breakfast, then I froze the rest. Now these damn things will be calling my name every time I open the freezer!

          I was down in Florida last week for a bit of girl-time with one of my dearest friends. It was a wonderful break and the weather was amazing! Might have done a bit of shopping too!!! Sorry I was MIA on comments, will catch up this week. XOXO

          Cinnamon Buns

          Please click here for the original recipe

          Makes 12 buns

          Ingredients for dough:

          • 250 mL (1 cup) warm milk
          • 8 g 1(2tbsp) quick yeast
          • 590 g (about 4 1/4 cups) all-purpose unbleached flour
          • 55 g (1/4 cup) granulated sugar
          • 3 g (1 tsp) cinnamon
          • 6 g (1 tsp) salt
          • 2 eggs
          • 76 g (1/3 cup) unsalted butter, room temperature

          Directions for dough:

          1. Combine yeast and warm milk and stir to dissolve yeast.
          2. In the large bowl of your KitchenAid mixer fitted with the scraping cookie dough hook, combine flour, sugar, cinnamon, salt, eggs and butter, blend until thoroughly combined.
          3. Add the milky yeast and switch to the dough hook. Knead the dough for about 5 minutes or until it comes away from the sides and is soft and silky.
          4. In a greased bowl, in a warm place, allow to rise until doubled in bulk (about 1 hour).
          5. Roll the dough into a rectangle about 0.5 cm (1/4 inch) thick, about 60 x 35.5 cm (24 x 14 inches).
          6. Spread the filling evenly over the rectangle to all side but one long side.
          7. Roll from the long side with filling to the edge into a tight roll, pinching the final side closed. Cut into 5 cm (2 inch) slices and place into a lightly greased pan 26.5 cm (10.5 inch) springform pan.
          8. Pre-heat the oven to 175° C (350° F). Let rest 15 minutes.
          9. Bake for 40-50 minutes until light golden brown and it has baked through (an internal temperature of 88–93°C (190–200° F ).
          10. Ice only right before serving.

          Ingredients for Filling:

          • 245 g (1 cup) packed brown sugar
          • 18 g (2 1⁄2 tbsp) cinnamon
          • 76 g (1/3 cup) unsalted butter, room temperature

          Directions for Filling:

          1. Combine all of the ingredients to make a smooth paste, set aside.

          Ingredients for Icing:

          • 20 g (1/4 cup) butter, room temperature
          • 70 g (1/4 cup) cream cheese, room temperature
          • 200 g (1 1/2 cups) icing sugar
          • 3 mL (1/2 tsp) clear vanilla
          • 2-4 tbsp cold water
          • Pinch of salt

          Directions for Icing:

          1. Combine all of the ingredients to make a smooth paste, set aside.

          Notes:

          • I reduced the sugar by half in the dough from the original recipe as I find these things usually super sweet. I increased the flour to make up for the sugar.
          • I also added cinnamon to the dough.
          • I added water to the icing as I prefer it to be drizzled instead of dipped or smeared.

          Read Full Post »

          applepreserves_first

          This is a naturally sweet applesauce, no added sugar or chemicals, just the beautiful sweetness of the apples!

          Since JT and I have embarked on our diet, I have been expanding a recipe collection because there is nothing worse than eating ‘diet food’. JT can attest that our food has been the furthest from ‘diet’, at least, our perception of ‘diet food’. We’ve had:

          • Chicken Schnitzel with cauliflower mash
          • Zucchini spaghetti and chicken meatballs
          • Mushroom and cauliflower crêpes with lentil béchamel sauce
          • Apple and Dijon glazed pork tenderloin
          • Pulled pork tenderloin crêpe with homemade BBQ sauce
          • Navy bean mushroom ‘risotto’
          • Pacific Salmon with cauliflower dill sauce on wilted spinach
          • Chicken Tikka Masala on cauliflower ‘rice’
          • Pork tenderloin on braised red cabbage
          • Pork tenderloin with mushroom sauce on sautéd veggies
          • Tilapia en papillote
          • Bouillabaisse

          The real challenge is finding alternatives that fit into the diet parameters so I created this apple preserve (or butter) as a condiment, but also as a sweetener in some of the dishes named above. I try to vary the meals so that we don’t get bored of the same thing.

          The other thing that I’m finding quite helpful is weighing everything to make sure we are not having more than we should — I’ve fallen off that bandwagon a few times, so it’s great to get back to it. Measuring is a great tool to keep you on track and it keeps you from inching up the volume (which I can be guilty of)! I measure out 100 g  (3.5 oz) portions of any protein we purchase and freeze them individually. I know each baggy is 100 g (3.5 oz) which is exactly the portion size we should be eating. It doesn’t take long to get used to the smaller volumes particularly since we have to drink a lot of water. And the veggies are quite generous (230 g 8 oz per portion), in fact, JT has a difficult time eating the allotted volume of veggies sometimes (I do a lot of wilted spinach…makes for a smaller amount!). Fortunately, we can season to our heart’s content so the food isn’t bland. The other thing about 100 g or 3.5 oz portions is that it makes the budget go further! I’m not going to post a lot more about my regimen but I will share the odd recipe I think you might enjoy. Plus, we have a few cheat days planned (Super Bowl for one!) so I’ll share some of those tasty treats. Thank you for allowing us to indulge in our resolutions, while I enjoy your wonderful recipes from afar, for the time being.

          Unsweetened Apple Preserves

          A KitchenInspirations Original Recipe

          Makes 750 mL (3 cups) preserves.

          Ingredients:

          • 1 kg (about 2 lb) red delicious apples, peel and core included*.
          • 1 L (about 4 cups) water
          • 6 cinnamon sticks
          • 10 g (about 3 tbsp) freshly grated ginger
          • pinch of salt

          Directions:

          1. In a medium Dutch oven, add chopped apples, water and cinnamon sticks and cook on medium heat until apples have broken down and thickened and most of the water has evaporated, about xx minutes.
          2. Add freshly grated ginger and pinch of salt, stir well.
          3. Pour into prepared containers and seal with new lids. Store in the freezer. Use refrigerated preserves within a month.

          Uses:

          • Use to sweeten sauces and dressings instead of sugar.
          • Pour over unsweetened yogurt or ice cream or gelato.
          • Use as a condiment for pork.
          • Combine with a little Dijon Mustard as a glaze over pork tenderloin.

          *The peel and core add natural pectin to the preserves which help to thicken and preserve it.

          applepreserves

          Read Full Post »

          marmalade_first

          My dear friend Lorraine recently launched her new travel company, focussing on unique food and travel experiences, traveling in the style and class that she has grown accustomed to! Her first journey is to Peru, a gastronomical hot-bed, who knew? Do take a gander to her new site Experiential Traveller and check it out.

          It so happens that I have had Peruvian cuisine only a couple of times, in New York City, of all places! A few years ago, JT and I were sitting in our hotel lobby waiting for our dear friends Paul & T to arrive when this very animated woman, Melony comes in holding a bag of freshly baked bagels. She comes bounding over to us with such excitement and says, “I bet you’ve never had a Brooklyn bagel!” We said we’ve had bagels in New York but she interrupted and claimed with no uncertainty that they were most likely not authentic Brooklyn bagels and that today was our lucky day because she just bought a bag of the city’s finest and we MUST try them. It’s not like we had a choice, so we followed her into the attached hair salon (she was the manager) and she proceeded to hand us authentic Brooklyn bagels. Well, you can’t just eat someone’s authentic Brooklyn bagels without some small talk, and that’s how we found out about the BEST (THE BEST, Jerry. THE BEST) Peruvian restaurant in the city (Mancora in The Lower East Side)! And on the plus side, it wasn’t a wallet-breaker either! We had one of the best lunches there with our dear friends Paul and T! You see, I did come back around to Peru!

          Orange marmalade goes so well with Brooklyn bagels so when I had a few oranges left over from a gig late last summer, I decided to make orange marmalade! I chose an Ina Garten recipe that took two days as we were heading up to the cottage and I didn’t have time to finish it in the city. Having to do it again, I’d probably go with a long cooking jam instead of macerating the fruit as I didn’t feel it gave anything different to the texture. But if you need a jam recipe spanning over two days, this one is for you!

          This recipe is roughly based on Ina Garten’s Orange Marmalade

          Easy Orange Marmalade

          Yields: 500 mL (~2 cups)

          Ingredients:

          • 2 large oranges (ends removed and sliced very thinly, yields about 575 g)
          • 2 cups water
          • 300 g sugar
          • 45 mL lemon juice

          Directions:

          1. Combine thinly sliced orange slices and the water in a non-reactive pan (I used my Le Creuset). Bring to a boil, stirring often.
          2. Remove from heat and add sugar, stirring until entirely dissolved. Add lemon juice and stir.
          3. Cover and leave overnight.
          4. The following day, bring the mixture back to a boil, stirring often. Reduce to a simmer and simmer uncovered for 2 hours, stirring often. Turn up the heat again and gently boil for an additional 30 minutes, skimming off any foam that forms. Cook the marmalade until it reaches 105° C (220° F) or when a small sample forms wrinkles as you run your finger through it on a very cold plate. At this point, I felt there was too much peel and not enough jam, so I took about half and processed it smoothly with an immersion blender and returned it to the peel and combined. It’s quite a lovely texture.
          5. Pour into sterilized jars and apply lids. Process for 10 minutes in hard boiling water.

          marmalade_2

          Notes:

          • The sugar was reduced to 300 g  (a little more than the 3:1 ratio).
          • I found the multi-process a bit much for the result, I will find a version that is not so labour intensive next time. You may wish to try Helene’s family recipe.
          • The platter was a gift from my cousin and his wife when they stayed with us for a little more than two weeks, summer 2015. I adore gifts like that, I will always think of them when I use the platter. It’s hand painted Herend Porcelain, a very famous Hungarian porcelain house.

          This is a good article on the differences between a Brooklyn Bagel and a Montréal Bagel (my favourite). Updated Jan 10/17.

          Read Full Post »

          strawberryjam_first

          On a recent trip to Europe, our dear friends Paul and T met us in Almeria to spend a few days together at my cousin Lucy’s flat in San José, Spain.

          We stayed one night in Almeria because the flat was already booked. We stumbled upon Joseba Anorga Taberna quite by accident and had one of our most memorable meals in Spain (not counting the one star Michelin, but that’s another story). The Tapas were excellent and beautifully presented. It was a ridiculously hot and humid evening in Almeria so we didn’t want a heavy meal to weigh us down so sharing tapas was the perfect solution.

          Joseba Anorga Taberna is a contemporary restaurant rated as one of the top ten in Almeria, what luck we had finding it! These are just a few of the tapas we enjoyed our first night in Spain. Buen Apetito.

          This slideshow requires JavaScript.

          Just before we left for Europe, I found the last of the Ontario strawberries at my local grocer and they weren’t even overpriced! I bought a few pints and decided to make strawberry jam out of them to enjoy over the winter. I used a pectin-free recipe using a 3:1 ratio, three parts fruit to one part sugar. The jelling will take longer than a full-sugar version but it’s worth it. It’s not a sickly sweet jam, which is just fine by me!

          strawberryjam_3

          The jam is rich with strawberry flavour, just like Mom’s!

          Strawberry Jam

          Yield: 500 mL or 2 cups

          Ingredients:

          • 936 g strawberries, washed and hulled
          • 309 g sugar
          • 1/4 cup lemon juice, about 1 good size lemon
          • zest of 1 lemon

          Directions:

          1. Combine all of the ingredients in the bowl of your 10-cup food processor. Plus until desired consistency is achieved (see notes).
          2. Pour content into a non-reactive, heavy bottom pan (I used my Le Creuset). Slowly heat until the sugar is dissolved and bring very slowly to a boil. Remove foam as it appears (see notes).
          3. Boil until the jam reaches 105° C (220° F) and has thickened up and reached the jellied stage (test a small amount on an ice cold plate and if you can wrinkle the jam, it’s done!)

          strawberryjam_2

          We like this jam a lot.

          Notes:

          • I reduced the sugar according to this website (see last paragraph). To get to the jelly stage will take a little longer than the full sugar version, but it’s worth it.
          • I do not have a potato masher, instead of pulsing you may mash the berries with said masher, add the remaining ingredients and mix well.
          • Apparently, foam contains a lot more air than the actual jam so leaving it may reduce the shelf-life of your jam (source here).

          Read Full Post »

          CrispyMacNCheeseWaffleBites_First

          Occasionally, I click on a Facebook sponsored post, these waffle bites were one of them. But the photo was not for a recipe, it was just a photo and when I googled the bites the results were quite disturbing (like a train wreck of Mac ‘n Cheese, a total mess), nothing like the image that was sponsored on Facebook! So I put on my thinking cap and came up with this recipe. I basically mixed a serving of waffle batter with 1 serving of macaroni and cheese and sprinkled both top and bottom with more shredded cheese. These are bites so I did not fill the waffle pan, I wanted them small. You need to cook these slightly longer than a normal waffle because you want the cheese to crisp up, it’s the only way they will come away from the pan without leaving a cheesy mess.

          CrispyMacNCheeseWaffleBites_4

          Delicious Cheesy Morsels

          Mac ‘n Cheese Waffle Bites

          A KitchenInspirations Original Recipe

          Makes 4 small waffles, cut into fourths, about 16 crackers

          Ingredients:

          • 1 leftover serving* of your favourite Mac ‘n Cheese (any packaged or homemade will do).
          • 1 egg
          • 1/2 cup milk
          • 1/2 cup AP flour
          • 1/2 tsp baking powder
          • pinch of salt
          • 1 cup of shredded good quality old cheddar (or any good melting cheese)
          • 2 tbsp olive oil

          Directions:

          1. Make sure your leftover Mac ‘n Cheese is at room temperature (not cold out of the fridge)
          2. Combine egg and milk and beat well.
          3. Sift flour, baking powder and salt into egg mixture and beat until well combined and thick.
          4. Pour over leftover Mac ‘n Cheese and mix well.
          5. Preheat your waffle iron. Brush both sides generously with olive oil. Add a couple of tablespoons of shredded cheddar to the base, spoon in about 1/2 cup of the Mac ‘n Cheese waffle batter onto the centre and add a couple more tablespoons of the shredded cheddar on top and close the pan.
          6. Waffles need to cook a little longer than normal so that cheese crisps up.
          7. Waffles are cooked when the top of the waffle pan easily peels away from the waffle, although you may need a little nudge to release if cheese is sticking to the iron.
          8. Cut into quarters with a pizza cutter.

          CrispyMacNCheeseWaffleBites_2

          If you like crispy cheese, you will LOVE these.

          Notes:

          • *A leftover serving is basically a 1/2 cup of uncooked noodles and cheese sauce.
          • To make more, simply multiply the waffle ingredients by the number of servings of Mac ‘n Cheese (for example, KD has 4 servings per box, so ingredients would be 4 eggs, 2 cups milk, 2 cups flour, 2 tsp baking powder etc…).
          • I, intentionally did not make these bites the full-size of the waffle pan, I wanted them irregular and smallish.
          • Waffle bites are crispy and not creamy, they are like a giant Mac ‘n Cheese chip.
          • Add chopped green onions for extra flavour.
          • Serve with salsa, a bruschetta topping or greek yogurt or sour cream for dipping.

          CrispyMacNCheeseWaffleBites_3

          A view of the lake.

          I didn't cook the first one long enough and it literally split in half. Perfectly edible but not pretty!

          I didn’t cook the first one long enough and it literally split in half. Perfectly edible but not pretty!

          Read Full Post »

          OatmealBreakfastCake_first

          Many of you are shaking your heads right about now. Breakfast Cake? Has she gone completely mad? How can it be? A cake for breakfast? This is actually a recipe I tested some time back and I loved it so much, I’ve continued to make it on a regular basis, particularly for the cottage.

          This one was baked at home on the BBQ because it was way too hot to be turning on the oven, even if it is for such a lovely breakfast cake. JT developed a wonderful contraption inside our Weber gas grill: he inverted a vegetable grill basket and set it in the centre, this allows the ‘cake’ to be lifted off the grill so that the I can keep the middle burner on low and the two outside burners on medium, maintaining the inside ‘oven’ an even 350° F! So next time you want to bake something and it’s too hot, try this nifty idea!

          OatmealBreakfastCake

          Would you care for some maple syrup with that?

          Blueberry and Peach Oatmeal Breakfast Cake

          Please click here for the original recipe. This recipe serves 8 or one 9″ x 9″ cake.

          Ingredients:

          • 500 mL (2 cups) 2% milk
          • 250 mL (1 cup) egg whites
          • 250 mL (1 cup) applesauce*
          • 2 tsp ground cinnamon
          • 1/4 tsp salt
          • 270 g (3 cups) large flake oats
          • 1/2 cup blueberries
          • 1 peach, cubed evenly
          • A mix of strawberries, blueberries and raspberries
          • maple syrup

          Directions:

          1. Combine wet ingredients and mix well. Add the cinnamon, salt and large flake oats and mix well. Allow to sit for several hours in the refrigerator or overnight (mixture will become very thick as oats absorb the liquid).
          2. Preheat the BBQ to 350° F.
          3. Add 1/2 cup blueberries and cubed peaches and mix well. Pour contents into a parchment lined pan and bake for about 50 minutes or until a cake tester comes out clean from the centre. Serve warm with berries and maple syrup.

          Oatmeal NutFacts

          Serving size is based on 1/8 of the cake.

          OatmealBreakfastCake2

          Notes:

          • This recipe works particularly well with any type of fruit, so allow your imagination go wild!
          • I’ve also been known to serve this with whipped cream.
          • Kids may only want half a serving because it is very filling.
          • For truly Gluten Free, please choose oats that claim Gluten Free on the packaging as most oats are processed in non-gluten free factories and may be contaminated.
          • * the apple sauce was the leftover apple pulp from when I made this apple jelly.
          • This is not a sweet breakfast cake.
          • Replace milk with orange juice for another flavour.
          • Surprisingly, when I tested the original recipe, it also was very cake-like even though the picture on the original site shows more porridge than cake!
          • Nuts are also a wonderful addition but I wanted a nut free version due to an allergy.

          Read Full Post »

          Beghrir_First

          These tasty treats resemble English crumpets in both flavour and texture. Please click here to see my attempt at making the English treats.

          Six years ago, we visited Morocco  My how time flies. During our visit, JT and I took two cooking classes, one at our Riad and the other at a very famous restaurant, Maison MK with Chef, Omar El Ouahssoussi. Both lessons had us making popular Moroccan main courses which we have made several times since our return. All of the food in Morocco is exceptional, a wonderful contrast of savory and sweet, carefully paired. Even breakfast in Morocco was something special. Breakfast always had a bit of a continental leaning but with Moroccan specialties, like this pancake. I’ll never forget the first time I tried Beghrir, on the rooftop patio of our Riad. It came with a little pitcher of syrup that tasted like honey and melted butter, you drizzle this syrup on the little cakes and the holes soak up all of the wonderfulness. I was instantly delighted with the unique texture and flavour of these interesting yeast-based pancakes and loudly declared that I would make them as soon as we returned. Yes, that was SIX years ago. We’ve made most of the dishes we learned how to make in our cooking classes but I let this one fall off my list. Better late than never, eh?

          Part of my hesitation to make this wonderful pancake was the prep and rest time, some recipes rest for one and half hours! I just didn’t have the time for that, so when I found My Moroccan Food blog’s Baghrir recipe, with only 30 minute resting time, I knew it was for me! As luck would have it, I only had about half of the required semolina in my pantry so I had to improvise. I also rather liked an ingredient I saw in the New Moroccan cookbook (please see notes below) so I altered the proportions of the original recipe to include almond flour. I am going to give this a try making it gluten free and hopefully, I won’t drag it out another six years.

          Beghrir, THE Moroccan Pancake

          Makes about 42 little pancakes about 5-6 cm (3-3.5″) diameter.  For the original recipe, please click here.

          Ingredients:

          • 120 gr of fine semolina
          • 120 g AP unbleached flour
          • 50 g almond flour
          • 1 tbsp granulated sugar
          • 1 tsp yeast
          • ½ tsp salt
          • 500 mL (2 cups) warm water
          • 2 tsp baking powder

          Directions:

          1. Combine all of the ingredients in a large bowl and blend well with a stick/immersion blender. Allow to stand in a warm place for 30 minutes.
          2. After 30 minutes you should see the yeast taking action. Give the batter another blending and prepare your pan by spraying well with non-stick spray.
          3. Preheat the pan (see notes below). Using a 4.5 cm (2.75″) ice cream scoop, scoop a scant helping of batter and pour from the centre out on the hot pan. The Beghrir will cook from the bottom up, you do not flip this pancake. Cook until the batter is no longer wet. Repeat until all of the batter is gone.

          Beghrir_2

          These tasty Moroccan breakfast cakes are very similar in texture and flavour to English Crumpets.

          Beghrir_3

          The honey butter syrup makes this breakfast a treat and extremely moreish.

          Notes:

          • The pan must be very hot for the batter to bubble, but not hot enough that the batter burns before it cooks, it’s a bit of a balancing act.
          • I used a well-seasoned cast iron pan (the one I use to make crêpes) so I had to keep turning the heat down so the beghrir doesn’t burn.
          • Beghrir will stick together while hot, so cool them laying out in a single layer.
          • Beghrir freezes very well. I plan to repurpose them with a little cream cheese, smoked salmon and fresh dill during the holiday season, although JT really loved them with the syrup.
          • To reheat Beghrir, steam them for a few minutes. Steaming maintains the crumpet-like texture. (updated October 15, 2016)
          • The original recipe is a synthesis of Chef Mourad Lahlou’s 2011 cookbook, New Moroccan, (page 196) and this blog. I found Chef Mourad’s recipe a tad complicated for first thing in the morning so I simply borrowed the almond flour he adds, I figured it would add texture and flavour. Next time I may try his recipe for contrast.
          • Chef Mourad used a flat indented silver dollar pancake pan (like this one) but I did not have one and I do not think it is needed, the pancakes turn out beautifully round on their own.
          • The syrup is an equal combination of butter, honey and about half the volume of water, heat gently to melt butter and whisk to combine, serve warm.

          • Beghrir can be topped with anything, try some jam, or even maple syrup, but I’ll stick to the traditional honey and butter, it’s so good!
          • Beghrir can be spelled Baghrir or Beghrir, or so says the internet.

          I can’t believe I didn’t post a pic of the new table yet! This is the newly improved table, havent decided to paint the legs yet!

          Read Full Post »

          BananaBread_First

          Summer has been very warm and humid in Toronto. Don’t get me wrong, I am not complaining because February comes all too quickly and the -25° C (-13° F) is still too fresh in my mind but I really don’t like to turn the oven on (particularly for a recipe that calls for one hour!) when it’s that hot outside (it makes the A/C work even harder). So I modified this recipe to be baked on the Barbie with ingredients I had on hand.

          BananaBread_2

          The top is swirled with cinnamon, but not too much to be overpowering.

          Give this a light toasting to get even more flavour out of the loaf.

          We’ve been spending a lot of time at the cottage this year, JT has some council meetings and we like to avoid the traditional weekend traffic so we go up Thursday and come back Tuesday or even go up Sunday and come back Friday. It’s been great, neither of us stresses about weekend traffic anymore! But having so much time at the cottage can be a bit boring, so I prefer to have projects lined up so I can amuse myself without spending a lot of time on the computer. I had been looking for a small cocktail table to set between two chairs in our living area but it had to be rustic and small and sadly I couldn’t find anything.

          IMG_0028

          A small table for two glasses between the chairs would be perfect.

          I was inspired by rustic tables made of a cross section of a log with sticks as legs like this one:

          Screen Shot 2016-08-23 at 3.32.43 PM

          Inspiration table

          But I was stuck on how to slice a log so that it’s perfectly even on both sides because we have limited tools. And then I found this log tea light at Winners (TJ Max) in the right diametre for a reasonable price and my little table was born.

          Underside

          Tea light spots will help anchor legs in place.

          TableTop

          Table top has just the right amount of petina.

          JT and I sourced the legs in the forest, we had to make sure they were not too new or too old or had bugs in them (you know how I feel about that). I cut the legs to size in the city (I have a table saw) and then I assembled the table at the cottage while JT was at a meeting, just in time to receive our good friends for a weekend.

          RusticTable_phase I

          TabI hadn’t decided to paint the legs at this point.

          Unfortunately, I turned around for a split second and my friend pulled the new table up to the movies on the shelf hoping to find something she hadn’t seen before and…yep…you guessed it…she thought it was a stool and sat on it! #notastool was the hashtag for the weekend. I ended up disassembling it and starting from scratch. Fortunately the table top was in tact so all I did was rebuild the legs.

          BrokenTable

          It’s an honest mistake.

          When I perused the net for banana bread recipes, I noticed that many of them had a lot of sugar. A LOT! I was hoping for something less sweet so that it’s a bit healthier when I found Cookie and Kate’s recipe. I would have made it verbatim but then I realized that I was short of a few ingredients so I improvised. I liked the idea of whole wheat flour but I didn’t want 100% of it, so I divided the flour into 1:3/4 so the texture is a little smoother (plus I didn’t have white whole wheat flour on hand — what is that anyway?).  The bread is wonderful when it is lightly toasted and smothered with butter with a cup of tea. It will sooth away any bruises caused by using a table as a stool, that was not meant as a stool. #notastool.

          BananaBread_3

          Banana Bread

          Original recipe, please click here. This recipe makes one generous 10 cm x 23 cm (4″x 9″) loaf

          Ingredients:

          • 125 mL (1/2 cup) melted coconut oil
          • 60 mL (1/4 cup) honey
          • 60 mL (1/4 cup) milk
          • 60 mL (1/4 cup) water
          • 5 mL (1 teaspoon) vanilla extract
          • 2 eggs
          • 125 mL (1/2 cup) roughly mashed ripe bananas (about 2 smallish bananas)
          • 60 mL (1/4 cup) dates
          • 128 g (1 cup) whole wheat flour
          • 94 g (3/4 cup) AP flour
          • 1 teaspoon baking powder
          • 2.5 mL (½ teaspoon) ground cinnamon, plus more to swirl on top
          • 2.5 mL (½ teaspoon)salt
          • 70 g (½ cup) chopped almonds

          Directions:

          1. Preheat the BBQ to 177 ° C (350° F) using only the front and back burners. Prepare a 10 cm x 23 cm (4″ x 9″) loaf pan by generously spraying with non-stick baking spray.
          2. In the large bowl of a food processor, add melted coconut oil, honey, milk, water, vanilla extract, eggs, bananas and dates and pulse until dates and bananas have been well incorporated into the liquid.
          3. Sift the flours, baking powder, cinnamon and salt. Add all at once to the liquid and pulse a few times to incorporate. Stir in chopped almonds.
          4. Pour into prepared pan and set into a larger pan. Place pan into the centre of the BBQ so that the elements that are on are not below the loaf pan. Bake for 50-60 minutes or until cake tester comes out clean (mine was perfect in 50 minutes).
          BananaBread_4 It’s a dense bread that is perfect for breakfast or a small snack.

          Read Full Post »

          WholeWheatSpeltCinnamonBread_1

          Recently my sister-in-law and her husband stayed at our place as they had an early morning appointment downtown because they live in another city that is 2 hours away. My brother-in-law cannot eat sugar or white flour and I wanted to create a special breakfast bread that he could eat so I searched and searched the world-wide cookbooks. My general GOTO blog for speciality flour creations is Angie’s Recipes because Angie creates or modifies existing recipes using anything BUT white flour and most of her recipes use natural sugars so it didn’t surprise me when I landed on her version of the Cinnamon Spelt Ring. I loved this recipe because I could experiment with the dough slicing techniques that another friend, Maria at A_boleyn mastered with her Swedish Cinnamon Star Bread. In fact, this beautiful technique has been demonstrated on many blogs and it was about time for me to give it a go. I doubt my family minded being guinea pigs!

          This was my first attempt, I made a star bread as well as a rope ring but they were too thin and not bready enough. This was my first attempt, I made a star bread as well as a rope ring but they were too thin and not bready enough so I revised the recipe and made it again!

          I modified the recipe to include whole wheat flour instead of the two types of spelt flour that Angie’s recipe had. As well, I have replaced white sugar with dates for the filling. My first test, although tasted OK, was not up to my expectations, it was just too thin and not bready like a cinnamon bun, so I made it again with a lot more success.

          This is the unbaked bread. In hindsight, this dough was bready enough to make two loaves! This is the revised recipe below of the unbaked bread. In hindsight, this dough was bready enough to make two loaves!

          Whole Wheat, Spelt Cinnamon Bread

          Original recipe from Angie’s Recipes Blog, please click here.

          This recipe makes one 40 cm x 15 cm (15″ x 6″) rope.

          Ingredients:

          • 165 mL Milk, lukewarm
          • 3 Egg yolks, large, divided
          • 30 g flavourless vegetable oil (I used canola)
          • 20 g Maple syrup
          • 8 g Instant dried yeast
          • 250 g Whole Wheat Flour (may want to reduce this to 225 for a shaggier dough).
          • 100 g Spelt Flour
          • 5 g salt

          Directions:

          1. Combine warm milk, 2 egg yolks, vegetable oil, instant dried yeast and maple syrup and whisk well. Allow to proof until bubbling.
          2. Sift the flours together into the bowl of your stand mixer. Make a well in the centre and add the wet ingredients and mix until well combined. Knead for 10 minutes.
          3. Allow to rise in a warm place for 1 hour and 20 minutes or until doubled in size.

          Ingredients for filling:

          • 75 g unsalted butter
          • 100 g dates
          • 6 g ground cinnamon
          • 2 g salt

          Directions:

          1. Add all of the filling ingredients into the bowl of a small food processor and process until completely smooth and combined.
          2. Roll out the dough into a 0.5 cm (1/4 inch) thick rectangle (mine worked out to 38 cm x 25 cm (15″ x 10″). Spread all of the cinnamon butter mixture evenly over the dough, leaving a 1 cm (1/2 inch) border on three sides (spread right to the long side that you will begin to roll). Starting at the long end, roll up the dough tightly to form a roll. Seal all of the edges well by pinching them closed. Slice the roll in half lengthwise, leaving the last 5 cm (2 inches) connected.
          3. Turn each half cut-side up and carefully wrap the halves together like a rope, maintaining the cut-sides up to expose the filling. Carefully place on a baking tray lined with parchment paper and allow to rest, covered in a warm location for 1 hour. Check out Angie’s blog for detailed photos on how-to roll, cut and form into a rope. Or check out Maria’s blog on how to make the star version of this gorgeous bread.
          4. Preheat the oven to 375° F (190 °C).
          5. Mix a teaspoon of water into the remaining egg yolk and brush over dough. Bake for about 30-35 minutes or until golden brown and internal temperature is around 200 °F (93°C). You may wish to cover with some foil so it doesn’t brown too quickly.
          6. Serve with home-made jam and butter.
          WholeWheatSpeltCinnamonBread2 This is the baked loaf, it’s a beauty!
          CheeseEggBraid2 I also wanted to make the rope bread as a savoury cheese version and used my Sesame Bread Recipe; I divided the dough into two equal portions, spread a few handfuls of sharp cheddar on one rectangle instead of the cinnamon butter, and also made a plain cut wheat sheaf version of the other. Both turned out excellent.
          The cheese melted in the roll and was a lovely flavour in the egg bread. The cheese melted in the roll and was a lovely flavour in the egg bread.

          Read Full Post »

          Older Posts »