Feeds:
Posts
Comments

Archive for the ‘Moroccan recipes’ Category

We had some dear friends over for a BBQ in late-August and we made homemade Moroccan lamb burgers with a wonderful spiced prune and nut couscous; I needed a Morrocan-style dessert so I chose this wonderful baklava recipe. To be honest, I wasn’t able to differentiate between Middle Eastern baklava and Morrocan baklava but rest assured, they are both delicious. This version has walnuts, pistachios and almonds with a syrup flavoured with orange and lemon rind, cloves and orange blossom water. It should have rose water in it as well, but I am not a fan so I skipped it. 

Metaxas (Moroccan Baklava)

For the original recipe, please click here. Makes about 33 cm x 23 cm 5 cm (12 inches x 9 inches x 2 inches) baking pan of Metaxas.

Ingredients

  • 150 g sugar
  • 150 mL water
  • rind of an orange (no white pith)
  • rind of a lemon (no white pith)
  • 5 whole cloves
  • 60 mL honey
  • 5 mL orange blossom water
  • 100 g walnuts
  • 100 g pistachios
  • 100 g lightly toasted, blanched almonds
  • 100 g sugar
  • 2.5 g ground cinnamon
  • 200 g unsalted butter, melted
  • 10 commercial phyllo dough sheets, cut in half length-wise to fit your pan

Directions:

  1. Combine the sugar, water, both orange and lemon rinds, cloves and cinnamon stick in a medium saucepan. Bring to a slow boil then turn the heat down to simmer, uncovered for 8 minutes. Remove the pan from the heat and strain to remove the spices and rinds. Stir in the honey and orange blossom water. Set aside to cool. See notes to make use of the orange and lemon rind.
  2. Preheat the oven to 300° F and toast the nuts for 12 minutes. Remove from the heat and cool. Increase the oven temperature to 350° F.
  3. In the small bowl of your food processor, combine the cooled nuts, sugar and cinnamon and pulse so they are relatively finely chopped with some larger pieces.
  4. Line a 33 cm x 23 cm 5 cm (12 inches x 9 inches x 2 inches) pan parchment and brush generously with butter.
  5. Begin by lining the bottom of the pan with one sheet of phyllo pastry and brush generously with the melted butter. Continue until you have five sheets stacked. Spread about one-third of the nut mixture over the fifth sheet evenly to the sides. Continue with the next five sheets spreading each sheet generously with the melted butter. Spread another third of the nut mixture over the tenth sheet evenly to the edges. Continue with the next five sheets as before, and spread the fifteenth sheet with the last third of the nut mixture. Finish with the last five sheets of phyllo as before, drizzling any remaining butter over the top of the last sheet.
  6. Bake in a preheated oven at 350° F for 45 minutes. Cover with foil if the top browns too quickly. Remove the pan from the oven and cut immediately. To cut the Metaxas in the traditional diamond pattern, begin by cutting a line from one corner to the opposite corner and repeat to the last corner. Then cut parallel lines to create small diamond slices. Pour the cooled syrup over the hot Metaxas. Allow to stand overnight at room temperature before serving.

Layers of delicious nuts bathed in a luxurious syrup between crunchy sheets of phyllo.

Notes:

  • Remove and separate the orange and lemon rinds and place on a parchment-lined baking sheet. Bake for 10 minutes at 300° F until firm. Eat as a snack.

Read Full Post »

Beghrir_First

These tasty treats resemble English crumpets in both flavour and texture. Please click here to see my attempt at making the English treats.

Six years ago, we visited Morocco  My how time flies. During our visit, JT and I took two cooking classes, one at our Riad and the other at a very famous restaurant, Maison MK with Chef, Omar El Ouahssoussi. Both lessons had us making popular Moroccan main courses which we have made several times since our return. All of the food in Morocco is exceptional, a wonderful contrast of savory and sweet, carefully paired. Even breakfast in Morocco was something special. Breakfast always had a bit of a continental leaning but with Moroccan specialties, like this pancake. I’ll never forget the first time I tried Beghrir, on the rooftop patio of our Riad. It came with a little pitcher of syrup that tasted like honey and melted butter, you drizzle this syrup on the little cakes and the holes soak up all of the wonderfulness. I was instantly delighted with the unique texture and flavour of these interesting yeast-based pancakes and loudly declared that I would make them as soon as we returned. Yes, that was SIX years ago. We’ve made most of the dishes we learned how to make in our cooking classes but I let this one fall off my list. Better late than never, eh?

Part of my hesitation to make this wonderful pancake was the prep and rest time, some recipes rest for one and half hours! I just didn’t have the time for that, so when I found My Moroccan Food blog’s Baghrir recipe, with only 30 minute resting time, I knew it was for me! As luck would have it, I only had about half of the required semolina in my pantry so I had to improvise. I also rather liked an ingredient I saw in the New Moroccan cookbook (please see notes below) so I altered the proportions of the original recipe to include almond flour. I am going to give this a try making it gluten free and hopefully, I won’t drag it out another six years.

Beghrir, THE Moroccan Pancake

Makes about 42 little pancakes about 5-6 cm (3-3.5″) diameter.  For the original recipe, please click here.

Ingredients:

  • 120 gr of fine semolina
  • 120 g AP unbleached flour
  • 50 g almond flour
  • 1 tbsp granulated sugar
  • 1 tsp yeast
  • ½ tsp salt
  • 500 mL (2 cups) warm water
  • 2 tsp baking powder

Directions:

  1. Combine all of the ingredients in a large bowl and blend well with a stick/immersion blender. Allow to stand in a warm place for 30 minutes.
  2. After 30 minutes you should see the yeast taking action. Give the batter another blending and prepare your pan by spraying well with non-stick spray.
  3. Preheat the pan (see notes below). Using a 4.5 cm (2.75″) ice cream scoop, scoop a scant helping of batter and pour from the centre out on the hot pan. The Beghrir will cook from the bottom up, you do not flip this pancake. Cook until the batter is no longer wet. Repeat until all of the batter is gone.

Beghrir_2

These tasty Moroccan breakfast cakes are very similar in texture and flavour to English Crumpets.

Beghrir_3

The honey butter syrup makes this breakfast a treat and extremely moreish.

Notes:

  • The pan must be very hot for the batter to bubble, but not hot enough that the batter burns before it cooks, it’s a bit of a balancing act.
  • I used a well-seasoned cast iron pan (the one I use to make crêpes) so I had to keep turning the heat down so the beghrir doesn’t burn.
  • Beghrir will stick together while hot, so cool them laying out in a single layer.
  • Beghrir freezes very well. I plan to repurpose them with a little cream cheese, smoked salmon and fresh dill during the holiday season, although JT really loved them with the syrup.
  • To reheat Beghrir, steam them for a few minutes. Steaming maintains the crumpet-like texture. (updated October 15, 2016)
  • The original recipe is a synthesis of Chef Mourad Lahlou’s 2011 cookbook, New Moroccan, (page 196) and this blog. I found Chef Mourad’s recipe a tad complicated for first thing in the morning so I simply borrowed the almond flour he adds, I figured it would add texture and flavour. Next time I may try his recipe for contrast.
  • Chef Mourad used a flat indented silver dollar pancake pan (like this one) but I did not have one and I do not think it is needed, the pancakes turn out beautifully round on their own.
  • The syrup is an equal combination of butter, honey and about half the volume of water, heat gently to melt butter and whisk to combine, serve warm.

  • Beghrir can be topped with anything, try some jam, or even maple syrup, but I’ll stick to the traditional honey and butter, it’s so good!
  • Beghrir can be spelled Baghrir or Beghrir, or so says the internet.

I can’t believe I didn’t post a pic of the new table yet! This is the newly improved table, havent decided to paint the legs yet!

Read Full Post »

This weeknight meal started out to be a navy bean curry, but I went a little overboard on the spices and it ended up with the flavouring of our holiday in Morocco. If you please you could add some raisins, currents or even dates. Perhaps a nut or two for some crunch. All in all a very flavourful recipe that I hope you will enjoy.

Moroccan Inspired Navy Beans with Mushrooms

Serves 1 (just multiply by the number you need). I eyeballed this recipe, so if you decide to make it, make sure you alter it to your own taste! The only important bits are to soak the beans and cook them all the way through, the rest is really up to you!

The beans were cooked in the ‘curry’ until creamy

Ingredients:

  • 75 g dried Navy Beans, soaked overnight
  • 1 cup finely chopped sweet onion
  • 1-3 cloves of garlic finely minced (I like my microplane for this)
  • 1/4 cup dried mushrooms, reconstituted in warm water, liquid reserved
  • 1 1/2 cups fresh cremini and white mushrooms, sliced thickly
  • 1 tsp Garam Masala
  • 2 tsp Meat Masala
  • 3 tsp curry powder
  • 1 tsp cumin
  • 1 tsp ginger (I used the powdered Moroccan ginger)
  • 1 tbsp white vinegar
  • 1/2 cup chicken stock
  • Water, as much as the beans will absorb
  • 1/2 cup celery chopped
  • 1/4 cup grape tomatoes cut in half
  • 1 tbsp cilantro, chopped
  • 1 tbsp green onions
  • Hot pepper flakes (to taste)
  • Non-stick spray

I like to add pepper flakes for a bit of heat

Directions:

  1. Lightly spray a pressure cooker with non-stick spray and heat. Add onions. Cook the onions until they are brown, you’ll have to watch this as the spray doesn’t really give you enough fat so you’ll need to add very little bits of the stock. We don’t want to steam the onions, we want to BROWN them.
  2. Add 1-2 minced cloves of garlic and ALL of the dry spices and cook until you can smell the wonderful aroma (you are cooking the bitterness out of them). Add the drained beans and cook for a minute or so.
  3. Add the white vinegar and mix well. Add the remaining stock and about 2 cups of water. Close the lid and put the timer on for 10 minutes. At the end of 10 minutes, check to see if the beans have absorbed all of the water (how fast they absorb will depend on how dry they were…and how long you soaked them. Cooking the beans can take anywhere from 30 minutes to 1 hour). Keep adding water, or the reserved mushroom liquid until the beans are soft.
  4. In the meantime, heat a skillet and spray lightly with the non stick spray. Add the mushrooms and sauté until they are cooked (even the rehydrated ones). About half way through the cooking, add the remaining minced garlic. Set aside.
  5. When the beans are fully cooked, add the mushrooms, chopped celery and tomatoes and heat through.
  6. Serve garnished with the cilantro, green onions and hot pepper flakes.
  7. Enjoy.

This photo shows just a small portion, 75 g of dry beans is actually quite a lot of food

Read Full Post »

I’m always intrigued as to what draws a person to a recipe. It’s so personal and subjective, yet the food made from the recipe tantalizes taste buds whether you chose the recipe or not. Friday night JT wanted to make mussels, but we were a tad tired of the same old white wine sauce and we had just had a green curry so that was out. He scoured the net and was drawn to a Moroccan style mussel which included chick peas. Now I am trying to cut carbs down considerably (that’s actually JT’s bread he snuck onto my plate for the photo) and when I read the recipe I was immediately drawn to the chick peas…would they be satisfying enough that I wouldn’t need bread? That was the question.

When I first announced that we had planned a trip to Morocco, Greg at Rufus’ Food and Spirits Guide kindly emailed me a link to an article that discussed the merits of  traditional Moroccan cuisine in comparison to Modern Moroccan cuisine and we were so intrigued that we bought the cookbook. It’s been sitting on my kitchen desk and when I have any moment, I page through the lovely photos. Sadly, the recipes are very complex, often involving mixes of pastes and such that I do not have ready (a traditional Moroccan household would) so I have been unable to find something easy enough to make. Fast forward to Friday night: JT scouring the net for a recipe for mussels. He finds one on Epicurious. We have all the ingredients at home and it sounds like it would be fantastic. The spices were definitely a tip of a hat to Morocco.

HEY! Who snuck that piece of bread in my shot?

Moroccan Style Mussels with Chick Peas

Original recipe is from Epicurious, JT modified his version, of course

Ingredients:

  • 1/2 medium onion, coarsely chopped (1/2 cup)
  • 1 garlic clove, finely minced
  • 3/4 tsp ground cumin
  • 1/2 tsp paprika (preferably hot)
  • 1/2 tsp ground ginger
  • 1/4 tsp ground cinnamon
  • pinch cayenne
  • 1 1/2 tbsp olive oil
  • 1/2 tbsp cider vinegar
  • 1/2 (15- to 19-oz) can chickpeas, rinsed and drained
  • 1 tsp sugar
  • 1/2 cup halved grape tomatoes
  • 1 1/2 lb cultivated mussels, scrubbed and beards removed
  • 1/2 cup raisins
  • 1/3 cup low sodium chicken stock

Directions:

  1. Cook onion, garlic, and spices in oil in a 5- to 6-quart heavy pot over moderately low heat, stirring, until onion is softened, about 6 minutes.
  2. Stir in vinegar and simmer 1 minute.
  3. Add chickpeas, sugar, tomatoes, raisins and chicken stock and increase heat to moderate and gently simmer, uncovered, stirring occasionally, until slightly thickened, about 15 minutes.
  4. Add mussels and return to a simmer. Cover tightly with lid and cook until mussels just open wide, 3 to 6 minutes. (Discard any mussels that remain unopened after 6 minutes.)
  5. Serve Immediately.

The verdict? A M A Z  I N G! I not only did not NEED the bread, I did not WANT it. The chick peas were satisfying and filling AND the broth? What can I say, pass that spoon over please. This is going to make repeated appearances in our house, for sure!

Read Full Post »

Happy Saturday, dear readers! This is a full weekend of chores…some more fun than others, but you shall have to wait for tomorrow to find out. Plus, tomorrow I am going to introduce you to a dear friend who has just started blogging, we’re going to make one of her first blog-recipes tomorrow! I am very excited about it.

Today is my blogging friend, Charles of Five Euro Food, birthday, so I’d like to take this moment and wish him a very happy birthday. Charles has been a loyal commenter since I have discovered the pleasure of reciprocal commenting (OK, it only took me 4+ years!). You have certainly enriched my blogging experience beyond my expectations. Happy Birthday Charles, and many many more!

If you have made any of the Moroccan Salad recipes, you will by now understand the mass quantity of salad you are left with. We have been eating Morrocan salads all week; dallop on this, mixed into that, etc, etc, etc. You can well imagine that we are now a little tired of the same thing :-(!

This week we decided to reinvent our Quinoa Tabouleh recipe; we used RED and regular Quinoa which added colour to an already beautiful salad. And we added the left overs of the Carrot and Courgette (zucchini) Moroccan Salads. We grilled our shrimp and then I made a very simple green sauce with lemon juice, parsley, cilantro and garlic (a tip of the hat to Chimichurri Sauce). It was DELICIOUS. I loved the added flavours that the Moroccan carrot and zucchini brought in and I loved the colour of the red quinoa. If you haven’t already tried tabouleh, you MUST. And making it with quinoa just adds the extra healthiness that we need (and it’s gluten free!).

Reinventing Quinoa Tabouleh

Some other Quinoa recipes I’m sure you will love (sorry if I missed your recipe, some of you didn’t have ‘search’ built into your home page!):

Read Full Post »

Continuing on the Moroccan dinner party we had on the weekend, I made an inspired Crème Brulé and by inspired, I just mean I took some Moroccan flavours and put them into a tried and true Crème Brulé recipe. I found this recipe on line about 9 years ago and have long since lost the link. A guy wrote it, no idea his name but I really liked its simplicity and that you are virtually guaranteed a perfect Crème Brulé that will never taste like scrambled eggs!

Orange Crème Brulé

Crème Brulé

Makes about 3 servings 2/3 cup each

Ingredients:

  • 1 3/4 cups half and half
  • 5 egg yolks
  • 1/3 cup sugar
  • 2 tablespoon Grand Marnier
  • 1/2 tsp orange flavouring (you can use orange blossom water but I find it a little too perfumey)
  • pinch of freshly grated cinnamon
  • 1-2 tbsp of light brown sugar to ‘brulé’

Directions:

  1. Preheat oven to 275°F.
  2. Whisk the half and half, egg yolks, sugar and falvourings together in a bowl. Mix it all up until it gets nice and creamy.
  3. Pour this mixture into ramekins. My ramekins were about 2/3 of a cup each.
  4. Place the ramekins in a baking pan and fill the baking pan with hot water, about halfway up the sides of the ramekins. Place the pan with the ramekins in the oven for 30-45 minutes to an hour or so. You’ll know they’re done when you can stick a knife in one and it comes out clean. Remove the ramekins from the baking pan, set them on the counter, and let them cool. (The deeper your custard is the longer it will need to bake)
  5. Sprinkle a thin layer of the light brown sugar on the top of each. Make sure it’s a THIN layer, but also make sure it completely covers the custard. Now torch it!

Read Full Post »

You may recall at Maison MK we made Lamb Tajine, our guests Kevin and Barb with whom we are traveling down memory lane don’t care for Lamb; fortunately, the recipe deck from Maison MK included the same Tajine except using beef! Perfect. We decided to cook the dish the same way that we did at Maison MK, in a pressure cooker and only present in the Tajine.

Beef Tajine

Ingredients:

  • 1 kg stewing beef in large cubes
  • 50 g almonds with skins on.
  • 50 g prunes
  • 1 tbsp honey
  • pinch of cinnamon
  • 1 onion, chopped
  • 4 cloves garlic, finely minced
  • 1/2 cup cilantro, finely chopped
  • 1/2 cup parsley, finely chopped
  • 1 tsp 5 spices (a Moroccan blend our Chef gave us as a gift)
  • 1 tsp ginger
  • 1 large pinch saffron
  • 1 tsp turmeric (for colour)
  • 1 tsp cinnamon
  • salt and pepper to taste
  • 1-2 tbsp oil
  • 2-4 cups of water

Directions:

  1. Add the pitted prunes to a small saucepan and cover with water. Bring to a boil and cook for about 8-10 minutes (this is to soften the prunes and not disintegrate them!)
  2. Strain the prunes and return to heat, add the honey and cook until the prunes are glazed and all of the water has evaporated. Set aside.
  3. Add the almonds to a small saucepan and cover with water. Boil for 3 minutes. Strain and cool immediately with cold water. Remove skins; the skins should come off very easily.  Our Chef deep fried the almonds but we roasted them in a 375°F oven for 5-10 minutes.
  4. In a very hot pressure cooker with a bit of oil, brown the meat on all sides, set aside.
  5. Add a bit more of the oil and cook the onions until a little brown. Turn down the heat and add the garlic and stir until you can smell it. Return the beef to the pan.
  6. Add the ginger, saffron and turmeric and 1 cup of water. Stir well. Put the pressure cooker lid on and cook on a medium level flame for 10 minutes.
  7. Give the meat a stir and add 1-2 cups of water and cook with the pressure cooker lid on for another 40 minutes. Check to see how the meat is, after about 40 minutes it should be tender enough that you don’t need a knife to cut it. There should be enough ‘gravy’ to serve with the meat.
  8. Add salt and cinnamon and stir well. Stir in the cilantro and parsley. Serve in a tajine with couscous.

The beef turned out incredibly well, falling apart, no need for a knife! How do you like the tip of the hat to the 1970’s propping? What is that in the background? A bedspread? or is it curtains? Not sure either — I was just having a little fun!

Beef Tajine with Prunes and Almonds

This is the tajine that Hayat gave us as a gift!

Our new tajine

Read Full Post »

As the second course of our 4 course Moroccan meal this past weekend, I present the Trio of Moroccan Salads; these salads came out of our second cooking class at Maison MK. Our Chef, Omar El Ouahssoussi ran a very professional kitchen and both JT and I were equally impressed; colour coded cutting boards, one for meat and one for vegetables!

Chef Omar El Ouahssoussi

The class started out meeting the chef and the guide (not sure why, our chef spoke near perfect English) and we headed out to the souks to buy the food for our class. Our first stop was the vegetable vendor, where we bought onions, carrots, aubergine (egg plant) and courgette (zucchini). Then off to the spice vendor; I thought this was for our entertainment as the kitchen would be well stocked with the required spices, but the chef actually bought spices to give us as a gift! Then we stopped at the meat vendor where we bought our lamb and lastly the fresh herb vendor where we picked up some mint. But I digress, back to the salads.

Our shopping excursion

As our starter we have chosen to prepare the three salads that Chef Omar taught us to make, Aubergine, Courgette and Carrot Salads. We will serve them as close to the way Chef Omar served them to us. While preparing the salads, the one thing Chef Omar mentioned is that in Morocco, it is better to over cook than under cook, so the salads are all cooked vegetables richly flavoured with spices. I imagine this was originally done to rid the food of bacteria and if the food had spoiled a bit, the spices would make them palatable…but not in our case, the salads were unbelievably delicious! Over cooking reminded me of an article Greg sent over about a month or do ago from the New York Times. Click here for an interesting read.

Chef Omar generously gave us printouts of each of the recipes we cooked; sadly the translation is not as good, but I will fill in the gaps with my memory!

Trio of Cooked Moroccan Salads

Aubergine Salad

Ingredients:

  • 2 medium aubergines, chopped evenly into 1 cm or 1/2 inch cubes with the skins on (recipe calls for 1kg, which is too much)
  • 2 cloves garlic, finely chopped
  • 1 tbsp lemon juice
  • 1 tbsp tomato paste
  • 3 tsp paprika
  • 1 tsp cumin
  • 1 tbsp olive oil
  • 2 tbsp vegetable oil
  • Salt and paper to taste
  • 1/4 cup each finely chopped fresh cilantro and flat leaf parsley.

Directions:

  1. In a large pot cover the chopped aubergine with water, add the lemon juice and stir well (the lemon prevents it from turning brown)
  2. Cook over a medium simmer for 15-20 minutes or until the aubergine is soft.
  3. Drain water well and return to hot pot and cook off as much liquid as possible.
  4. Add garlic, tomato paste and spices and simmer for another 10 minutes, mashing the soft aubergine with a fork. Mix in both oils.
  5. Salt and pepper to taste.
  6. Once cooled to room temperature, add the fresh cilantro and flat leaf parsley and mix in well. Serve cold or at room temperature, shaped into little molds garnished with arugula and spinach.

Courgette salad

Ingredients:

  • 3 smallish courgettes, coarsest grated it cut into small even cubes
  • 2 cloves garlic, finely chopped
  • 1 tsp paprika
  • 1 tsp cumin
  • 1 tbsp olive oil
  • 1 tbsp vegetable oil
  • 1 tsp unsalted butter
  • 1 tsp white vinegar (to help maintain the bright green colour)
  • Salt and paper to taste
  • 1/4 cup each finely chopped fresh cilantro and flat leaf parsley.

Directions:

  1. Melt butter in a medium sized frying pan and stir fry the courgettes until soft.
  2. Add the vinegar, garlic and the spices.
  3. Mix in both oils and season with salt and paper to taste.
  4. Once cooled to room temperature, add the fresh cilantro and flat leaf parsley and mix in well.
  5. Serve cold or at room temperature, shaped into little molds garnished with arugula and spinach.

Carrot salad

Ingredients:

  • 3 large carrots cut into small even cubes
  • 2 cloves garlic, finely chopped
  • 2 tsp paprika
  • 1 tsp cumin
  • 1 tbsp olive oil
  • 1 tbsp vegetable oil
  • 1 tbsp lemon juice
  • Salt and paper to taste
  • 1/4 cup each finely chopped fresh cilantro and flat leaf parsley.

Directions:

  1. In a medium saucepan, cover carrot cubes with water and simmer until they are soft.
  2. Strain water off and return to pan and cook the remaining moisture off.
  3. Add the lemon juice, garlic and the spices and cook for about 5 minutes longer (carrots should be cubes but soft enough to squash – but don’t squash them), remove from heat.
  4. Mix in both oils and season with salt and paper to taste. Once cooled to room temperature, add the fresh cilantro and flat leaf parsley and mix in well.
  5. Serve cold or at room temperature, shaped into little molds garnished with arugula and spinach.

Courgette is top left, carrot is top right and the aubergine is front and centre

And I’ve finally got all the photos up on Shutterfly, so if you’re interested (and I am beyond flattered if you are), you are welcome to view our humble vacation photos in this link.

Read Full Post »

This past weekend we had our good friends Barb and Kevin over and we thought what better way to give them a taste of our Moroccan experience than to serve a variety of Moroccan delicacy’s that we learned how to make in our cooking classes. The hors d’œuvres for our Moroccan meal comes from our very first class in our Ryad Dar Les Cignones (The Storks – we had an old dilapidated palace across from the hotel where actual enormous storks made their nests!).

This is our lovely Chef at Dar Les Cignones

Our beautiful Chef (sadly, I cannot recall her name) at our Ryad showed us how to make these delicious pillows of Phyllo Pastry (which she actually made herself, although I won’t!) stuffed with a richly spiced shrimp mix. She did not give us a little printout like Maison MK did, so I had to go by memory and find a similar recipe on line and made some minor alterations. The photo below is the one taken with the iPhone4 with the flash at the Ryad. I tried to fix it a bit in Photoshop so it doesn’t look as cold and harsh. The funny story around the briouats is that the Chef specifically asked me if I wanted them deep fried or baked, and I opted for baked ‘pour la santé’ I said. And low and behold, we are served deep fried briouats! They were very tasty non-the-less!

Our baked Briouat with Dar Les Cignones Fried Briouat in the background

Baked Shrimp Briouats

Makes 26 5 cm (2 inch) triangles

Ingredients:

  • 300 g shrimp, peel on
  • 2 cloves garlic, minced
  • Salt and freshly ground black pepper
  • 1/4 cup yellow onion, finely chopped
  • 1 tbsp tomato paste
  • 3 tablespoons chopped fresh flat-leaf parsley
  • 3 tablespoons chopped fresh cilantro leaves
  • 3/4 teaspoon ground cumin
  • 1/2 teaspoon sweet paprika
  • Pinch of cayenne
  • Large pinch of saffron threads, revived in a little water
  • 1/4 cup fresh panko (or bread crumbs, I had panko)
  • 5 sheets of phyllo dough
  • 1/2 cup olive oil

Directions:

  1. Chop the shrimp into 1/2 cm bits, doesn’t have to be even or pretty.
  2. Heat a splash of oil in a pan and sauté the onions, add the shrimp and cook through.
  3. Add the garlic, tomato paste and spices and stir until you can smell the aroma.
  4. Remove from heat and add the panko, mix well.
  5. Allow to cool completely and add the fresh parsley and cilantro leaves. Mix well.
  6. Take 1 sheet of phyllo at a time, cut into 4-5cm strips. Drizzle with olive oil.
  7. Add about 1 tsp of the cooled filling to one end and fold tightly as shown in the diagram.
  8. Pre-heat oven to 350 ° F. Bake triangles for 12-15 minutes or until golden. Serve immediately or allow to cool and freeze.

Folding takes practice, make sure you have lots of phyllo on hand!

Baked Shrimp Briouat

Read Full Post »

We’re back to the old grind as they say; 10 hours of laundry, and a little grocery shopping later I’m back in my kitchen ready to cook up a storm!
Both JT and I picked up head colds while we were away; you know, the nasty, sneezey, sniffley, coughy kind? Chicken soup to the rescue! Everyone has their cold-cure secret recipe handed down from generation to generation so I won’t blog about it now, but what I will blog about is the amazing olive bread I made to accompany the cold cure soup! WARNING: you have to really LOVE olives, it will be too olivey if you’re just so-so on them!
We had this particular olive bread several times (almost every time) during our trip, it’s addictive. You just can’t stop! Not sure if I mentioned this before, but Moroccan food is not well salted, which is good because most of the time I find restaurant food too salty. This bread, on the other hand, is on the salty side, which goes perfectly with Moroccan food, or cold cure chicken soup. I found the recipe at Cooking with Alia please recall I made her Sellou as one of my Trio of Moroccan desserts. Since it worked so well, I thought I’d try her Moroccan Olive Bread. We made a typical Moroccan Bread at Maison MK in Marrakech and I discovered that Moroccan bread tends to be ‘shaggier’ than Western bread (looser and sticky to start). Then, after a rising, you add flour little by little to pull in the dough until it is no longer sticky. I think I used an additional cup of flour for this step! Bottom line it worked like a charm! Light, fluffy very olive tasting bread. DELICIOUS!
Another thing I should mention is that I used real Moroccan olive oil and its taste is so unique and delicious, I don’t think normal olive oil will do. But if you can’t find the genuine Moroccan olive oil, be sure to use the darkest and richest olive oil you can find, it will make a difference. Also, I halved the recipe but left the olive oil as full quantity! The technique is what we learned in Maison MK.
Thanks Alia, this recipe will be definitely made again in our home.

Moroccan Olive Bread

Ingredients:

    • 1 1/2 cups of flour (keep extra flour on the side for kneading)
    • 3/4 cup of warm water
    • 3 oz of black olives cut into small pieces (I used 1/2 sun dried and 1/2 kalamata)
    • 3 tablespoons of olive oil
    • 1 tablespoons of thyme (I had only 1 tsp and it was fine)
    • 1/2 tablespoon of dry yeast
    • 1/2 teaspoon of sugar
    • 1/2 teaspoon of salt

Directions:

  1. Activate the dry yeast (I used instant) with the sugar and warm water. Let the yeast mixture rest for 5 minutes. The yeast is active if the mixture expands and bubbles up.
  2. Add the olive oil, thyme, and salt to the yeast mixture.
  3. Gradually add the flour to the mixture until the flour is completely absorbed. You will end up with a very sticky/shaggy dough.
  4. Fold the olives into the dough.
  5. Cover the dough and let it rest in a warm place for 30 minutes.
  6. After 30 minutes, the dough doubles in volume. Sprinkle your workspace generously with flour and place the dough over it.
  7. Sprinkle the dough with flour and knead for the next 10 minutes using the palm of your hand. Add flour to the dough until you end up with a malleable non-sticky dough. It should just be non-sticky, not shiny like regular bread dough. You will know when the dough stops sticking to your hand.
  8. You can make round breads by flattening the ball of dough with the palm of your hand and then pinch the edges up and in to make a nice ball.
  9. Transfer the bread pinched side down onto a baking pan covered with parchment paper. Flatten a little with the palm of your hand.
  10. Cover the boule and let rest in a warm place for 30 minutes.
  11. Preheat your oven to 420° F degrees.
  12. Place your baking pan in the lower third of the oven and bake for 30 minutes or until done. I like a slightly crustier crumb, so next time I will brush with egg white, like you do with a French stick! Or you can also put a pan of water in the oven with the bread for the first 15 minutes.

Read Full Post »

We had a great sleep! And no ill effects from the jet lag…yet!
The first thing we needed to do is change our Travelers cheques to cash. Both trip advisor and a recently published book on Morocco said ‘everyone’ does this ‘everywhere’. You must see where I am going with this? Read NO ONE, NO WHERE. No bank, no exchange bureau, no where! They LIED! One more spot, the last one, a credit bureau; no the girl clerk does NOT do this, but that hotel on the corner does! So we go there, and low and behold, they DO! And it was not a rip-off, they were quite pleasant and reasonable. We met our Berber Souk tour guide there; a nice gentleman about my age born to a Berber Mom and an Arab Dad. He generously guided us through the souk highlighting areas we might have interest in, of course stopping at the ‘non-touristy’ honest shops (likely where he gets commission). Non-the-less a good experience. The shops expect bartering, which I love! And we did end up buying some Morrican saffron, cinnamon, cumin and a Moroccan spice mix.
This is our lunch place.

20111104-114125.jpg
He took us through the mazes of the souks for about two and a half hours. So nice. I did end up also buying a leather purse and a very cool fossil for my nephew (a disgusting bug, he will love it!).
The afternoon we booked a cooking course with our Riad; we were to be guided through the market to buy the food we will cook. Sadly the weather turned viscous and the winds were atrocious, so we turned back, but the cooking lesson prevailed! Our gracious translator Said Hayat and our wonderful Chef took us through the next two hours of traditional Moroccan cooking. Forget about that instant couscous, we made real couscous that took an hour, with our hands! So cool (actually, it was pretty hot!). We made Shrimp Briouat, (we will biy their actual cookbook and will remake the entire dinner in Toronto on our return for Barb and Kevin!) Chicken Tangine and Stewed Lamb (minus the lamb for Kevin!). We made grapefruit brûlée and apple tart tatin. And then we had it ALL for dinner! Our hosts were amazing! We had such a great time. It’s a must do in Marrakech! Here are some photos of our first culinary adventure!

20111104-181614.jpg

20111104-181637.jpg

20111104-181659.jpg
A traditional flavour base in Moroccan cooking is called smen it’s a very pungent, cheesy smelling butter. Think fish sauce in Thai cooking – its a flavour base!
Tomorrow we have hired a guide to takes us to the Atlas mountains! Bon nuits mes amis! (it’s all coming back to me now!)

Read Full Post »

As you all may know by now, our trip to Morocco is fast approaching and are goal to cook Moroccan has somehow gotten lost in our busy lives. We still have so many of the flavours to sample. Our nephew, Brian is staying with us for one more week, and I’m sad to say that I will miss him. But we have decided to enjoy Sunday dinners together in the future (or until he finds something better to do)! This past Sunday, we made one of my favourites but we put a Moroccan twist on it: Beer Butt Chicken, Moroccan Inspired Cornbread and Quinoa Tabbouleh Moroccan Style. Today, I will share the cornbread recipe.

Moroccan Inspired Cornbread (original recipe from Fred’s Not Here, a southern-style restaurant in Toronto). We haven’t been in quite some time, it was getting a little run-down about 10 years ago, but their corn bread recipe still rocks!

Ingredients:

  • 3/4 cup medium ground corn meal
  • 3/4 cup all purpose flour
  • 1/4 cup granulated sugar
  • 1 tsp baking powder
  • 1/2 tsp cinnamon
  • 1/2 tsp nutmeg
  • 1/2 tsp salt
  • 1 egg
  • 3/4 cup milk
  • 1/8 cup vegetable oil
  • 2-3 tbsp dried jalopeño flakes
  • 1/4 cup finely chopped green onions
  • 1/4 cup finely chopped dates
  • 3/4 cups shredded sharp cheddar cheese

Directions:

  1. Pre heat oven to 400°F. Pre heat oiled cast iron frying pan (8″ in diametre).
  2. Sift cornmeal, flour, sugar, baking powder, salt and spices in a bowl.
  3. Blend eggs, milk and oil in another bowl.
  4. Stir wet ingredients into dry.
  5. Fold in the shredded cheese, jalopeño, dates and green onion.
  6. Pour into the hot cast iron pan and bake for 25 minutes or until firm and golden.
  7. Cut into wedges and serve warm with butter.

Moroccan Inspired Cornbread with dried chili flakes and dates

Moroccan Inspired Corn Bread

Warm Corn Bread

Bon Appetit

Read Full Post »

The three desserts were a hit!

From left to right: Coconut Lemon Cake, Fig Tart and Sellou

The fig tart and the orange cardamom cream was the perfect combo of spicy and sweet. The pastry was flaky and rich. The coconut lemon cake, was moist, a little crunchy, and very lemony. The icing was glaze-like, just thick enough to hold the toasted coconut.
The Sellou were shaped in small muffin cups, Resembled marzipan with a little crunch and unexpected perfume of lemon zest and cardamom. I had wanted a little pyramid, but I didn’t have time to get to the market to my favourite kitchen shop to treat myself to a new tool. I dusted the tops eith icing sugar like freshly fallen snow. We served the trio with espresso. JT wants me to make all three again. That makes me very happy!

Read Full Post »

Moroccan Preserved Lemons

I’ve been thinking about preserved lemons; it seems every second Moroccan recipe I pick up calls for preserved lemons. I love the tang of a freshly squeezed lemon; I love the colour of lemons, the wake-up call a squeeze of lemon gives to almost anything…so why not preserved lemons? I was a bit concerned about the salt, but most of the recipes call to rinse the salt off, and I even found one called to blanch the preserved lemon in boiling water for 30-60 seconds to remove some of the bitterness the pith and the skin may cause. Well, that’s practically insurance that I will love it. I decided to make only two, to give it a try.

I researched several recipes and they were pretty much all the same: steralize jar, cut lemons, salt, press firmly into jar to extract as much lemon juice as possible, if not enough juice came out, fill with more lemon juice, leave for a few days at room temperature, pressing down every day, then refrigerate. The recipe I loosely followed was a David Lebovitz recipe (he is an American chef living in Paris). I added the suggested cinnamon to mine and WOW! Salt and cinnamon really have an affinity. Next time, I will add a cinnamon stick so it doesn’t mess up the lemon juice as much!

I can hardly wait to try this in a month!

Preserved Lemon with Cinnamon

Read Full Post »

I am so excited to introduce my best friend and husband as guest blogger today, please meet JT! I have asked JT to blog about the Moroccan Braised Beef because I had also asked him to prepare it. When I read the recipe on Epicurious, it dawned on me that it was indeed very similar to Julia Child’s Boeuff Bourguignon, and since JT is the master of THAT meal, it really was a no brainer (plus it got me out of the kitchen a bit sooner 😉 ). And I hand it over to you, JT…

I don’t pretend to have the same knowledge nor quite the same passion for cooking as does my wife Eva, but I do have some specialty items I do enjoy creating ……glass of wine in hand. As Eva eluded to above, one of my favourites meals to make (and eat) is bœuff bourguignon (bb), however during the summer months it is just too hot to prepare and too heavy to eat. So, when Eva asked if I could make the Moroccan braised beef (mbb) I was happy to oblige (considering the temperature had gone from 28° C last week to lows around 5° C this past weekend). In reviewing the mbb recipe I saw two steps that I found interesting compared to the bb. First, in the bb recipe, the beef is seared in a hot pan then coated with flour and baked at a high temperature for a few minutes. This gives a really nice thick sauce after bb has fully cooked. While the mbb beef is seared, it does not add any flour or thickeners, but it does have a lot of liquid. Eva suggested to use the bb method of baking the flour onto the meat, but I resisted and made it according to the recipe. Since the mbb is simmered on the stove top uncovered instead of in the oven as with the bb, much of the liquid is evaporated off (also giving the house a really great aroma). The final product had a beautiful thick sauce similar to my usual bb. The second step in the mbb that I was curious about was the creation of a glaze. Again following the recipe to a T, the ingredients did boil down to a very shiny, flavourful, glaze. I mixed the beef into the glaze first for a couple of minutes prior to adding the rest of the liquids to incorporate even more flavour into the meat. Here are a couple of tips to hopefully improve the appearance, flavour and texture. 1) Cut the beef into about 1″ (25 cm) to 2″ (50 cm)…..any larger than 2″ is just too large in my opinion. 2) Simmer at a very low heat setting and increase cooking time to longer than 1 1/4 hours. I cooked ours for 2+ hours and the meat just fell apart. 3) Add some of your raisins about half way through the simmering process as the long cooking time tends to almost dissolve them into the sauce and it is nice to see some of them in the final product 4) Never add a wine or sherry you wouldn’t drink.

You may now wonder which I like better bb or mbb? I am leaning toward the mbb, but that may be just because it is a new taste to me……I’ll have a better idea after dinner tonight as we having leftover mbb…..yum!!!

Thanks JT for a great synopsis of the recipe and the tips. I sure would make eat it again, and again!

Moroccan Braised Beef

Moroccan Braised Beef

Ingredients:

  • 3 tablespoons olive oil, divided
  • 2 1/2 pounds boneless chuck roast, cut into 2-4-inch cubes
  • 2 cups chopped onions
  • 3 garlic cloves, chopped
  • 1 tablespoon garam masala* (Krishna Jamal’s HeartSmart™ Flavours of India, Publisher: Douglas & McIntyre, 1998)
  • 1 tablespoon paprika
  • 1 teaspoon ground cumin
  • 1/2 teaspoon turmeric
  • 1/2 teaspoon cayenne pepper
  • 1 cup dry red wine
  • 1/2 cup dry Sherry
  • 2 cups beef broth
  • 1 14 1/2-ounce can diced tomatoes in juice
  • 1/2 cup golden raisins

Directions:

  1. Heat 2 tablespoons oil in large pot over medium-high heat. Sprinkle meat with salt and pepper. Add meat to pot; sauté until no longer pink, about 5 minutes. Transfer meat to bowl.
  2. Heat 1 tablespoon oil in same pot. Add onions; sauté until brown, about 8 minutes. Add garlic and next 5 ingredients; stir 1 minute. Add wine and Sherry; boil until reduced to glaze, stirring occasionally, about 8 minutes.
  3. Add broth, tomatoes with juice, and 1/4 cup raisins (reserve about 1/4 cup of the raisins to add later as suggested in tip 3 above); stir to blend. Add beef and accumulated juices; bring to simmer. Reduce heat to medium-low. Simmer uncovered until sauce is thick and beef is tender, stirring occasionally, about 2 hours 15 minutes.
  4. Season stew with salt and pepper. (Can be made 2 days ahead. Cool slightly, chill until cold, then cover and keep chilled. Rewarm before serving.)

You will notice that the Epicurious link to spiced almonds and couscous also included raisins, but since the beef had raisins, we omitted them, the almonds added an excellent of flavour AND texture.

Spiced Couscous with Almonds

Ingredients:

  • 2 cups hot water
  • 3/4 cup raisins
  • 4 tablespoons ( 1/2 stick) butter, divided
  • 3 tablespoons dry white wine
  • 1/2 teaspoon saffron threads
  • 1 cup couscous
  • 1 medium onion, chopped (about 1 1/2 cups)
  • 3/4 cup sliced almonds, toasted
  • 2 teaspoons ground cinnamon

Directions:

  1. Add 2 tablespoons melted butter, wine, and saffron to a measuring cup and let sit for about 20 minutes.
  2. Meanwhile, melt 2 tablespoons butter in medium skillet over medium-low heat. Add onion; cover and cook until translucent and tender, stirring occasionally, about 8 minutes. Reserve.
  3. Bring the saffron water to a boil, add couscous and remove from heat. Allow to sit covered for about 15 minutes or until couscous has absorbed all of the water. Fluff with a fork.
  4. Mix onions, almonds and cinnamon into couscous. Season to taste with salt and pepper and serve.

All in all, an exceptional Moroccan dinner we are both eager to try in Morocco. PS, our guests also seemed to really enjoy it. Thank you Gordon and Angela for allowing us to use you as test victims…again!

Read Full Post »

Harira

This is a traditional Moroccan soup, with many variations. I really liked the ingredients from Epicurious, with some minor alterations based on the reviews (love the reviews). I made this a day in advance so the flavours could really meld. Click on the heading to link to the original recipe. This soup reminded me very much of Mulligatawny, and was equally as flavourful. I am looking forward to ordering this soup in Morocco to see whether my version was authentic.

Harira a traditional Morocca Soup

Ingredients:

  • 4 cups chicken broth (or vegetable broth)
  • 4 cups water, I held off, adding after for desired consistency
  • a 28-to 32-ounce can whole tomatoes, drained and puréed coarsely
  • 1/4 teaspoon crumbled saffron threads
  • 2 tsp cumin
  • 1 tsp coriander
  • 2 medium onions, finely chopped
  • 2 carrots, diced
  • 2 stalks of celery, diced
  • 2 cups canned chick-peas, rinsed, hulls removed
  • 1/4 cup raw long-grain rice (I used brown rice)
  • 1/2 cup dried lentils
  • salt to taste
  • 3/4 cup finely chopped fresh cilantro
  • 3/4 cup finely chopped fresh parsley leaves

Directions:

  1. Soak the saffron threads in the chicken stock for about 20 minutes (you get more flavour out of them).
  2. In a heavy kettle (at least 5 quarts) sauté onions, carrots and celery until tender and dust with cumin and coriander and sauté only until you smell the spice.
  3. Add the chicken stock, tomatoes, saffron, chick-peas, rice and lentils and simmer covered for 30 minutes, or until lentils and rice are tender.
  4. I took half the soup and puréed it to a smooth and velvety finish and then poured it back into the chunky soup. It made for a really delicious thick vegetable soup, add water to achieve the desired consistency.
  5. Soup may be prepared 4 days ahead (cool uncovered before chilling covered).
  6. Garnish with chopped cilantro and parsley, drizzle with EVOO

Read Full Post »

I’ve been cruising the net trying to find the right combo of courses for our Moroccan themed dinner party on Saturday; it’s not as easy as it sounds, there are so many interesting recipes and flavours, it’s difficult to choose. We found the main course and side first, then the desserts. Then I thought OMG, we need a soup! And the temperatures in Toronto have plummeted to a chilly 7°C overnight – great soup weather! And, last but not least i went scouring the net for hors d’œuvres.
This post is all about the hors d’œuvres. I was enamored by this recipe because it sounded like hummus, and I adore hummus. The flat bread reminded me of something my Mom used to make with ‘leftover’ bread dough, Langos (pronounced langosh, it’s a traditional Hungarian pan-fried flat bread). Plus, it has so many names…I knew it was the one for us! I have linked the original recipes in their titles. It is rather odd to make this flat bread using a food processor, but it does seem to work, and the dough is not too heavy to bog down the processor’s motor. It’s a chewy, tasty bread, something like Naan. Of course, my alteration is the substitution of two to one all-purpose flour to whole wheat flour. (it had to be done).

Batbout or Matlouh or Mkhamer or Toghrift or Matlou with Bessara
aka Moroccan Flat Bread with Fava Bean Dip

Batbout or Matlouh or Mkhamer or Toghrift or Matlou (Moroccan Flat Bread)

Batbout and Bassara

Ingredients:

  • 2 cups all-purpose flour
  • 1 cup whole wheat flour
  • 2 teaspoons instant yeast
  • 1 teaspoon salt
  • 1 cup warm (not hot) water
  • 1 tablespoon herb (I did not add this)

Directions:

  1. Combine all the dry ingredients in the food processor by giving them a whirl of the blades.
  2. Stop the machine and add the water all at once. Close the machine and mix until the dough forms a ball of slighly sticky dough. Add more water by the tablespoon if you find your ball of dough is a bit tough. You want a very supple, soft dough.
  3. Divide the dough in 4 balls. Oil them well with good quality, peppery olive oil and let rise in a warm place for 30 minutes.
  4. There are a complex number of rolling steps which my source describes wonderfully with photos. Here is my simplified version:
  5. Flatten each ball to a rectangle about 1/2cm thick, fold in the long sides (like a business letter, she describes!) Flatten a bit more with your fingers and then roll it up like a small, tight jelly roll. Punch down the top and allow to rise another 30 minutes. I covered with EVOO and plastic wrap and put them in the fridge overnight (a trick to slow down the yeast so I can make the bread when I have more time tomorrow).
  6. Pre heat your cast iron pan to very hot for about 15 minutes. We have natural gas, so it didn’t take as long.
  7. Bring the rolled up dough balls to room temperature. Once at room temperature flatten to a large circle about a 1/2cm thick – this bread will thicken slightly in the pan. Oil generously (I would switch to an oil with a higher flash point, like peanut or grape seed). Fry both sides until cooked through and golden brown. Serve warm or at room temperature.

http://moroccanfood.about.com/od/saladsandsidedishes/r/Bessara_Recipe.htm

Bessara

This is a slightly soupier dip than hummus. You can even thin it down and serve it as a soup!

Ingredients:

  • 1 1/2 cups canned fava beans (also known as Broad Beans)
  • 2 cloves garlic, finely minced
  • 1/3 cup olive oil (I used chipotle oil oil for a bit of a kick!)
  • 1/4 cup lemon juice
  • 2 tablespoons vegetable stock, as required
  • 1 1/2 teaspoons salt
  • 1 teaspoon ground cumin, lightly roasted
  • 1/2 teaspoon sweet paprika
  • 1/2 teaspoon hot paprika or cayenne pepper (I omitted since I used the chipotle olive oil).
  • For garnish, mix a small amount of roasted cumin, paprika, chopped cilantro. Drizzle with EVOO.

Directions:

  1. Put beans into a food processor, add garlic, olive oil, lemon juice, 2 tablespoons of vegetable stock and spices.
  2. Process on high speed until smooth, adding additional liquid if necessary to thin the Bessara. It should be thin enough to pour or spread out on a plate. Taste the Bessara and adjust the seasoning if desired.
  3. To serve, heat until warm and serve with the flat bread above. Garnish the Bessera with any of the following: ground cumin, paprika, hot paprika, EVOO, or chopped parsley.

Read Full Post »

We are continually researching Morocco for our upcoming trip and I am so excited about the latest our latest discovery: a cooking class in Marrakech at Maison MK! We chose this course because they take you to market to buy your ingredients! How cool is that? In Mellah market we will learn about all the local products, & ingredients. The covered market sells fruit & vegetables, meat, fish, poultry, spices, etc. We will buy all the ingredients to make the tagine in the maison mk kitchen. (Apparantly this is the market they took Jamie Oliver to for his programme on Marrakech!) This trip keeps getting better and better!

This is the third recipe for my Moroccan themed dinner party dessert trio. I found this recipe on About.com, and validated it with bloggers and other sites — I like the way the citrus ties it into the two other desserts. The tasters I made were a huge success (last night with JT and this morning with my friend, Kim). I cut the recipe into a quarter of the original, although I list it as it’s full volume, from this link. It’s very quick once you have all your ingredients ready mise en place, as they say. I have shown my revisions in blue.

Moroccan Coconut Lemon Cake

Ingredients:

— For the Cake—

  • 4 eggs
  • 1/2 cup oil
  • 1 1/2 cups sugar
  • 2 cups flour
  • 1 1/3 cups grated unsweetened coconut
  • 4 teaspoons baking powder
  • 1/2 teaspoon salt
  • 1/2 cup milk
  • 1/4 cup fresh lemon juice
  • zest from one or two lemons
  • 1 teaspoon vanilla

— For the Icing and Garnish —

  • 1 cup powdered sugar, sifted (I used less)
  • 2 to 3 tablespoons cream or milk
  • 1 teaspoon vanilla
  • I also added about 2 tbsp of coconut powder, because I felt the powdered sugar was too sweet.
  • I also added about 2 tbsp lemon juice to help cut the sweetness of the powdered sugar
  • 1/2 cup toasted, sweetened coconut* I used more because I wanted the whole cake covered.

Preparation:

  1. Preheat the oven to 350° F (180° C). Grease and flour your cake pan(s).
  2. Zest and juice the lemon.
  3. With an electric mixer or by hand, beat together the eggs and sugar until pale and thick. Gradually beat in the oil. Beat in the vanilla, lemon juice and zest.
  4. Stir in the flour, coconut, baking powder and salt, and then the milk. Beat until smooth.
  5. Pour the batter into your prepared pan(s). Bake until the cake tests done: 25 to 30 minutes for layers; 35 to 40 minutes for oblong; about 40 minutes for a tube or bundt pan. Even the little ramekins I used took about 30 minutes for the cake tester to come out clean.
  6. Allow the cake to cool in the pan for 7 to 10 minutes. Loosen the cake from the sides of the pan with a spatula, and turn out the cake onto a rack to finish cooling.
  7. To decorate the cooled cake, mix everything BUT the toasted coconut to spreadable consistency. Spread the icing in a thin layer over the enitre cake, and dust with the toasted coconut so that it covers all sides and the top. Allow the icing to set before serving.

*Note:To make toasted coconut, spread grated unsweetened coconut in a single layer on a baking sheet. Bake at 350° F (180° C) for 5 to 8 minutes, or until light golden. Remove from the oven and leave to cool. Cover and store until needed.

Read Full Post »

I’ve been reading up on Moroccan blogs; one such blog mentioned that a Moroccan host can take up to a week to prepare a meal for her honoured guests! I started Monday… does that count?

Onto dessert #2 for my little trio for Saturday night’s Moroccan themed dinner party. I found this one on Epicurious, and just liked the way it sounded but I did verify that this dessert does exist in Moroccan cuisine. I cut this recipe in half but list the full ingredients below, and it made five mini tarts, perfect! (ok, three are for the dinner party – I don’t eat dessert- and one was the taster for JT to make sure it was yummy and it sure was!!! the larger round one is for my friend (and boss) because she gives me a ride home most evenings (believe it or not, we live across the street from each other…we are indeed good friends!)

Moroccan Fig & Sesame Tart with Orange Cardamom Cream

Fig and Sesame Tart

Ingredients for pastry:

  • 1 1/2 cups all-purpose flour
  • 1/2 cup confectioners sugar
  • 1/4 teaspoon salt
  • 3/4 stick (6 tablespoons) cold unsalted butter, cut into 1/2-inch cubes
  • 4 large egg yolks
  • 1 tablespoon heavy cream
  • 1 teaspoon sesame seeds, toasted

For filling:

  • 9 ounces dried Turkish figs, stemmed and finely chopped (1 1/2 cups)
  • 1/2 cup water
  • 4 1/2 tablespoons granulated sugar
  • 3/4 teaspoon cinnamon
  • 3 tablespoons sesame seeds, toasted
  • 1 tablespoon orange-flower water (preferably Mymouné) I googled orange water substitutions and found that you can use an orange liqueur like Triple Sec.

For cardamom orange cream:

  • 1 cup heavy cream
  • 2 tablespoons mild honey
  • 1 1/2 teaspoons finely grated fresh orange zest
  • 1/4 teaspoon ground cardamom
  • Accompaniment: fresh orange sections

Directions, pastry dough:

  1. Pulse together flour, confectioners sugar, and salt in a food processor until combined.
  2. Add butter and process until mixture resembles fine meal.
  3. Add 3 yolks (reserving the fourth for egg wash) and process until it forms a smooth dough, 2 to 3 minutes. (Don’t worry about overworking dough.)
  4. Transfer dough to a work surface and gather into a ball, then divide into 3 equal pieces. Form one third of dough into a small disk, then form remaining dough into a larger disk. Chill disks, each wrapped in plastic wrap, until firm, at least 1 hour.

Make filling while dough chills:

  1. Simmer figs, water, sugar, and cinnamon in a 1- to 2-quart heavy saucepan, uncovered, stirring occasionally, until mixture is thickened, 2 to 3 minutes.
  2. Stir in sesame seeds (3 tablespoons) and cook, stirring, 1 minute.
  3. Remove from heat and stir in orange-flower water, then transfer filling to a bowl.
  4.  Cool filling to room temperature, about 30 minutes.

Assemble and bake tart:

  1. Put oven rack in middle position and preheat oven to 350°F. Line a baking sheet with parchment paper and place flan ring in center.
  2. Roll out larger disk of dough into an 11-inch round on a lightly floured surface with a floured rolling pin. (If dough is too firm to roll out, let stand at room temperature 5 minutes.)
  3. Fit dough into flan ring, pressing dough up side of ring (dough is very tender and tears easily; patch as needed; they will blend in during baking), then trim dough flush with top of ring. Spoon filling into crust and spread evenly.
  4. Roll out remaining disk of dough into a 9-inch round on lightly floured surface with floured rolling pin. Gently lay round over filling, then roll rolling pin over top to trim. Patch if necessary.
  5. Beat together remaining yolk and cream (1 tablespoon) in a cup with a fork and brush some of egg wash over top crust, then chill until egg wash appears darker and is slightly tacky, about 3 minutes. Brush with second coat of egg wash and chill again. Lightly score top with back of a small knife to make a decorative pattern and sprinkle with sesame seeds (1 teaspoon).
  6. Bake tart until top is golden, 30 to 35 minutes (I found 40-45 minutes did the trick).
  7. Transfer tart on baking sheet to a rack and cool 10 minutes, then slide tart off parchment onto rack to cool. Gently remove ring.

Make cream and serve tart:

  1. While tart bakes, stir together cream, honey, zest, and cardamom in a medium bowl and chill, covered. Just before serving, beat cream mixture with an electric mixer until it holds soft peaks.
  2. Serve tart, warm or at room temperature, with cream and oranges.

My tarts were very small, about 10 cm x 4cm and the round one was about 8cm. I plan on serving the three desserts on a long rectangular plate. My ‘Platogram” is below. I usually do this for more complex dinners so I don’t mess it up after a couple of glasses of wine!

Plating the Dessert

Read Full Post »

It’s a very happening week in Toronto because we have the Toronto International Film Festival (TIFF) — the world’s largest film festival (according to Wiki, obviously a Torontonian wrote it!). We have been graced with some of the biggest stars, George Clooney (be still my heart), the BrAngelina’s, Madonna, Robert DeNiro to name a few. JT and I have been fortunate enough to score tickets from friends in the past, but unfortunately, not this year :-(, so to feel part of the action, we decided to get all dolled up [you know, just in case we bump into someone ;-)] and head downtown to the Ritz (we [I] heard Mr. Clooney was staying there). The Ritz is a brand new hotel in Toronto, opened in April, I think. We’ve been fortunate enough to have stayed in several Ritz Hotels in US and Canada and the one thing that is consistent is the quality of service — always exceptional. We had a glass of wine at TOCA and then we ventured to the back patio DEQ (say Deck) for another glass and some dinner.

At TOCA we were served a little plate of deep fried capers (not to my taste, capers were crunchy but the brininess was lost), crispy maple bacon (very weird taste, also not my cup-a-tea) and some roasted salted corn (very tasty). A pleasant surprise was that a very tasty Pinot was only $10 a glass. Last year we went down to the Four Seasons Hotel (another TIFF hangout, we actually saw Henry Winkler with his family) and the wine was $15 a glass, we had two each and paid about $80 with taxes — NO FOOD!! Dare I say, the Ritz is way classier!

Snacks at TOCA at the Ritz Carlton Toronto

TOCA Overall rating (in my opinion): Decor 4/5, service 4.5/5, food na/5, Value 4/5, Noise: 4/5 (1 being very noisy, and 5 being very quiet).

After our glass of wine, we asked the manager to direct us to the other bar with the ‘great patio’ — he actually escorted us there. That’s service! I’m used to “see that sign at the far right, head that way and make a left, you can’t miss it!” type of service! He sat us at the patio bar as more than half the restaurant was closed for a private TIFF party. Later, we found out Mr. Clooney spent Friday and Saturday night at this bar [OMG, I may have been sitting on the exact same bar stool that HE sat on — damn, I was wearing white pants, not so easy to avoid washing ;-)]

We enjoyed DEQ’s specialty flat bread, which is kind of like a pizza, it had Chorizo and artichokes, quick roasted tomato goat cheese – it was delicious! JT was still hungry so we ordered Bruschetta, 6 pieces, also a signature dish (you order the amount you want, 1 each of three flavours or two each); the flavours were tomato-basil, Ingersoll burrata-pesto and speck asparagus with a poached quail egg. I was not that hungry but managed to scarf down the speck asparagus with the quail egg and the tomato-basil – both were delicious. The bartender was very nice, chatted us up for some of the time. We stayed until a little after 11 work beckoned; sadly the TIFF party that reserved the other half of the patio did not start before we left. Oh well, perhaps I’ll bump into Mr. Clooney some other time (in my dreams, perhaps)!

DEQ Overall rating (in my opinion): Decor 4.5/5, service 4.5/5, food 4/5, Value 4/5, Noise: 4/5 (1 being very noisy, and 5 being very quiet).

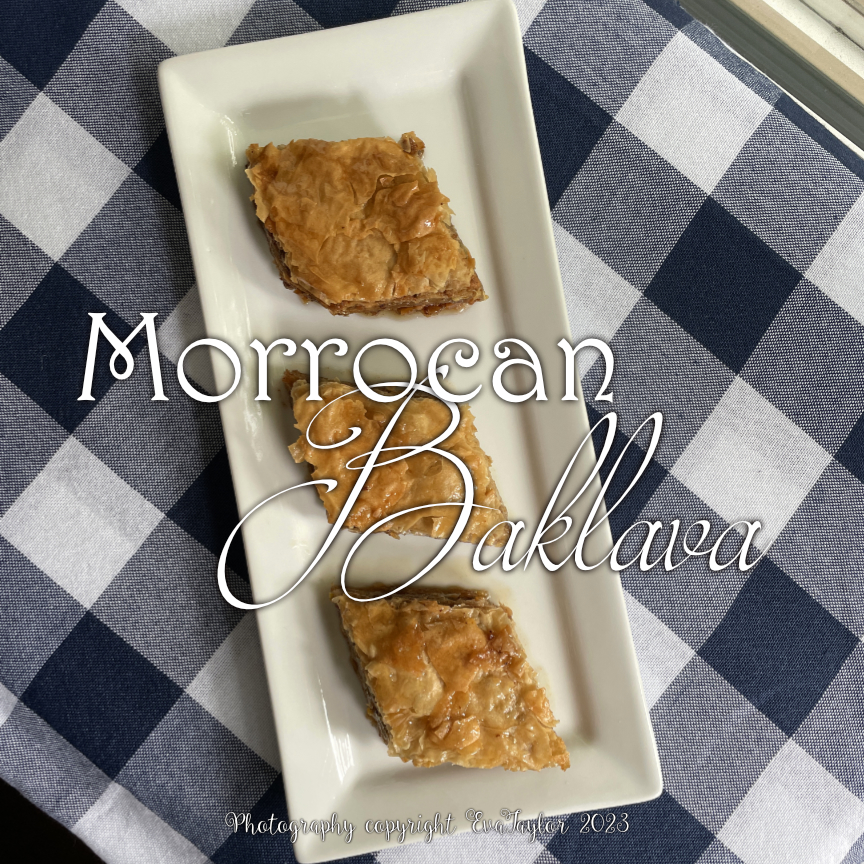
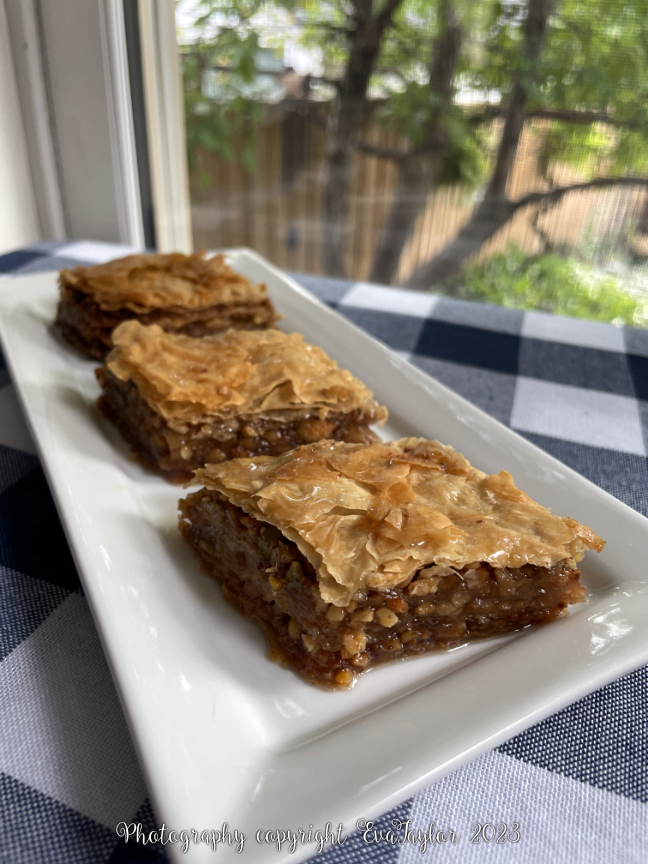
Back to cooking! We are having good friends over for dinner on Saturday, and to help jump start our Moroccan adventure, we decided to have the theme as Moroccan food. I tested this recipe and it turned out pretty good. I am planning to have three little dessert samplers for Saturday night, Sellou is one of them.

“Sellou (or sfouf) is a unique unbaked Moroccan sweet made from toasted unhulled sesame seeds, fried almonds and flour that has been browned in the oven. Packed with calories and nutrients, it’s traditionally served during Ramadan and after childbirth, when there’s greater need to restore energy and maintain good health. It’s also served at Eid, weddings and other special occasions.” from About.com

Since I am not familiar with Moroccan cooking, I decided to not venture too far from to the recipe, which I picked up from Cooking with Alia. I did add a little lemon rind, you know how much I love almonds and lemon together. It is not as sweet as it sounds, and it’s got some very complex flavours going on. Although I restrained the amount of Cardamon I added, it was still very perfumey but it mellowed out on day two – I suspect by the weekend it will have rounded out beautifully. I also cut the recipe into 1/3, because I am serving three desserts I didn’t want too much of it. I suspect it will be very rich with all the nuts after a meat laden meal. The baked flour is a very strange thing indeed, and although it is rather stinky while baking, it really added some earthiness to the flavour. Not sure if I would add it again, trying to refrain from carbs, but it was interesting. The recipe below is pretty much verbatim from Alia, with the exception of the parts I’ve altered in brackets.

Sellou a traditional Moroccan Dessert

Ingredients:

  • 200 grams of flour
  • 125 grams of roasted almonds – you can also buy raw blanched almonds and roast them or fry them yourself
  • 100 grams of sesame seeds (I used both black and white for interest)
  • 125 grams of honey
  • 75 grams of powdered sugar
  • 1 ½ teaspoon of anise powder
  • 2 teaspoon of cinnamon powder
  • a pinch of salt
  • ¼ teaspoon of ground mastic gum (I did not have this, so I omitted it)
  • 113 grams of butter (1 stick)
  • 1-2 tsp grated lemon rind (this was not part of the recipe)
  • Secret Ingredient 1: 125 grams of roasted peanuts (I only had natural crunchy peanut butter, so that is what I added instead)
  • Secret Ingredient 2: ½ teaspoon of cardamom powder (pinch or less)

Directions:

  1. Browning the flour:
    1- preheat your oven to 350° F
    2- place the flour in a baking pan and spread it evenly
    3- cook the flour in the oven for about 30 minutes
    4- To avoid smoke in your house, and for the flour to cook evenly and not burn, you need to stir it every 5 minutes until it is done
    5- You will notice that the color of the flour will start changing and the flour is done when it has a deep golden brown color
    6- Sift the flour – use a spoon to break the flour lumps
    7- Let the flour cool down before using it.
  2. Preparing the other ingredients:
  3. 1- while the flour is cooking, you can actually start roasting the sesame seeds in a skillet on medium-low heat. Stir frequently so they do not burn.
    2- This will take about 20-30 minutes. remove the seeds from the heat when they darken and become fragrant – you can taste them, they should have a nutty flavor.
    3- Using a food processor, mix the roasted peanuts and the roasted almonds together.
    If you prefer sellou to have a fine texture, then mix the nuts until you get a powder.
    I personally prefer my sellou to be crunchy, so I only half mix the nuts to keep solid parts.
  4. Mixing the dry ingredients:
    Now that we are ready, we are going to mix all the dry ingredients together (flour, sugar, spices, sesame seeds, almonds, and peanuts).
  5. the last step then is to add the melted butter and honey. And at the very end, mix in the lemon rind.
    Mix well using a spatula until all the butter and honey are incorporated into the mixture.
    Now, if you want to preserve the moist sellou, just put it in an airtight container and place in the fridge for up to 1 month. Just make sure to bring it to room temperature before serving.
  6. Serve the Sellou in little cups, or shape a dome out of it, cover it with powdered sugar and decorate roasted almonds.

Read Full Post »

I wanted something healthy and not too heavy to go with ribs we were BBQ’ing for Rae and Mon, so we settled on Moroccan Style Quinoa. This recipe is a delicious combo or tart, salty and sweet, with the great texture of the Quinoa (super grain). I used a lovely bowl I picked up in Budapest during one of our first visits as a married couple. It’s about 25 years old now!

Moroccan Style Quinoa Salad

  • 1 cup dry Quinoa
  • 2 cups water (I usually do 50-50 water and LS Chicken Stock)
  • 1/2 tsp salt, or to taste
  • 1/2 chopped, roasted pistachios
  • 1/2 cup mixed dried cherries, cranberries and raisins (you can use currents too)
  • 1/4 chopped honey dates, chopped
  • 2 green onions, finely chopped
  • 1/4 cup lemon juice
  • 2 cloves garlic finely minced
  • 1-2 tbsp mint, finely chopped
  • 2-4 tbsp parlsey, finely chopped

Moroccan Style Quinoa

  1. Toast Quinoa in deep pan over medium heat (it will sound like pop corn, when you hear it start to pop, count to ten and remove from heat).
  2. Add water stock mixture and salt. Stir on medium heat until it comes to a boil. Cook 10-12 minutes or until the Quinoa has absorbed the liquid. Allow to completely cool.
  3. When cool, add the remaining ingredients (reserve a few pistachios for presentation) and stir well. Serve with your favourite BBQ!

I’ll probably have this for lunch on Monday with some roast chicken on top! YUM! Let me know if you have any favourite Quinoa recipes you’d like to share.

Read Full Post »