Feeds:
Posts
Comments

Posts Tagged ‘baked’

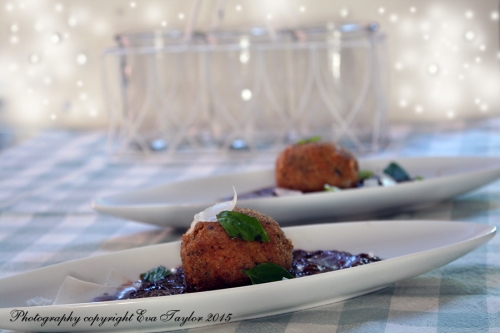
Arancicu_first

I was testing a rice cooker recently and one of the recipes was Risotto on a specific setting on the machine. To say it was challenging is an understatement but after 6 tests and tweaks we finally came up with a recipe I was rather happy with. And the neighbours were also happy, one can only eat so much risotto! The last test was the best and JT and I had it for supper but it made so much that I had enough left over to make Arancini di Riso, Italian Rice Balls and boy were they delicious!

Everyone has a favourite risotto recipe so I won’t reinvent the wheel, you just need to have some risotto made and cooled (I spread it out onto a parchment lined baking sheet and covered it with plastic wrap in the fridge overnight). The risotto should be able to be formed into a ball, so if your risotto is a little dry, you may want to add a bit of liquid to allow it to stick together in a spherical shape.

Arancini_2999

Baking at 400° F gives you the crispy crust that you expect from deep frying, except you didn’t!

Arancini di Riso (Rice Balls)

My mushroom risotto recipe yielded 8 cups (give or take 2 L) but we ate about 3 cups in for dinner, so I estimate that the remainder 5 cups (1.25 L) made 22-24 balls

Ingredients:

  • 5 cups risotto
  • 1 1/2 cups bread crumbs
  • 1/2 cup AP unbleached flour
  • 3 eggs
  • 1 cup shredded mozzarella (or 22-24 1 cm or 1/2 inch cubes)
  • Fresh basil and Parmesan for garnish

Directions:

  1. Spread risotto onto a parchment-lined baking sheet and cover with plastic wrap, refrigerate until entirely cooled (overnight).
  2. Add bread crumbs to a shallow bowl and the flour to another shallow bowl. Lightly beat the eggs with a splash of water and pour into a third shallow bowl.
  3. Make golf-ball sized balls of the cooled risotto and squeeze a good pinch (or one cube) of cheese into the centre — cover the cheese entirely with the risotto otherwise it will leak out. Continue until you have used up all the risotto.
  4. Coat each ball in flour, then roll into the eggs and repeat the flour and egg mixture (this will make the balls as crispy as if they had been deep-fried). After the final roll in the egg wash, roll each ball in the bread crumbs to coat well . Set onto a parchment lined baking sheet and freeze for future use.
  5. To bake from frozen pre-heat the oven to 400° F. Spray Arancini and the baking sheet with olive oil. Bake for 30 minutes or until golden and warmed through; turn often so it bakes evenly.
  6. Serve with a chunky salsa or tomato sauce.
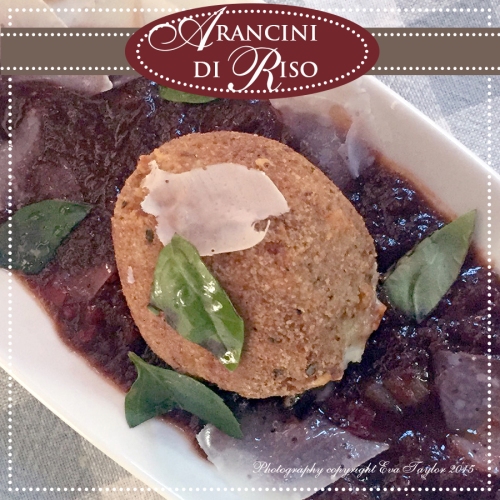
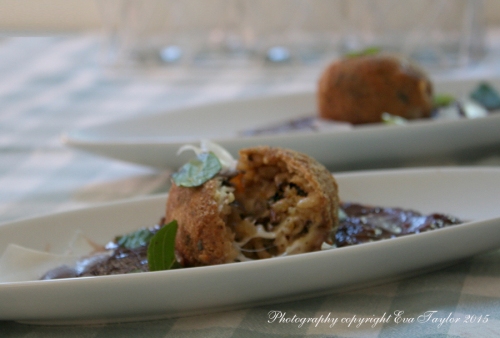
Arancini_3000

The cheese melts on the inside and becomes deliciously gooey!

We had our dear friends Paul and T up from the US this past weekend (hence the tardiness of this post), here are a few pics!

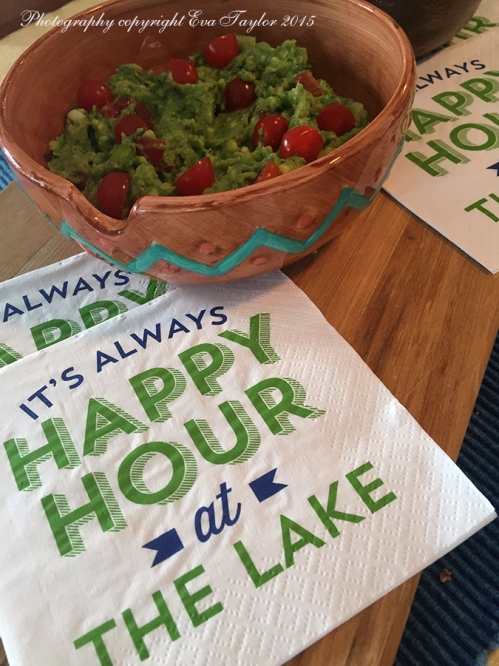
HappyHourLake

We might have had a few of these!


Paddleboating

Paddleboating on a very warm day.


Fishermen

Our lake apparently has good fishing.


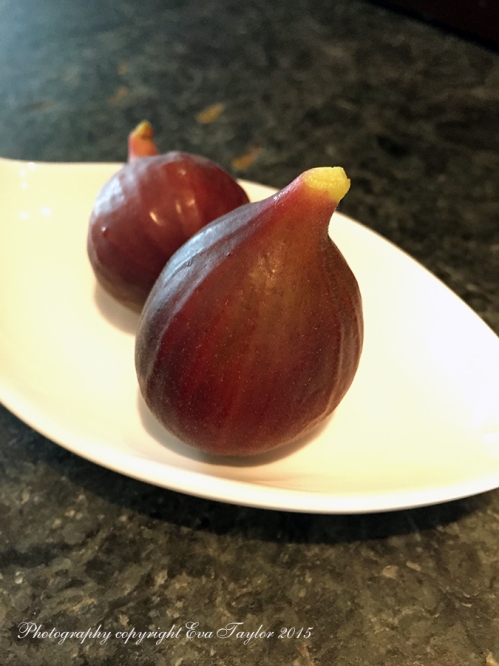
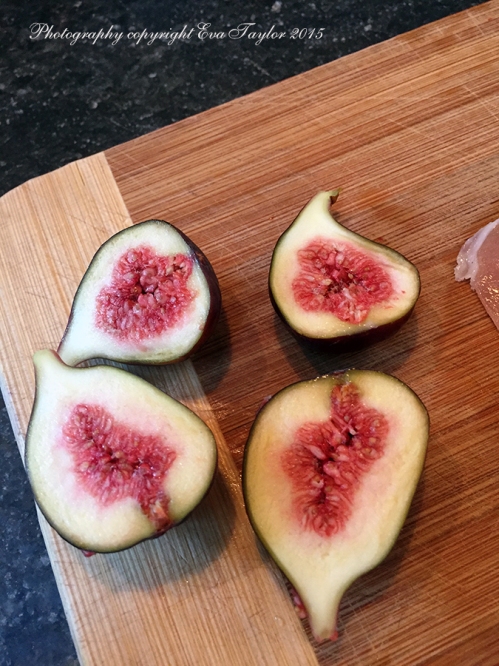
TheFirstFigs_1

Figgy finally made us a couple of figs.


TheFirstFigs

Sadly they were not as sweet as I had hoped. I’m sure I just need to fertilize.


Read Full Post »

I am very excited to tell you that THIS post will tip this blog over the 100,000 views! I can hardly believe it. My humble little blog from Bloor West Village. Go figure. I was going to do some sort of prize, but I have no idea how to measure who my 100,000 visit was. So I’ll have to think of something else. WOOO HOOO!

20121204-154841.jpg

Oh Christmas Tree

We decorated the tree a few days after we got it home. Now I know it’s probably a lot larger than many cultures, but for Canadians this tree is small; even by our standards it’s a wee bit puny, we had to put it up on a table to get the height we needed! But I’m OK with that, because that just gives us more room for presents!

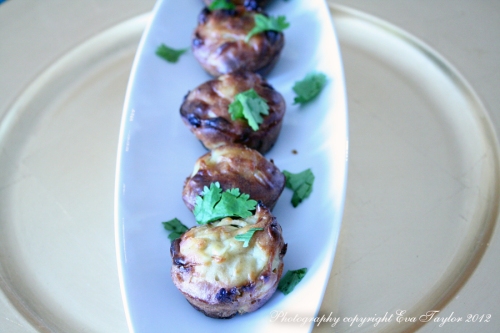
These delicious little bites were baked, believe it or not, and you will be surprised at how soft and chewy the centre is and how crispy the exterior becomes when you reheat. I don’t think I will deep fry my bhajis ever again.

Baked Onion Bhajis

Don’t be fooled by their size, they pack a big punch of flavour

original recipe from BBC. Makes about 24 mini bhajis.

Ingredients:

  • 2 large eggs
  • 1 Vidalia onion very thinly sliced
  • 120 g/4 oz all-purpose flour
  • 1 tsp ground coriander
  • 1 tsp cumin
  • non stick cooking spray

Directions:

  1. Pre-heat the oven to 400°F. Pre-heat a 12 or 24 mini muffin tin.
  2. Beat the eggs and add the finely chopped onion rings, mix well.
  3. Combine the flour, ground coriander and cumin and stir well. Add to the egg, onion mixture and stir well to combine.
  4. Generously spray the mini muffin tin, add about 1 tbsp of the batter per cavity. Bake for 7-10 minutes, then flip each bhaji so that it browns evenly on both sides and bake for another 7-10 minutes.
  5. Remove from the oven and allow to cool completely. To serve, pre-heat oven to 350°F and place bhajis onto a cookie sheet and heat for about 10-12 minutes, crisping up the exterior.
  6. Serve immediately with some onion chutney or tamarind chutney.

Read Full Post »

Sunday was a relatively quiet day, recovering from our very first Robbie Burns dinner organized by my fire-fighter friend (Christine). She’s been doing it for years and I’ve always managed to have something else planned, but this year we bit the bullet and committed early. What was my hesitation, you may ask? Well, they serve Haggis. Now you might say that, “Eva, you have eaten some very unusual items, what’s with the Haggis?” It’s really the unknown, all that weird innards stuff ground up and stuffed into the stomach, cooked in the stomach and served in the stomach (it’s pretty grey, by the way). They have an actual ceremony for the Haggis and then they cut it up and serve it as a side dish along an enormous pile of roast beef. I couldn’t even get through it all. I did have some of the Haggis, it was heavily spiced and let’s just say I didn’t hate it, but you won’t see me running to the front of the line for another bowl! On top of it all, I think it gave me the worst heart-burn I’ve had in ages.

I own nothing tartan, nothing. So a week before the night I made the pilgrimage to the mall to pick up something nice in tartan but not too expensive and to my surprise, there was nothing but lumberjack shirts to be had and you know what a lumberjack girl I am! So I came home empty handed when I got a text from my friend (boss) Kim that she had a little tartan mini she would be happy to lend me! I was ecstatic! I have been told that see myself through ‘fat eyes’ and so this was no exception, I looked at the skirt and thought “this isn’t going to fit” but then I gave it a go, and it did, quite nicely, I might add! I paired it with a cute little black top, solid black tights and my slouchy suede red boots (5″ heel)! I was ready for the prom, I mean the Robbie Burns dinner.

The skirt was very short, but with the opaque tights it worked like a charm, and the boots.

Slouchy Red Suede Boots

JT found himself a very fetching plaid tie at the dollar store (guess how much it was?) The evening was a lot of fun, a little Scottish dancing (some local kids) and then the DJ started with the dance-hall music. We danced until midnight, screaming our heads off, bouncing around on the dance floor. My legs are killing me today, but it was well worth it.

This is the second course of our Sunday dinner with nephew Brian. No, I haven’t forgotten about the give away…I’ve been a bit busy! Stay tuned, I’ll make the announcement a little later this week!

Baked Salmon Cakes with Cilantro Pesto on Greens

Makes 3 huge ones, or 6 much smaller appetizer portions

Ingredients:

  • 1 can low sodium, Skinless, Boneles salmon, drained
  • 1/2 cup mashed potato with roasted garlic (you can use instant for this, but I made this when I had left overs)
  • 1 egg slightly beaten
  • 1 clove garlic, finely minced
  • 1 tsp horseradish
  • 2 green onions finely chopped
  • 1/4 cup panko
  • 2 squirts of non-stick spray for baking

Directions:

  1. Pre-heat oven to 350°F.
  2. Mix everything but the panko and the non-stick spray together, making sure all the flavours are evenly distributed.
  3. Roll in panko evenly.
  4. In a large frying pan, heat and squirt one squirt of non-stick spray. Gently fry each side until golden brown, place on sprayed cookie sheet until all have been browned and place in oven for 15-25 minutes, until cooked through.
  5. Serve with Cilantro Pesto on a bed of leafy greens.

Cilantro Pesto

Ingredients:

  • 1 cup cleaned and dried cilantro
  • 1/2 cup cleaned and dried parsley
  • 2 tbsp sesame oil
  • 1 small clove garlic
  • 3 tbsp white and black toasted sesame seeds
  • 1 tsp soy sauce
  • 2-4 tbsp lime juice (to taste)
  • 1-2 tsp agave nectar

Directions:

  1. Place all the ingredients (except the lime juice and agave) into the bowl of an immersion blender and blend until desired consistency is achieved, adding the lime juice slowly.
  2. Taste, add more lime juice and a little agave to achieve the correct balance of sweet, salty, sour and bitter.

The earthy, slightly sweet pesto made a wonderful accompaniment to the salmon cakes

Read Full Post »

This past weekend we had our good friends Barb and Kevin over and we thought what better way to give them a taste of our Moroccan experience than to serve a variety of Moroccan delicacy’s that we learned how to make in our cooking classes. The hors d’œuvres for our Moroccan meal comes from our very first class in our Ryad Dar Les Cignones (The Storks – we had an old dilapidated palace across from the hotel where actual enormous storks made their nests!).

This is our lovely Chef at Dar Les Cignones

Our beautiful Chef (sadly, I cannot recall her name) at our Ryad showed us how to make these delicious pillows of Phyllo Pastry (which she actually made herself, although I won’t!) stuffed with a richly spiced shrimp mix. She did not give us a little printout like Maison MK did, so I had to go by memory and find a similar recipe on line and made some minor alterations. The photo below is the one taken with the iPhone4 with the flash at the Ryad. I tried to fix it a bit in Photoshop so it doesn’t look as cold and harsh. The funny story around the briouats is that the Chef specifically asked me if I wanted them deep fried or baked, and I opted for baked ‘pour la santé’ I said. And low and behold, we are served deep fried briouats! They were very tasty non-the-less!

Our baked Briouat with Dar Les Cignones Fried Briouat in the background

Baked Shrimp Briouats

Makes 26 5 cm (2 inch) triangles

Ingredients:

  • 300 g shrimp, peel on
  • 2 cloves garlic, minced
  • Salt and freshly ground black pepper
  • 1/4 cup yellow onion, finely chopped
  • 1 tbsp tomato paste
  • 3 tablespoons chopped fresh flat-leaf parsley
  • 3 tablespoons chopped fresh cilantro leaves
  • 3/4 teaspoon ground cumin
  • 1/2 teaspoon sweet paprika
  • Pinch of cayenne
  • Large pinch of saffron threads, revived in a little water
  • 1/4 cup fresh panko (or bread crumbs, I had panko)
  • 5 sheets of phyllo dough
  • 1/2 cup olive oil

Directions:

  1. Chop the shrimp into 1/2 cm bits, doesn’t have to be even or pretty.
  2. Heat a splash of oil in a pan and sauté the onions, add the shrimp and cook through.
  3. Add the garlic, tomato paste and spices and stir until you can smell the aroma.
  4. Remove from heat and add the panko, mix well.
  5. Allow to cool completely and add the fresh parsley and cilantro leaves. Mix well.
  6. Take 1 sheet of phyllo at a time, cut into 4-5cm strips. Drizzle with olive oil.
  7. Add about 1 tsp of the cooled filling to one end and fold tightly as shown in the diagram.
  8. Pre-heat oven to 350 ° F. Bake triangles for 12-15 minutes or until golden. Serve immediately or allow to cool and freeze.

Folding takes practice, make sure you have lots of phyllo on hand!

Baked Shrimp Briouat

Read Full Post »