Feeds:
Posts
Comments

Archive for the ‘Vegetable Sides’ Category

At our favourite Chinese Dim Sum place, they serve the most incredible green beans — they have such a lovely crunch to them. I wanted to replicate the recipe at home. I won’t make them often because they are fried, but they are a nice treat once in a while.

Ingredients:

  • French Green Beans, washed, dried and trimmed
  • Peanut oil
  • 1 clove garlic, finely minced
  • Sea salt
  • Sesame seeds

Directions:

  1. Add about 1 cm of high flashpoint oil, like peanut oil to a frying pan or wok. Heat until about 300° F.
  2. In smaller batches, fry the green beans until the skin puckers, set them onto a layer of paper towel to absorb the excess oil. Work through the batches until you have fried all the beans. At this point, you may set them aside until you are ready to serve them.
  3. Pour off most of the oil and fry the garlic lightly (not brown), then return the beans to the hot pan and fry until thoroughly warmed. 
  4. Serve hot garnished with sea salt and sesame seeds.

These are best served fresh but I have had success in storing them for a few days in the fridge and just pan-frying them until warm.

Read Full Post »

I came across this recipe on my Instagram feed and was immediately smitten. We are not big potato eaters but we do like a delicious potato recipe when we feel like some spuds and I can attest that this is one delicious high-class spud recipe. It will be a bit more effort than mashed potatoes but believe me, it’s worth it. Plus there is the “WOW” factor. I served up these golden medallions aside a couple of Waygu beef tenderloins a friend gifted us for JT’s birthday. These potatoes are absolutely delicious, think bœuff bourguignon potatoes that have caramelized nicely on all sides, they are crispy and creamy at the same time. And, you can make them in advance and finish them about 15 minutes before you’re ready to serve.

A rich potato side.

Fondant Potatoes

For the original recipe, please click here.

Serves 2 (to serve more people, simply multiply the ingredient below)

Ingredients:

  • 4 small yellow potatoes
  • 15 mL peanut oil
  • 40 g unsalted butter
  • 125 mL red wine
  • 125 mL chicken stock
  • 125 mL beef stock
  • 15 mL roasted garlic purée
  • Pinch of salt

Directions:

  1. Peel and cut the potatoes into large scallop-sized rounds (about 3cm in diameter). It’s important that they are relatively even in size to each other so they cook evenly.
  2. Brown each side in a frying pan with the hot peanut oil on medium heat. Add a pinch of salt.
  3. Add the butter and allow it to melt. Then increase the heat to just over medium and add the red wine, boil it off so it has almost evaporated, flipping the potatoes about halfway through and basting them with the red wine. You don’t want the liquid in a rip-roaring boil, just a fine rumble.
  4. Combine the chicken, beef stocks and roasted garlic and add about one-third of it to the pan. Lower the heat to medium and continue to cook until almost all of the liquid has evaporated, basting occasionally. Add the next third and cook until almost all of the liquid has evaporated, basting occasionally (to make ahead, cook the potatoes until this step leaving the addition of the final third of the liquid to reheat and finish cooking just before serving) and finally, add the last third, flipping the potatoes and basting occasionally, so that the potatoes are very soft but still maintain their shape and the cooking liquid is almost entirely evaporated (keep an eye on it at this point so it doesn’t burn). You should be able to easily cut through the potatoes.
  5. Allow the potatoes to cool for a few minutes and serve.

Browning up the top and bottom before the fondant process.

Notes:

  • You may be tempted to serve a ‘normal’ serving of potatoes but these are extremely rich so two or three medallions per serving are perfect.
  • The dish takes quite some time to caramelize so set aside about an hour to make a batch.
  • The original recipe bakes the potatoes in the oven but I found mine caramelized much better on my induction cooktop as I am able to have very fine control over the heat.

Read Full Post »

Sometimes it’s just the simplest things that are the best. While we were in Spain, we had a lot of tapas, they serve tapas every time you order a glass of vino. Sometimes it is as simple as delicious olives, or sometimes it’s a little ham sandwich. While we were in Granada, we slipped into this adorable little bar and ordered a couple of glasses of vino with some tapas. Before we even had our first sip, they brought out a good quantity of homemade potato chips and these little round sandwiches (about 7-10 cm in diameter). If we hadn’t already ordered a selection of cheeses and charcuterie, we would have been done! And they would not have been offended. This is Spain, where a glass of good quality wine is €3.50 (less than $5) AND it comes with food! And there is no expectation of tipping, most restaurants add a small service fee per person so you needn’t worry about it.

We were sitting at home one evening when we decided to have a glass of vino and JT asks what we were having for hors d’œuvres! I had to scramble a bit because I hadn’t pre-made anything for the freezer but I did have some incredible peppers (did I mention how wonderful vegetables taste in Spain?) so I sliced them thinly and sautéed them and presented them with some toasted Spanish pine nuts. They were fantastic! So simple. If you’re serving a crowd, you might want to add a splash of red wine and some sliced chorizo, served with crusty bread of course. This is definitely going into my repertoire because I always have peppers at home.

I haven’t stipulated quantities because it’s what you have on hand. I used about a half of pepper each of the red and yellow and about 1/4 of an onion.

These are some of the sweetest peppers we’ve ever tasted.

Sautéed Peppers with Pine Nuts

A KitchenInspirations Original Recipe

 Ingredients:

  • Red peppers, deveined and seeded, cut into strips
  • Yellow peppers, deveined and seeded, cut into strips
  • Onion, thinly sliced
  • Splash of olive oil
  • Pine Nuts, toasted
  • Salt and pepper to taste

 Ingredients:

  1. Sauté the onions and peppers in a splash of olive oil. Add the chorizo and red wine, if using
  2. Sprinkle with pine nuts, salt and pepper and serve with crusty bread.

Read Full Post »

I had purchased a small package of sugar snap peas from one of our green grocers in early August for a dish but I really only needed about a dozen of them so I had to find something to make with the leftovers before they expired. I decided to blanch them for a minute or so and dress them with toasted sesame oil, a splash of soy sauce with a splash of rice vinegar to serve with my prized pork Bulgogi recipe, it was lovely.

Quick Sugar Snap Pea Salad

A KitchenInspirations Original Recipe

Serves 2, as a side salad

Ingredients:

  • A handful of sugar snap peas, blanched
  • 15 mL toasted sesame oil
  • a splash of soy sauce
  • a splash of rice wine vinegar (unseasoned)
  • toasted black and white sesame seeds for garnish

Directions:

  1. Combine the dressing and pour over the blanched sugar snap peas and coat well.
  2. Plate and sprinkle sesame seeds over the top.
  3. Serve chilled.

Notes:

  • Sesame oil can be overwhelming, 15mL was enough for this amount of sugar snap peas, if in doubt, start with a small amount and taste.
  • I blanched the sugar snap peas for about 1 minute in boiling, salted water.


Read Full Post »

I’m always on the lookout for low-carb options, not that I don’t love my carbs, they are just not as kind to me as alternatives, so I like to balance our intake with some low-carb options. I created this recipe when I had purchased too many zucchini’s and I thought it would make a nice alternative to the potato rösti that we are used to, I was wrong, it was significantly better than I expected. There is only cheese in this, no other binder! Other recipes use egg but it made a frittata-like pancake instead of rösti, which should be crispy on the outside, soft on the inside. This recipe is definitely a keeper! 

Zucchini Rösti

A KitchenInspirations Original Recipe

Makes 2 dinner portions or 4 appetizer portions

Ingredients:

  • 250 g zucchini, coarsely grated
  • 50 g Parmigiana, finely grated
  • 50 g Gruyère, coarsely grated
  • 2 g salt, divided
  • Pepper to taste

Directions:

  1. Place the grated zucchini into a bowl and toss with 2 grams of salt, allow to sit for about 30 minutes.
  2. Strain the zucchini and salt mixture and squeeze out as much water as you can. Taste for seasoning and add a little more salt if necessary, keeping in mind that some cheeses are saltier than others.
  3. Toss the strained zucchini with the cheeses and add pepper to taste.
  4. Heat a seasoned cast iron pan or non-stick frying pan to medium heat, then lower to medium-low.
  5. Add about half or a quarter of the zucchini mix to the pan and press down into a pancake about 1 cm tall. Cook until the edges are golden, gently loosen the cheese all around and beneath the patty, it may have stuck a little on the pan and flip repeat for the other side. 
  6. Serve hot as a base for fish, steak, chicken or even a poached egg.

Cheesy delicious goodness in every bite.

Notes:

  • Other cheese that would work: low moisture Mozzarella, Appenzeller, Cheddar etc. I would avoid feta, cream cheese, brie, etc.
  • There is no need for oil or butter, the cheese will render and the oils will help fry the Rösti.
  • If you don’t have time to wait for the salt to squeeze out all of the moisture from the zucchini, you may use it as is, just note that the inside will be much softer than if you had removed most of the moisture.
  • If you don’t have a seasoned cast iron pan or a non-stick pan, add a piece of parchment to the pan before adding the zucchini mixture, this will allow the cheese to caramelize and release from the pan easily.
  • I served Serrano ham wrapped cod with a dollop of Greek yogurt.

Read Full Post »

We’ve fallen in love with Vietnamese food. Banh Mi in particular. This Vietnamese/French delicacy is packed with flavour that a typical sandwich simply cannot compete with.

The sandwich begins with a fantastic bun that feels light (as in weight) and doesn’t have a rough, mouth tearing crust, but a fine, thin one. The crumb needs to be a little chewy with a hint of sweetness. It bounces back slowly if imprinted with a finger. It needs to contain some wet and heavy fillings so it needs good structure. The bun will make or break this delicious sandwich.

The fillings are equally as important. Our favourite sandwich is lightly smeared with butter on both sides (this waterproofs the spongy bread). Then there’s a good smear of paté, layered with a protein (usually in the form of a cold cut), topped with a sweet and sour carrot/daikon pickle, a decent squirt of mayonnaise, finished with thinly sliced cucumber and a good handful of cilantro. It is a work of art. But don’t admire it too long as it’s best consumed shortly after assembly. Sure, you can get grocery-store banh mi that was assembled earlier that day and wrapped in plastic wrap, but there is no comparison.

We had some roast beef leftover from a Sunday dinner that I sliced thinly for our first foray into this special sandwich. I made my own pickled carrot. The rest is carefully selected, good quality, store-bought ingredients.

Always use sterylized jars with new lid inserts.

Check out your local Vietnamese restaurants for this delicacy, if it’s your first time. But be sure to read the reviews because a bad banh mi will ruin your experience.

Pickled Carrot

Makes about 500 mL pickled carrot

Ingredients:

  • 450 g carrot, peeled, cut into strips 1 mm square and 5 cm long (I had about a half a parsnip so it went right in!)
  • 50 g sugar
  • 30 g sea salt
  • 1 L water
  • 200 mL white vinegar

Directions:

  1. Combine the sugar, salt, water, vinegar, and heat gently to melt the sugar and salt. Pour over the carrot and fill a sterilized mason jar with the carrot and warm liquid.
  2. Allow to cool then refrigerate. May be consumed right away for about a month or so.

Read Full Post »

Thai Basil Eggplant

Mid last month, I made a batch of Mulligatawny Soup and had some leftover eggplant, so I searched for a recipe for Thai Basil Eggplant that reminded me of a delicious dish served by a hole in the wall Ma and Pa shop when I worked in the corporate world. This one fits the bill.

Thai Basil Eggplant

Serves 2

Ingredients:

  • 250 g Japanese or Chinese eggplants
  • 45 mL toasted sesame oil, divided
  • 5 g roasted garlic puréed
  • 5 g toasted sesame seeds
  • Good handful of basil leaves, plus more for serving
  • 30 mL unseasoned rice vinegar
  • 10 mL soy sauce
  • 15 mL Sweet Thai Chili Sauce

Directions:

  1. Chop the eggplant into eighths. Heat 30 mL sesame oil in a large pan and cook the eggplant chunks until slightly golden and somewhat soft in the centre, about 6-8 minutes.
  2. Add the garlic purée and sesame seeds and toss to coat well. Add the basil leaves and cook until wilted.
  3. Stir the vinegar, remaining sesame oil and soy sauce into the sweet Thai chili sauce and mix well. Drizzle half of the sauce into the eggplant and cook stirring often until the eggplant has entirely softened.
  4. Serve hot with the remaining sauce drizzled over it and additional Thai Basil leaves as garnish.

I never said it was authentic Thai.


Read Full Post »

We just love Asian flavours, particularly in the summertime. The food is light, fresh and easy to eat on these endless, hot, muggy, summer days. I’ve made quick-pickled daikon in the past as a garnish but this time I wanted something that will serve a few meals. I love Nami’s no-nonsense approach to authentic Japanese food so her blog Just One Cookbook is generally my go-to and this was no exception. I did make a minor change by omitting the heat and reducing the sugar (even though she warned against it). I love the fresh crunch of this daikon pickle. But be warned, the daikon odour will penetrate everything and it is potent! I put the Lamp Berger on every time I open the jar!

Pickled Daikon

For the original recipe, please click here.

Makes about 500 mL

Ingredients:

  • 454 g fresh daikon, julienned thinly
  • 45 g sugar
  • 30 mL rice vinegar
  • 5 mL mirin
  • 2 g salt

Directions:

  1. Combine all of the ingredients in a tightly sealable container (you may wish to double bag it because it really stinks up the refrigerator).
  2. Mix well. Seal the container and place in the fridge for 2 days.
  3. After 2 days, rinse well and strain. Sterilize a jar and add the daikon to the jar, seal and refrigerate. Will keep for about 1 month.

Read Full Post »

My dear friend Lorraine Elliott published this recipe while we were wintering in Spain. It’s not super hot in Spain this time of year and we prefer it that way because we are not fans of extreme heat or crowds. I like to choose simple recipes that can be baked in the oven to warm the kitchen up a bit. The moment I saw this recipe, I knew I had to make it. Unfortunately, I couldn’t source Halloumi in our little village or even the big supermarket in the city so I used a Spanish Manchego. It was delicious! A perfect lunch with a tomato side salad.

It’s similar to Spanakopita but not really.

Spinach, Feta and Manchego Pie

Makes a pie about 12 cm x 25 cm x 3 cm.

Serves 4-6 people

Ingredients:

  • 2 sheets of puff pastry, defrosted in the refrigerator overnight
  • 400 g frozen spinach, defrosted in the refrigerator overnight
  • 100 g sweet onion, finely sliced
  • 20 g roasted garlic, puréed
  • Pinch of nutmeg
  • 120 g Greek feta, crumbled
  • 80 g of Manchego, grated
  • 15 mL milk, divided

Directions:

  1. Once the spinach has defrosted, squeeze out as much moisture as you can.
  2. Preheat the oven to 400° F. Line a loaf pan with parchment paper.
  3. Roll out one sheet of the puff pastry to about 2 times the size of your pan. Insert it into the parchment-lined pan and dock it with a fork.
  4. Press a sheet of foil into the pan to hold the sides of the pastry up. Add some weight to avoid it from rising too much. Bake for 25-30 minutes or until lightly golden.
  5. In the meantime, sauté the onion until translucent, add the spinach and break it up to incorporate the onion evenly. Stir in the roasted garlic purée and nutmeg. Transfer to a bowl.
  6. Add the cheese to the spinach and stir until entirely combined. Season with salt and pepper to taste.
  7. Roll the second sheet of pastry to the size of the pan. Return it to the refrigerator.
  8. Remove the foil from the baked pastry and spoon the spinach mixture pressing it evenly into the pan.
  9. Brush the top part of all four sides of the pastry with milk. Remove the second pastry from the refrigerator and lay it over the spinach-filled pastry. Press the sides of the top pastry into the spinach-filled pastry.
  10. Brush the top of the pastry with the remaining milk and bake for 20-25 minutes or until golden.
  11. Slice the pie into equal portions, serve piping hot with a little salad.

Note:

Read Full Post »

chickenschnitzel_first

We just got back from a two-week holiday in Arizona. I apologize for not commenting as much as I usually do, but you know the drill on holidays.

Regarding Arizona, I would love to say it was perfect weather, and perhaps it was, for Toronto weather but it was cold, sometimes snowy and rainy. Our time with dear friends more than made up for the lousy weather. Although we did have a few gloriously sunny days before the ugly, rainy days we spent in Sedona. Fortunately, our time at the Grand Canyon was clear, albeit cold (read: two layers of leggings, three long-sleeved Ts and a light winter jacket with hat, mittens and scarf). Once I get our photos sorted, I’ll post a few good ones on the blog, in the meantime, I thought I’d share one of my favourite ‘diet’ dishes, chicken “schnitzel” with roasted garlic cauliflower mash!

Chicken “Schnitzel” with Roasted Garlic Cauliflower Mash

A KitchenInspirations Original Recipe

Serves 2

Ingredients:

  • 460 g cauliflower
  • 2-3 cloves garlic, roasted
  • 1/4 cup water
  • 165 g chicken breast, boneless, skinless
  • 35 g egg white
  • 2 Ryvita whole wheat snack bread
  • 10 g whole wheat flour
  • 1/4 cup Herbes en Provence with granulated onion and garlic
  • few sprays of non-stick spray
  • chopped fresh dill for garnish

Directions:

  1. Pre-heat oven to 425° F.
  2. Break down cauliflower into equal-sized florets and set on a baking sheet lightly sprayed with non-stick spray. Roast until softened. Add a bit of water at the end to steam to perfect tenderness for about 5 minutes.
  3. Add the cauliflower florets into a glass bowl and add the roasted garlic cloves. Blitz with the hand blender until creamy and smooth, adding a bit of water if necessary (I just added the left-over steaming liquid from the roasting pan). Set aside.
  4. Divide the chicken into two equal portions and butterfly each, cover the chicken with plastic and flatten it to about 0.5 cm or 1/4 inch with a kitchen mallet. Put them into the fridge.
  5. Add Ryvita to a small zip lock bag and smash into smaller but coarser bits. Add the Herbes en Provence and mix well.
  6. Add the egg whites into a large flat bowl and beat with a fork.
  7. Remove one chicken cutlet from the fridge and lightly dust each side with the whole wheat flour. Then dip it into the egg whites to cover both sides. Sprinkle each side with the Ryvita mixture to coat evenly. Repeat with second cutlet.
  8. Heat a non-stick frying pan. Spray each side of each cutlet and cook cutlets on both sides until nicely golden and the internal temperature is 185°F. Serve immediately with a slice of lemon and some fresh dill sprinkled onto it.

Notes:

  • The diet I use allows for two 100 g servings of protein per day.
  • If you don’t have roasted garlic on hand, simply put a few unpeeled cloves into a ramekin filled with a little water or stock and sprinkle with sea salt. Bake until softened.
  • Even though the chicken is very thin, it is so tender, it will knock your socks off.

Read Full Post »

roastedwildmushroom_first

During our Epic European Vacation this past September, JT booked us into a One Star Michelin Restaurant, Alejandro, just outside of Almeria in the quiet town of Roquetas de Mar. We decided to do lunch because it was a little far to drive for dinner and we were already in Almeria, dropping off our dear friends Paul and T at the airport. Plus, lunch is more reasonable and probably less crowded. As it turned out, we were the only ones in the small restaurant for the majority of our meal, the entire kitchen team (I saw three chefs) and front of the house (two people) focussed on serving us, talk about service! The luncheon degustation tasting menu (nine courses) was only 50 Euros each, including a 10% tip (10% is the norm)! There were a few outstanding courses that I will attempt to recreate, tipping my hat to my new friend, David Crichton of Fine Dining at Home who consistently creates restaurant-quality meals in his humble home kitchen. Dave, I think you’d like this.

I won’t do a full review of the restaurant because they did not speak English, although, they had one English menu that they pointed to as they explained the dish in Spanish. #lostintranslation I should have used google translate! Notwithstanding, it was an exceptional meal and for the price, I would definitely recommend a visit if you are in or near Almeria (it’s only about a 30-minute drive from Almeria).

I won’t lie, this recipe is not quick, nor is it an easy recipe but if you make the mousse in advance, the rest comes together rather quickly. The mousse freezes well so I can see freezing 60 mL or 1/4 cup portions for future dinner parties.

The first layer, obscured by mushroom crumbs, is a mushroom mousse. The mushroom crumb is made from mushroom powder with toasted panko, seaweed and sea salt; it provides textural balance to the ultra-creamy mousse. The whole wild mushrooms are coated with Mycryo® and roasted in a super hot oven to coax out their subtle sweetness and temper their earthiness (the mushroom mousse and crumb brings all the earthiness needed for this dish). I used a variety of wild and cultivated mushrooms, sadly, not nearly as interesting as the dish below, but equally as tasty. I’m excited to make this dish for our next dinner guests!

The original dish

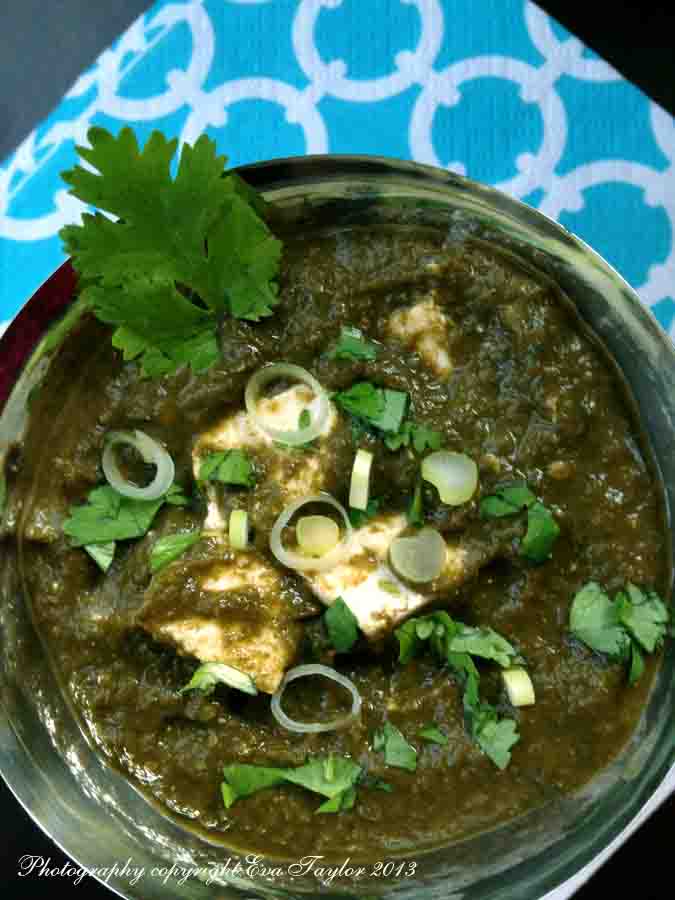
The original dish: Roasted wild mushrooms, sitting a top of mushroom crumbs which was covering a smooth as silk mushroom mousse. An incredible combination of flavours and textures. Fortunately for photography, the restaurant was brightly lit.

Roasted Wild Mushrooms on Mushroom and Chestnut Mousse with Mushroom Crumbs

A KitchenInspirations Original Recipe inspired by the One Star Michelin Chefs at Alejandro, Spain.

Makes 6 appetizer servings

Ingredients for the mushroom mousse:

Makes about 300 mL (1.25 cups) Mousse

  • 30 g (2 tbsp) unsalted butter
  • 50 g shallots, roughly chopped
  • 35 g garlic
  • 60 mL (1/4 cup) EVOO
  • 30 mL (2 tbsp) Mycryo®
  • 200 g mix of wild mushrooms,roughly chopped
  • 100 g peeled, roasted chestnuts, roughly chopped
  • 125 mL (1/2 cup) mushroom stock

Directions:

  1. Remove outer layer of garlic skins but leave the inner layer intact. Place garlic bulb into a heatproof ramekin and cover partially with olive oil. Roast in a 175° C (350° F) oven until soft. Set aside.
  2. Melt butter in a dutch oven, add shallots and cook until caramelized.
  3. Dust the mushrooms in Mycryo® and add to shallots, stir and add the roasted chestnuts. Cook mushrooms and chestnuts until they are well seared and very soft, add roasted garlic.
  4. Purée with an immersion blender with the mushroom stock (adding a little at a time until desired consistency for mousse is achieved). Press the mousse through a fine sieve. Set aside and keep warm until plating.

mushroommousse

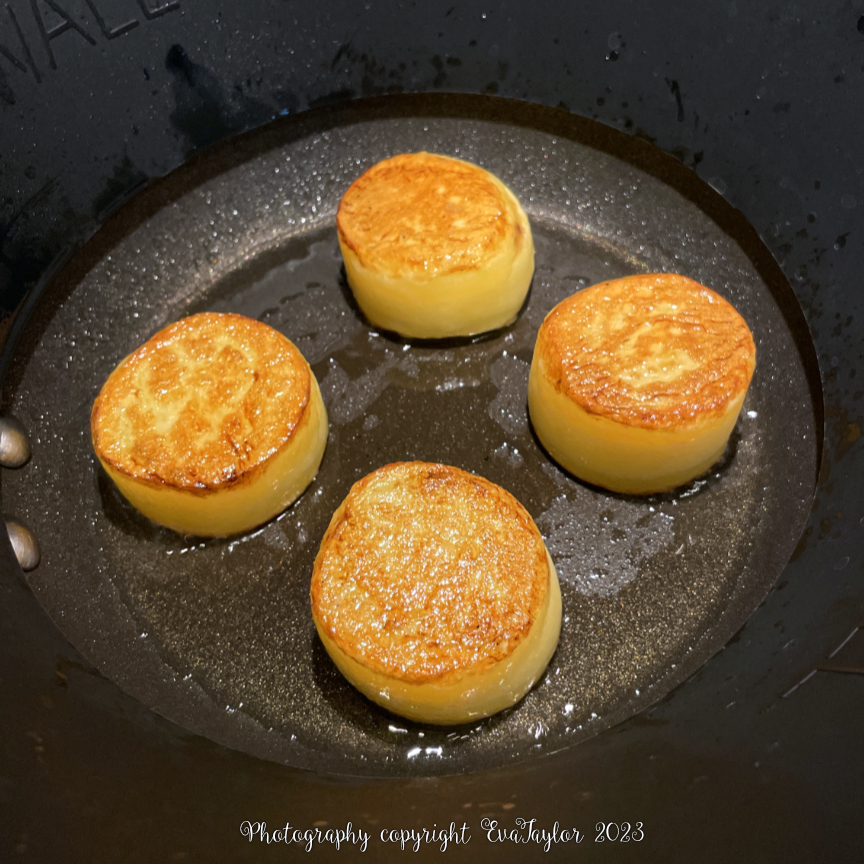
This is the mushroom mousse, so smooth and creamy.

Ingredients for the roasted mushrooms:

  • Mycryo®
  • 240 g wild mushrooms, mixed (choose smaller ones for the presentation)

Directions:

  1. Pre-heat the oven to 220 ° C (425° F). Coat the clean and dry mushrooms with Mycryo®. Spread in a large cast iron frying pan, leaving plenty of space around each mushroom (do not crowd, you don’t want them to steam, you want them to roast).
  2. Place cast iron pan in the hot oven. Turn mushrooms often for about 15-20 minutes or until mushrooms have browned and cooked through. Set aside and keep warm until plating.

Ingredients for the mushroom crumbs:

  • 60 g (1/2 cups) panko
  • 2 tbsp unsalted butter
  • 15 g (1/4 cup) mushroom powder
  • 10 g Seaweed Bouchées (like this), crumbled
  • sea salt
  • Pinch of smoked paprika

Directions:

  1. Melt butter in a frying pan, add panko and toast until golden. Remove from heat, add the mushroom powder, salt, smoked paprika and seaweed bouchées, stir well. Spinkle onto a clean piece of parchment and cool.

mushroomcrumb

This is the mushroom crumb, an earthy flavour with a good crunch.

Assembly:

  1. On warms plates, smear about 50 mL (1/4 cup) of the warm mushroom mousse. Sprinkle with the mushroom crumbs covering the mousse entirely and top with a variety of roasted mushrooms.

roastedmushrooms

The finished dish. It was met with a lot of mmmmmm.

Notes:

  • To make mushroom powder, take a variety of dried mushrooms, pulse in a coffee grinder dedicated to spices until it is a fine powder. Press through a fine sieve to catch any sand bits. Reserve in a clean jar for future use.
  • To make mushroom stock, take 10 g (1/3 cup) of a variety of dried mushrooms and place in a microwave-safe container and cover with 250 mL or 1 cup water. Microwave on high until mushrooms have reconstituted. Pour mushroom liquid through a fine gold coffee filter to capture all the sandy bits. Reserve 125 mL or 1/2 cup and freeze the rest for some other recipes (great in mushroom risotto).
  • This recipe is my impression of what we had in Spain. JT said it was pretty good according to memory.
  • UPDATE (January 2, 2017): I served this as the first course of our New Year’s Eve Dinner 2016 and got RAVE reviews! If you have mushroom lovers in your crowd, it’s worth the time and effort to prepare this dish. I made extra mousse (it’s the fussiest part) and froze it for an upcoming dinner party.
  • Because I was serving this as a course in a multi-course meal, I pre-roasted the mushrooms and then reheated them in a non-stick pan with about 2 tbsp butter.


Read Full Post »

CoconutCauliFriedRice
A Chicken Mole Enchilada is not a low calorie dish, it’s about balance so I decided that I wanted a lighter side, hence the Coconut Cauliflower “Fried Rice”. It’s really easy to prepare and goes well with Mexican and Thai dishes. The coconut flour absorbs moisture and helps the cauliflower “fry” instead of steam.

Coconut Cauliflower “Fried Rice”

A KitchenInspirations Original Recipe

Makes about 1 L or 8 cups coconut cauliflower “fried rice”

Ingredients:

  • 2 heads cauliflower, washed and chopped roughly
  • 1/2 cup coconut flour
  • salt and pepper to taste
  • 2 tbsp EVOO

Directions:

  1. Add cauliflower to the bowl of your food processor (blender or emersion blender will not work), plus a few times until cauliflower resembles rice. Add the coconut flour and pulse to combine.
  2. Season with salt and pepper.
  3. Heat the EVOO in a large Dutch oven, add the cauliflower rice in batches (we don’t want to steam it, just heat it and give it a rough fry, like fried rice). Continue until all of the “rice” has been fried. Keep warm until ready to serve.

Notes:

  • Coconut flour absorbs moisture so the coconut cauliflower rice actually retains a similar texture to rice.
  • Coconut flavour may not work with all dishes but it was absolutely wonderful with the Chicken Mole Enchiladas.
  • You may also add some spices to this dish, like cumin or coriander but the mole was flavourful enough, I did not want to confuse the palette.


CoconutCauliflowerRice NutFacts

Based on 15 servings.

CauliflowerCoconutRice

Read Full Post »

HungarianGreenBeanStew_first

Green bean stew (Zöldbab Főzelék) is one of those Hungarian dishes that is an aquired taste, it has a bit of a sour flavour and is usually rather heavy on the dill. I never liked it as a kid, but it is a Hungarian staple particularly as spring approaches. Recently, I found myself with a relatively large package of the lovely, extra-thin green beans and I wondered how I could make this roux-based dish a little healthier. I omitted the lard (I know, it’s flavour but we’re also trying to lose a few so we’re being good!) and I remade the roux with puréed lentils! Not so traditional, but it was rather tasty. With JT giving it a solid thumbs up, I’ll definitely be making this dish again!

Healthy Hungarian Green Bean Stew (Egészséges Zöldbab Főzelék)

A KitchenInspirations Original Recipe

Serves 2

Ingredients:

  • 300 g Green Beans, trimmed and cut i bite-size pieces
  • 90 g leeks, roughly chopped
  • 20 g garlic, roughly chopped
  • 30 g red lentils
  • 1 tsp Hungarian Paprika
  • Vegetable Stock
  • 1 tsp EVOO
  • 1/4 cup Greek yogurt
  • 2-3 tbsp fresh dill, finely chopped.

Directions:

  1. Heat olive oil in a Dutch oven, sauté green beans until soft but still has a bit of a crunch adding a tablespoon of the vegetable stock as needed. Set aside.
  2. In the same pan, add leeks, garlic and lentils and sauté adding a bit of vegetable stock until lentils are soft, add the paprika near the end. Purée the lentil sauce until smooth add  vegetable stock until desired consistency is achieved (should be thick like a roux). Add the yogurt and purée again until smooth. Return the beans to the lentil sauce and add the chopped dill (to taste), heat through and serve immediately.

Notes:

  • For an authentic Hungarian Green Bean Stew, please visit my friend Zsuzsa for her recipe.
  • I wanted a fat-free and gluten-free roux and that is why I chose red lentils to thicken the sauce.
  • This is a slightly sour dish from the yogurt, if you don’t like that type of flavour, omit it.
  • I served a baked tilapia on the stew, the tilapia is just seasoned with salt and pepper.

This was the first time I made this stew and JT LOVED it!

This was the first time I made this stew and JT LOVED it!


Based on 2 servings per recipe.

The healthy version based on 2 servings per recipe.


This is the original Hungarian Recipe which uses lard, sour cream and flour.

This is the original Hungarian Recipe which uses lard, sour cream and flour.

Read Full Post »

SweetPotatoHummus_first

A couple of weeks ago my kitchen had all sorts of half used leftover vegetables from a testing I did for my recipe testing lady. They were for recipes that called for specific volumes of vegetables (such as, 1 cup) instead of the quantity of vegetables (such as 1 medium carrot). I always find those recipes a bit odd because I am left with bits and pieces that lay around for weeks without any specific purpose. Indeed, I could have thrown them into a soup or stew but I wasn’t making either of those things. Then I saw my lovely friend Lorraine’s Roasted Vegetable Hummus recipes and thought “GENIUS”! What a great way to use up bits and pieces of leftover veg. Thank you Lorraine, truly a great idea (ps, it was darn delicious too!).

Because this recipe was created to use up leftover vegetables, feel free to modify the quantity or variety to what you have on hand. This would also work beautifully if you had leftover roasted veg from a dinner. Hummus is an easy Middle Eastern dip/spread and the seasonings should be to your personal taste; we love the traditional flavours so I’ve kept it pretty much the same with the exception of substituting tahini with toasted sesame oil because that’s what I had (you can use peanut butter too, I know, GASP!!!).

It turned out that The Hungarians had never tried sweet potatoes (not sure if it’s a veg not available in Budapest or they were never introduced to it) but it was a grand success as a dip AND as a roasted vegetable side for our roast chicken dinner one night.

Sweet Potato and Carrot Hummus

makes about 1 cup, depending on the size of your vegetables

Ingredients:

  • 1 medium sweet potato, peeled and cut into equal sized cubes
  • 2 medium carrots, peeled and cut into equal sized cubes
  • 1 large clove of garlic, whole
  • 3 tbsp EVOO, divided
  • 1/4 tsp sea salt
  • 1 tbsp each, cumin and coriander
  • 2 tbsp lemon juice
  • 2 tbsp water or vegetable stock
  • 2 tbsp smoked sesame oil
  • toasted sesame seeds for garnish

Directions:

  1. Pre-heat oven to 190° C (375° F).
  2. Add sweet potato and carrot cubes to a large roasting pan and drizzle with 1 tbsp olive oil.
  3. Add garlic (peel and all) to a small ramekin, top off with 2 tbsp olive oil and and water. Season with sea salt. Cover with foil and tuck into a corner of the roasting pan.
  4. Roast vegetables for about 35 minutes or until very tender, try not to brown the vegetables so that the dip colour remains vibrant.
  5. Scrape vegetables from roasting pan into a glass bowl, squeeze the garlic out from its skin and pour the liquid from the garlic into the glass bowl with the sweet potato and carrot.
  6. Toast the cumin and coriander until fragrant, add to the glass bowl along with the remainder of the ingredients (with the exception of the sesame seeds). Purée until smooth, season with salt and pepper, if desired. For an ultra smooth dip, press through a fine sieve. Garnish with toasted sesame seeds. Serve at room temperature with bread, crackers or crisp vegetables.

SweetPotatoHummus

It’s creamy and naturally sweet.

My dear friend Genie of Bunny, Eats, Design suggested I submit this post to our growing edge for June, themed Picnic, hosted by Maddie from Supper Lovin’

our-growing-edge-banner

Read Full Post »

AppleChutney_First

There is nothing like the push of having extended stay visitors to open your eyes to see all the deficiencies in your home. Case in point, several years ago I filled a few cracks on one of my kitchen walls and then I painted over the patches but since the rest of the wall was about 4 years old, the paint dried a slightly different colour and the wall looked patchy in certain lights. It was on my to do list f o r e v e r! So a couple of weeks ago, after I filled in a few new cracks, bought a new can of paint (when did paint become SO expensive?) I finally repainted the entire wall. A fresh coat of paint really freshens up a room. Of course, once I started filling in cracks all over the house and painting, there was no stopping me…it turned into a two-day project. But then it’s another thing off the list.

Recently we had James, a long-time college friend of JTs over for an Indian dinner and I made my new favourite Jamie Oliver Chicken Tikka Masala recipe along with Palek Paneer, the best Naan ever and a few condiments, pickled carrot and this delightful Apple Chutney. I am certain that James, who is a renovator, was too polite to say anything about my patchy walls but I kept the lighting low anyway!

What are some of the nagging to do’s on your home maintenance list?

AppleChutney

Sweet, tangy with a little bit of heat.

Apple Chutney

A KitchenInspirations Original Recipe

Ingredients:

  • 1 Granny Smith apple (about 165 g)
  • 165 onion, coarsely chopped
  • 80 g dates, coarsely chopped
  • 10 g fresh ginger, grated
  • 3 tbsp white balsamic vinegar
  • 1/8 tsp cloves
  • 70 mL water
  • 1 tbsp Sweet Apricot Chili Sauce
  • 1/4 cup Coconut Sugar

Directions:

  1. Combine all the ingredients in a heavy bottom sauce pan and cook on medium heat until onions have caramelized and the sauce is thick but still have texture.
  2. Cool. Serve at room temperature.
  3. Store in the refrigerator for 1 week or freeze.

Read Full Post »

We’re buried in the chaos of the Christmas holidays and on Wednesday and Thursday we were buried in snow! This was our first real accumulated snow fall and the first has always been my favourite kind — the virgin snow delicately covering our urban landscape like a thick, fluffy duvet. It’s really a perfect backdrop for Christmas and with the company party coming up tomorrow, it’s perfect timing. Hopefully the city mess and dirt will keep at bay so the snow remains perfect for one more day.

Mushrooms have always been a huge favourite at our house, be it fresh, plain button mushrooms or fresh, wild mushrooms like shiitake, portobello, king or cremini, we even have a few recipes for the specialty dried variety. But for this special recipe, I chose fresh wild mushrooms.

I created this vegan recipe (to be enjoyed by all) because I wanted to show-case oven roasting mushrooms because it’s a technique that is relatively new to me (oven roasting vegetables is not new, just oven roasting mushrooms). Oven-roasting mushrooms brings out their sweetness and subdues the strong earthiness that some wild varieties have. Toss in finely chopped, fresh garlic and Extra Virgin Olive Oil from our neighbour’s father’s olive grove in Greece and these tasty fungi make a mouth-watering filling for these classy little tarts. By adding a bit of puréed red lentils AND puréed roasted cauliflower and celeriac mash put these gems over the top flavour-wise and adding a lovely creamy texture that glides into your mouth like a velvet cape.

This is the FLAKIEST pastry EVER!

This is the FLAKIEST pastry EVER!

Vegan Mushroom Tarts

A Kitcheninspirations original recipe.

Makes about 36 little tarts

Ingredients:

  • 600 g variety of wild mushrooms (I used  a combo of white, King, Portobello and Shiitake
  • 20 g garlic, finely chopped
  • 50 mL EVOO
  • 1/2 tsp sea salt
  • 1/3 cup red lentil purée (click here for recipe)
  • 1/4 cup cauliflower and celery root mash (click here for recipe)

Directions:

  1. Pre-heat oven to 450° F (232° F)
  2. Toss roughly chopped mushrooms in garlic, EVOO and salt. Spread out in a large roasting pan  and roast for about 20 minutes or until the released liquid has evaporated and mushrooms are roasted golden. Turn often so the mushrooms don’t stick to the pan.
  3. Cool.
  4. Add mushrooms to a food processor and process until all are relatively small bits. Fold in the red lentil purée and the cauliflower and celery root mash. Season to taste.
  5. You may freeze the mushroom filling at this point to use later. To use later, defrost first.
  6. Fill the baked pastry cups with the mushrooms and reheat at 200° F  (93° C) for 10-12 minutes or until warmed through.

Vegan Thyme Pastry Cups

Vegan tart pastry recipe from Vegan Baking with minor alterations. The links below for vegan butter and shortening are included in case you feel like experimenting. (This is an EXCELLENT Vegan blog with a lot of instruction and science behind the madness).

Ingredients:

  • 2 ½ cups all-purpose flour
  • 1 tbsp sugar
  • 1 teaspoon salt
  • 1 tsp thyme
  • ¾ cup (161 grams) or 1 ½ sticks cold Regular Vegan Butter or non-hydrogenated margarine cut into small pieces
  • ½ cup (108 grams) or 1 stick cold Vegan Shortening or store bought shortening, cut into 4 pieces
  • ¼ cup cold water
  • 3 Tablespoons cold vodka (believe it or not, I did not have any, so I omitted it)

Directions:

  1. Whisk the dry ingredients together. Cut in the vegan butter and shortening just like you would a normal butter pastry, keeping it as cold as you can.
  2. Add the cold water and vodka and work lightly until it forms a ball. Make three disks and refrigerate, wrapped in plastic wrap for 30 minutes or overnight (mine was over night).
  3. Pre-heat the oven to 350° F (177° C).
  4. Roll out the pastry between two sheets of parchment paper to about 1 mm (1/16″) thick. Cut with your favourite cookie cutter and shape into mini muffin cups. Bake for 10-15 minutes or until lightly golden.
  5. Use immediately or freeze until required. No need to defrost before re-heating with filling.

Notes:

  • To help avoid the pastry getting soggy with the filling, I froze the pre-baked pastry and the filling separately and combined and reheated just prior to serving.
  • This pastry is also enough for one 9″ double crust pie. The original recipe serves up a sweet version too. Your should definitely check it out.


Read Full Post »

Baked Onion_3

It’s like a globe of caramelized deliciousness.

I’ve been having so much fun and yes, it’s work and it’s wonderful. I even have a real styling gig booked and I’m super excited about it…5-6 solid days. It’ll be grueling  because we’re shooting around 50 shots in a week! I’ve already practiced some of the dishes to make sure the day goes smoothly. It’s for a line-up of proteins for home meal replacements using 9  fully cooked products in 4-5 applications each. I had to come up with the usage suggestions based on the client’s parameters (I actually had to come up with 10 each – 90 in total and from the 10, they selected 4-5 that I’m making during that week). It was fun but challenging in coming up with the ideas because I didn’t want just ordinary options. They all had to be relatively easy to put together, few ingredients that “Mom” would have easy access to and meals that come together in less than 30 minutes because “Mom” is super busy.

In the meantime, I thought I’d share a couple of photos that although I was assisting, the wonderful stylist allowed me to style entirely on my own. They were published this past spring by Viva Magazine Online.

Foodfeature_viva_spring2014-2

Rustic Breakfast Pizza

Foodfeature_viva_spring2014-7

These were incredibly delicious.

This is a pdf of the Foodfeature_viva_spring2014, we did all the food in this issue. I cooked most of it and the food stylist plated it, the only one I had next to nothing to do with was the duck confit. The photographer is Arash Moallemi, please click here to see his work.

I don’t often get the pleasure of watching specialty cable channels like Food Network Canada because we cancelled our cable service 2 years ago and now use a digital antenna. I could go on line to watch, but many of these channels now put advertising into the shows and you are unable to fast forward like the old VCRs and I no longer have the patience to watch it through. About 2 weeks ago, I was at someone’s house with cable TV and we watched Laura Calder’s French Food at Home. She made a few recipes that I would consider ‘keepers’ but this one really stood out for me so I made it at the cottage as a light lunch and rest assured I will be making this beautiful dish again and again. Next time, it’ll be an appetizer for a dinner party. I hope you enjoy it, it infuses the house with a gorgeous fragrance as it bakes and because it bakes on such a low setting, it won’t warm up your house in the middle of the summer. I hope you enjoy it too. Please click here for the original recipe because I made some alterations.

Baked Onions with Dijon Tarragon Vinaigrette

Makes 4 whole onions, serves 4.

Ingredients:

  • 4 ordinary cooking onions
  • 1/4 cup EVOO
  • 1/4 cup white wine vinegar
  • 1 tbsp mayo
  • 1 tsp Dijon mustard
  • 2 tbsp olive oil from roasting the onions
  • 1 tsp finely chopped tarragon
  • Good grind each of pepper and sea salt

Directions:

  1.  Pre-heat the oven to 425 F.
  2. Add 1/4 cup Extra Virgin Olive Oil to a small Dutch oven.
  3. Remove only the exterior skin of each onion and cut the stem side flat. You want some skin left on the onion for presentation. Sprinkle with sea salt.
  4. Nestle the onions into the olive oil and bake uncovered  for 15 minutes at 425 F.
  5. Lower the oven temperature to 250F and cover the dutch oven with a lid or foil. Continue to bake for 2-3 hours or until the onion is extremely soft.
  6. Combine the white wine vinegar, mayo, Dijon mustard and olive oil and whisk well. Stir in the chopped tarragon and a good grinding of salt and pepper.
  7. Spoon a little bit of the baked olive oil in the centre of a plate. Put each onion on top of the baked olive oil.
  8. Cut the onion skins in about 4 places and peel back to reveal the creamy goodness. Drizzle the tarragon dressing over each serving.
  9. Serve warm with Crostini or just as is and wait for the accolades!

Baked Onion_1

The onion breaks down and becomes wonderfully soft and sweet.


Baked Onion_2

We were at the lake when I made them.

Notes:

  • Laura cautioned against using olive oil because she didn’t want the flavour to over power the delicate sweetness of the onion, I did not find that it did.
  • Laura placed her onions on little piles of sea salt, I didn’t have any so I did not employ that method.
  • Laura used a raw egg in her dressing, I used a tablespoon of mayo instead.
  • The baked olive oil is packed with flavour so save the left overs to make a very yummy salad dressing.
  • An additional serving suggestion is to serve it with a Gruyère crisp but I didn’t have Gruyère  at the lake.

Read Full Post »

Recently we were invited to a “slider” party. The invitation pictured one of those garden slides that you soak with the garden hose and take a running leap onto it and slide all the way down. But it wasn’t a party like that. We’re talking food sliders! You know, the tiny little sandwiches or burgers that you generally have a few of. The BBQ was hosted by that Titanic, Black and White and Bond party couple and it was the same five couples. Each couple was charged with bringing their own favourite slider for dinner. Yep, that meant we all ate five (FIVE) mini burgers! But it was great fun.

I figured there would be a good selection of burgers (chicken, turkey and beef) so I wanted something a wee bit different; I made our Whiskey BBQ Pulled Pork (previously posted here) with a celeriac, fennel and cabbage slaw. I was inspired by my friend Sissi over at With a Glass when she presented us with her own version of a fennel slaw with an ouzo mayonnaise, but sadly I happened to mention my intentions to JT and he gave me that look; you see, he likes fennel and he likes ouzo but felt that the two together might be a little too strong. I begged to differ but some things are not worth arguing about, so I kept the fennel and made a new dressing for it. It was a tasty slaw and it went very well with the pulled pork. I omitted the mayonnaise from this slaw as we were dining al fresco and I wasn’t sure how long the food would sit outdoors in the heat and sun. The lemon juice and zest were added to mimic the tangy flavour of mayo.

CreamyRemoulad_3209

It was creamy without being heavy.

Celeriac, Fennel, Carrot and Nappa Cabbage Slaw

Makes about 10 cups of slaw but it depends on how large your vegetables are.

Ingredients:

  • 1 medium sized celeriac
  • 1 large carrot
  • 1 medium sized fennel
  • 1 small head Nappa cabbage
  • 3/4 cup greek yogurt
  • 1-2 tbsp lemon juice
  • zest of 1/2 lemon
  • 2-4 tbsp honey
  • salt and pepper to taste

Directions:

  1. Reserve 6-8 large cabbage leaves for presentation.
  2. Grate the celeriac, carrot, fennel and cabbage using a fine grater, mix well. Set aside.
  3. Combine the yogurt, lemon juice, zest and honey and mix well. Season with salt and pepper to taste.
  4. Mix the dressing with the slaw and serve chilled on a flat plate with the leaves spread around to hold the slaw.

Pulled Pork_3207

Such a cute little slider, don’t you think?

Pulled Pork_3204

I made tiny little pretzel buns for the pulled pork sliders.

Read Full Post »

We had JTs family for Easter brunch again this year and I wanted to change it up a bit and serve some different sides. I recently started following John over at Kitchen Riffs and he posted a fantastic update to the traditional scalloped potato dish…he added celery root! Can you believe it? This change was very appealing to me because although scalloped potatoes are not considered healthy, this version is slightly healthier than the traditional version. While potatoes have almost 1 calorie per gram, and a glycemic load of 29, celery root has 0.4 calories per gram with a glycemic load of 6! While it may not make this a healthy dish, it does help mitigate some of the other not-quite-so-healthy ingredients in this dish.

EasterTable_2506

Our Easter Table

I was also inspired to add some thyme to this dish as I was preparing the béchamel sauce and it was fantastic; the thyme really played into the celeriac flavours beautifully. The celeriac also made this dish a lot less starchy than one made exclusively with potatoes. I’m definitely keeping this version for future family dinners.

A warm, bubbly crispy crust scalloped potato and celeriac

A warm, bubbly cheese crusted scalloped potato and celeriac

The original recipe came from my trusty Five Roses Cookbook which is now falling apart at the seams, but that’s OK, it looks well-loved!

ScallopedPotatoes_2504

The thyme flavour with the celeriac is a pleasant surprise.

Scalloped Potatoes with Cereriac

Serves 10-12 small servings

Ingredients:

  • 3 medium sized potatoes (Yukon Gold work very well), peeled and sliced very thinly
  • 1 small celeriac (celery root), peeled and sliced very thinly
  • 1/2 Vialia onion, sliced very thinly
  • 3 tbsp unsalted butter
  • 2 cups skim milk
  • 1/4 cup AP flour
  • 1 tsp salt
  • 1 tbsp chopped fresh thyme, plus one sprig for garnish
  • 1/2 cup grated yellow cheddar cheese

Directions:

  1. Prepare an oven-proof baking dish with non-stick cooking spray (I like to use one pretty enough to serve from and that way I’m not messing around plating the dish). Preheat the oven to 190°C (350°F).
  2. Melt the butter in a sauce pan over low heat, increase the heat a little and add the flour, mixing well to combine. Cook this mixture for a few minutes making sure not to burn it. Slowly add the milk into the cooked flour and whisk to combine and remove all lumps. Add the chopped thyme and salt and whisk well; cook the béchamel until thick (should still be pourable).
  3. Beginning with the potatoes, layer a single layer on the bottom of the prepared baking dish and cover the bottom fully. Next layer the onions over the potatoes and then the celery root. Cover these three layers with the thyme béchamel sauce. Repeat the layering process with the béchamel sauce until you have used up all of the vegetables, leaving a small amount of béchamel to pour over the very top of the layers.
  4. Place the baking dish onto a cookie sheet (you’ll thank me later) and sprinkle the cheddar over the béchamel. Bake uncovered for 1 hour 30 minutes or until a cake tester flows into the potato, celery root easily. Serve hot.

 Notes:

  • Béchamel thickens as it bakes so don’t worry if you feel your béchamel is runny, it will be fine made with the proportions in this recipe.
  • This dish may be made in advance, cooled and refrigerated. Reheat with additional cheese (broiling may be necessary).
  • When you reheat, make sure the béchamel bubbles up.

ScallopedPotatoes_2497

A traditional dish with a new angle!

This is using the celeriac.

This is using Potato and Celeriac.

Screen Shot 2014-04-21 at 11.44.40 AM

Potato and Celeriac, yielded about 12 portions for the dish I used.

Read Full Post »

Happy Easter everyone! Hope you all had a lovely weekend. In Canada we have Good Friday as a holiday. Some things like the LCBO are closed on Sunday as well. Saturday will be a busy day, so better get there early to stock up for the family dinner!

My earliest memory of eating Hungarian Lecsó was when I was about 8 or 9 years old and my father made it for us. We were a typical Eastern European family in that the father virtually never cooked, that was ‘woman’s work’ but my Dad did step up on the occasion that my dear Mom had to go into the hospital and have an operation. I don’t remember much else about this time except that Dad cooked lecsó. One other thing, my 6 or 7 year old brother was beside himself with worry when our parents told us that Mom was going to be away in the hospital for a few days, and through tears a great degree of anxiety he asked, “Who will cook for us?” Our obsession with food runs deep.

160-1974b_IMG

Circa 1974 Edward’s Gardens in Toronto. Dad, my little brother and I. Mom was taking the photo. What the heck is going on with my hair????

My experience has been that Lecsó is to Hungarians what Lasagna is to Americans or Bangers and Mash are to the English, it’s a fairly common staple. It’s easy enough to put together and it’s comforting and satisfying without being overly filling. The Hungarians generally use a Hungarian green pepper which is more like a Cubanelle, longer and lighter in colour with a more subtle flavour than the green peppers we are accustomed to in North America. I switched up this dish by using colourful red, yellow and orange peppers (capsicums) and Vidalia Onions which are much sweeter.

The traditional protein accompaniment in our household was Debreceni Kolbász which is like a thick hot dog, named after the city in which it was made. Most Hungarian sausages are coarsely ground pork seasoned heavily with paprika and garlic where as a Debreceni is subtly seasoned very finely ground pork that has the texture that resembles what you would know as a hot dog. The only difference from North American hot dogs and Hungarian Debreceni is that Debreceni has a very distinct ‘pop’ as you bite through the casing. I haven’t had a Debreceni in many years for the same reasons I haven’t had a hot dog — they are just too unhealthy to be worth it for me. I made poached Cod to eat with this dish and it was exceptional.

Lecso_2296

A delicious and warming brothy sauce with cooked peppers, onions and tomatoes.

Hungarian Lecsó

Serves 4

Ingredients:

  • 2 red peppers, sliced
  • 2 orange peppers, sliced
  • 2 yellow peppers, sliced
  • 2 large tomatoes, chopped (peeled and seeds removed)
  • 1 medium sized Vidalia onion, finely sliced
  • 200 mL home made tomato sauce
  • 1/2 tsp paprika (sweet or hot)
  • 1/4 tsp smoked paprika (sweet or hot)
  • salt and pepper to taste
  • parsley for garnish

Directions:

  • In a light spray of olive oil, cook the onions until translucent.
  • Add the sliced peppers and tomatoes and cook until very slightly softened.
  • Add the tomato sauce and seasonings and cook for about 10 minutes on a medium temperature.

Lecso_2293

Spice it up a notch by adding some hot peppers to the mix.

Notes:

  • Hungarians traditionally use lard as the fat which adds flavour but is extremely unhealthy so I add a pinch of smoked paprika which also adds to the depth of flavour that the debreceni would bring.
  • Traditionally the peppers are cooked until limp but I prefer a little texture to my lecsó so I don’t cook them as much.
  • Like most stewy dishes this is a lot better the second day.
  • Consider adding a poached egg to this dish (Hungarians might eat this with scrambled eggs).
  • Sour cream or yogurt are also used as a garnish to this dish.
  • Cubanelle peppers come in both hot and sweet varieties and look virtually identical. You will want to make sure you buy the right one and not make the same mistake we did for a meal we served at the cottage several years ago — that was a rude awakening!

Read Full Post »

JT and I were sipping wine in the living room by a roaring fire, we were discussing the Christmas “Do-Over” dinner that we decided to host in January. I had just done all the shopping for the menu and then JT mentions that his family are not much stuffing lovers. THAT in itself is blasphemous, but what made it worse is that I had just done all the shopping. Did I mention that I had just done all the shopping? I had bought a lot of mushrooms. A LOT. And they weren’t cheap so they were not going to be omitted from the dinner!

So instead of making a stuffing of mushrooms and chestnuts I created a pilaff! And what a success it was; the earthy mushroom flavours with the slightly chewy texture of the wild rice and the sweet chestnuts and brown rice complimented each other so well, I decided to blog about it so I don’t forget to make it next time. This recipe is really just a combination of suggestions, so if you don’t like something, omit it and add a bit of something else. Even the volumes of everything are a suggestion, so put on your recipe developer hat and make this pilaff your own!

Another great thing is that you can make it the day before so you’re not in a panic the day that  6 people descend on you!

WildMushroomRicePilaf_1946

Even my Nephew who is not fond of mushrooms had a generous helping!

Wild Mushroom Rice Pilaff with Chestnuts and Cognac

Serves 8-10 as part of two other side dishes.

Ingredients:

  • 500 g – 1 kg wild mushrooms (I used 1 Portobello, ~5 cremini, ~12 shitaki, ~1 large bunch oyster), chopped roughly
  • 300 g (3.5 oz) roasted chestnuts, peeled and chopped roughly
  • 1/4 cup pancetta, diced rather small
  • 1/2 sweet onion (about 1 cup), chopped finely
  • 1 clove garlic
  • 1/3 cup wild rice (cooked, as per directions)
  • 1/4 cup sweet brown rice (cooked, as per directions)
  • 1/4 cup cognac or brandy
  • 1 tbsp unsalted butter
  • 1/4 tsp thyme

Directions:

  1. In a very hot Dutch oven, cook pancetta until crispy, remove and drain on paper towel and set aside. You may use the pancetta grease to cook in, but it you’d rather be a touch healthier, wipe out the pan and spray with a little non-stick cooking spray.
  2. Cook onions until translucent. Add garlic and continue to cook until fragrant. Deglaze the pan with the cognac. Add the butter to the hot pan and once melted add the chopped mushrooms. Cook with the top off until the mushrooms are no longer chewy.
  3. Stir in the pancetta, chestnuts and cooked rice until well blended. Spray non-stock cooking spray in a decorative casserole dish which can be put into the oven and pour the mushrooms and rice into it. Don’t pack it down.
  4. If you are making this the day before, allow to cool completely and refrigerate. When you are ready to serve, remove the pilaff from the fridge and allow to come to room temperature.
  5. Pre-heat the oven to 150°C (300°F) and reheat for 20-30 minutes. Serve hot.

WildMushroomRicePilaf_1945

The chestnuts are such a sweet and creamy surprise!

Tips:

  • You may ‘chop’ the mushrooms in a food processor to save time, but be careful not to chop too finely. I did not use this method because I wanted larger, identifiable mushroom pieces.
  • You may also use barley, wheat berries or any other sturdy grain instead of wild rice.
  • Cooking sherry may be substituted for the cognac or brandy, but I prefer cognac with mushrooms.
  • I like to buy already peeled and roasted chestnuts like these, but you can roast and peel your own.
  • To add another layer of texture and flavour, add 1/2 cup of chopped roasted pecans.

Screen Shot 2014-02-03 at 11.55.51 AM

Based on 10 servings

Read Full Post »

Are you tired of the same old vegetables served at holiday gatherings? I know I am. This recipe is a perfect new take on the traditional Brussels Sprouts and best of all, they are so easy to prepare! My lovely SIL Wendy makes a version of this tasty treat every year at Thanksgiving (it may be because I always ask her to), but I’ve never made it at home! So for our Christmas “Do-Over” last month I decided to give it a go. Make it vegetarian by using vegetable broth instead of chicken broth and omit the pancetta, but you may need to add a bit extra salt.

We had a Christmas “Do-Over” because JT’s 90 year old father wasn’t well enough to travel to Peterborough where JT’s sister kindly hosted the dinner since we weren’t sure we would have power. This tasty side dish is easy to eat and fast to prepare, what more could you want? Oh, yes, it’s tasty too.

ShreadedBrusselsSprouts_1941

Aren’t Brussels Sprouts just very tiny cabbages?

Shredded Brussels Sprouts with Pancetta and White Balsamic Vinegar

Serves 8-10 as part of two other side dishes.

Ingredients:

  • 500 g (about 14 cups) washed Brussels sprouts, shredded
  • 50 g (about 1/2 cup) pancetta, finely chopped
  • 1/2 (about 1 cup) sweet onion, finely sliced
  • 1 clove garlic, minced finely
  • 50 mL (about 1/4 cup) white balsamic vinegar, or to taste
  • 100 mL (about 1/2 cup) chicken stock

Directions:

  1. In a large dutch oven, crisp the pancetta to golden. Remove with a slotted spoon to a paper towel, set aside.
  2. Add the onion and cook until translucent, then add the garlic and cook until fragrant. Deglaze the pan with the white balsamic and chicken stock. Add the shredded Brussels sprouts and sauté until slightly wilted. Stir in the pancetta. Serve hot.

ShreadedBrusselsSprouts_1942

You’ll never think the same way about Brussels sprouts.

Screen Shot 2014-02-03 at 11.47.32 AM

Read Full Post »

Recently we entertained our lovely neighbours across the street; it was a thank you dinner of sorts because they happened to rescue us on my benchmark birthday party this past summer when we ran out of beer! We asked them what kinds of food they enjoy and Indian was one of the selections. I love cooking Indian food but because there are just the two of us I usually don’t bother but doubling the audience makes it all the more worth-while. It was an extravagant meal so I started cooking a couple of days in advance and it really didn’t seem to be that much trouble; the saucy, stewy dishes of India lend themselves to being made ahead and allowing the flavours to combine over time making them taste so much better than the day they were made. I was very pleased with the results and will definitely make these dishes again in the future.

I also would like to thank Helene DeSouza (Masala Herb) for posting her favourite Palek Paneer recipe this month, if it wasn’t for her I likely would never have made this dish having tasted a restaurant version that was unremarkable. Helene’s recipe has the complex depth of flavours that one expects from Indian food. I urge you to try it.

The menu:

  • Onion Bhajis  (I made this one again and it was extremely tasty) with Tamarind Chutney (recipe to come)
  • Aloo Papri Chat (please click here for the recipe)
  • Carrot Pickle (please click here for the recipe)
  • Beef Bhuna (please click here for the recipe)
  • Butter Chicken (please click here for the recipe) NOTE: I used 1 lb fresh roma tomatoes and 2 cups of home made tomato sauce made from raw tomatoes cooked down and blended until smooth WITH oven roasted tomatoes blended and the whole thing run through a very fine sieve to get rid of the skin and seeds).
  • Palek Paneer (The Palek (spinach) gravy is new from Helene DeSouza who runs Masala Herb in Goya, India; recipe below)
  • Naan (please click here for the recipe) and Papadums (I bought some very special Papadums in Chicago when we visited with Chgo John of From the Bartolini Kitchens)
  • Chai Crême Brûlée (please click here for the recipe)

Paneer

The texture turned out perfectly this time.

The texture turned out perfectly this time.

This firm, unripened Indian cheese makes a rectangle 23 cm x 13 cm x 2 cm (9″ x 5″ x 3/4″).

This is the original recipe

Ingredients:

  • 4 liter Fresh whole milk
  • 5 tbsp lemon juice

Directions:

  1. Heat the milk in a deep and heavy bottom pan at medium heat (this is really important, so the milk doesn’t burn). Allow it come to a gentle boil (around 200 F) and stay there for a minute. Make sure the milk is not vigorously boiling, if it does, immediately reduce the heat and bring the milk back to gentle boil.
  2. Begin by adding the lemon juice a table spoon at a time, stirring gently to incorporate. With each addition you will notice that the milk separating. The final addition of lemon juice will separate the curds from the whey very obviously. Switch off the gas immediately or if you are cooking on electric, remove pan from the element to stop the heat.
  3. Line a sieve with double layered cheesecloth, making sure the cheesecloth is long enough to be bundled up and tied later. Pour the curd and whey through the cheese cloth. Set the whey aside or discard (I tried making ricotta from this whey but there was no more curd to be had. I understand that Whey is healthy so you can search the net to find uses, I did not and trashed it).
  4. Wash the curd in the cheese cloth, by running it through cold water to remove the lemon taste.
  5. Tie up the cheesecloth in a tight bundle and hang it over something to allow it to drain for about 30 minutes.
  6. Line a nice rectangular pan with a double folded cheese cloth making sure you have enough length and width to fold over the top. Add the curd to the pan, pressing it firmly into the pan. I didn’t press my corners and edges well enough and they were a bit crumbly. I used a small glass to help push the curd down and compress it. Place the  wrapped cheese between two cutting boards over a sink or a large pan and put a heavy pot on top for 1-2 hours.You don’t want to add too much weight for too long as it can drain out way too much moisture from the cheese making it hard and crumbly. Your cheese should have a slightly elastic texture so when you lightly press your finger into it, it will bounce back.
  7. Wrap it and store it in the fridge for up to a week or cover well with plastic wrap and freeze. Defrost entirely before use. If you find your cheese still is a bit too wet, you can store it LIGHTLY wrapped in the fridge and the chill will dehydrate it further (I did not have to).
  8. Cut the block into small one bite chunks and add to the Palek sauce to warm up. Be very gentle when stirring as to not crumble the cheese too much.

Paneer_1480

Cubes of firm unripened cheese remind me of firm tofu.

Palek Paneer (Spinach Gravy with Unripened Cheese Cubes)

Saag Paneer_1474

The lemon juice also helps to preserve the lovely green colour of the spinach.

Please click here to see Helene’s lovely recipe.

Ingredients:

  • 250 g baby spinach (or a standard large size bag)
  • 1 green Chili
  • 100 mL water
  • 1 small Onion, finely chopped
  • 2 tbsp Oil
  • 1 tbsp Garlic, finely minced
  • 1 tsp Cumin Powder
  • 1 tsp Coriander Powder
  • pinch Cinnamon powder
  • ½ tbsp Garam Masala
  • ½ tbsp red Chili Powder
  • 1 tbsp Tomato Paste
  • splash of lemon juice
  • 2 tbsp cream
  • Salt & Pepper to taste
  • 200 grams fresh Paneer bite size cubes (Indian Cottage Cheese)
  • cilantro and green onions to garnish.

Directions:

  1. Wash spinach well and if you’re not using baby spinach, remove all the hard stems.
  2. Blanch the spinach in 100 mL water, set aside.
  3. In 2 tbsp oil, fry the onions until caramelized. Add the garlic paste and stir for a moment. Add the cumin, coriander, cinnamon, Garam Masala and chili powder and allow to develop their aroma. As soon as you smell the herbs, remove from heat. Add the tomato past and combine with the blanched spinach.
  4. Purée with an emersion blender until very smooth, add a splash of lemon juice to brighten the flavours. Press through a fine seive.
  5. At this point you may put the finely puréed spinach mixture into a container and store in the fridge for a day or two.
  6. When you are ready to serve, reheat slowly in a pot, and add the two tablespoons of cream, salt and pepper. Add the Paneer and stir very gently so that the paneer does not break apart. Serve garnished with chopped cilantro and green onions.

Saag Paneer_1475

The gravy was rather thick, you can loosen it with water, vegetable stock or more cream.

Read Full Post »

It’s the most wonderful time of the year! You may think that I’m referring to Christmas, but then you’d be wrong. It’s Halloween, of course! JT and I traditionally have a pumpkin carving contest, and this year is no different. We scour the net for unusual pumpkin patterns and when we find one we get down to the dirty job of carving. Carving is made easier with the right tools, but then again isn’t everything? I bought a set of pumpkin carving tools at an end of season sale last year and wish I had bought two sets! So in light of the grand tradition, I’m going to ask you to vote on your favourite pumpkin! May the best pumpkin win!

WitchyPumpkin_1262

Vote for me. Vote for me!

ScaryPumpkin_1255

Vote for me. Vote for me!

Halloween2013_1253

Hope the decorations and the scary music doesn’t frighten the wee ones too much!


We were craving a unique hors d’œuvres so I remade a traditional polenta recipe into a delightful orange snack: polenta “fries”! The orange is strictly from the sharp cheddar. And the best part is that you can easily freeze these babies for those lovely drop-ins during the holiday season.

Cheddar Polenta “Fries”

PolentaFries_1154

They are crispy on the outside, soft and creamy on the inside.

Ingredients:

  • 1 cup fine cornmeal
  • 2 cups stock (vegetable, beef or chicken)
  • 150 g grated old cheddar cheese
  • Salt to taste
  • 1/4 tsp smoked paprika
  • Pinch of chili flakes
  • 2 tbsp finely chopped chives

Directions:

  1. Bring stock to a boil and add the smoked paprika and chili flakes.
  2. Slowly add the cornmeal, whisking quickly as you add it.
  3. Add the grated cheese and mix well.
  4. Turn heat right down to low and cook for 10-15 minutes until it no longer feels as hard grain.
  5. Turn into a parchment lined square Pan about 22 cm x 22 cm or 9″ x 9″ and press down evenly and firmly. Allow to cool.
  6. Cut into 1cm or 1/2″ wide “fries” about 5 cm or 3″ long. Fry each side until golden in a light oil.
  7. Serve warm with marinara sauce or salsa.

Other serving suggestions:

  • Serve with soup instead of crackers.
  • Cut into small rounds and serve instead of rice or potatoes with a gravies meat.
  • Cut into small rounds and serve as ‘crackers’ topping with a cold cut or a pickle round!

PolentaFries_1160

Marinara Sauce or Salsa are the perfect accompaniment.

PolentaFries_1162

You sure I can’t interest you in even one?

Read Full Post »

We’ve been off on a little vaycay to the U.S. capital city, Washington, DC and I’ll post the photos and stories soon — but I also have a little surprise!
My friend Lorraine from Not Quite Nigella posted a wonderful alternative to fried rice and for obvious reasons I was ALL OVER IT. Of course, this blog wouldn’t be the same if I didn’t change it up a bit — not that Lorraine’s version her Cauliflower Fried Rice wasn’t perfect, I just didn’t have all of her ingredients handy and I wanted it now! So I made it Curried Cauliflower “Fried” rice and boy did it hit the spot; it was even delicious the next day when I took it to work with some grilled shrimp on top. Very tasty indeed.

Thai"Fried"CauliflowerRice_4728

Resist over cooking because you really do want a tiny little crunch.

Curried Cauliflower “Fried” Rice

Serves 4 generous portions

Ingredients:

  • 1 medium head cauliflower
  • 1/4 cup sultana raisins
  • 2 green onions finely chopped
  • 4 tbsp low fat coconut milk
  • 1 tsp curry powder
  • 2 tbsp unsweetened grated coconut
  • 1 tsp lime juice
  • 1 tsp honey
  • a few sprays of non-stick EVOO

Directions:

  1. In three rounds, place the washed and dried cauliflower into a food processor and pulse roughly until you get a coarse grind, like rice.
  2. Heat a cast iron skillet add the EVOO and the ground cauliflower and “fry” until lightly browned. You are trying to achieve a nice golden crust on it, scraping is essential. Try not to add liquid as that will boil the cauliflower and you don’t want it too soft — you still want a touch of a bite to it. If your pan isn’t large enough, you may need to “fry” in batches so the excess doesn’t ‘steam’ the caulflower.
  3. Add the curry powder and heat until fragrant mixing it into the “fried” cauliflower rice.
  4. Remove from heat and add the coconut milk, lime juice and honey (it’s easier if you mix the three in a small container and add at once). Give it a good stir into the cauliflower.
  5. Add the raisins and green onions and mix well.
  6. Garnish with unsweetened grated coconut, serve warm.

Thai"Fried"CauliflowerRice_4730

The curry flavours really went well with the sweet cauliflower.

Read Full Post »

I know I’ve posted a chick pea and cauliflower curry recipe before, but this one has a bit of a twist, it’s Thai and I just couldn’t resist! The fresh flavours that Thai spice combinations brings to this dish is simply mouth watering, and it’s even better the next day (fortunately, I made enough for my lunch at work). You can blanket this beautiful curry over Jasmine rice, perhaps with a little coconut in it, but we just put it over a combo of Arugula and Spinach to manage the waist-line! I found the original recipe here but I made my own changes just because I felt it needed it when I tasted it mid-way.

Thai Chick Pea Cauliflower Curry_BLOG

I don’t know about you, but I am really getting tired of these night-time photos!

Chick Pea and Cauliflower Thai Curry

Serves 4,

Ingredients:

  • 1/2 cup finely chopped sweet onion (I used Vidalia)
  • 3 cloves garlic, finely minced
  • 1 tbsp freshly grated ginger
  • 1/2 tsp turmeric
  • 1/4 tsp cayenne pepper
  • 2+1/2 tsp. ground cumin
  • 1/2 tsp ground coriander
  • 2 tbsp fish sauce
  • 3-4 tbsp coconut milk powder in about 1/4 cup boiling water, dissolved
  • 1 cup vegetable stock
  • 4 kafir lime leaves
  • 12-14 oz can chickpeas
  • 1 generous head of cauliflower
  • 1/4 cup lime cordial
  • 1/2 cup cilantro, lightly chopped for garnish
  • 1 finely sliced scallion for garnish

Directions:

  1. Heat up a wok or frying pan over medium-high heat. Add 2 tbsp. oil plus the onion and garlic. Stir-fry 1 minute.
  2. Add all of the dry spices, plus fish sauce fry together briefly.
  3. Add the cauliflower, stock and dissolved coconut milk powder. Add the kafir lime leaves and cook the cauliflower until it is fork tender but not too soft. Add the chick peas and heat through.
  4. Remove from heat. Stir in the lime cordial and give it a good stir.
  5. Do a taste-test. Adjust the salt level by adding a little more soy or fish sauce if not salty enough. If too salty, add a squeeze of lime juice.
  6. Garnish with chopped coriander and finely sliced scallion and serve hot with either rice or greens.
  7. ENJOY!

Read Full Post »

Who says you can’t have breakfast for hors d’œuvres? Breakfast anytime is great, particularly when I had a few quails eggs left over and we needed a quick little hors d’œuvres for cocktail hour! Serve these on toast points or rice crackers like I did. I garnished with a small dot of yogurt and dill for colour.

Scrambled Quails Eggs with Cheese

Makes about 8 crackers

A little scrambled egg bite

A little scrambled egg bite

Ingredients:

  • 4 quail eggs
  • 2 tbsp grated cheddar cheese
  • 1 tbsp plain Greek yogurt
  • dill to garnish
  • 8 rice crackers (I used these)

Directions:

  1. In a heat proof bowl, whisk together the quail eggs and cheese. Cook over a Bain Marie until the eggs are no longer runny, folding over constantly.
  2. Serve about 1 tbsp of the scrambled egg on toasts or crackers, garnish with yogurt and dill.

Read Full Post »

For the same dinner as the previous post, I made this wonderful German Purple Cabbage Slaw. I’m not exactly sure how authentic German it is, but it did indeed have flavours from German slaws that I’ve had and it was so pretty against the Candied Salmon and Rösti potatoes. It made for a very festive dinner. I was inspired by this recipe, but since I already had purple cabbage at home, that’s what I used and not the white cabbage in the recipe. What I really liked about this recipe is that the dressing is added hot which will slightly wilt the cabbage, but cabbage is strong enough that there will still be a slight crunch to it. They normally add caraway seeds but since I hate them, I omitted them!

Pretty like jewels. Sparkling, pretty jewels.

Pretty like jewels. Sparkling, pretty jewels.

German Purple Cabbage Slaw

Serves 4

Ingredients:

  • 1/2 small purple cabbage, finely shredded
  • 2 tbsp EVOO
  • 140 ml cider vinegar
  • 100 ml vegetable stock
  • 2 teaspoons salt
  • 2 teaspoons mustard
  • 2 tablespoons sugar
  • Parsley for garnish

Directions:

  1. In a glass micro-wave safe container, combine oil, vinegar, stock, salt, mustard and sugar and heat until sugar has dissolved, stirring often.
  2. Add the shredded cabbage to a non-metallic bowl and pour vinegar-oil mixture over cabbage and combine thoroughly. Cover and refrigerate for at least 4 hours or overnight.
  3. To serve, check seasonings, adjust, drain dressing and serve in a decorative bowl. You may want to let the slaw sit in a colander to drain completely, otherwise you will have purple cabbage stains on your table cloth. I guarantee it.
  4. Garnish with parsley.

Read Full Post »

Way back in December we had our good friends Lee and Stefan for dinner. JT and I decided to make Barb’s Salmon that’s like Candy (with a few minor alterations, will blog soon about it) with Swiss Rösti potatoes, German Red Cabbage Slaw (coming soon) and John’s Yogurt Dill Sauce. It was a huge success and the best part is that these potatoes may be made in advance and reheated. The Swiss usually have this for breakfast, and I know I’m breaking all the rules by serving it for dinner…so arrest me (did you say you had hand-cuffs ;-)?)

These famous potatoes can be purchased ready-made that you just slip them into the frying pan and reheat, but I wanted to make them from scratch; how hard could that be? I searched and search the web and came across several variations on the preparation of this classic side dish, and after much deliberation I chose my method. Some of the recipes par-boiled the potatoes and some did not; I chose to par-boil to cut down the finishing time (plus I had read that not par-boiling makes the interior of the rösti a little starchy tasting).

Swiss Röstli Potatoes

Crispy yet soft on the inside

Crispy yet soft on the inside

Serves 4-6 (depending on how hungry you are)

Ingredients:

  • 4-6 Medium Sized Yukon Gold Potatoes (actually, you can use any potato you would use as mashed potatoes)
  • salt and pepper to taste

Directions:

  1. Peel and chop potatoes in half (you want a chunk large enough to grate without grating your knuckles).
  2. Put the potatoes into a pot with cold water and salt (this step was prevalent in many recipes, something to do with cooking evenly) with salt and bring to a boil. Keep on the boil until there is still some resistance when you poke the pieces with a fork or cake tester — you definitely DO NOT want to cook them 100%.
  3. Remove from the pot and allow to cool completely.
  4. On a large grater, grate the potatoes entirely.
  5. Heat a large cast iron skillet with a few tablespoons of oil (err on more than less). Add the potatoes so that they evenly fill the pan, and lightly compress. Cook until it is crispy on one side.
  6. If preparing ahead, allow to cool and set aside now.
  7. To reheat: Flip. If you are brave, use this method, if you’re like me, then two dinner plates will do the trick very nicely. Cook the underside of the Rösti until crispy and the potatoes have heated all the way through.
  8. Serve by cutting into wedges. I served this dish in the cast iron pan I cooked it in because I wanted it to maintain the heat on the table.
  9. Service with Yogurt Dill Sauce.

We had barely enough leftovers for breakfast the following day — that’s how good they were. In fact, this is a meal I will make again; it’s rustic yet has a certain sophistication with all the flavours going on.

Read Full Post »

There is another Indian Restaurant in Toronto that we really like, and you’ve probably heard of it because it’s in all the major cities around the world, it’s called Bombay Palace on Jarvis Street. We usually go there for lunch and there are two particular things I love, the carrot pickle and the Aloo Papri Chaat (described as a sweet Medley of crispy wafers chickpeas, potatoes with yogurt-mint chutney dressing). I tried to find as close a recipe as possible to this tangy, sweet and crunchy side, and this one was pretty darn close. I had to make a few changes due to unavailable ingredients, but to be honest, the flavour didn’t suffer for it. I must warn you, it does take a lot of steps.

Aloo Papri Chaat

A delicious mix of sweet and tangy flavours with the crunchy texture of the wafers

Serves 4-6 as a side dish

Ingredients:

  • 1/2 cup all purpose flour
  • 1/4 cup Semolina flour
  • 1 teaspoon tamarind paste
  • 7-8 teaspoon sugar
  • 1/2 teaspoon red chili powder
  • 1 dried apricot
  • 1 small cooked potato, cubed
  • 100 g chick peas
  • 1/2 cup low fat yogurt (if using Greek yogurt, you will need to add milk to achieve the right consistency)
  • 1 chopped green chili
  • 1/2 teaspoon Chaat Masala (see spice mix below)
  • Salt
  • 1 cup peanut oil for frying

Directions:

  1. Make a soft dough with the flour and semolina by adding a little bit of water at a time.
  2. Roll the dough out into a rectangle and cut into bite-sized squares.
  3. Heat the oil to fry the squares and fry them until they puff a little and are golden. Drain oil off and set aside.

Directions for the Tamarind Chutney:

  1. In a small heavy bottom sauce pan, add the tamarind paste and the apricot. Add about 1 cup of hot water to it and heat to a boil until the tamarind paste dissolves and the apricot is mushy. Blend well with an immersion blender. Strain out any hard bits from the tamarind paste.
  2. Add the sugar, chili powder and mix well. Boil until all of the water evaporates and you are left with a thick rich paste.

Ingredients for the Chaat Masala:

Note: the original recipe for Chaat Masala called for Mango Powder which I did not have, and therefore I substituted the apricot into the tamarind mix to replicate the sweet and tangy flavour of the mango powder.

  • 1 tbsp coriander
  • 1 tsp cumin
  • 1/8 tsp cayenne
  • 1/4 tsp ginger
  • 1/2 tsp paprika
  • 1/4 tsp black salt

Directions for the Chaat Masala:

  1. Put all ingredients into a bowl and mix well. If some of the spices are seeds, you will need to grind them well.

Directions for the Yogurt Sauce and assembly:

  1. Whip the yogurt with a whisk until thin and runny (or if it’s Greek Yogurt, add a little milk),
  2. Add  the cubed potatoes, chopped green chili, the chickpeas and a teaspoon or two of the tamarind and mix well (being careful not to break up the potatoes).
  3. Add the bite sized Papri (wafers) and mix gently to coat.
  4. Garnish with Coriander leaves and finely chopped green onions.

A quick shot of the actual serving dish at the dinner party, the lighting sucks as it was already night

Read Full Post »

It must be officially fall because the temperatures have plummeted and the rains have set in, the skies are grey and the wind is noisy. Kind’a depressing weather, and it certainly doesn’t inspire so I wasn’t up to menu planning; but paging through a local grocery chain’s fall 2010 issue, JT found a recipe he thought he would like to have to spice up our weekly meal plan. We’re making chickpea and potato curry. Now I don’t usually gravitate toward potato recipes, but I was totally uninspired in making the menu this week and decided to just go for it, potatoes and all. Next time, I would add a handful of sultana raisins to add the sweetness this curry was missing. Or alternatively I think I’ll try this with sweet potatoes or even butternut squash as I think the sweetness of the sweet potato or butternut squash would be heavenly with the curry.
Do you meal plan? I generally plan out the entire week on Sunday and do the groceries Sunday afternoon. I always make enough for lunches for the following day. The planning makes my head want to explode for an hour or so but then I don’t have to think about it! I store the plan on the iCloud in my Reminders app on my iPhone and that way I have it no matter where I am (because if I’m having fish on Thursday I’ll need to pick it up from my fishmonger that day and my Reminders will remind me!)
The dish comes together reasonably quickly and cooks in about 30 minutes. I think it took me 10 minutes to prep everything (mise en place) so 40 minutes tops. And I am sure you can do this in the slow cooker, I would choose low and cook for 4-5 hours (just remember to heat the curry powder in a lightly oiled frying pan before you add it to revive the flavours). The starch in the potato makes a very nice and creamy sauce. In the recipe below I cut the potatoes down to half, as I just didn’t want as many carbs. The method for preparing the onions is a little unconventional, but it worked out very flavourful.

Warm with a touch of heat is nice when it’s blistery cold outside

Chickpea and Potato Curry

Original recipe can be found in Longos Fall 2010 magazine or here.

Serves 4

Ingredients:

  • 1/2 vidalia onion, halved
  • 2 cloves garlic, chopped roughly
  • 1 inch piece fresh ginger, grated finely with a microplane
  • 1 small hot chili pepper, halved and seeded
  • 1 tbsp canola oil
  • 1 tbsp mild curry powder or paste
  • 3 cups water
  • 3/4 lbs Yukon Gold potatoes, peeled and cubed small (about 2 potatoes)
  • 1 can (19 oz) chickpeas, drained and rinsed
  • 1 1/2 tbsp garam masala
  • 1/4 cup roughly chopped fresh cilantro
  • 1-2 cups greens (arugula or spinach) per person

Directions:

  1. In your immersion blender, purée onion, garlic, ginger and chili pepper into a fine paste (you can do this in a mini processor too, but I find the immersion blender does a finer job).
  2. In a large deep skillet, heat oil and cook onion paste for about 5 minutes or until softened.
  3. Stir in curry powder and cook for 1 minute.
  4. Add 2 cups of the water and stir to make a gravy consistency (it was actually quite liquid/soupy for me).
  5. Add the potatoes; cover and cook, stirring occasionally for about 20 minutes or until potatoes are tender but firm.
  6. Add chickpeas, garam masala and remaining water and cook for 10 minutes or until thickened and potatoes are very tender.
  7. Serve on a bed of greens, sprinkled with chopped cilantro.

Read Full Post »

Good day everyone, I’m still in Lyon (figuratively speaking, of course) and cooking with Chef Villard and his lovely recipes. This is a condiment that he paired with lightly cooked snow peas and a little goats cheese and boy was it good. I particularly loved the colour, unfortunately when you add the goats cheese it lightens up quite a bit, but by then you’re starving for having enjoyed the aromas of the meal all afternoon long!

That sure is green

To be honest, JT wasn’t in love with the pesto which was originally Rocket (arugula), pine nuts and Parmesan cheese so I decided to be inspired by Chef Villard and not follow the recipe 100% (of course you did, says JT). The rocket tends to get a touch bitter when processed, although I do enjoy the peppery taste I wanted to temper the bitterness so I used the same amount of spinach as the rocket. Then I was thinking of the entire meal and wanted to repeat some flavours for consistency, so instead of pine nuts, I used roasted hazelnuts (the pumpkin soup has a drizzle of hazelnut oil to finish it). So in the essence of our meal in Lyon, here is the pesto recipe.

Rocket and Spinach Pesto with Hazelnuts (on Snow Peas with Goats Cheese — not shown)

Serves 6 (I had enough pesto left over for some hors d’œuvres the next day),

Ingredients:

  • 35 g roasted hazelnuts
  • 35 g combined baby rocket (arugula) and baby spinach
  • 1 clove garlic, finely minced
  • 1 tbsp parmesan cheese
  • 2-4 tbsp EVOO
  • Salt to taste
  • 60 g snow peas
  • 20 g goats cheese

Directions:

  1. In a small food processor add the hazelnuts, rocket, spinach, finely minced garlic and Parmesan cheese and drizzle a small amount of EVOO to get the chopping going adding a little bit to allow the purée to happen with ease (you don’t want this too runny). Taste and salt as desired.
  2. When you have achieved the consistency desired set aside (this is actually quite good if you make it in advance and the flavours have time to really develop).
  3. Cook the snap peas and as soon as they are done, immerse them into ice cold water to stop the cooking quickly. Simmer water on the stove to reheat just prior to serving.
  4. To serve, add a few tablespoons of the pesto to the hot, drained snow peas and crumble the goats cheese into it, stir lightly to distribute evenly.
  5. Enjoy warm.

Read Full Post »

Lentilles du Puy

Before our recent trip to Europe, I had read many-a-blog about lentilles du Puy so you know what was on the top of my souvenir list. But of course, the Lentilles du Puy. Grown in the du Puy region of France, these lentils are known as the best of all the lentils for a few reasons: they cook quickly, they don’t break down and go mushy and they have a wonderful peppery taste. Many of their benefits can be attributed to the volcanic soil they are grown in. These delicious lentilles du Puy are wonderful in salads as they don’t lose their shape. We’ve just been home 10 days and I’m almost through my 500g box (yes, it was worth the weight) of dried lentils and I’m already panicking to find a source in the city. HELP!

The box could use a redesign, don’t you think?

I got my inspiration from this recipe on Epicurious and tuned it the second time as I forgot to photograph it the first time (and almost forgot to photograph it the second time too!).

This dish was almost a memory by the time I remembered to take the photo; hence the closeup, it was my lunch at work!

Lentilles du Puy

Serves 4,

Ingredients:

  • 1 cup lentilles du Puy picked over and rinsed
  • 3 cups water or chicken stock or wine
  • 1 onion, finely chopped
  • 1/4 cup finely chopped pancetta
  • handful of sliced white or brown mushrooms
  • 1 garlic clove, halved
  • 1/4 teaspoon dried thyme
  • 2 tbsp EVOO
  • grape tomatoes finely chopped
  • Freshly grated Parmesan Cheese
  • 1 bunch arugula, coarse stems discarded, washed well and spun dry

Directions:

  1. In a heavy saucepan sauté the pancetta until crispy in 2 tbsp olive oil. Remove but reserve the remaining olive oil.
  2. In the pancetta oil sauté the onions and when translucent, add the lentilles du Puy, garlic, thyme and mushrooms and give it a quick stir. Add the liquid and cook covered for 30 minutes on a low simmer (the original recipe called to strain the liquid off the lentils, but I reduced the liquid so that the lentils absorb it all and you have a beautifully cooked batch).
  3. Add the crisp pancetta, grape tomatoes and garnish with Parmesan cheese. Serve on a bed of Arugula or as is.

Read Full Post »

We’re still on vacation, and on our last night in Lyon we tool a wonderful cooking class; our chef-host had a beautiful fig tree in the back yard, and we ate fresh figs right from the tree! Although I prepared this post well before we left, I thought it appropriate to post before I return. I do hope you’re all doing well, know that You know that I miss reading about what you’re cooking and that I’ll be back next week with lots of stories!!

One of our dear friends brought us a package of fresh, beautiful figs as a hostess gift (I love my friends!). Coincidentally I had taken out a portion of goats cheese from the deep freeze, so this salad was literally staring me in the face. A quick weeknight meal. There are no directions or quantities, do what your heart dictates, you can even throw in some crispy prosciutto or don’t make it crispy. It’s simple and wonderful. I sautéed the onions until they were soft and then I poured in about 1/4 cup balsamic vinegar and cooked it down until it was the consistency of syrup. You can use this to dress the salad…it doesn’t need much.

My salad has fresh figs, quartered, toasted sliced almonds, goats cheese, caramelized onion, balsamic dressing, arugula (rocket) and spinach.

It’s kinda like the kitchen sink salad

Fresh Figs, Goats Cheese, Caramelized Onion and Walnuts on Arugula and Spinach

I’m posting this from our little apartment in Paris in the Le Marais … Correction: Montmatre district. Here is a little peak. Cheers!

20120925-175959.jpg

20120925-180017.jpg

20120925-180024.jpg

20120925-180036.jpg

20120925-180044.jpg

Read Full Post »

20120806-123937.jpg

This post was written at the cottage including the photos taken on my lowly iPhone 3GS! Hopefully Apple’s September announcement will be about the iPhone 5, for which I am anxiously awaiting the release.

Do you have to create a meal plan for the weekends at the cottage? I do, I have to. We have no decent stores anywhere near our cottage. I once forgot cream cheese and had to settle for a cream cheese and chive dip from a 7-11. It was pathetic. I have to have everything figured out because to forget an ingredient would be devastating (well, for me anyway).

I had a menu plan for this past weekend which was our Civic Holiday long weekend (each first Monday of August is the Simcoe Day, in honor of our first Lieutenant Governor of Upper Canada, John Graves Simcoe) and it was good and it was well thought out. I had shopping lists and everything. And then I read a couple of posts which made me switch my plan. Yes, you read that correctly. I revised the meal plan to include these wonderful recipes that inspired me.
My first deviation was because of Karen at Backroad Journal Posted a healthier version of Eggplant Parmesan that I just couldn’t resist; plus it gave me an opportunity to use my adorable cast iron individual square frying pans! It was incredibly delicious!

Eggplant Parmesan

(only slightly modified from Karen’s lovely recipe)
Serves 4-6 for lunch as a main

Ingredients:

  • 4 baby eggplants, sliced 1 cm (0.5″)
  • 1/2 lemon
  • 2-3 tbsp EVOO
  • 4 garlic cloves, finely minced
  • salt to taste
  • 300-400 mL basic homemade tomato sauce, or your favorite marinara sauce
  • a handful of chopped fresh basil
  • 1 cup ricotta
  • 1 clove garlic, finely minced
  • 1/4 cup freshly grated Parmesan cheese
  • 1 large ball fresh mozzarella, sliced
  • 20 cm (8″) square pan plus individual serving dishes
  • Non-stick spray

Directions:

  1. After slicing the eggplant, rub each side with lemon juice to prevent ‘rusting’.
  2. Mix the olive oil with the garlic and brush each side if the eggplant slices liberally. Grill on a hot grill until slices are soft. Sprinkle with salt to taste. Set aside (may be made in advance).
  3. Mix the ricotta with one clove finely minced garlic, salt to taste.
  4. In an oven proof 20 cm (8″) pan, line with parchment and spray with non-stick spray. Line the bottom with one layer of eggplant, top with half of the ricotta. Dot with roughly torn fresh basil. Drizzle with the tomato sauce, add another layer of eggplant. Top with the remaining ricotta, roughly torn fresh basil and the remainder of the tomato sauce.
  5. Add the sliced fresh mozzarella evenly on top. Bake on indirect heat on the BBQ until fully warmed through and mozzarella has melted. Sprinkle with freshly grated Parmesan and broil until bubbly.
  6. Serve in individual serving dishes garnished with fresh basil and green onions.

20120806-124044.jpg

Read Full Post »

We first had this slaw in NYC about 5 years ago at Susur Lee’s now defunct Shang restaurant in NYC’s LES (Lower East Side). Fortunately, he still serves this incredible dish in Toronto and DC. This is not a new slaw in our household. In fact, a month doesn’t go by without a version of this slaw surfacing (here, here, here, here, here, here and here) offering up left-overs for the entire week. Yes, we love it THAT much! I decided it would make a lovely main course with BBQ’d rib eye slices (the way Lorraine makes the steak here) last weekend for our dinner party. It was a huge success and now I have slaw left overs for the week!

I’ve had a few people ask me for the recipe recently, you can see the original Susur Lee’s recipe on Food Network or in his gorgeous book A Culinary Life; my version below, is my version. Now the ingredient list is daunting, but I beg you not to be put off, it is a recipe worth making. Also, a lot of time can be cut down if you get everything organized “mise en place” before beginning. I will go through some of my time saving techniques in TIPS below and hopefully it will help encourage you to make it. It is one damn good slaw, if I do say so myself.

Despite the overwhelming number of ingredients, it is WORTH making this slaw

It’s not all that time consuming if you have everything ‘mise en place’

It’s such a colourful slaw, that your eyes sing with glee when you first see it. Please click here to see the slaw Chef Lee and his famous slaw.

You can chop your herbs by hand, but I needed a time saver on this day, so I chopped them in my Cuisinart mini processor

It’s all about balance in this slaw, so tasting throughout is very important

The colourful dry ingredients above.

By keeping the ‘wet’ ingredients separate to the ‘dry’ you will preserve the freshness of this slaw and be able to stretch it out over a week

It’s all about balance of flavours.

The dressing is sweet, tart, tangy and a bit spicy

I had a luncheon of grilled shrimp and the slaw. YUM YUM YUM!

The assembly with the pickled onions, watercress and grilled shrimp

Susur Lee’s Singapore Slaw, AKA 19 Ingredient Slaw

Serve 8-10 (please click here to see the original unadulterated recipe)

Ingredients:

Pickled Red Onion (make 2 days ahead):

  • 1 red onion, sliced thinly on a mandoline
  • 1 cup rice wine vinegar
  • 1 cup water
  • 1/2 teaspoon salt
  • 1/4 teaspoon black peppercorns
  • 1/4 teaspoon fennel seeds
  • 1 bay leaf
  • 1 sprig thyme

Salted Apricot Dressing (make 2 days ahead):

  • 1 cup dried apricot
  • 1/2 cup rice wine vinegar
  • 1 teaspoon mirin
  • 1 1/2 tablespoons onion, finely chopped
  • 1/2 tablespoon peeled and chopped fresh ginger
  • 1/4 teaspoon salt
  • 3 tablespoons sugar (taste and adjust)
  • lime juice (to taste) I find the dressing a little sweet and the lime juice helps cut it, but you must taste it to be sure there is balance.

For the Singapore Slaw Salad:

  • 1 pickled red onion
  • 1 1/2 cups Apricot Dressing
  • 1 large English cucumber, julienned
  • 1 medium sized mango, firm but not soft, peeled and julienned
  • 1 large carrot, peeled and julienned
  • 1 small jicama, peeled and julienned
  • 1 medium sized fennel bulb, julienned (this is my addition)
  • 1/2 head of purple cabbage, julienned (this is my addition)
  • 4 teaspoons toasted sesame seeds (to dress)
  • handful of watercress (to dress)

For the herb mix:

  • 1/2 cup of Thai basil leaves, finely chopped
  • 1/2 cup of mint, finely chopped
  • 1/2 cup of cilantro, leaves only, finely chopped
  • 2 green onions, green and white parts, finely chopped

Directions:

  1. Make the pickled onion and dressing 2 days ahead, so it has time to develop the flavours, plus it will take the pressure off having to do everything in one day. Store both in the refrigerator.

For the Pickled Red Onion:

  1. Peel and julienne red onion and set aside in a medium bowl. In small saucepan, bring vinegar and water to a boil. Season with salt, peppercorns, fennel seeds, bay leaf, and thyme; continue boiling for another 5 minutes. Pour mixture into a heat proof jar while hot and let sit for at least 1 hour or two days in the fridge.

For the Salted Apricot Dressing:

  1. In an immersion blender container, combine the dried apricot, vinegar, mirin, onion, sugar, ginger, and salt. Purée until smooth. Taste and add lime juice and additional sugar if necessary.

TIPS:

  • A mandolin with a fine julienne attachment is a MUST. I use my Borner Roko Vegetable Shredder. Part of the beauty of this slaw is that all the ingredients are julienned uniformly, plus you’ll be standing for a very long time if you have to do this by hand! You need not clean it out between shredding as it all goes into the same pot.
  • Get yourself two large bowls and one medium sized bowl. One large bowl is for your ‘dry’ ingredients and one is for the peelings; the medium sized bowl is for your wet ingredients.

For the Singapore Slaw Salad:

  1. Julienne the wet ingredients first mango and cucumber, as there are only two, combine well and cover with plastic wrap and store in the refrigerator.
  2. Julienne the ‘dry’ ingredients: carrot, jicama, fennel and purple cabbage, combine well and set aside.
  3. Wash and dry all the herbs for the herb mix, including the green onion. Add to a little food processor (I find the fuller it is the better) and processes until all the herbs are finely chopped. Add to the “dry” ingredients and mix well. Cover and refrigerate until serving.

Serving:

  1. In a new bowl, take 2/3 of the “dry” ingredients and 1/3 of the “wet” and combine thoroughly. Dress with about 1/4 of the dressing (start small and increase as required) and combine well. Serve on a platter, piled high in the centre. Sprinkle sesame seeds overall and dress with the watercress leaves. Add the pickled onion over the summit to curl here and there (you don’t need a lot, just a few strands). Serve immediately with grilled chicken, grilled steak (please see Lorraine’s amazing technique for a full flavoured steak here), tofu or shrimp.

Thai Marinated Steak:

Prepare your steak just as Lorraine shows you in her blog here (don’t worry, it works like a charm!). Once it has aged for a couple of days, marinate it in the marinade below for a few hours.

Ingredients:

  • 50 mL lime juice
  • 1/2 tsp sesame oil
  • 1/4 cup cilantro stems and roots
  • 1/2 tsp fish sauce
  • 2 tbsp mirin
  • 1/2 tbsp sugar
  • 2 cloves garlic finely chopped

Directions:

  1. Combine the ingredients in the bowl of an immersion blender and blitz until smooth.
  2. Pour over the aged steak and refrigerate. Turn the steak throughout the day occassionally.
  3. Remove steak from fridge for about 1 hour to bring to room temperature before grilling.
  4. Follow Lorraine’s instructions on grilling.

Read Full Post »

You may recall I posted the hot and cold smoked salmon for our progressive dinner party here and I served it with a Quinoa Tabouleh (leave out the feta and poached egg) and a rather simple Creamy Cole Slaw by Martha Stewart. Since the recipe was basically verbatim, I wasn’t going to post it, but I’m still having the slaw having added more vegetables and made up more dressing, so I thought to my self, “self, this is good enough to post.” And so I shall. The dressing is sweet, tangy and creamy and it is not over the top. I don’t like the creamy slaws they serve in deli’s either as they are just too mayonnaise-y. This one is perfect. I know I will make this again during this summer. Because we had no salmon left over for lunches, on Sunday I had roasted a whole chicken with Herbs en Provence and just shredded it on the slaw. It was delicious.

A tangy but not too creamy slaw.

A Very Simple Creamy Cole Slaw (by Martha Stewart)

Serves 8-12

Ingredients:

  • 1 tablespoon Dijon mustard
  • 1 tablespoon cider vinegar
  • 1 tablespoon freshly squeezed lemon juice
  • 1/2 tablespoon sugar (you may not think this is necessary, but it really smooths out the flavours)
  • 1 teaspoon coarse salt
  • 1/2 cup fat free mayonnaise (this was regular mayo)
  • 1/4 cup fat free Greek Yogurt (this was sour cream)
  • 1 small napa cabbage, (about 1 3/4 pounds), finely shredded
  • 1 medium carrot, finely shredded (this was 2)
  • 1 small celeriac, finely shredded (this is my addition)
  • 1 small chili pepper, diced finely as garnish (thank you Sissi for pointing out that I had missed this).

Directions:

  1. Whisk together mustard, vinegar, lemon juice, sugar, salt, mayonnaise, and sour cream in a small bowl. Refrigerate dressing, covered, until ready to use, or up to 2 days.
  2. Put cabbage, carrots, and celeriac in a large bowl and toss. Reserve dressing until an hour or so before serving.
  3. Pour in dressing over the amount of slaw you will consume and toss thoroughly. Refrigerate, covered, until slaw begins to soften about 1 hour. If not using immediately, refrigerate undressed slaw, covered.

The shredded BBQ’d chicken with the herbs en Provence made it a lovely summertime dinner

Read Full Post »

What goes around comes around right? My friend Charles at Five Euro Food posted this recipe last week and coincidentally I was just thinking about making a chick pea salad for dinner, so I thought, why not his recipe? His recipe incorporated all the flavours I love in Hummus but he made it into a delightful summer salad; and with the heat wave we’ve been having, it’s a perfect summertime dish (well, maybe not declared perfect by guest, but certainly perfect in my mind!). Of course, I didn’t have time to get to the green grocer, so I used vegetables I had on hand, which is exactly what Charles had prescribed.

I actually made it with two rather healthy sized cloves of garlic, and woe, it was strong; in fact, so strong, I had to rinse a portion off for JT so he doesn’t offend his customers! I ate mine full octane, because, well, it’s been rather slow these last couple of weeks so I just thought, what the heck! I’ll be eating the entire parsley plant later!

I took a bit of artistic license by adding roasted red and yellow peppers and tomatoes

Deconstructed Hummus Salad

A recipe from Five Euro Food, slightly altered.

Serves 4

Ingredients:

  • 540 mL (19 oz) chick peas
  • 1-2 mini cucumbers, chopped into bite sized pieces
  • 1/2 each roasted red and yellow peppers, cut into small cubes
  • 1 green onion, finely chopped
  • 1 jalopeño, finely chopped
  • 2 oven roasted tomatoes, diced (please see this post for oven roasting tomatoes; because of the heat, I did it on the BBQ)

Dressing Ingredients:

  • 30 mL (2 tbsp) EVOO
  • 59 mL (1/4 cup) lemon juice
  • 1 small clove garlic, finely minced
  • 1 tbsp tahini
  • 2 tsp cumin
  • 1/2 tsp coriander
  • 1/2 tsp salt

Directions:

  1. Combine the dressing ingredients and set aside.
  2. Combine the vegetables and chick peas and mix well. Drizzle with the dressing and serve immediately. If you wish the vegetables to mix with the dressing in advance, I would suggest leaving out the cucumber until serving as it tends to get a bit on the mushy side.
  3. Serve over greens or spinach, as below.

It was a light, refreshing and garlicy dinner. Lunch will be wonderful tomorrow.

Read Full Post »

My friend, Sawsan over at Chef in Disguise made this salad and posted it early this week and by luck we had all the ingredients on hand and by that same luck we needed something to go with our oven roasted Salmon. I can honestly say it was delicious, the flavours and textures really worked well together, please pop over to Sawsan’s blog and check out her photos (it was dark by the time I snapped the shots and my photos are pitiful!). If you don’t have salmon to eat with it, a little goats cheese would be very tasty indeed!

I left out the pomegranate seeds as they are now out of season and were $7.00 for a very small container! We should have substituted pine nuts for the pomegranate seeds…next time. Sawsan gave me a great tip, she said she buys her pomegranate when on sale and she seeds them into a little container and freezes them for just this type of application! That’s just genius, thank you for sharing that great tip!

Thank you Sawsan for another wonderful recipe.

I used a square form, the round one would have worked out better!

Layered Avocado Beet Citrus Salad

Serves 3 (I made extra for lunch the next day)

Ingredients for the Salad:

  • 4 Beets, roasted until fork tender, peeled and cubed
  • 2 oranges sectioned and cut into cubes (juice reserved)
  • 1 medium avocado, cut in half, pit removed and cubed
  • 1 1/2 cups arugula leaves, cleaned and dried

Ingredients for the Dressing:

  • 1/2 cup fresh orange juice (one to two oranges)
  • 2 Tbsp olive oil
  • 2 Tbsp vinegar
  • 2 Tbsp fresh lemon juice
  • 1/2 tsp honey
  • 1/8 tsp sea salt
  • 1/2 teaspoon mustard

Directions for the Dressing:

  • Combine all ingredients into a small jar and shake well. Refrigerate.

Directions for assembly:

  • Arrange the arugula leaves in the centre of the plate.
  • Place a plating ring or square (7 cm) on top of the arugula leaves.
  • Layer with the beets then the avocado and finally the oranges.
  • Remove the ring and drizzle with the dressing.
  • Enjoy!

Read Full Post »

Every so often we like a meal without meat. Indian flavours are always so welcome particularly on these bitterly cold winter nights. I saw one of our celebrity chefs, Chef Michael Smith, made this recipe on his show Chef at Home, and I’ll be darned if I can find it. It’s a really easy recipe and comes together quite quickly. It also serves up lunch very well the next day. And if you tire of it, just add bit of vegetable stock and purée into a lovely creamed soup.

There

Curried Cauliflower and Chickpeas

Ingredients:

  • 450 g cauliflower cut into small florets
  • 300 g rehyrdated chick peas (if using canned, drain and rinse)
  • 160 g onion roughly chopped
  • 75 g raisins
  • 1 tsp cumin
  • 1 tsp corriander
  • 2 tsp curry
  • 1 cup water
  • 2 tbsp coconut milk powder*
  • splash of EVOO

Directions:

  1. Heat the oil in a large dutch oven and sauté the onions until translucent.
  2. Add the cauliflower and sauté for a couple of minutes. Add the chick peas.
  3. Sprinkle the spices over the hot cauliflower and stir until you can smell their wonderful aroma. Add the raisins.
  4. Add water and mix in the coconut milk powder. Cover and allow to simmer until the cauliflower is tender.
  5. Serve over a bed of mixed greens.

* In Toronto, they sell coconut milk in cans in our grocery stores, but I usually find I need only about 1/2 of a can. It doesn’t freeze well so I end up keeping in the fridge until it grows something weird and then it gets tossed. I found the coconut milk powder in the ethnic section in our large grocery retailer and thought it’s the perfect solution for me. You can do a search on line, I’m sure you will be able to find it in your local ethnic store.

Read Full Post »

Older Posts »