Feeds:
Posts
Comments

Posts Tagged ‘creamy’

White Minestrone

A Kitcheninspirations original recipe

Makes 2.4 L hearty soup

Ingredients:

  • 15 mL olive oil
  • 1 leek, chopped
  • 1.5 L stock (see notes)
  • 15 g butter
  • 4 stalks celery, diced
  • 2 zucchini, diced
  • 6 medium cremini mushrooms, diced
  • Handful of spinach, roughly chopped
  • 540 mL can of white beans, drained and rinsed
  • 1 g oregano
  • cocktail bocconcini, chopped
  • Basil, chiffonade

Directions:

  1. Heat the olive oil in a stock pot. Add the leeks and wilt. Add the vegetable stock and corn broth and cook the leeks until they are falling apart.
  2. Blitz with your best blender until smooth and creamy. Push through a fine sieve into a large glass measuring cup and set aside, discard the pulp.
  3. Add the butter and melt, add the celery, zucchini and mushrooms and sauté until fork tender. Add the spinach and oregano and cook until the spinach has wilted. Add the white beans
  4. Serve hot in small cups garnished with a sprinkle of the bocconcini and the chiffonade of basil.

Notes:

  • I used a combination of corn broth and vegetable stock which gave the soup a beautiful flavour.

Read Full Post »

Way back in later September, JT and I rented our neighbours’ cottage in Muskoka. Its vista reminds me of our beloved cabin that we no longer visit. But that’s a whole other story for some other time. Right now, I’d like to focus on the cottage we rented, and its beautiful views. Click on the images below to view the gallery.

We invited some dear vegetarian friends up for a couple of days and one of the days we had a grazing dinner of tapas and cheeses. One dish that was very successful was the mushroom and chestnut paté with cognac. You would be hardpressed to guess this does not have any meat. The texture is creamy and smooth with great depth of flavour.

Mushroom and Chestnut Paté with Cognac

Makes 125 mL Paté

Ingredients:

    • 100 g roasted chestnuts, roughly chopped (I used this one)
    • Handful of raw cremini mushrooms
    • 1 shallot, roughly chopped
    • 2-3 cloves roasted garlic
    • 80 g butter, room temperature
    • 15 mL EVOO
    • 30 mL cognac
    • pinch of nutmeg
    • pinch of allspice
    • pinch of salt and black pepper
    • ~20 g butter, to top off paté

Directions:

  1. Melt 20 g butter with the olive oil in a pan. Sauté the shallots until caramelized, add the mushrooms and cook until softened. Add the chestnuts and sauté lightly until softened. Deglaze the pan with the cognac.
  2. Set aside to cool.
  3. When cool, add the cooked ingredients to a food processor or jar of the immersion blender. Add remaining softened butter (not the melted butter at the end of the list), roasted garlic and spices and pulse until very smooth.
  4. Add the paté to a plastic-lined pan and press into the corners or into a shallow mason jar, as pictured, and smooth the top over. Pour melted butter over the top and allow to harden.
  5. Allow this paté to come to room temperature before serving.

Notes:

  • You may substitute the butter with vegan butter should you desire, however I am unsure of the impact it would have on the overall flavour.
  • You may use any type of mushroom, I love cremini’s earthy sweetness.

Read Full Post »

HomemadeButter_first

My dear Mom encouraged us as children to participate in cooking. Sometimes it was as simple as cleaning green beans or popping sweet peas out of their pods, whatever the task, it always resulted in increasing our comfort level in the kitchen for which, to this day I am truly grateful. One such exercise was to make whipped cream for a dessert topping. I must have been quite young because Mom set-up a workstation on the kitchen table so I could see inside the bowl of our olive green Iona Stand Mixer!

I no longer have the stand for the mixer.

I no longer have the stand for the mixer.

We poured the ice cold cream into an ice cold glass bowl and I started the mixer. I learned that starting the mixer on high only resulted in cream splashing all over my face! The bowl sat on some sort of ball-bearing Lazy Susan which you had to gently hold so the bowl wouldn’t spin out of control (I was in charge of that). As you undoubtedly already know, whipping cream to stiff peaks doesn’t take long, but I didn’t know that back then! Dear Mom was distracted and before I knew it, the cream began separate and turn to butter, the fat congealing and separating from the buttermilk. These types of “mistakes” never resulted in a scolding, they turned into lessons and this one became Butter Making 101! In those days we ate a lot of butter so Mom knew this lesson wouldn’t go to waste! Fortunately, dear Mom always had extra whipping cream in the refrigerator and so I learned to make two things that day: butter and whipping cream.

This is a great exercise for children but be careful because today’s stand mixers can be very dangerous for small hands.

Homemade Butter

Ingredients:

  • 1 L (8 cups) whipping cream (35% fat)
  • Pinch of salt (optional)
  • Cheese cloth and a fine sieve.

Directions:

  1. Place your stand mixer mixing bowl and whisk into the freezer for 10-15 minutes or until very cold.
  2. When bowl and whisk have chilled through, secure bowl to stand and add the cream. Slowly begin beating cream, adding a pinch of salt if desired.
  3. At about 10 minutes, the cream should begin to thicken and separate from the whey, once you have distinct separation stop beating. Voilà, you have made butter!
  4. Strain through a sieve lined with cheesecloth. Reserve the buttermilk (I’ll use it to feed my sourdough starter), transfer butter to a resealable container and refrigerate. Or separate into smaller portion sizes and freeze. You will also need to squeeze excess buttermilk from the butter.

Butter_2

Deliciously creamy, homemade butter.

Notes:

  • You can make butter from any amount of whipping cream, I just had 1 litre left over from a gig.
  • I used my whisk attachment of my Kitchenaid stand mixer, but I’ve seen people do it in a blender too although I would find it too difficult to clean thoroughly.
  • Flavour butter with fresh herbs to make a compound butter and freeze in small portions to flavour fish, poultry or meats.
  • I chose not to salt my butter but you can add salt as you wish.
  • Butter freezes very well. Portion into 1/4 (125 mL) or 1/2 cup (250 mL) portions.

Portion size is 1 teaspoon.

Portion size is 1 teaspoon.

Read Full Post »

CreamedLentilSoup_First
Lunch in my new freelance reality is often something simple like cauliflower florets with a homemade bean dip but these last few weeks have made me crave soup like nothing else. Often I have something frozen that I can thaw on the range or in the microwave at a moment’s notice but because I had a head cold, I totally exhausted my stash. No canned soups here, homemade is way too easy!

We always have a pantry-full of dried beans and pulses, but as usual, I forgot to soak my beans so I used the next best thing and what I’d consider “instant” — the old standby, red lentil (they are Australian! Who knew?) The red lentil cooks up quickly and has a mild earthy flavour that takes to being flavoured with other vegetables and spices. I also noticed that I was very short in other ingredients so this soup was dictated by what was on hand, a few button mushrooms, onions, garlic and about 1 celery rib. JT loved it, as did I so I was very glad I had the forethought of jotting down the ingredients as I made up a batch. I netted about 600 mL which makes for a hearty meal for two but can be served as smaller portions for four as a starter. Definitely going to bookmark this one for the future, it’s a keeper!

Creamed Lentil Soup with Warm Goats Cheese & Mushroom Relish

A Kitchen Inspirations Original Recipe.

Ingredients:

  • 1 cup dried red lentils
  • 1 celery rib, chopped
  • 1/2 sweet onion, chopped
  • 1 large clove garlic, minced
  • 1/2 tsp salt
  • 1/2 tsp black pepper
  • 1 tsp EVOO
  • 4 cups water or vegetable stock

Directions:

  1. Heat the EVOO in a small Dutch oven, add the celery, onion and garlic, sauté until soft and onions are transluscent.
  2. Add the lentils and sauté for a moment, add the water and stir well.
  3. Cook the lentils over medium heat until soft. Transfer to a glass bowl and purée until smooth and creamy with an immersion blender. Set aside while making the warm relish.
  4. Garnish with crumbled herbed goats cheese and warm csramelized mushrooms.

Ingredients for the Warm Relish:

  • Handful of button mushrooms, cubed very small
  • 1 tsp butter
  • 1 small clove garlic
  • 2 tbsp herbed goats cheese

Directions for the Warm Relish:

  1. Melt the butter in a small cast iron frying pan, add the mushrooms and sauté until caramelized. Add the garlic and sauté until fragrant. Garnish soup as indicated above.

A comforting, smooth, filling soup with some great flavours.

A comforting, creamy, filling soup with some great flavours.

Notes:

  • The herbed goats cheese was something I had on hand from another dish, it is simply softened goats cheese, finely chopped parsley, thyme and sun dried tomatoes, sea salt combined.
  • Feel free to substitute plain goats cheese, crème fraîche, sour cream or Greek yogurt.
  • I usually press a soup like this through a fine sieve but did not feel it necessary this time, it was super creamy and smooth.
  • I would have loved to garnish with some finely chopped fresh herbs but sadly my herb garden was put to rest a few weeks ago.

Screen Shot 2015-10-28 at 3.51.27 PM

Based on 4 servings, without mushroom & goats cheese relish.

Screen Shot 2015-10-28 at 3.52.48 PM

Based on 4 servings, without mushroom & goats cheese relish.

Read Full Post »

Recently we were invited to a “slider” party. The invitation pictured one of those garden slides that you soak with the garden hose and take a running leap onto it and slide all the way down. But it wasn’t a party like that. We’re talking food sliders! You know, the tiny little sandwiches or burgers that you generally have a few of. The BBQ was hosted by that Titanic, Black and White and Bond party couple and it was the same five couples. Each couple was charged with bringing their own favourite slider for dinner. Yep, that meant we all ate five (FIVE) mini burgers! But it was great fun.

I figured there would be a good selection of burgers (chicken, turkey and beef) so I wanted something a wee bit different; I made our Whiskey BBQ Pulled Pork (previously posted here) with a celeriac, fennel and cabbage slaw. I was inspired by my friend Sissi over at With a Glass when she presented us with her own version of a fennel slaw with an ouzo mayonnaise, but sadly I happened to mention my intentions to JT and he gave me that look; you see, he likes fennel and he likes ouzo but felt that the two together might be a little too strong. I begged to differ but some things are not worth arguing about, so I kept the fennel and made a new dressing for it. It was a tasty slaw and it went very well with the pulled pork. I omitted the mayonnaise from this slaw as we were dining al fresco and I wasn’t sure how long the food would sit outdoors in the heat and sun. The lemon juice and zest were added to mimic the tangy flavour of mayo.

CreamyRemoulad_3209

It was creamy without being heavy.

Celeriac, Fennel, Carrot and Nappa Cabbage Slaw

Makes about 10 cups of slaw but it depends on how large your vegetables are.

Ingredients:

  • 1 medium sized celeriac
  • 1 large carrot
  • 1 medium sized fennel
  • 1 small head Nappa cabbage
  • 3/4 cup greek yogurt
  • 1-2 tbsp lemon juice
  • zest of 1/2 lemon
  • 2-4 tbsp honey
  • salt and pepper to taste

Directions:

  1. Reserve 6-8 large cabbage leaves for presentation.
  2. Grate the celeriac, carrot, fennel and cabbage using a fine grater, mix well. Set aside.
  3. Combine the yogurt, lemon juice, zest and honey and mix well. Season with salt and pepper to taste.
  4. Mix the dressing with the slaw and serve chilled on a flat plate with the leaves spread around to hold the slaw.

Pulled Pork_3207

Such a cute little slider, don’t you think?

Pulled Pork_3204

I made tiny little pretzel buns for the pulled pork sliders.

Read Full Post »

Flash back to November 2013, please recall our Indian extravaganza thank you dinner I made for our very generous neighbours. As you know, I’m not a huge fan of Indian desserts (remember this one?) so when I planned the dinner party I knew right away that I wanted to make a version of Chai Crème Brûlée. Sadly it’s winter in these parts which means it gets dark anywhere from 4:30, so I wasn’t able to take a decent photo until I was able to remake this tasty dessert and shoot it in daylight!

Chai flavours really come out in this creamy crème brûlée

I served with two spoons so you can have a taste too!

Chai Crème Brûlé

Serves 1 (slightly more than 1/2 cup serving); just multiply by the number of people you need to feed to get your amounts

Ingredients:

  • 1/2 cup of whole milk or cream per person
  • 1.5-2 tsp sugar per person
  • 1 black tea bag
  • 1 cinnamon stick
  • 2 star anise
  • 3 green cardamon pods, smashed gently.
  • 1 egg yolk per person
  • 1-2 tbsp per person of sugar to brûlée

Directions:

  1. Preheat oven to 135°C or 275°F.
  2. Infuse the milk with the Chai spices: combine milk or cream, sugar, black tea bag, cinnamon stick, star anise and cardamon in a small pot and heat until just under boiling, simmer for 15 minutes. Set aside to cool with a lid on the pot (or refrigerate overnight, which is what I did). Strain to remove all the bits, discard strained pieces.
  3. Once cooled, whisk the infused milk, egg yolks in a vessel with a pouring spout.
  4. Pour this mixture into ramekins. My ramekins were about 2/3 of a cup each. Place ramekins into a roasting pan with 5cm sides, put the pan into the pre-heated oven. Pour enough water around the ramekins to reach up just over half way on the side of the ramekins (it’s much easier to do this once the pan is in the oven so you’re not balancing the custard and the water on your way to the oven).
  5. Bake for 30-45 minutes to an hour or so. You’ll know they’re done when you can stick a knife in one and it comes out clean. Remove the ramekins from the baking pan, set them on the counter allow them cool. (The deeper your custard is the longer it will need to bake).
  6. Sprinkle a thin layer of  sugar on the top of each. Make sure it’s a THIN layer, but also make sure it completely covers the custard. Now torch it! Garnish with Whipped cream if you’d like (for the dinner party, I infused the whipping cream with a hot cinnamon stick which I heated for 1 minute on high in the microwave. I refrigerated the whipping cream and hot cinnamon stick until serving and then I removed the stick and whipped the cream).

Tips:

  • To save some time, just use a prepared Chai teabag.
  • Don’t squeeze the tea bag, it will be bitter.

ChaiCremeBrulee_1923

I know you want to dig in!

ChaiCremeBrulee_1925

The chai flavours really go well with the creamy crème brûlée

Screen Shot 2014-01-27 at 12.29.17 PM

Read Full Post »

This is an absolute favourite of our household, but to be honest the gravy is usually laden with butter and ghee which is really bad for you, so I prefer to make my own so that it’s healthier. The Makhani gravy is from this recipe, but as I mentioned in the menu post, I had to add a little sweetness (I used Agave Nectar) to counter the very acidic tomatoes — I suspect that the full butter and cream of the original recipe would do the same, so if you choose to go full fat on this baby, omit the agave. There I said it.

The paneer is a soft unripened cheese made similarly to Ricotta, but instead of leaving it loose, you press it into a rectangular shape to be cut into cubes. Easy.

A delicious, rich tasting tomato gravy with gently firm paneer

Paneer Makhani

This is the original recipe I just doubled the quantity

Serves 4-6 as a part of several dishes

Ingredients:

  • 4 liter Fresh whole milk
  • 4-6 tbsp lemon juice

Directions:

  1. Heat the milk in the deep and heavy bottom pan at medium heat (this is really important, otherwise you will need to spend at least a half hour trying to clean the burnt milk off the bottom). Allow it come to a gentle boil and stay there for a minute. Make sure the milk is not vigorously boiling (also important, see note above). If it does, immediately reduce the heat and bring the milk back to gentle boil. But if you do burn your enamel pan, I have a great tip at the end.
  2. Add two tablespoons of lemon juice and quickly stir it in (because I had doubled the recipe, it took a bit longer to develop). At this point, you will start to see small curdles in the milk but no whey. Add another tablespoon or two of juice and again stir it in. The curdles will increase and you will slowly begin to see the yellowish whey. Add the last tablespoon of juice and with this, you should be able to see a clear yellowish whey separating from the curdles, switch of the gas immediately at this point. Depending on the acidity of the juice, the amount of juice you require may differ. Start with one tablespoon at a time till you achieve the results.
  3. You could save the whey, and if you do: Line another pan with double layered cheesecloth. Make sure the cheesecloth is long enough to be bundled up and hanged later. Run the whey through the cloth which will collect all the curdles. Set the whey aside.
  4. Wash the curdles in the cheese cloth, by running it through cold water to remove the lemon taste.
  5. Tie up the cheesecloth in a tight bundle and let it drain for about 30 minutes. Then place weight on the cheese to get it to be flatter and drain out extra moisture. I wanted a nice block of cheese so I pressed the contents of the cheese cloth into a square cake pan about 20 cm (8 inch). Then I took the still wrapped cheese and placed it between two cutting boards and put a heavy pot on top for 1-2 hours.You don’t want to add too much weight for too long as it can drain out way too much moisture from the cheese making it hard and crumbly. Your cheese should have a slightly elastic texture so when you lightly press your finger into it, it will bounce back.
  6. Wrap it and store it in the fridge for up to a week.
  7. Reheat very slowly in the microwave for 30 second spurts until too warm to touch. Add to the makhani gravy at the last minute (I didn’t want my paneer to fall apart).

TIP: if you happen to burn the milk to the bottom of your pan, try this handy tip, cover burnt area with a good thick layer of table salt, add a bit of water and heat but don’t hard boil. Using a silicon scraper, see if it comes off. If it doesn’t, do the same but instead of water, use lemon juice and this time bring to a soft boil. Using a silicon scraper, peel away the burnt layer. Voilà!

Read Full Post »

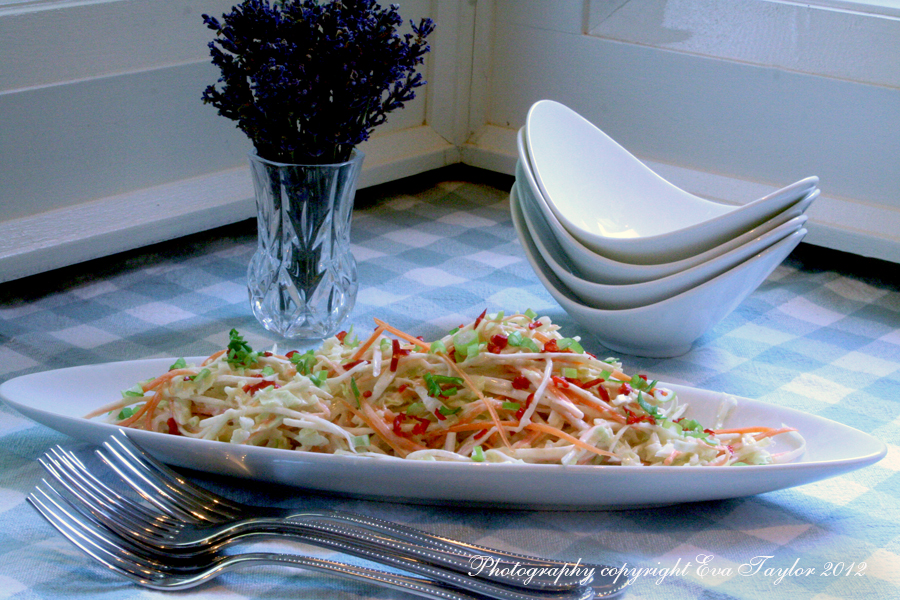
You may recall I posted the hot and cold smoked salmon for our progressive dinner party here and I served it with a Quinoa Tabouleh (leave out the feta and poached egg) and a rather simple Creamy Cole Slaw by Martha Stewart. Since the recipe was basically verbatim, I wasn’t going to post it, but I’m still having the slaw having added more vegetables and made up more dressing, so I thought to my self, “self, this is good enough to post.” And so I shall. The dressing is sweet, tangy and creamy and it is not over the top. I don’t like the creamy slaws they serve in deli’s either as they are just too mayonnaise-y. This one is perfect. I know I will make this again during this summer. Because we had no salmon left over for lunches, on Sunday I had roasted a whole chicken with Herbs en Provence and just shredded it on the slaw. It was delicious.

A tangy but not too creamy slaw.

A Very Simple Creamy Cole Slaw (by Martha Stewart)

Serves 8-12

Ingredients:

  • 1 tablespoon Dijon mustard
  • 1 tablespoon cider vinegar
  • 1 tablespoon freshly squeezed lemon juice
  • 1/2 tablespoon sugar (you may not think this is necessary, but it really smooths out the flavours)
  • 1 teaspoon coarse salt
  • 1/2 cup fat free mayonnaise (this was regular mayo)
  • 1/4 cup fat free Greek Yogurt (this was sour cream)
  • 1 small napa cabbage, (about 1 3/4 pounds), finely shredded
  • 1 medium carrot, finely shredded (this was 2)
  • 1 small celeriac, finely shredded (this is my addition)
  • 1 small chili pepper, diced finely as garnish (thank you Sissi for pointing out that I had missed this).

Directions:

  1. Whisk together mustard, vinegar, lemon juice, sugar, salt, mayonnaise, and sour cream in a small bowl. Refrigerate dressing, covered, until ready to use, or up to 2 days.
  2. Put cabbage, carrots, and celeriac in a large bowl and toss. Reserve dressing until an hour or so before serving.
  3. Pour in dressing over the amount of slaw you will consume and toss thoroughly. Refrigerate, covered, until slaw begins to soften about 1 hour. If not using immediately, refrigerate undressed slaw, covered.

The shredded BBQ’d chicken with the herbs en Provence made it a lovely summertime dinner

Read Full Post »

It’s raining cats and dogs as I type this. It’s been raining for two days and they are predicting more. Me. Not happy. This is the not so pretty part of autumn.

We’re having JTs “step brother’s” over for dinner tonight; Alan is from Vancouver and Peter is from Wasaga Beach. Our nephew Brian (the one we visited in Calgary in June, just moved back to Toronto and is staying with us for a couple of weeks) is also joining us. Wow, that’s me with four handsome men! I decided to make an all time favourite that really only works with a crowd, Paella.

But first our appetizer: the beautiful fall inspired butternut squash velouté. What’s a little different about this soup is that there is no Roux, or cream, just vegetables. And a Granny Smith apple (you see how I snuck that in?). I always oven roast my vegetables for the most flavour, and for this one, I also roasted an entire head of Ontario Garlic. The roasting happened a little quicker than expected because of all the moisture in the pan from the onions and the apple, I didn’t get the anticipated caramelization on the squash. Next time, I’ll roast the squash and potato separate to the apple and onion; it still made a mighty fine autumn soup. I have modified the instructions as such.

Going into the oven at 400°F

The recipe is really just to taste, if you love something, add more, hate something, omit it!

Ingredients:

  • 1 large butternut squash, cut into cubes (save the seeds)
  • 1 medium Yukon Gold potato, peeled and cubed
  • 1 medium Vidalia, or Mayan onion, peeled and chopped into eighths
  • 1 head of garlic, remove some of the outer peel, leaving the cloves intact
  • 1 Granny Smith apple, washed and cut into similarly sized cubes as everything else
  • Chicken or vegetable stock (we used no salt stock, we’re getting back into home made chicken stock time soon).
  • Extra Virgin Olive Oil (EVOO)
  • Sea Salt and Pepper to taste

Squash Seeds:

  • 1/4 tsp paprika
  • 1/4 tsp all spice
  • sea salt to taste
  • 1 tsp EVOO

Directions:

  1. Preheat oven to 400°F.
  2. Make sure your vegetables are cut to similar size so they cook similarly.
  3. Roast potatoes and squash drizzled with EVOO and salt in one pan; the onions and apple drizzled with EVOO in another for 30-45 minutes until soft.
  4. Put the trimmed garlic head in a ramekin that just fits it, drizzle with EVOO (about 2 Tbsp) and salt lightly. Cover with tin foil and bake until bulbs are soft, about 45 minutes.
  5. Combine everything in a large high sided bowl (the apple skins should just peel off, but don’t worry if the don’t) and purée with an immersion blender until smooth, adding stock to desired consistency.
  6. Press through a fine sieve or chinoise strainer, so it’s velvety smooth. Keep warm or refrigerate for later. Reheat before serving.
  7. Clean off the reserved squash seeds, drizzle with EVOO, sprinkle on the spices and bake until slightly toasted (or when they begin to pop).
  8. 8. Serve in soup cups with the squash seeds as garnish.

The soup, excuse me, velouté

Happy Friday Everyone, I hope you enjoy your weekend.

Read Full Post »

We’re invited to a surprise benchmark birthday party this weekend for a long time friend of our’s. I wanted to make an easily transported, no fuss dip. JT absolutely loves Bar Mercurio‘s white bean paste that they serve instead of butter with their focaccia, so I knew I had to make it! I wanted to make it a few days ahead to allow the flavours to really blend.
The picture doesn’t do it justice. This dip is SOOOOOO creamy, you would think there is gobs and gobs of butter in it, but there ISN’T! So incredibly good, and creamy.

20110824-054204.jpg

White Bean Dip

Ingredients:

  • 1 cup dried navy beans (if you use canned, make sure you rinse really well)
  • 5 cups LS chicken stock or a mix with water
  • 2 tbsp panchetta
  • 2 tbsp shallots
  • 2-4 tbsp lemon juice
  • Sea salt to taste
  • 1 head garlic
  • 1 tbsp olive oil
  • 3 tbsp LS chicken stock

Directions:

  1. Preheat oven to 375°F.
  2. Remove most, but not all excess outer skin from garlic bulb. Put into a tightly fit ramekin. Drizzle with the olive oil and 3 tbsp chicken stock. Seal tightly with foil and bake for 30-45 minutes or until garlic is soft.
  3. In a large Dutch oven, fry the panchetta until crispy. Remove from pan but reserve the fat in the pan.
  4. Cook the shallots in the reserved bacon fat until translucent.
  5. Rinse the beans (it is recommended not to soak over night as that apparently increases the propensity to cause gas, and no one wants that!). Add them with the stock into the pan with the shallots. Cook the beans until very soft and mushy (1 1/2 to 2 hours. Or you can reduce this time significantly by cooking in a pressure cooker). Allow to cool to room temperature.
  6. When the garlic has cooled to room temperature, squeeze each clove out of its skin into a large food processor bowl. Add the beans, the liquid from poaching the garlic and panchetta. Add lemon juice and sea salt to taste. Process until smooth and creamy. . Serve with pita chips or bread sticks.

As a note, I thought I would want to press this mix through a fine seive, but JT reminded me that those bacon bits would be lost, so I processed a bit longer so the bacon bits are a lot smaller. It has a very smooth and creamy texture.

Read Full Post »

It’s seven in the morning and I’m posting a recipe from my bed at the cottage! It still amazes me! What I really should be doing is going for a half hour swim, but the air is a bit nippy – hmmm, comfy bed or chilly swim?

Simple red cabbage slaw
2-3 cups finely shredded red cabbage
1/2 finely shredded celeriac (celery root)
1 green onion finely chopped
About a dozen or so mini cherry tomatoes sliced in half
3 tbsp low fat mayo
2 tsp Dijon mustard
2 tbsp lemon juice
Salt to taste

Combine all vegetable ingredients and mix well.
Combine all wet ingredients and mix well.
Toss the slaw with the dressing to coat well, refrigerate for 30 minutes.
Serve chilled.

20110731-072421.jpg

Read Full Post »