Feeds:
Posts
Comments

Archive for the ‘Snacks’ Category

As the weather is warming up, we are allowing ourselves to once again dream of patio days sipping on summery cocktails and enjoying the company of friends. These lazy days require some lazy snacks and I have just the tasty and healthy snack for you if you have an air fryer. I have the Instant Pot with the air fryer lid, and let me tell you, it works wonders! We don’t fry a lot so I didn’t want an appliance that just did one thing so this air fryer lid addition to my Instant Pot is the perfect solution.

These spiced chickpeas are so crispy and crunchy, they disintegrate in your mouth like a chip would and then the spice creeps up on you, just a little with tantalizing flavours of cumin, coriander, garlic and smoked paprika with a hint of heat, salt and sweetness. Just perfect for a glass of prosecco or Cava. Cheers!

Air Fried Spiced Chick Peas

Makes enough for 4 as a cocktail snack.

A KitchenInspirations Original Recipe

Ingredients:

  • 1 can 540 mL chickpeas, drained, rinsed and dried
  • 40 g cornstarch
  • 30 mL olive oil
  • 2.5 g cumin
  • 2.5 g coriander
  • 2.5 g granulated garlic
  • 2.5 g smoked paprika
  • 2.5 g sea salt
  • 15 g honey, divided

Directions

  1. Mix the cumin, coriander, garlic, paprika, and sea salt until well combined.
  2. In a large sieve, sprinkle the cornstarch evenly over the chickpeas (I did mine in two batches). Drizzle the olive oil over them and mix well.
  3. Add the chickpeas to your air fryer and fry at 400° F for 15-20 minutes, pausing halfway to stir and separate them. I air-fried the recipe in two batches as my air fryer is not huge and I only wanted one layer so they really crisp up.
  4. Confirm that the chickpeas are crispy (and not creamy in the centre) and pour them into a bowl and sprinkle with half the spice mixture. Drizzle with half of the honey and mix until well-coated. Return the chickpeas to the air fryer and fry for an additional 5 minutes (so the honey caramelizes). Pour onto a cookie sheet to cool completely. Repeat with the second batch.

Notes:

  • The spice mix is totally up to you. Just plain salt and pepper would be nice too.

Read Full Post »

These cookies came about because of two things: the first thing was, one of the items I brought home from England was Treacle, we don’t easily get it here and I was curious about it and secondly, I was cleaning out my baking drawer when I came across a small package of candied ginger so I thought I’d kill two birds with one stone and bake up a batch of these tasty treats. These are not low-carb, they are what they are. Sometimes you just need a treat.

Ginger Snaps

Makes about 36-46 Cookies depending on how big your melon baller is.

Ingredients:

  • 76 g butter
  • 100 g brown sugar
  • 60 mL Lyle’s Golden syrup
  • 60 mL treacle
  • 250 g all-purpose flour
  • 4 g baking powder
  • 4 g baking soda
  • 4 g ground ginger
  • 5 g freshly ground ginger
  • 4 g ground allspice
  • 30 g finely chopped candied ginger tossed in icing sugar

Directions:

  1. Preheat the oven to 350°F.
  2. Line two baking sheets with parchment paper, sprayed with non-stick cooking spray.
  3. In a small saucepan gently melt the butter, brown sugar and both syrups (do not boil unless you want to end up with jawbreakers!). Cool slightly.
  4. Sift dry ingredients together into a medium-sized bowl.
    Make a well in the centre and pour in the syrup mixture. Mix well to make a soft dough.
  5. Using a large melon baller shape into small balls (about the size of a walnut). Place each ball about two inches apart; press down to form even rounds about 1/2 cm thick.
  6. Bake 10-12 minutes or until very very lightly browned. Cool on the cookie sheet for a minute and then remove to fully cool on a wire rack. If you were to err, err on the shorter baking time so they don’t get super hard.
  7. Store in an airtight container or freeze. If they get too hard, add a slice of bread or a moist brown sugar disk for a few hours.

Read Full Post »

This is my ‘”GO-TO” gluten-free cracker, not just because they are so tasty, but because they are super-easy to make and require very little equipment! This recipe is half of my usual recipe because I didn’t want leftovers but because the measurements are metric, it’s super-easy to double or triple. The only thing I would caution you about is that they burn very quickly because of the natural oils in ground almonds and the grapeseed oil but hopefully it won’t deter you from making them, they are worth it.

Almond Sesame Crackers (Gluten Free)

Makes 40 crackers but it depends on how thick you roll them and how large you cut them. This recipe was first posted in 2011 in Imperial measures.

Ingredients:

  • 150 g unblanched ground almonds
  • 7 teaspoons sea salt
  • 60 g sesame seeds, I like black and white versions, toasted lightly.
  • 1 egg
  • 15 mL grapeseed oil

Directions:

  1. Preheat the oven to 325° F with the rack set in the middle.
  2. Mix the first three ingredients together in a medium-sized bowl. Whisk the egg with the grapeseed oil together.
  3. Combine the egg mixture with the dry ingredients and stir until well coated and clearly mixed well.
  4. Roll between two sheets of parchment paper to just less than 1 mm thick. Cut into 4-centimetre squares leaving the crackers on the parchment (no need to separate). 
  5. Cut off the parchment that is on top and slide the cut crackers onto a baking sheet. Bake for 15-20 checking often near the end as it burns quickly. Remove the baking sheet and slide the parchment off it onto a cooling rack. Cool slightly and snap the crackers apart. Cool completely to store.

These crackers have excellent flavour and texture.

Notes:

  • Add various nuts (although they should be small) to the batter for a slightly different texture.
  • The thicker you roll your crackers the sturdier they will be, but just less than 1 mm is sturdy enough for a good thick dip.
  • These crackers are quite moreish but be careful as they are also very filling so you don’t need as many to satisfy you!
  • I reduced the baking temperature to 325° F from 350° F because I burnt the first batch!

Read Full Post »

As we wait with bated breath for season three of Ted Lasso, I thought it would be fun to recreate his infamous shortbread cookies. These cookies conjured swoons from Rebecca, Ted’s boss! And rightly so, a well-made shortbread biscuit will melt in your mouth with the creamy taste of butter but not choke you to death with a puff of flour.

Years ago, I met a fellow running a shortbread cookie business in Toronto, he made both savoury (my favourite) and sweet and his shortbread was absolutely dreamy. I asked him what his secret was and he said cornstarch! Who knew? So I always like to include a little cornstarch in my shortbread to make them melt in your mouth, although, this is not part of Ted Lasso’s recipe.

A lovely, melt-in-your-mouth shortbread.

Ted Lasso-ish Shortbread Biscuits

This recipe makes one 23 cm x 23 cm (9 inch x 9 inch) pan.

Ingredients:

  • 250 g unsalted butter, room temperature
  • 100 g  icing sugar, sifted
  • 5 mL pure vanilla extract
  • 5 g lemon zest
  • 240 g all-purpose flour
  • 75 g cornstarch
  • Pinch of salt

Directions:

  1. Prepare a 23 cm x 23 cm (9 inch x 9 inch) pan by lining with parchment.
  2. Beat the butter until light and fluffy, add the icing sugar, vanilla, and lemon zest; whip this mixture until fluffy and completely combined.
  3. Sift the flour, cornstarch, and salt together, add it to the butter mixture and beat on low speed, just until combined.
  4. Press the dough into the pan evenly and cut into slices (this will make it easier to cut when baked). Refrigerate for 30 minutes.
  5. Preheat the oven to 300° F. Evenly dock the cookies with a fork and bake the shortbread for 45-60 minutes (mine were perfect at 45) or until just beginning to get golden on the edges. Cool in the pan and retrace the cut marks with a sharp, dry knife. Allow the cookies to cool completely in the pan. When cool, remove the cookies by lifting the parchment out of the pan and gently break the cookies at the cut marks but they should separate easily.

Notes:

  • Ted’s cookies don’t have vanilla or lemon zest but I can’t resist these flavours so I added them. Cornstarch isn’t part of the original recipe either, as I mentioned previously.
  • North American icing sugar already has some cornstarch in it to prevent clumping, but I’ve upped the ante and added more.
  • The cookies are fragile when hot, avoid touching them as you will leave fingerprints all over them.
  • Store the cookies in a cool, dry place or freeze them if they are not being consumed immediately, although they’re probably delicious when frozen too!

Read Full Post »

Hearty winter soups are a staple when we are in Canada and I just love to serve soups with scones. This recipe is an old favourite but I had run out of fresh onions so I used my handy dehydrated onion flakes in this easy recipe. There is just a little time to rehydrate the onions and you’re good to go. 

Cheddar Cheese and Onion Kefir Scones

A KitchenInspirations Original Recipe

Makes 9 large scones

Ingredients:

  • 260 g AP flour
  • 15 g sugar
  • 15 g baking powder
  • 5 g salt
  • 2 g cream of tartar
  • 56 g cold butter
  • 155 g frozen, shredded sharp cheddar cheese, plus more for topping
  • 200 mL buttermilk, 15 mL for brushing the tops
  • 30 g dehydrated onion flakes

Directions:

  1. Preheat oven to 450° F. Line a baking sheet with parchment paper.
  2. Rehydrate the onions flakes in the buttermilk for 5 minutes.
  3. Combine the dry ingredients in the large bowl of your food processor with the blades and mix well.
  4. Cut in the cold butter until it resembles a coarse meal. Replace the blade with the plastic dough blade.
  5. Add the buttermilk onion mixture and cheese to the flour and pulse to combine into a ball (cheese should still be frozen or at the very least, extremely cold).
  6. If it’s really warm in your kitchen, it’s best to refrigerate the dough for 30 minutes. With very little flour to prevent sticking, roll the dough into 1 cm thickness and use your favourite cookie cutter to cut even shapes (I used 5 cm squares with scalloped edges.
  7. Place each shape onto the prepared baking sheet about a centimetre apart and brush the tops with the extra buttermilk. Add a pinch of frozen shredded cheese to each top, if desired.
  8. Bake for 10 to 15 minutes or until lightly golden.

So flakey and delicious!

Notes:

  • I buy my cooking/baking cheese on sale in 400 g logs and I grate them into zip-lock bags and freeze them. If you break up the shreds as they freeze, they won’t stick together in clumps.
  • The frozen cheese will help make these flakey.

These are the grey days that just kill me.

Read Full Post »

Happy New Year! Hope your holidays were lovely. We had Christmas Eve with my cousin’s family in their new home. It’s so exciting to have a new home and be able to decorate and start from scratch. The dinner was fabulous and it was a lot of fun opening presents with them.

Just before Christmas, we had another progressive dinner with our neighbours. This time, the theme was Indian and we were charged with the hors d’œuvres and appetizers. I (obviously), made onion bhaji to start and then we had a cup of Mulligatawny soup. These dinners always have too much food so I kept it small. These bhajis turned out so good, I decided I wanted to keep the recipe for the future. I served them with store-bought Date and Tamarind Chutney.

Onion Bhaji Revisited

Makes about 20 bhajis, depending on size. For the original recipe, please click here.

Ingredients:

  • 2 sweet onions, finely sliced

  • 100 g gram flour (chickpea flour)

  • 5 g baking powder

  • 4 g Aleppo chilli flakes

  • 4 g turmeric

  • 100 mL water
  • 1 L vegetable oil for frying

Directions:

  1. Soak the sliced onions in cold water while you make the batter.
  2. Preheat the oil to 350° F.
  3. Add the gram flour, baking powder, Aleppo flakes and turmeric to a large bowl and whisk to combine. Slowly add 90 mL of the water to form a batter and mix well. Strain the onions and add them to the batter, adding about 10 mL of water, if necessary. Mix to coat the onions.
  4. When the oil is 350° F, scoop a generous tablespoon of the bhaji mixture into the hot oil and fry until golden and the internal temperature is 200° F. Remove the bhaji from the oil onto a paper-lined tray and allow to drain the oil. Continue until you’ve fried all of the bhaji batter.
  5. To serve, reheat the bhaji on a sheetpan in a 275° F oven for 12 minutes or until the internal temperature is 125° F.

These were gobbled up in nothing flat. I froze an additional batch I made and they are still fabulous reheated!


Read Full Post »

    This recipe has been in the family for years. My brother gave me the original cookbook in the 1970’s inscribed, “This is for me, in the long run.” It’s been made dozens and dozens of times, often around Christmas for our goody trays. This time I made them around thanksgiving because we were having my cousin’s adult kids for dinner because their parents were galavanting in Europe and they are not big pumpkin fans! Galavanting may not be right, I might be a tiny bit jealous!

    Chewy Peanut Butter Squares Revisited

    Makes one pan 33 cm x 23 cm x 5 cm (13″ x 9″ x 2″) baking pan

    Ingredients:

    • 140 g all-purpose flour

    • 6 g baking powder

    • 5 g salt

    • 148 g peanut butter, smooth or chunky

    • 113 g butter

    • 330 g firmly packed brown sugar

    • 2 eggs

    • 15 mL vanilla

    • 140 g lightly salted peanuts

    • 1 cup icing sugar with enough drops of cold water to make a liquidy icing (but one that will set well)

    • Directions:

      1. Preheat the oven to 350°F.

      2. Line a 33 cm x 23 cm x 5 cm (13″ x 9″ x 2″) baking pan with parchment

      3. Combine flour, baking powder, and salt; set aside.

      4. Heat the peanut butter and butter together until melted.

      5. Stir in sugar, eggs and vanilla until well blended.

      6. Add the flour mixture and stir just until combined. Fold in the extra peanuts.

      7. Spread the batter into a prepared pan and bake 25 to 30 minutes or until a tester comes out clean.

      8. Cool on a wire rack.

      9. When cool, drizzle the melted chocolate over the top. Working quickly, drizzle swirls of the white icing in a crazy pattern. Allow the topping to set. Cut into 1-2″ square inch squares or rectangles. 

      Chewy, peanutty deliciousness


    Read Full Post »

    A friend brought us his homemade raspberry jam a few weeks ago and because we don’t eat a lot of jam, I thought I’d make it into these gorgeous squares. The recipe originated from my friend Liz but I just swapped out the caramel for the jam and it worked out beautifully. I made this batch for some friends visiting from Arizona.

    Raspberry Crumble Squares

    Makes one 22 cm x 33 cm (9″ x 13″) pan

    Ingredients:

    • 250 g unsalted butter, at room temperature
    • 100 g sugar
    • 100 g powdered sugar
    • 5 mL vanilla
    • 2.5 mL almond extract
    • 280 g flour
    • 8 g salt
    • 150 mL seedless raspberry jam

    Directions:

    1. Preheat the oven to 359° F. Prepare a 23″ x 33″ cm (9″ x 13″) pan by lining with parchment.
    2. Cream the butter with the sugars until fluffy. Beat in the vanilla and the almond extract.
    3. Beat in the flour and salt on low speed until entirely incorporated.
    4. Portion about 2/3 of the flour mixture into the bottom of the pan and press evenly to all sides. Bake for 20 minutes. Refrigerate the remaining pastry.
    5. After you have baked the base pastry, pour the raspberry jam onto the base and spread evenly with an offset spatula. Crumble the remaining pastry onto the top, being careful not to cover it entirely.
    6. Bake for an additional 25-30 minutes or until the topping is golden.
    7. Allow to cool completely and cut into squares or bars.

    They look like jewels.

    Read Full Post »

    Upon our return from Spain, I was missing being there so I made the Almond Tuiles of Sevilla (Tejas Dulces de Sevilla). They are delicious but it got me thinking about a savoury version. We had brought home some wonderful cheese called Old Amsterdam and I thought it would make a delicious snack. They are light and airy and crisp. They are strong enough for dip, but tasty on their own. I love how rustic they look from just breaking them apart.

    Savoury Cheese Tuiles

    Makes about 20 cm x 30 cm sheet

    Ingredients:

    • 1 egg
    • 30 g cheese (I used Old Amsterdam)
    • 1 g salt
    • 1 g smoked paprika 
    • 50 g flour 

    Directions:

    1. Beat the egg until it reaches the ribbon stage (about 5 minutes), add the salt and smoked paprika and mix well, then fold in the flour.
    2. Spread evenly on a parchment-lined baking sheet and sprinkle the cheese over it evenly and bake at 275° F for 20-35 minutes or until it has totally dried out and developed a golden colour.
    3. Cool entirely and once cool break into shards. Serve at room temperature.


    Read Full Post »

    Way back in April we had an outdoor Indian evening with a single neighbour and for hors d’œuvres I served Pork Samosas. They were delicious and so moreish. They are not the traditional deep-fried samosa, but they are baked phyllo pastry versions. I can tell you that they didn’t last long.

    Photo of baked pork samosas

    A delicously flavourful, crispy triangle.

    Baked Pork Samosas

    A KitchenInspirations Original Recipe

    Makes about 16 two-bite samosas

    Ingredients:

    • 15 mL vegetable oil
    • 1/2 shallot, finely chopped
    • 200 g ground pork
    • 5 g garam masala
    • 5 g curry powder
    • 10 g cumin
    • 5 g grated ginger
    • 10 g roasted puréed garlic 
    • 200 g mix vegetables
    • 50 g frozen peas, thawed
    • 10 g cilantro leaves, chopped, plus extra for garnish
    • 1/2 pack phyllo pastry
    • 150 g unsalted butter, melted

    Directions:

    1. Heat the vegetable oil in a frying pan and sweat the shallot until translucent.
    2. Add the pork and cook until no longer pink, mix in the ginger and garlic and stir well.
    3. Sprinkle the garam masala, curry powder and cumin over the cooked pork and stir until fragrant. Remove from heat and mix in the vegetables and cilantro. Allow to cool completely.
    4. Cut each phyllo sheet into 5 cm widths and brush with melted butter.
    5. Starting at one end, dollop a tablespoon of the pork mixture and begin folding in a triangle pattern like illustrated below.
    6. Brush the tops with more melted butter. Bake in a preheated oven for 15-20 minutes or until golden and heated through. Serve with peach chutney.

    Read Full Post »

    I posted this recipe about 9 years ago so I felt it was time for an update and repost. Lemony desserts are a favourite here so whenever I have an extra lemon or two rolling around the kitchen, a lemony dessert makes an appearance.

    Even though these squares are two layers, they come together quickly. The shortbread crust is tender and the coconutty custard topping is lemony and chewy. One could say they’re a match made in heaven!

    Chewy Lemon Squares with Coconut

    From Company’s Coming Squares by Jean Pare.

    Makes 1 pan 23 cm x 23 cm (9×9 inch)

    Ingredients, base:

    • 200 g all purpose flour
    • 50 g granulated sugar
    • 114 g butter, cold

    Directions, base:

    1. Preheat the oven to 350° F.
    2. Crumble flour, sugar and butter until mealy (you can save time and pulse this in a food processor, metal blades)
    3. Press into ungreased 23 cm x 23 cm (9×9 inch) pan. Bake for 20 minutes.

    Ingredients, topping:

    • 2 eggs
    • 60 mL lemon juice, freshly squeezed
    • 200 g granulated sugar
    • 20 g all purpose flour
    • 2 g baking powder
    • 75 g flaked, unsweetened coconut
    • 2 g salt
    • 5 mL lemon essence

    Directions, topping:

    1. Beat eggs slightly. Stir in the rest of the ingredients.
    2. Spread over par-baked shortbread base. Bake at 350° F for additional 30 minutes, until set in the centre and golden in colour.
    3. Cool and cut into squares, or bars.

    The carmelized coconut on the top makes it moreishly chewy where the end pieces with more edges are coveted!

    Read Full Post »

    I am constantly on the lookout for new hors d’oeuvres/finger food that I can insert into my cocktail repertoire. I came across this tasty recipe in early April when I was looking around for something to make with polenta. I loved the crackers because I’ve already made Polenta Fries, Polenta Crisps, and Polenta Choux Pastry. Yotam Ottolenghi’s recipe includes a beautiful tapenade but I didn’t have parsley and I wasn’t going to go out for just one ingredient as we had just stepped into our THIRD State of Emergency Lockdown, so I improvised with baby arugula, and I must say, it’s darn tasty, I may even substitute the parsley with arugula going forward.

    Don’t let the dark edges fool you, they are the best part!!!

    Polenta Bites with Mediterranean Tapenade

    Recipe inspired by Yotam Ottolenghi

    Makes about 35 little crackers and enough tapenade for about 6 or 8 crackers.

    Ingredients for the Polenta Bites:

    • 350 mL chicken stock
    • 15 mL roasted garlic purée
    • 15  EVOO
    • 2.5 g sea salt
    • 75 g fine cornmeal
    • 40 g finely grated parmesan
    • 5 g chopped chives

    Directions for the Polenta Bites:

    1. Prepare a large sheet of parchment paper by spraying it with non-stick spray. Set aside.
    2. Heat the chicken stock with the roasted garlic purée, extra virgin olive oil and sea salt until a slow boil.
    3. Slowly pour in the cornmeal and stir vigorously until all has been incorporated into the water and it is beginning to thicken, add the grated parmesan and chives and cook, stirring constantly until very thick.
    4. Pour the hot mixture onto one half of the prepared parchment and fold the other half over it. Using a rolling pin, roll out to about 2mm thick. Even out the edges (cooks treat) and cut into 3 cm squares. Allow to cool completely.
    5. Preheat the oven to 425° F (I used convection) and bake the polenta bites for 20 minutes. Remove the sheet from the oven and flip the crackers over so that the top is the bottom and the bottom is the top and try to separate the crackers and move them around on the parchment so they bake evenly. Bake for an additional 20 minutes. Cool completely.

    Green olives, kalamata olives, artichoke hearts and peppery arugula make a very tasty tapenade.

    Ingredients for the Mediterranean Tapenade:

    • 5 Green olives (with pimento)
    • 6 Kalamata olives, pitted
    • 4 quarters Marinated Artichoke Hearts
    • 2 small handfuls of baby arugula
    • 1 green onion about 15 cm long, roughly chopped
    • 30 mL EVOO
    • salt and pepper to taste

    Directions for the Mediterranean Tapenade:

    1. Add everything into a small food processor and process until you have achieved the desired consistency.
    2. Serve as a dip or portioned onto each cracker like a canape.


    Read Full Post »

    These are super quick and easy to make. They don’t keep well, particularly if your house is a bit humid so plan to bake them just before you want to eat them or if they get a bit soggy, just pop them into the oven to dry them out a bit.

    Deliciously crunchy and cheesy crisps.

    Cheese Crisps

    A KitchenInspirations Original Recipe

    Makes about 12-15 crisps

    Ingredients:

    • 400 g old cheddar cheese, grated

    Directions:

    1. Pre-heat the oven to 400° F. Line a rimmed baking sheet with parchment paper or a silicone matt.
    2. Spread the cheese out on the matt as thinly as possible so that the grated pieces are interlaced.
    3. Bake for 4-6 minutes or until the cheese has entirely rendered and is starting to become golden but not burned.
    4. Carefully remove from the oven and pull the parchment onto a cutting board. With a pizza cutter, cut into wedges. Allow to cool completely. Serve immediately.

    Notes:

    • I use a rimmed baking sheet because the oils from the cheese may slide onto the oven and burn.
    • Parchment may burn so a silicon matt is preferred.


    Read Full Post »

    It’s definitely going to be a very different holiday season this year. We usually escape the drudgery of November by renting a house in a friends’ community in Arizona but, not this year. I’m already dreading February when we usually escape to Spain, thank you COVID19, not this year.

    I usually look forward to all the holiday parties, both throwing and going to them, but not this year.

    Over the last few years, I’ve slowly stopped baking my Christmas goodies to give to friends, but not this year. We deserve a treat. So friends, drop the diet and enjoy!

    We usually entertain friends and family this time of year around our wood-burning fireplace in our living room, but not this year. However, we’ve adapted our outdoor space to include a natural gas heater, and equipped the sectional and chairs with electric blankets, trying to extend our entertaining capacity during these trying times. It’s been very successful at 10° C (50° F) but who knows how cosy it will be when temperatures plummet to -10° C (14° F) in January and February. I’m taking full advantage while I can.

    This recipe was developed for an evening when we socially-distance-entertained friends under the warm heat trapped under the awning and cosy electric blankets.

    These crackers are like biscotti because they are twice-baked. Using an electric slicer gives you excellent control and wonderfully thin slices.

    Fruit and Seed Crackers

    Makes 75 thinly sliced crackers

    For the original recipe, please click here.

    Ingredients:

    • 2 eggs, lightly whisked
    • 300 mL milk
    • 15 mL honey or agave syrup
    • 5 g salt
    • 125 g spelt or whole wheat flour
    • 200 g AP unbleached flour
    • 60 g dried cranberries
    • 70 g raw pumpkin seeds
    • 50 g sesame seeds

    Directions:

    1. Prepare a small terrine pan (like this one) by lining it with parchment paper. Preheat the oven to 350° F.
    2. Combine the eggs, milk and honey and mix well.
    3. Sift the salt and flours together to combine. Stir in the fruit, nuts and seeds. Make a well in the centre and pour the egg mixture into the dried ingredients, stir to combine.
    4. Pour into the prepared pan and bake for 25-35 minutes or until a toothpick comes out clean. Reduce the oven temperature to 300° F.
    5. Tip the loaf out to cool completely and then slice as thinly as possible (I found the electric slicer did a beautiful job). Bake cracker slices until toasty and crisp, about 20-30 minutes, flip if necessary. Cool completely to store.

    Notes:

    • I adapted this recipe from Chef Mimi’s blog. I used the seeds and fruit I had on hand, it’s quite versatile, so use what you have on hand.
    • I made these again in August 2021 and did not have whole wheat or spelt flour so I substituted almond flour and they turned out lovely.


    Read Full Post »

    In mid-July, we were one of five couples invited to a socially responsible BBQ at a friend’s house. They put three tables together outside giving us ample space to distance ourselves. Each couple was asked to bring something and this marvellously flavourful side was one of the dishes someone brought. Everyone asked for the recipe, including me! I chose to make it as a dip for a summer evening cocktail party, socially responsibly distanced, of course. Each couple had their own plate!

    The beans and lentils are packed with flavour, the salsa and lime yoghurt just up the ante.

    Baja Mexican Beans and Lentil Dip with Lime Sauce and Salsa

    From Bowls of Goodness: Vibrant Vegetarian Recipes Full of Nourishment By Nina Olsson

    For the original recipe please click here

    1. Combine all of the ingredients and set aside.
    1. Combine all of the ingredients and mix well. Refrigerate until needed
    • Olive oil
    • 2 shallots, diced
    • 200 g dried navy beans (400 g cooked)
    • 100 g dried lentils du puy (200 g cooked)
    • 4 cloves garlic, finely minced
    • 1 avocado, finely diced
    • 1 tsp dried oregano
    • 1 1/2 tsp cumin
    • 1 tsp sweet paprika
    • 1 tsp smoked sweet paprika
    • 3/4 tsp salt
    1. Cook the beans and lentil until softened, rinse.
    2. Heat oil in a frying pan and add the shallots until caramelized, add the garlic and cooked beans and cook until they can easily be mashed about 5 minutes. Add the remaining ingredients and cook for 2 minutes.
    3. Serve in a bowl or on a plate drizzled with the Baja Sauce and Salsa with baked tortilla chips

    I chose blue tortilla chips because they were gluten-free and organic.

    Read Full Post »

    We enjoyed a lot of seafood in Spain. But this recipe did not come from our time there, it graced our cocktail table soon after we moved back into our newly renovated bedroom. We were watching a little Jamie Oliver before turning out the lights and the recipe that night was this gem: Crispy Squid and Smashed Avocado. It was a hit the first time I made it, and soon after, I was getting requests to make it again. It is a deep-fried recipe, and you all know how much I love deep-frying, but it is quickly fried and on my first measure of the oil used, I was able to get most of it back after it cooled which means the calamari did not absorb much. Cutting the calamari length-wise instead of in rounds will allow the calamari to curl up like a spring which looks super cool. I paired this tapa with Romesco Sauce and Avocado Cream, and they were both awesome!

    Calamares Fritos

    To see the original recipe, please click here.

    Serves 1-2 people

    Ingredients:

    • 1 calamari tube, cleaned and sliced lengthwise to open up
    • 65 g all-purpose flour
    • pinch of sea salt
    • 1 L vegetable oil

    Ingredients for the Avocado Cream:

    • 1 Avocado
    • pinch of cumin
    • pinch of sea salt
    • 1 lime, juiced

    Ingredients for Serving:

    Directions:

    1. Cut the calamari into strips lengthwise (not rings). Add the flour and sea salt to a bowl and toss the calamari strips until well coated.
    2. Heat the vegetable oil to 375° F. Fry the calamari strips 5 at a time until golden. Drain excess oil on kitchen paper.
    3. Meanwhile, mash or cream the avocado with cumin, sea salt and lime juice.
    4. Serve calamari hot with the sauces.

    Notes:

    • Cut the calamari into thin strips length-wise so that it will curl into a spring shape as it fries. Shorter ones will curl less.
    • This dish is equally as good with either sauce so if you don’t want two sauces, just go with one.
    • To scale up the dish, just add another calamari tube for each additional person. More than 4 people, double the avocado cream recipe.

    Read Full Post »

    During our time in Spain, we ate a lot of delicious tapas. One such tapa was the Ensalada de Aguacate y Atún, a simple yet spell-binding combination of tuna, avocado, lemon juice and olive oil. Using the very best of all four ingredients allows each one to shine individually and together they melt into the most magical concerto. We just couldn’t get enough of it. It was, however, not easy to find in our little town so I decided to make it part of our weekly meal plan. I made this one for our Valentine’s Day lunch.

    Ensalada de Aguacate y Atún

    Serves 2

    Ingredients:

    • 150 g canned tuna in oil
    • 200 g ripe avocado, cubed
    • Juice of one lemon
    • A good drizzle of olive oil
    • Arugula

    Directions:

    1. Drain the tuna and combine it with the cubed avocado and lemon juice.
    2. Spoon evenly onto a bed of arugula. Drizzle generously with olive oil.

    Notes:

    • For presentation purposes, I layered the ingredients over the arugula. In reality, it is served well combined.
    • The arugula was my addition, the true dish is served on its own.

    Read Full Post »

    This is an old recipe that I’ve made on the blog before, I just wanted to update it using weight measures instead of imperial volume and I also wanted to use fresh ginger instead of the dried powder. If you like the bite of ginger, this one is for you. This day I made them in late October was actually quite lovely and I braved the chill to take this photo on our back deck. Winter is coming!

    It has that delicious chewy texture that some ginger snaps might have if they don’t dry out.

    Ginger Snaps Revisited

    Makes about 36 to 46 cookies, depending on how large you make them\

    Ingredients:

    • 75 g butter
    • 115 g brown sugar
    • 1/4 cup light corn syrup
    • 1/4 cup black molasses
    • 30 g fresh ginger
    • 280 g you all-purpose flour
    • 3 g salt
    • 5 g baking powder
    • 5 g baking soda
    • 2 g ground allspice

    Directions:

    1. Combine the butter, brown sugar, corn syrup and molasses and heat gently until melted. Set aside.
    2. Grate the fresh ginger and stir into the melted butter mixture.
    3. Combine the remaining ingredients and whisk or sift to stir. Make a well in the centre and pour the melted butter mixture into it and mix until all of the flour mixture is incorporated.
    4. Preheat the oven to 350° F. Line a baking sheet with parchment paper.
    5. Drop the cookie dough by even spoonfuls (I used a large melon baller) onto the lined cookie sheet. Roll each ball in the palm of your hand to create a smooth ball, then press down to flatten with a flour cookie press to about half a centimetre.
    6. Bake for 10-12 minutes (I baked mine for 10) and cool on a wire rack. Store in an air-tight container but don’t worry, you won’t have to store them for long.

    Read Full Post »

    Late last summer, I did some prop shopping for a prop-stylist colleague who was swamped and needed a hand. It’s a lot of work, don’t get me wrong, the shopping bit is fun but there is a lot of schlepping! And you have to be extremely organized to be able to return some of the props that weren’t used! That being said, it’s a job I don’t envy, they earn every penny and then some. While I was waiting for a store to open, I stopped into an Italian cafe for a coffee and biscotti. The coffee was fine but the biscotti was atrocious, it was soggy! Imagine that. Such an unsatisfying treat. The worst. So I had to make my own! These definitely hit the spot!

    Cranberry and Almond Biscotti Revisted

    Makes about 30 biscotti

    Ingredients:

    • 320 g AP unbleached flour
    • 4 g baking powder
    • 3 g salt
    • 340 g sugar
    • 125 g butter, room temperature
    • 2 large eggs
    • 7 mL almond extract
    • 150 g frozen cranberries, defrosted
    • 70 g almonds, toasted

    Directions:

    1. Preheat the oven to 350° F. Line a baking sheet with parchment.
    2. Combine the flour, baking powder and salt and mix well. Fold in the cranberries and almonds (I used whole)
    3. In the large bowl of your stand mixer, combine the sugar, butter, eggs and almond extract and mix for about 4 minutes.
    4. Fold in the dry ingredients until entirely combined (I did this using my whisk attachment so I didn’t break up the cranberries.
    5. Divide the batter in half and shape into relatively skinny logs on the parchment, leaving sufficient space between the two as they will spread during baking.
    6. Bake for 35 minutes or until golden.
    7. Remove logs from the oven and transfer to a cutting board. Using a serrated knife, slice each log into 1.5 cm slices. Place cut-side down on the baking sheet (reuse the original parchment) and bake for 10 minutes, flip and continue to bake for 5 more minutes or until lightly golden. Cool completely.
    8. Store in an air-tight container or freeze. Serve with coffee or tea.

    You’ll need to bake these a little longer because the cranberries are moist.

    Read Full Post »

    We are knee-deep in entertaining season so I thought I’d share some easy recipes for entertaining. Homemade dips are simple to make and are a million-times better than store-bought dips. I’ve suggested grilling the eggplant for a smoky flavour in my recipe but if your grill is tucked away for the long winter, you can broil them for a similar effect.

    Speaking of entertaining, do you own a wood-burning fireplace or know someone who does? Do you struggle to bring wood in from your wood pile when you have friends over? The sawdust and bits of wood alway stick to your clothes and the number of trips in and out is tiring! I have a solution! I’ve created a handy log carrier, hand made by yours truly in Canada! This is the perfect gift for the wood burning fireplace owner! Made of heavy duty denim, with a copper handles, these carriers can hold 12-14 kg (25-30 lbs) of wood, the perfect amount for a roaring fire without breaking your back! They are $60 (Canadian) each or two for $100 (Canadian). Shipping within Canada and to the US is available but you’ll need to contact me before November 23 to make sure you get it by Christmas. Now let’s get busy and make some baba!

    Baba Ganoush

    For the original recipe, please click here.

    Makes about 400 mL dip

    Ingredients:

    • 8 small Thai aubergines, halved and seeded
    • olive oil
    • 2 cloves of roasted garlic
    • 15 mL tahini
    • 6 g cumin
    • extra virgin olive oil
    • juice of half a lemon
    • sea salt to taste

    Directions:

    1. Grill aubergines on very hot BBQ, until skin is charred and the flesh is soft (we did ours mostly on the skin side on the BGE).
    1. Roast the garlic in a parchment pouch wrapped in foil. Cool.
    2. Peel the charred skin and away from the aubergine and discard, peel roasted garlic and discard skins.
    3. In the bowl of your food processor, add all of the ingredients and purée until smooth, season to taste.

    Notes:

    • I like to toast my cumin for big flavour.
    • Use raw garlic if you wish, we have developed a bit of an aversion to raw garlic so I roast it whenever possible.
    • Use as much olive oil to give you a smooth dip.
    • I would not substitute peanut butter for the tahini in this case.
    • If you like a tarter dip, add more lemon juice.
    • Seeds of the eggplant tend to be bitter, so I’d remove them.

    Read Full Post »

    In late March/early April, we spent two glorious weeks in Arizona. We stayed with friends for this duration because we had offered to puppy-sit (Jordan) while they took a quick 7 day holiday in Ireland. We had never puppy sat before but their beautiful black lab, Jordan is quite possibly one of the laziest dogs we have ever met so she was really no problem at all. We did get her used to three walks per day, that is, until we bumped into a woman carrying a black light, walking her dog after dark. I had to ask and yes, it was to detect scorpions. That was the end of our after dark walks. Period.

    I like to arrive with gifts in hand and these basil Parmesan Straws were the perfect hostess gift because I had a bunch of basil that needed using a couple of days before our departure. Plus they are pretty tasty. Jordan thought so too.

    Sun-dried Tomato, Basil and Parmesan Straws

    A KitchenInspirations Original Recipe

    Makes about 75 pieces

    To print this recipe, please click here.

    Ingredients:

    • 290 g flour
    • 10 g Fresh Basil, finely chopped
    • 50 g sun-dried tomatoes in oil, roughly chopped
    • 10 g garlic, finely minced
    • 110 g unsalted butter (cold)
    • 30 g  grated Parmesan cheese
    • 2 eggs, beaten separately
    • 15-30 mL water or milk
    • Sea salt

    Directions:

    1. Pre-heat oven to 400°F.
    2. Put all dry ingredients into a food processor, including the basil, sun-dried tomatoes and garlic, and process to mix well.
    3. Add the butter and process to coarse granules.
    4. While the blades are running, pour in the egg and process until a soft ball forms. If this does not happen, drizzle little bits of water until a soft ball forms.
    5. Remove from processor and using a small amount of flour, roll out the dough to about 1/2 cm thickness. Cut into 8cm x 7 mm straws and position evenly on a cookie sheet. Brush with second egg and sprinkle with sea salt.
    6. Bake for 12-15 minutes until golden.
    7. Remove and allow to cool. This will store well in a cool, dark place or freeze.

    Notes:

    • I like to use a plastic ruler to cut the straws evenly. My ruler is a dedicated food ruler that never is used with pens or pencils or markers!
    • This type of rolling pin gives you evenly thick dough, but as I have mentioned previously, it is a pain to unscrew the disks and I inadvertently have to wash all of the disks each time I use it.
    • This dough is a bit wetter than some of my other recipes because of the sun-dried tomatoes and fresh garlic.

    Read Full Post »

    We had just completed a gorgeous hike one weekend in February at Kortright Centre for Conservation. It was a warmer day and the sun was beaming beautifully throughout the hike. There were some muddy spots and some icy spots but it was totally manageable. This park is not manned this time of year, but, fortunately they leave the gate open for visitors like us. The park is not maintained during the winter but a good pair of hiking boots and you’re good to go. Click down to the end to see a few pictures of our hike.

    Unfortunately all of the service buildings are closed this time of year, and after an hour-long hike and ingesting 500 mL of water, one might need facilities, so we decided to stop at a Starbucks on our way home. I usually like to purchase something when I use the facilities in a place but it was well into the afternoon and I really didn’t want a cup of regular coffee and ordering a decaf at Starbucks is about the most painful experience I have ever endured so I avoid it at all costs. Instead, we ordered an oatmeal cookie which they had unfortunately sold out of so, we shared one of their Ginger Molasses cookies. It was so delicious that I wanted to replicate the recipe and bake some at home. JT and I are HUGE ginger fans and I prefer to use fresh ginger whenever I can, so in this lovely recipe, I quadrupled the ginger and used fresh and I added a small amount of candied ginger chopped roughly. These definitely satisfied my ginger craving! Do you ever feel obligated to purchase something if you use a restaurant’s facilities?

    Chewy Ginger Molasses Cookies

    Makes about 72 x 20 g cookies.

    For the original recipe, please click here.

    To print this recipe, please click here.

    Ingredients:

    • 284 g unsalted butter at room temperature
    • 450 g white sugar
    • 2 eggs
    • 125 mL molasses
    • 20 g fresh ginger, finely minced
    • 570 g all-purpose unbleached flour
    • 3 g salt
    • 23 g baking soda
    • 6 g ground cinnamon
    • 1 g ground cloves
    • 50 g candied ginger, chopped
    • 50 g white sugar for rolling

    Directions:

    1. Cream the butter and sugar together until light and fluffy. Beat in the eggs, one at a time.
    2. Add the molasses and fresh ginger and beat well.
    3. In a separate bowl, combine the flour, salt, baking soda, cinnamon and cloves and whisk to combine well.
    4. Add to the butter mixture and beat until well combined.
    5. Refrigerate the batter for 1 hour.
    6. Pre-heat the oven to 350° F.
    7. Make 20 g balls and roll in the sugar and position on the parchment lined baking sheet leaving about 5 cm between each cookie (don’t be tempted to flatten, it will flatten out on its own in the heat of the oven). Bake for 10-11 minutes, remove from the oven but leave them on the baking sheet because they will finish baking on the sheet. Remove cookies from the baking sheet once they have all but cooled completely.
    8. Enjoy with coffee or tea or a glass of bubbly!

    Notes:

    • 11 minutes was absolutely perfect in my oven, the cookies hardened up perfectly sitting on the hot cookie sheet on the counter.
    • I always test-bake 1 or 2 cookies before I decide on how big to make the entire batch, it also gives you a solid idea of how long to bake them perfectly.
    • Weighing the cookie dough will give you more evenly-sized baked cookies. I can almost eyeball them after making a few balls, but I still like to weigh them for consistency.

    Read Full Post »

    Winter is not giving up easily in these parts. At least the days are sunny even if they are still nippy. It’s the grey days with endless overcast that really pull me into the dumpers, so I bake to make me happy; plus the ambient heat the oven gives off doesn’t hurt. I created this tasty scone recipe when I discovered a couple of rogue oranges in the refrigerator. The flavour combination may sound strange but it works, plus it’s delicious straight from the hot oven with a generous pat of butter.

    Cheddar Orange Scones

    A KitchenInspirations Original Recipe

    Makes 8 large scones

    Ingredients:

    • 270 g AP flour
    • 25 g coconut sugar
    • 20 g baking powder
    • 1 g salt
    • 56 g cold, unsalted butter, cut into small chunks
    • 150 g sharp cheddar
    • 1 egg, lightly beaten
    • 125 mL orange juice (about 1 navel orange)
    • zest of 2 navel oranges
    • Yogurt for brushing tops

    Directions:

    1. Pre-heat the oven to 425° F.
    2. In the large bowl of your food processor, combine flour, sugar, baking powder, salt and pulse a few times to mix well.
    3. Add the butter and pulse until well incorporated but not softened.
    4. Combine the egg, orange juice and zest and mix well.
    5. Pour into the food processor while pulsing and pulse until well mixed. If your kitchen is on the warmer-side, allow the dough to rest in the refrigerator for a bit here or if it’s on the chilly-side, proceed to next step.
    6. Roll out to about 2 cm thick and cut with your favourite cookie cutter. Continue until you’ve used all of the dough. Brush tops with yogurt and bake 15-17 minutes or until lightly golden on top and baked through. Cool slightly on a wire rack and serve warm with butter.

    Read Full Post »

    Do you keep a running list of things your friends and family won’t or cannot eat? I have found that it makes my life easier if I do, so one day, a long, long time ago, the “Friends’ Likes and Dislikes” list was born. Now I have it in Notes on my iPhone, it is so handy. I also keep a diary of dinner parties so I can avoid feeding friends the same thing!

    My list-making started with my “list of books that I’ve read” after buying the same book twice because they changed the cover artwork! Isn’t that annoying! I now refer to the list before I make a book purchase. I have also made lists of movies we’ve seen over the years and television shoes we’ve watched; keeping track of the season and episode help you keep on track if you’re not just using Netflix for streaming. I also have a running list of movies and TV shows I want to watch so that I can reference it on a rainy weekend for entertainment. The list-making didn’t end with the end of the cottage, oh no, dear friend, it continues to live on for a number of purposes! Do you make lists? What type of lists do you make?

    By the way, this would be on the No Go list for Mike because he hates nuts and seeds!

    Gluten Free Pumpkin Sesame Crackers

    Makes about 30 crackers

    To print recipe, please click here.

    Ingredients:

    • 100 g ground pumpkin seeds
    • 60 g sesame seeds
    • 10 g coconut flour
    • 5 g sea salt
    • 1 egg
    • 2 tsp sesame oil

    Directions:

    1. Pre-heat the oven to 350° F.
    2. Combine the dry ingredients and mix well.
    3. Combine the wet ingredients and whisk lightly until well combined.
    4. Pour the wet ingredients into the dry and stir until evenly mixed. Create a ball with the dough and press flat with the palms of your hands.
    5. Between two sheets of parchment paper, roll the dough until it is very thin (the best ones are only as thick as a sesame seed!). Using a ruler, cut into squares, rectangles or whatever shape you desire (I find straight-edged shapes easiest). Discard the top parchment.
    6. Place the parchment with the cut crackers on a baking sheet and bake for 10-14 minutes or until crisp. Allow to cool for a couple of minutes, then break apart using the cut lines.
    7. Serve with soup or dip.

    Notes:

    • Use whatever nut flour or seed flour you desire.
    • You may add flavourings but the sesame is fairly strong so you may wish to use a different oil.
    • I have used both toasted sesame seeds and untoasted, both are very good.
    • I find I usually have to remove the edge crackers earlier from the baking sheet and return the rest to bake a bit longer, continue to do so until the desired golden colour is achieved.

    Read Full Post »

    In an effort to eat healthier, I developed this recipe for a snack that is flavourful, crunchy and delivers a bit of protein and vitamins! The almond flour helps with the crunch as does the coconut flour, the dehydrated onion and garlic give the flavour this healthy snack delivers.

    Kale Chips

    A KitchenInspirations Original Recipe

    Serves 2 to 4

    To print recipe, please click here.

    Ingredients:

    • 120 g kale, washed, dried and cut into medium-sized pieces
    • 30 g almond flour
    • 20 g coconut flour
    • 10 g dehydrated onion
    • 5 g dehydrated garlic
    • 30 mL olive oil
    • salt to taste

    Directions:

    1. Pre-heat the oven to 93° C (200°F )(I used my convection (fan) setting).
    2. In a dedicated spice/coffee mill, grind the almond flour, coconut flour, onion and garlic until a fine powder. Set aside.
    3. Wash kale and dry as well as possible. Remove thick ribs. Cut into bite-sized pieces keeping in mind that they will shrink to about half their raw size.
    4. Drizzle olive oil over kale and toss to coat evenly. I gave them a quick, light massage to evenly coat each leaf.
    5. Spread kale on a cookie sheet so they are on one layer and not overlapping. Sprinkle lightly with about 7 g of almond flour mixture (I found it easier to sprinkle through a fine sieve).
    6. Bake for 15-20 minutes tossing occasionally until crisp. Sprinkle with salt.
    7. Serve immediately.

    Notes:

    • Spice up the finished kale chips with a little cayenne pepper.
    • Instead of olive oil, use chili oil to coat raw chips.
    • Spread the oil-coated chips evenly on a cookie sheet to dry quickly and evenly.
    • A medium to larger cut leaf will dehydrate to a bite-sized chip.
    • Store the leftover coconut flour mix in an air-tight container for future kale chips.

    Nutritional facts for kale chips

    Read Full Post »

    Just prior to Christmas, I did a couple of jobs which had me buying a lot of garlic. When I say a lot, I mean literally dozens of heads! Of course, I gave away as much as I could but the majority came home with me. I am not one to toss perfectly good food in the bin, so I decided to roast the heads and freeze them for quick additions to sauces and soups. Now, I must say that this idea is genius because roasted garlic is so tasty and having some quick at hand makes it easy to add another level of flavour without the harshness of raw garlic. Over the holidays, we got together with our wonderful neighbours and I made this delicious roasted garlic dip.

    Now there is that cold winter light!

    Roasted Garlic Dip

    A KitchenInspirations Original Recipe

    Serves 6-8, makes about 300 mL

    To print recipe, please click here.

    Ingredients:

    • 200 g roasted garlic (about 4 heads)
    • 125 g cream cheese, room temperature
    • 50 g Greek Yogurt
    • Sea salt to taste

    Directions:

    1. In a small bowl large enough to accommodate a stick blender, combine all of the ingredients and purée until smooth and silky.
    2. Serve at room temperature.

    Notes:

    • I roast garlic by cutting off the bottom of the head (the root end) and setting it in about 30 mL of olive oil. I like to cover the garlic I roast so it steams and roasts at the same time. I roast the garlic in a 350° F oven for about 45 minutes or until they are very soft.
    • To extract the garlic, simply squeeze each clove into a container.
    • Some people add freshly grated Parmesan to this dip but I find it rich enough without it.
    • Save the cut ends of the garlic for soup stock.

    This dip would also be a tasty cream sauce for pasta.

    Read Full Post »

    In October I did some really cool TV jobs! I cooked for the lovely and talented Chef Anjum Anand from her I love India Cookbook for Your Morning (click here to see the segment (about 1 min of commercials)) and Mark Bittman, the original author of the infamous No-Knead Bread! recipe (click here to see the segment (only about 30 seconds of commercials)) and Ocean Wise Executive Chef, Ned Bell from his beautiful new cookbook, Lure!

    Ned is awesome! It was indeed a pleasure to work with him. Yes, those are ‘sensible shoes’ as a fellow food stylist recently mentioned on instagram!

    Mark was incredibly humble and amazing to work with (although, I wish the camera-man would have said something about the angle of the burgers!)

    Mark released his Tenth Anniversary Edition of How to Cook Everything Vegetarian cookbook, simple meatless recipes for great food! The book is enormous, over 700 pages and it’s packed with great info, techniques, and wonderful recipes.  Although Mark is not vegetarian, he believes we should be enjoying a more plant-based diet. What I liked about his recipes is that they are truly vegetarian and not just cop-out vegetarian like spaghetti with tomato sauce that you see on some menus! I cooked tofu, tempeh, seitan and a really interesting beet burger. The recipes were easy to follow and came together quickly without special equipment. I will definitely make a few again and even others from the delicious cookbook.

    Although this recipe isn’t from his cookbook, it is indeed vegetarian.

    Basil and Sun-dried Tomato Gougières

    Makes about 50 gourgières. To print the recipe, please click here.

    Ingredients:

    • 250 mL (1 cup) water
    • 128 g (1/2 cup) unsalted butter
    • Pinch salt
    • 128 g (1 cup) all-purpose flour
    • 4 eggs
    • 40 g (~1/4 cup) sun-dried tomatoes (not in oil)
    • 15 g (~3 cloves) garlic cloves, finely minced
    • 7 g  (~10) basil leaves, chiffonade

    Directions:

    1. Preheat the oven to 425° F (218° C). Line a baking sheet with wet parchment paper (crumple the parchment into a ball and saturate with cold water and wring out, flatten with your hand on the baking sheet).
    2. In a heavy bottom saucepan, combine the water, butter, salt and garlic and heat until melted. Remove from heat and add the flour all at once, stirring well. Return to heat and cook for a couple of minutes until it comes away from the sides of the pan.
    3. Remove from the heat and beat in one egg at a time until fully incorporated, being careful not to scramble the eggs. Fold in the herbs and chopped sun-dried tomatoes.
    4. Using a small ice cream scoop dipped in water with a splash of oil, scoop out single balls onto the baking sheet about 5 cm (2 inches) apart. Bake for 20 minutes or until tops are golden and the puffs have poofed about double in size.
    5. Cool on a wire rack. Continue to bake until you have exhausted your batter.

    A light and delicious cocktail nibble.

    Read Full Post »

    Recently, we had a dinner party and I served a grilled caesar salad as one of the courses. Of course, you MUST have REAL bacon so JT cooked the bacon up on the BBQ (none of that maple crap) and I asked him to save the drippings for the roast potatoes but by the time I got around to tossing the tators in the bacon drippings, I had second thoughts so I used only about a tablespoon and tossed the rest with olive oil. I had about a 65 mL (1/4 cup) bacon drippings sitting in the refrigerator, crying for something creative so I came up with this easy recipe. The drippings have such an amazing flavour, and the bits of bacon add just the right amount of crunch. I think I may have to cook up another batch of bacon just for the drippings so I can bake another batch of these tasty morsels.

    Bacon and Parmesan Cheese Puffs

    A KitchenInspirations Original Recipe

    Makes 42 small puffs

    Ingredients:

    • 250 mL (1 cup) water
    • 65 mL (1/4 cup) bacon drippings
    • 5 mL 1/2 tsp salt
    • 145 g (1 cup) all-purpose flour
    • 3 eggs
    • 120 g (1 cup) grated Parmesan Cheese
    • 1 1/2 slices bacon, cooked until crispy and crumbled to small pieces

    Directions:

    1. Preheat oven to 200° C (400° F).
    2. Place water, bacon drippings and salt in a medium saucepan and bring to a boil over medium heat.
    3. Remove from heat and add flour, and stir until combined.
    4. Return to heat and stir cooking the flour mixture until it comes away from the sides of the pan and is a shiny ball.
    5. Place in a food processor with plastic blades and process for 15 seconds (give or take).
    6. Add eggs, one at a time and process for 40 seconds (err on the longer side of give or take).
    7. Add the cheese and process for another 5-10 seconds until smooth. Stir in the crumbled bacon.
    8. Dip a spoon or small ice cream scoop into 1 cup cold water with 5 mL (1 tsp) plain vegetable oil, place walnut-sized spoonfuls on a parchment lined cookie sheet about 3 cm (1 1/2 inches) apart.
    9. Bake for 20-25 minutes, until golden brown.
    10. Serve warm or room temperature.

    Notes:

    • You may also prepare this recipe with a good quality handheld mixer or stand mixer but I would suggest an immersion blender with the whisk attachment is not strong enough for this pastry.
    • These delightful balls puff up about 12 minutes into baking and are ideal for stuffing with a piping funnel (I bought a really cheap one from a dollar store and it works very well). Stuff with goats cheese, or your own recipe.
    • Unstuffed, they freeze very well, just pop them into a zip lock bag. To use, you need not defrost them, simply put them into a preheated 150° C (300° F) oven for 10-12 minutes, until defrosted and heated through.

    The bacon drippings give this treat great flavour and the bacon bits some nice texture.

    Read Full Post »

    I’ve been a little busy since we’ve returned from Arizona, you may have noticed my absence commenting and that I didn’t post last week. I was going to fret about it and try and throw together something but decided against it. Life happens.

    One of our dear friends sold their home in the burbs and moved into their condo just before we left for holidays. JT and I helped them paint before the move, with the move, and a little organization. You see, their home was around 2,500 square feet and they moved into a 600 square foot condo. To say they down-sized is an understatement. I have to admit, I was a little jealous that they were able to rid themselves of excess, but I had to be honest with myself, and I’m not there yet. This past weekend, we went to visit and you know me, I never go empty handed, so I made these cheese crisps.

    When I made the gluten free version of cheez-itz, I rolled them a bit thinner than usual and loved how crisp they baked up, so this time, I adjusted the gluten recipe and rolled them out in my KitchenAid pasta maker and the results were exceptional. Thinner crackers baked up so crispy, I was hooked. If you like cheese tuiles, then you will love these cheese-flavoured, light, crisp crackers, but be warned, they are quite addictive.

    I added a little album of our trip to Arizona at the end of this post, if you are interested. Basically, it was the coldest and rainiest time in Arizona this year. We experienced -15°C (59° F) and snow in The Grand Canyon and although the sun did make an appearance from time to time, it never really warmed up. I wore layered leggings and tops, a winter coat, gloves and scarf and ear muffs, most of the time while we were in The Grand Canyon and Sedona. It rained so much in Sedona; Sedona gets about 38 cm (15 inches) of rain a year, in two days we had 4 cm (1.5 inches)! Oh well, it’s another reason to go back!

    Cheese Crisps

    A KitchenInspirations Original Recipe

    Makes about 350 g crackers (about 6 cups)

    Ingredients:

    • 240 g full-flavoured, hard cheese, grated (see notes)
    • 45 g unsalted butter
    • 15 g vegetable shortening
    • ½ tsp salt
    • 1/2 tsp smoked paprika (see notes)
    • 1 cup (125 g) flour, plus more for rolling
    • 2 tbsp ice water

    Directions:

    1. Combine everything but the water in the large food processor bowl and pulse until fully combined.
    2. Slowly pour in the ice water and process until the dough comes together. It may not look like it will, but it will.
    3. Sprinkle a generous amount of flour on your surface and roll out small bits of the dough thin enough to get through #1 on the KitchenAid Pasta maker attachment. Run each sheet through three times on #1, two-times on #2 and two-times on #3. Return to your work surface and cut with a variety of cookie cutters. I chose smallish ones because I wanted bite-sized nibbles. They shrink to about 65% of the original size.
    4. Preheat oven to 375° F.
    5. Transfer crackers to a baking sheet (I line mine with parchment).
    6. Bake for 8-10 minutes until golden and crispy! Be careful – there’s a fine line with these between golden brown and overdone – and it only takes seconds to burn!

    Notes:

    • Use whatever full-flavoured cheese you have. This batch was made with equal quantities of sharp Cheddar, naturally-smoked Cheddar and Beemster.
    • I prefer to use the pasta maker to roll the dough because it guarantees the dough to be the same thickness throughout the batch. I wouldn’t go thinner than #3 though, really thin crackers will burn very quickly before they crisp up.
    • Change up the flavouring from smoked paprika to granulated garlic, finely ground dehydrated onions, finely ground dehydrated mushrooms, but be careful not to have too large chunks as they will get caught in your pasta maker rollers!

    This slideshow requires JavaScript.

    Read Full Post »

    strawberrypreserves_first

    This is an apple sweetened preserve with strong strawberry flavour and a hint of cinnamon. It’s delicious on toast, cheese or even a garnish on dessert. However, if you are a sweet tooth, this may not be for you.

    Late last year, JT and I decided to hunker down and lose the weight we put on in 2016, start date January 3, 2017. I don’t know about you, but it keeps getting more and more difficult to shed those pesky pounds. So over the last few weeks, we have been dry and on a very strict regiment. I’ve joined a doctor supervised program that I’ve had much success with in the past and I am happy to report, I am doing rather well. At this rate, I should reach my goal by March! I also bought a fit bit zip, so as corny as it sounds, I am getting in my 10,000 steps, a day! We got a bit lazy after our trip to Europe last fall, so it feels great to get back on track.

    The diet we subscribe to has you eating real food (in moderated proportions) so it will be easy to keep up the practice even after we reach our goals. Having said that, there are a few things that I miss because the preferred brands contain aspartame or some other chemical sugar that I decided many years ago to avoid like the plague. So, in this simple post, I present to you an apple-sweetened strawberry preserve recipe. I must warn the super sweet tooths out there that this recipe is definitely not for you. It does, however, have excellent strawberry flavour and the apple just curbs the tartness of the berries without any processed sugars! I suspect I could have added honey or some other natural sugar, but the diet really limits ALL sugars (except chemical) so my hands were tied. These preserves should be frozen as opposed to canned because it does not contain processed sugars as a preservative. At first, I made a single batch of one jar, but JT loved it so much, the jar did not last long. So when I saw strawberries (from Mexico) on sale for $1.88/454 g (1 pound) I jumped! Surprisingly, they have excellent flavour and aroma and the berries really shine through in this preserve.

    Apple Sweetened Strawberry Preserves

    A KitchenInspirations Original Recipe

    Makes about 500 mL (about 2 cups)

    Ingredients:

    • ~1.8 kg  (~4 lbs) strawberries
    • 1 cup water
    • 4 cinnamon sticks
    • 1 apple, chopped finely, peeled, cored (reserved)

    Directions:

    1. Roughly chop strawberries, add them to a heavy bottom saucepan along with the cinnamon sticks, apple and the water. Wrap the apple peel and core tightly in cheesecloth and add to the mix (the peel and core will add natural pectins which will help thicken it).
    2. Boil until the berries and apple have broken down, most of the water has evaporated and it has thickened. With a fork, mash any berry chunks or apple that have not broken down. Remove the cheesecloth bag, drain and discard.
    3. Bottle in sterilized jars and refrigerate for immediate use or freeze for future use. The refrigerator preserves are good for about one month, but it probably won’t last. The freezer jams will be good for about 6 months if they are sealed tightly.


    Read Full Post »

    KingMushroomScallops_First

    With the holidays fast approaching, I thought I would post a few favourites. I created a “king mushroom ‘scallop'” recipe last year (here) but the pic was awful and I wanted to try the recipe again using Mycryo®, the powdered cocoa butter that sears and seals in flavour. The mushroom ‘scallops’ seared beautifully, just like a real scallop and as I mentioned before, they have an uncanny textural resemblance to real scallops, without the price tag!

    Scallops, these days, are outrageously priced and I don’t know why. Costco has a bag of extra large frozen scallops that used to go for about $17 but over the years have snuck up to almost $30 which works out to just less than $3 each! Even though this recipe uses a vegetarian mushroom, you won’t miss real scallops. These tasty little morsels are sitting on a pillow of creamy avocado paste and then drizzled with caramelized shallots, deglazed with a hint of champagne vinegar. The flavours are sophisticated and the presentation is easily eaten by hand, good enough for any upcoming cocktail party, or before a dinner party and they are vegetarian. If you can’t get your hands on Mycryo®, use ghee, or if you wish to make them vegan, use a good quality oil with a high smoke point.

    King Oyster Mushroom “Scallops” on Crostini

    A KitchenInspirations Original Recipe

    Makes 5-6 pieces

    Ingredients:

    • 1 tbsp unsalted butter
    • 1 small shallot, finely chopped
    • 60 mL (1/4 cup) champagne vinegar (white wine vinegar works too)
    • 2 relatively thick stemmed King Oyster Mushrooms, cut into 2 cm (0.5 inch) thickness (tops removed and reserved for another recipe)
    • 2 tbsp Mycryo®
    • 2 tbsp avocado paste (recipe here) or pesto
    • 5-6 crostini

    Directions:

    1. Melt the butter in a small frying pan, add the shallots and cook until caramelized. Deglaze pan with the champagne vinegar. Scrape into a small bowl and set aside.
    2. Coat the king oyster mushroom slices generously with Mycryo®. Heat the same frying pan until very hot, add the mushroom ‘scallops’ and sear each side until golden and heated through. Remove from heat.
    3. Return the caramelized shallots with vinegar to the pan with the seared mushrooms and coat mushrooms well. 
    4. Prepare each crostini with a good smear of avocado paste or pesto, add one mushroom ‘scallop’ to each toast and spoon caramelized shallots with deglazing sauce over the crostini. Garnish with tiny basil leaves. Serve warm.

    Notes:

    • White wine vinegar is a good substitute for champagne vinegar.
    • Fry a little pancetta before melting the butter for added flavour (not vegetarian).
    • Substitute real scallops for the mushrooms (not vegan).
    • Try to get King Oyster mushrooms that are about the same thickness as a good-sized scallop.

    Read Full Post »

    tejas-dulces_first

    Happy Halloween Everyone! Hope you all have a ghoulish night!!!

    While in Europe this past September, we spent four extremely hot days in Sevilla. It’s no wonder they call Spain the “Frying pan of Europe”! It wasn’t as hot as it had been (near 50° C or 122° F) but it was hot enough for us! The sun was relentless and most locals only walk in the shade (you can tell who lives there because they hug the shadows directly beside the old buildings!). The city has covered some of its sunnier streets with canopy sails to shade the citizens and tourists, it’s that bad!

    Many of the historic town streets have these sails in both Sevilla and Madrid.

    Many of the historic town streets have installed these canopy sails to protect citizens and tourist from the unyielding sun, in both Sevilla and Madrid, though I did not see them in Granada.

    During one of our last walks though the beautiful historic part of town, we stumbled into the area where the locals actually live. There were no tourist shops, a few restaurants, just butchers, bakers, children’s clothing stores, kitchen stores (yes, I did buy something), grocery stores and specialty shops. One such shop was a beautifully designed little cookie shop where they sold only one type of cookie in three flavours: La Tejas Dulces de Sevilla, in almond, pistachio and coconut. A young lady was handing out samples in front of the beautiful store and we couldn’t resist. In one taste, we were immediately hooked on the simple almond flavour and lovely crunchy texture and we had to buy some. Upon returning to Toronto, I hid the small package so that I could work on a recipe and perfect it for the blog. I told JT it was for the greater good, he wasn’t impressed.

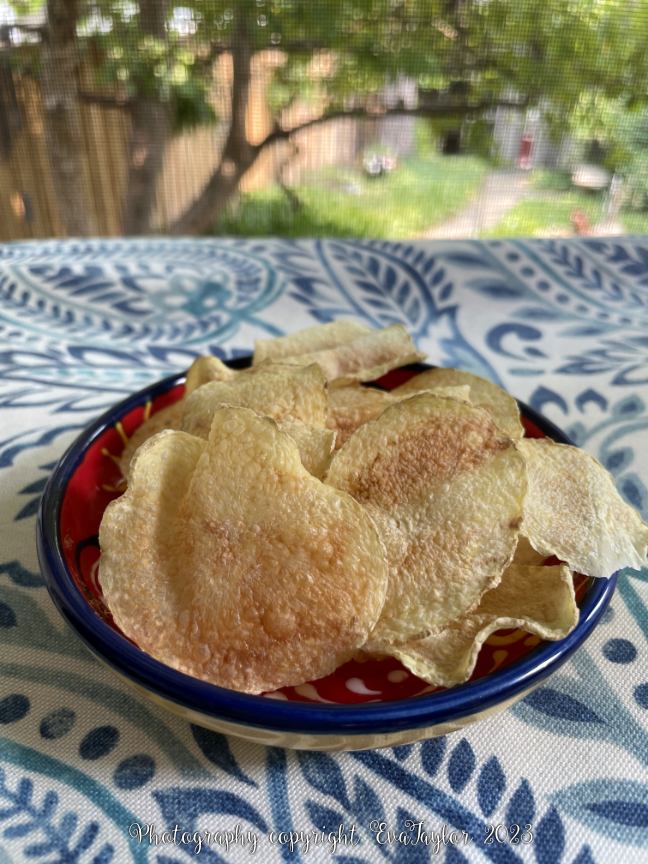
    The cookies are light, airy, crunchy and full of flavour; imagine a genoise batter spread paper-thin, topped with almonds and baked until golden. They are so GOOD! The recipe is relatively simple but follow the instructions to get the signature airy, crunchy texture. I think this could easily convert to a gluten free variety, stay tuned!

    I must warn you, though, because these are not like the French Tuiles, these have a bit more body than a traditional French tuiles. They are really more cracker-like than a tuile or a cookie.

    Scroll down to the end of this post to see pictures from this part of our trip.

    tejas-dulces_2

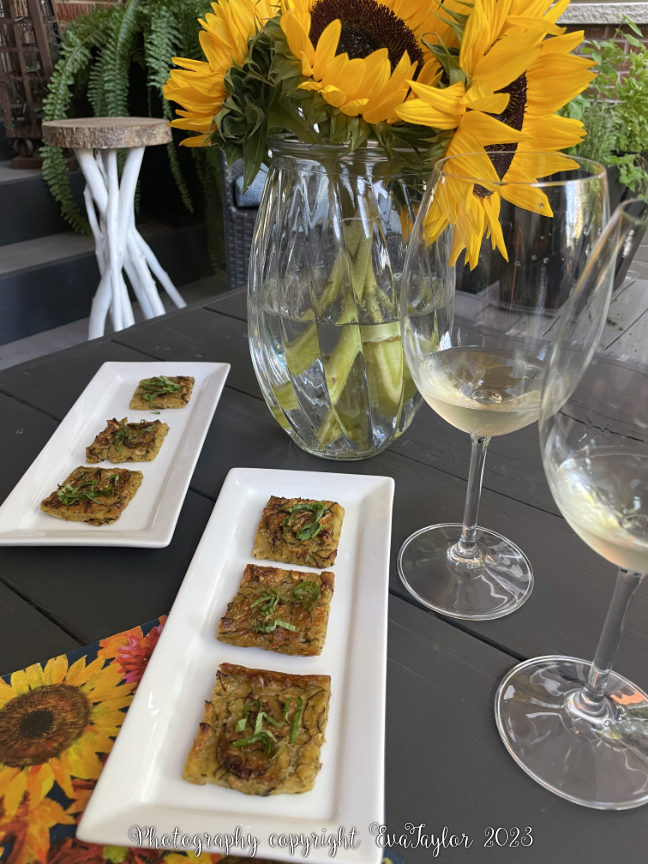
    Delicately sweet, these crispy, flavourful cookies hit the spot for an afternoon craving!


    original

    These are the originals we brought back from Sevilla, sadly only three left and a mess of crumbs but I’ve finessed the recipe so I can make more!

    Almond Tuiles of Sevilla (Tejas Dulces de Sevilla)

    A KitchenInspirations Original Recipe

    Makes 25 cm x 30 cm (10″ x 12″) sheet, cut to make cookies or various sizes

    Ingredients:

    • 30 g (2 tbsp) unsalted butter
    • 75 g (3/4 cup) almonds, thinly sliced and toasted
    • 1 large egg, at room temperature
    • 80 g (~1/3 cup) sugar
    • 1/2 tsp almond flavour
    • 1/2 tsp pure vanilla
    • 50 g cake and pastry flour
    • pinch of salt

    Directions:

    1. Toast the almonds until golden. Set aside to cool.
    2. Melt* the butter and set aside to cool.
    3. Beat the egg with the sugar until it reaches the ribbon stage, about 5 minutes. Beat in the flavourings and cooled butter.
    4. Sift the flour with the salt and fold into the egg mixture, cover and allow to rest at room temperature for 30 minutes.
    5. Pre-heat the oven to 265° F (130° C).
    6. Pour the entire batter onto a parchment-lined cookie sheet and spread out until it is quite thin (about 3-4 mm (about 1/8-3/16 inch) works out to about 30 cm x 30 cm (12″ x 12″). Evenly sprinkle the toasted almonds onto the batter and gently push into the batter**.
    7. Bake for 45 minutes to an hour or until evenly golden, turn the pan once about halfway.
    8. While still warm, move parchment onto a cutting board and cut into uneven shapes with a pizza cutter. Transfer parchment to a cooling rack and allow to cool. Cookies will firm up as they cool.
    9. Once cooled, store in an airtight container for about a week, but they won’t last that long!

    Spread batter out thinly (about 30 x 30 cm or 12 x 12 inches)

    Spread batter out thinly (about 30 x 30 cm or 12 x 12 inches)


    tejas-dulces_3

    I made another batch but spread the batter out much thinner. They probably could have baked a little longer to get a little richer colour, but the flavour and texture is spot on.

    Notes:

    • *for additional flavour, brown the butter in a frying pan until hazelnut in colour.
      ** to insure that all of the almonds are ‘stuck’ to the batter, I did a little toss of the pan quickly and that way I was able to move ‘unstuck’ almonds to a better place.
    • Add a teaspoon of lemon zest because lemon and almond go so wonderfully together!
    • Drizzle melted chocolate over the cookies once they are cool, refrigerate until set then store in an airtight container for about a week, but be warned, these won’t even last as long as the originals!

    This slideshow requires JavaScript.


    Read Full Post »

    CheeseBall_First

    My parents entertained a lot, it’s probably where I get my love for entertaining (read, feeding) friends and family. Mom would make canapés (tiny little sandwiches) and often have a cheese plate for nibblies. Mom’s canapé repertoire was whatever we had on hand, sometimes leftover roast beef, hard boiled egg or even some pickled herring with a dollop of sour cream and a sprig of fresh dill.

    Although this post is about a cheese ball, my dear Mom did not make cheese balls for entertaining purposes, they were for late night snacks*! Mom’s cheese mixtures usually consisted of whatever cheese was left over, grated and mixed together with butter (or margarine, in those days). Each cheese mixture was different because she never had the same proportions of cheese leftover.

    I believe, I was the first to make an actual cheese ball in my family, the recipe was likely from a one of my beloved Recipes Only Magazines, a quarterly food magazine that premiered in April 1983. It was delivered free to 2,000,o00 Canadian homes in predetermined areas. The inaugural magazine touted “To celebrate the joys of Food and Cooking…Our goal at Recipes Only will be simply to bring you excellence; excellence of recipes based on the plentiful ingredients from Canadian stores and gardens; excellence of presentation based on the best photographs and illustrations our award-winning team…can design…” Well, they did their best considering the timeframe. Dark, moody photos with some but not many relevant props, not like the odd 70’s food photos with weird fabrics (or were they all shower curtains?) thrown in! I’m certain my first cheese ball came from one of the Recipe Only Magazines but I no longer have them all so I cannot be sure (makes for a good story, though).

    RecipesOnly

    Sadly, I have only saved up to and including Issue 7, November/December 1984,  I also saved Issue 11, from 1985 (which has the index for the first 10 issues) and for some bizarre reason, Issue 24 from October 1987 (by which time, they were charging $1.00 for them). I even saved labels from Bick’s Pickles to send away for a tidy binder to hold my cherished Recipes Only Magazines.


    We’ve thoroughly enjoyed the more contemporary Potted Cheese at the beautiful Harbour House Hotel in Niagara-on-the-Lake (we often go down during the Christmas Holidays) during a sampling of Local Vintages from 4:00 pm to 5:00 pm each day in the Library Lobby. My cheese ball is not nearly as highbrow as the Potted Cheese but it is very tasty. I would encourage you to create your own with your own blend of cheese, it’s a perfect accompaniment to cocktails on the dock on a lazy summer’s day.

    CheeseBall_2

    I served the cheese ball with home made toasted sourdough baguette, Mary’s Crackers, cucumbers and celery sticks.

    A Tasty Cheese Ball

    A KitchenInspirations Original Recipe

    Makes 2 8-10 cm (3-4 inch) Cheese Ball

    Ingredients:

    • 250 g Cream Cheese
    • 55 g Danish Blue Cheese
    • 50 g Gruyère Cheese
    • 1 green onion, finely chopped
    • 100 g of chopped, toasted nuts, cooled (I used 50 g each of pecans and cashews because it’s what I had on hand).

    Directions:

    1. Combine all of the ingredients with the exception of the nuts, in the bowl of a food processor, process until smooth.
    2. Scrape out all of the cheese mixture and divide into two balls. Roll in the nuts to cover completely. Refrigerate or freeze until required.
    3. It’s best to allow the cheese ball to come to room temperature before serving.

    CheeseBall_3

    *Back in the 1970’s and early 80’s, we would often have a small snack of cheese, bread or popcorn while watching TV. We called it our “Late Night Snack”.

    Read Full Post »

    AdultGrilledCheese_First

    Cooking at the cottage means simple recipes using fresh ingredients. I don’t want to be in the kitchen any longer than I have to. Don’t get me wrong, I adore cooking but I also adore this view:

    CottageView

    This is the view looking out into the lake from our little bay.

    Several years ago, our dear friend Barb (Profiteroles and Pony Tails) and her then beau (now hubby) came up to our cottage, The Upper Deck. We traded off days for cooking and for one lunch Barb made this excellent grilled cheese sandwich (Toastie)! We’re not talking about a processed cheese slice slapped between two slices of Mungie-cake white bread. No, this is a serious blend of cheeses with a splash of whiskey or cognac and some delicious green onion thrown in for good measure. Believe me, when I say: once you have this grilled cheese, you will NEVER want any other.

    I posted this recipe originally in March 2009 and it was a bit of a sore spot because a named magazine asked to use my photo in a grilled cheese story but since I was relatively new to blogging, I wasn’t paying attention to the comments, so I missed out! Sigh. The flavour of the whiskey or cognac is essential, the cheese blend is entirely up to you, but I suggest hard cheese and not soft like goats cheese.

    Adult Grilled Cheese

    Serves 2

    Ingredients:

    • 125-150 g shredded cheese, in total
    • 1 tbsp butter
    • 2 slices sourdough bread, use this recipe
    • 1 green onion, thinly sliced
    • 2 tbsp cognac or whiskey

    Directions:

    1. Combine shredded cheeses, green onion and cognac and mix well.
    2. Butter one side of each bread, lay one slice buttered side down and top with the cheese mixture. Lay the other side of the bread on top, buttered side up.
    3. Heat a grill pan and place sandwich on top, lay a weight over it (I used 3 cast iron pans but I put a piece of parchment on top of the sandwich first).
    4. Grill until cheese has melted. Cut sandwich in half and serve with celery sticks and homemade salsa.

    Notes:

    • For this sandwich, we used Applewood Smoked Cheddar, Extra Old Cheddar and Mozzarella.
    • We have also used Mozzarella, Gruyère and white Cheddar, the combinations are endless. It is nice to use a stringy cheese for this type of sandwich.
    • You could also put additional cheese on the exterior (omit butter) and instead of grill, lay a piece of parchment down in a cast iron frying pan and cook, repeat for other side. See instructions from my dear friend Lorraine, here.

    Read Full Post »

    The marketing company that I work with from time to time recently moved into their new exciting office space and they invited me down for a look. I decided to bring them a baked treat (because that is how I roll) and created this new chewy chocolate peanut butter brownie recipe! I was inspired by your generous reaction to the Chocolate Peanut Butter Bark with Gold Sea Salt that I created, thank you. This is not an overly sweet brownie but it is richly flavoured with chocolate with the classic peanut butter combo. I used natural, chunky PB that isn’t sugared or salted, but feel free to use your traditional grocery store PB and omit the additional sugar and salt that I add in the later part of this recipe. The recipe is loosely based on my Go-To brownie recipe that my dear Mom cut out of the Toronto Star about 20 years ago (click here and here).

    Chocolate Peanut Butter Brownies 

    A KitchenInspirations Original Recipe

    Makes about 25 brownies

    Ingredients:

    • 1 cup all-purpose flour
    • 1 cup icing sugar
    • 5 tbsp cocoa powder
    • 1 tsp baking powder
    • 45 g (1 1/2 oz) semi-sweet dark chocolate chips
    • 3 tbsp butter
    • 1/2 cup water
    • 2 tsp vanilla extract
    • 2 egg whites
    • 1/2 cup natural, chunky peanut butter
    • 1/3 cup water
    • 1 tbsp icing sugar
    • Pinch of salt

    Directions:

    1. Sift flour, icing sugar, cocoa powder and baking powder.
    2. Melt butter  with chocolate chips, add vanilla and water and stir well.
    3. Beat in the egg whites (if the liquid is still hot, temper them so you don’t get scrambled eggs!)
    4. Add dry ingredients and stir well.
    5. Pour into a prepared 9″ x 9″ pan and line the pan with parchment paper, then spray with non-stick baking spray. Bake for 25-40 minutes until firm and cake tester comes out clean.
    6. Option to frost with a butter icing, but not necessary as this brownie is very moist and flavourful.

    Read Full Post »

    Silvasgombocz_first

    I recently read on a blog (which I can not find for the life of me, but if it was you, kindly mention it with a link in the comments) a rant about restaurant service where wait staff remove empty dishes from the table before everyone has finished eating. This is a HUGE issue in Toronto, particularly with the roadhouse-style (3 star or less) establishments. It is a disgusting trait, particularly when there are ONLY TWO people dining. Because JT inhales eats much quicker than I, I am often left eating at the table while his plate is cleared away. Just because restaurants here only pay servers minimum wage, it doesn’t mean that there shouldn’t be training! UGH.

    I mention this trend because on a recent dinner with neighbours (progressive dinner folks) at a fairly well reviewed French restaurant in our historic Distillery District they actually went one step further. It wasn’t a busy night but service was slow and we were through a bottle of wine before our first course even arrived; eventually we casually ate our appetizers and chatted up a storm so when they removed the dishes I got up for a quick bio break. I ordered my favourite bistro dish, Table Side Wellington Country Beef Tartar which is prepared in front of the guest. Can you guess what’s coming next? The server actually PREPARED MY DISH WITHOUT ME BEING THERE! OMG, did that really happen? Oh yes, it did. I was so aghast, I was speechless! So now, several weeks later I am ranting on my blog. Shame on you, French restaurant in the Distillery District, the remainder of the experience wasn’t even worth mentioning (OK, I will say the steak frites came in pieces (what? did they gather up the leftovers from other plates?) AND it was over-cooked). Strike that place off my list.

    It is no secret that Hungarians love food and we love to cook; so while my cousin and his lovely wife, Éva were visiting, I asked her to show me how to make a traditional, light Hungarian supper called Szilvásgombóc (Plum Dumplings). I’ve read many a blog that this dish is NOT a dessert and the Hungarians are quite adamant about it. When I was a child, we had this dish during plum season but I can’t recall if it was a main or a dessert. I have never made it on my own so I was happy to have Éva make it while I watched. It is delicately sweet and seasoned generously with toasted bread crumbs and cinnamon. We always had it with sour cream so my presentation included Greek Yogurt, but Éva always had it plain with extra cinnamon or with some lekvár (thick jam).

    We made the dish at the cottage, so I wasn’t able to document the weights and measures and I still have some in the freezer so I won’t be making it any time soon. For an experienced cook, like most of my followers, it is a recipe made by feel (similar to making Italian Gnocchi), but I will reference Ilona Horvath’s recipe from The Traditional Hungarian Kitchen published in 1996 and 2000. It is an excellent cookbook translated and worked into North American cooking standards and according to my dear Mom, good, old fashioned Hungarian recipes.

    Below, I present my dear Mother’s recipe from her Mother’s cookbook that she brought with her on her escape from Hungary in 1956, Az Ínyesmester Ezer Új Receptje published by Athenaeum, 1935. It is a well-loved, faded copy and the recipe for szilvásgombóc in the book is entirely by feel (no measurements documented!).

    Cookbook

    That’s a recipe for Roquefort Dressing written in my Mom’s handwriting in Hungarian.

    Magyar Szilvásgombóc (Hungarian Plum Dumplings)

    Makes about 24 gombóc

    Ingredients:

    • 12 sweet plums (the small Italian ones are best, we were not able to find them so we cut them in half)
    • Boiled potatoes (we used 5 medium-sized yukon gold potatoes)
    • All purpose flour
    • 1 egg
    • 4 tbsp cinnamon, divided
    • 3/4 cup of unseasoned bread crumbs (we made our own from whole wheat bread)
    • 2-3 tbsp sugar

    Directions:

    1. While boiling the peeled potatoes, wash, pit and cut the plums in half and season with 2 tbsp of cinnamon, set aside.
    2. Rice potatoes while still warm (Éva made a point of this). Beat the egg by hand and combine it with the riced potatoes.
    3. Slowly add flour to the potato and egg mixture to make a soft dough.
    4. Using about two tablespoons of dough, press out to about 1 cm thick in the palm of your hand (about the size of the palm of your hand), add a quarter of a plum to the centre and cover entirely with the dough, pinching the seams shut.
    5. Boil water with a pinch of salt. Boil plum dumpling until done (they should float to the top, just like gnocchi).
    6. Meanwhile, in a large frying pan, toast the breadcrumbs until golden and while still warm, add the sugar and mix gently until the sugar has melted and caramelized. It should not be a sopping mess. Turn off the heat. Add the remaining 2 tbsp cinnamon and mix well. Roll each cooked dumpling in the bread crumbs and plate.
    7. Serve warm or cold, with or without yogurt or sour cream

    This plate survived two bombings during the second world war.

    This plate survived two bombings during the second world war.

    Notes:

    • We tested one plum ball first to make sure it didn’t fall apart during boiling and decided it was a bit too soft and we added more flour.
    • The old cookbook describes a good plum dumpling dough to be thinly wrapped around the plum, a fine and light texture, somewhat pillowy (not chewy). “A jó szilvásgombóc téstája vékony, finom és könnyu, sőt omlós.”
    • I wish we had tasted the plums because they had very little taste and we should have seasoned them with a touch sugar to bring out their plum taste. This dish should not be sickly sweet, it is delicately sweet.
    • Ilona Horváth adds lard to the dough but we did not.
    • My relatives LOVE cinnamon so the proportions may be a bit much for the average person, add according to your own personal taste. Cinnamon in Europe is the real McCoy and is a lot stronger than our Cassia. Too much cinnamon may make the dish bitter!


    Read Full Post »

    SweetPotatoHummus_first

    A couple of weeks ago my kitchen had all sorts of half used leftover vegetables from a testing I did for my recipe testing lady. They were for recipes that called for specific volumes of vegetables (such as, 1 cup) instead of the quantity of vegetables (such as 1 medium carrot). I always find those recipes a bit odd because I am left with bits and pieces that lay around for weeks without any specific purpose. Indeed, I could have thrown them into a soup or stew but I wasn’t making either of those things. Then I saw my lovely friend Lorraine’s Roasted Vegetable Hummus recipes and thought “GENIUS”! What a great way to use up bits and pieces of leftover veg. Thank you Lorraine, truly a great idea (ps, it was darn delicious too!).

    Because this recipe was created to use up leftover vegetables, feel free to modify the quantity or variety to what you have on hand. This would also work beautifully if you had leftover roasted veg from a dinner. Hummus is an easy Middle Eastern dip/spread and the seasonings should be to your personal taste; we love the traditional flavours so I’ve kept it pretty much the same with the exception of substituting tahini with toasted sesame oil because that’s what I had (you can use peanut butter too, I know, GASP!!!).

    It turned out that The Hungarians had never tried sweet potatoes (not sure if it’s a veg not available in Budapest or they were never introduced to it) but it was a grand success as a dip AND as a roasted vegetable side for our roast chicken dinner one night.

    Sweet Potato and Carrot Hummus

    makes about 1 cup, depending on the size of your vegetables

    Ingredients:

    • 1 medium sweet potato, peeled and cut into equal sized cubes
    • 2 medium carrots, peeled and cut into equal sized cubes
    • 1 large clove of garlic, whole
    • 3 tbsp EVOO, divided
    • 1/4 tsp sea salt
    • 1 tbsp each, cumin and coriander
    • 2 tbsp lemon juice
    • 2 tbsp water or vegetable stock
    • 2 tbsp smoked sesame oil
    • toasted sesame seeds for garnish

    Directions:

    1. Pre-heat oven to 190° C (375° F).
    2. Add sweet potato and carrot cubes to a large roasting pan and drizzle with 1 tbsp olive oil.
    3. Add garlic (peel and all) to a small ramekin, top off with 2 tbsp olive oil and and water. Season with sea salt. Cover with foil and tuck into a corner of the roasting pan.
    4. Roast vegetables for about 35 minutes or until very tender, try not to brown the vegetables so that the dip colour remains vibrant.
    5. Scrape vegetables from roasting pan into a glass bowl, squeeze the garlic out from its skin and pour the liquid from the garlic into the glass bowl with the sweet potato and carrot.
    6. Toast the cumin and coriander until fragrant, add to the glass bowl along with the remainder of the ingredients (with the exception of the sesame seeds). Purée until smooth, season with salt and pepper, if desired. For an ultra smooth dip, press through a fine sieve. Garnish with toasted sesame seeds. Serve at room temperature with bread, crackers or crisp vegetables.

    SweetPotatoHummus

    It’s creamy and naturally sweet.

    My dear friend Genie of Bunny, Eats, Design suggested I submit this post to our growing edge for June, themed Picnic, hosted by Maddie from Supper Lovin’

    our-growing-edge-banner

    Read Full Post »


    KaleChips_first

    A few years ago we purchased a reasonably priced (read cheap) awning for our cocktail patio; I never loved the fabric, it was a pinkish/beige stripe that weathered into a more horrible pinkish colour over the years, but it was about 1/10th the price of one of those swanky awnings that you can order with custom fabric, so I compromised. It wasn’t bad enough that the colour sucked when it was new, it sucked even more over the years and the birds loved to bathe in the water that collected in the divot when it was closed and they also loved to peck little bugs that drowned. Sadly, their pecking caused many tears and eventually the awning looked so tattered and torn that we hadn’t unrolled it in two years!

    Old Awning

    This was the last time we unrolled the awning at my benchmark birthday party a couple of years ago. That’s my lovely SIL, Wendy. The colour just gets better and better.

    Fast forward to 2015 and my cousin and his lovely wife are coming for a visit from Europe in June. What is better than an actual deadline to get those nagging projects completed? So we are in fix it mode! The list is long.

    Last year, I priced replacing the fabric with an awning company and discovered that it’s still out of reach (I’d rather spend the cash on a vacation than an awning!) so I checked Youtube and found a really good video on how to remove and replace the awning fabric (click here for the video) and even though our awning is a different manufacturer, the basics are the same. So off I went to purchase 11 m or 12 yards of fabric! And specialty thread (nylon in case you are interested), a specialty sewing machine foot and of course heavy duty leather sewing machine needles! If you’re interested, I can post instructions on how to sew the awning, but it’s a cooking blog so I won’t bore you with it now.

    The worst part of sewing this type of project is finding the space to accommodate the enormous volume of fabric (3.2 m x 3.4 m or 125″ x 135″ finished size) so I ended up sewing it on the dining room table and pinning and cutting on the wood floors in our bedroom. Sewing on the dining room table and that I can see the awning from my kitchen window is my reason for using this post in Celia’s In My Kitchen series.

    PinningAwning

    I had to fold the fabric in half because that’s all the room I had!

    It didn’t take me long to make the awning but I had to wait 3 days to install it because it was raining and hailing (in April)! The installation went smoothly but you really do need two people to help feed the ends into the hardware. JT was great and we got it working in less than an hour! Now we wait for summer. Hopefully!

    Awning3

    This is the view from my kitchen window. I guess I could have opened the window and removed the screen for the pic.

    Awning1

    We chose a light grey fabric.

    Awning2

    The awning actually extends all the way to the far end of the deck but it was too windy and I didn’t want to risk issues.

    A couple of weekends ago, we had amazing weather and JT and I enjoyed lunch on the patio. I had a lovely bunch of fresh kale and I wanted to try something different so I baked Kale Chips! I know it’s been done to death, but these things were actually really tasty and if you’re looking for a healthy snack, I would suggest you try and bake some of these. I used Charles’ recipe which you can find here, the only thing I did differently is that I dressed the chips in some grated parmesan and sea salt. They didn’t last long.

    KaleChips3

    The olive oil gives them a gorgeous sheen and helps maintain the bright green colour.

    Kale Chips

    Ingredients:

    • 400 g Curly Kale
    • 2 tbsps Olive Oil
    • 1 tsp Sea Salt
    • 1/2 cup fine grated Parmesan Cheese

    Directions:

    1. Pre heat the oven to 93° C (200°F )(I used my convection (fan) setting).
    2. Wash kale and remove thick ribs. Cut into bite-sized pieces keeping in mind that they will shrink to about half their raw size.
    3. Drizzle olive oil over kale and toss to coat evenly. I gave them a quick, light massage.
    4. Spread on a cookie sheet so they are on one layer and not over lapping. Bake for 15-20 minutes tossing occasionally until crisp. Sprinkle cheese over hot kale and toss to coat.
    5. Serve immediately.

    KaleChips2

    They were crispy and very tasty.


    Read Full Post »

    VeganSpanakopita_4208

    In converting a recipe to Vegan, I generally try to keep in mind all the flavours AND the textures in the non-vegan version. When I decided to make Vegan Spanakopita I became very excited until I remembered that there was crumbled feta in my recipe. Crumbled feta is not Vegan, so I began to think…what oh what can I use to replace the flavour and the unique texture this delicious cheese brings to the table. Yes, I could have omitted it altogether, but then it wouldn’t be as delicious!  Some time ago, I’d made a note to marinate tofu in ‘feta’ flavours like lemon juice, apple cider vinegar, salt, oregano and olive oil…so I did a little experimentation and came up with this version. It’s actually pretty tasty on its own, but I needed it for this recipe so there won’t be marinated tofu on the buffet table, but this spanakopita more than makes up for it. I don’t think the non-vegans will mind this version. But there will be pulled pork and bacon wrapped dates just in case ;-)!

    Vegan Spanakopita

    A kitcheninspirations original recipe.

    Makes about 50, 6 cm (about 3 inch) triangles

    Ingredients:

    • 1 tbsp canola oil
    • 1 large sweet onion, sliced thinly
    • 5 cloves garlic ~20 g, finely minced
    • 500 g zucchini grated (about 2 medium-sized)
    • 300 g spinach
    • 3-4 tbsp finely chopped fresh dill
    • 2 tbsp chopped fresh oregano
    • 350 g marinated tofu, drained, roughly chopped (recipe below)
    • About 8-10 sheets phyllo
    • 1/4 cup canola oil

    Directions:

    1. Heat canola oil in a large dutch oven. Add the sliced onion and sweat it out a bit, add the garlic and cook for about a minute. Add the grated zucchini (click here for some clear steps on making this dish) and cook for 3-4 minutes. Add the spinach and cook until it has totally wilted.
    2. Remove from the heat and add the fresh dill, oregano and roughly chopped marinated tofu. Set into a fine sieve and allow to cool and drain.
    3. Once completely cool, prepare the phyllo sheets by cutting them into 3 cm or 2.5 inch strips and lightly spraying each one with canola oil. Use two strips per triangle. Place one heaping teaspoon of the cooled filling onto one end and start folding into a triangle. Brush or spray lightly all over with the canola oil.

      VeganSpanakopita_4196

      A heaping teaspoon of filling goes at the end.

      VeganSpanakopita_4197

      Begin folding into a triangle and continue until the length is used up.

      VeganSpanakopita_4198

      The nature of the folds covers in the filling very well.

      VeganSpanakopita_4200

      A tidy little triangle.

    4. Bake at 350°F for 12-14 minutes if saving for the freezer or 116-18 minutes to serve immediately.
    5. To reheat, place a single layer of the triangles onto a baking sheet and reheat in 300°F for 10 minutes or until golden.

    VeganSpanakopita_4209

    The oil makes the phyllo very crispy.

    Marinated Tofu

    Makes enough for one batch of Spanakopita (prepare 1-2 days ahead to allow tofu to absorb the marinade flavours)

    Ingredients:

    • 350 g extra firm tofu
    • 1/4 cup apple cider vinegar
    • 1/4 cup lemon juice
    • 1/4 cup water
    • 1/4 cup EVOO
    • 1 tbsp fresh oregano
    • 1 tbsp plus 1 tsp sea salt
    • 1/2 tsp freshly ground mixed peppercorns

    Directions:

    1. Place the drained tofu on a cutting board over a sink so it’s tilting a bit into the sink. Place another cutting board on top and a heavy cast iron pan. Leave for 30 minutes to drain.
    2. Meanwhile, combine the apple cider vinegar, lemon juice, water, EVOO, oregano, sea salt and peppercorns and mix well.
    3. Once drained, dry off the tofu and cut into 1 cm cubes. Place into a glass container and cover with the marinating liquid. Marinate in the refrigerator, shaking the jar intermittently over 1 to 2 days. Drain to use.

    Read Full Post »

    A surprisingly creamy dip

    A surprisingly creamy dip

    We’re hosting the company Christmas party (the company I write social media content for) and 1/4 of them are vegans and vegetarians! As usual, I really didn’t feel like making two different things so other than 2 fish and 3 meat dishes, everything else is going to be vegan! I’m even testing my skills with some pretty interesting desserts and VEGAN CHEESE! Stay tuned, I’m looking forward to learning to cook gourmet vegan. BTW, thank you to a long-time friend and colleague (and loyal reader) Michela, who offered some excellent suggestions ❤️.

    Did you know that purée-ing (with a stick blender) cooked red lentils become so incredibly creamy that it tastes like you’ve added cream or butter to it? It makes an incredible dip and it also could be used as a base for a gluten free, even vegan white sauce! I make a large batch and freeze in an ice cube tray for quick additions to ‘cream’ up a sauce! Recently, we had an incredible cauliflower-lentil ‘Alfredo’ sauce which was TDF! So good. Next time I make it I’ll be sure to jot the ingredients down and actually measure everything!

    A few years ago I won the runner-up prize for a photo contest from Roger Mooking (a celebrity chef here in Toronto), the prize was a Crock Pot with a mini heated dip pot. The crock pot croaked last year but the mini dip pot goes on. I don’t know about you, but I have never liked using this unattractive pot on my buffet table, so about a year or so ago I did some testing to see how hot it actually gets and was quite surprised that you could actually cook in it! The temperature gets to around 165F which would be enough to cook meat, but I wouldn’t suggest it. It is however, perfect to make a batch of beans or lentils for dip! I’ve been using it almost every week to make healthy bean or lentil dips. So if you have one sitting on a back shelf gathering dust, bring it out and put it to good use. Put it on before you go to work and when you get home you have a delicious dip or base for a creamy soup or sauce.

    Creamy Red Lentil Dip

    An original Kitcheninspirations recipe.

    Makes about 250 mL (1 cup) of dip

    Ingredients:

    • 1/2 c red lentils
    • 1 cup water or vegetable stock
    • 1/2 tsp cumin
    • 1/2 tsp coriander
    • 1/2 tsp sea salt
    • 1 tbsp dehydrated onion flakes
    • 1/2 tsp granulated garlic
    • 1-2 tbsp lemon juice
    • 1/2-1 tsp toasted sesame oil

    Directions:

    1. Add all ingredients except lemon juice and toasted sesame oil to a mini dip crock pot, stir and then cover.
    2. Plug it in (only way to turn it on) and cook for 3-4 hours or when lentils are very soft.
    3. Turn hot cooked lentils into a tall container. Purée using a stick blender until smooth and creamy adding lemon juice and toasted sesame oil to taste. Refrigerate until needed.

    I drizzled some toasted sesame oil over the top.

    I drizzled some toasted sesame oil over the top.

    The oven roasted tomatoes are incredibly sweet but still give this dip a piquant flavour.

    The oven roasted tomatoes are incredibly sweet but still give this dip a piquant flavour.

    RedLenilDipOvenRoastTomato_3984

    These little water crackers were the perfect accompaniment to this cream dip.

    Additional Flavours:

    • “Hummus”: to the recipe above, add additional finely chopped fresh garlic at the end as you purée to give it more of a hummus flavour.
    • Curry Dip: omit the lemon juice and toasted sesame oil and add 1/2 tsp curry powder with 2 tbsp coconut milk powder at the purée stage.
    • Oven dried tomato dip: Omit the cumin, coriander, lemon juice and sesame oil. Add to cooked lentils, 1 tbsp chopped oven (or sun dried) tomatoes plus 1 or 2 fresh basil leaves and purée until creamy and smooth.

    Notes:

    • Other lentils (like green or du puys) don’t turn out as creamy, I’ve tried them and seriously prefer red.
    • I use granulated garlic (not the same as garlic powder) and dehydrated onions in this recipe because we preferred the end taste over cooking fresh cloves and onions in the mini crock pot. For whatever reason, the mini crock gave the garlic a very unusual flavour.
    • To make a base for ‘cream’ sauce, omit everything but the lentils, water and salt. Purée when cooked, allow to cool and freeze in ice cube tray for future use.
    • Note on December 8: Lentils cook in far less time than the prescribed 3-4 hours, it’s just that I’ve left it on for that length and the result was what I wanted, totally mushy and easily puréed lentils. If you’re around and can unplug the little dip warmer when the lentils are first cooked, then be my guest.

    Read Full Post »

    Older Posts »

    %d bloggers like this: