Feeds:
Posts
Comments

Archive for the ‘Desserts’ Category

Let me begin this post by admitting that I have not had a serious Christmas baking-spree in quite a few years. People are watching their sugar intake, fat intake and intake in general and during the Christmas holidays, we tend to overeat so leaving sweets off the list seems to be a no-brainer. Plus there seems to be plenty of sweets around anyway. This year was going to be no different, I would bake a few things but not the 10-15 items I used to bake back in the day. 

When we were down in Arizona (don’t worry, it’ll all tie together in the end), we hosted quite a few dinner parties and I cooked a lot. But, in order not to have too many leftover pantry items, I decided that I wouldn’t bake sweets but these dinner parties still needed something for dessert. For one such occasion, I bought a Ghirardelli  Caramel Brownie Mix that turned out much better than I imagined, they actually tasted homemade! I can usually taste a chemical flavour in mixes but I have to admit, I haven’t purchased a mix in several decades so I had no idea how far they’ve come along. This mix was so yummy, I brought 2 packages back for a friend who isn’t a baker as a souvenir gift. Because I hadn’t done my marathon Christmas baking in so many years, I’d completely forgotten that my dear friend’s daughter i’s allergic to walnuts and…you guessed it, the mix had walnuts! What a bummer! I felt horrible that I’d forgotten her allergy; my usual Christmas baking had me focused on baking items without walnuts just for her! How could I have forgotten? I blame age, that’s my story and I’m sticking to it. So fast forward to Christmas 2022, I baked my friend’s daughter these brownies to make up for my foolish mistake. They are a bit more finicky than my regular brownies, but they have the best texture that is worth the extra step. The changes I made to the recipe are listed in the notes below.

You might think this is an outdated photo, with the Christmas tree in the background, but I have the little tree out all year long!

Best-ever Fudge Brownies

For the original recipe, please click here.

Makes 1 23 cm x 23 cm (9″ x 9″) pan

Ingredients:

  • 165 g sifted all-purpose flour

  • 5 g salt

  • 113 g unsalted butter

  • 118 g semi-sweet Belgian chocolate, coarsely chopped

  • 62 g Belgian milk chocolate, coarsely chopped

  • 200 g sugar, divided

  • 5 mL pure vanilla extract

  • 4 large eggs, room temperature

Directions:

  1. Preheat the oven to 350° F. Line a 23 cm square pan with parchment.
  2. Sift together the flour and salt, set aside.
  3. Microwave the butter and two chocolates for 15-second spurts on hi, stirring and carefully watching it to make sure the chocolate doesn’t seize. Add 100 g of the sugar and stir to combine. Microwave for 1 minute on power 4, stir often, and then microwave for two 15-second spurts on high, stirring frequently. Mix in the vanilla and set aside.
  4. Combine the second 100 g of sugar with the eggs in the small bowl of your stand mixer and whisk well by hand. Add half of the egg mixture to the chocolate mixture slowly, making sure you don’t scramble the eggs with the heat of the chocolate. Set aside.
  5. Set the remaining egg mixture bowl onto your stand mixer and mix on high for 3 minutes or until doubled in volume and thickened. Gently fold this mixture into the chocolate mixture and when almost combined, add the sifted flour and salt and fold until combined.
  6. Pour into the prepared pan and bake in the centre of the oven for 23-27 minutes (the centre should just be set). Allow to cool completely and cut into squares.

Notes:

  • The recipe has been changed to metric and some steps have been converted to use the microwave instead of a bain-marie.
  • I used a metal 23 cm x 23 cm pan and my baking instructions have been adjusted to suit my pan and oven.
  • The original recipe used bittersweet chocolate and semi-sweet chocolate but I only had semi-sweet and milk chocolate and it turned out very well.


Read Full Post »

Back in October, we were seeing friends more than usual as we were going to spend the month of November in Arizona; there is always a feeling of urgency to see our peeps just before we go away for a significant period of time. For one such get-together, I finally baked a Basque Cheesecake! I say finally because it’s been on my list for years! I chose the Serious Eats recipe because it was in grams and easy to half as I only needed about half of the size.

Basque Cheesecake

For the original recipe, please click here. This recipe makes one 23 cm (8 inch) cheese cake.

Ingredients:

  • 450 g full-fat cream cheese, brought to 21°C
  • 135 g and 15g sugar, divided
  • 137.5 g egg (~3 whole eggs)
  • 15 g egg yolk (~1 yolk)
  • 115 g heavy cream
  • 10 g all-purpose flour
  • 5 g vanilla extract
  • 1.5 g salt
  • 2 g lemon zest, finely grated

Directions:

  1. Prep the pan by lining it with 2 square sheets of parchment paper (see notes).
  2. In the bowl of your stand mixer, combine the cream cheese and 135 g of sugar and beat with the paddle attachment, scraping the sides frequently, until there are no more lumps and the sugar has dissolved (3-4 minutes).
  3. Add the eggs one at a time, beating for about 10 second on each addition, scraping the sides of the bowl between additions.
  4. Add the remaining ingredients and beat until smooth.
  5. Pour the batter into the prepared parchment-lined pan and refrigerate for 30 minutes to one hour.
  6. Pre-heat the oven to 425° F with the oven rack in the middle.
  7. Remove the cake pan from the refrigerator and set on a rimmed baking sheet. Sprinkle the remaining 15 g of sugar over the top of the pan and bake until the cheesecake is lightly browned on top.
  8. Increase the temperature to 450° and bake until the top is darker brown without burning (see notes). The cheesecake will be done when centre registers between 150° F and 155° F (65.5° C to 68° C). Or when the centre only jiggles a little bit.
  9. Allow the cheesecake to cool at room temperature for at least 4 hours. To remove from the pan, use the overhang of the parchment to pull the cheesecake straight out and set on an even surface, remove the parchment carefully, prying it away gently or with a small knife. Serve at room temperature or store in the fridge for no more than 3 days, covered to avoid it drying out.

This is a super-rich cheesecake that really doesn’t need any accompaniments.

Notes:

  • The easiest way to line a round pan with parchment is to thoroughly wet the parchment and wring it out. Now press it into the round pan, leaving the excess to overlap the rim of the pan. Set it in a warm oven to dry out (doesn’t have to be 100% dry, just dry enough so that the batter doesn’t stick to it). Cool completely. If you have two same-sized pans, you can insert the second one into the parchment-lined pan to push the parchment into the edges.
  • Your baking temperature may need to be reduced, on my first attempt, the timing in the original recipe was off because and I burnt the cheesecake. I reduced the temperatures to suit my oven.
  • You really don’t need a spring-form pan to make this cake, the parchment does all the work.

Read Full Post »

Canadian Thanksgiving was October 10th, about a month earlier than American Thanksgiving. We do everything pretty much the same as Americans, except that we are not as much into American football. Thanksgiving to Canadians means family getting together and enjoying the company, the food, and the gorgeous fall colours, not so much sports. This year was a quiet Thanksgiving because we usually celebrate with my cousins’ family but my cousin and her hubby were in Europe so we only had the adult kiddos over for dinner. We love cranberry like the next guy but I always seem to have a tonne left over as I did this year. So I decided to reinvent them into Liz’s dreamy Crumble Bars. JT is in charge of making the cranberry sauce and he usually only adds about half the sugar on the package recipe but since the kids were coming over, I asked him to make it a bit sweeter so he used 3/4 of the recommended sugar. The sauce was still reasonably tart which made it a perfect topping for these sweet pastry bars. I dare say, one of my favourites. So if you have cranberry sauce left over, give these a try, you won’t be disappointed.

Cranberry Crumble Bars

Makes one 22 cm x 33 cm (9″ x 13″) pan

Ingredients:

  • 250 g unsalted butter, at room temperature
  • 100 g sugar
  • 100 g powdered sugar
  • 5 mL vanilla
  • 2.5 mL almond extract
  • 280 g flour
  • 8 g salt
  • 150 mL homemade cranberry sauce

Directions:

  1. Preheat the oven to 350° F. Prepare a 23″ x 33″ cm (9″ x 13″) pan by lining with parchment.
  2. Cream the butter with the sugars until fluffy. Beat in the vanilla and the almond extract.
  3. Beat in the flour and salt on low speed until entirely incorporated.
  4. Portion about 2/3 of the flour mixture into the bottom of the pan and press evenly to all sides. Bake for 20 minutes. Refrigerate the remaining pastry.
  5. After you have baked the base pastry, pour the cranberry jam onto the base and spread evenly with an offset spatula. Crumble the remaining pastry onto the top, being careful not to cover it entirely.
  6. Bake for an additional 25-30 minutes or until the topping is golden.
  7. Allow to cool completely and cut into squares or bars.


Notes:

  • Jellied canned cranberry sauce may be too runny to work in this recipe, you definitely want sauce with fruit in it.

Read Full Post »

    This recipe has been in the family for years. My brother gave me the original cookbook in the 1970’s inscribed, “This is for me, in the long run.” It’s been made dozens and dozens of times, often around Christmas for our goody trays. This time I made them around thanksgiving because we were having my cousin’s adult kids for dinner because their parents were galavanting in Europe and they are not big pumpkin fans! Galavanting may not be right, I might be a tiny bit jealous!

    Chewy Peanut Butter Squares Revisited

    Makes one pan 33 cm x 23 cm x 5 cm (13″ x 9″ x 2″) baking pan

    Ingredients:

    • 140 g all-purpose flour

    • 6 g baking powder

    • 5 g salt

    • 148 g peanut butter, smooth or chunky

    • 113 g butter

    • 330 g firmly packed brown sugar

    • 2 eggs

    • 15 mL vanilla

    • 140 g lightly salted peanuts

    • 1 cup icing sugar with enough drops of cold water to make a liquidy icing (but one that will set well)

    • Directions:

      1. Preheat the oven to 350°F.

      2. Line a 33 cm x 23 cm x 5 cm (13″ x 9″ x 2″) baking pan with parchment

      3. Combine flour, baking powder, and salt; set aside.

      4. Heat the peanut butter and butter together until melted.

      5. Stir in sugar, eggs and vanilla until well blended.

      6. Add the flour mixture and stir just until combined. Fold in the extra peanuts.

      7. Spread the batter into a prepared pan and bake 25 to 30 minutes or until a tester comes out clean.

      8. Cool on a wire rack.

      9. When cool, drizzle the melted chocolate over the top. Working quickly, drizzle swirls of the white icing in a crazy pattern. Allow the topping to set. Cut into 1-2″ square inch squares or rectangles. 

      Chewy, peanutty deliciousness


    Read Full Post »

    A friend brought us his homemade raspberry jam a few weeks ago and because we don’t eat a lot of jam, I thought I’d make it into these gorgeous squares. The recipe originated from my friend Liz but I just swapped out the caramel for the jam and it worked out beautifully. I made this batch for some friends visiting from Arizona.

    Raspberry Crumble Squares

    Makes one 22 cm x 33 cm (9″ x 13″) pan

    Ingredients:

    • 250 g unsalted butter, at room temperature
    • 100 g sugar
    • 100 g powdered sugar
    • 5 mL vanilla
    • 2.5 mL almond extract
    • 280 g flour
    • 8 g salt
    • 150 mL seedless raspberry jam

    Directions:

    1. Preheat the oven to 359° F. Prepare a 23″ x 33″ cm (9″ x 13″) pan by lining with parchment.
    2. Cream the butter with the sugars until fluffy. Beat in the vanilla and the almond extract.
    3. Beat in the flour and salt on low speed until entirely incorporated.
    4. Portion about 2/3 of the flour mixture into the bottom of the pan and press evenly to all sides. Bake for 20 minutes. Refrigerate the remaining pastry.
    5. After you have baked the base pastry, pour the raspberry jam onto the base and spread evenly with an offset spatula. Crumble the remaining pastry onto the top, being careful not to cover it entirely.
    6. Bake for an additional 25-30 minutes or until the topping is golden.
    7. Allow to cool completely and cut into squares or bars.

    They look like jewels.

    Read Full Post »

    Although Tart Tatin recipes have been featured on this blog a few times (here, here and here), I figured, why not again with different fruit? This time we’re baking Pear Tart Tatin! Dreamy caramel, soft pears and crispy pastry, what more can you want? I borrowed this recipe from Martha Stewart with some minor adjustments. I usually worry that the fruit lets out too much liquid and it won’t be super caramel-y but I needn’t have worried on this one, the pears cook on the stove and finish in the oven. It’s a bit of standing around but you can make it in advance and just serve it at room temperature. 

    This tart was perfectly caramelized. What a wonderful dessert.

    Pear Tart Tatin

    Makes 1 tart about 30 cm (12 inches) in diameter

    Ingredients:

    • All-purpose flour, for rolling
    • 1 sheet frozen puff pastry (from a 450 g package), thawed in the refrigerator
    • 100 g sugar
    • 8 mL cider vinegar
    • 30 mL water
    • 30 g unsalted butter
    • Pinch of salt
    • 4 firm, ripe pears, each peeled, halved, cored, and cut into 6 wedges
    • Pinch of cardamon

    Directions:

    1. Lightly dust your work surface with flour. Roll out the puff pastry to a 30 cm square and cut into a circle. Refrigerate until required.
    2. In a 30 cm cast iron skillet, combine the sugar, vinegar and water and heat on medium-low heat until golden (about 15 minutes). Stir in the butter and the salt. Add the pears in a decorative pattern and cook in the caramel uncovered for 30-40 minutes (until pears are firm but soft). Sprinkle the cardamon over the pears.
    3. Meanwhile, pre-heat the oven to 375° F. When the pears are ready, add the prepared puff pastry, pushing down the edges to form a “fence”.
    4. Bake covered, for 15 minutes, then remove the lid and bake an additional 15 minutes until the pastry is golden and crispy.
    5. Cool in the pan for 15 minutes, then invert onto a decorative plate.

    Cooking the pears for an extended period of time made the caramelization absolutely perfect.

    Notes:

    • My pears were rather firm so I extended the stove-top-time about 15-20 minutes from Martha’s time. This also allowed the liquid to evaporate so that the sauce is pure, dreamy caramel.
    • I prefer to use all-butter puff pastry.

    Read Full Post »

    We’re coming up to our last few weeks in Spain and I’m thinking about how to use up all the groceries we bought. I probably shouldn’t have bought a pack of sugar (about 350 g) but it was only about €0.50 so I’m not going to kill myself but I will give an honest go of using some of it. Peanut butter is not a common ingredient in Spain (most likely all of Europe) and is therefore expensive (€6.00 for a 500 g jar) but JT loves the stuff, so we splurged. We’ll be away for about 9 days of the last 18 days in Spain so I wanted to start on my pantry cleanup sooner than later.

    I didn’t want to buy another package of butter so I needed a recipe that did not use it. Fortunately, this one is an old favourite, slightly modified to incorporate pantry ingredients. The 30 g portions make a decent size cookie but not large by any stretch of the imagination. The butter is not beaten into the peanut butter (mainly because I didn’t have a mixer) just mixed in well, without too much exertion which makes it an easy cookie recipe. I’ll be definitely keeping this one in my repertoire.

    Delicious cookies with just the right amount of chewiness.

    Pantry Clean Out Peanut Butter Cookies

    A KitchenInspirations Original Recipe

    Makes 19 cookies about 30 g each

    Ingredients:

    • 250 g crunchy peanut butter (natural, no salt or sugar added)
    • 2 eggs
    • 80 g flour
    • 165 g sugar
    • 3 g salt
    • 50 dark chocolate with sea salt

    Directions:

    1. Preheat the oven to 350° F.
    2. Combine the peanut butter and eggs and mix well.
    3. Combine the flour, sugar and salt and mix well.
    4. Add the dry ingredients to the wet and mix well.
    5. Portion out 30 g balls and flatten slightly with your palm. Dot the chocolate pieces onto each one evenly.
    6. Bake for 8-12 minutes at 350° F.

    Read Full Post »

    I haven’t made Tiramisu in ages and when I saw my friend Lauraine’s Beeramisu pop up on her socials I was sold! Plus I needed a dessert to bring with us to a dinner party at a friend’s place. Our friends are not big coffee lovers but they love beer so I knew this would be perfect immediately! I didn’t have a chocolate porter but I did have some Vanilla Porter that I knew would work. None of us like a super-rich or sweet dessert so I cut some sugar and eggs down a bit and I still got two desserts out of this recipe. Thank you, Lorraine, for the recipe and inspiration.

    Vanilla Porter Beer-amisu

    For the original recipe, please click here.

    This recipe makes one loaf pan about 9 cm wide x 20 cm long x 6 cm tall AND an 18 cm diametre round pan.

    Ingredients:

    • 3 egg yolks
    • 75 g sugar
    • 360 g mascarpone, placed at room temperature for an hour
    • 400 mL whipping cream
    • 5 mL vanilla 
    • 150 mL vanilla porter or stout beer, chilled
    • 28 sponge fingers (around 230g/8.1ozs)
    • 1-2 tablespoons cocoa powder

    Directions:

    • Combine the egg yolks with the sugar in a double boiler and whisk until the sugar has melted and the eggs have thickened about 10 minutes. Allow to completely cool.
    • Meanwhile, whip the cream and vanilla until soft peaks form, not stiff peaks
    • When the egg mixture has cooled, whisk the mascarpone into the egg mixture until smooth and creamy. Fold in the whipped cream.
    • Prepare your pans by lining them with plastic wrap. Dip each sponge finger into the porter quickly (you don’t want it soaked). 
    • Place a smooth layer of the mascarpone on the bottom of each pan then begin lining the bottom with the dipped sponge fingers until the bottom layer has been filled. Add another layer of the mascarpone and repeat with the sponge fingers. I got two layers in each vessel. Pull up the plastic wrap and fold it over so the Beer-amisu doesn’t dry out in the fridge. Allow to rest in the fridge for 2 days.
    • When ready to serve, open the plastic wrap and tip the container onto a serving dish so that the top is the bottom and the bottom is the top. Sprinkle with cocoa powder. Serve in slices.

    This is the unromantic shot in the pans. I’m going to freeze the round one for future use.

    Read Full Post »

    I know I can always count on my friend, Liz, over at That Skinny Chick Can Bake and I can tell you that this recipe did not disappoint! I must admit that I did find the Biscoff a wee bit odd (I can’t imagine smearing it on toast) but it did give the cookies a fabulous background flavour. I am sure glad that I initiated my freeze the cookies raw and bake as required to avoid overindulging because these cookies are very easy to overindulge. I had to make a couple of small alterations as well as turning the recipe into metric because that is how I like to bake. Thank you, Liz, for another wonderful addition to my cookie repertoire!

    Liz’s Biscoff Cookies

    For Liz’s original recipe, please click here.

    Makes about 60 cookies, depending on size.

    Ingredients: 

    • 400 g flour
    • 10 g baking soda
    • 5 g baking powder
    • 3 g salt
    • 215 g cup sugar
    • 115 g brown sugar
    • 300 g Biscoff Spread (crunchy or creamy)
    • 113 g shortening
    • 113 g butter
    • 2 large eggs
    • 1 teaspoon pure vanilla extract
    • 200 g Skor bits
    • 200 g dark Chocolate Chips

    Directions:

    1. Preheat oven to 350º. Line baking sheets with parchment.
    2. Using a mixer, combine sugar, brown sugar, Biscoff, shortening, and butter and mix until well combined. Add egg and vanilla and beat until well combined. 
    3. Mix in baking soda, baking powder, then salt. Mix in flour just till incorporated, then stir in toffee chunks.
    4. Roll about 1 1/2-2 tablespoons of dough into balls, then place on prepared pans, about 2 inches apart. Bake 12 to 14 minutes or until golden. Allow to cool completely on wire cooling racks.

    Notes:

    • These cookies freeze very well. Freeze before baking on a large sheet and then put them into a ziplock bag. Bake from frozen for 10 minutes in a preheated 350° F oven..

    Read Full Post »

    Prize Butter Tarts

    This is the second year in a row that we have’t escaped to Arizona (you know why). But fortunately, November wasn’t too bad this year, meaning we had a lot of sunny days. I can definitely live with that. December has been quite the opposite, mostly we have grey, dull, dreary days. Some days with snow. These are the type of days you don’t even want to get out of bed. At least, I don’t.  But eventually, you have to shop for groceries and you drag yourself out of bed. 

    On one such occasion, I found myself in the baked goods aisle at our local No Frills an aisle I do not frequent. I picked up a packet of ordinary grocery store butter tarts. Why? Why? It was the lack of sunlight, that’s my story and I’m sticking to it. I snapped out of it and decided to come home and bake a batch. This Five Roses recipe has been my goto recipe for 40 years. 

    A delicious Canadian tradition.

    Prize Butter Tarts

    Original recipe is from page 135 of Five Roses, A Guide to Good Cooking, 25th Edition (Revised 1983), Published by Lake of the Wood Mills Ltd.

    Makes 12 large butter tarts

    Ingredients:

    • 200 g brown sugar
    • 100 mL melted butter
    • 1 egg, beaten
    • 30 mL milk
    • 15 mL vanilla
    • 50 g walnut pieces
    • 12 large tart pastry (muffin cup size)

    Directions:

    1. Preheat the oven to 375° F. Prepare a baking sheet by lining it with parchment (in case the filling overflows).
    2. Add everything but the walnuts and the pastry to the bowl of a food processor. Process until well combined.
    3. Fill each tart with a few of the walnut pieces and add about 15 mL of the tart filling to each tart pastry, filling only about 2/3 full (these will bubble up during baking quite a bit). Bake for 20 minutes or until pastry is golden.
    4. Allow to cool completely before serving.

    Read Full Post »

    I saw this recipe on Celia’s Instagram account and was instantly curious. I have an old blondie recipe that is completely different so I was intrigued by Celia’s recipe that creamed the butter instead of melting it, I wondered what kind of textural differences are there? To my absolute delight, I loved Celia’s recipe, it makes more of a fudgy cookie bar than a crispy, chewy blondie as my ancient recipe does but I loved the addition of the chocolate chips. Even though there is an entire cup of brown sugar, it is not as sickly sweet as my recipe is which really surprised me. Although this recipe takes a bit of planning (bringing the butter to room temperature), it is worth it. It makes a nice treat on a chilly winter’s day.

    Butterscotch Blondies

    For the original recipe, please click here.

    Makes one 23 cm x 23 cm (9 inch x 9 inch) pan

    Ingredients:

    • 300 g AP) flour
    • 5 g baking soda
    • pinch of salt
    • 250 g unsalted butter, room temperature
    • 215 g brown sugar
    • 1 large egg
    • 125 mL milk (I used hazelnut almond milk, because I had it)
    • 10 mL pure vanilla extract
    • 360 g mixed chocolate chips (I use Belgium dark and milk)

    Directions:

    1. Preheat the oven to 300° F.  Prepare a 23 cm x 23 cm (9 inch x 9 inch) pan by lining with parchment paper.
    2. Combine the flour, baking soda and salt, set aside.
    3. Cream the butter and brown sugar until light and creamy then beat in the egg, milk and vanilla.
    4. Mix in the flour and then fold in the chocolate chips. This makes a rather stiff batter.
    5. Turn into the prepared pan and spread evenly to the corners and sides with a stiff spatula.
    6. Bake for 30-35 minutes or until a wooden toothpick comes out clean.
    7. When completely cooled, cut into desired bars or squares with a clean, sharp knife.

    Read Full Post »

    Plum Cake

    I was laying in bed one morning, waiting for the alarm to come on, looking through all the events of the day on my iPhone when my dear friend Barb (Profiteroles and Ponytails, blog on hiatus) text me this plum cake recipe. She had made it with peaches and was quite impressed and thought I might like it too. I really appreciate recommendations like this because as it happened, I was on the lookout for a dessert for friends coming for a patio dinner that Saturday, perfect timing! It turns out, the recipe is excellent with plums. They totally caramelized and sweetened up, it was a hug transformation as the raw plums were quite tart. I converted the recipe to metric measures but you can find the original imperical measures here.

    The recipe has 200 grams of sugar which seems like a lot, but our plums were quite tart so they really helped balance the large amount of sugar. 

    Truth be told, I forgot to take a photo until it was too late. Guests took half home.

    Plum Cake

    Makes 1 23 cm cake (9 inch)

    Ingredients:

    • 145 g unsalted butter, at room temperature
    • 200 g granulated sugar
    • 2 eggs, at room temperature
    • 125 mL whole milk, at room temperature
    • 5 mL vanilla extract
    • 60 g almond flour
    • 3 g lemon zest
    • 170 g all-purpose flour
    • 1 teaspoon baking powder
    • 2 g salt
    • 8-10 plums, cut in half

    Ingredients for the topping:

    • 30 g granulated sugar
    • 3 g cinnamon
    • 30 g unsalted butter, cut into 0.5 cm cubes

    Directions:

    1. Preheat your oven to 375° F. Prepare a 23 cm (9 inch) springform pan by buttering all the sides and bottom, add a circle of parchment to the bottom.
    2. Combine the butter, sugar, eggs, milk, vanilla extract, almond flour and lemon zest in the large bowl of your food processor. Process until smooth. 
    3. Sift the flour, baking powder and salt and add to the smooth batter and process only until combined. 
    4. Pour the batter into the prepared pan and spread evenly in the pan. Add the plums, cut-side up, pressing down slightly, in a circular pattern until the pan is filled with the plums.
    5. Bake for 45 minutes. Meanwhile, combine the sugar and cinnamon and mix well.
    6. At 45 minutes, sprinkle the sugar mixture over the cake, making sure to get some onto each plum. Dot with the butter. Return to the oven and continue to bake for an additional 20 minutes or until a toothpick comes our clean. Allow to cool completely in the pan.
    7. To remove from the pan, loosen the sides with a sharp knife and spring the cake from the pan. Serve at room temperature.

    Notes:

    • I added the lemon zest. Also the original recipe used some whole wheat flour which I didn’t have. 
    • The plums release a lot of liquid so my baking took a lot longer than expected, keep testing with the toothpick for doneness. The timing above is what the recipe called for, I baked my cake for an additional 40 minutes after I added the topping.


    Read Full Post »

    I posted this recipe about 9 years ago so I felt it was time for an update and repost. Lemony desserts are a favourite here so whenever I have an extra lemon or two rolling around the kitchen, a lemony dessert makes an appearance.

    Even though these squares are two layers, they come together quickly. The shortbread crust is tender and the coconutty custard topping is lemony and chewy. One could say they’re a match made in heaven!

    Chewy Lemon Squares with Coconut

    From Company’s Coming Squares by Jean Pare.

    Makes 1 pan 23 cm x 23 cm (9×9 inch)

    Ingredients, base:

    • 200 g all purpose flour
    • 50 g granulated sugar
    • 114 g butter, cold

    Directions, base:

    1. Preheat the oven to 350° F.
    2. Crumble flour, sugar and butter until mealy (you can save time and pulse this in a food processor, metal blades)
    3. Press into ungreased 23 cm x 23 cm (9×9 inch) pan. Bake for 20 minutes.

    Ingredients, topping:

    • 2 eggs
    • 60 mL lemon juice, freshly squeezed
    • 200 g granulated sugar
    • 20 g all purpose flour
    • 2 g baking powder
    • 75 g flaked, unsweetened coconut
    • 2 g salt
    • 5 mL lemon essence

    Directions, topping:

    1. Beat eggs slightly. Stir in the rest of the ingredients.
    2. Spread over par-baked shortbread base. Bake at 350° F for additional 30 minutes, until set in the centre and golden in colour.
    3. Cool and cut into squares, or bars.

    The carmelized coconut on the top makes it moreishly chewy where the end pieces with more edges are coveted!

    Read Full Post »

    Loaded Double Belgian Chocolate Cookies

    Makes about 40 cookies using a 4.5 cm ice cream scoop

    Ingredients:

    • 227 g unsalted butter at room temperature
    • 200 g brown sugar
    • 100 g granulated sugar
    • 2 large eggs
    • 10 mL pure vanilla extract
    • 360 g all-purpose flour
    • 1 teaspoon baking soda
    • ½ tsp salt
    • 150 g semi-sweet chocolate, chopped into chunks (chocolate chips work too)
    • 150 g milk chocolate chips
    • 50 g Skore bits
    • 100 g of dried, unsweetened cranberries or dried cherries

    Directions:

    1. Cream the butter and the sugars together until light and fluffy. Add the eggs one at a time until well incorporated, add the vanilla.
    2. Sift the flour, baking soda and salt together and add to the butter mixture to form a batter.
    3. Fold in the inclusions (reserving a small amount to add after the cookies come out of the oven for presentation, if desired).
    4. Bake in a pre-heated 350° F oven for 12-15 minutes or until the cookies are slightly golden at the bottom.
    5. Add the remaining inclusions, if desired and allow to cool completely on a cooling rack.

    Notes:

    • I used a 4.5 cm releasing ice cream scoop, if you use the slightly smaller one, you will likely get about 60 cookies.
    • To help with portion control, I generally freeze the raw batter in scoops on a cookie sheet and bake as needed, 1 to 2 at a time (it drives JT crazy but he is grateful for the portion control).

    Read Full Post »

    At the beginning of December, we had close friends come over for a lunch outside, it was still pretty warm with the heater and electric blankets plus we lucked into a super warm December afternoon. JT made his famous Bœuf Bourguignon and I made these Low Carb Icy Squares; they literally melt in your mouth. My friend recently lost 50 lbs on a keto diet and she wanted a little treat but didn’t want to overindulge and these fit the bill perfectly.

    The paper cups are necessary because without them these little flavour bombs will melt all over your hands

    Low Carb Icy Squares

    For the original recipe, please click here.

    Makes 36 little squares (each square is about 5 grams of net carbs)

    Ingredients:

    • 480 ml heavy whipping cream
    • 1 tsp vanilla extract
    • 90 g butter
    • 1 tbsp espresso powder
    • 2 tbsp erythritol
    • 90 g dark chocolate with a minimum of 70% cocoa solids, chopped
    • 25 g milk chocolate, chopped
    • Gold sea salt

    Directions:

    1. Boil the whipping cream and vanilla in a heavy-bottomed saucepan for one minute and then reduce the temperature to a simmer until the cream is reduced to about half of the amount (about 20-30 minutes). Stir occasionally.
    2. Reduce the heat even further and add the espresso powder, erythritol and butter and stir until smooth (make sure the erythritol melts completely).
    3. Place both chocolates into a bowl and pour the reduced cream over it and stir until melted.
    4. Pour the chocolate cream into a parchment-lined 20 cm square (8 inch square) baking pan (squared-off sides is preferred) and allow to cool in the refrigerator for a few hours. When ready to serve, sprinkle with gold sea salt and cut into 36 equal squares. Serve in tiny paper muffin cups.
    5. Store in the refrigerator in an air-tight container for 2-3 weeks.

    Notes:

    • The original recipe did not call for the erythritol but because I added the espresso powder, it made it a bit bitter so I had to add it along with the milk chocolate, you could try omitting them both for a  2 g net carb dessert.
    • The better quality ingredients you use, the better the taste and in this recipe, it is worth it to splurge.

    Read Full Post »

    Way back in November, 2019, I made a version of this cake in Arizona. It seems a life-time ago. We don’t know when we will be able to travel again so it’s nice to have some food memories to be nostalgic about. I made this for an outdoor brunch last July for a gluten-intolerant friend.

    Gluten-Free Reduced-Sugar Orange Olive Oil Cake

    Makes one 23 cm (9 inch) cake

    Please click here for the original recipe

    Ingredients:

    • 2 eggs, room temperature
    • 100 g coconut sugar, divided
    • 80 mL EVOO
    • 5 mL vanilla
    • Zest of 2 oranges
    • Juice of 2 oranges, divided
    • 150 g all-purpose gluten-free flour
    • 1 tsp baking powder
    • 1/2 tsp baking soda
    • 1/2 tsp salt
    • Icing sugar for dusting

    Directions:

    1. Preheat the oven to 350° F
    2. Spray a 23 cm pan with non-stick spray and line bottom with parchment paper.
    3. Combine the eggs and 95 g coconut sugar and beat until light, fluffy and smooth.
    4. Slowly drizzle in the olive oil and vanilla while beating.
    5. Add all of the zest and 45 mL of the freshly squeezed orange juice and beat until well combined.
    6. In a separate bowl combine the gluten free flour, baking powder, baking soda and salt and mix well.
    7. Add the flour mixture to the egg mixture and beat only until combined.
    8. Pour into the prepared 23 cm pan and bake for 25-30 minutes or until toothpick tests clean. Allow to cool.
    9. Meanwhile, combine the remaining juice and sugar and bring to a boil until the sugar has melted into the juice. Cool and add the Grand Marnier.
    10. Turn out the cooled cake onto a decorative plate and slowly spoon the orange juice mixture onto the cake allowing it to be absorbed.
    11. Decorate with sprinkled icing sugar just before serving.

    The lovely syrup makes this cake lusciously moist.

    Read Full Post »

    I am not a huge pumpkin fan. There I said it. I was around 19 years old when I first tried pumpkin pie and I just never got into it. Don’t get me started on the pumpkin spice craze! So pumpkin type desserts are never high on my list during the holidays. We had our Thanksgiving on October 12 and I wanted a dessert I could make in smaller portions (because, let’s not kid ourselves, stretchy pants can only stretch so far!) so I made this spice cake in very shallow muffin cups. If someone was still hungry, they could have two, and believe it or not, they did!

    Our awning and natural gas heater have had some good use as the temperatures become more fall-like. Unfortunately, the combination of the heat and sun has dried out the awning; at one point after a good rainfall, as we were pushing the water off the awning, a fist went through it. I was able to glue the small hole together with a glue gun, but now we were aware that the awning is precariously brittle. Too bad that fat raccoon never got the memo. Sometime during the night, an 18 kg (40 lb) beast was climbing across said awning and unfortunately fell through it, causing a 50 cm (20 inches) hole. Poor thing must have broken its neck on the fall because I, unfortunately, found him dead as a doornail the next morning. We’ve never had to dispose of any dead animals before so I called the information number of the city. After a 20 minute conversation, which resulted with NO HELP what-so-ever, we decided to discard him ourselves (the city was backlogged 20 days for pickup so they suggested we dispose of him in our next garbage collection which happened to be 2 weeks from the date!) I found a company online who came out and did the dirty deed for us. JT was perfectly willing to do it, but I didn’t want him to, plus we had nowhere to dump the guy. UGH! A good bleach washing of the deck and 24 hours drying time in the sun, and no one was the wiser.

    We lucked out for weather that weekend, as the temperatures progressively became warmer and warmer and Saturday October 12 turned out to be around 25° C (77° F)! The evening cooled off a bit, but our natural gas heater did the trick to keep us warm. We had the dinner with two, socially distanced friends and the evening was wonderful. I was so relieved it was warm enough for an outdoor dinner because our COVID numbers are on the rise again and I’m just not comfortable entertaining indoors.

    These cakes are a remake from a blog post from 2010.

    Ginger Spice Cakes Revisted

    Makes about 24 mini spice cakes (60 mL (1/4 cup) muffin pans or 12 standard muffin-sized spice cakes

    For the original recipe, please click here

    Ingredients:

    • 75 g unsalted butter, room temperature, plus more for pan
    • 200 g all-purpose flour, plus more for pan
    • 1 teaspoon baking soda
    • 160 mL boiling water
    • 1 teaspoon baking powder
    • 1 teaspoon ground ginger
    • 3/4 teaspoon ground cinnamon
    • 1/4 teaspoon ground cloves
    • 1/4 teaspoon ground nutmeg
    • 1/4 teaspoon salt
    • 85 g packed dark-brown sugar
    • 1 large egg (if halving the recipe, use a small egg)
    • 160 mL un-sulfured molasses
    • 1 1/2 teaspoons finely grated peeled fresh ginger
    • Crystallized ginger, thinly sliced lengthwise, for garnish
    • Chocolate Ganache

    Directions:

    1. Preheat the oven to 350°F. Prepare a 60 mL (1/4 cup) muffin pan by generously buttering and flouring it*, tapping out excess flour, set aside.
    2. Carefully stir together the baking soda and boiling water (this will bubble up, so be careful), set aside to cool.
    3. In a medium bowl, sift together the flour, baking powder, ground ginger, cinnamon, cloves, nutmeg, and salt, set aside.
    4. In the bowl of an electric mixer fitted with the paddle attachment, beat the butter and brown sugar on medium speed until light and fluffy, 2 to 3 minutes. Add the egg, and beat until combined. Add the molasses, fresh ginger, and reserved baking soda mixture; beat until combined. (The batter will look curdled but will come together once the flour is added.) Add the flour mixture, and beat until well combined.
    5. Divide batter evenly among prepared muffin cups, filling each about halfway. Bake, rotating pan halfway through until a cake tester inserted in the centre of a cake comes out clean, about 20-25 minutes. Transfer pan to a wire rack to cool for 15 minutes. Invert cakes onto rack to cool completely. Place a piece of parchment under the wire rack while cooling
    6. Spoon about 1 tablespoon of Chocolate Ganache over each cake, allowing some drip down the sides. Garnish with a small chunk of crystallized ginger. Cakes may refrigerated, in air-tight containers, for up to 3 days; we suggest you bring them to room temperature before serving.

    Silicon Muffin Cups 60 mL or 1/4 cup size.

    Notes:

    • You may wish to save time and just spray the muffin pans with non-stick spray but I warn you, half of your cakes will stick to the pan. Buttering and flouring is the only way to go.
    • These have a very rich molasses flavour, which we like but some will find it too strong.
    • I made a semi-sweet chocolate ganache for these cakes and it was just the right foil for the rich, sticky cake.

    Read Full Post »

    For special occasion desserts, I like to pop over to my long-time blogging-friend Liz, Skinny Chick Can Bake. Liz has the most beautifully presented desserts that I have seen from a home cook. Most of Liz’s recipes are also unfamiliar to me as I grew up in a European household. A dear friend was turning 70 in September and I wanted to make a special dessert to celebrate the occasion and this beauty did not disappoint. It has a lovely banana flavour but the pineapple isn’t flavour-forward other than providing some added moisture. It reminded me of banana bread but it was much moister than the standard quickbread. And that cream cheese frosting is one that dreams are made of.

    Hummingbird Cake

    For the original recipe, please click here.

    Makes one 20 cm cake, about 16 servings

    Ingredients for the cake:

    • 400 g flour
    • 300 g sugar
    • 6 g cinnamon
    • 6 g salt
    • 5 baking soda
    • 3 eggs, lightly beaten
    • 375 mL vegetable oil
    • 7 vanilla extract
    • 540 g mashed bananas (use ripe bananas)
    • 228 g crushed pineapple, drained (about 1/2 a container)
    • 120 g chopped pecans, toasted for about 5 minutes at 350 degrees

    Ingredients for the Frosting:

    • 500 g cream cheese, room temperature
    • 40 g butter, room temperature
    • 10 mL vanilla
    • 1/2 lemon, juiced
    • 500 g icing sugar, sifted
    • Pecans, for garnish

    Directions:

    1. Begin by preheating the oven to 350° F and prepare three 20 cm round cake pans by lining with parchment paper and spraying with a non-stick spray.
    2. Sift the flour, sugar, cinnamon, salt and baking soda together in a large bowl, set aside.
    3. Combine the eggs, vegetable oil, vanilla, mashed bananas and crushed pineapple and fold into the flour to make a smooth batter. Pour evenly into the three prepared baking pans.
    4. Bake for 35-40 minutes or until a toothpick inserted in the centre comes out clean. Allow to cool in the pan on a wire rack.
    5. Meanwhile, cream the cream cheese and butter together until light and fluffy. Add the vanilla and lemon juice and beat well until incorporated. Add the sugar a little at a time, scraping down the sides of the bowl frequently until all of the sugar has been incorporated.
    6. When the cakes are thoroughly cool, cut the dome off the top is there was one. Lay the first cake on a serving platting protected by parchment (in short rectangles so that they are easy to remove). Spread a thin layer of the icing over the first layer, place the next cake on top and spread again, add the final layer to the top. Crumb-coat the entire cake in a thin layer and refrigerate for 2 hours to set. When the frosting is firm, finish the cake with the remaining frosting or as desired.
    7. Decorate the cake with more pecans that have been toasted.

    Notes:

    • Although the cake has a whopping 300 g of sugar, it is not excessively sweet, it’s the frosting that takes it over the top! I won’t kid you, it is sweet but not as sweet as it was in the original recipe.
    • I reduced the butter to about one-quarter of the original recipe, it still made a super-rich frosting.
    • Neither our friends nor we like super-sweet desserts so I opted to reduce the sugar from 6 cups to 4 cups in the frosting and added the juice of half a lemon to help cut it even more. The resulting frosting was still sweet but it didn’t make your teeth tingle. If you prefer an even less sweet frosting, I suggest you reduce the cream cheese by one quarter so that you require less the icing sugar thicken it up. As it was, 4 cups of icing sugar to 500 g cream cheese and 40 grams of butter made a light fluffy frosting but it needed refrigeration to keep stiff. It was a hot and humid day when I served this cake and my version of frosting didn’t melt but it wasn’t as stiff as frosting usually is.
    • I baked the three layers in a 20 cm (8-inch) round pans because I did not have 9-inch pans as Liz’s recipe calls for (hence the slightly longer baking time as they turned out somewhat thicker.
    • The original cake had coconut but I omitted it because our friends do not like coconut.

    Read Full Post »

    In late August we had friends over for a wonderful outdoor dinner and I asked if they wouldn’t mind bringing dessert. I usually like to control the entire event, but summer is a lot more casual and dining al fresco has added more of a casual flavour to our entertaining, so I thought, why not. My friend made these chocolate brownies (with raspberry instead of cherry) from Donna Hay and I must say they were totally swoon-worthy. So rich and chocolatey and the preserves just added a lovely moist texture. I did not have raspberry jam but I did have a good handful of frozen cherries so I popped them into a pan with a drizzle of water and a spoon of sugar and cooked them, then I puréed them with my stick blender and further cooked them down to just less than 125 mL.

    Just dollop the preserves on top and swirl a knife through to make this marble-like pattern.

    Chocolate-Cherry Brownies

    Makes 1 23 cm square pan. Original recipe by Donna Hay

    Ingredients:

    • 114 g butter
    • 125 g unsweetened chocolate, finely chopped
    • 3 large eggs
    • 375 g sugar
    • Pinch of salt
    • 5 mL vanilla extract
    • 125 g all-purpose flour
    • 125 mL cherry preserves

    Directions:

    1. Preheat the oven to 350° F. Line a 23 cm square pan with parchment and butter or spray with non-stick spray.
    2. Melt the butter and chocolate over low heat.
    3. Whisk together the eggs, sugar, salt and vanilla extract until smooth. Add the flour and stir in.
    4. Pour the batter into the prepared pan. Dot with spoonfuls of cherry preserves on top. Run a knife through to make a marbled pattern.
    5. Bake for 35-40 minutes or until an inserted toothpick still has a few moist crumbs attached when extracted. Allow to cool completely in the pan and cut into even squares, I got 16.

    Read Full Post »

    We have been eating a lot more ice cream this year than any other year. In fact, I bet if I added up all the gelato and ice cream we have eaten since May, it will exceed my lifetime consumption! In one summer! JT has never been a big fan but for some reason, this year he is ravenous for it! I generally don’t like to keep ice cream or gelato in my freezer because it literally calls my name at all hours. Anyway, it doesn’t count if you eat it directly out of the container, standing up with the freezer door open. That’s my story and I’m sticking to it.

    Vanilla Bean Gelato

    A KitchenInspirations Original Recipe

    Makes about 550 mL gelato

    Ingredients:

    • 250 mL 2% milk
    • 250 mL 35% cream
    • 1 large egg yolk
    • 65 g sugar
    • 16 g cornstarch
    • 10 g skim milk powder
    • 5 mL vanilla bean paste

    Directions:

    1. Begin by mixing the milk and cream together. Reserve 65 mL of the milk mixture and make a slurry with the cornstarch, mixing until the starch is dissolved and the mixture is smooth.
    2. Combine remainder of the milk in a medium-sized saucepan with the egg yolk, sugar and the milk powder and heat slowly until it almost comes to a boil making sure the sugar and milk powder have completely dissolved.
    3. Stir in the cornstarch slurry and continue to cook on medium-low heat for 3 minutes, stirring continuously until thickened.
    4. Remove the pan from the heat and transfer the cream to a bowl to chill overnight in the refrigerator.
    5. The day you wish to make the gelato, fold in the vanilla bean paste until thoroughly incorporated.
    6. Freeze the gelato according to directions on your ice cream maker.

    Read Full Post »

    Several of our friends have July birthdays, as do I. We were invited to brunch (outdoors, of course) in early July and I offered to bake the birthday cake. This particular friend is not a traditional cake lover, no super-sweet icing or frosting for this guy, so I decided to find a nice European cake recipe with fruit, because they are always a hit!

    This French Apple cake is made with rum and butter and is so delectable and moist, even though it has only 1 apple! I will definitely make this cake again for the non-cake lovers!

    Super moist cake with little bits of apple and the lovely flavour of buttered rum.

    French Apple Cake

    For the original recipe, please click here. Note that I converted the recipe to metric measures and modified it a bit.

    Makes 1 23 cm (9-inch) cake

    Ingredients:

    • 114 g unsalted butter, at room temperature
    • 130 g granulated sugar
    • 5 mL vanilla extract
    • 45 mL dark rum
    • 15 mL milk
    • 2 large eggs
    • Zest of one lemon
    • 140 g AP flour
    • 3 g baking powder
    • 3 g salt
    • 150 g baking apple, peeled, cored and cut into 1 cm cubes
    • Sanding sugar

    Directions:

    1. Preheat the oven to 350° F. Prepare a 23 cm (9 inch) round pan by lining the bottom with parchment and buttering the sides.
    2. Cream the butter and the sugar until light and fluffy.
    3. Add vanilla, rum and milk and mix well. Add the eggs one at a time and mix well.
    4. Whisk the flour, baking powder and salt together. Add to the butter batter and mix until combined.
    5. Fold in the apples.
    6. Pour into the prepared pan and dust with the sanding sugar. Bake for 30-35 minutes or until a toothpick comes out clean.
    7. Cool the cake on a wire rack. When cool, run a thin knife along the sides to loosen and turn onto a plate. Flip right side up (sugar-side up).
    8. Serve slightly warm or at room temperature sprinkled with powdered sugar with whipped cream or Crême Fraiche.

    Read Full Post »

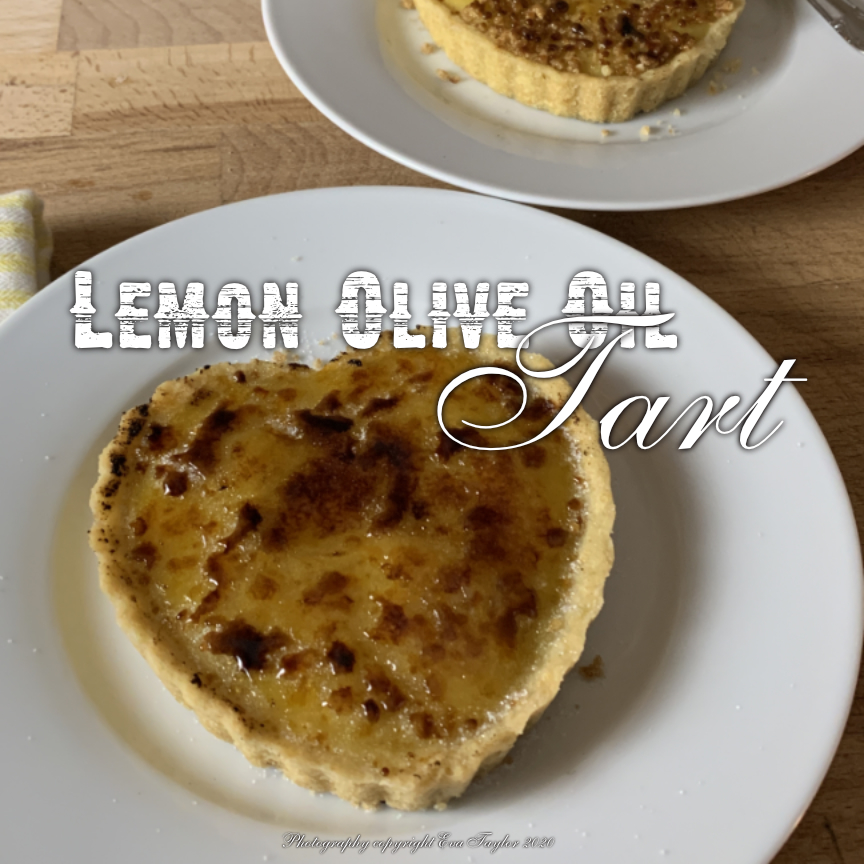
    We have been watching America’s Test Kitchen to help us fall asleep, taking our minds off the news and the ugly reality of late. This recipe was on Season 20 and I was taken right away. We love lemon and this one definitely ticks a lot of boxes, it’s not sickly sweet and it IS sooooo lemony. If you like lemon, I urge you to make this tasty treat. Note that I did not love their pastry recipe so I substituted my tried and true Viennese Pastry recipe.

    I decided to brulée the top just as my favourite French Bistro does with their Tarte au Citron (which incidentally takes two days to make!)

    Lemon Olive Oil Tart

    Please click here for the original recipe from America’s Test Kitchen.

    Makes about six 8 cm pastry shells with a total of 300 mL lemon curd filling

    Ingredients for the pastry:

    • 145 g all-purpose flour
    • 60 g sugar
    • 2 g salt
    • 114 g unsalted butter at room temperature
    • 1 egg yolk
    • ½ tsp pure vanilla
    • 1 tsp finely grated lemon rind

    Pastry Directions:

    1. Preheat oven to 350°F
    2. Put all ingredients into a food processor and process JUST until the dough sticks together (over-processing will cause tough pastry). Divide into six even discs and refrigerate for 30 minutes.
    3. Lightly flour your board and roll out the pastry to fit your preferred pan (I used 8 cm round pans). Dock the bottom with a fork several times.
    4. Blind bake the crust 30 minutes or until golden. You may need to reshape the pastry, mine got all puffy and misshapen because I didn’t refrigerate long enough and it was a super hot day.

    Ingredients for the curd:

    • 70 g sugar
    • 10 g AP flour
    • Pinch of salt
    • 2 large eggs plus 1 large yolk
    • lemon zest of one lemon
    • 130 mL lemon juice
    • 40 mL extra-virgin olive oil

    Directions for the curd:

    1. Add all of the ingredients to a small, heavy-bottom pan and cook on low heat until it is 160F, and just slightly thickened.
    2. Strain through a fine-mesh sieve for a velvety finish. Refrigerate with an oiled parchment placed on top to prevent a skin.
    3. Pour into the prepared, hot shells and bake for 8-12 minutes until the centre jiggles a bit.
    4. Allow to cool completely before serving.
    5. Sprinkle with sugar and brulée the top, just as you would with crème brulée.

    A tangy, tasty, lemon treat.

    Notes:

    • Fresh lemon juice is essential for a clean, lemony flavour.
    • ATK felt that the olive oil helps the lemony flavour shine better than butter.

    Read Full Post »

    We have been doing a lot of entertaining since our return from Arizona. I love feeding my friends, it really does make me happy. A few weekends ago we had a marathon weekend entertaining on Friday, Saturday, Sunday AND Tuesday! Fortunately, I was able to plan ahead and make a few things for a couple of the dinner parties considering both friends had gluten-free requirements. First, I made a batch of the original recipe with almonds then I recalled that my dear friend’s hubby is a nut-hater (the food kind) so I created a chocolate version of the recipe. It was wonderful. I served them with coffee.

    The snow just doesn’t want to stop.

    Gluten-Free Chocolate Tuiles of Sevilla (Tejas Dulces de Sevilla)

    A KitchenInspirations Original Recipe

    Makes 25 cm x 30 cm (10″ x 12″) sheet, cut to make cookies of various sizes

    Ingredients:

    • 1 large egg, at room temperature
    • 95 g sugar
    • 1 tsp pure vanilla
    • 30 mL unflavoured oil
    • 50 g Gluten Free flour (I used this mix)
    • 15 g cocoa powder
    • 80 g milk chocolate chips

    Directions:

    1. Pre-heat the oven to 250° F.
    2. Beat the egg with the sugar until it reaches the ribbon stage, about 5 minutes. Beat in the vanilla and oil.
    3. Sift the gluten-free flour with the cocoa powder and salt together then fold into the egg mixture.
    4. Pour the entire batter onto a parchment-lined cookie sheet and spread out until it is quite thin (about 3-4 mm (about 1/8-3/16 inch) works out to about 25 cm x 30 cm (10″ x 12″). Evenly sprinkle the chocolate chips onto the batter and gently push into the batter.
    5. Bake for 45 to 50 minutes or until evenly baked, turn the pan once about halfway.
    6. While still warm, move parchment onto a cutting board and cut into uneven shapes with a pizza cutter or break into natural shapes after it cools. Transfer parchment to a cooling rack and allow to cool. Cookies will firm up as they cool.
    7. Once cooled, store in an airtight container for about a week, but they won’t last that long!

    Notes:

    • I use an offset spatula to spread the batter onto the parchment paper.
    • This recipe will work well with store-bought gluten flour too.

    Read Full Post »

    We rented a different house this year in Arizona and the kitchen was much better equipped so I had a lot more fun with it. Needless to say, we entertained a lot; three sets of friends came down from Toronto and of course, our two sets of friends in Encantarra were repeated guests. I’m guessing I was the first one to give the kitchen a good workout, even the BBQ had not been used in the two years the house had been rented!

    I made this cake the first week we were in Arizona. I found the recipe in a very outdated Phoenix magazine. The recipe was created by a 14-year-old boy. I loved the use of olive oil in it, plus I just adore orange cake. I modified the recipe a bit so that it better reminded me of a cake my dear Mom used to make.

    Orange Olive Oil Cake

    This recipe originated in the Phoenix magazine, May 2015 but I couldn’t find it online. I’ve converted it to metric and made some alterations.

    Makes one 23 cm cake

    Ingredients:

    • 2 eggs
    • 155 g sugar, divided
    • 80 mL EVOO
    • 5 mL vanilla
    • Zest of 2 oranges
    • Juice of 2 oranges, divided
    • 150 g all-purpose flour
    • 1 tsp baking powder
    • 1/2 tsp baking soda
    • 1/2 tsp salt
    • 50 mL Grand Marnier
    • Icing sugar for dusting

    Directions:

    1. Preheat the oven to 350° F
    2. Spray a 23 cm pan with non-stick spray
    3. Combine the eggs and 135 g sugar and beat until light, fluffy and smooth.
    4. Slowly drizzle in the olive oil and vanilla.
    5. Add all of the zest and 45 mL of the freshly squeezed orange juice and beat until well combined.
    6. In a separate bowl combine the flour, baking powder, baking soda and salt and mix well.
    7. Add the flour mixture to the egg mixture and beat only until combined.
    8. Pour into the prepared 23 cm pan and bake for 25-30 minutes or until toothpick tests clean. Allow to cool.
    9. Meanwhile, combine the remaining juice and sugar and bring to a boil until the sugar has melted into the juice. Cool and add the Grand Marnier.
    10. Turn out the cooled cake onto a decorative plate and slowly spoon the orange juice mixture onto the cake allowing it to be absorbed.
    11. Decorate with icing sugar.

    This is a highly flavoured and scented cake that is kept moist by a delicious orangy syrup.

    Would you care for a slice?

    Read Full Post »

    As you know, we spent just over a month in Arizona again, and our friends house-sat for us. I made these tasty treats for dessert the night before we left, they absolutely loved them. The cornflakes replaced the graham crackers and we didn’t even miss them. I have made these treats a few times since then.

    I often get my dessert inspiration from my dear friend Liz, that Skinny Chick Can Bake; this tasty treat came from her but I modified it to be gluten free. Although I’ve never tasted the original version, I can tell you hands down that this one is a real winner! If you like peanut butter and chocolate, give this super easy, tasty treat a go.

    Gluten-Free Reese’s Peanut Butter Squares

    Makes one 20 cm pan

    Please click here for the original recipe.

    Ingredients:

    • 45 mL butter, melted
    • 120 g corn flakes, pulsed to a powder
    • 170 g icing sugar
    • 195 g natural peanut butter
    • 6 g sea salt
    • 190 g semi-sweet chocolate chips
    • 15 g butter or vegetable oil

    Directions:

    1. Combine everything but the chocolate chips and vegetable oil in the large container of your food processor and process until smooth and comes together.
    2. Press into a 20 cm square pan lined with parchment paper and refrigerate for 30 minutes.
    3. Meanwhile add the chocolate chips and butter or vegetable oil to a microwaveable bowl and melt, stirring intermittently.
    4. Cool slightly and pour over chilled peanut butter pan, spread evenly. Refrigerate for an hour before slicing.
    5. Slice with a warm, dry knife, wiping between slices.

    The winter light is quite evident here, but don’t allow that to dissuade you, these are very yummy.

    The cornflakes add an incredible texture that make these taste just like Reese’s Peanut Butter Tarts, only better!

    Notes:

    • I’ve used a variety of natural peanut butters (no sugar or salt) to make these, including crunchy, with no substantial difference to the outcome of this recipe.
    • To make this recipe vegan, try melted coconut oil. Although I have not tried using melted coconut oil, I’m certain it would work because there is not much in the recipe.
    • Once the recipe initially sets, you can bring the bars to room temperature to serve.
    • Try using other nut butters (such as Hazelnuts) to up the ante!

    Read Full Post »

    It’s been a busy year and I’ve seen spending a lot of time in front of my computer. I don’t mind doing that type of work, but I do miss cooking and with that, getting my advanced blog posts ready to publish. In fact, I am nowhere near the advanced the blog posts I should be, in preparation for our yearly sojourn to Arizona. I have four posts ready to go but I should have 10! That makes me nervous because I may not have time to post while we are in Arizona; we have three separate group friends coming down for 5-7 days each! That means a lot of sightseeing and daily adventures and less cooking and recipe developing.

    You can definitely see the winter light creeping in.

    I modified and made this little recipe because during one coffee break JT mentioned that he would love to have a little biscotti to nibble on while we sit and enjoy our coffees. I like making biscotti because they are easy and are not overly finicky. This recipe came together quickly and more or less in one bowl.

    Chocolate Chip and Almond Biscotti

    For the original recipe, please click here.

    Makes about 20 biscotti but it depends on how thickly you form and cut the logs

    Ingredients:

    • 57 g unsalted butter, at room temperature
    • 225 g brown sugar
    • 10 mL pure vanilla extract
    • 5 mL almond extract
    • 275 g all-purpose flour
    • 75 g almond flour
    • 20 g baking powder
    • pinch salt
    • 165 g chocolate chips

    Directions:

    1. Preheat the oven to 350° F.
    2. Cream butter and brown sugar until light and fluffy.
    3. Add the eggs, one at a time and best until entirely incorporated. Add the extracts and beat.
    4. Whisk together the dry ingredients (omit the chocolate chips) and blend into the butter mixture.
    5. Fold in the chocolate chips.
    6. Form into two even logs and place on a parchment-lined baking sheet and flatten slightly. Bake for 30 minutes.
    7. Slice diagonally into 10 slices each and lay flat on the same parchment-line baking sheet and bake again for about 10 minutes or until lightly golden. Cool completely before serving.

    Notes:

    • I shaped my logs too wide, next time I shall make them more slender and have twice the number of biscotti.
    • Biscotti store well in an airtight container but if it will take you more than a week to consume, I would freeze them until required. Defrost at room temperature.
    • I didn’t have whole almonds but this would have been lovely having a few whole almonds folded into the batter.

    Read Full Post »

    This unusual cake was a contribution of a dear neighbour we had over recently for a dinner party. We were so blown away with the use of quinoa that we had to give it a try ourselves. The recipe is super easy and oh-so-chocolatey! The original recipe isn’t vegan or dairy-free but I did substitute melted coconut oil for the butter and lactose-free milk for the milk. For Vegan, you could use soaked chia seeds for the eggs. Let me know how it turns out if you try the vegan version.

    Be ready to hand out the recipe, this cake is that good. I was pleasantly surprised with the frosting, very rich and chocolatey; the mild avocado flavour was not off-putting (unless you hate avocados).

    Care for a slice?

    Chocolate Quinoa Cake

    For the original recipe, click here.

    Makes a double layer 20 cm cake

    Ingredients:

    • 300 g cooked quinoa (135 g or 3/4 cup dry yields about 300 g cooked)
    • 120 mL whole milk
    • 4 eggs
    • 5 mL pure vanilla extract
    • 170 g unsalted butter, melted
    • 140 g coconut sugar
    • 90 g unsweetened cocoa powder
    • 2 tsp baking powder
    • 1/2 teaspoon salt

    Directions:

    1. Preheat the oven to 350F. Line 2 20cm round baking pans with parchment and spray with non-stick spray.
    2. Add all of the wet ingredients, quinoa, eggs, vanilla, milk with sugar, salt and cocoa to your large food processor and process until smooth and creamy. Add the baking powder snd blend until combined.
    3. Turn into prepared pans in equal portions and bake for 30 minutes-or until a cake tester comes out cleanly.
    4. Cool. Turn out of pans and frost with the frosting below.

    Chocolate Avocado frosting

    Click here for the original recipe.

    Makes about 250 mL, plenty to frost the cake above

    Ingredients:

    • 2 very ripe avocados
    • 45 g unsweetened cocoa powder
    • 90-120 mL pure maple syrup
    • Splash of pure vanilla extract
    • Pinch of sea salt

    Directions:

    1. Add all of the ingredients into the cup of your immersion blender and blend repeatedly until entirely smooth.
    2. Frost cake as soon as it has cooled. Store covered in the refrigerator.

    Notes:

    • If you blend all of the cake ingredients together for too long, you’ll get a brownie-like texture.
    • Flegg (vegan egg substitute) is ground flaxseed with water mixed until gelatinous.
    • For the frosting, I used 90 mL Maple syrup and it was sweet enough.
    • The original recipe suggests the icing will discolour if made too soon before serving but we didn’t think leaving it for a couple of days impacted the colour to a great degree after all it’s pretty chocolate-brown anyway!
    • Avocados must be super ripe to get the creamy texture of a buttercream. You may use frozen avocados.
    • The second time I made this recipe I used coconut oil instead of butter and it was lovely.

    Well, the renovation is complete. What should have taken 4-6 weeks ended up almost 5 months! This was a better experience than the first; our contractor was younger and had excellent communication skills which made the process much smoother. Basically, we took about 1/3 of our master bedroom and added an ensuite and walk-in closet and we also updated the main bathroom. We contracted the cabinet maker to make the built-ins on the wall across from the bed. JT and I installed the crown moulding. The master bath has all the amenities: fog-free mirror, heated floor, heated towel rack, flush-mount rain shower and so on. I am still on the hunt for a carpet for the bedroom. Here is a short video of the project.

    Read Full Post »

    Peach Tarte Tatin

    You know you have a winning dessert when the same friends ask you to bring the same dessert you brought to their home the last time. This is that dessert. It really ticks all of the boxes, local, delicious, fresh peaches, crispy and chewy puff pastry and last but not least, smooth sweet caramel. You just can’t go wrong!

    Peach Tarte Tatin

    For the original recipe, please click here.

    Serves 6-8

    Ingredients:

    • 6 to 8 large, firm-fleshed peaches, we used Ontario Peaches
    • 100 grams granulated sugar
    • 75 grams butter, cubed
    • pinch of cinnamon
    • 30 mL cognac
    • pinch of salt
    • 1 sheet all-butter puff pastry, about 250 g (store-bought is fine), defrosted in the refrigerator 

    Directions:

    1. A day or so before you wish to serve this dessert, peel the peaches and remove the stone and cut them in half. Sprinkle lightly with lemon juice and place on a paper-lined cooling rack, cover with a clean kitchen towel and store in the refrigerator to allow to dehydrate a bit.
    2. In a cast iron or non-stick pan, add the sugar and cook over medium-low heat until caramelized. DO NOT STIR but you may swish the sugar in the pan as it begins to turn golden to cook more evenly.
    3. Add the butter and swirl until melted and combined with the sugar, add the pinch of cinnamon salt and the cognac and continue to swirl to combine.
    4. Turn the heat to low and add the apples in a circular pattern keeping in mind that the part you can see is actually the bottom of the tarte.
    5. Cook the peaches for about 8 minutes on medium-low. Meanwhile, preheat the oven to 375° F.
    6. While the peached are cooking stove-top, untouched, cut the defrosted pastry in a slightly larger circle than the pan and put into the freezer for 5 minutes.
    7. Remove the pan with the peaches from the heat, and top with the pastry, tucking in the sides all the way around.
    8. Bake for 25-30 minutes or until the pastry is golden. Allow to rest for 10-15 minutes.
    9. Turn out, upside-down onto a serving platter and serve warm.

    Read Full Post »

    At the time I wrote this post, the last week of June, we were still not finished our renovation. Someone mentioned it might be because of my treats. Whatever the reason, it is rather frustrating. A trade might come in for a few hours and then leave. I can see other things that can be done in the meantime, but it’s usually just one thing at a time. Our last reno was the same, so I guess it is “normal”. Still frustrating.

    In the meantime, I am scouring the web for new recipes and this one stood out for me. My friend Liz of That Skinny Chick that can Bake is my GoTo for outrageous treats. Her blog is filled with decadent sweets, beautifully presented and photographed. As I was cruising through her beautiful blog, I came across her Caramel Butter Squares and WHAM! I knew what my next treat would be. Plus I had a jar of Argentinian Dulce de Leche in my pantry, it was a done deal.

    I converted Liz’s recipe to metric measures because I find it much easier. The Dulce de Leche caramelizes in some parts and is a bit runny in others. It really is dreamy. We will see how the guys like it.

    Douce de Leche Butter Squares

    For original recipe, please click here.

    Ingredients:

    • 227 g unsalted butter, at room temperature
    • 100 g sugar
    • 100 g powdered sugar
    • 15 mL vanilla
    • 280 g flour
    • 8 g salt
    • 230 g Dolce de Leche sauce

    Directions:

    1. Preheat the oven to 325° F. Prepare a 23″ x 23″ cm (9″ x 9″) pan by lining with parchment and spraying with non-stick spray.
    2. Cream the butter with the sugars until fluffy. Beat in the vanilla.
    3. Beat in the flour and salt on low speed until entirely incorporated.
    4. Portion about 1/2 of the flour mixture into the bottom of the pan and press evenly to all sides. Bake for 20 minutes. Refrigerate the remaining pastry.
    5. After you have baked the base pastry, pour in the Dolce de Leche sauce and spread evenly with an offset spatula. Crumble the remaining pastry onto the top, being careful not to cover entirely.
    6. Bake for an additional 25-30 minutes or until the topping is golden.
    7. Allow to cool completely and cut into squares or bars.

    Notes:

    • Liz’s recipe calls for an 8″ square pan, but I had quite a bit of pastry left over so I upped it to 9″. In fact, the second time I made this, I used a 9″ x 13″ pan and it was excellent.
    • You may use premium caramel sauce, as Liz’s recipe does.
    • You may also use 300 mL caramelized sweetened condensed milk. Learn how to make caramel from sweetened condensed milk here.
    • Liz also has a recipe that includes chocolate chips.

    For these squares, I used Caramelized Sweetened Condensed Milk. They were pretty darned tasty.

    Read Full Post »

    It seems that our contractor and subs are all foodies this time around! From our first gen Slovanian contactor to the Greek plumber, Costa Rican electrician and Croatian cabinetmaker they all LOVE food! In fact, our cabinetmaker has more food pics on his phone than I do!

    This food-centric group plays into my baking very well! In fact, to reciprocate, our contractor, Marko brought us Portuguese Custard Tarts as a gift and they were awesome! I knew on first bite that I had to make them. What makes them awesome is the flaky, crispy, yet chewy pastry. It’s a laminated pastry, like a croissant but much easier to make. Although they require a little planning ahead, they are totally worth it. Do yourself and your family and make this recipe, you won’t regret it.

    Portuguese Custard Tarts

    Makes 32 mini custard tarts

    For the original recipe and an excellent video, please click here.

    Ingredients for the pastry:

    • 200 g AP unbleached flour (I had to add a bit more flour in March 2020)
    • pinch of salt
    • 135 mL water
    • 120 g butter, softened, divided into thirds

    Directions for the pastry:

    1. In the bowl of your stand mixer fitted with the dough hook, combine the flour, salt and water and knead until it begins to come away from the bowl. It is a shaggy dough.
    2. Remove dough from the bowl and flour generously (it is very sticky). Form into a square as best as you can (it is a very wet dough). Cover with plastic wrap and rest it for 10-15 minutes.
    3. On a generously floured surface, roll the dough out to 40 cm  40 cm square. Brush off any excess flour from the top. Gently spread the 1/3 of the softened butter on 2/3 of the dough to about 3 cm from the edge. Fold the unbuttered third over the buttered middle and fold the other side over that (exactly like you would working croissant dough).
    4. Turn the dough 90° and roll out again to a 40 cm square, generously flouring as needed. Brush off excess flour and repeat buttering the dough with 1/3 of the butter the same way and fold the same way as previously.
    5. Roll out the dough a third time to 40 cm square and butter with the last third of the butter, the entire surface leaving about 3 cm all the way around the edge. Roll the dough tightly from one end to the other, cut the roll into two and wrap with plastic wrap and refrigerate for 4 hours or overnight.

    Ingredients for the custard:

    • 20 g AP unbleached flour
    • 25 mL milk
    • 125 mL milk (two separate quantities of milk)
    • 87 mL water
    • 120 g granulated sugar
    • 1/2 cinnamon stick
    • 3 eggs yolks

    Directions:

    1. Combine the flour with 25 mL milk and whisk until smooth. Set aside.
    2. Heat 125 mL milk until almost boiling. Slowly pour into the flour and milk slurry and whisk until smooth. Set aside.
    3. In a small, heavy bottom saucepan, combine the water, sugar and cinnamon stick. Without stirring, heat until the sugar has melted and it has reached 225° F. Remove the cinnamon stick carefully. Pour into the milk-flour slurry until and whisk until smooth. Whisk this mixture for about 10 minutes to cool significantly.
    4. Whisk the egg yolks together and whisk them into the cooled slurry. This mixture keeps refrigerated for 1 day until the pastry has rested in the refrigerator.

    Making the tarts:

    1. Preheat the oven to 550° F or the highest temperature your oven will go. The trick is to bake these super hot for a short time.
    2. Lightly butter mini muffin tins.
    3. Slice the rolled dough in about 1.5 cm slices and place each one into a buttered muffin cavity. With slightly wet fingers, push the dough up into the sides of the tin making sure the bottom doesn’t become too thin. Fill 3/4 full with the custard mixture.
    4. Bake for 15 minutes ir until the custard tops become blistered slightly and the crust has baked to a crisp pastry.
    5. Cool and serve.

    Notes:

    • I have also made these tarts using store-bought puff pastry and although they are good, they are not the same as homemade laminated pastry. If you have the patience, do the homemade version, it is better.


    Read Full Post »

    Spring has been avoiding us in Toronto. We have had a few nice days of sunshine and relative warmth but for the most part it’s been rainy and unseasonably cold. It is depressing. If it weren’t for the gorgeous greenery exploding in anticipation of summer, you would think it is November.

    I haven’t baked madeleines in a very long time and I thought the orange flavour would mentally transport us to more summer-like weather and JT loves orange and chocolate. Sadly, they were not a big hit with the construction crew but that made JT happy because he was able to keep them for himself (it’s been a bit of struggle keeping JT from munching on the treats that I’ve made for the crew, wink wink). These baked up beautifully and without that strange little bump in the centre, which is a win for me.

    Orange & Almond Scented Madeleines

    Ingredients:

    • 4 large eggs
    • 100 g granulated sugar
    • 1/2 tsp almond extract
    • 1/2 tsp orange extract
    • 1 1/2 tsp freshly grated orange zest (about 2 small oranges)
    • 128 g all-purpose flour
    • 48 g almond flour (finely ground blanched almonds)
    • 145 g unsalted butter, melted and cooled slightly, divided
    • 80 g semi-sweet chocolate, melted

    Directions:

    1. Preheat oven to 375°F.
    2. With about 30 g of the butter, generously butter the Madeleine moulds and put it into the freezer.
    3. Melt the remainder of the butter in the microwave or small saucepan. Set aside to cool.
    4. Put about 2 tbsp of the melted butter in a frying pan and toast the almond flour (carefully, this burns quickly). Set aside to cool.
    5. In a bowl of an electric mixer, beat the whole eggs with the granulated sugar until the mixture is thick and pale and forms a ribbon when the beaters are lifted (15-20 minutes).
    6. Beat in the toasted almond flour and mix well so no lumps remain.
    7. Beat in the almond and orange extracts and the zest.
    8. Sift in the flour in 4 batches over the mixture, folding it in gently after each addition.
    9. Put about 250 mL of the batter into the cooled melted butter and incorporate well.
    10. Gently fold this butter-batter mixture into the remaining batter.
    11. Spoon the batter into twenty-four buttered Madeleine moulds and bake the Madeleines in the lower third of a preheated 375°F oven for 10 minutes, or until the edges are golden.
    12. Turn the Madeleines out on a rack, let them cool.
    13. Once cooled, dip into the chocolate if using right away, if not, Madeleines freeze well.

    Read Full Post »

    The renovation is going well. We really like this contractor because he communicates frequently. He’s on site almost every day; he’s only missed one or two days and it was because his wife had a baby! The subs are also good, only a couple of them smoke and they have been reasonably good about not littering their cigarette butts (you’d be surprised).

    However, I do have a couple of issues which we will take up with him on our project review at completion. It’ll be feedback to he can improve for the next project.

    As you know, I bake for the guys almost everyday and these squares were part of my repertoire. The pastry is delicious but quite delicate so it’s a little finicky to roll out. JT thought the jam to crust ratio wasn’t high enough, but I like a buttery crust so it was fine with me. The jam caramelizes as it bakes and concentrates the flavour. I used a jam with double the fruit, but i think regular jam would work too. Needless to say, these didn’t last long.

    Linzer-Style Squares

    For the original recipe, kindly click here.

    Makes one 23 cm 23 cm (9″ x 9″) pan

    Ingredients:

    • 250 g butter, cold
    • 250 g flour
    • 125 g icing sugar
    • 1 tsp cinnamon
    • A pinch of ground cloves
    • A pinch of salt
    • 150 g ground almonds
    • 1 tsp Lemon zest
    • 1 egg yolk
    • 375 mL Jam (your choice)
    • 1 egg, whisked (for brushing the lattice)

    Directions:

    1. In a food processor, combine the butter, flour, icing sugar, cinnamon, cloves, ground almonds, pinch of salt, lemon zest and egg yolk and pulse until it comes together. Form into a disk and cover with plastic wrap and allow to rest for 30 minutes in the refrigerator.
    2. Preheat the oven to 350° F. Line a square pan with parchment paper.
    3. Divide the dough into 1/3 and 2/3 and push the 2/3 quantity of dough into the pan in an even layer. Spread the jam of your choice over the bottom layer of the dough.
    4. Divide the remaining 1/3 of the dough into 12 equal parts and roll into thin straws. Lay the straws on top of the jam layer in a lattice pattern. Brush the lattice with egg and bake for 50-60 minutes or until pastry is lightly golden.
    5. Cool completely and cut into even squares. Sprinkle with icing sugar if desired.

    Notes:

    • This is not a traditional Linzer torte.
    • Linzer is traditionally made with red currant jam, I used strawberry because I had a lot of it on hand.

    Read Full Post »

    I baked these apple crumble squares for the contractor and his team way back in early May. They inhaled them! I’m thinking this lot loves fruit so my next treats will focus on the fruity varieties. I found the original recipe here and made some modifications by cutting down the sugar because we don’t love sweet sweets. The pastry is lovely, just the right amount of caramelization and shortcrust texture, the apples are plentiful, soft and sweet and the crumble topping is just the icing on the squares, except it’s crumble and not icing! These are definitely going into my square repertoire. A real tasty treat.

    Apple Crumble Squares

    Makes 1 23 cm x 33 cm (9″ x 13″) pan

    Ingredients for the crust:

    • 170 g unsalted butter, room temperature
    • 115 g granulated sugar
    • 256 g all-purpose flour
    • 1/2 teaspoon cinnamon
    • zest of one lemon
    • pinch salt

    Directions for the crust:

    1. Preheat the oven to 350° F. Line a 23 cm x 33 cm pan with parchment.
    2. Using a stand mixer, combine the butter and sugar and beat until fluffy. Beat in the flour, cinnamon, lemon zest and salt.
    1. This is a very soft pastry, roll between two sheets of parchment and press into the parchment-lined pan evenly and bake for 15 minutes.
    1. Remove from heat and cool as you are slicing the apples.

    Ingredients for the Apples:

    • 5 medium apples, cored and thinly sliced
    • 45 g all-purpose flour
    • 65 g granulated sugar
    • 1 tsp cinnamon

    Directions for the Apples:

    1. Combine the flour, sugar and cinnamon and mix well.
    2. Lay a thin layer of apples onto the pastry and sprinkle the flour, sugar and cinnamon over the apples and repeat until all of the apples and flour mixture are utilized.

    Ingredients for the Crumble:

    • 65 oats, not quick
    • 100 g dark brown sugar
    • 65 g all- purpose flour
    • 1/2 tsp cinnamon
    • 114 g cold butter, cubed

    Directions for the Crumble:

    1. Using a plastic blade in your food processor, combine all of the ingredients and pulse until coarsely combined. Sprinkle evenly over the apples and bake for 45 minutes or until apples are soft to poke through.
    2. Cool and slice into squares. Serve at room temperature.

    Read Full Post »

    Our last trip to Europe was a culinary shopping success, but sadly failed miserably in the Fashion area, particularly shoes. My shoe shopping times were constantly thwarted by siesta, and when there wasn’t siesta, I just wasn’t in the mood. I guess it just wasn’t my time. That isn’t to say that there wasn’t shopping, because there was quite a bit of shopping to be had, and I did my fair share, in the culinary field.

    I brought back a variety of things that will be revealed in due time but now I shall direct you to this very delicious dessert/snack of peach and coconut jelly squares made with agar-agar. I have been wanting to buy this stuff but I have only ever found flavoured product so when I spotted it at my favourite grocery store in Almeria, I was all over it. Figuring out what to do with it was another story, so many interesting recipes. But what I really needed was a test experiment to see what exactly the texture of jelly that agar-agar creates. You see, we had the most luxurious, smoked fish mousse at our favourite French bistro and I was determined to recreate it. I was fairly certain that it was not made with gelatin because the texture was way to creamy and easily spreadable. It was so silky and smooth spread across some toasted baguette, it was a wonderful textural and taste experience. Making this light dessert showed me the proportions I needed to make a smooth, yet spreadable smoked fish mousse.

    This is a recipe modified from this tasty recipe. I used peaches because I had peaches at home (frozen from the previous spring). It’s refreshing and the texture is smooth and creamy but it also has a bit of a gelatinus mouthfeel.

    Peach and Coconut Jelly Squares

    Ingredients:

    Peach Layer

    • 100 mL grilled peach purée (roughly about 2 peaches peeled and chopped)
    • 5 mL lime juice
    • 150 mL water
    • 2 g 1 agar-agar powder
    • 30 g monk fruit crystals 
    • 5 mL vanilla

    Coconut Layer

    • 200 mL cup water
    • 1 tsp agar-agar powder
    • 45 g monk fruit crystals
    • pinch of salt
    • 200 mL coconut milk

    Directions:

    1. Add the water to a saucepan and add the agar-agar, slowly bring to a full boil, and stir until the agar-agar has completely dissolved. Add the monk fruit crystals and stir until dissolved.
    2. Add the peach purée and vanilla and stir to combine well. Pour into the mould.
    3. For the coconut layer, add the water to a saucepan and add the agar-agar and slowly bring to a full boil and then stir until the agar-agar has dissolved. Add the monk fruit crystals and stir until dissolved, add the salt and coconut milk and stir to combine well.
    4. Once the peach layer has set (this happens as it cools, does not need to be refrigerated), carefully pour the coconut layer over it. Both layers should be warm so that they stick together.

    Read Full Post »

    I’ve been baking like a mad woman for our contractor and team. They seem to really like it. I know that JT does! I’ve made tangzhong cinnamon rolls, rice crispy squares, carrot cake, pineapple upside down cake, chewy lime squares cherry squares, chocolate chunk cookies and so on. We put our Keurig just outside the construction zone with fresh Timmy’s coffee but I don’t think they drink coffee! So I added tea, still no takers! The younger guys don’t even smoke! Go figure!

    The demo had moved along at a good pace, uncovering a mess of previous badly done renos. Fortunately, not difficult to fix, just annoying that it was done so poorly! The next weeks will tell if we will finish by the deadline of June 1, as we were hoping to have overnight guests on the 5th! Fingers crossed.

    Just before we hunkered down, I had my gluten intolerant BFF and picky-eater hubby for brunch. I’d always wanted to make a cornmeal cake so I figured why not now! This one had a gritty texture but not entirely unappealing. I think next time I’ll use a finer texture or I’ll soak the cornmeal a bit.

    Gluten-Free Lemony Cornmeal Cake

    Makes one 20 cm (8 inch) cake

    Ingredients:

    • 140 g cornmeal
    • 50 g almond flour
    • 50 g unsalted butter
    • zest from 1 lemon
    • 30 mL fresh lemon juice
    • 150 g granulated sugar
    • 2 eggs
    • 120 mL Greek yoghurt
    • 5 mL pure vanilla extract
    • 120 mL lemon juice
    • 70 g sugar

    Directions:

    1. Line a 20 cm (8 inch) round cake pan with parchment, buttered lightly. Preheat the oven to 350° F.
    2. Whip the butter until light and fluffy add the lemon zest. Slowly add the granulated sugar and beat until light and fluffy, scraping down the sides.
    3. Add the eggs one at a time and beat well. Add 30 mL lemon juice, yoghurt and vanilla extract and beat until incorporated.
    4. Fold in the dry ingredients and pour into the prepped pan. Bake for 20-25 minutes or until a toothpick comes out clean.
    5. Meanwhile, combine 120 mL lemon juice and remaining sugar and cook on a slow boil until slightly thickened and sugar is completely dissolved. Reserve for cake.
    6. When cake is done, allow to rest for 10 minutes, then pour the lemon syrup over the cake.

    Notes:

    • This cake has a lot of texture, similar to cornbread, it’s not bad, just different.
    • The lemon syrup adds a nice amount of moisture and lemony flavour to this simple dessert.

    Read Full Post »

    We were recently invited to a friend’s home for dinner so I offered to make dessert. When I was perusing the net, looking for a tasty fruit dessert, I came across Tarte Tatin and realized that I had never made it for the blog! Fortunately, I had package of puff pastry in the freezer so I was halfway there, a quick trip to buy apples and I was done!

    Don’t be intimidated by having to make caramel, it’s very easy. You just need patience and concentration, never turn your back on it because that is when it will burn!

    Simple Tarte Tatin

    For the original recipe, please click here.

    Serves 6-8

    Ingredients:

    • 6 to 8 large, firm-fleshed apples, we used Gala
    • 100 grams granulated sugar
    • 75 grams butter, cubed
    • pinch of cinnamon
    • 30 mL cognac
    • pinch of salt
    • 1 sheet all-butter puff pastry, about 250 g (store-bought is fine), defrosted in the refrigerator

    Directions:

    1. A day or so before you wish to serve this dessert, peel the apples, core and quarter them. Sprinkle lightly with lemon juice and add to a large bowl, cover with a clean kitchen towel and store in the refrigerator to allow to dehydrate a bit.
    2. In a cast iron or non-stick pan, add the sugar and cook over medium-low heat until caramelized. DO NOT STIR but you may swish the sugar in the pan as it begins to turn golden to cook more evenly.
    3. Add the butter and swirl until melted and combined with the sugar, add the pinch of cinnamon salt and the cognac and continue to swirl to combine.
    4. Turn the heat to low and add the apples in a circular pattern keeping in mind that the part you can see is actually the bottom of the tarte.
    5. Cook the apples for about 8 minutes on medium-low. Meanwhile, preheat the oven to 375° F.
    6. While the apples are cooking stove-top, untouched, cut the defrosted pastry in a slightly larger circle than the pan and put into the freezer for 5 minutes.
    7. Remove the pan with the apples from the heat, and top with the pastry, tucking in the sides all the way around.
    8. Bake for 25-30 minutes or until the pastry is golden. Allow to rest for 10-15 minutes.
    9. Turn out, upside-down onto a serving platter and serve warm.

    The caramel soaks into the puff pastry making a delicious crust and soft apples!

    I made a little-grilled peach tarte Tatin with the leftover puff pastry, waste not, want not.

    Read Full Post »

    I spied this spectacular dessert on my dear friend Liz, That Skinny Chick Can Bake social media account at the end of January and was immediately impressed. Flourless and full of chocolatey goodness, this cake ticked off so many boxes, I absolutely had to make it. Get out your pocketbooks because this cake has an enormous amount of chocolate (500 g plus the ganache!). Pull out all the stops and use the best chocolate you can afford.

    This is an extremely rich cake. In fact, it is like eating a giant truffle. I would portion the slices a wee bit thinner but this made for a prettier picture.

    My first attempt, I reduced the recipe to make two very small tarts. I went full-out low-carb, which meant replacing the sugar with erythritol and using unsweetened chocolate. It was actually fine for my taste but JT suggested a bit more sweetness would satisfy our dinner guests. My attempt at making a simple syrup from erythritol and water proved successful for a pomegranate syrup I had made (but had forgotten to photograph) so I applied the same formula to this recipe, increasing the water to accommodate the large amount of erythritol. I boiled down the syrup to 1 cup and I wouldn’t try boiling it down any more as it had begun to crystallize on the top.

    The semi-sweet chocolate sacrificed much of the low carb aspect so I won’t even do the analysis. I may try increasing the erythritol and going back to unsweetened chocolate to see if that might bring the carbs back to a reasonable level, but I’m going to wait with that experiment until we recover from this version of this decadent dessert. If you have a special dinner, this dessert definitely fits the bill and the splurge. Thanks, Liz, I can always count on you for a decadent dessert.

    La Bete Noir (Flourless Chocolate Cake)

    For the original recipe, please click here.

    Serves about 20 people

    Ingredients for the cake:

    • 375 mL water
    • 150 g Erythritol
    • 128 g butter, diced
    • 388  g semisweet chocolate, chopped
    • 112 g unsweetened chocolate, chopped
    • 6 eggs

    Ingredients for the ganache:

    • 200 mL heavy cream
    • 226 g semisweet chocolate, chopped

    Topping, as shown:

    • 25-30 g Pistachios, roughly chopped
    • 125 mL whipping cream

    Directions:

    1. Preheat the oven to 350° F. Prepare a 25 cm springform pan by covering the bottom and all the way up the sides with two layers of foil paper. Cut a circle from parchment and place it in the inside bottom of the pan. Place the pan into a large, higher-sided pan and set aside.
    2. Combine the water and erythritol in a small saucepan and heat until boiling, whisking until the erythritol has completely dissolved into the water. Continue to boil and reduce the volume to 250 mL. Set aside to cool slightly.
    3. Combine the butter with all of the chocolate and heat gently in the microwave until it is melted and smooth. Stir in the erythritol simple syrup. Cool slightly.
    4. Place all of the eggs into another bowl and beat until fully combined. Pour the eggs all at once into the chocolate mixture and whisk until smooth.
    5. Pour the chocolate mixture into the prepared springform pan. Fill the larger pan with boiling water to about 3/4 the way up. Bake on the centre rack for about 50 minutes or until centre has set.
    6. When ready, remove from the oven and allow to cool on a wire rack. When sufficiently cooled, run a sharp knife along the inside edge to release the cake from the pan. Carefully remove it from the pan and allow to cool completely.
    7. Place an inverted glass on top of a clean piece of parchment and place a wire rack on top of the glass, set aside.
    8. Remove the bottom of the springform pan as well as the parchment from the cake and place it on the wire rack that is resting directly on the inverted glass.
    9. Make the ganache by heating the cream to almost boiling and pour over the chocolate. Mix until the chocolate is completely melted and smoothly combined with the cream.
    10. Pour the ganache over the cake and allow to flow over the top and sides evenly. Allow this to set at room temperature or in the refrigerator.
    11. Decorate the top with the chopped pistachios and serve with a dollop of whipped cream. Be prepared for guest requesting a take-away box for later (at least our’s did). It’s that good!!!

    Notes:

    • This cake is extremely rich, so I increased the serving size from 16 to 20.
    • The original recipe did not mix semi-sweet with unsweetened chocolate, it was all semi-sweet.

    Read Full Post »

    Late last summer, I did some prop shopping for a prop-stylist colleague who was swamped and needed a hand. It’s a lot of work, don’t get me wrong, the shopping bit is fun but there is a lot of schlepping! And you have to be extremely organized to be able to return some of the props that weren’t used! That being said, it’s a job I don’t envy, they earn every penny and then some. While I was waiting for a store to open, I stopped into an Italian cafe for a coffee and biscotti. The coffee was fine but the biscotti was atrocious, it was soggy! Imagine that. Such an unsatisfying treat. The worst. So I had to make my own! These definitely hit the spot!

    Cranberry and Almond Biscotti Revisted

    Makes about 30 biscotti

    Ingredients:

    • 320 g AP unbleached flour
    • 4 g baking powder
    • 3 g salt
    • 340 g sugar
    • 125 g butter, room temperature
    • 2 large eggs
    • 7 mL almond extract
    • 150 g frozen cranberries, defrosted
    • 70 g almonds, toasted

    Directions:

    1. Preheat the oven to 350° F. Line a baking sheet with parchment.
    2. Combine the flour, baking powder and salt and mix well. Fold in the cranberries and almonds (I used whole)
    3. In the large bowl of your stand mixer, combine the sugar, butter, eggs and almond extract and mix for about 4 minutes.
    4. Fold in the dry ingredients until entirely combined (I did this using my whisk attachment so I didn’t break up the cranberries.
    5. Divide the batter in half and shape into relatively skinny logs on the parchment, leaving sufficient space between the two as they will spread during baking.
    6. Bake for 35 minutes or until golden.
    7. Remove logs from the oven and transfer to a cutting board. Using a serrated knife, slice each log into 1.5 cm slices. Place cut-side down on the baking sheet (reuse the original parchment) and bake for 10 minutes, flip and continue to bake for 5 more minutes or until lightly golden. Cool completely.
    8. Store in an air-tight container or freeze. Serve with coffee or tea.

    You’ll need to bake these a little longer because the cranberries are moist.

    Read Full Post »

    You guys know of our dear friends, Paul & T, they summer in Wisconsin and winter in Arizona. This year, they decided to sell their Wisconsin home and move permanently to Arizona. They were kind enough to invite us to the Lake House one last time. Because they are imminently selling their home in Wisconsin, we were not able to bring lasting gifts because their trip home to Arizona will be packed solid with whatever they move from their home in Wisconsin. Food is always a good bet with them, so I’ve been experimenting with recipes and this one, I must say is a winner. Don’t skip the drizzle, it just makes it OTT lemony. You have to love lemons to make this tasty treat, or at least, have someone that does. It probably works with lime too, although I haven’t tried it.

    I used this recipe as my starting point, I just loved how they looked, with the drizzle and all. Plus, it sounded like they were really lemony, but I wanted to up the ante so I also added a splash of lemon extract as well as lemon zest to the cookie dough. BANG!

    Buttery, melt in your mouth lemon shortbread that has balanced sweetness.

    Lemony Shortbread Cookies

    Makes 54 cookies, about 3 cm x 3 cm

    For the original recipe, kindly click here.

    To print this recipe, please click here.

    Ingredients:

    • 227 g unsalted butter, at room temperature
    • 86 g powdered sugar
    • 5 mL vanilla extract
    • 5 mL lemon extract
    • 5 g lemon zest
    • 240 g AP unbleached flour
    • 56 g cornstarch
    • 2.5 mL salt

    Ingredients for the drizzle:

    • 80 g confectioner’s sugar
    • 15 mL fresh lemon juice
    • 5 mL lemon zest
    • water (to thin, if needed)

    Directions:

    1. Combine the butter and confectioner’s sugar and beat until light and fluffy. Beat in the vanilla, lemon extracts and lemon zest.
    2. Sift the flour, cornstarch and salt into the butter and mix until a smooth dough is formed. It will take about 1.5-2 minutes.
    3. Between two pieces of parchment, roll out the dough to a 33 cm x 23 cm rectangle and cut into little squares (I did 3 cm x 3 cm), refrigerate cookies on the cookie sheet for 30 minutes. They don’t spread much, so you needn’t leave more than 1 cm between each cookie.
    4. Preheat the oven to 325° F. Bake for 15-20 minutes, you don’t want them too golden because these are pretty if pale white.
    5. For the drizzle, mix the confectioner’s sugar, lemon juice and zest in a food processor and process until smooth and drizzle-able. If necessary, add water.
    6. Allow the cookies to cool completely before drizzling with the lemony mixture.
    7. Allow the drizzle to set at room temperature before stacking the cookies.

    Notes:

    • I baked these on a super hot day, not sure why my version took so much longer than the original recipe.
    • I found the original drizzle recipe made way too much drizzle, it has a good lemon flavour and is intended to enhance the shortbread, not overwhelm it so I reduced the quantities by half.

    Read Full Post »

    We were scheduled for a Progressive Dinner when we returned from Arizona. Our neighbours John and Nancy were the main-course hosts so they chose the theme: the Kentucky Derby. This group is a hoot and everyone chose something fun to wear that was indicative of the Derby. JT and Tom wore bow ties (JT made his bow-tie from a standard tie using this video, don’t you just love Google?!). Iona and I wore crazy hats and Nancy dressed up as a jockey, she is around 5 feet tall and really looked the part. Neighbour John dressed as a stable-hand, all in denim! It was a super fun night that ended somewhere around 2am!

    People at the Derby seem to wear brightly coloured clothes and the guys always seem to sport bow ties.

    I was responsible for dessert and I went a little crazy and did Mint Julep three ways: Panna Cotta, Macarons and Trifle! You may notice a sablé horse on the plate too but I didn’t like the recipe so it will be ignored. The desserts went over well, the bourbon was noticeable but not overwhelming, as was the mint. I doubt I’ll make these flavours again but it was fun for the night. And yes, we were served Mint Julep’s at Tom and Iona’s as part of our starters.


    My crazy hat!

    Kentucky Derby, Mint Julep Three Ways

    • Panna Cotta
    • Macarons
    • Trifle

    Mint Julep Panna Cotta with White Chocolate Almond Crumb

    To print the Mint Julep Panna Cotta, please click here.

    Serves 6

    Ingredients:

    • 8 g Powdered unflavored gelatin
    • 50 mL Cold water
    • 700 mL Whole milk
    • 75 g Sugar
    • 2 g Tonka bean, finely grated
    • 1 cinnamon stick
    • 1 g small bunch Fresh mint leaves, including stems
    • 1/4 tsp Real Mint extract
    • 65 mL Kentucky Bourbon (to taste and optional)
    • 1-2 tablespoon finely chopped mint leaves

    Directions:

    1. Dissolve gelatin in the cold water. Set aside. Lightly rub vessels with a non-flavoured oil, set aside.
    2. Warm milk with sugar, grated tonka bean and cinnamon to 150° F (DO NOT BOIL), add mint leaves and allow to steep for 10 minutes Stir in gelatin until dissolved.
    3. Strain milk mixture through a fine sieve and discard mint. Into the strained mixture, stir in the mint extract and Kentucky Bourbon a little at a time, tasting each time until the desired flavour is achieved. Cool slightly.
    4. Pour into prepared vessels and chill for 2-4 hours or until set.

    White Chocolate Almond Crumb

    Ingredients:

    1. 50 g white chocolate chips
    2. 5 mL Bourbon
    3. 25 g ground almonds
    4. 15 g coconut flour

    Directions:

    1. Melt the chocolate with the bourbon on low heat, stir in the ground almonds and coconut flour, it will be rather thick.
    2. Sprinkle/spread relatively thinly on a Silpat and bake for 3 minutes in a preheated 350° F oven, until golden.
    3. Cool completely and crumble with a fork until relatively fine. Reserve for assembly.

    Please click here to print this recipe.

    Serves 6

    The Blueberries

    Ingredients:

    • 300 g Blueberries
    • 125 mL Bourbon

    Directions:

    1. Combine the blueberries and bourbon and allow to sit at room temperature for at least 30 minutes or one day.
    2. Strain, reserving the blueberry bourbon. Set aside until assembly.

    The Sponge

    Ingredients:

    • 4 large eggs
    • 120 g sugar
    • 120 g all purpose flour
    • 1 tsp vanilla
    • 2 tbsp granulated sugar

    Directions:

    1. Pre-heat oven to 350° F. Line a 23 cm x 33 cm (9″ x 13″) cake pan or jelly roll pan with parchment paper, carefully folding the corners. Spray with non-stick cooking spray.
    2. Separate the eggs into two medium bowls. Beat the egg whites until stiff peaks form, but not dry. Set aside.
    3. Beat the egg yolks with the sugar until pale and creamy and falls in a thick ribbon.
    4. Fold in 1/3 of the egg whites into the pale egg yolk mixture.
    5. Sift about 1/3 of the flour into the egg yolk mixture, then alternate folding in with the egg whites being careful not to deflate the batter.
    6. Once all of the egg whites and flour have been folded in, the mixture will be thick. Pour carefully into your prepared baking pan and spread out evenly. Bake for 20-25 minutes or until your cake tester comes out clean.
    7. Lift the cake out of the pan using the parchment edges and allow to cool completely.
    8. Measure your Mason jar diameter and select a round cookie cutter of similar size. Cut 12 rounds for the trifle and set aside.

    Stabilized Mint Julep Whipping Cream

    Ingredients:

    • 3 g unflavoured gelatin
    • 15 mL Cold water
    • 15 mL Bourbon
    • 1 mL mint extract
    • 125 mL whipping cream,
    • 8 g icing sugar
    • 2 g freshly chopped mint, as garnish

    Directions:

    1. Dissolve the gelatin in the cold water, mix in the bourbon and mint extract, set aside.
    2. Whip the cream with the icing sugar. Add a bit of the whipped cream to the gelatin mixture and whisk well to combine. Strain this mixture if it’s lumpy. As you are whipping the cream, add the gelatin mixture and whip until well-combined.
    1. Layer one sponge round into the bottom of each mason jar, sprinkle about 5 mL to 10 mL of the reserved blueberry bourbon onto each sponge in the mason jar. Add about 15 blueberries on top of the sponge in each jar. Using a pipping bag, trop the blueberry layer with the stabilized whipped cream. Sprinkle lightly with the chopped mint garnish.
    2. Layer the second sponge on top of the whipped cream, sprinkle about 5 mL to 10 mL of the remainder of the reserved blueberry bourbon onto each sponge in the mason jar. Top with the whipped cream and finish with about 12-15 blueberries in each jar. Sprinkle with the remaining mint garnish. Tightly close lid and refrigerate until serving.

    Mint Julep Macarons

    Makes about 10 macarons (four ;-)for the cook!).

    To print this recipe, please click here.

    Ingredients:

    • 35 g blanched, finely ground almond meal or flour
    • 58 g icing sugar
    • 1 large egg white, room temperature
    • 25 g granulated sugar
    • A pinch of gel food colouring (I used green)

    Directions:

    1. Pre-heat the oven to 350° F. Line your baking sheet with parchment with circle-round templates beneath it (this is a more detailed account of this recipe).
    2. Combine the almond meal with the icing sugar and sift a few times, discard or reserve the larger bits for something else.
    3. In the small bowl of your stand mixer, whisk the granulated sugar and egg white together by hand and then beat on #4 for 2 minutes, #6 for 2 minutes.
    4. Add the pinch of food colouring now and beat for a final two minutes on #8.
    5. Pipe onto the prepared parchment onto the circle-rounds. Tap the baking sheet on the counter to remove any air bubbles and bake for 13 minutes or until feet have developed but the cookie does NOT brown. Cool on parchment and remove carefully. Fill with Mint Julep Buttercream (recipe below).
    6. Unfilled cookies may be kept in the freezer for up to one month in an air-tight container.

    Mint Julep Buttercream

    Ingredients:

    • 57 g butter (softened)
    • 200 g icing sugar
    • 2.5 mL mint extract
    • 25 mL bourbon
    • 2.5 mL brandy
    • Gel food colouring of choice

    Directions:

    1. Combine softened butter with the icing sugar, mint extract, bourbon and brandy and beat until extremely light and fluffy.
    2. I wanted this buttercream to resemble the colour of bourbon so I coloured it with a little brown, red and yellow gel colouring.
    3. Fill a piping bag with the buttercream and fill each half cookie carefully. Top with the second half of the cookie. Store on its side in an air-tight container in the fridge. Cookies remain fresh for up to one week. Allow to come to room temperature before serving, but make sure the room isn’t too warm otherwise the buttercream will melt.

    Mint Julep Four Ways Plating

    1. Sprinkle the white chocolate crumb on one side of the plate. Top with the mint julep pannacotta and garnish with small mint leaves.
    2. Add the macaron on its side and finish with the uncovered trifle. Serve with a shot of bourbon, or pass like we did (I just thought it looked nice for the photo).

    The horse cookie was a sablée that did not work out as well as I had hoped. Recipe will not be forthcoming. Yes, I bought a horse cookie cutter!

    Read Full Post »

    Older Posts »

    %d bloggers like this: