Hope all the Canadians reading this post are having a Happy Thanksgiving this weekend! The second Monday of October has been designated as Canadian Thanksgiving, not sure why, but we’ll take a holiday in October any day of the week!
We used to spend Thanksgiving at the cottage, often inviting my dear Mom and her hubby Geo, but since her passing in 2005, we’ve been invited to my brother’s cottage in the Muskoka. It’s quite a different life-style than ours to have a cottage in Muskoka. For example, you needn’t do much grocery shopping in the city because you can get everything and anything you need for the weekend in one of the well stocked grocery stores; in comparison, last time I forgot Parmesan Cheese and I was even going to settle for the powdered prepackaged cheese but our little shop didn’t even have that, so we had to drive an hour to find it! You might wonder why it’s so different in the Land of the Thousand Lakes (our cottage area) and Muskoka. Well, let me tell you. It’s because Hollywood has descended on Muskoka and while we have 1,000-2,000 square foot cottages (93-186 square metres) (ours is about 600 square feet), Muskoka boasts 10,000 and 20,000 square foot cottages (930-1860 square metres) with helipads and landing strips! There is name dropping in Muskoka whereas we just talk about the dear we may have seen on the back road driving in. Goldie Hawn has a sprawling cottage on the same lake as my brother. We’ve never really been close to it, but apparently people think it’s ok to moor their boat and hop out to look around. She has security. My SIL spotted her in their local grocery store, where you could order Sushi grade tuna for the weekend (I’m lucky to get mac and cheese at ours). Steve Martin visits Martin Short who also has a nice place down the road on my brother’s lake. I heard that Steve Martin is very kind and hands out business cards that prove you’ve met him: “this certifies that you have had a personal encounter with me and that you found me warm, polite, intelligent and funny” and of course he signs it. Martin Short’s wife once ran after my brother while he jogged down the road in front of their place to warn him that there have been bears seen that very morning! So you see, while we hob nob with the dear, chipmunks, bunnies and beavers, the folks in the Muskoka’s hob nob with the rich and famous.
My brother’s family is down to earth and their cottage is much more modest than those around them. They are generous to a fault and we always eat well and drink copious amounts of wine when we visit. We’ve had balmy 24°C days and on the very same weekend, we’ve had snow flurries! But it’s always a relaxing weekend to connect with family and take long quiet walks around the lake.
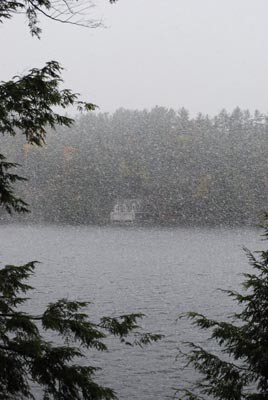
Snow flurries a few years ago. View from the dining room and kitchen.
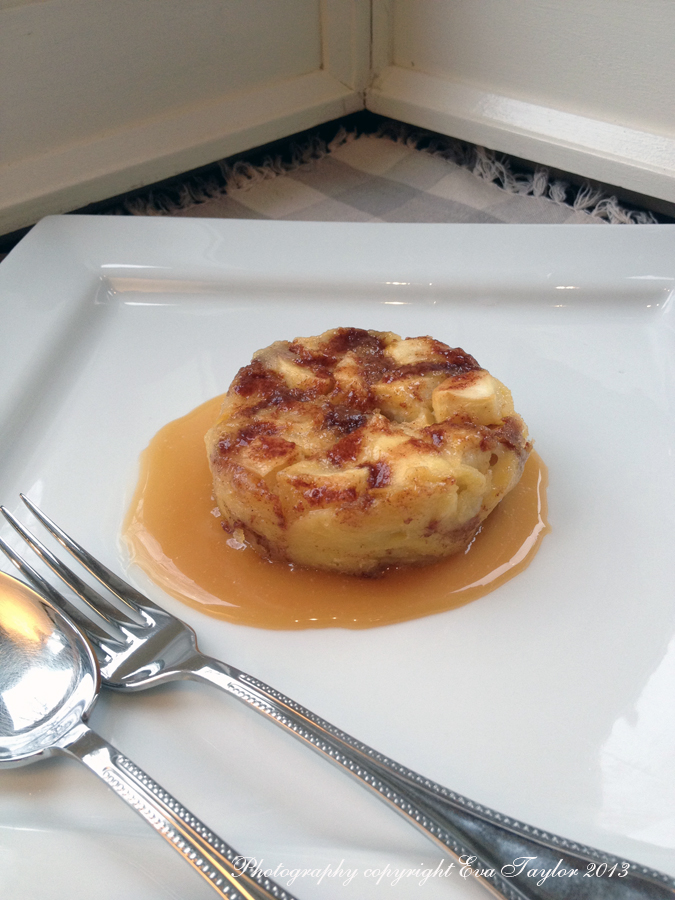
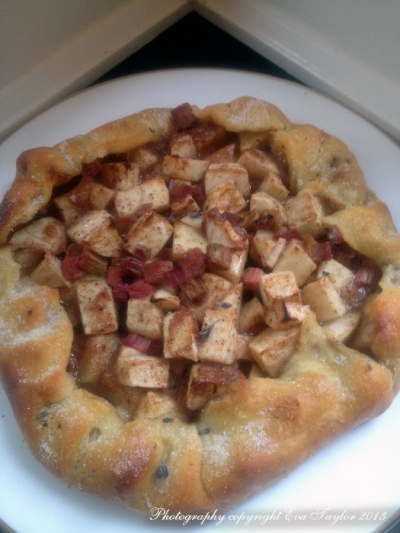
Although I didn’t make this galette for the Thanksgiving weekend, it dawned on me that it would be the perfect sweet for afternoon tea or dessert after a big turkey dinner. I used the lavender sugar that my dear friend Barb (Profiteroles and Ponytails) brought up when they visited us at the cottage this summer. It just made this dessert that much fancier! Thanks Barb.
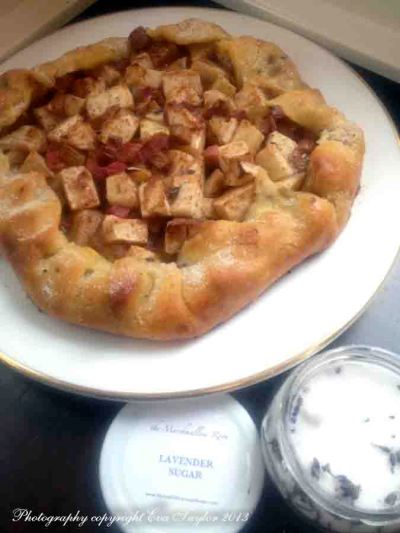
The Lavender Sugar was a gift from my friend Barb from Profiteroles and Ponytails
Apple Rhubarb Galette with Lavender Sugar
Serves 6-8
The Galette Pastry Recipe comes from Baking with Julia by Dorie Greenspan
Ingredients:
- 1/2 Galette pastry
- 1/2 c Rhubarb
- 3 Apples, chopped into equal-sized pieces
- 2 tbsp all purpose unbleached flour
- 1/4 cup sugar
- 1 tsp cinnamon
- 1/2 tsp allspice
- 1 tbsp egg white for brushing pastry
- 1 tbsp Lavender Sugar for garnish
Directions:
- Combine the apples and rhubarb and dust with the spices, sugar and flour, coating evenly
- Roll out the galette pastry to about 10cm or 3 inches larger than required. Fill centre with the fruit and turn up the sides to form the galette.
- Brush pastry with egg white and bake for 25 minutes or until edges are golden brown and fruit is soft.
- Remove from the oven and dust with 1 tbsp Lavender Sugar.
- Serve warm or at room temperature.
The Rhubarb was the perfect foil for this sweet dessert
The rhubarb came from our dear friend’s Monica and Rae’s garden in Toronto. I still have some in the freezer, it will be a welcome taste of summer in mid-winter!
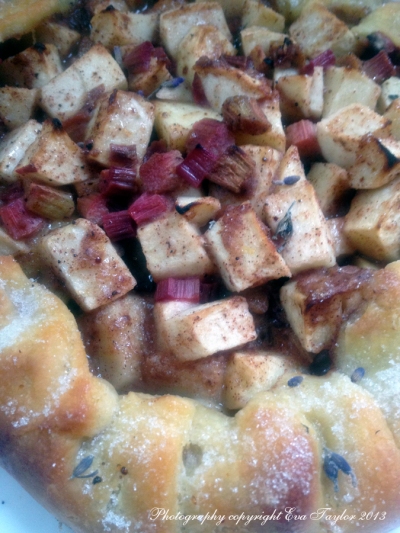
Can you see the little Lavender Flowers?
Read Full Post »