Feeds:
Posts
Comments

Posts Tagged ‘lime’

For New Year’s Eve, I made several tapas to feed us through the evening and this sauce was one that accompanied some lamb Spiedini that JT barbequed on the Big Green Egg. But it would be equally as delicious with shrimp. It’s not overly minty, which I prefer, it’s just minty enough.

Herbaceous Mint Sauce

A KitchenInspirations Original Recipe

Ingredients:

Makes about 125 mL sauce

  • 10 g fresh parsley
  • 20 g fresh cilantro
  • 5 g mint
  • 10 g roasted garlic purée
  • Juice of half a lime
  • 45 mL white Balsamic
  • 65 mL EVOO
  • salt and pepper to taste

Directions:

  1. Combine all of the ingredients in a small food processor and process until the herbs have been chopped up but not puréed. 

Notes:

  • Do not refrigerate if serving the same day. If you wish to make the sauce in advance, refrigerate it covered but remove it from the fridge about 4 hours prior to serving so that the olive oil can come to room temperature otherwise, it congeals and it’s not pretty nor with the herbs have their best flavour.

Read Full Post »

Many years ago, when I was working as a design manager in a professional services firm, one of the freelancers I regularly hired invited me to a potluck house party.  It was mostly women and someone hired a fortune teller (apparently, this was the purpose of the party); everyone took turns going upstairs to have their fortune read. Everyone but me. I have never been a fan, to be honest, it’s a bit freaky to me so I stay clear. Fortunately for me, someone brought this salad and I was just as happy, sitting downstairs munching on this delicious dish. I asked for the recipe and it was quickly jotted down on a scrap piece of paper. It’s been many years since I’ve made it and I have lost the recipe so I really had to stretch my memory to come up with the dressing but I think I’ve got it and it’s a keeper. It’s important to toast the curry powder either dry or in a little oil to bring out the full flavour and subdue the bitterness that it could have. The salad is best made hours or a day before you plan on eating.

I stuffed a delicious freshly baked croissant with the tasty salad. Definitely a keeper.

Curried Chicken Salad in a Croissant

Makes enough for 2 for lunch

Ingredients:

  • 15 mL curry powder, heat level is your choice
  • 15 mL oil (optional)
  • 3 g salt
  • 125 mL yogurt
  • 75 mL mayonnaise
  • 30 mL lime juice
  • pinch of sugar
  • 150 g rotisserie chicken, cubed
  • 40 g raisins
  • 50 g celery, cubed
  • 1/2 red pepper, cut into small cubes
  • 2 scallions, thinly sliced
  • 30 g pecans, toasted and roughly chopped

Directions:

  1. Heat the oil in a small frying pan and add the curry powder and salt and cook until fragrant, remove from heat and set aside to cool.
  2. Combine the yogurt, mayonnaise, lime juice and stir well. Once the curry has cooled, add it to the yogurt mixture and mix well. Taste and add sugar as desired.
  3. Combine the chicken, celery, raisins, red peppers and scallions and mix into the prepared dressing. Stir well to coat. Set in the refrigerator for a few hours for the flavours to meld.
  4. When ready to serve, cut the croissant lengthwise in the center and open up like a clam. Stir half of the pecans into the salad, reserving the other half for garnish. Spoon the salad into the croissant and sprinkle each croissant with a quarter of the remaining toasted pecans.

Notes:

  • I had made some crispy shallots for another dish and saved the oil from frying the shallots, the oil was quite fragrant, so I used the shallot oil to toast the curry powder.
  • You don’t need to add sugar, just taste the dressing to be sure. You can make the dressing a day in advance which will help the flavours come together.
  • You can also serve this on a bed of greens instead of a croissant, but I had some at home, so why not.


Read Full Post »

This winter we ate a lot. I mean, we ate a lot of soup. Who am I kidding, we did eat a lot, but we also ate a lot of soup. I became quite proficient at some of our ethnic favourites, this Thai Lemongrass Shrimp soup being one of them. I reverted back to an old favourite recipe from an Australian cookbook a friend gave me years ago, Bay Books Cookery Collection, Thai Cooking Class, written by Somi Anuntra Miller and Patricia Lake. It is a well-illustrated cookbook with some great background, techniques and lists of ingredients for successful Thai cooking. In fact, it is my GoTo Thai cookbook. I have tweaked the recipe to resemble that of a favourite Thai restaurant.

Shrimp Lemongrass Soup (Tom Yam Goong)

Makes about 500 mL soup

Ingredients:

  • 500 mL chicken stock
  • 8 pieces fresh galangal
  • 8-12 Fresh Kaffir lime leaves
  • 2 pieces of 2 cm lemongrass, sliced in half lengthwise
  • 60 mL lime juice
  • 15 mL fish sauce
  • 2.5 mL chilli paste
  • 5-10 g of cane sugar
  • 8 fresh shrimp, peeled and deveined (skins reserved)
  • 10 fresh cremini mushrooms, cut into quarters
  • 80 g vermicelli rice noodles
  • 2 Campari tomatoes, cut into 6ths
  • Chiffonade of Cilantro leaves, Thai basil and thinly sliced green onions to garnish

Directions:

  1. Bring the chicken stock, galangal, Kaffir lime leaves and lemongrass along with the shrimp skin to a slow boil and then simmer for 30 to 60 minutes. Strain out the stock so that it is clear and without any bits.
  2. Add the lime juice, fish sauce, chilli paste and cane sugar and continue to simmer until sugar has completely dissolved. Taste for balance and add a bit of lime juice or sugar to balance if required.
  3. Boil water for the noodles, completely cover noodles in the hot water and allow to soak until al dente. Rinse in cold water to stop from cooking further.
  4. Bring the soup to a slow boil and add the mushrooms and shrimp and cook until the internal temperature of the shrimp is 120° F.
  5. Meanwhile, preheat the bowls (it’s winter and they cool down incredibly quickly). Reheat the noodles by running them under super hot water.
  6. Assemble the soup: add half of the heated noodles to each bowl, top with 4 shrimp in each bowl and spoon the hot liquid over the noodles and shrimp, dividing the mushrooms equally between the two. Add a cut tomato into each bowl and garnish with the chiffonade of cilantro and Thai basil and green onions.

Read Full Post »

Bloor West Village (BWV) is really starting to shape up in terms of restaurants. Of course we have more than our share of the usual pubs and sports bars but fine dining and house made food restaurants have had a difficult go at it mainly due to greedy landlords offering absurdly high rents. But in recent times, the restaurant selection has expanded and now we have some excellent choices for good food. One of the more recent places is a Korean BBQ place and although the food is wonderful, the ambiance is not (I think I counted about 21 TVs surrounding the perimeter just below the ceiling, and it’s not a huge place!) so we will reserve our patronage for lunch or take out.

I was immediately intrigued by the spices and flavours of Korean cuisine but my only experience was with Charles (Five Euro Food, in hiatus presently) when we met up in Paris in 2012 and Sissi’s tantalizing recipes for pickles and kimchi. So one afternoon, I decided to explore said cuisine at home. Of course, I was ill-prepared and did not have some of the specific spices (Korean chili paste, Korean red pepper powder) so I had to improvise using ingredients found in my European kitchen. We loved it and, because we have a relatively young Korean palet, did not immediately taste a huge difference compared to the restaurant food we’ve experienced. In general, (in my opinion), Korean food can be rather spicy (hot) and may not be for everyone (they seem to have only one way to make it: really, really hot) so the recipe below is a slightly tempered version. Of course, you may make it as hot as you like.

Korean Pork “Bulgogi”

For the original recipe, please click here.

Print Korean “Bulgogi” Recipe

Makes 2 servings

Ingredients:

  • 200 g Pork Tenderloin, thinly sliced
  • 1/2 large sweet onion, halved and thinly sliced
  • 4 medium garlic cloves, crushed
  • 45 mL (3 tbsp) fresh ginger, finely minced
  • 125 mL (1/2 cup) sweet pimento paste (like this) or Korean chili paste
  • 2 tbsp toasted sesame seed oil
  • 63 mL (1/4 cup) dark soy sauce
  • 30 mL (2 tbsp) Hungarian sweet paprika (or Korean chili powder)
  • 3 mL (1/2 tsp) smoked Spanish paprika
  • 5 mL (1 tsp) hot Hungarian paprika paste (like this), or to taste
  • 30 mL (2 tbsp) honey
  • 30 mL (2 tbsp) mirin
  • 2 medium scallions, white and green parts, finely sliced
  • 10 mL (2 tsp) toasted white and black sesame seeds

Directions:

  1. Combine everything but the pork, scallions and sesame seeds in a blender and blend until smooth.
  2. Toss the pork with the onions; cover with 1/2 of the marinade (reserve the rest for another time) and coat well, refrigerate for 1-4 hours.
  3. Warm a cast iron pan on the grill (or stovetop), add a little oil and cook the marinated meat and onions until the pork is cooked through. Leave the top open to allow the sauce to thicken.
  4. Serve with finely sliced scallions and toasted sesame seeds over sticky rice or cauliflower rice.

This is a richly flavoured Korean inspired dish.

Notes:

  • This version is not an overly spicy dish, but it is richly flavoured with a very slight kick.
  • I modified the ingredient list to suit what I had in my pantry. I cannot say whether the original recipe would be significantly spicier but my guess would be, that it is.
  • Make a double or triple batch of the marinade and reserve for future meals, it really is tasty.

Or you may use chicken, like this and make it a Bulgogi Bowl! I made a quick carrot pickle and topped shredded ice burg lettuce for a lighter dinner, it was wonderful!

Read Full Post »

PeaKaffirLime_First

A few months ago, one of my Chef FB peeps posted about a product she received called Mycryo®. I was intrigued, I had never heard of such a product so off I went to research it. The product is powdered cocoa butter and their website touts that it seals in flavour with fewer calories than pan firing in oil! How exciting is that?! I immediately thought of a few applications that release fluids quickly making it difficult to sear: Scallops, mushrooms, potatoes, and the list goes on! I HAD to HAVE it! So off I went to their website to see where I might purchase this unique product, and to my delight, there were quite a few stores. I made the mistake of not calling ahead to see if they had it in stock and I shuffled off to several stores (sigh, you know how I hate going to specialty grocery stores!) to track it down but was sadly disappointed, although I did make some other purchases so my trips were not entirely useless. I returned home, with a sunken heart and proceeded to call and email around but, I was not able to find it. What to do? My desire for this product had not waned, so I tweeted the Canadian company and they immediately responded and the next thing I knew, they sent me a full-size sample! Isn’t that lovely?

Mycryo

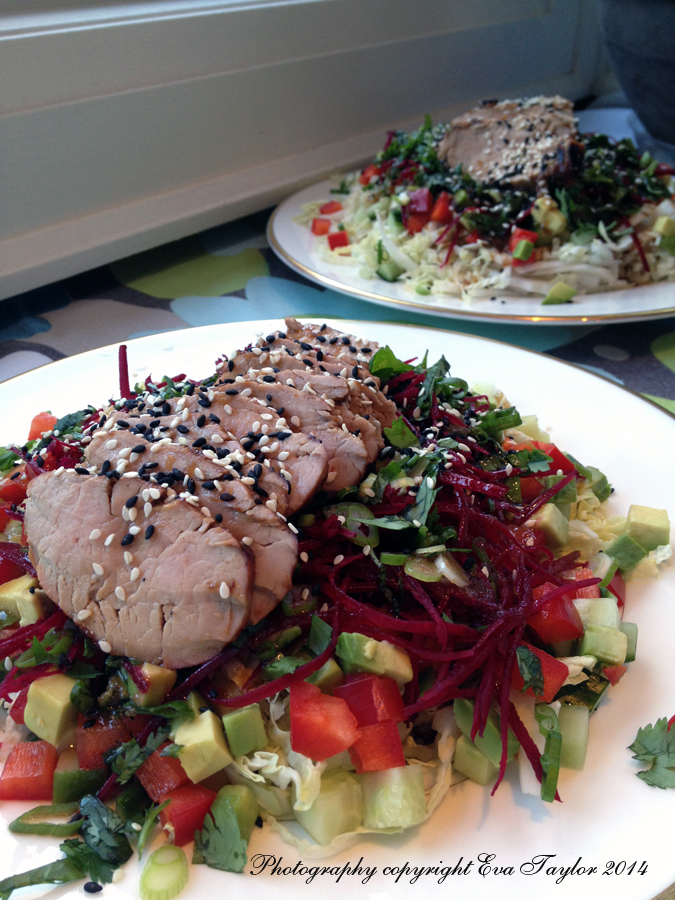
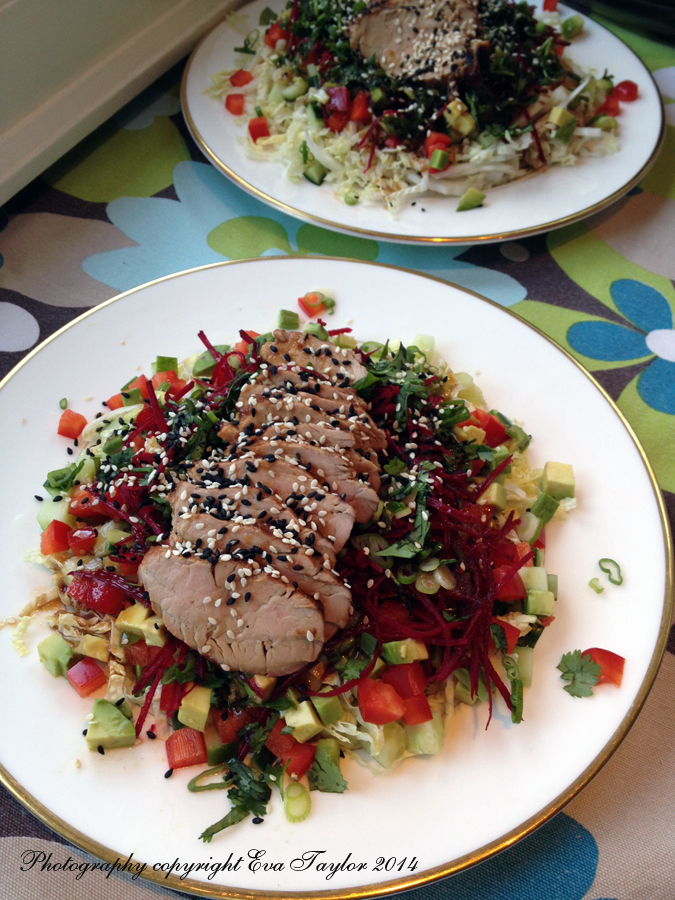
I’ve been using Mycryo® in my everyday cooking (I even transferred some to a small bottle to take to the cottage), although I haven’t had a blog worthy recipe before this one, it works just as they claim. I’ve tried Mycryo® with mushrooms, scallops, shrimp, pork shoulder (for pulled pork) and pork tenderloin (roast), oven roasted potatoes and sweet potatoes. It doesn’t splatter as much as oil does and that makes me happy because I don’t need to clean up a mess! Although, I must tell you that I haven’t had as much success with potatoes or sweet potatoes, but that may be due to the fact that I only have a small convection oven at the cottage, where I tried it. This recipe, however, works out perfectly with this unique product, the shrimp did not release any liquid, making a wonderfully crisp coating, just like deep frying but without the excessive calories.

PeaKaffirLime3

That shrimp is either enormous or that’s a very small bowl 😉!

Chilled Pea Soup with Kaffir Lime Coconut Milk garnished with Toasted Coconut Shrimp

A KitchenInspirations Original Recipe

Makes 1.25 L (5.5 cups)

Ingredients:

  • 25 g coconut milk powder (around 4 heaping tbsp)
  • 1 cup milk (I used 2%)
  • 1 cup water
  • 750 g frozen peas (about 1 lb)
  • 10 g dried Kaffir Lime Leaves (a good handful, use less if fresh)
  • 1 tbsp chopped cilantro
  • 10 g grated frozen ginger (about 1 tsp)
  • 2 cups vegetable stock or water
  • 2 tbsp lime juice
  • pinch of sea salt

Directions:

  1. Combine coconut milk powder with milk and water and blend with an immersion blender until well blended.
  2. Add the defrosted peas, dried kaffir lime leaves, cilantro, ginger and 2 cups vegetable stock (or water) to the coconut milk. Blend with an immersion blender until smooth. Strain through a fine sieve and add the lime juice, blend again briefly (see notes below).

PeaKaffirLime2

The soup tastes like summer!

Serving Suggestion, per person:

Ingredients, per person:

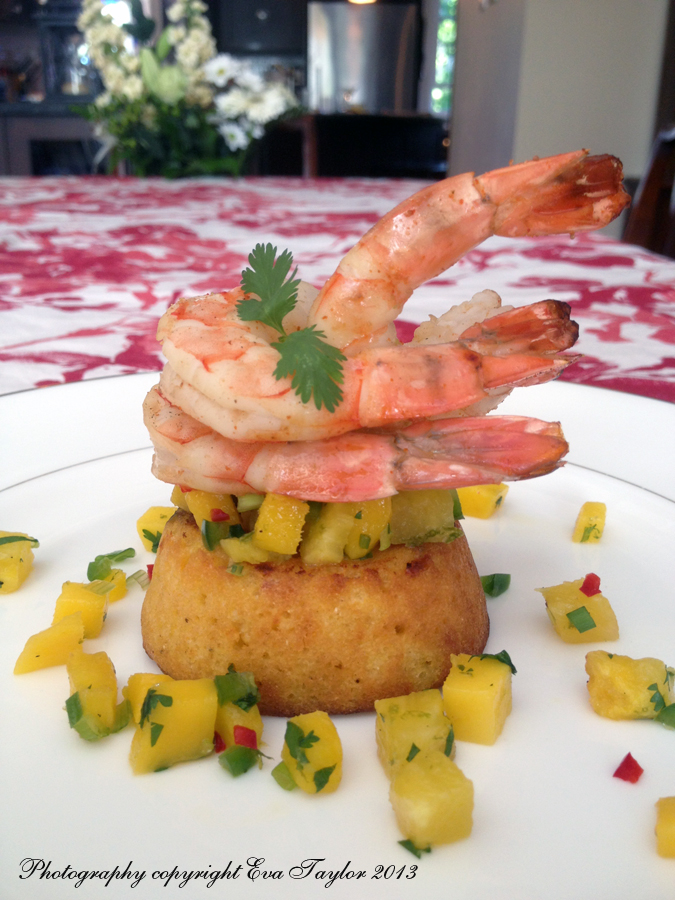
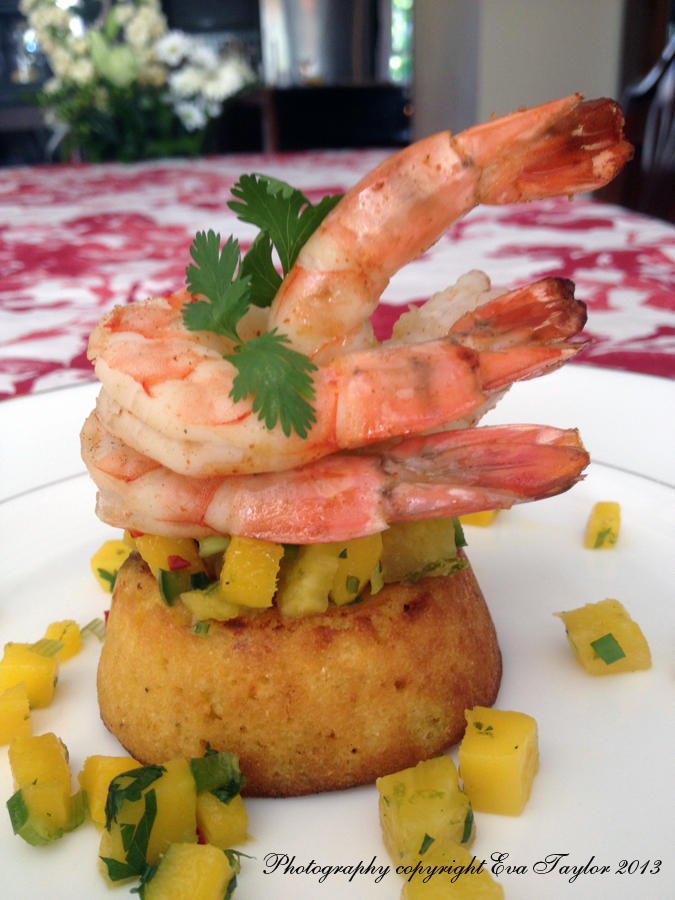
  • 1 large shrimp, entirely peeled (I hate to have to fish the shrimp out with my fingers to pull off the tail)
  • 1/2 tbsp AP unbleached flour
  • 1/2 tbsp egg white with a pinch of sugar or honey, whisked
  • 1 tbsp toasted coconut
  • 1/2 tsp Mycryo®*

Directions:

  1. To toast the coconut, Toss with 1/2 tsp Mycryo® and toast lightly in a small frying pan set aside to cool,.
  2. Dredge the shrimp in the flour and coat well. Next coat the shrimp with the egg white mixture. Then back into the flour and dip back into the egg white mixture (see notes). Then lastly,  coat the shrimp well with the toasted coconut, set aside. Continue until you have all of the shrimp prepared.
  3. Preheat the oven to 190° C (375° F). Lay shrimp on their sides onto a baking sheet. Gently sprinkle Mycryo® on side one, then flip the shrimp and sprinkle on side two. Bake for 3-5 minutes or until entirely opaque.
  4. Pour the chilled soup into a soup bowl, gently add the shrimp so that it remains visible (I may have propped said shrimp on an inverted bowl in the soup, food styling trick for photography ONLY!). Serve immediately.

Notes:

  • Obviously, to be vegetarian and vegan, omit the shrimp!
  • Substitute 1 cup coconut milk plus 1 cup water for the coconut milk powder and milk. To reduce calories, reduce the proportion of coconut milk to 1/2 cup plus 1 1/2 cup milk and 1 cup water.
  • To get more out of your soup, blend the remaining pulp from the sieve a few times adding only a little water or vegetable stock, press through a fine sieve each time and add to the main soup. I usually do this 2 or 3 times and the pulp is reduced about 1/2 to 1/4 each time!
  • Pulp broth: do yourself a favour and boil some water (I did about 500 mL or 2 cups) and pour it over the pulp, allow to sit until cooled and then strain it through a fine sieve (like a metal coffee filter) and reserve the liquid for your next soup. It packs a bunch of flavour and now you have stock from something that would have been compost! Compost the remaining pulp.
  • Refrain from adding additional sweetness to the soup until you have tasted the final product, I feel the peas should be sweet enough.
  • Other garnish options are:
    • Whipped coconut milk with toasted coconut.
    • 1 or 2 grilled shrimp per serving (just dust the dry shrimp in Mycryo® on both sides and put on a hot grill)
    • Toast some coconut and chiffonade some mint, dress each bowl.
    • a dollop of crème fraîche with some toasted coconut.

Disclosure:

Eva Taylor/Kitcheninspirations received 550 g container of Mycryo® by Mycryo® Canada free of charge; this recipe was developed by Eva Taylor for Kitcheninspirations, and the opinions expressed in this post are that of Eva Taylor/Kitcheninspirations.

nutrition

Nutritional facts based on 250 mL soup with 1 shrimp, approximately 26 g.

WWnutrition

WW tables based on 250 mL soup with 1 shrimp, approximately 26 g.

Read Full Post »

20140519-084249-31369627.jpg

The tart lime custard is a lovely contrast to the sweet blueberries.

It’s our 28th wedding anniversary. Yes, I was a child bride! We celebrated at the cottage, hence the slight delay in this post. We actually married on the Holiday Monday of the Victoria Day long weekend (today) because we didn’t want to wait a year for the reception hall. One place I called had a 3-year waiting list! Can you imagine waiting 3-years for a reception hall? How long did you have to wait? We also didn’t want to pay a king’s ransom for our wedding and the holiday Monday was less expensive than a Friday or Saturday; it meant that we had funds to put a down payment on our first home. What’s the most expensive wedding you attended? About 20 years ago we went to a wedding that was over $40,000!

We didn’t have a traditional wedding cake for our wedding either because neither JT nor I like fruitcake, so we had Black Forest cake but I definitely could have enjoyed these shaker lime tarts instead. The tarts are a cross between a curd and a custard and they are plenty tart, which both JT and I adore. I made these last week when a friend dropped by to deliver his FILs pickled herring so I naturally invited him for dinner. I was inspired by fellow Torontonian blogger Ilan’s Iron Whisk recipe here but I didn’t make his recipe because I thought the Sweetened Evaporated Milk would make it way too sweet for our taste, so I adapted my old favourite Martha Stewart recipe that I first posted here. Both the filling and pastry components come together very quickly and it sure was tasty with the fresh blueberries on top.

Shaker Lime Tarts with Blueberries

Makes 4 small tarts (about 10 cm or 4 inches in diametre)

Ingredients:

  • 3 limes (I used ordinary limes but you can use Key Limes instead, you’ll need about 8)
  • 1 cup granulated sugar
  • 2 large eggs
  • 1 batch of Viennese Pastry (recipe below)

Directions:

  1. Zest the limes entirely into a non reactive bowl (glass works) and reserve about 1 tsp for the pastry. Cut limes crosswise into paper-thin rounds using a mandoline or a very sharp knife; discard ends and seeds.
  2. Place lime slices and any juice that you can collect into non reactive bowl with the zest and cover with sugar; toss to coat evenly. Cover with plastic wrap and allow to stand at room temperature overnight.
  3. Divide the pastry into four equal balls. With the heel of your hand, flatten out the balls into a small disk. Place the disks into the centre of a spring form tart pan and press out to the edges with your fingers. Roll the top to get a nice scalloped edge.
  4. Place the tart pans on a rimmed baking sheet lined with parchment and refrigerate for 1 hour.
  5. Preheat oven to 450° F (232° C) with rack in lower third.
  6. Pour the sugar and lime mixture through a fine sieve, pressing the lime slices to get every drop.
  7. Add the lightly beaten eggs to lime mixture and stir well to combine.
  8. Divide the lime liquid among the refrigerated tart shells.
  9. Bake tarts on parchment covered baking sheet for 15 minutes, then reduce heat to 350° F (177° C) and bake until filling is set and beginning to look golden, about 15 minutes.
  10. Allow to cool on sheet on a wire rack for about 10 minutes. Remove tarts from pans, and allow to cool completely on wire racks.
  11. Top in a even pattern of blueberries.

Viennese Pastry

Originally from the Five Roses Flour Cookbook

Ingredients:

  • 1/2 cup all purpose flour
  • 1/8 cup sugar
  • pinch of salt
  • 1/4 cup unsalted butter
  • 1 large egg yolk at room temperature
  • 1/4 tsp vanilla
  • 1 tsp reserved lime zest

Directions:

  1. In a food processor, add all of the ingredients except the egg yolk and vanilla, process until the butter is incorporated and it resembles coarse corn meal.
  2. Add the egg yolk and vanilla and process until it becomes a ball. If it is very soft, you may want to refrigerate for 30 to 60 minutes.
  3. Follow directions above for use in the lime tarts.

Notes:

  • You may coat this with a neutral glaze but I didn’t.
  • You may also garnish the plate with a simple blueberry coulis. Purée fresh or frozen blueberries and pressing through a fine sieve. Add a bit of water or your favourite booze to loosen to make a rich paste.

20140519-084442-31482191.jpg

Very tasty.

Read Full Post »

AsianPorkSalad_2379

It’s tangy, crunchy and quite delicious.

I always knew that my blogging would someday parlay into something more but did I ever hope it would be two-fold? Never in a million years! First it was food styling (which I’m still doing) and as luck would have it, I recently reconnected with a colleague and a new opportunity was born: I’ve been social media content! How cool is that? I’ve been very fortunate to have been given this opportunity and I thank my lucky stars every minute! And I thought I was just lucky in love! So if you need food related social media content, I’m your gal! Email me at evataylor at bell dot net  and we’ll ‘talk’!

I know you’re scrolling ahead to see these photos so let me take the suspense out: they were taken on the morning of April 15, 2014 — I kid you NOT! I was hoping to be yearning for light, salad-ie dishes by now but sadly the weather is STILL not cooperating. Yes, we did have a couple of exceptionally warmish days last weekend but for the most part it’s still soup and stew weather. And like my rebellious feet I am holding out and silently switching gears to a more summery palate!

Snow_2420

I took this photo in High Park on my morning walk. Yes indeed it’s pretty…if it were December! Not April 15 for sure.

Snow_2424

It was cold enough that the snow stayed all day.

Snow_2425

It really is rather beautiful.

As I’m sure most of you operate with similar intentions, I cruise blogs particularly when inspiration evades me and this recipe was no different; it was inspired by the lovely Sawsan’s beautiful Sushi Salad. I must confess that I didn’t record or photograph the first attempt of this creation which was a huge mistake (or was it?) so we actually had this tasty dish two nights in a row! And if it were up to me, it would have been three or four!
The volumes are ball-park, use what you like, omit what you don’t! Easy. If you have celery add it, if you don’t, no worries. The beauty of this dish is the crunch and variety of each and every bite.

Sawsan used ‘cauliflower’ rice but the cauliflower was not nice the day I wanted to make this dish so I substituted Napa cabbage. Since we were having this as a dinner course, I added a marinated BBQ’d pork tenderloin as our protein but chicken or fish would be an excellent substitution.

AsianPorkSalad_2378

The avocado adds a certain je ne said quo is, but may be omitted if you’re watching calories.

Asian Inspired Crunchy Spring Salad

Serves 2 as a dinner portion. Please click here for the original recipe.

Ingredients for the pork and marinade:

  • 200 g pork tenderloin
  • 1 tbsp soy sauce
  • 2 tbsp lime juice
  • 1 tbsp finely chopped garlic
  • 1 tbsp grated ginger
  • 1/4 cup mirin
  • 1 tsp toasted sesame oil
  • 1 tbsp hoisin sauce

Directions for the pork and marinade:

  1. Remove all fat and silver skin from the tenderloin. Stab it a few times with a fork, all the way around.
  2. Combine the ingredients for the marinade and roll the prepared tenderloin in it to cover. Let rest in the fridge for a minimum of 20 minutes or overnight.

Ingredients for the dressing:

  • 1 tsp soy sauce
  • 1/4 cup rice vinegar
  • 1 tbsp grated ginger
  • 1 tbsp toasted sesame oil

Directions for the dressing:

  1. Combine all ingredients and mix well. Set aside. (may be prepared the day before)

Ingredients for the salad:

(as suggestions, if you dislike something omit it and if you love something, by all means add more!)

  • 5-6 cups of finely sliced Napa cabbage
  • 1 cup cucumber, cubed
  • 1/2 avocado, cubed
  • 1/2 red pepper, cubed
  • 1/2 medium sized red beet (raw, peeled and julienned)
  • 2 green onions finely chopped
  • a good bunch of cilantro, finely chopped
  • 1 tbsp toasted sesame seeds

Directions for the salad:

  1. BBQ the tenderloin until the internal temperature reads 71° C or 160°F at its thickest part. Allow to rest for 10 minutes before slicing.
  2. Lay a generous bed of the finely sliced Napa cabbage on each plate.
  3. Sprinkle the cubed cucumber, avocado and red pepper along the outer edge of the base. Add the julienned beets to the centre so it just peeks outside the ring (the beets discolour the Napa so I didn’t want it to bleed all over it).
  4. Garnish with the green onions and cilantro.
  5. After the pork rests for 10 minutes, slice into thin slices. Lay 100 g sliced pork onto each plate and garnish with the dressing and the toasted sesame seeds.

AsianPorkSalad_2380

The abundance of colour was no mistake…perfect for a dreary, wet spring day.

Read Full Post »

Spring has been slowly emerging, taking its dear sweet time, but today, it’s finally going to be 17°C (62.6°F). Even on Tuesday, the sun was shining and it was actually warm enough to sit outside in the sun with a cup of hot coffee. We’re cautiously hopeful for spring, although there is still some ice in our backyard believe it or not. Stubborn ice that just won’t give up. One of our radio stations has a repeating ad that goes something like this: “April, you have just one job: melt the GD ice so spring can finally show up.” Seriously, just one job! Can it be THAT hard? Yes, we are frustrated! But at least it’s starting…

I’m beginning to think about summer foods, lighter fare and this is a quick and delicious recipe I came up with for lunch about a month ago; I think it may have even been snowing at the time (a month ago). The bright, fresh flavours contrasted against the peppery arugula will make a sensational meal on a super hot, humid day (soon, please be soon). Definitely making this lovely dish for the cottage, it’ll be perfect for eating on the dock, wearing shorts and a light T!

CevicheWW_2269

A delightful combination of shrimps and scallops cooked in lime juice

Shrimp and Scallop Ceviche

Makes 1 small serving (to make a meal of it, increase the weight of shrimp and scallop to 100 g in total).

Ingredients:

  • 30 g shrimp*, cubed rather small
  • 20 g scallop*, cubed rather small (similar size to shrimp)
  • 1 tbsp lime juice
  • 1/4 tsp non-calorie sweetener of your choice
  • 1 tbsp cilantro, minced
  • 1 green onion, minced
  • 1 stalk celery, cubed
  • 5 cm (2 inches) English cucumber, cubed
  • 1/4 apple (or Jicama)
  • 5 cm (2 inches) English cucumber, cubed
  • 100 g Arugula

Directions:

  1. Combine the lime juice and the non-calorie sweetener of your choice and mix well.
  2. Make sure you cube your seafood into equal sized cubes so that they ‘cook’ at the same rate. Combine the cubed shrimp, scallop, cilantro and green onion with lime dressing and toss well. Set aside in the refrigerator for 30 minutes to one hour.
  3. When the seafood has become opaque, add the celery, cucumber and apple and toss well. Serve over arugula or lettuce of choice

CevicheWW_2270

The apple adds the sweetness that the jicama would have.

*’cooking’ seafood in citrus does not kill off any parasites, so you should be very careful with the choice of seafood — it should be fresh, or boil in water until done and prepare the salad just prior to serving.

Ceviche Nut

Based on 1 small serving

CevicheWW

Based on 1 small serving.

Read Full Post »

I found this clever idea in the latest LCBO magazine. My vases were a little smaller than the idea in the magazine so some of my tulips had to stick out at the top.

I found this clever idea in the latest LCBO magazine. My vases were a little smaller than the idea in the magazine so some of my tulips had to stick out at the top.

Recently, we hosted a dinner party for guests who were doing Weight Watchers and because I don’t like to sabotage anyone’s journey to a healthy weight I decided to make the entire meal WW friendly and that meant putting my thinking cap on.  Now I don’t know about you, but I adore guacamole, it’s so creamy, fresh and tangy and it really enhances a few dishes as a condiment but may also be used as a wonderful dip with fresh vegetables!

Now I know what many of you will say, “but wait, avocados are a good fat” and while that is very true, it’s all about balance and budget so if you can save a little here you can spend it there (perhaps on an extra glass of vino?), is all I’m saying!

Before I even searched on line, I had the idea of creating a mockamole from spinach. Why spinach? I chose spinach because #1 it’s a gorgeous green and you can purée it smooth uncooked and #2 it fits well into the WW point system.  Once I determined what my basic ingredients would be, I started to search “mockamole” on the net and found that the majority of them are made with green peas. Now green peas are quite healthy but when I did the nutritional calculation using peas, my 1 tablespoon mockamole resulted in 1 WW point whereas my spinach mockamole resulted in 0 points for 1 tablespoon. So that was it.

Guacamole is a simple yet flavourful combination of ingredients and other than subbing out the avocado, I kept it pretty true to form. I used 4 tablespoons of cooked puréed navy beans as my ‘creamy’ ingredient and it worked out great. I loved the bright green colour as well as the bright flavours in this recipe. JT said it was an excellent substitute for real guacamole! It’s quite garlic-y so if it’s date night, you may wish to tone it down a notch or make sure your partner has some too ;-)!

Mockamole_2308

May I interest you in a little dip?

Mockamole (Spinach ‘guacamole’)

Makes about 3/4 cup.

Ingredients:

  • 100 g fresh spinach (may be frozen)
  • 4 tbsp navy bean paste (see notes)
  • 1 clove garlic, finely minced
  • 1 tbsp (15 mL) lime juice
  • 1 tbsp cilantro, chopped
  • 1 tbsp green onion, finely chopped
  • Cilantro or parsley for garnish
  • Chopped tomatoes (optional)

Directions:

  1. If using frozen spinach, wring out well. If using fresh spinach, wash and dry well.
  2. Combine the spinach, navy bean paste, garlic, lime juice and cilantro in a small food processor and process until very smooth (I found my immersion blender did this beautifully). Fold in chopped tomatoes if you are adding them.
  3. Add chopped green onion and garnish with a sprig of cilantro. Serve with cucumber slices, celery sticks or cauliflower florets or use in a meal that requires guacamole as a condiment.

Mockamole_2310

Choose vegetables that hold onto the dip like a spoon!

Mockamole_2303

The cooked puréed beans give this dip its creamy texture.

Mockamole_2306

Who are you calling “dip”?

Per 1 tbsp serving

1 tbsp serving

Per 1 tbsp per serving.

1 tbsp serving.

Notes:

  • Navy bean purée: I usually make up a batch of plain navy beans for thickening soups, sauces and gravies and then freeze for later use. Cook navy beans in water without salt. Purée and press through a fine sieve. Allow to cool completely and put 1 tbsp portions into an ice cube tray (specifically for savoury things) and freeze. Once frozen, take each cube and put it into a larger ziplock bag and that way you have a creamy gluten-free thickening agent for future recipes.
  • If you add too much liquid to the puréed spinach mix, strain for a couple of hours in a coffee filter reserved for savoury things before serving.
  • To blanch spinach quickly, add spinach to a heat proof bowl with about 1/2 cup water and nuke for about 2-4 minutes until soft. Rince with cold water and wring out well.

Read Full Post »

I always like to serve a salad, particularly when we have a reasonably heavy meal so I came up with this easy Caribbean inspired slaw recipe that hit the spot perfectly when I served it with the Trinidadian Chicken Curry Roti; the coconut cream helped subdue the slight heat from the curry and it was very fresh and delicious. I based the recipe on this slaw that was inspired by Toronto Chef and Food Network Canada celebrity, Susur Lee. Keep the wet and dry ingredients separate until just before serving so that the slaw doesn’t get too sloppy and wet; wet ingredients would be the cucumber and the mango which may be stored together. The beauty of this slaw is the uniformity of each component, so take your time in grating, slicing and chopping.

CaribbeanSlaw_2089

The coconut milk in the dressing helped subdue the heat from the curry.

Caribbean Inspired Slaw

Makes about 8 cups of slaw

Ingredients:

  • 2 (about 2 cups) carrots, grated
  • 1/2 (give or take 3 cups) savoy cabbage, shredded
  • 1 green onion, finely sliced
  • 1/2 (about 1 cup) English cucumber, grated
  • 1 mango, grated
  • 1/2 cup cilantro, finely chopped
  • 1/2 cup grated unsweetened coconut
  • 1/4 cup coconut cream
  • 1/2 tsp tamarind concentrate
  • 2 tbsp lime juice
  • 1 tbsp honey

Directions:

  1. Combine the shredded cabbage with the green onion, grated carrots, cilantro and grated coconut, toss well to combine. Refrigerate until serving.
  2. Combine the grated cucumber and mango and toss well to combine. Refrigerate until serving.
  3. For the dressing, combine the coconut cream, tamarind, lime juice and honey and mix well. Refrigerate until serving.
  4. When ready to serve, combine the cabbage mixture with the cucumber mixture and toss well to combine. Add the dressing and toss well to combine. Garnish with additional grated coconut and cilantro. Serve immediately.

CaribbeanSlaw_2083

A wonderful combination of crunch and soft sweet fruits and vegetables.

CaribbeanSlaw_2086

The slaw really packs a lot of flavour.

Screen Shot 2014-02-15 at 3.17.41 PM

Read Full Post »

Today is my dear Mother’s birthday; were she alive, she would have been 78 years young!

Happy Birthday Mom, I miss you.

Happy Birthday Mom (21 in this photo), I miss you.

Several years ago we dined at Diego, a lovely Mexican restaurant in the MGM Hotel in Las Vegas and I had a wonderful Ceviche that I have not been able to forget. It was an unusual combination of coconut milk and lime juice that just hit my taste buds perfectly. I adore ceviche and order it whenever I see it on a good restaurant’s menu and have not had the pleasure of these flavours together in one since. So, I thought I’d take a stab at it and create an opportunity to use one of my pearls in the process! Clever, don’t you think?

I’ve made ceviche before, the non-cheater kind but I wanted to put this together quickly for an hors d’œuvres recently and I didn’t feel like waiting for the acid to ‘cook’ the shrimp so I came up with this ‘cheater’ version. You can make the ceviche the old fashioned way, but this really worked out well!

I would have liked to add cubed avocado to this dish but sadly forgot to put it on my shopping list! I’ll remember next time, this is a very quick and tasty recipe.

It’s also rather coincidental in this cyber world how we all post about similar things so I can’t go without mentioning my dear Australian Blogging friend Lorraine who just last week posted this gorgeous recipe about real ceviche. Great minds think alike…please don’t finish the last part of this saying, it kinda bursts my bubble!

CheaterCevicheSpoons_2007

It’s just as tasty and doesn’t take long to make.

Cheater Shrimp Ceviche

Makes ~200 mL Ceviche (slightly more than 3/4 cup), or 8 single serve Chinese Spoons

Ingredients:

  • 1 tbsp coconut milk powder
  • 1 tsp fresh ginger, grated finely
  • 1 tbsp rosa’s lime cordial
  • 2 tbsp lime juice
  • 80 g cooked cocktail shrimp, chopped
  • 3-4  slices of English Cucumber (0.5 cm or 1/4″ thick) cubed
  • 1 celery rib, cubed
  • 1/4 cup avocado, cubed
  • 1 tbsp cilantro, chopped
  • 1 tbsp green onion, chopped
  • 1 tsp smoked paprika pearls

Directions:

  1. Combine the coconut milk powder, finely grated ginger, lime cordial and lime juice in a measuring cup and blend until smooth with a stick blender.
  2. Combine the chopped shrimp, cubed English cucumber, avocado (if I had some) and celery with the cilantro and green onion, toss with the coconut milk dressing to coat evenly.
  3. Serve immediately garnished with the smoked paprika pearls.

CheaterCeviche_2004

A refreshing combination of flavours.

Read Full Post »

I totally agree.

I totally agree. And by ‘right’ I’m sure Ms. Midler is referring to pointy stiletto’s wouldn’t you say? (Charlie, Kristy, Liz and Lorraine?)

Speaking of shoes, my dear friend Monica was recently at Fallsview Casino and spotted this store that specializes in life-sized chocolate shoes. It’s like I’ve died and gone to heaven!

Chocolate Shoes...could life get any better?

Chocolate Shoes…could life get any better?

And coincidentally, we had Rae and Monica over for dinner and I always like to make something special when we have company so when I saw the recipe on Bam’s kitchen, I knew I HAD to try it. Bam made the entire recipe gluten free, sugar free, dairy free and egg free, but I didn’t have those restrictions so I improvised.

The flavours are subtle cajun and although you can add as much heat as you wish, I used fresh jalopeño chilies with the veins and seeds cut out to reduce the heat. The grilled pineapple adds a wonderful sweetness and the grilled jalopeño cornbread is a lovely base for the dish adding subtle smokiness from the grilling. I used an old favourite recipe for the cornbread, Fred’s Not Here Jalopeño Cornbread it packs a lot of flavour and the recipe can be halved easily — I didn’t do that because I wanted the extra. Also, for the night of the dinner party, I served 10cm (4 in) round cakes, but the muffin size is a much better proportion (hence my presentation in this post). Thank you Bam for the inspiration.

Cajun Grilled Shrimp with Grilled Pineapple and Mango Salsa on Grilled Jalopeño Cornbread

Serves 4

The flavours were complex but also worked very well together.

The fresh flavours worked very well together.

Fred’s Not Here Jalopeño Cornbread

Makes 12 regular muffin-sized cornbreads or four 10cm cakes plus 6 regular muffin-sized cornbreads

Ingredients:

  • 1 1/4 medium ground corn meal
  • 1 1/4 all purpose flour (I’m going to try using quinoa flour next time)
  • 1/2 cup granulated sugar
  • 1 1/4 tsp baking powder
  • 1 tsp salt
  • 2 eggs
  • 1 1/2 cups milk
  • 1/4 cup vegetable oil
  • 1/2 red and 1/2 green finely diced jalopeños (if you like things spicy, add cayenne to your taste).
  • 1/2 cup finely chopped green onions
  • 1 1/2 cups shredded sharp cheddar cheese

Directions:

  1. Pre-heat oven to 400°F. Spray non-stick cooking spray generously into each muffin cavity.
  2. Sift cornmeal, flour, sugar, baking powder and salt in a bowl.
  3. Blend eggs, milk and oil in another bowl.
  4. Stir wet ingredients into dry.
  5. Fold in the shredded cheese, jalopeño and onion.
  6. Spoon to fill muffin cavity and bake for 25 minutes or until firm and golden.

Grilled Pineapple and Mango Salsa

Makes about 1 1/2 cups of salsa

Ingredients:

  • 3 thick slices of pineapple
  • 1 good size Mango
  • 1 scallion, finely chopped
  • 1/2 red and 1/2 green finely diced jalopeños
  • zest of one lime
  • juice of one lime
  • 1/4 cup finely chopped cilantro

Directions:

  1. Dry off the pineapple and grill the pineapple until you get some good grill marks (takes about 10-15 minutes per side). Set aside to cool
  2. Dice the mango into 1 cm or 1/4 inch dice. Add the finely chopped red and green jalopeños, scallion, lime zest and lime juice. When the pineapple has cooled, dice it in a similar size to the pineapple, mix into the mango.
  3. Add the chopped cilantro just prior to serving. Serve cold.

Cajun Grilled Shrimp

Serves 4

Ingredients:

  • 1/4 cup lime juice
  • 3 tbsp EVOO
  • 2 tbsp honey
  • pinch of salt
  • dash of cumin
  • dash of corriandre
  • 1 clove garlic, finely chopped
  • pinch of cayenne
  • 16 large shrimps

Directions:

  1. Clean shrimp and remove the shell, leaving the tail intact.
  2. Mix all the ingredients together and pour over the shrimp, marinate for about 1-4 hours (marinating too long will cause the acid of the lime juice to ‘cook’ the shrimp).
  3. Heat the grill to smoking hot! Grill the shrimp until no longer opaque. Keep warm.

Assembly:

  1. Cut the crown off the cornbread muffins so that both top and bottom are flat. Brush both sides lightly with softened butter.
  2. Grill corn bread muffins on both sides so good grill marks are achieved and it heats the cornbread through. Place one cornbread round on the centre of each plate. Add the chopped cilantro to the salsa and pile it on top of the cornbread, don’t worry if some fall to the side, it actually looks better that way.
  3. Mound the shrimp on top of the salsa and garnish with a little coriander leaf.

Notes:

  • Cornbread may be made in advance and stored in an airtight container.
  • Freeze left over cornbread for another occasion.
  • The salsa is fantastic on burgers, so save some for another time.
  • The cornbread tops can be saved in the freezer for another recipe, like stuffing!

This one had too much coriander garnish

This one had too much coriander garnish and not enough salsa on the plate

Actual Photo from the dinner party; bad lightling and perhaps a glass or two of wine made it blurry. That's my excuse and I'm sticking to it.

Actual Photo from the dinner party; bad lighting and perhaps a glass or two of wine made it blurry. That’s my excuse and I’m sticking to it.

Read Full Post »

I’m always looking for something new and different and when I saw a Wheat Berry Salad on my friend Angie’s blog, Taste of Home, I knew I had to try it at least once. Angie cooks with a lot of whole grains, always healthy and always inventive. She is also a master of bread making, her loaves are gorgeous, appetizing and did I say gorgeous?

I had never heard of wheat berries before reading Angie’s post and I am so glad that I did see it and was inspired to make it. Thank you Angie, I know I will make this grain again and again.

Wheat Berries look very similar to pearl barley, but they are darker in colour and apparently have a nuttier taste. They are a very dense grain and therefore many sites suggest pre-soaking. I soaked my berries overnight and it still took about an hour of boiling. They have more of a bite than barley and are a bit chewier, which I liked, but JT did not.  I have found that you will need a ratio of 3 or 4 parts water to 1 part wheat berries. You can substitute wheat berries anywhere a grain is used, for example rice pilaf or even risotto!

The avocado and the mango are a nice contrast in textures to the wheat berry

Wheat Berry Salad

Serves 4, Inspired by Angie, Taste of Home, Wheat Berry and Watermelon Salad

Ingredients:

  • 1 cup wheat berries, soaked over night
  • 1/2 avocado, cubed
  • 1 Mango,  cubed
  • 1/2 chopped cilantro
  • 1 roasted red pepper, chopped
  • juice of 1/2 lime
  • salt to taste

Directions:

  1. Cook wheat berries in 3-4 cups of water, about 1 hour (at around 45 minutes check to see if you like the texture, and if you do, stop cooking).
  2. Add the cubed avocado, mango and chopped red pepper. Drizzle with the lime juice and salt to taste. Mix in the cilantro. Serve warm or cold as a side to a BBQ’d dish.

Read Full Post »

I had an incredible ceviche salad some time ago that Sissi of With a Glass reminded me of with her lovely recipe for her Hot & Cold Rice Bowl with Shrimp, Avocado and Cucumber. This salad combined the wonderful creamy avocado with the tangy citrus of the refreshing grapefruit. I decided I needed to serve something a little off the beaten path for a dinner we were having with our good friends Rae and Monica a couple of Saturdays ago and came up with this refreshing and flavourful recipe that was inspired by our recent trip to NYC. Norma (Garden to Wok), that lettuce you see in the photo is home grown.

To keep things on the healthier side, I didn’t use flour tostadas but instead substituted them with whole wheat flax fajita shells, cut into triangles and broiled for a few minutes to make them crisp, like crackers.

Our first lunch in NYC inspired this recipe. The lettuce you see is home grown.

Shrimp Ceviche with Grapefruit, Avocado, Cucumber and Corn

Serves 4 appetizer portions

Ingredients:

  • 150g raw shrimp (20-30 per lb count), shelled, deveined and chopped into equal bite-sized portions
  • 1 small ripe avocado, finely diced with about 3 tbsp lime juice sprinkled on it or you can dice the avocado just before serving
  • 1 grapefruit, peeled and sectioned, seeds removed, juice reserved.
  • 1/4 cup of frozen corn (defrosted)
  • 1/4 cup of finely diced cucumber
  • 2 tbsp toasted unsweetened coconut
  • 1/4 cup freshly squeezed lime juice
  • 1/4 tsp sesame oil
  • pinch of cayenne pepper
  • pinch of sugar or honey
  • 1 lime cut into wedges
  • 4 tbsp avocado paste (recipe can be found here) or use guacamole
  • 4 lettuce leaves, washed and stored until serving (we had curly lettuce)
  • 1 small fajita shell (we always have whole grain flax)(use gluten free for a GF version)
  • 2 tbsp cilantro, chopped roughly
  • 1 tsp fresh mint, chiffonade finely
  • salt to taste

Directions:

  1. Mix the juice from the grapefruit and lime juice in a jar with a lid; taste and add sugar to taste. Add the cut shrimp (raw) pieces and coat well. Refrigerate until the shrimp is entirely opaque (it took my shrimp about 4 hours as I left them in about 1/2″ chunks)
  2. In another covered jar, mix the grapefruit, corn and cucumber. Reserve in the refrigerator.
  3. Preheat the oven to 375°F. Coat the fajita shell lightly in EVOO. Cut into 8 even triangles. Bake each side until the shells are golden, flipping when done. Allow to cool.
  4. When you are ready to serve, add the shrimp (and liquid) to the reserved grapefruit, corn and cucumber and mix; add the sesame oil, cayenne pepper, sugar or honey, salt, cilantro and mint. Stir well.
  5. Place one lettuce leaf on each plate. Spoon equal amounts of the ceviche into each leaf. Garnish with a lime wedge and sprinkle with the toasted coconut. Take two of the toasted fajita shells and smear a bit of the avocado paste on each one and stack one on top of another. Garnish each plate with one stack of two.

Notes:

  1. Ceviche is seafood cooked with acid. It does indeed cook, but it you are squeamish, then pre-cook your shrimp by boiling it until done. Don’t soak it in the grapefruit/lime mix as it will continue to cook and you will have rubbery ceviche. Simply reserve the shrimp in the fridge and dress when you are ready to serve.
  2. This recipe calls for a balance of salty, sweet and sour. I keep my ‘dressing’ separate from the raw shrimp so I can taste it until I am satisfied that it is good.

Read Full Post »

I love a multi-course dinner, it just feels so extravagant, but sadly, most multi-courses do not take into consideration the volume of food to be consumed, so I only do it at home and never at a restaurant. I try to keep in mind how much food, a variety of textures and mixing up courses with hot, warm and cold dishes. I also like to space out the dinner party so that dinner lasts a couple of hours and not wham bam thank you mam!

This is the intermisso, or palate cleaner for our Vegetarian Valentine Dinner.

I was over at Rufus’ Food and Spirits Guide the other day and they offered a lovely looking and refreshing granita made with grapefruit. Hmmm, I thought, I rather like that, so I picked up a gorgeous red grapefruit and made this lovely intermisso. I only wanted four smallish portions, so I didn’t make the amount in Greg’s recipe. I adjusted it as below.

Grapefruit Granita

Ingredients:

  • 1 large ruby red grapefruit
  • 1/2 lime, juice and zest
  • 1 small drop orange extract (I didn’t have orange flower water)
  • 2 tbsp simple syrup or to taste (it really depends how sweet your grapefruit is)

Directions:

  1. Wash grapefruit and lime well.
  2. Cut the fruit out of the skin and pith over a bowl so that all the juices can be captured.
  3. Stir in simple syrup, orange extract, lime juice and zest. Pour into a glass container (about the size of a brownie pan), cover and freeze.
  4. To serve, scrape with a strong fork into bowls.
  5. Garnish with fresh mint if desired.

Greg’s recipe: To make a simple syrup, heat equal parts sugar and water over medium heat until dissolved. Remove from heat, cool and store in the refrigerator.

A nice tart palate cleanser before we dig into the Paella

The chunks of grapefruit mix in with the ice crystals. It’s really quite tasty.

These dainty little glasses come from my MIL. Aren't they sweet?

Read Full Post »