Feeds:
Posts
Comments

Archive for the ‘Tapas’ Category


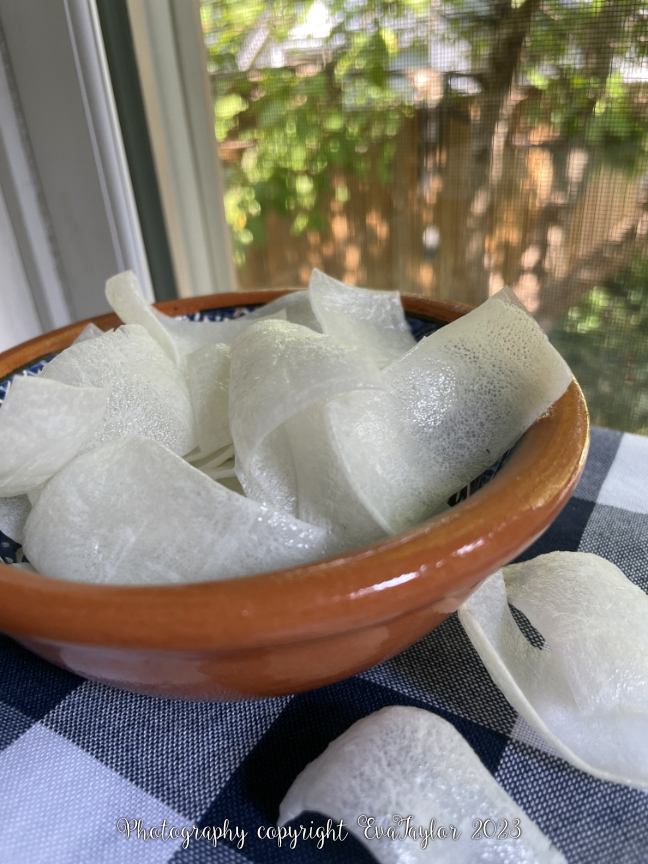
Talk about an easy recipe. And they satisfy the crunch aspect of snacks! Plus they’re not unhealthy! And I usually have a packet of rice paper in my pantry! All winners in my books.

I developed this “recipe” in response to an air-fryer version I saw on my Instagram feed; their version took too long to “fry” and was too fiddly. These Rice paper chips remind me of the mystery shrimp chips you get at Thai restaurants, they’re super crispy and melt-in-your-mouth, just like shrimp chips. But they are not deep-fried! They are microwaved!

Each sheet makes about 36 chips, less than .30g of carbs per chip! Easy AND Healthy? Where do I sign up?

I used square rice paper sheets that are made for Fresh Rolls. They need to be fresh and not brittle so they cut cleanly, but you could snap them into irregular shapes if they’re not fresh (I’m unsure that they’ll all microwave at the same rate though).

Using large kitchen shears, cut each sheet into six even strips, then cut each strip into six even rectangles. Place on a piece of parchment paper (no need to carefully place them, they don’t stick together) and microwave for 30-40 seconds on high. Immediately pour finished chips into a bowl and season with sea salt. Done!

Easy peasy. You can thank me later.

These melt in your mouth without sticking to your teeth (like some rice paper chips do)

Read Full Post »

The weather is still lovely in the big smoke so we continue entertaining on our back deck. I’m always looking for something a little different and these scallion pancakes truly fit the bill. I first saw the recipe on Mi Mi’s blog and was immediately intrigued. Mi Mi’s pancakes were more of a thicker bread and she admitted she had forgotten a final step, so I scoured the internet for “my” recipe. The one I posted below is a compilation of several recipes that I read through. The pancake itself is a very thin, but super flavourful. Crispy, chewy and full of flavour a veritable trifecta! We just had them with a simple dipping sauce and they were absolutely delicious. Thank you Mi Mi for drawing my attention to this tasty treat.

These pancakes are crispy and chewy at the same time.

“Chinese Scallion” Pancakes

Makes 4 pancakes appetizer-sized portions. Don’t kid yourself, you’ll probable eat two.

Ingredients:

  • 150 g AP flour
  • 3 g salt
  • 93 g cold water
  • 6 scallions, green parts only, finely sliced
  • Olive oil (enough to coat the pan about 0.5 cm deep)

Directions:

  1. Combine the flour and the salt and mix well. Add the water into the centre of the flour mixture and mix until the water is absorbed into the flour. Knead the dough with your hands for 5-7 minutes or until quite elastic. Cover lightly with olive oil and allow to rest for 45 minutes to 1 hour.
  2. Divide the dough into two or four equal portions and roll out using the KitchenAid pasta maker to the finest thickness. The dough will be very sticky so flour or grease your surface to prevent sticking.
  3. Sprinkle the sliced scallions (and whatever additional spice, if using) over the rectangle and roll up from the long side. Then, roll the log onto itself like a scroll. Roll the scroll out to about 20 cm diameter. Cook on medium heat until the pancake is golden on both sides. Cut into wedges to serve. Serve with the dipping sauce below.

Dipping sauce ingredients:

  • 15 mL soy sauce
  • 15 mL sesame oil
  • 15 mL Mirin or sweet rice wine
  • Sesame seeds

Dipping sauce directions:

  1. Mix all of the ingredients together and serve with the cooked pancakes.

Notes:

  • You can add a variety of other spices like Chinese Five-spice, Aleppo pepper flakes, or mint to name a few.
  • I used cold water because from what I’ve read, it will make the dough chewy, hot or boiling water will apparently make it crispier. I wanted chewy and figured it would be crispy from the pan frying and I was correct.
  • The green part of the scallion is apparently softer so it won’t poke through the dough but mine did anyway and it did not alter the flavour or texture.
  • Use either flour or oil to prevent this very sticky dough from sticking everywhere. I used flour on this one.
  • To make the rolled dough more manageable, you can roll two smaller lengths and stick them together because when they scroll and you roll them out, you won’t notice a difference.
  • Most recipes call to roll the dough into a circle at first but I wanted a very thin dough so I just made sheets using my KitchenAid pasta machine and it worked out fantastic.

Read Full Post »

One of our most memorable meals in Spain was at the beautiful One Star Michelin restaurant in Retama Restaurant within La Caminera Hotel. We should have stayed at the hotel, but we had already booked something in Valdepeñas, a short drive away. We chose The Traditional menu, without wine pairings (I react poorly to some heavier reds and whites aged in oak casks).

As part of a course, we were served a wonderful little bite of Atascaburras, a typical dish of the La Mancha Region. The story goes that two shepherds and their donkeys were isolated after a big snowfall, with only salt cod, potatoes, garlic, and olive oil at hand, and in their desperation, they created this dish to feed themselves and their donkeys over several days until they were rescued. This dish is often eaten during a snowfall and it is said that the water to boil the potatoes and cod in should be freshly fallen snow. Obviously, there was no snow in sight but the story and delicious flavour of these little cod fritters were definitely calling to me. They called them fritters in the restaurant but they were not deep-fried, I suspect the chef used a Takoyaki pan to sear the small balls. We were served one each. Traditionally, this dish is usually served on a platter with bread or crackers. Since I don’t have a Takoyaki pan, I chose to serve it as a dip. In modern times, a boiled egg is used to garnish the dip but it was not traditional. I chose to use a hard-boiled egg yolk, grated on top of the dish as a garnish.

The atascaburras was served as a round ‘fritter’

Atascaburras

Makes about 500 mL dip

Ingredients:

  • 300 g potato (I used Yukon Gold)
  • 300 g salt cod, soaked and rinsed several times over 48 hours
  • 130 mL olive oil
  • 1/2 clove of garlic, finely minced
  • Salt to taste
  • 1 egg yolk, hard-boiled
  • Red pepper oil

Directions:

  1. Cook the cleaned but unpeeled potato in water for 15 minutes. After 15 minutes, add the prepared salt cod and cook an additional 10 minutes. Reserve the water.
  2. Add both the cod, potato and garlic to a blender (I used a magic bullet because it really emulsifies beautifully). Add the olive oil and emulsify, adding a little of the reserved water to make a smooth, creamy dip. Taste and salt if necessary.
  3. Place in an oven for 15-20 minutes on 250° F to just warm up. Serve in a low-sided dish with grated egg yolk as garnish and sprinkled with a little red pepper oil.

No, that is not cheese, it’s grated hard-boiled egg yolk.

Read Full Post »

Sometimes it’s just the simplest things that are the best. While we were in Spain, we had a lot of tapas, they serve tapas every time you order a glass of vino. Sometimes it is as simple as delicious olives, or sometimes it’s a little ham sandwich. While we were in Granada, we slipped into this adorable little bar and ordered a couple of glasses of vino with some tapas. Before we even had our first sip, they brought out a good quantity of homemade potato chips and these little round sandwiches (about 7-10 cm in diameter). If we hadn’t already ordered a selection of cheeses and charcuterie, we would have been done! And they would not have been offended. This is Spain, where a glass of good quality wine is €3.50 (less than $5) AND it comes with food! And there is no expectation of tipping, most restaurants add a small service fee per person so you needn’t worry about it.

We were sitting at home one evening when we decided to have a glass of vino and JT asks what we were having for hors d’œuvres! I had to scramble a bit because I hadn’t pre-made anything for the freezer but I did have some incredible peppers (did I mention how wonderful vegetables taste in Spain?) so I sliced them thinly and sautéed them and presented them with some toasted Spanish pine nuts. They were fantastic! So simple. If you’re serving a crowd, you might want to add a splash of red wine and some sliced chorizo, served with crusty bread of course. This is definitely going into my repertoire because I always have peppers at home.

I haven’t stipulated quantities because it’s what you have on hand. I used about a half of pepper each of the red and yellow and about 1/4 of an onion.

These are some of the sweetest peppers we’ve ever tasted.

Sautéed Peppers with Pine Nuts

A KitchenInspirations Original Recipe

 Ingredients:

  • Red peppers, deveined and seeded, cut into strips
  • Yellow peppers, deveined and seeded, cut into strips
  • Onion, thinly sliced
  • Splash of olive oil
  • Pine Nuts, toasted
  • Salt and pepper to taste

 Ingredients:

  1. Sauté the onions and peppers in a splash of olive oil. Add the chorizo and red wine, if using
  2. Sprinkle with pine nuts, salt and pepper and serve with crusty bread.

Read Full Post »

I always create a menu plan for every week and when we arrived in Spain, it was no different. I like to schedule meals out in a restaurant but if they don’t work out, I also like to have something easy to fix on hand, dried cheese tortellini was one of these things. We had been out for lunch at one of our favourite Italian places and the couple at the table next to us ordered the fried cheese tortellini and I was inspired, they looked so delicious. I have made fried pasta before but used North American dried pasta and it wasn’t good, they were too thick and ended up really hard and difficult to eat so I didn’t bother posting about them. These little gems are different, they are crispy, chewy little parcels filled with cheese! They are wonderful. I tested up a batch of 18 and found them quite successful so I fried up the entire package! I froze them for when we reunite with our dear friends Paul and T from Arizona, they came for a visit in early May. Just pop them onto a parchment-lined baking pan and bake at 350° F for about 10-12 minutes. Serve with salsa, romesco sauce or any one of your favourites. Make sure you make a bunch because they are addictive.

They are crispy and chewy little parcels of deliciousness.

Crispy Fried Cheese Tortellini

A KitchenInspirations Original Recipe

Makes as many tortellini as your package has.

Ingredients:

  • 1 package dry cheese-filled tortellini, cooked through
  • 500 mL high flash-point oil
  • dipping sauce, your choice

Directions:

  1. Heat the oil to 350° F
  2. Fry only 5-6 at a time until golden, place on an absorbant cloth to soak up any excess oil.
  3. Serve warm with your favourite dipping sauce.

Notes:

  • Cook your pasta to slightly overdone, this will provide the best crunch.
  • Cook your pasta in advance so that you can totally drain them and allow them to slightly dry out on a paper towel or parchment (this will prevent the oil from splashing when the water hits it).

Read Full Post »

We enjoyed a lot of seafood in Spain. But this recipe did not come from our time there, it graced our cocktail table soon after we moved back into our newly renovated bedroom. We were watching a little Jamie Oliver before turning out the lights and the recipe that night was this gem: Crispy Squid and Smashed Avocado. It was a hit the first time I made it, and soon after, I was getting requests to make it again. It is a deep-fried recipe, and you all know how much I love deep-frying, but it is quickly fried and on my first measure of the oil used, I was able to get most of it back after it cooled which means the calamari did not absorb much. Cutting the calamari length-wise instead of in rounds will allow the calamari to curl up like a spring which looks super cool. I paired this tapa with Romesco Sauce and Avocado Cream, and they were both awesome!

Calamares Fritos

To see the original recipe, please click here.

Serves 1-2 people

Ingredients:

  • 1 calamari tube, cleaned and sliced lengthwise to open up
  • 65 g all-purpose flour
  • pinch of sea salt
  • 1 L vegetable oil

Ingredients for the Avocado Cream:

  • 1 Avocado
  • pinch of cumin
  • pinch of sea salt
  • 1 lime, juiced

Ingredients for Serving:

Directions:

  1. Cut the calamari into strips lengthwise (not rings). Add the flour and sea salt to a bowl and toss the calamari strips until well coated.
  2. Heat the vegetable oil to 375° F. Fry the calamari strips 5 at a time until golden. Drain excess oil on kitchen paper.
  3. Meanwhile, mash or cream the avocado with cumin, sea salt and lime juice.
  4. Serve calamari hot with the sauces.

Notes:

  • Cut the calamari into thin strips length-wise so that it will curl into a spring shape as it fries. Shorter ones will curl less.
  • This dish is equally as good with either sauce so if you don’t want two sauces, just go with one.
  • To scale up the dish, just add another calamari tube for each additional person. More than 4 people, double the avocado cream recipe.

Read Full Post »

During our time in Spain, we ate a lot of delicious tapas. One such tapa was the Ensalada de Aguacate y Atún, a simple yet spell-binding combination of tuna, avocado, lemon juice and olive oil. Using the very best of all four ingredients allows each one to shine individually and together they melt into the most magical concerto. We just couldn’t get enough of it. It was, however, not easy to find in our little town so I decided to make it part of our weekly meal plan. I made this one for our Valentine’s Day lunch.

Ensalada de Aguacate y Atún

Serves 2

Ingredients:

  • 150 g canned tuna in oil
  • 200 g ripe avocado, cubed
  • Juice of one lemon
  • A good drizzle of olive oil
  • Arugula

Directions:

  1. Drain the tuna and combine it with the cubed avocado and lemon juice.
  2. Spoon evenly onto a bed of arugula. Drizzle generously with olive oil.

Notes:

  • For presentation purposes, I layered the ingredients over the arugula. In reality, it is served well combined.
  • The arugula was my addition, the true dish is served on its own.

Read Full Post »

You may recall that I made a version of this recipe in November 2012 but had an unfortunate accident when the entire omelette slid out of the pan and onto the floor! No “three-second rule”, that baby was toast!

Preparing for a recent trip to Spain, I thought it was the perfect opportunity to repost the recipe in its full glory. These creamy little potatoes are the perfect ingredient for this simple but tasty dish. And it’s perfect if you have leftover potatoes. But don’t stop there, even though the potatoes and onion are the traditional tapa, the flavour combos are endless. In fact, I cheated and added a little crispy pancetta for additional flavour.

Spanish Potato Omelette

A KitchenInspirations Original Recipe

Makes one loaf pan, about 10 cm x 21 cm (4″ x 8.25″), 16 slices

Ingredients:

  • 4 large eggs
  • 200 g potatoes
  • 60 g onion, finely sliced
  • 30 mL roasted garlic
  • 30 g pancetta, finely diced

Directions:

  1. Preheat oven to 350°F. Generously grease a loaf pan, set aside.
  2. Boil the potatoes until soft. Strain and layout on a cool baking sheet and smash with a fork. Allow to cool completely.
  3. In a small frying pan, over medium heat, sauté the pancetta until crispy, remove and set aside.
  4. Whisk the eggs together, add the roasted garlic and whisk well. Mix in the smashed potatoes, pancetta and raw onions.
  5. Pour into the prepared loaf pan, making sure the inclusions are evenly distributed.
  6. Bake for 30-35 minutes or until egg is completely set. Cool slightly, run a sharp knife around the perimeter and turn out of the pan. Flip over and slice into even, bite-sized rectangles.
  7. You may serve immediately or cool completely, refrigerate and gently reheat the prior to serving.

Notes:

  • I did not bother to peel the potatoes, I just smashed the little buggers skin and all after boiling.
  • The original Spanish recipe called for the onions to be sweated out beforehand, you can do this, but I found no alteration in the flavour of the omelette so why waste the extra time?
  • You may also serve these with a dollop of sriracha mayo.

Read Full Post »

Way back in later September, JT and I rented our neighbours’ cottage in Muskoka. Its vista reminds me of our beloved cabin that we no longer visit. But that’s a whole other story for some other time. Right now, I’d like to focus on the cottage we rented, and its beautiful views. Click on the images below to view the gallery.

We invited some dear vegetarian friends up for a couple of days and one of the days we had a grazing dinner of tapas and cheeses. One dish that was very successful was the mushroom and chestnut paté with cognac. You would be hardpressed to guess this does not have any meat. The texture is creamy and smooth with great depth of flavour.

Mushroom and Chestnut Paté with Cognac

Makes 125 mL Paté

Ingredients:

    • 100 g roasted chestnuts, roughly chopped (I used this one)
    • Handful of raw cremini mushrooms
    • 1 shallot, roughly chopped
    • 2-3 cloves roasted garlic
    • 80 g butter, room temperature
    • 15 mL EVOO
    • 30 mL cognac
    • pinch of nutmeg
    • pinch of allspice
    • pinch of salt and black pepper
    • ~20 g butter, to top off paté

Directions:

  1. Melt 20 g butter with the olive oil in a pan. Sauté the shallots until caramelized, add the mushrooms and cook until softened. Add the chestnuts and sauté lightly until softened. Deglaze the pan with the cognac.
  2. Set aside to cool.
  3. When cool, add the cooked ingredients to a food processor or jar of the immersion blender. Add remaining softened butter (not the melted butter at the end of the list), roasted garlic and spices and pulse until very smooth.
  4. Add the paté to a plastic-lined pan and press into the corners or into a shallow mason jar, as pictured, and smooth the top over. Pour melted butter over the top and allow to harden.
  5. Allow this paté to come to room temperature before serving.

Notes:

  • You may substitute the butter with vegan butter should you desire, however I am unsure of the impact it would have on the overall flavour.
  • You may use any type of mushroom, I love cremini’s earthy sweetness.

Read Full Post »

One of the main differences between blog food and food styled food is that blog food is edible. You wouldn’t want to eat food styled food because it’s likely sat on set for hours and at the least been handled to death or at the very worst, there have been additions which make the food last longer on set! Meat is regularly oiled up to look juicy, sauces and stews get a dash of white corn syrup to look glossy and delicious, etc. The gummy-bear pancakes on my website were generously coated with silicon spray so they wouldn’t absorb the syrup too readily! Wraps are most often superglued together, and their stuffing is generally only 1/3 deep (the rest is crumpled up paper towel!). Coffee, tea or bevy’s in general are usually not even real, kitchen bouquet parades as a variety of liquids! So there is a HUGE difference between blog food (which we usually eat, moments after it’s shot) and food styled food! But you needn’t worry about these gyozas, not only are they pretty enough to eat, they were eagerly consumed directly after the shoot, and they were so yummy!

Turkey Gyoza

For original gyoza wrapper recipe, please click here.

Makes 16 gyoza

Ingredients:

  • 120 g AP unbleached flour
  • 67 mL water, boiling
  • pinch of salt
  • cornstarch for dusting
  • 150 g lean ground turkey
  • 5 mL sesame oil
  • 40 g shallots (1 large)
  • 3 g garlic scapes, finely minced
  • 10 g ginger, finely grated
  • 15 g carrot, finely grated
  • 15 mL soy sauce
  • 3 g coconut sugar
  • Butter or grapeseed oil to brown gyoza

Directions:

  1. Combine flour and salt in a bowl. Add boiling water to the flour and salt mixture slowly to make a dough, turn out to a surface and knead for about 10 minutes until smooth. Cut dough into two and roll into a sausage-like roll. Wrap in plastic and allow to rest at room temperature for 30 minutes.
  2. Heat the sesame oil in a pan and sweat out the onions, add the scapes and cook for a minute. Add the ground turkey and cook through. Stir in the ginger, carrot, soy sauce and coconut sugar and cook for a minute. Remove from heat and allow to cool thoroughly.
  3. To make the wrappers, roll each sausage out to a manageable thickness and run it through the KitchenAid pasta roller from #1 to #4.
  4. Cut into 7.5 cm (3 inch) rounds. Wet the edges of each round, spoon 5 mL (1 tsp) of meat filling into the centre and fold in half and seal the edges. I used a handy pleater like this one to get perfect pleats.
  5. Steam each one for 3-5 minutes. When cooked, melt butter or grapeseed oil in a cast iron pan. Pan fry each one on one side only so it is golden and crispy. Serve with your choice of dipping sauce.
  6. Freeze uncooked gyoza on a piece of parchment and once frozen add to a ziplock bag for future use. Frozen gyoza will cook in 3-5 minutes!

One side is crunchy while the other side is soft. They are sooo good!

Read Full Post »

KingMushroomScallops_First

With the holidays fast approaching, I thought I would post a few favourites. I created a “king mushroom ‘scallop'” recipe last year (here) but the pic was awful and I wanted to try the recipe again using Mycryo®, the powdered cocoa butter that sears and seals in flavour. The mushroom ‘scallops’ seared beautifully, just like a real scallop and as I mentioned before, they have an uncanny textural resemblance to real scallops, without the price tag!

Scallops, these days, are outrageously priced and I don’t know why. Costco has a bag of extra large frozen scallops that used to go for about $17 but over the years have snuck up to almost $30 which works out to just less than $3 each! Even though this recipe uses a vegetarian mushroom, you won’t miss real scallops. These tasty little morsels are sitting on a pillow of creamy avocado paste and then drizzled with caramelized shallots, deglazed with a hint of champagne vinegar. The flavours are sophisticated and the presentation is easily eaten by hand, good enough for any upcoming cocktail party, or before a dinner party and they are vegetarian. If you can’t get your hands on Mycryo®, use ghee, or if you wish to make them vegan, use a good quality oil with a high smoke point.

King Oyster Mushroom “Scallops” on Crostini

A KitchenInspirations Original Recipe

Makes 5-6 pieces

Ingredients:

  • 1 tbsp unsalted butter
  • 1 small shallot, finely chopped
  • 60 mL (1/4 cup) champagne vinegar (white wine vinegar works too)
  • 2 relatively thick stemmed King Oyster Mushrooms, cut into 2 cm (0.5 inch) thickness (tops removed and reserved for another recipe)
  • 2 tbsp Mycryo®
  • 2 tbsp avocado paste (recipe here) or pesto
  • 5-6 crostini

Directions:

  1. Melt the butter in a small frying pan, add the shallots and cook until caramelized. Deglaze pan with the champagne vinegar. Scrape into a small bowl and set aside.
  2. Coat the king oyster mushroom slices generously with Mycryo®. Heat the same frying pan until very hot, add the mushroom ‘scallops’ and sear each side until golden and heated through. Remove from heat.
  3. Return the caramelized shallots with vinegar to the pan with the seared mushrooms and coat mushrooms well. 
  4. Prepare each crostini with a good smear of avocado paste or pesto, add one mushroom ‘scallop’ to each toast and spoon caramelized shallots with deglazing sauce over the crostini. Garnish with tiny basil leaves. Serve warm.

Notes:

  • White wine vinegar is a good substitute for champagne vinegar.
  • Fry a little pancetta before melting the butter for added flavour (not vegetarian).
  • Substitute real scallops for the mushrooms (not vegan).
  • Try to get King Oyster mushrooms that are about the same thickness as a good-sized scallop.

Read Full Post »

CrispyMacNCheeseWaffleBites_First

Occasionally, I click on a Facebook sponsored post, these waffle bites were one of them. But the photo was not for a recipe, it was just a photo and when I googled the bites the results were quite disturbing (like a train wreck of Mac ‘n Cheese, a total mess), nothing like the image that was sponsored on Facebook! So I put on my thinking cap and came up with this recipe. I basically mixed a serving of waffle batter with 1 serving of macaroni and cheese and sprinkled both top and bottom with more shredded cheese. These are bites so I did not fill the waffle pan, I wanted them small. You need to cook these slightly longer than a normal waffle because you want the cheese to crisp up, it’s the only way they will come away from the pan without leaving a cheesy mess.

CrispyMacNCheeseWaffleBites_4

Delicious Cheesy Morsels

Mac ‘n Cheese Waffle Bites

A KitchenInspirations Original Recipe

Makes 4 small waffles, cut into fourths, about 16 crackers

Ingredients:

  • 1 leftover serving* of your favourite Mac ‘n Cheese (any packaged or homemade will do).
  • 1 egg
  • 1/2 cup milk
  • 1/2 cup AP flour
  • 1/2 tsp baking powder
  • pinch of salt
  • 1 cup of shredded good quality old cheddar (or any good melting cheese)
  • 2 tbsp olive oil

Directions:

  1. Make sure your leftover Mac ‘n Cheese is at room temperature (not cold out of the fridge)
  2. Combine egg and milk and beat well.
  3. Sift flour, baking powder and salt into egg mixture and beat until well combined and thick.
  4. Pour over leftover Mac ‘n Cheese and mix well.
  5. Preheat your waffle iron. Brush both sides generously with olive oil. Add a couple of tablespoons of shredded cheddar to the base, spoon in about 1/2 cup of the Mac ‘n Cheese waffle batter onto the centre and add a couple more tablespoons of the shredded cheddar on top and close the pan.
  6. Waffles need to cook a little longer than normal so that cheese crisps up.
  7. Waffles are cooked when the top of the waffle pan easily peels away from the waffle, although you may need a little nudge to release if cheese is sticking to the iron.
  8. Cut into quarters with a pizza cutter.

CrispyMacNCheeseWaffleBites_2

If you like crispy cheese, you will LOVE these.

Notes:

  • *A leftover serving is basically a 1/2 cup of uncooked noodles and cheese sauce.
  • To make more, simply multiply the waffle ingredients by the number of servings of Mac ‘n Cheese (for example, KD has 4 servings per box, so ingredients would be 4 eggs, 2 cups milk, 2 cups flour, 2 tsp baking powder etc…).
  • I, intentionally did not make these bites the full-size of the waffle pan, I wanted them irregular and smallish.
  • Waffle bites are crispy and not creamy, they are like a giant Mac ‘n Cheese chip.
  • Add chopped green onions for extra flavour.
  • Serve with salsa, a bruschetta topping or greek yogurt or sour cream for dipping.

CrispyMacNCheeseWaffleBites_3

A view of the lake.

I didn't cook the first one long enough and it literally split in half. Perfectly edible but not pretty!

I didn’t cook the first one long enough and it literally split in half. Perfectly edible but not pretty!

Read Full Post »

CheeseBall_First

My parents entertained a lot, it’s probably where I get my love for entertaining (read, feeding) friends and family. Mom would make canapés (tiny little sandwiches) and often have a cheese plate for nibblies. Mom’s canapé repertoire was whatever we had on hand, sometimes leftover roast beef, hard boiled egg or even some pickled herring with a dollop of sour cream and a sprig of fresh dill.

Although this post is about a cheese ball, my dear Mom did not make cheese balls for entertaining purposes, they were for late night snacks*! Mom’s cheese mixtures usually consisted of whatever cheese was left over, grated and mixed together with butter (or margarine, in those days). Each cheese mixture was different because she never had the same proportions of cheese leftover.

I believe, I was the first to make an actual cheese ball in my family, the recipe was likely from a one of my beloved Recipes Only Magazines, a quarterly food magazine that premiered in April 1983. It was delivered free to 2,000,o00 Canadian homes in predetermined areas. The inaugural magazine touted “To celebrate the joys of Food and Cooking…Our goal at Recipes Only will be simply to bring you excellence; excellence of recipes based on the plentiful ingredients from Canadian stores and gardens; excellence of presentation based on the best photographs and illustrations our award-winning team…can design…” Well, they did their best considering the timeframe. Dark, moody photos with some but not many relevant props, not like the odd 70’s food photos with weird fabrics (or were they all shower curtains?) thrown in! I’m certain my first cheese ball came from one of the Recipe Only Magazines but I no longer have them all so I cannot be sure (makes for a good story, though).

RecipesOnly

Sadly, I have only saved up to and including Issue 7, November/December 1984,  I also saved Issue 11, from 1985 (which has the index for the first 10 issues) and for some bizarre reason, Issue 24 from October 1987 (by which time, they were charging $1.00 for them). I even saved labels from Bick’s Pickles to send away for a tidy binder to hold my cherished Recipes Only Magazines.


We’ve thoroughly enjoyed the more contemporary Potted Cheese at the beautiful Harbour House Hotel in Niagara-on-the-Lake (we often go down during the Christmas Holidays) during a sampling of Local Vintages from 4:00 pm to 5:00 pm each day in the Library Lobby. My cheese ball is not nearly as highbrow as the Potted Cheese but it is very tasty. I would encourage you to create your own with your own blend of cheese, it’s a perfect accompaniment to cocktails on the dock on a lazy summer’s day.

CheeseBall_2

I served the cheese ball with home made toasted sourdough baguette, Mary’s Crackers, cucumbers and celery sticks.

A Tasty Cheese Ball

A KitchenInspirations Original Recipe

Makes 2 8-10 cm (3-4 inch) Cheese Ball

Ingredients:

  • 250 g Cream Cheese
  • 55 g Danish Blue Cheese
  • 50 g Gruyère Cheese
  • 1 green onion, finely chopped
  • 100 g of chopped, toasted nuts, cooled (I used 50 g each of pecans and cashews because it’s what I had on hand).

Directions:

  1. Combine all of the ingredients with the exception of the nuts, in the bowl of a food processor, process until smooth.
  2. Scrape out all of the cheese mixture and divide into two balls. Roll in the nuts to cover completely. Refrigerate or freeze until required.
  3. It’s best to allow the cheese ball to come to room temperature before serving.

CheeseBall_3

*Back in the 1970’s and early 80’s, we would often have a small snack of cheese, bread or popcorn while watching TV. We called it our “Late Night Snack”.

Read Full Post »

ScallopKingMushroomHD_FIRST

Spring has finally sprung in Toronto and our weather is finally behaving as it should; the greenery is no longer terrified to show itself and many have already begun their journey into Summer 2015 — the saucer magnolias are spectacular in the hood. The Japanese Cherry blossoms in High Park are still tucked away but a few days of warmth and sunshine should remedy that and they’ll be in full bloom in no time. We had our first drinks on the back patio on Friday and we celebrated with some tasty bites.

Now about these bites, I came upon this discovery quite by accident…I was exploring a recipe for bacon-wrapped mushrooms I saw on Greg’s lovely blog (BTW, exceptional recipe) using King mushrooms and as I was cutting into them, I couldn’t help but think they looked a lot like scallops. So a few days later, I dug out an old favourite recipe I posted in 2008, Grilled Scallop Bruschetta with Avocado Paste — The King mushrooms made a wonderful substitution for the scallops but sadly I didn’t have any of our favourite avocado paste (I freeze it in ice cube trays and then put them into plastic baggies for quick hors d’œuvres). It’s a classy hors d’œuvres for a summer cocktail party that I hope you will give a try. For a vegan version, you can omit the parmesan cheese from the pesto or serve it over the avocado paste as I had intended. The King mushrooms not only look like scallops but cooked well, they even have a lovely scallop-like texture.

ScallopKingMushroomHD copy

King Mushroom “Scallops” on Pesto Crostinis

a Kitcheninspirations Original Recipe

Serves 2

Ingredients:

  • 2 thick King Mushrooms
  • 2 tbsp of your favourite sugary vinegar, or a sauce with a high percentage of sugar (for caramelization) (I used a Baco Noir & Blueberry Balsamic)
  • 1 tsp canola oil (or oil with a high flash point)
  • 4 thin crostini bread, your choice
  • 1 tbsp pesto (please click here for recipe)
  • sea salt

Directions:

  1. Wipe/wash the king mushrooms and dry off well. Cut into 4 thick slices. Marinate the slices in the vinegar for 5-10 minutes. Reserve marinating vinegar.
  2. Toast the bread on both sides and slather with 1 tsp of the pesto on each. Set aside.
  3. Heat a cast iron frying pan until very hot add the oil and heat up. Drop each slice of mushroom onto the hot pan and lower the temperature to medium. You want to cook the mushroom while developing a beautiful caramelization on each side.
  4. Add one slice of cooked mushroom to each avocado slathered crostini. Add the marinating vinegar to deglaze the pan and thicken by cooking it down (shouldn’t take long). Drizzle the pan juices onto each crostini, sprinkle with a little sea salt. Serve immediately.

Read Full Post »

We’re buried in the chaos of the Christmas holidays and on Wednesday and Thursday we were buried in snow! This was our first real accumulated snow fall and the first has always been my favourite kind — the virgin snow delicately covering our urban landscape like a thick, fluffy duvet. It’s really a perfect backdrop for Christmas and with the company party coming up tomorrow, it’s perfect timing. Hopefully the city mess and dirt will keep at bay so the snow remains perfect for one more day.

Mushrooms have always been a huge favourite at our house, be it fresh, plain button mushrooms or fresh, wild mushrooms like shiitake, portobello, king or cremini, we even have a few recipes for the specialty dried variety. But for this special recipe, I chose fresh wild mushrooms.

I created this vegan recipe (to be enjoyed by all) because I wanted to show-case oven roasting mushrooms because it’s a technique that is relatively new to me (oven roasting vegetables is not new, just oven roasting mushrooms). Oven-roasting mushrooms brings out their sweetness and subdues the strong earthiness that some wild varieties have. Toss in finely chopped, fresh garlic and Extra Virgin Olive Oil from our neighbour’s father’s olive grove in Greece and these tasty fungi make a mouth-watering filling for these classy little tarts. By adding a bit of puréed red lentils AND puréed roasted cauliflower and celeriac mash put these gems over the top flavour-wise and adding a lovely creamy texture that glides into your mouth like a velvet cape.

This is the FLAKIEST pastry EVER!

This is the FLAKIEST pastry EVER!

Vegan Mushroom Tarts

A Kitcheninspirations original recipe.

Makes about 36 little tarts

Ingredients:

  • 600 g variety of wild mushrooms (I used  a combo of white, King, Portobello and Shiitake
  • 20 g garlic, finely chopped
  • 50 mL EVOO
  • 1/2 tsp sea salt
  • 1/3 cup red lentil purée (click here for recipe)
  • 1/4 cup cauliflower and celery root mash (click here for recipe)

Directions:

  1. Pre-heat oven to 450° F (232° F)
  2. Toss roughly chopped mushrooms in garlic, EVOO and salt. Spread out in a large roasting pan  and roast for about 20 minutes or until the released liquid has evaporated and mushrooms are roasted golden. Turn often so the mushrooms don’t stick to the pan.
  3. Cool.
  4. Add mushrooms to a food processor and process until all are relatively small bits. Fold in the red lentil purée and the cauliflower and celery root mash. Season to taste.
  5. You may freeze the mushroom filling at this point to use later. To use later, defrost first.
  6. Fill the baked pastry cups with the mushrooms and reheat at 200° F  (93° C) for 10-12 minutes or until warmed through.

Vegan Thyme Pastry Cups

Vegan tart pastry recipe from Vegan Baking with minor alterations. The links below for vegan butter and shortening are included in case you feel like experimenting. (This is an EXCELLENT Vegan blog with a lot of instruction and science behind the madness).

Ingredients:

  • 2 ½ cups all-purpose flour
  • 1 tbsp sugar
  • 1 teaspoon salt
  • 1 tsp thyme
  • ¾ cup (161 grams) or 1 ½ sticks cold Regular Vegan Butter or non-hydrogenated margarine cut into small pieces
  • ½ cup (108 grams) or 1 stick cold Vegan Shortening or store bought shortening, cut into 4 pieces
  • ¼ cup cold water
  • 3 Tablespoons cold vodka (believe it or not, I did not have any, so I omitted it)

Directions:

  1. Whisk the dry ingredients together. Cut in the vegan butter and shortening just like you would a normal butter pastry, keeping it as cold as you can.
  2. Add the cold water and vodka and work lightly until it forms a ball. Make three disks and refrigerate, wrapped in plastic wrap for 30 minutes or overnight (mine was over night).
  3. Pre-heat the oven to 350° F (177° C).
  4. Roll out the pastry between two sheets of parchment paper to about 1 mm (1/16″) thick. Cut with your favourite cookie cutter and shape into mini muffin cups. Bake for 10-15 minutes or until lightly golden.
  5. Use immediately or freeze until required. No need to defrost before re-heating with filling.

Notes:

  • To help avoid the pastry getting soggy with the filling, I froze the pre-baked pastry and the filling separately and combined and reheated just prior to serving.
  • This pastry is also enough for one 9″ double crust pie. The original recipe serves up a sweet version too. Your should definitely check it out.


Read Full Post »

A surprisingly creamy dip

A surprisingly creamy dip

We’re hosting the company Christmas party (the company I write social media content for) and 1/4 of them are vegans and vegetarians! As usual, I really didn’t feel like making two different things so other than 2 fish and 3 meat dishes, everything else is going to be vegan! I’m even testing my skills with some pretty interesting desserts and VEGAN CHEESE! Stay tuned, I’m looking forward to learning to cook gourmet vegan. BTW, thank you to a long-time friend and colleague (and loyal reader) Michela, who offered some excellent suggestions ❤️.

Did you know that purée-ing (with a stick blender) cooked red lentils become so incredibly creamy that it tastes like you’ve added cream or butter to it? It makes an incredible dip and it also could be used as a base for a gluten free, even vegan white sauce! I make a large batch and freeze in an ice cube tray for quick additions to ‘cream’ up a sauce! Recently, we had an incredible cauliflower-lentil ‘Alfredo’ sauce which was TDF! So good. Next time I make it I’ll be sure to jot the ingredients down and actually measure everything!

A few years ago I won the runner-up prize for a photo contest from Roger Mooking (a celebrity chef here in Toronto), the prize was a Crock Pot with a mini heated dip pot. The crock pot croaked last year but the mini dip pot goes on. I don’t know about you, but I have never liked using this unattractive pot on my buffet table, so about a year or so ago I did some testing to see how hot it actually gets and was quite surprised that you could actually cook in it! The temperature gets to around 165F which would be enough to cook meat, but I wouldn’t suggest it. It is however, perfect to make a batch of beans or lentils for dip! I’ve been using it almost every week to make healthy bean or lentil dips. So if you have one sitting on a back shelf gathering dust, bring it out and put it to good use. Put it on before you go to work and when you get home you have a delicious dip or base for a creamy soup or sauce.

Creamy Red Lentil Dip

An original Kitcheninspirations recipe.

Makes about 250 mL (1 cup) of dip

Ingredients:

  • 1/2 c red lentils
  • 1 cup water or vegetable stock
  • 1/2 tsp cumin
  • 1/2 tsp coriander
  • 1/2 tsp sea salt
  • 1 tbsp dehydrated onion flakes
  • 1/2 tsp granulated garlic
  • 1-2 tbsp lemon juice
  • 1/2-1 tsp toasted sesame oil

Directions:

  1. Add all ingredients except lemon juice and toasted sesame oil to a mini dip crock pot, stir and then cover.
  2. Plug it in (only way to turn it on) and cook for 3-4 hours or when lentils are very soft.
  3. Turn hot cooked lentils into a tall container. Purée using a stick blender until smooth and creamy adding lemon juice and toasted sesame oil to taste. Refrigerate until needed.

I drizzled some toasted sesame oil over the top.

I drizzled some toasted sesame oil over the top.

The oven roasted tomatoes are incredibly sweet but still give this dip a piquant flavour.

The oven roasted tomatoes are incredibly sweet but still give this dip a piquant flavour.

RedLenilDipOvenRoastTomato_3984

These little water crackers were the perfect accompaniment to this cream dip.

Additional Flavours:

  • “Hummus”: to the recipe above, add additional finely chopped fresh garlic at the end as you purée to give it more of a hummus flavour.
  • Curry Dip: omit the lemon juice and toasted sesame oil and add 1/2 tsp curry powder with 2 tbsp coconut milk powder at the purée stage.
  • Oven dried tomato dip: Omit the cumin, coriander, lemon juice and sesame oil. Add to cooked lentils, 1 tbsp chopped oven (or sun dried) tomatoes plus 1 or 2 fresh basil leaves and purée until creamy and smooth.

Notes:

  • Other lentils (like green or du puys) don’t turn out as creamy, I’ve tried them and seriously prefer red.
  • I use granulated garlic (not the same as garlic powder) and dehydrated onions in this recipe because we preferred the end taste over cooking fresh cloves and onions in the mini crock pot. For whatever reason, the mini crock gave the garlic a very unusual flavour.
  • To make a base for ‘cream’ sauce, omit everything but the lentils, water and salt. Purée when cooked, allow to cool and freeze in ice cube tray for future use.
  • Note on December 8: Lentils cook in far less time than the prescribed 3-4 hours, it’s just that I’ve left it on for that length and the result was what I wanted, totally mushy and easily puréed lentils. If you’re around and can unplug the little dip warmer when the lentils are first cooked, then be my guest.

Read Full Post »

Many years ago my family lived in an apartment building on the second floor and my parents became friends with the couple across the hall who had three kids. They were from Chile and the husband/dad worked for Motorola and was transferred to Canada (I believe he was an electrical engineer but I can’t be sure because I was only 8). The kids were, Edward, Malu and Christina; my brother fell in love with Christina (the youngest) and asked for her hand in marriage — they were 6 years old. Edward was my age but we were never interested in each other, after all, he was a creepy boy and I was certain he had couties! Malu was a year younger than I and we became friends. We were family friends for several years…7 or 8 I believe, and one day we came home to find that they had moved out without a single word or forwarding address. We haven’t seen them since. How weird is that? Have you ever had such a strange experience?

My dear Mom was always ready to try anything and when the opportunity arose, she would arrange to swap dinners with her Chilean friend. Mom also did that with an Indian friend and a Jamaican friend! This was our introduction to the family love of food. My Mom’s Chilean friend made us Empanadas which are a South American meat patty, often changed up from country to country by the spices added and the type of meat used. Last year when we were in D.C., we had Empanadas at a great little Spanish restaurant and they put their own twist into this delicious patty…they added soft cheese! Boy was it good. It was deep fried and the casing was soft and crispy and the centre filled with wonderfully spiced ground meat and a delicious soft cheese. When I realized that in my 7 years of blogging, I have never posted an Empanada recipe I decided that it was darn time! Shame on me because they are so easy to make and freeze very well. Pop a couple into the oven or microwave and you’ve got a delightful snack or appetizer or light lunch.

A couple of weeks ago, our lovely neighbours invited us for a tapas cocktail afternoon and she made a version of Empanada that got my attention (with chorizo) but for this recipe I shall post my dear Mom’s traditional Chilean friend version for the  filling. To be honest, I never really liked Mom’s recipe for the pastry so I made my neighbours pastry recipe instead and I think it’s pretty darn perfect. The pastry is a cross between bread dough and pie crust; the exterior is firm but the texture when you bite into it has some elasticity so the patty doesn’t fall apart. This time I made small one-bite sized patties and a slightly larger 3-4 bite luncheon patties. I hope you enjoy them as much as we do.

Empanadas2 It’s an optical illusion, the front ones are about half the size of the back ones!

Empanadas

Updated July 2022

Makes about 48  mini 5cm (2 inch) Empanadas AND 32 larger 15 cm (3.5 inch)

Ingredients, filling:

  • 454 g ground meat (could be mixed veal with pork and beef)
  • 3 medium onions, finely chopped
  • 1 cup chopped black olives
  • 1 cup of golden raisins
  • 2 tbsp cumin
  • 1 tbsp paprika (sweet or smoked)
  • Salt to taste (but be careful because the olives are quite salty)
  • 1 ball of fresh mozzarella or Manchego, cut into 1 cm (1/2 inch pieces)

Directions, filling:

  1. Heat oil in a large dutch oven. Cook onions until soft.
  2. Add the spices and heat until you can JUST smell them.
  3. Braise the meat until completely cooked, add the raisins. and the chopped black olives.
  4. Allow to cool completely before filling dough.

Ingredients, dough:

  • 6 cups all purpose flour
  • 4 eggs
  • 1/2 cup milk
  • 1/2 cup olive oil
  • 4 tsp baking powder
  • 4 tsp salt
  • 1 egg beaten with about 1/4 cup water
  • 1 cup sesame seeds for garnish

Directions, dough:

  1. Pre heat oven to 350°F.
  2. Combine all dough ingredients until it forms a soft dough (kitchenaid is fine).
  3. Roll out dough to about 1mm thick (I used the #3 setting on my pasta maker) and cut with a round cookie cutter (small 1 bite size should be no larger than 5 cm or 2 inches and larger luncheon versions should be about 15 cm or 3.5 inches).
  4. Brush some of the egg wash all around the edge of each circle. Into the centre of each dough circle, add about 1‐2 tbsp meat mixture, making sure you have some raisins and olives in each circle. Add one square of cheese per round.
  5. Fold dough over filling so it is a crescent and seal the edges.
  6. Place on a cookie sheet lined with parchment paper. Brush each crescent top with the egg wash for shine and sprinkle with sesame seeds or Parmesan cheese.
  7. Bake for 20-25 minutes or until lightly golden. Serve warm and enjoy with a bit of jam or compote or mustard.
    They are pretty darn tasty. They are pretty darn tasty.

Notes:

  • These freeze very well, just pop them into a zip-lock baggy and freeze, use one at a time or as needed.
  • The recipe may be successfully halved or quartered.
  • If you don’t like black olives, leave them out, same with raisins but you will miss the salty and sweet combination.
  • We used fresh mozzarella because we could not find Manchego cheese. Regular mozzarella may be too hard so I would avoid it.
  • In hindsight, the cheese almost completely melted out of the empanada, so next time I doubt I’ll add it.
  • May 2017 update to recipe;
    • I increased the liquid measurement in the dough by 1/4 cup each.
    • JT wanted larger empanadas, so I used #1 on the pasta maker and a 10 cm (4 inch) diametre cookie cutter to make more luncheon-sized versions. We got about 35 out of the batch, but had a bit of the meat mix left over.

Read Full Post »

Sunday was my dear Dad’s birthday, he would have been 91, Happy Birthday Dad!

Mom and Dad 1959

Mom and Dad 1959

What does your grocery shopping map look like? Ours is called the Golden Horseshoe which means we shop the outer edge. Here in Canada it usually means that we enter the store in the vegetable section, round over through the deli/specialty cheese then bakery then fish/meats and finish off in dairy.
We don’t do a whole lot in the aisles. Recently I did a couple of assisting jobs that took me deep into un chartered territory: the middle aisles! I had to pick up groceries for a Canadian lifestyle TV show for two segments and I have to admit that it was an eye opener! What I found enormously frustrating was that a number of items that could be in more than one spot. Even the staff didn’t know for sure. Gluten free is a great example because a number of GF products are also organic, so now you’ve hot two completely opposite locations for the same product. Or if it’s flour and it’s a national brand, it could be in the normal baking section on the same shelf as the regular glutenated versions! Yes, it’s frustrating. What does your grocery store layout look like and do you shop the aisles?

I was making polenta the other day and as I was stirring the polenta and it began to thicken I was suddenly reminded of Pâte à Choux  just after you add the flour to the butter and water mixture, and the idea came to me so I spent the following day developing a gluten free Pâte à Choux that you could not tell was Gluten Free. I must tell you, this is it. Many Gluten Free recipes just don’t cut it for me, it’s either the weird flour smell (garbonzo bean flour), taste or the crumbly texture, so you know this recipe must have checked positive on all of these points.

My first attempt used superfine corn meal (I blitzed it in a coffee grinder a few times) and even though it puffed up as well as the glutenated version it was just too corn mealy (think corn muffin texture even though the corn meal was superfine) the texture wasn’t right at all and so the experimentation began. Perhaps if I had used corn flour instead of meal, it would have been a different story, but I’ll leave that for another time.

GF ChouxPastry_2158

This is the 100% cornmeal version, it’s just too corny, if you’ll pardon the pun.

After some research I decided a pastry made only with cornmeal was not the answer so I went searching for home made gluten free flour recipes so I didn’t have to waste time hunting down a GF flour in the grocery store. Many of them had similar ingredients but I was limited to what I had at home and the volume of each ingredient I had on hand which determined my home-made GF flour recipe; a combination of 6 parts superfine corn meal, 3 parts potato starch and 1 part tapioca flour was the result and I’m rather pleased how it worked out in this recipe. The texture and mouth feel of these choux resemble the texture and mouth feel of the glutenated choux cheese pastries that we know and love! I was so happy because my BFF is gluten intolerant and my brother has chosen to omit gluten from his diet to manage an illness. The last time I asked him if he wanted me to make a gluten free item for him he said it’s just not worth it. He’ll surely change his mind with these.

I tried making these the quick and easy way that my normal food processor choux is made (like this) but did not have as good luck with them, they were not as elastic as a good choux should be, so I reverted to the old fashioned way with the hand mixer and it worked out perfectly.

Gluten Free Cheese Choux Pastry

Makes 25, 4 cm or 1.5 inch puffs

GF ChouxPastry_2162

As the three bears put it, “this one is just right”

Ingredients:

  • 65 mL soda water
  • 30 g unsalted butter
  • 1/4 tsp salt
  • 40 g gluten free flour*
  • 1/4 tsp zanthan gum (see notes)
  • 1/4 tsp gluten free baking powder
  • 1 egg
  • 30 g grated sharp cheddar cheese

Directions:

  1. Preheat the oven to 200° C/400° F.
  2. Combine the gluten free flour, zanthan gum and gluten free baking powder and stir well.
  3. In a saucepan with high sides, melt the butter into the water with the salt over medium heat. Add the flour mix all at once and cook this mixture until it clears away from the sides of the pan.
  4. Remove from heat. Using a hand held mixer, whip this mixture for about a minute. Add the egg and beat for about 2 minutes, add the cheese and beat the pastry until it is elastic and smooth.
  5. Prepare a baking sheet by measuring a piece of parchment to cover it, soak the parchment in running water and squeeze out excess water. Smooth the wet parchment over the baking sheet. (see notes)
  6. Using a pastry bag with a 2 cm (3/4 inch) nozzle, pipe very small rounds (see note) onto a the prepared baking sheet.
  7. Bake for 15-20 minutes or until lightly browned.
  8. Serve warm or freeze once cooled and reheat in a warm oven at 177° C/350° F for 12-15 minutes from frozen.

*Gluten Free Flour Recipe

Makes about 120 g of flour, enough for 3 batches if these puffs

Ingredients:

  • 6 tbsp superfine corn meal
  • 3 tbsp potato starch
  • 1 tbsp tapioca starch

Directions:

  1. Mix well until combined. Store in an air tight container until required.

Notes:

  • Zanthan Gum is used as a binder in gluten free baking, if you omit it your baking may end up crumbly. It is also used as a thickener but I’ve never tried it that way. It has no perceivable smell or taste. The general consensus is that you add 1 tsp Zanthan Gum to 1 cup GF Flour so that is how I determined how much to add in my recipe.
  • I found that piping about 2 cm or 3/4 inch balls onto the damp parchment and slicing it from the piping tip made the task very quick and quite neat. It also regulated the size of the rounds so that they were more or less equal.
  • I used soda water because I thought it might make an airier pastry, not sure if it helped or not but that’s my story and I’m sticking to it.
  • Years ago I had read a recipe for choux that the author lightly wets the baking sheet in order to create a humid environment which helped the choux puff up even more. It was so long ago, I don’t know where I read it but my wetting and wringing the parchment is different enough.

GF ChouxPastry_2164

The outside is crisp while the inside is soft and airy like it is supposed to be.

Based on 2 per serving

Based on 2 per serving

Read Full Post »

Several years ago we dined in a lovely bistro in the heart of the financial district downtown Toronto called Forte Bistro and Lounge. JT had read about Chef Greg Argent in one of our foodie magazines and he knew right away we had to experience his cooking! Sadly, the restaurant is no longer around but the delicious memories of Chef Argent’s cuisine still lingers on.

A delightful combination of rich broth and caramelized onions in a perfectly bite-sized pillow.

A delightful combination of rich broth and caramelized onions in a perfectly bite-sized pillow.

One such dish was the unique French Onion Soup Dumplings ($11): a tender pasta dumpling filled with braised veal broth and gruyère cheese; what made this tasty dumpling so unusual was the surprise of the explosion of veal glacé that would fill you mouth with flavour after biting into the tender pasta, immediately reminding you of French Onion Soup! I have tried many times to recreate this wonderful dish without success and then Chef Argent revealed his ‘secret’ when I asked how he does it. Today I will share with you the secret of the tasty, unassuming little dumpling, but you must swear never to speak of it again! Although the recipe is laborious, I urge you to make a batch to serve as an amuse bouche or little hors d’œuvres at your next Super Bowl party (you may freeze uncooked dumplings on a parchment lined sheet lightly dusted with flour and then put them into a zip-lock bag), you will not only thank me for the wonderful compliments your lucky guests bestow upon you, you may even wish to send me gifts! 😉

Did you figure out the 'secret'?

Did you figure out the ‘secret’?

French Onion Soup Pillows

makes 60 single bite pillows

Ingredients for the broth:

  • 0.5 kg (about 1 pound) Beef bones or oxtail bones
  • 130 g (about 4.5 oz) sweet onion, thinly sliced
  • 1 tsp merlot salt (from my friend Kristy at Eat, play, love; our family food adventures)
  • 600 mL water, divided
  • 1 bay leaf
  • 1 tbsp cooking sherry
  • 3 g (a scant teaspoon) powdered gelatine (agar agar will not work here)
  • 1 cup caramelized onions (please click here for a great recipe)
  • Home made pasta dough or 60 square won ton wrappers (for a great pasta dough recipe, please check out Chicago John’s kitchen)
  • Gruyère cheese to garnish

Directions for the broth:

  1. Preheat oven to 350°F 177°C. Put a 11.5 cm x 21.5 cm (4 1/2″ x 8 1/2″) metal loaf pan into the freezer.
  2. Sear the beef bones well on high heat. Remove from pan and set aside. Deglaze the pan with 1 tbsp cooking sherry or port. Add the onions to the pan and sauté for a minute or so on the residual heat from searing. Spread the onions out evenly on the bottom of the pan. Return the beef bones to the pan and nestle into the onions, add the merlot salt, bay leaf and 300 mL water. Cover with tin foil and roast in the oven for about 1 hour, checking occasionally to make sure the water hasn’t evaporated, top up as needed.
  3. Remove pan from oven and remove tin foil. Add an additional 200 mL water and boil on the stove top until liquid is reduced to about 150 mL (about 5 oz). Strain through a fine sieve and press as much liquid out of the cooked onions as possible.
  4. Set aside about 60 mL (1/4 cup) of the stock and cool. Keep the remainder stock on a soft boil.
  5. Stir the gelatine into the cooled stock until melted. Add the boiling stock and stir well. Allow to cool to room temperature and pour into the super cooled loaf pan. Refrigerate until set.

FrenchOnionSoupPillows_1960

You can develop a little assembly line to speed up the process!

An unexpected, rich, delicious soup explodes in your mouth when you bite into each pillow.

An unexpected, rich, delicious broth explodes in your mouth when you bite into each pillow.

Directions for assembling the pillows:

  1. Roll out the pasta dough to #4 thickness on the Kitchenaid Pasta roller (less than 1 mm or 0.125 inch). Using a 6-7cm (2.5″ -2.75″) oval cookie cutter, cut out the ovals to make both sides of the pillows.
  2. Remove the jelled broth from the fridge and cut into 0.5-1cm (0.25″-0.5″) rectangles.
  3. Onto each oval, more or less centred, add one jelled broth rectangle and about 1/4 tsp caramelized onion. Wet your finger and run a wet bead along the outer edge of the pasta oval. Turn up both sides of the oval and squeeze the edges together to bind — you don’t want these pillows to burst open when boiling.
  4. Lightly flour a parchment lined baking sheet and add each finished pillow to it so as not to touch each other. Freeze and bag frozen pillows into a zip lock bag or container. Use as many as needed.
  5. Bring an appropriate  amount of salted water to a boil. Add frozen pillows and boil until they float to the surface. Remove with a slotted spoon onto a clean dish cloth to drain off water. Present on a Chinese soup spoon and garnish with a small amount of finely grated gruyère cheese. Brûlée the cheese until it is golden and crispy. Serve immediately.

FrenchOnionSoupPillows_1950

The Brûléed Gruyère cheese taste just like the burnt bits on a French Onion soup bowl.

Read Full Post »

Hello everyone! I do hope you are enjoying the holidays. As you may have heard on the news Toronto was savagely hit with an ice storm last weekend and over half a million homes were left without power, some still don’t have power. I am very pleased to report that our power was only out for about  28 hours so it wasn’t that bad. We did have to rejig our Christmas plans as we were to host festivities on Christmas Day and not knowing how quickly the power would be restored we made arrangements to have it at JT’s sister’s place in Peterborough (the power company had indicated it may be 5 days!). My nephew Brian kindly offered us his apartment for warmth which was great because I had to prepare a few things to take for Christmas Eve’s dinner and Christmas Day dinner. It made me realize how fragile we are and how dependant we are on power, particularly in the winter. Fortunately, we didn’t lose food,  we put refrigerator things to keep cool outside and the freezer was cold enough and full enough to maintain the frosty temperature (thanks to Norma Garden to Wok, who kindly suggested to put buckets of ice into it if it wasn’t chuck full).
The house temperature fell to around 10°C  (50°F) so we turned the water off and put antifreeze in the traps and toilets. We didn’t have to do anything with our hot water rads, apparently they are good until the temperature falls below freezing for a couple of days. Of course, that’s just a wild guess and I am so glad we didn’t have to find out the hard way. Many of our dear friends reached out to us and offered a warm place to stay, which was incredibly generous, THANK YOU! We are indeed very lucky to be surrounded by such a wonderful group. Merry Christmas indeed.

As the holiday season continues and we are partying with gusto, I wanted to pass along a recipe I developed after Barb and I were introduced to a very novel hors d’œuvres at the KPMG Clara Hughes event in November. This hors d’œuvres was so unique and delicious I had wanted to try to recreate it for cocktails with Barb and her family on Christmas Eve, a tradition we’ve been enjoying for many years, but unfortunately we were one household of a 250,000 left without power for a few day after the ice storm last weekend so I put it off. It’s not complicated but it does require technique so you may wish to practice a bit before you serve it up at your party. You will need a slab of ice, easily made using a cookie sheet or roasting pan, or more authentically a good amount of freshly fallen, CLEAN snow. In the city, our snow is not very clean, so I opted for the slab of ice.

The sweet candied Maple Syrup provides a wonderful contrast to sharp cheese such as blue, extra old cheddar or even Parmesan (any double or triple cream cheeses will be too soft to do this with)..

Maple Cheese Popsicles

Serves 4-6

Ingredients:

  • 1 slab of ice (or shaved ice*), made using a cookie sheet or rectangular roasting pan (you will need to make this 2 days or more in advance). Add sprigs of Christmas tree trimmings and bright red cranberries for a festive feel. I lined a 10″ x 13″ x 2″ roasting pan with plastic wrap to help me lift the ice out of the pan.
  • An accurate candy thermometer.
  • 1/2 cup pure maple syrup (any colour will do, but we used Amber).
  • A variety of cheeses (such as blue, extra old cheddar or even Parmesan) cut into 1 cm x 2 (1/2 inch x 1 inch) rectangles.
  • tooth picks.

Directions:

Prepare everything in advance:

  1. Bring the cheese to room temperature, place one tooth pick into each and set the little soldiers aside.
  2. Prepare a lovely serving dish by lightly spraying it with non-stick spray. You will set the maple cheese popsicles onto this dish and if it’s not sprayed, the maple candy will stick to it (at least that was my experience).
  3. To keep the maple syrup from setting up as you prepare these delightful bites, fill a cake pan deep enough to hold boiling water about half way to three-quarter the way up the small sauce pan sides. Place it directly at your work station.
  4. Place a dish cloth at your work station and put the slab of ice on it (decorate the edges with Christmas tree clippings or add cranberries and greenery to the ice when you make it so that it’s very festive. You may remove the pan or leave the ice it in, it’s up to you).

Now you are ready to begin cooking the maple syrup:

  1. When all of your guests have arrived, put the maple syrup into a heavy bottomed very small sauce pan (mine was ~1 cup (250mL) volume) and insert the candy thermometer, cook on medium to medium-high heat until it reaches 240° F (116° C) which is about 8-10 minutes depending on how cold your maple syrup was to begin with. Watch the syrup carefully as once it hits 250° F (121° C) it will begin to crystallize and it will be ruined for this application, but you can use it in coffee or tea, so don’t discard.
  2. When the maple syrup has reached  240° F (116° C), remove it immediately from the heat and place the sauce pan into the bath with the boiling water.
  3. Using a dry spoon which holds about 1 tsp, drizzle the maple syrup in a lace-like rectangular pattern on the ice slab long enough to roll the cheese in once. Almost immediately after you finish drizzling, using one of the prepared cheese bites on a tooth pick, begin at one end and roll up the maple candy around the cheese. Either hand it to a guest or place it on the prepared serving platter.
  4. Repeat until you have used up all of the cheese. If your kitchen is chilly, you may wish to replace the boiling water bath about half way through so that the syrup doesn’t set up.

These photos were from the second trial, the first trial didn’t work out!

MapleCheesePopsicles_1666

Although these aren’t as lacy as I would have liked, they did turn out better than I expected.

MapleCheesePopsicles_1668

It takes a bit of practice to get the technique right.

MapleCheesePopsicles_1667

The maple candy starts to melt, that’s why it’s good to spray your serving dish with non-stick spray. I made these about 30 minutes ahead and stored them in the fridge and they still melted a bit.

Notes:

  • If you forgot to make your slab of ice, you can take  about 10 ice cubes and in a good strong blender or food processor, pulse until you achieve a reasonable amount of shaved ice without big bits. The shaved ice will melt faster therefore it is a good idea to have more ice on hand to refill the shaved ice container. You will need to continue to work so have your kitchen helper shave more ice, or prepare it in advance and store it in the freezer on another cookie sheet or flat platter.
  • I prefer blue cheese as the pairing with the sweet maple syrup, but some people don’t like blue, so have some cheddar on hand.
  • Fry up some thick cut bacon that is cut into 1 cm x 2 (1/2 inch x 1 inch) rectangles and wrap the maple around it as an alternative option.

Read Full Post »

It’s the most wonderful time of the year! You may think that I’m referring to Christmas, but then you’d be wrong. It’s Halloween, of course! JT and I traditionally have a pumpkin carving contest, and this year is no different. We scour the net for unusual pumpkin patterns and when we find one we get down to the dirty job of carving. Carving is made easier with the right tools, but then again isn’t everything? I bought a set of pumpkin carving tools at an end of season sale last year and wish I had bought two sets! So in light of the grand tradition, I’m going to ask you to vote on your favourite pumpkin! May the best pumpkin win!

WitchyPumpkin_1262

Vote for me. Vote for me!

ScaryPumpkin_1255

Vote for me. Vote for me!

Halloween2013_1253

Hope the decorations and the scary music doesn’t frighten the wee ones too much!


We were craving a unique hors d’œuvres so I remade a traditional polenta recipe into a delightful orange snack: polenta “fries”! The orange is strictly from the sharp cheddar. And the best part is that you can easily freeze these babies for those lovely drop-ins during the holiday season.

Cheddar Polenta “Fries”

PolentaFries_1154

They are crispy on the outside, soft and creamy on the inside.

Ingredients:

  • 1 cup fine cornmeal
  • 2 cups stock (vegetable, beef or chicken)
  • 150 g grated old cheddar cheese
  • Salt to taste
  • 1/4 tsp smoked paprika
  • Pinch of chili flakes
  • 2 tbsp finely chopped chives

Directions:

  1. Bring stock to a boil and add the smoked paprika and chili flakes.
  2. Slowly add the cornmeal, whisking quickly as you add it.
  3. Add the grated cheese and mix well.
  4. Turn heat right down to low and cook for 10-15 minutes until it no longer feels as hard grain.
  5. Turn into a parchment lined square Pan about 22 cm x 22 cm or 9″ x 9″ and press down evenly and firmly. Allow to cool.
  6. Cut into 1cm or 1/2″ wide “fries” about 5 cm or 3″ long. Fry each side until golden in a light oil.
  7. Serve warm with marinara sauce or salsa.

Other serving suggestions:

  • Serve with soup instead of crackers.
  • Cut into small rounds and serve instead of rice or potatoes with a gravies meat.
  • Cut into small rounds and serve as ‘crackers’ topping with a cold cut or a pickle round!

PolentaFries_1160

Marinara Sauce or Salsa are the perfect accompaniment.

PolentaFries_1162

You sure I can’t interest you in even one?

Read Full Post »

You’re probably thinking “she’s gone mad” bacon and eggs for a Super Bowl appetizer? What could she possibly be thinking? Well, once you taste these babies, you’d wish you had made more of them. Just the perfect size to pop in your mouth (or for more delicate mouths, ehem, one may need two bites). I bought quail eggs for an appetizer for our friend’s Paul and T (post to come soon and I don’t want to spoil it) but I had a few of these gorgeous little eggs left over, so I came up with this breakfast for appetizer treat, and since Super Bowl is on Sunday, why not serve it to your discerning guests?

IMG_4020_BLOG

You can see how small the quails eggs are in comparison to the large Grade A egg.

We spotted this sign walking up to a restaurant on Bloor for lunch last Sunday. Since this post had bacon in it, I thought it appropriate.

BaconIsMeat_Blog

A sandwich board sign in our hood which seemed appropriate with this post.

It’s really not a recipe, you can easily see all the ingredients, so I’ll just describe it. You’ll need 1 large slice of German seedy bread (we usually use this brand’s 7-Grain bread), 4 slices of Pancetta, sliced about 3.5 mm or 1/4 inch thick and four quail eggs.

First you want to fry the bacon until crispy, set aside in a warm oven, reserve bacon grease. Then cut four rounds of bread about 4-5 cm or 2.5 inches in diametre, and fry each side of the bread in the bacon fat until slightly toasted, but saturated in the bacon fat (you can hear your arteries bursting, no, wait, those are mine bursting), set aside and keep warm. In the remaining bacon fat, fry up each egg, trying to keep as circular shape as possible. Serve immediately, you want the yolks a little runny. To serve: take one slice of the bread round, put the bacon on top and then the egg, garnish with parsley or cilantro leaves. Serve with a napkin because you will have creamy yolk running down your chin.

Bacon&Eggs2_BLog

A one, perhaps two bite morsel

They turned out so pretty, I had to take two photos.

Bacon&Eggs1_BLog

Oh, you have a little dribble on your chin, let me get that for you.

Go Jays Go!

Oops.

Read Full Post »

While in Barcelona, Spain we enjoyed many tapas that we’d never tried before and one particular tapa was the Potato Omelet. Now you know that I am not a huge potato eater, but for some reason I really wanted to try it. The starch in the potato makes for a very dense and slightly chewy omelet, which was usually served as a small cube, sometime with bread but most often not.

The potato omelet is the cube centre back.
We enjoyed this plate while dining along side of the Mediterranean Sea!

Now that we’re home, I’ve experimented with other ‘fillings’ for this simple treat and yesterday I think I hit the jackpot. I made this little hors d’œuvres with a shallot, finely diced chorizo and a sliced mushroom. What made it hit the jackpot for me was the texture and because I wasn’t using a potato in this version, I needed to add something to help thicken the egg. I remembered Sissi’s recipe for a Korean Pancake (which I thoroughly enjoyed) and she added corn starch to the egg batter to firm it up. So that’s exactly what I did. Thanks Sissi. It made eight 2.5cm squares (1″) that were tasty and incredibly easy to make. You can even make it in advance and reheat.

A lovely dense texture and a little spice from the Chorizo

Chorizo, Shallot and Mushroom Omelet Tapa

Ingredients:

  • 1 whole egg and 1 egg white
  • 1 tbsp corn starch
  • 1 mushroom, sliced about 2mm thick
  • 30 g finely diced chorizo (I didn’t add extra salt as I find Chorizo salty enough)
  • 20 g finely chopped shallot

Directions:

  1. Preheat oven to 350°F.
  2. Beat the egg and white together, add the corn starch and beat until all the lumps have disolved.
  3. Generously grease a small loaf pan 7cm x 13cm (2.75″ x 5″) or 200 mL (3/4 cup size).
  4. Add the chorizo, shallots and mushrooms and make sure they are distributed evenly in the pan. Pour the egg batter over it and tap a few times so that it reaches under and over all the inclusions. Bake for 30-40 minutes or until egg is entirely set. You may serve immediately or cool completely and reheat this mixture prior to serving.

And definitely don’t let my ingredient mix stop you from trying something you have on hand…for example, ham and gruyère cheese!

Ham, Gruyère cheese and a little Dijon

The possibilities are definitely endless. I do hope you enjoy this snack.

The potato and bacon omelet took a nose dive out the pan. It must have been possessed! And NO, for all the guys, the three second rule did NOT apply.

Read Full Post »

A few of my lovely readers have commented that they would love to have a tapas dinner party but it seems like a lot of work, so I’ve put together a few words of advice as I have hosted tapas dinner parties for over a year now and have experienced successes and failures. I hope these tricks alleviate the mystery and inspire you to have a tapas dinner party.

  1. Planning is everything. Think of a theme you wish to follow and create a menu around it; break it out into steps for timing and serving (I’ll give an example of this). Decide how many groups of courses you will serve (i.e., 4 courses of sets of 1-2 dishes are 4 x 1 (0r 2)). If this is your first tapas dinner party and you don’t have a stock up of quick hors d’œuvres in the freezer then start the cooking about 1 week in advance and make 1 to 2 things for the freezer. Don’t worry, you will use them up eventually!
  2. Mise en place is key. Chop, cut, slice, grate anything you can do ahead of time, DO IT. Prepare similar items all at once (as in chop ALL the onions you will need and separate it out into each course). Store meats and fishes in the fridge. I always put ingredients that need to be together in one place in the fridge.
  3. It’s on ‘the list’. There are many components to a tapas dinner party, so even the best of us will struggle to remember everything you need to add, pinch, and sauce so MAKE A LIST and REFER to it throughout the evening.
  4. Distribute the labour. I have found including your partner in helping with preparation and serving the courses allows each of you to alternate kitchen duty and spend time with your guests.
  5. Make it Simple. Choose a combination of freshly made courses and previously made and frozen courses.
  6. Keep it small. Remember that you are having a lot of food over a long period of time so portions should be small (for example, 1-2 medium shrimp per person is one course. Do you have frozen soup in the fridge? Serve it in shooters instead of bowls—it’s an instant serving!
  7. Timing is everything. Make sure you serve the courses spread out over time, this dinner party is about conversation and food…all night. Our tapas usually last 3-4 hours with some breathers in between.
  8. Relax. Fortunately Tapas make a very casual dinner party so you needn’t worry when one coarse is 15 minutes later than expected. Keep the wine flowing and the conversation going and you will have a wonderful evening.

To illustrate how easy this type of dinner party is, below I am posting a sample menu. I may use this for a future dinner party.

Our 21012 European Adventure through Tapas (4 x 1):

Course 1: Budapest

  • Áginéni’s Cheese Sticks (I usually have these in the freezer, but if I don’t I just make a fresh batch and freeze the leftovers for another party!)

Course 2: Spain

Course 3: France

  • Escargot en Profiteroles (I always have the cheese puffs, canned escargot, and frozen butter, garlic and parsley balls ready for action)

Course 4: Austria

  • Austrian Sachertorte three ways. Make one beautiful dessert and serve it three different ways in very small portions. (off the top of my head, I’m thinking 1) a traditional slice, 2) roughly cut into a small trifle, 3) and twice baked into a small biscotti and served with a mini cappuccino!)

Think ahead when you’re cooking weekday meals, if you’re making a large batch of chili, put aside a full serving for a future tapas dinner and serve it in mini pitas. If you’ve made soup, set aside enough for shooters and serve in espresso cups. A dip and bread may be considered as a course. A simple course might be Saganaki. I try to alternate previously prepared or easy courses with something a bit more complex. Involving your partner to help with alternate courses also breaks up the time spent in the kitchen…don’t you think your partner might love to light the Saganaki and serve this fiery treat?

Desserts, I find are relatively easy too. If you’ve made brownies, cut the edges and freeze. Then for a small tapas dessert, whip some cream or make a quick custard and assemble a trifle with the left-over edges, serve with a shot for extra effect!

Example for timing the menu above (note: the times are just guidelines)

7:30 guests arrive, start with libations and Aunte Ági’s cheese sticks. Pit the oven on and move into the living room and have lovely conversation. Perhaps put on a fire, and definitely play some music (we like jazz).

7:45: put the scallops into the oven, they will take longer than the bacon wrapped dates. Depending on the size of scallops, turn about 5-7 minutes, now add the bacon wrapped dates. Bake for another 5-7 minutes.

8:10 serve the bacon wrapped scallops and dates. Keep the oven on.

Around 8:30-8:45 your partner should pop into the kitchen to start the chorizo course, meanwhile fill the glasses.

Warm the serving dish and prepare the dish.

9:00 Serve chorizo dish with bread.

9:45 You’ll likely want a bit of a break, but you can ready the escargot for the oven, bake for 10 minutes until butter has melted and the Chou is crispy. Serve hot at 10ish.

The dessert should already be made and plated with some last minute garnished to attend to. Serve with coffee/tea when your guest say they are ready.

Tapas need not be stressful, after all, it’s about getting together with friends in a casual setting. Cheers! I hope to read about your tapas dinner party soon.

Read Full Post »

20121007-101639.jpg

We’re celebrating Canadian Thanksgiving at my brother’s place on the Muskoka’s and it’s pretty chilly. Although on the way up the trees seemed to be at their height of Autumn colours, the trees along Lake Rosseau aren’t quite there yet.

I set up a couple of posts before our holidays knowing that I would be busy when I returned; I’m still trying to organize all my photos from the trip, but that is a full time job. It’s great to have the camera (iPhone) at your disposal all the time, but it does make it too very easy to take too many photos. I have more than 300 and JT has over 150 photos (he didn’t bother taking too many because my phone takes better pictures!). I am hoping to have the Paris part of our trip next week sometime, in the meantime, I hope you enjoy this post…continuing on the tapas theme.

We had a tapas dinner party for some friends the weekend before we left and I made Spelt Fajita Shells; I made them myself instead of buying them at the store because I wanted smaller shells, so that we wouldn’t fill up on one tapa. They worked out great, and I’ll be making them again.

Can you guess what this is?

How about this?

We had a garlic shrimp skillet to stuff these little babies with. It was quite successful as the shrimp vanished in no time!

I made mini fajita shells so that we could eat more of them!

Spelt Fajita Shells

Original recipe can be found here.

Ingredients:

  • 3/4 cup spelt berries, ground in a mill or 1 cup spelt flour
  • 1/2 teaspoon salt
  • 3/4 teaspoon baking powder
  • 1/2 tablespoon oil
  • 1/2 cup hot water

Directions:

  1. Combine all the ingredients (I used my food processor, but don’t over process) and mix into a ball of dough. It should have a little elasticity but not too much.
  2. Cover and let sit in a warm place for 20 minutes.
  3. Divide the dough into 16-20 equal parts and let sit, covered, another 20 minutes (these will make a tortilla about 10cm or 4inches in diametre).
  4. Take each ball and place closer to the hinge of the tortilla press (not centre) and press down. To get it even thinner and bigger, pulse the press a few time so that the dough reaches to the edges of the press. Repeat until all of the dough balls have been pressed. Keep covered with a damp cloth so they don’t dry out.
  5. Preheat a skillet on medium high heat. Spray with non-stick cooking spray.
  6. Cook each side of the tortilla until golden (or slightly brown, like mine)
  7. Cook all of the tortillas, watching carefully. The instructions said to place the tortillas in a plastic bag, with wet paper towels in between them to keep them soft and moist but if you forget, you can steam the tortillas just before serving and they will become soft and moist and fresh again.
  8. Freeze leftovers and reheat by steaming.

Yes, that is a glazed ceramic flower pot bottom, you caught me ;-)!

Sizzling garlic shrimp with cilantro and lemon

Read Full Post »

I was very excited about our trip to Barcelona, Spain because I was hoping to be inspired to create new and innovated tapas. As you all know, I enjoy having tapas dinner parties and this little inspiration will make a wonderful addition to my repertoire. Although we didn’t really have anything like it in Barcelona, I created this hors d’œuvres the first day of our return, I was just so darn excited about it. It’s relatively simple, and if you have polenta left over, even better. I made a small batch and cooled it with ice and our heat sucking stone (our Canadian Soapstone counters have the ability to suck heat out of anything you put on it). JT thought they were just OK, but I think he would love them if I had just put some bacon on them! I really enjoyed them; you can top them with anything, including prosciutto or even a crispy fried sausage slice but I just used some simple Sharp Cheddar with Horse Radish. You can also serve this warm or at room temperature. I froze the left over polenta squares and will use them for a future tapas dinner party! Cheers!

Polenta Cheese “Crisps”

Crispy on the outside and soft and creamy on the inside. The cheese was just the icing on the cake!

Original recipe modified from Epicurious

Ingredients:

  • 1 1/2 cups cold water
  • 1/2 cup polenta (not quick-cooking)
  • 1/2 teaspoon chopped thyme
  • pinch of salt
  • 1/4 cup grated Parmigiano-Reggiano
  • 1 tablespoons unsalted butter, cut into bits
  • 2 tbsp canola oil for frying
  • 25 small square slices of cheese, your choice
  • Chives for garnish

Directions:

  1. Spray an 8″ square baking pan with non-stick cooking spray.
  2. Combine water, polenta, herbs, and pinch of salt in a heavy saucepan and bring to a boil over medium heat, whisking. Reduce heat to medium-low and cook, stirring constantly with a long-handled wooden spoon, until polenta begins to pull away from side of pan, 10 to 15 minutes. Stir in cheese and butter until incorporated, then transfer polenta to baking dish, spreading evenly with a dampened rubber spatula. Chill until set, about 45 minutes (to speed up the process, I put a piece of plastic wrap over the top and lined ice cubes along the top. Once the cubes started to melt, I pulled them off and then carefully lifted the plastic wrap so the water didn’t spill onto the firm polenta).
  3. Turn out the polenta from the pan (should fall out easily, mine did) and cut into 2-3 cm (1.5″) squares. Preheat a cast iron frying pan and add about 2 tbsp canola oil. Fry one side until golden and then flip. Cover the second side with a 1-2mm slice of cheese, garnish with chives.
  4. Serve warm or room temperature.

Read Full Post »

We travelled from Vienna to Barcelona with one of the intercontinental airlines, Berlin Air; it was efficient and relatively inexpensive (less than $100 pp Canadian). The terminal in Vienna is being overhauled and I don’t know about you, but JT and I have the uncanny ability to chose a flight that departs from the absolute farthest terminal in and out of the building. This was no exception; fortunately we were able to dump our weighty luggage early and manage the walk (and hobble) to the extreme farthest part of the temporary portable building (yes, this terminal was even farther from the actual terminal — it was outside the terminal!). Our drive from Budapest took two hours longer than it should have and we were both anxious not to miss the flight, we made it but we’re being boarded within 15 minutes of arrival! Thank goodness my dear Aunt made sandwiches which we gobbled down while speed-waiting! For some reason security did not care about food, just our documents which were pulled out and scrutinized. Oh, and my shoes! (nudge, nudge wink, wink my shoe buds Kristy and Charlie)

We rented an apartment with AirBnB that was in the Barri Gotic area (thanks for the tip for AirBnB, Charles – I’ll have a little surprise about Charles later!). The apartment was great, much as described on line and the bed was comfy, the kitchen had a coffee maker and a good fridge and the bathroom was modern and we had free wifi! The location was great too, within a short walk to La Rambla with the pedestrian boulevards with restaurants and shops.

The living room overlooked a quiet pedestrian street-no noisy mopeds!

This is the pass through to the small ‘office’. We were streaming music from Martini in the Morning a lovely Jazz station in Southern California.

The bed was a king which is unheard of in Europe! Nice and roomy.

The dining area in the kitchen. That’s an interior window that opened to a fairly large shaft. People hung their laundry out there!

Modern appliances and a N’espresso Machine. Mind you we did have a bit of a challenge finding the cartridges for the machine. To save calories we ate a simple breakfast in our apartment most mornings (plain yogurt, a little bread and coffee)

Our first full day was kind of a bust, full fledged rain so we opted for a bus tour of the city — a great way to get to know what you want to see. We ended up getting the two day pass so that we could go back and see things more in detail, but we ended up just seeing new things. So much to see, so little time.

The architecture is very interesting — this is the Olah hotel with strange eyeballs/Security cameras on the exterior.

Designed by Gaudi a famous Spanish architect and a leader of Catalan Modernism.

Personally, I find Gaudi architecture somewhat disturbing and upsetting

The organic shapes almost seem to make the building come alive…like it’s an alien.

JT had read about this place and indeed it was an excellent lunch

Views from the bus tour

This undulating roof was a market just around the corner from our apartment. Sadly it was open only until 4pm every day and we kept missing it.

Just around the corner from our apartment

They were setting up a stage for later that evening when the Catalan’s would protest for separation. Québequois are not the only one’s who wish to separate!

The Cathedral of Barcelona interior a wonderful example of high gothic architecture

A restaurant that once was the cellars to another cathedral.

It was a really cute place, but the food was just so-so.

Statue of Christopher Columbus. Yes, he was indeed Italian, but his boat was Spanish!

We had a lovely lunch on the shores of the Mediterranean!

A selection of tapas…I did happen to ‘borrow’ the menu for future ideas!

Part of our hood

Along La Ramba, the pedestrian avenue

The weather became brighter and warmer as the evening progressed

The protestors who want to separate. All peaceful.

Walking back…so many motorbikes and scooters!


And that concludes our trip to Barcelona. I had additional photos showing a vista from a fort high above the city, but sadly the light didn’t really provide enough contrast and the photos were dull and boring. We’ll just have to return to Barcelona to get better photos!

Read Full Post »
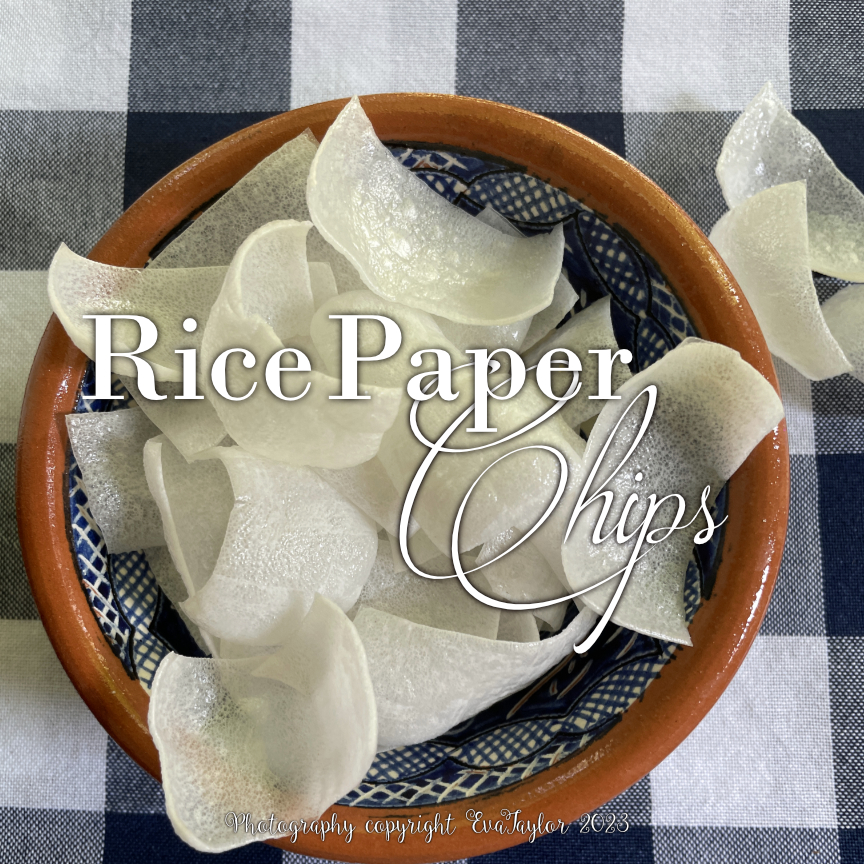
I was over at Sissi’s blog last week and was intrigued by her Korean Pancake with Shrimp and Scallop. It really wasn’t the recipe that intrigued me, but her description of this unusual dish: “I was literally spellbound by this extraordinary snack” and as many of you commented I was curious to see why such a simple dish could possibly spellbind a sophisticated cook, like Sissi. So I had to make it.

When I mentioned to JT that we were having this pancake for dinner, he was skeptical, but he is open minded and will try anything once. After he finished 2/3’s of the dish, he turns to me and says “I would like you to make this again”. Now THAT is success in my books.

My first attempt was Sissi’s recipe verbatim (with the exception of the sauce, to which I added a bit of fresh ginger), but sadly the pancake broke in half and was an unco-operative subject for a photo, so of course, I had to make it again, with a twist! The texture of this pancake is really nothing like a North American pancake at all, so if you are expecting light and fluffy batter, you will be disappointed. It is dense (as if you overworked a North American pancake and the gluten’s were invigorated!), slightly chewy with a nice firm texture. There is a touch of sweetness from the corn flour. The sauce is really incredible and I would recommend it for anything, not just this dish (such as scallops on a bed of greens!).

Gluten Free South Western Korean-inspired Pancake

I didn’t notice any taste difference using the chick pea flour. Even the texture was relatively similar.

Recipe adapted from Sissi’s blog With a Glass (click here for original recipe)

Serves 2

Sauce Ingredients:

  • 3 tbsp soy sauce
  • 1 tbsp rice vinegar
  • 1 stalk of green onion finely cut
  • 1 clove garlic, finely grated
  • 1/2 tsp fresh ginger, finely grated
  • 1/2 tsp sesame oil
  • 1/2 tsp toasted sesame seeds

Directions:

  1. It’s best to make the sauce first so it has a little time to blend and allow the flavours to meld together. You can even do it a day ahead, adding the green onions and sesame seeds just when you are ready to serve so they remain crisp.
  2. Combine all ingredients and set aside.

Pancake Ingredients:

  • 3 spring onion stalks, sliced thinly
  • 1/2 medium hot green chili, finely chopped
  • 1/2 medium hot red chili, finely chopped
  • 1 clove garlic, finely grated
  • 50 g chorizo sausage, finely chopped
  • 30 g fresh or frozen corn
  • 40 g red pepper (capiscum)
  • 40 g crimini mushrooms

Batter Ingredients:

  • 56 g chickpea flour
  • 20 g corn flour (take fine cornmeal and run it through a food processor until it resembles the texture of regular flour)
  • 200 mL ice cold water
  • 1/3 tsp salt
  • 1/2 tsp sugar
  • 2 egg whites, beaten

A very tasty lunch, indeed

Directions:

  1. Combine all the batter ingredients and mix well with a whisk.
  2. Heat a cast iron skillet to medium and lightly spray with non-stick spray or olive oil.
  3. Pour about 1/3 of the pancake batter onto the pan, allowing it to fill the entire diametre of the pan.
  4. Add the pancake ingredients, distributing everything evenly so you can get a small taste of everything in every bite.
  5. Pour the remainder of the batter over the the pancake and allow it to cook through. You will see the batter become quite a bit denser looking as it cooks. Carefully flip the pancake so that both sides are golden.
  6. Serve with the previously prepared dipping sauce.

Read Full Post »

I had an incredible ceviche salad some time ago that Sissi of With a Glass reminded me of with her lovely recipe for her Hot & Cold Rice Bowl with Shrimp, Avocado and Cucumber. This salad combined the wonderful creamy avocado with the tangy citrus of the refreshing grapefruit. I decided I needed to serve something a little off the beaten path for a dinner we were having with our good friends Rae and Monica a couple of Saturdays ago and came up with this refreshing and flavourful recipe that was inspired by our recent trip to NYC. Norma (Garden to Wok), that lettuce you see in the photo is home grown.

To keep things on the healthier side, I didn’t use flour tostadas but instead substituted them with whole wheat flax fajita shells, cut into triangles and broiled for a few minutes to make them crisp, like crackers.

Our first lunch in NYC inspired this recipe. The lettuce you see is home grown.

Shrimp Ceviche with Grapefruit, Avocado, Cucumber and Corn

Serves 4 appetizer portions

Ingredients:

  • 150g raw shrimp (20-30 per lb count), shelled, deveined and chopped into equal bite-sized portions
  • 1 small ripe avocado, finely diced with about 3 tbsp lime juice sprinkled on it or you can dice the avocado just before serving
  • 1 grapefruit, peeled and sectioned, seeds removed, juice reserved.
  • 1/4 cup of frozen corn (defrosted)
  • 1/4 cup of finely diced cucumber
  • 2 tbsp toasted unsweetened coconut
  • 1/4 cup freshly squeezed lime juice
  • 1/4 tsp sesame oil
  • pinch of cayenne pepper
  • pinch of sugar or honey
  • 1 lime cut into wedges
  • 4 tbsp avocado paste (recipe can be found here) or use guacamole
  • 4 lettuce leaves, washed and stored until serving (we had curly lettuce)
  • 1 small fajita shell (we always have whole grain flax)(use gluten free for a GF version)
  • 2 tbsp cilantro, chopped roughly
  • 1 tsp fresh mint, chiffonade finely
  • salt to taste

Directions:

  1. Mix the juice from the grapefruit and lime juice in a jar with a lid; taste and add sugar to taste. Add the cut shrimp (raw) pieces and coat well. Refrigerate until the shrimp is entirely opaque (it took my shrimp about 4 hours as I left them in about 1/2″ chunks)
  2. In another covered jar, mix the grapefruit, corn and cucumber. Reserve in the refrigerator.
  3. Preheat the oven to 375°F. Coat the fajita shell lightly in EVOO. Cut into 8 even triangles. Bake each side until the shells are golden, flipping when done. Allow to cool.
  4. When you are ready to serve, add the shrimp (and liquid) to the reserved grapefruit, corn and cucumber and mix; add the sesame oil, cayenne pepper, sugar or honey, salt, cilantro and mint. Stir well.
  5. Place one lettuce leaf on each plate. Spoon equal amounts of the ceviche into each leaf. Garnish with a lime wedge and sprinkle with the toasted coconut. Take two of the toasted fajita shells and smear a bit of the avocado paste on each one and stack one on top of another. Garnish each plate with one stack of two.

Notes:

  1. Ceviche is seafood cooked with acid. It does indeed cook, but it you are squeamish, then pre-cook your shrimp by boiling it until done. Don’t soak it in the grapefruit/lime mix as it will continue to cook and you will have rubbery ceviche. Simply reserve the shrimp in the fridge and dress when you are ready to serve.
  2. This recipe calls for a balance of salty, sweet and sour. I keep my ‘dressing’ separate from the raw shrimp so I can taste it until I am satisfied that it is good.

Read Full Post »

First I’d like to apologize, my Armenian Nutmeg Cake post was inadvertently published on June 10 yesterday (which was June 15) I was sure I had it set up for June 20. I hastily reset the publish date to June 20 without realizing all the comments attached. I am hoping the comments remain but if they don’t I apologize in advance and by no means expect you to comment again. WordPress can be such a pain in the !@## sometimes! Now back to our regular programming.

I am soooo excited with my vegetables this year! I grew green onions for the first time this year on the garage roof (best sun ever), and I also filled a pot with lettuces on our back deck. The first harvest was amazing. I haven’t bought my tomato plants yet, these weekends have been crazy hectic and this one is no different.

The onion might have been left in the ground a little long

Crisp Green Lettuce, YUM

It’s cocktail season on the back deck and you know how I love my little hors d’œuvres whenever I serve booze. So I decided to make French Onion Gougeres, little cheese puff stuffed with the deliciousness of sweet onion confit and gruyère cheese. The cheese is all melty and the puffs are reminiscent of the crouton within the French Onion Soup and the caramelized onions are of course the onions within the soup. The only thing that’s missing is the rich beef broth, but I didn’t want my gougeres soggy so it was omitted.

I made the puffs a couple of months ago and froze them. They freeze incredibly well. For the Cheese Puff recipe, please click here.

A perfect little bite with a perfect martini. Cheers!

I filled these beauties with the onion confit I also made some time ago and froze (I freeze small batches in little zip lock bags so I can pull out a small amount or two and use as needed). (Yes, Norma, I also cook for my freezer!).

The sweet onion, the oozy gruyère and the crisp pate a choux is making my mouth water.

Please click here for the Sweet onion confit recipe.

French Onion Gougeres or Pate a Choux

Serves 2 for hors d’œuvres

Ingredients:

  • 4 pre made cheese puffs (they defrost very quickly)
  • 4 tsp Sweet Onion Confit
  • 4 1cm squares of good quality gruyère

Directions:

  1. Pre heat oven to 375°F
  2. Cut the tops about 3/4 off the cheese puffs leaving them attached at the back.
  3. Stuff each of the puffs with 1 tsp of the onion confit and one square of the gruyère.
  4. Press the tops back down. Bake for about 12-15 minutes until the cheese has melted and the puffs are firm to touch (we like them a little crispy on the outside).
  5. Serve immediately with Vodka Martinis, shaken and not stirred.

Cheers.

Read Full Post »

Happy Thursday everyone. By now I am sure you have read Barb (Profiteroles and Ponytails) had a Tapas dinner party on the weekend and we were kindly invited; we had such a variety of food and it was soooo good. I made Chgo John’s Cheese Bread again (how many times do I have to make this bread before EVERYONE sees that they MUST make it?) and some devil’s on horseback and the Chorizo with Tomatoes and Balsamic Vinegar. I had a few leftover red and yellow peppers and decided to add them to the recipe, so below is the updated recipe, with photos this time. It’s such an easy tapas to make, just add what you have on hand, and you can make it in advance, as I did and just reheat in the oven or you can do it all right away. I would suggest, however, not to make it in cast iron unless it has an enamel coating as the vinegar will remove any seasoning you have diligently worked so hard on. We just served the dish in these adorable cast pans.

The martini with more in it is mine.

Chorizo with Tomatoes and Balsamic Vinegar

Serves 4 if you’re having other tapas courses

Ingredients:

  • 1 cup 1/4″ sliced and halved chorizo sausage
  • 1/3 cup grape tomatoes, quartered
  • 1/4 cup chopped onion (I prefer Mayan sweet onions or vidalia)
  • 1 clove garlic finely chopped (I prefer to use my microplane)
  • 1/2 cup mixed sliced yellow and red peppers
  • 1/3 cup balsamic vinegar
  • 2 tbsp olive oil
  • salt and pepper to taste

Directions:

  1. Heat olive oil in a small pan, add chorizo and caramelize each side.
  2. Add onions and garlic and sauté for a minute, add the peppers and sauté for another minute.
  3. Add balsamic and allow balsamic to reduce slightly 3-4 minutes (this will thicken the balsamic a bit)
  4. If you are making this in advance, I would add the tomatoes when you reheat so they maintain some shape. If you make this to eat now, add tomatoes and sauté for another minute.
  5. Serve immediately or reheat (adding the quartered grape tomatoes) with that gorgeous Cheese Bread I cannot stop making and bragging about.

I wish you had smell-a-vision like I do.

I feel like Grover in the "near".... "far" episode

Read Full Post »