Feeds:
Posts
Comments

Posts Tagged ‘mini’

I seem to have come into quite a bit of free time of late; you may have noticed my sporadic commenting and I do apologize but we’ve been spending a lot of time at the cottage (cabin/lake house). We renovated or more accurately, gave it a face lift and that makes me want to spend more time there. Freshly painted white walls instead of the dowdy wood panelling from the 1960’s, replaced the linoleum and industrial carpeting with lovely wood laminate flooring added some kitchen cabinets in my efforts to annoy the mice and even gave the furniture a face lift too with new slip covers — and purchased new artwork! You can see my excitement. So we’ve been making the most of it. Come September I hope to be back in the normal swing of things.
In the meantime I wanted to share a recipe for Butter Tartlets that I made for my birthday bash from my very ancient Five Roses Flour cookbook and I’ve been making these tartlets since I began to bake in my early teens — they have been a family favourite. This time I used a flower cookie cutter to give them a lovely scalloped edge and I baked them in mini muffin tins so they are quite small, one or two bites.

ButterTartlette_0475

Caramelized brown sugar coating the flaky pastry.

Prize Butter Tartlets

Original recipe from Five Roses Flour Cookbook (1983)

Makes about 18 mini two bite tartlets

Ingredients for the pastry:

  • 1 1/2 cup of AP flour
  • 1/2 tsp salt
  • 1/2 cup vegetable shortening
  • 5-6 tbsp ice cold water

Directions for the pastry:

We all have our favourite pastry recipes so if you prefer to use your own, by all means do so but I hope you make these tasty tarts!

  1. Mix flour and salt together and cut in the shortening with a pastry blender or fork until the mixture is crumbly (like oatmeal).
  2. Add water a little at a time until the mixture hold together, do not overwork.
  3. Roll out to about an 1/8th of an inch or 1 mm thick and cut with an appropriate cookie cutter (I used a lovely scalloped edge to make my tartlets).
  4. Press into a mini muffin tin and refrigerate until you have prepared the filling.
ButterTartlette_0474

They are rather small, are you sure I can’t interest you in more than one?

Ingredients for the filling:

  • 1/2 cup brown sugar
  • 1/4 cup or 36 small pieces of walnuts
  • 1/4 cup melted butter (unsalted)
  • 1 small egg, beaten
  • 1 tbsp milk
  • 1/2 tsp vanilla
  • 1/2 tsp dark rum (secret ingredient)

Directions for the filling:

  1. Melt brown sugar and butter together (I do this in a microwave, on low) allow to cool a bit.
  2. Add the beaten egg, milk and flavourings. Mix well.
  3. Spoon about 2 teaspoonful into each pastry tartlet and add 2 walnut pieces to each. Bake in a 375°F oven for about 15-20 minutes or until the pastry has browned a bit.

ButterTartlette_0473

You know you want one!


These two are before photos, dark and dowdy:

20130817-151016.jpg

20130817-151030.jpg

20130817-151049.jpg

20130817-151155.jpg

20130817-151220.jpg
We changed the colour scheme to blues and whites to reflect the boathouse theme a bit more. The refrigerator was a later gift from my Mom’s husband so it’s a bit of an after thought, we’ll incorporate it into the kitchen when we get rid of the propane burners, which protrude out from the wall.
Sigh, back to reality!

Read Full Post »

20121007-101639.jpg

We’re celebrating Canadian Thanksgiving at my brother’s place on the Muskoka’s and it’s pretty chilly. Although on the way up the trees seemed to be at their height of Autumn colours, the trees along Lake Rosseau aren’t quite there yet.

I set up a couple of posts before our holidays knowing that I would be busy when I returned; I’m still trying to organize all my photos from the trip, but that is a full time job. It’s great to have the camera (iPhone) at your disposal all the time, but it does make it too very easy to take too many photos. I have more than 300 and JT has over 150 photos (he didn’t bother taking too many because my phone takes better pictures!). I am hoping to have the Paris part of our trip next week sometime, in the meantime, I hope you enjoy this post…continuing on the tapas theme.

We had a tapas dinner party for some friends the weekend before we left and I made Spelt Fajita Shells; I made them myself instead of buying them at the store because I wanted smaller shells, so that we wouldn’t fill up on one tapa. They worked out great, and I’ll be making them again.

Can you guess what this is?

How about this?

We had a garlic shrimp skillet to stuff these little babies with. It was quite successful as the shrimp vanished in no time!

I made mini fajita shells so that we could eat more of them!

Spelt Fajita Shells

Original recipe can be found here.

Ingredients:

  • 3/4 cup spelt berries, ground in a mill or 1 cup spelt flour
  • 1/2 teaspoon salt
  • 3/4 teaspoon baking powder
  • 1/2 tablespoon oil
  • 1/2 cup hot water

Directions:

  1. Combine all the ingredients (I used my food processor, but don’t over process) and mix into a ball of dough. It should have a little elasticity but not too much.
  2. Cover and let sit in a warm place for 20 minutes.
  3. Divide the dough into 16-20 equal parts and let sit, covered, another 20 minutes (these will make a tortilla about 10cm or 4inches in diametre).
  4. Take each ball and place closer to the hinge of the tortilla press (not centre) and press down. To get it even thinner and bigger, pulse the press a few time so that the dough reaches to the edges of the press. Repeat until all of the dough balls have been pressed. Keep covered with a damp cloth so they don’t dry out.
  5. Preheat a skillet on medium high heat. Spray with non-stick cooking spray.
  6. Cook each side of the tortilla until golden (or slightly brown, like mine)
  7. Cook all of the tortillas, watching carefully. The instructions said to place the tortillas in a plastic bag, with wet paper towels in between them to keep them soft and moist but if you forget, you can steam the tortillas just before serving and they will become soft and moist and fresh again.
  8. Freeze leftovers and reheat by steaming.

Yes, that is a glazed ceramic flower pot bottom, you caught me ;-)!

Sizzling garlic shrimp with cilantro and lemon

Read Full Post »

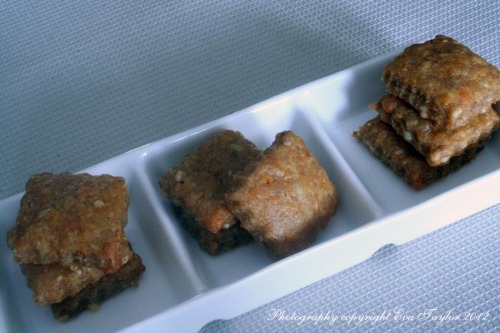
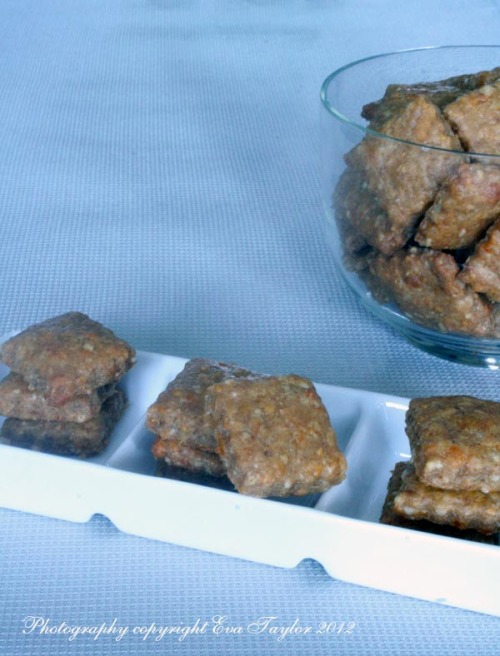
I need a little gift to take to dinner at friends tonight so I’ve been searching my beloved blogs to see what’s out there. I’ve been following Dara on Generation Y Foodie since Ann at Cooking Healthy for Me reviewed her self published cookbook. Dara generally cooks on the healthier side so when I saw this recipe originally posted by Ann, with a little twist, I knew I had to try it. What Dara did was change out the white flour for whole wheat and she added a bit of texture with some ground flax seeds! Brilliant, if you ask me. These little cheese nibbles are a family favourite now, thanks to Ann (my niece and nephew devoured an entire batch in 25 minutes last weekend!) and as I’m always looking to make things a bit healthier…I jumped on these.

They still have the same cheesy taste, but they have a bit of texture from the whole wheat and the flax, and they also have a touch of earthiness too. We gave it a good thumbs up. Thanks Dara for this lovely treat, I will be making it again and again.

Yummy little cheesy nibbles

Whole Wheat Cheez-Itz

You know you want one!

Ingredients:

  • 8oz sharp cheddar cheese, finely grated (I had to add a bit of mozzarella as I had run out of the cheddar)
  • 1/4 c extra virgin olive oil
  • 1 cup whole wheat flour
  • 2 tbsp ground flax seed
  • 2+ tbsp ice water
  • 1/2 tsp sea salt
  • Pinch of cayenne pepper

Directions:

  1. Preheat oven to 425° F
  2. Add the cheese, flour, flax, sea salt and cayenne into a food processor. Process a couple of times to mix everything together.
  3. Add the olive oil at once as you are processing the mixture, adding in the ice water one table spoon at a time until the dough sticks together nicely.
  4. Refrigerate for 30+ minutes (but to be honest, I never have time for this, please see my tip below).
  5. Place a sheet of parchment below and on top of the ball and roll out to about 1/8″ (2mm) thickness.
  6. Cut using your favourite cookie cutter (mine is a 1″ (2.5cm) square with scalloped edge. It’s a perfect size because they do shrink in the oven.
  7. Bake for 13-15 minutes or until they have a golden bottom (this is the perfect crunch).
  8. Cool and enjoy.

Tip:

I store my grated cheese in a zip-lock bag in the freezer. I virtually never remember to defrost it in advance, but using the ice cold cheese in this recipe allows me to skip the step of chilling the dough. Time saved on both counts!

Read Full Post »