Feeds:
Posts
Comments

Posts Tagged ‘cinnamon’

We had some dear friends over for a BBQ in late-August and we made homemade Moroccan lamb burgers with a wonderful spiced prune and nut couscous; I needed a Morrocan-style dessert so I chose this wonderful baklava recipe. To be honest, I wasn’t able to differentiate between Middle Eastern baklava and Morrocan baklava but rest assured, they are both delicious. This version has walnuts, pistachios and almonds with a syrup flavoured with orange and lemon rind, cloves and orange blossom water. It should have rose water in it as well, but I am not a fan so I skipped it. 

Metaxas (Moroccan Baklava)

For the original recipe, please click here. Makes about 33 cm x 23 cm 5 cm (12 inches x 9 inches x 2 inches) baking pan of Metaxas.

Ingredients

  • 150 g sugar
  • 150 mL water
  • rind of an orange (no white pith)
  • rind of a lemon (no white pith)
  • 5 whole cloves
  • 60 mL honey
  • 5 mL orange blossom water
  • 100 g walnuts
  • 100 g pistachios
  • 100 g lightly toasted, blanched almonds
  • 100 g sugar
  • 2.5 g ground cinnamon
  • 200 g unsalted butter, melted
  • 10 commercial phyllo dough sheets, cut in half length-wise to fit your pan

Directions:

  1. Combine the sugar, water, both orange and lemon rinds, cloves and cinnamon stick in a medium saucepan. Bring to a slow boil then turn the heat down to simmer, uncovered for 8 minutes. Remove the pan from the heat and strain to remove the spices and rinds. Stir in the honey and orange blossom water. Set aside to cool. See notes to make use of the orange and lemon rind.
  2. Preheat the oven to 300° F and toast the nuts for 12 minutes. Remove from the heat and cool. Increase the oven temperature to 350° F.
  3. In the small bowl of your food processor, combine the cooled nuts, sugar and cinnamon and pulse so they are relatively finely chopped with some larger pieces.
  4. Line a 33 cm x 23 cm 5 cm (12 inches x 9 inches x 2 inches) pan parchment and brush generously with butter.
  5. Begin by lining the bottom of the pan with one sheet of phyllo pastry and brush generously with the melted butter. Continue until you have five sheets stacked. Spread about one-third of the nut mixture over the fifth sheet evenly to the sides. Continue with the next five sheets spreading each sheet generously with the melted butter. Spread another third of the nut mixture over the tenth sheet evenly to the edges. Continue with the next five sheets as before, and spread the fifteenth sheet with the last third of the nut mixture. Finish with the last five sheets of phyllo as before, drizzling any remaining butter over the top of the last sheet.
  6. Bake in a preheated oven at 350° F for 45 minutes. Cover with foil if the top browns too quickly. Remove the pan from the oven and cut immediately. To cut the Metaxas in the traditional diamond pattern, begin by cutting a line from one corner to the opposite corner and repeat to the last corner. Then cut parallel lines to create small diamond slices. Pour the cooled syrup over the hot Metaxas. Allow to stand overnight at room temperature before serving.

Layers of delicious nuts bathed in a luxurious syrup between crunchy sheets of phyllo.

Notes:

  • Remove and separate the orange and lemon rinds and place on a parchment-lined baking sheet. Bake for 10 minutes at 300° F until firm. Eat as a snack.

Read Full Post »

These melt-in-your-mouth shortbread cookies are like no other shortbread cookie you’ve tasted. The flour and almond flour is toasted to give the cookies a unique nutty flavour. The recipe is from the 16th century so I suppose they toasted the flour to pasteurize it.  I used shortening and butter to make this recipe but traditionally they are made with lard, pork lard in particular. You can read about the history of the cookies here. I flavoured my cookies with cinnamon and orange zest because it felt Christmasy. I made these treats for my cousin’s daughter’s boyfriend who has come from Spain for a year on a work visa and being his first Christmas away from his family, I wanted to give him a little taste of home. This recipe is a compilation of a few that I found online, with some personal additions (such as butter and orange zest);

Polvorón

Makes about 20 cookies about 4 cm in diameter

Ingredients:

  • 250 g flour
  • 60 g almond flour
  • 135 g icing sugar
  • 114 g shortening, room temperature
  • 45 g butter, room temperature
  • 4 g cinnamon
  • 2 g salt
  • 2 g orange zest
  • Icing sugar for garnish

Directions:

  1. Preheat the oven to 325° F. Line a baking sheet with parchment.
  2. Toast the flour in the oven for 20 minutes or until very light brown or beige. Cool completely.
  3. Toast the almond flour in a dry frying pan until golden, cool completely.. Combine the two flours, cinnamon, salt and whisk.
  4. Whip the shortening, butter and icing sugar until light and fluffy. Add the orange zest. Slowly add the flour mixture until entirely incorporated, it will be crumbly but will stick together. Shape into a disk and cover with plastic wrap and refrigerate for 30 to 60 minutes.
  5. Roll out the dough on a lightly floured surface to one cm thick and cut with a four-centimeter cookie cutter and place about half a centimeter apart on the parchment-lined baking sheet. Keep rolling and cutting until all of the dough is used up. Bake for 10-12 minutes, these cookies will burn quickly so watch them, they should be golden brown when done. Don’t touch them while they are warm.
  6. Carefully slide the cookies on the parchment off the baking sheet to cool. The cookies will be extremely delicate while hot. Dust with icing sugar while hot and allow them to cool completely without disturbing them.
  7. Serve at room temperature.

I think I would prefer to have more butter in the cookie next time.


Read Full Post »

Plum Cake

I was laying in bed one morning, waiting for the alarm to come on, looking through all the events of the day on my iPhone when my dear friend Barb (Profiteroles and Ponytails, blog on hiatus) text me this plum cake recipe. She had made it with peaches and was quite impressed and thought I might like it too. I really appreciate recommendations like this because as it happened, I was on the lookout for a dessert for friends coming for a patio dinner that Saturday, perfect timing! It turns out, the recipe is excellent with plums. They totally caramelized and sweetened up, it was a hug transformation as the raw plums were quite tart. I converted the recipe to metric measures but you can find the original imperical measures here.

The recipe has 200 grams of sugar which seems like a lot, but our plums were quite tart so they really helped balance the large amount of sugar. 

Truth be told, I forgot to take a photo until it was too late. Guests took half home.

Plum Cake

Makes 1 23 cm cake (9 inch)

Ingredients:

  • 145 g unsalted butter, at room temperature
  • 200 g granulated sugar
  • 2 eggs, at room temperature
  • 125 mL whole milk, at room temperature
  • 5 mL vanilla extract
  • 60 g almond flour
  • 3 g lemon zest
  • 170 g all-purpose flour
  • 1 teaspoon baking powder
  • 2 g salt
  • 8-10 plums, cut in half

Ingredients for the topping:

  • 30 g granulated sugar
  • 3 g cinnamon
  • 30 g unsalted butter, cut into 0.5 cm cubes

Directions:

  1. Preheat your oven to 375° F. Prepare a 23 cm (9 inch) springform pan by buttering all the sides and bottom, add a circle of parchment to the bottom.
  2. Combine the butter, sugar, eggs, milk, vanilla extract, almond flour and lemon zest in the large bowl of your food processor. Process until smooth. 
  3. Sift the flour, baking powder and salt and add to the smooth batter and process only until combined. 
  4. Pour the batter into the prepared pan and spread evenly in the pan. Add the plums, cut-side up, pressing down slightly, in a circular pattern until the pan is filled with the plums.
  5. Bake for 45 minutes. Meanwhile, combine the sugar and cinnamon and mix well.
  6. At 45 minutes, sprinkle the sugar mixture over the cake, making sure to get some onto each plum. Dot with the butter. Return to the oven and continue to bake for an additional 20 minutes or until a toothpick comes our clean. Allow to cool completely in the pan.
  7. To remove from the pan, loosen the sides with a sharp knife and spring the cake from the pan. Serve at room temperature.

Notes:

  • I added the lemon zest. Also the original recipe used some whole wheat flour which I didn’t have. 
  • The plums release a lot of liquid so my baking took a lot longer than expected, keep testing with the toothpick for doneness. The timing above is what the recipe called for, I baked my cake for an additional 40 minutes after I added the topping.


Read Full Post »

You caught me: I made hot cross buns at Easter while we were visiting our friends in Arizona but sadly their pantry did not contain icing sugar, so I was forced to skip the “cross” on the buns. They were exceptionally tasty (even without the icing cross), flavoured with warming spices and some rum-soaked currents.

Hot Cross-less Buns

For the original recipe, please click here.

To print this recipe, please click here.

This recipe makes 12 large, soft, pillowy buns.

Ingredients:

  • 125 mL rum
  • 100 g dried currants
  • 375 mL milk, room temperature
  • 2 large eggs, plus 1 egg yolk (save the white for the topping)
  • 2 teaspoons instant yeast
  • 53 g light brown sugar
  • 550-600 g Unbleached All-Purpose Flour
  • 1 tsp ground cinnamon
  • 1/4 tsp ground cloves or allspice
  • 1/4 tsp ground nutmeg
  • 1 3/4 tsp salt
  • 1 tbsp baking powder
  • 85 g butter, room temperature
  • 15 mL milk

Directions:

  1. Soak the currents in the rum for about 20 minutes.
  2. Meanwhile, combine the milk, eggs, yeast, brown sugar and whisk to combine. In the large bowl of your stand mixer, combine the flour, cinnamon, nutmeg, salt and baking powder, whisk to combine.
  3. Add the softened butter to the flour mixture and mix until the butter is well combined (you may also do this with your fingers). Add the liquid ingredients to the flour mixture and beat until a soft dough has formed (if it is too soft, add a bit more flour to it and beat). Meanwhile, strain the currents and add them to the dough and beat well. This is a very soft and sticky dough.
  4. Place in a well-greased bowl and allow to proof for 1 hour or until doubled in size.
  5. Prepare a large, high sided baking pan by buttering the base and all sides.
  6. When the dough has doubled in size, make about 112 g balls out of them. Place in the prepared pan and allow to rest with a clean cloth covering it for 1 hour.
  7. Pre-heat the oven to 375° F.
  8. Combine the left-over egg white with 15 mL milk and beat well. Brush the tops of the rolls with the mixture. Bake for 20 minutes or until the internal temperature reads 190° F. Allow to cool slightly before serving.

Fresh out of the oven, these pillowy-soft buns are fragrant and delicious.

Notes:

  • The original recipe called for 50% more currents but I felt it was a little too much so I reduced it.
  • My dough was quite soft and sticky with the originally called-for flour, so I added a bit more flour.
  • The original recipe wanted the leftover rum to be incorporated into the dough, but my dough was already too soft and sticky so I skipped it.
  • This tip from King Arthur flour sounds quite interesting and I will try it next time I make this tasty recipe:
    “Want to make these buns a day or so ahead of time? Try the tangzhong technique, a Japanese method for increasing the softness and shelf life of yeast rolls. Begin by measuring out the flour and milk you’ll be using in the recipe. Now take 3 tablespoons of the measured flour and 1/2 cup of the measured milk; put them in a saucepan set over medium-high heat. Cook the mixture, whisking constantly, until it thickens and forms a thick slurry; this will take about 1 1/2 to 2 1/2 minutes. Transfer the cooked mixture to a bowl, let it cool to lukewarm, then combine it with the remaining flour, milk, and other dough ingredients. Proceed with the recipe as directed. Well-wrapped and stored at room temperature, your finished hot cross buns should stay soft and fresh for several days.”

Would you care to try one?

Read Full Post »

Is it a cake, fruit custard or pie?

I was invited to a BBQ at the marketing firm I work with and, of course, I couldn’t go empty handed! I spotted Lorraine’s recipe for an apple cake she made for Mr. NQN’s birthday and was immediately intrigued. Everyone loves cake and everyone loves apples (I hope) so I dove in head first and made her lovely cake. I modified the recipe to be gluten free (I didn’t know everyone at the BBQ and wanted to be safe and inclusive) and I used coconut sugar instead of superfine white sugar and increased the apple volume because I bought 5!

Thanks Lorraine for this tasty inspiration.

One of those peeler gizmos would have come in handy.

It’s really more apples than cake.

I made JT a tester.

The Imposter Apple Cake with Salted Coconut Caramel Sauce

For the original recipe on Lorraine Elliot’s beautiful blog, please click here.

Makes 1 cake, 20 cm (8 inch) diametre. Serves 6-8.

Please click here to print this recipe.

Ingredients:

  • 5 medium apples (about 750 g, I used Galas)
  • 3 eggs, room temperature
  • 100 g (2/3 cup) super fine coconut sugar
  • 150 mL (5 oz) milk
  • 30 g (2 tbsp) butter, melted and cooled
  • 120 g (3/4 cup) gluten free flour
  • 1 tsp cinnamon
  • Pinch of salt
  • 50 g (1/2 cup) slivered almonds, toasted (reserve until ready to serve).

Directions:

  1. Preheat the oven to 350° F (170° C).
  2. Line the bottom of a 20 cm (8 inch) round cake pan with parchment and spray generously with non-stick spray.
  3. Prepare a bowl with cold water and 2 tbsp lemon juice, set aside.
  4. Peel the apples and slice very thinly using a mandoline. Immerse the slices into the cold lemony water.
  5. Combine the eggs and sugar and beat until thick. Add the milk and melted butter and beat until well combined.
  6. Sift the flour, cinnamon and salt and add to the wet ingredients. Beat just until combined and lumps are gone.
  7. Drain the sliced apples and dry slightly. Fold the apple slices into the batter to coat well.
  8. Pour into the prepared pan and bake uncovered for 50-55 minutes or when a cake tester comes out clean.
  9. Cool completely before serving.
  10. Top with toasted almonds when serving.

Ingredients for Salted Caramel Sauce

Makes 200 mL (3/4 cup) caramel sauce

  • 90 g  (3/4 cup) coconut sugar
  • 1/4 tsp lemon juice
  • 5 mL (1 tsp) water
  • Good pinch of sea salt
  • 125 mL (1/2 cup) 18% cream
  • 20 g (heaping tablespoon ) butter

Directions:

  1. Heat cream and salt in a microwave proof container until very hot but not boiling, set aside.
  2. Combine coconut sugar, lemon juice and water in a microwave safe container and mix well (I used a 250 mL (2 cup) glass measuring cup).
  3. Microwave sugar mixture for 1-3 minutes in 15-second intervals (45 seconds did it for me) until sugar bubbles up but does NOT BURN, sugar crystals should be completely dissolved and you should begin to see it turn to a darker amber colour.
  4. Remove and set on a dishcloth for 30 seconds or until it reaches the colour of dark caramel.
  5. Slowly pour in the hot milk, being VERY careful as this will bubble up, whisking to incorporate.
  6. Stir well and then add the butter and stir until completely dissolved. Serve warm or at room temperature.

The caramel sauce really makes this dessert.

Notes:

  • This is not a very sweet cake and therefore, the coconut sugar caramel sauce is perfect for it.
  • Want to jazz it up even more? Add a dollop of cream fraiche or whipped cream on top.
  • The original recipe put the almonds on top of the raw batter and bake it altogether, but I found that almonds went soggy after 1 day in the refrigerator so next time I make this tasty cake, I will not add the amonds until I am ready to serve (recipe has been amended with this change).

Read Full Post »

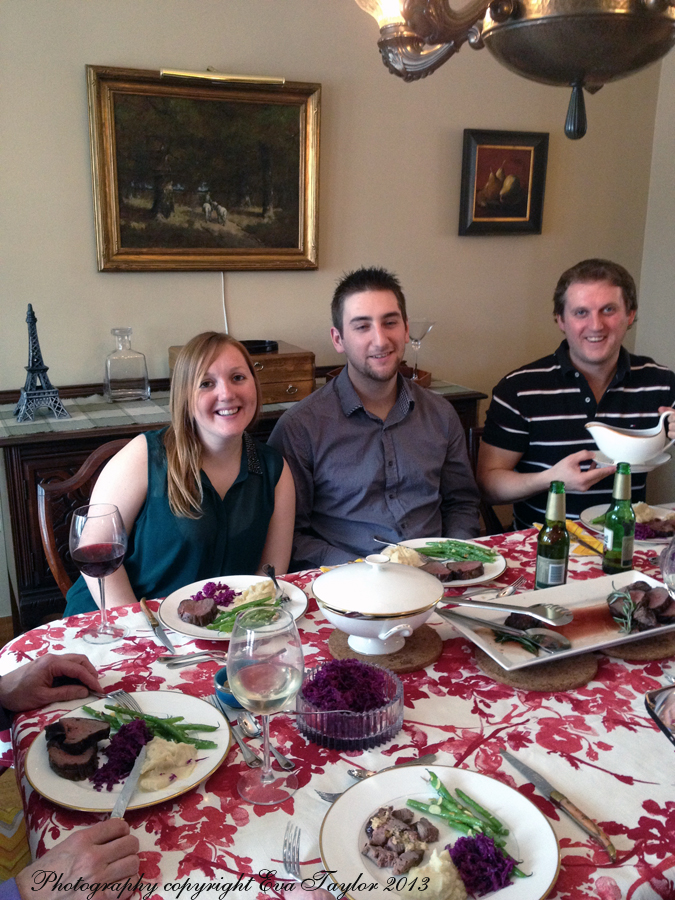
We had our 15th or 16th (I’ve lost count) progressive dinner recently. It was our turn to host the main course, so we got to choose the theme and we chose Canada’s 150th birthday! This opens up the menu to several options and we all did very well! We began our feast with appetizers at John and Nancy’s, they had a lovely selection of Canadian cheeses with a variety of crackers. We were up next and we chose Tourtière as our main course. We finished the evening off at Tom and Iona’s where we enjoyed a Canadian Touque cake! I wish I had taken a picture of it, but it was dark and we were already into a few bottles of vino! 😉

Tourtière is a traditional Québequois meat pie with as many variations on the recipe as there are families! So, of course, I had to put my own spin on it. But before I get to the recipe, allow me to give you a bit of history that I found interesting (like to learn more? This is a good article).

This was the first test recipe.

Tourtière can be traced back to the 1600’s, served on Christmas Eve as part of a massive réveillon after Christmas Mass, it is time-consuming and expensive to make. Original recipes were made of cubed meat instead of ground meat and usually contained a variety of pork, beef, veal and in some cases, wild game. The uniqueness of Tourtière comes from the spices used to flavour the meat blend, most commonly would be cinnamon, cloves, nutmeg, summer savoury, and thyme. Some even added grated potato, bread crumbs or oatmeal to help soak up the liquid. The pastry is always a rich, savoury, buttery pastry in a pie form, or are baked in layers like a lasagna; I chose to make mine a log similar to Beef Wellington. I will say, it was tasty but I doubt I would make it again (unless it was a special request).

The first one looked a little rough.

The first recipe I tried included grated raw potato which was added to the browned meat at the end and stock poured over to help cook it. Both JT and I agreed that it lead to a starchy filling and I decided right then and there that I would not go that route. You do need a little something to absorb some of the flavouring liquid so I chose bread crumbs. For this quantity of meat, some recipes added an entire cup, but I really wanted to avoid that starchy, gummy texture so I reduced both the stock and breadcrumbs significantly and was much happier with the outcome. The other thing I did slightly differently, is I added cooked bacon! It really brought a nice, layer of flavour to the pie without being overly bacon-ie.

The pastry is rather rich and employs a completely different method than regular pastry, the butter is room temperature and is basically rubbed into the flour and then the lightly beaten eggs and water are added at once, using the paddle attachment until just combined. Then it is set into the refrigerator to allow for the butter to set. It is rather odd, but it does work and it does make a very rich pastry that is both delicate but firm enough to hold the heavy meat filling. I decorated the log with maple leafs and then I scored the leaves for effect.

Just about ready to be popped into the oven.

Tourtière

Please click here to print recipe
Serves 6, plus

Ingredients:

  • 100 g bacon
  • 275 g each beef, veal, and pork
  • 130 g onion, finely diced
  • 125 g celery, finely diced (roughly 2 ribs)
  • 10 g garlic, finely minced (roughly 2 cloves)
  • 125 mL beef stock
  • 1 tbsp Worcestershire sauce
  • 20-30 g bread crumbs (unseasoned and finely ground)
  • 1 tsp each, salt and pepper (less salt if your bacon was really salty or to taste)
  • 1 tsp ground nutmeg
  • 1/4 tsp ground cloves
  • 1/2 tsp ground cinnamon
  • 1 tsp dried thyme

Directions:

  1. Crisp the bacon. Reserve 30 mL (2 tbsp) of the rendered fat (set remainder aside if desired).
  2. Caramelize the onions in the 15 mL (1 tbsp) bacon fat. Near the end, add the garlic and stir until you can smell the aroma (this will cook further, later in the process). Reserve the onions and garlic mixture.
  3. Brown meat in batches using a little bit of the remaining 15 mL of bacon rendering. On the last batch of meat, deglaze the pan with a mixture of the beef stock and Worcestershire sauce.
  4. Turn the heat right down and return all of the meat to the pan, and add the celery and stir well.
  5. Sprinkle the breadcrumbs a little at a time while stirring to achieve a slightly drier texture but be careful, because it can make it mushy and starchy (I used about 20 g of the bread crumbs).
  6. Lightly toast the aromatic spices (nutmeg, cloves, and cinnamon). Mix with salt, pepper and dried thyme and sprinkle evenly onto the meat mixture and stir well. Allow the meat to cool completely and then assemble into the pie crust.


This one turned out very well.

The Savoury Pastry Recipe

Please click here for original recipe. The recipe makes enough for 1 log.

Please click here to print this recipe.

Ingredients:

  • 470 g cake and pastry flour
  • 12 g salt
  • 254 g unsalted butter, room temperature
  • 125 mL cool water
  • 2 eggs

Directions:

  1. Combine flour, salt and smallish chunks of butter in the large bowl of your stand mixer, equipped with the paddle attachment. Mix until the butter is fully incorporated into the flour (should be mealy).
  2. Combine the water and eggs and mix well. Add the water egg mixture to the dough all at once and mix until just incorporated, the dough will be very shaggy.
  3. Transfer the dough without a lot of handling to a smaller bowl and cover with plastic wrap and refrigerate for 2 hours so the butter can set.
  4. Turn the shaggy dough out and bring it together with your hands, flattening and folding the crumbs until it comes together.
  5. Roll as required or wrap and chill or freeze for future use.


May I offer you a slice? Please have some smoked ketchup with it.

Assembly:

Ingredients:

  • 1 egg, lightly beaten

Directions:

  1. Preheat the oven to 350° F.
  2. Bring the pastry out of the refrigerator about 15 minutes (or less if it is hot in your kitchen) before you wish to begin rolling. Roll pastry with a little flour on parchment paper.
  3. Roll a rectangle about 30 cm x 40 cm (12″ x 16″) and place the meat mixture into the centre in a long log, leaving space at each end. Fold up the ends and pinch closed and fold up the sides and pinch closed. Cut off excess pastry at the ends, reserve for decoration.
  4. Flip the entire log so that the seam is underneath. Roll the remaining pastry a little thinner than the rectangle and cut out shapes with a cookie cutter (I used a maple leaf).
  5. Lightly brush the pastry with the lightly beaten egg. Decorate with cut outs and then brush the cutouts with the remaining egg.
  6. Bake for 45-50 minutes or until pastry is golden and shiny. Slice into a variety of thicknesses to please all your guests.

Notes:

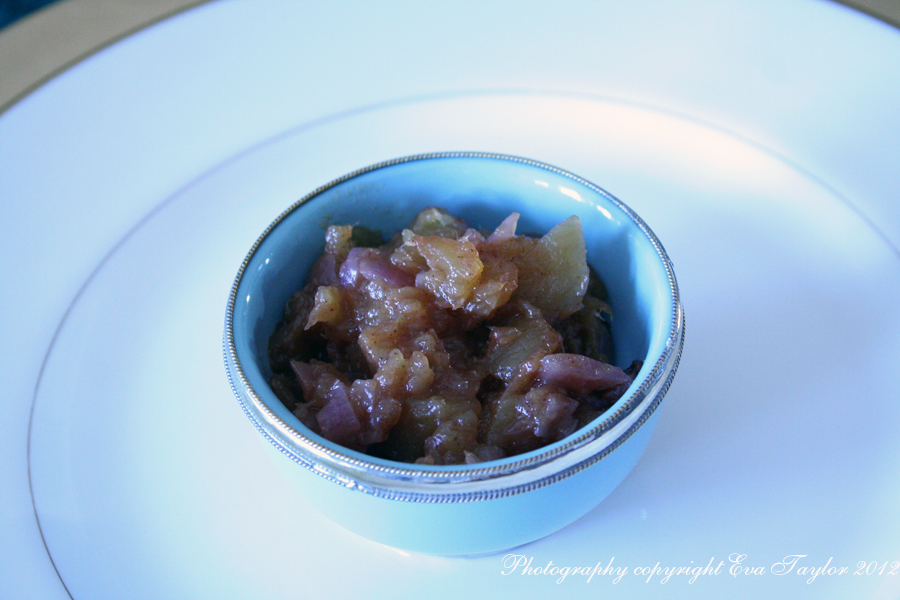
  • I served the Tourtière with Bacon Jam recipe and home made ketchup (recipe to come) and this Chutney.
  • Sides to consider: creamed corn, peas, green beans with garlic and almonds, and or mashed potatoes. It is a heavy meal so you may wish to include a salad.
  • JT made a wonderful no knead bread and I cut little patts of butter with my small maple leaf cookie cutter.

Night photos always suck.

Read Full Post »

When I was down in Florida with my dear friend, Kimberley from University, I mentioned that I had recently baked some killer cinnamon buns and she sighed. She is gluten intolerant but will splurge every couple of years on a Cinnabon with dire results, she explained that it’s never really as good to warrant the pain afterward. That is the precise moment I decided to create a gluten-free cinnamon bun that she would be happy to eat AND digest! This is the result of several tests, I hope you love them as much as we did!

Gluten Free Cinnamon Sticky Rolls

Print GF Cinnamon Rolls Recipe

Makes about 6 small cinnamon buns.

Ingredients:

  • 230 g (1 1/4 cup) gluten-free flour (I used this one)
  • 15 mL (1 tbsp) coconut sugar
  • 5 mL (1 tsp) cinnamon
  • 5 mL (1 tsp) baking powder
  • pinch baking soda
  • pinch salt
  • 30 mL (2 tbsp) cold butter
  • 125 mL (1/2 cup) buttermilk

Directions:

  1. Combine gluten-free flour, coconut sugar, cinnamon, baking powder, baking soda and salt and mix well.
  2. Using a fork or pastry blender, cut in the cold butter to distribute evenly (may be done in a food processor).
  3. Sprinkle in the buttermilk and using a fork, bring the pastry together quickly to get a sticky ball of dough. On a lightly floured (with GF flour) board, knead a few times, but not enough to heat up the dough. Pat into a rectangle about 23 x 20 cm (9 inches x 8 inches).
  4. Preheat the oven to 400° F (200° C). See directions for the filling.

Ingredients for the filling:

  • 30 g (2 tbsp) unsalted butter, softened
  • 40 g (2 tbsp) brown sugar
  • 2 tbsp cinnamon

Directions for the filling:

  1. Combine the butter, sugar, cinnamon and mix well.
  2. Spread the filling over the rectangle to all four sides.
  3. Roll up the rectangle into a tight roll. Cut into 6 small rolls.
  4. Place cut sides down into a lightly greased oven proof pan. Bake for 15 to 20 minutes or until lightly golden. Cool slightly and remove with a spatula to a cooling rack.
  5. Drizzle with a little icing sugar and water mix. Serve warm or at room temperature.

A more biscuit-like pastry, these strongly-flavoured cinnamon rolls heat up beautifully and satisfy a cinnamon roll craving.

Read Full Post »

Last month we hosted dessert for our fifteenth(?) progressive dinner. Our neighbour, John selected Georgia State as the theme because of the Golf that was going on (what golf?) at that time so food had to be a Georgia favourite or something connected to the PGA. Of course, I went straight to the expert, my dear friend Betsy of Bits and Breadcrumbs for her advice and she really came through for me, Thank you, Betsy. I made three mini desserts, one of which, the Chocolate Pecan Pie is traditionally served at the Open, the other two were Southern favourites, Peach Crumble (recipe below) and Chess Pie, that I really just wanted to make. All of the desserts are miniatures because we always tend to over do it at these progressive dinners and I served them all in the living room at the coffee table, take as many or as few as you wish. I followed some tried and true recipes for the Chocolate Pecan Pie and the Chess Pie (see links above) and I loosely followed Betsy’s recipe for the crumble. Hope you don’t mind, Betsy, I combined a few ingredients from various southern recipes on your blog and I think I scored a hole in one! And that concludes my golfing puns!

So, let me tell you about our dinner! For the first course, Tom and Iona (read Iona) did a bunch of things, we began with an Arnold Palmer (with vodka)! I’d never heard of this concoction before this past February when we were in Arizona visiting friends, it was very tasty! Then, the food: Iona made Pimento Cheese sandwiches (OMG, so GOOD!), jalopeño Poppers (baked) and a wonderful bean and rice dish served in a glass. Then we had the main course, it was Mike Weir’s (Canadian) signature Master’s Dinner (I had no idea the winner can choose the dinner menu!) It was Elk and Arctic char (that’s a fish), with Canadian beer (I had some of his wine!). And, of course, there was dessert! We also set up a little putting green for fun!


Mini Chocolate Pecan Pies and Mini Chess Pies. How many would you have?

The putting green was quite successful!

Bourbon Peach Crumble: Progressive Dinner #15(?)

Makes 4 60 mL (2 oz) ramekins and 4 30 mL (1 oz) ramekins

Ingredients:

  • 2 cups roughly chopped peaches (I used frozen because it is not peach season)
  • Bourbon, to cover peaches for soaking
  • 2 tbsp flour
  • 1/4 cup sugar (reduce if your peaches are sweet, mine were not)
  • 1/4 tsp cinnamon
  • 2 tbsp soaking bourbon
  • 1 tsp vanilla
  • pinch of salt

Ingredients for the crumble:

  • 1/4 cup brown sugar
  • 2 tbsp toasted pecan pieces
  • 1/4 cup oats
  • 1 tbsp flour
  • 1/4 tsp cinnamon
  • 2 tbsp unsalted butter
  • 2 tsp Skor® bits
  • pinch of salt

Directions:

  1. Chop the peaches into wedges and then into thirds so they fit better in the ramekins.
  2. Add the peaches to bowl with a cover, and pour the bourbon over it so it covers all of the peaches, Soak peaches overnight in the fridge.
  3. The next day, strain the liquid from the peaches reserving 30 mL (2 tbsp), reserve the remainder for another use.
  4. Preheat the oven to 175° C (350° F).
  5. Spray the ramekins with non-stick baking spray.
  6. Combine the flour, cinnamon, reserved bourbon from soaking liquid, vanilla and salt and mix well. Sprinkle over the strained peaches and stir well to coat.
  7. Add roughly 15-30 mL (1-2 tbsp) of the coated peaches to each prepared ramekin.
  8. Combine the brown sugar, toasted pecans, oats, flour and cinnamon and mix well, cut in the butter until the butter is well mixed. Top each ramekin with about 15 mL (1 tbsp) of the crumble and then sprinkle about 1.5 mL (1/4 tsp) Skor bits over the top.
  9. Bake uncovered for 30 minutes. Allow to cool slightly to serve or reheat when ready to serve. Serve with stabilized Bourbon Whipped Cream (to stabilize whipping cream, please click here).

Oozy, boozy goodness. I intended for the sauce to drip and bake down the sides. No, really, I did!

Notes:

  • For the mini tarts, I used Martha Stewarts cream cheese pastry recipe, but I doubled it. You can freeze left over pastry dough.
  • I made 1/2 of this chess pie recipe and I netted about 20 tarts various sizes (although I only show the tear-drop shape in the photo. If I make this again, I’ll make half of the recipe.
  • I made 1/4 of this pecan pie recipe (I melted 10 g of semi-sweet chocolate, allow to cool, into the recipe) and netted about 14 small tarts (muffin tin-sized).

We added a few tee’s and golf balls but it was too dark for a pic.

MiniMeringueTarts_Rev

This shot is part of a creative collaboration I recently did with a professional photographer and prop stylist for our portfolios. I also served the little bite-sized lemon curd meringues for the progressive dinner just because you can’t have too much dessert! Photograph by Paula Wilson and Props by OK Props, Oksana Slavutych.


Read Full Post »

applepreserves_first

This is a naturally sweet applesauce, no added sugar or chemicals, just the beautiful sweetness of the apples!

Since JT and I have embarked on our diet, I have been expanding a recipe collection because there is nothing worse than eating ‘diet food’. JT can attest that our food has been the furthest from ‘diet’, at least, our perception of ‘diet food’. We’ve had:

  • Chicken Schnitzel with cauliflower mash
  • Zucchini spaghetti and chicken meatballs
  • Mushroom and cauliflower crêpes with lentil béchamel sauce
  • Apple and Dijon glazed pork tenderloin
  • Pulled pork tenderloin crêpe with homemade BBQ sauce
  • Navy bean mushroom ‘risotto’
  • Pacific Salmon with cauliflower dill sauce on wilted spinach
  • Chicken Tikka Masala on cauliflower ‘rice’
  • Pork tenderloin on braised red cabbage
  • Pork tenderloin with mushroom sauce on sautéd veggies
  • Tilapia en papillote
  • Bouillabaisse

The real challenge is finding alternatives that fit into the diet parameters so I created this apple preserve (or butter) as a condiment, but also as a sweetener in some of the dishes named above. I try to vary the meals so that we don’t get bored of the same thing.

The other thing that I’m finding quite helpful is weighing everything to make sure we are not having more than we should — I’ve fallen off that bandwagon a few times, so it’s great to get back to it. Measuring is a great tool to keep you on track and it keeps you from inching up the volume (which I can be guilty of)! I measure out 100 g  (3.5 oz) portions of any protein we purchase and freeze them individually. I know each baggy is 100 g (3.5 oz) which is exactly the portion size we should be eating. It doesn’t take long to get used to the smaller volumes particularly since we have to drink a lot of water. And the veggies are quite generous (230 g 8 oz per portion), in fact, JT has a difficult time eating the allotted volume of veggies sometimes (I do a lot of wilted spinach…makes for a smaller amount!). Fortunately, we can season to our heart’s content so the food isn’t bland. The other thing about 100 g or 3.5 oz portions is that it makes the budget go further! I’m not going to post a lot more about my regimen but I will share the odd recipe I think you might enjoy. Plus, we have a few cheat days planned (Super Bowl for one!) so I’ll share some of those tasty treats. Thank you for allowing us to indulge in our resolutions, while I enjoy your wonderful recipes from afar, for the time being.

Unsweetened Apple Preserves

A KitchenInspirations Original Recipe

Makes 750 mL (3 cups) preserves.

Ingredients:

  • 1 kg (about 2 lb) red delicious apples, peel and core included*.
  • 1 L (about 4 cups) water
  • 6 cinnamon sticks
  • 10 g (about 3 tbsp) freshly grated ginger
  • pinch of salt

Directions:

  1. In a medium Dutch oven, add chopped apples, water and cinnamon sticks and cook on medium heat until apples have broken down and thickened and most of the water has evaporated, about xx minutes.
  2. Add freshly grated ginger and pinch of salt, stir well.
  3. Pour into prepared containers and seal with new lids. Store in the freezer. Use refrigerated preserves within a month.

Uses:

  • Use to sweeten sauces and dressings instead of sugar.
  • Pour over unsweetened yogurt or ice cream or gelato.
  • Use as a condiment for pork.
  • Combine with a little Dijon Mustard as a glaze over pork tenderloin.

*The peel and core add natural pectin to the preserves which help to thicken and preserve it.

applepreserves

Read Full Post »

WholeWheatSpeltCinnamonBread_1

Recently my sister-in-law and her husband stayed at our place as they had an early morning appointment downtown because they live in another city that is 2 hours away. My brother-in-law cannot eat sugar or white flour and I wanted to create a special breakfast bread that he could eat so I searched and searched the world-wide cookbooks. My general GOTO blog for speciality flour creations is Angie’s Recipes because Angie creates or modifies existing recipes using anything BUT white flour and most of her recipes use natural sugars so it didn’t surprise me when I landed on her version of the Cinnamon Spelt Ring. I loved this recipe because I could experiment with the dough slicing techniques that another friend, Maria at A_boleyn mastered with her Swedish Cinnamon Star Bread. In fact, this beautiful technique has been demonstrated on many blogs and it was about time for me to give it a go. I doubt my family minded being guinea pigs!

This was my first attempt, I made a star bread as well as a rope ring but they were too thin and not bready enough. This was my first attempt, I made a star bread as well as a rope ring but they were too thin and not bready enough so I revised the recipe and made it again!

I modified the recipe to include whole wheat flour instead of the two types of spelt flour that Angie’s recipe had. As well, I have replaced white sugar with dates for the filling. My first test, although tasted OK, was not up to my expectations, it was just too thin and not bready like a cinnamon bun, so I made it again with a lot more success.

This is the unbaked bread. In hindsight, this dough was bready enough to make two loaves! This is the revised recipe below of the unbaked bread. In hindsight, this dough was bready enough to make two loaves!

Whole Wheat, Spelt Cinnamon Bread

Original recipe from Angie’s Recipes Blog, please click here.

This recipe makes one 40 cm x 15 cm (15″ x 6″) rope.

Ingredients:

  • 165 mL Milk, lukewarm
  • 3 Egg yolks, large, divided
  • 30 g flavourless vegetable oil (I used canola)
  • 20 g Maple syrup
  • 8 g Instant dried yeast
  • 250 g Whole Wheat Flour (may want to reduce this to 225 for a shaggier dough).
  • 100 g Spelt Flour
  • 5 g salt

Directions:

  1. Combine warm milk, 2 egg yolks, vegetable oil, instant dried yeast and maple syrup and whisk well. Allow to proof until bubbling.
  2. Sift the flours together into the bowl of your stand mixer. Make a well in the centre and add the wet ingredients and mix until well combined. Knead for 10 minutes.
  3. Allow to rise in a warm place for 1 hour and 20 minutes or until doubled in size.

Ingredients for filling:

  • 75 g unsalted butter
  • 100 g dates
  • 6 g ground cinnamon
  • 2 g salt

Directions:

  1. Add all of the filling ingredients into the bowl of a small food processor and process until completely smooth and combined.
  2. Roll out the dough into a 0.5 cm (1/4 inch) thick rectangle (mine worked out to 38 cm x 25 cm (15″ x 10″). Spread all of the cinnamon butter mixture evenly over the dough, leaving a 1 cm (1/2 inch) border on three sides (spread right to the long side that you will begin to roll). Starting at the long end, roll up the dough tightly to form a roll. Seal all of the edges well by pinching them closed. Slice the roll in half lengthwise, leaving the last 5 cm (2 inches) connected.
  3. Turn each half cut-side up and carefully wrap the halves together like a rope, maintaining the cut-sides up to expose the filling. Carefully place on a baking tray lined with parchment paper and allow to rest, covered in a warm location for 1 hour. Check out Angie’s blog for detailed photos on how-to roll, cut and form into a rope. Or check out Maria’s blog on how to make the star version of this gorgeous bread.
  4. Preheat the oven to 375° F (190 °C).
  5. Mix a teaspoon of water into the remaining egg yolk and brush over dough. Bake for about 30-35 minutes or until golden brown and internal temperature is around 200 °F (93°C). You may wish to cover with some foil so it doesn’t brown too quickly.
  6. Serve with home-made jam and butter.
WholeWheatSpeltCinnamonBread2 This is the baked loaf, it’s a beauty!
CheeseEggBraid2 I also wanted to make the rope bread as a savoury cheese version and used my Sesame Bread Recipe; I divided the dough into two equal portions, spread a few handfuls of sharp cheddar on one rectangle instead of the cinnamon butter, and also made a plain cut wheat sheaf version of the other. Both turned out excellent.
The cheese melted in the roll and was a lovely flavour in the egg bread. The cheese melted in the roll and was a lovely flavour in the egg bread.

Read Full Post »

ChaiTiramisu_First

We had good friends over for dinner recently and I made an Indian extravaganza (all posted recipes but I’ll repeat them below). I wanted something a little different because I’d already made Chai Crème Brûlée and Gulab Jamun. I’ve always wanted to bake Lady Fingers and that’s how I landed on Chai Tiramisu. We feasted on the Indian food and then retired to the living room to enjoy the wood fire and dessert; our guests must have enjoyed the dessert because after they’d decided they had had enough and rested the half-eaten plates on the coffee table, they kept picking them up for ‘just one more bite’, eventually finishing off the entire plate. Now THAT makes me happy.

It’s not overly sweet and the chai comes through from the chai liquor soaked lady fingers. The ricotta and Greek yogurt combo makes it slightly less rich than the mascarpone version which was good considering the heaviness of the meal; I would definitely make it again even with the home-made ladyfingers, but if you’re tight for time, the store bought Italian ladyfingers would certainly do the trick.

Chai Tiramisu and Homemade Ladyfingers

Makes approx 1 loaf pan 23 cm x 13 cm  (9″ x 5″) tiramisu.

ChaiTiramisu_7636

Placing the tiramisu in the freezer for one hour before serving guarantees perfect slices.

Lady Fingers

Makes about 36 small lady fingers

Roughly based my recipe on this recipe, but I reduced volumes and I changed the method for egg whites

Ingredients Ladyfingers:

  • 2 eggs, room temperature, separated
  • 4 tbsp sugar, divided
  • 1/2 tsp bourbon vanilla extract
  • pinch of cream of tartar
  • 42 g cake and pastry flour, sifted

Directions Ladyfingers:

  1. Pre-heat the oven to 350° F (176° C). Generously butter and flour a lady finger molded tray or a cookie sheet.
  2. Beat egg whites with 2 tbsp sugar and cream of tartar until stiff peaks form, set aside.
  3. Beat egg yolks with remaining 2 tbsp sugar and vanilla extract until pale in colour but not ribbons.
  4. Gently fold in the egg whites being careful not to deflate. Carefully sift the flour into the egg mixture and fold even more carefully so as not to deflate but making sure all the flour is well incorporated.
  5. Using a lady finger molded baking tray, or piping the batter into long fingers
  6. Bake for 12 minutes, allow to cool completely in pan and gently coax out to remove.

LadyfingerPan_7618

Butter generously and then dust with flour. Don’t take the non-stick spray shortcut, it doesn’t work!

Ingredients for Chai liquor (see note):

  • 1/3 cup of milk
  • 2 short cinnamon sticks
  • 2 star anise
  • 3 green cardamom pods
  • 8-10 cloves
  • 1 tsp sugar
  • 5 cm fresh vanilla bean
  • 1 black tea bag
  • 1 tsp Pastis (or any anise flavoured liquor such as Ouzo or Anisette)

Directions for Chai liquor:

  1. Add milk and all of the spices except the vanilla bean to a small saucepan and stir well.
  2. Scrape seeds out of the vanilla bean and add both bean and seeds to the saucepan. Heat slowly to infuse the milk with the chai flavours, about 10 minutes, stirring occasionally. Allow to cool, strain through a coarse sieve to allow vanilla seeds to remain in infused milk. Stir in Pastis. Set aside for assembly.

Ingredients for the Ricotta Cream and Chai Sugar:

  • 1 1/2 cups ricotta cheese (See note)
  • 3/4 cup Greek yogurt
  • 1/2 tsp orange zest
  • 1 tsp vanilla
  • 3 tbsp icing sugar, divided
  • 1/2 tsp cinnamon
  • 1/8 tsp cloves
  • 1/8 tsp cardamon
  • 1 tsp cocoa
  • 1/4 cup, roughly chopped pistachios, toasted

Directions for the Cream and Chai Sugar:

  1. Combine ricotta, yogurt, orange rind and 2 tbsp icing sugar and whip until fluffy.
  2. Combine 1 tbsp icing sugar, cinnamon, nutmeg, cardamon and cocoa and mix well.

Directions for Assembly:

  1. Line a small loaf pan with parchment paper.
  2. Dip each end of the ladyfingers into the chai liquor and line the loaf pan with them. Spread one third of the cream mixture over top, sprinkle with the chai sugar. Repeat 2 more times.
  3. Refrigerate overnight. About 90 minutes before serving, place in the freezer for so it’s easy to slice. Remove after 1 hour and slice into portions. Sprinkle some of the chai sugar on each plate, carefully place each slice in the centre of the plate, allow to sit for 30 minutes so it’s not overly cold. Serve with sprinkled pistachios.

Notes:

  • On using ricotta over mascarpone: I chose ricotta for two reasons, first is calories, this dessert made with ricotta is less than half the calories than using the richer mascarpone and two is budget, for some bizarre reason, mascarpone was $15 for about the same size of a $4 ricotta tub.
  • Feel free to use a chai tea bag to infuse the milk and omit all of the other spices, although I would still add the vanilla bean and seeds and the Anise liquor. Do not squeeze the tea bag otherwise you will have bitter chai liquor.
  • This dessert is best if it sits overnight in the fridge.
  • Although it is tempting to spray the ladyfinger pan with a non-stick spray, it will NOT WORK. Butter it generously and dust with flour. Each pan must be washed and rebuttered.

ChaiTiramisu_7635

The lady fingers soak up the Chai Liquor so they are pillowy soft.

Previous Posts about Indian Food:
Palek Paneer

Also known as Saag Paneer

Also known as Saag Paneer

Carrot Pickle and Mango Chutney

Lightly crunchy and packed full of flavour

Lightly crunchy and packed full of flavour

Sweet and tangy, just like a chutney should be

Sweet and tangy, just like a chutney should be

Best Naan Ever

Chewy and crispy at the same time

Chewy and crispy at the same time

Aloo Papri Chat

A quick shot of the actual serving dish at the dinner party

A quick shot of the actual serving dish at the dinner party

Beef Buhna

Tender beef cubes drenched in a mildly spicy, fragrant, flavourful gravy

Tender beef cubes drenched in a mildly spicy, fragrant, flavourful gravy

Paneer Makhani

A delicious, rich tasting tomato gravy with gently firm paneer

A delicious, rich tasting tomato gravy with gently firm paneer

Baked Onion Bahjis

Don't be fooled by their size, they pack a big punch of flavour

Don’t be fooled by their size, they pack a big punch of flavour

Jamie Olivers Chicken Tikka Masala (by far our favourite Indian Recipe)

ChickenTikkaMasala2_Blog

Chai Crème Brûlée

ChaiCremeBrulee_1925

Lemon Lentil Soup

Lemon Lentil Soup_1337

Tamarind Chutney

Tangy, sour and sweet all at once.

Tangy, sour and sweet all at once.

Enhanced Mulligatawny Soup

Enhanced Mulligatawny Soup

Enhanced Mulligatawny Soup

Gulab Jamun

Gulab Jamun

Gulab Jamun

Matar Paneer

matarpaneer

Read Full Post »

AlmasSutemeny_First

We had a grand 2-week visit with my Hungarian relatives, enjoying the many things that Toronto has to offer. During the annual street party, our dear neighbour (one of whom we do the Progressive dinners with) asked us all over to their place for a BBQ. I made dessert. I chose to remake the Martha Stewart Apple Cake that I previously posted here. It was so well received that My cousin asked for the recipe, so I will post this recipe in Hungarian for my kin in Budapest (English will follow).

Egy nagyon jó két hétes nyaralás volt a magyar rokonokal. Meglátogatunk mindent ami van Torontoba. Az este amikor az utca ünneplés volt, a kedves szomszéd (akikval közül csináljuk Progresszív vacsorákat) meg hivtak minket egy grillezésre. Én csináltam a desszertet. Úgy döntöttem, hogy meg csinálmon a Martha Stewart almás süteményét, amit korábban irtam rola itt. Annyira szereték, hogy az unokatestvérem kérte a receptet, így én hozzászólom a receptet magyarul (English recipe to follow).

Apple Cake

A tasty combo of cake and apples with a good dose of cinnamon. Egy finom torta almával és egy jó adag fahéjjel.

Almás Sütemény

Az eredeti recept it van.

Egy reczept csinál egy 23 cm kerék tepsit ami 8 – 10 cm magas, vagy két 20 cm kerék tepsit de csak 5 cm magas.

Hozzávalók:

  • szukor meghinteni a tepsit 
  • 195 g liszt
  • 12 g sütőpor
  • 5 g  só
  • 7 g fahéj puder, plusz egy kicsi a tepsinek és a pite tetejére
  • 85 g vaj, olvaszva
  • 170 g barna cukor, plusz egy kicsi a pite tetejére
  • 125 mL tej
  • 2 tojás, szobahőmérség
  • 2 nagy alma, hámozott és vékonyra szeletelve
  • 30 g vaj, plusz egy kicsi a tepsinek és a pite tetejére kis csipetkékb

Utasítás:

  1. A sütőt előmelegítjük 200 °C-ra.
  2. Ki vajazuk a tepsit egy kis vajal és meghintjük cukorral.
  3. A liszthez hozzáadjuk a sütőport, a sót, és a fahéj pudert és alaposan keverjük össze.
  4. Egy másik tálban jól megkeverük egy habverővel az olvasztott vajat, a barna cukrot, a tejet, és a tojást.
  5. Lassan a vaj keveréket a liszt keveréketel hozá adjuk és osze keverjük.
  6. Öntsük a tésztát az előkészített tepsibe és az almát egyenként rendezzük körbe szorokan amíg elfogy (ugy mint a kép).
  7. A pite tetejét meghintjük egy kis barna cukral és fahéjjal es kis csipetke vajjal.
  8. Sütjük amíg a teteje arany szinu és a gyümölcs meg van fóve, körülbelül 40-50 perc, vagy amíg a sütemény teszter (tiszta fogpiszkáló) a tészta közepének jön ki tisztan.

Apple Cake2

Perfect for dessert or afternoon tea. Egy tökéletes desszert, vagy délutáni cávéval.

Apple Cake

Original recipe may be found here.

Makes one 9″ deep spring-form pan cake or two 8″ slightly shallower round cakes.

Ingredients:

  • sugar for dusting pan
  • 195 g flour
  • 12 g baking powder
  • 5 g  salt
  • 7 g cinnamon
  • 85 g butter, unsalted and melted, plus a bit more for the pan and cake top
  • 170 g dark brown sugar, packed
  • 125 mL milk (I used skim)
  • 2 large eggs, room temperature
  • 2 large apples, peeled, cored and sliced into 2 mm sliced wedges

Directions:

  1. Preheat oven to 375° F. Butter a 9″ springform pan and line the bottom with parchment. Sprinkle with sugar and shake the pan to coat.
  2. In a large bowl, whisk together flour, baking powder, salt and cinnamon.
  3. In a medium sized bowl, whisk together melted butter, brown sugar, milk and eggs.
  4. Slowly fold the butter mixture into the flour mixture, just stirring until blended.
  5. Spoon the batter mixture into the prepared springform pan, smooth the top evenly.
  6. Arrange the apple slices in a circle closely together in the cake batter. Then press each piece of fruit gently down into the batter.
  7. Sprinkle over with the 2 tbsp brown sugar and cinnamon. Top the brown sugar by dotting the remaining 1 tablespoon of butter over.
  8. Bake until top is golden and the fruit has softened, about 35-50 minutes in a convection oven (fan oven for my European friends), or until a cake tester inserted in the centre comes out clean.

TheFamily

Our last lunch together on the back patio.

Read Full Post »

BakedBrie_Intro

To be honest, I had not intended on posting this recipe but the accolades it received at a party we had late last year with our neighbours, well, I just couldn’t ignore it. If you like warm, melty brie, chopped cashews and almonds, some chopped dried cherries, apricots and raisins then this is for you. Oh, did I forget to mention the home-made caramel sauce? Yes, you did read that correctly.

Ingredients for the Brie:

  • Small round of Brie
  • About 50 g chopped nuts (I used cashews and almonds)
  • 25 g chopped dried cherries
  • 25 g chopped dried apricots
  • 25 g golden raisins
  • 1/2 tsp allspice
  • 1/2 tsp cinnamon

Ingredients for the caramel sauce:

  • 1/4 cup granulated sugar
  • 3/4 tsp lyle’s Golden syrup
  • 3/4 tsp water
  • Dash of lemon juice
  • 1/4 cup heavy cream, heated
  • 1/2 tbsp salted butter

Directions:

  1. Pre heat oven to 275° F (135° C).
  2. Combine the nuts and dried fruit with the spices and set aside.
  3. In a microwave proof measuring cup, add the sugar, syrup, water and lemon juice, whisk to combine.
  4. Microwave the sugar mixture on high until it JUST begins to darken (mine was a hair less than 1 minute 20 seconds, using a new microwave — watch it carefully). Remove it carefully from the microwave and set aside on a heat-proof surface and watch it turn dark amber.
    Meanwhile, heat the heavy cream until almost boiling. When the melted sugar had reached a gorgeous amber colour, slowly add the hot cream while whisking. Add hot cream little by little as it will bubble up. Stir in butter until melted.
    Pour hot caramel over spiced nut and dried fruit mix, toss until combined.
  5. Place Brie round in the centre of a heat proof vessel (I used cast iron so it will keep warm for a while). Pour the nut caramel mixture over the Brie and bake until Brie is hot and melty 5-10 minutes. Serve with French stick and crackers.

BakedBrie_Blog

I wish I had shot a pic of it right out of the oven but sadly it disappeared too quickly!


Read Full Post »

Greetings fellow bloggers and readers. I would like to take this opportunity to thank you for following my blog, it has been an enormous enjoyment. As you may recall, my life has taken a bit of a turn and I’ve been working hard to get into the food styling arena but it’s a long process so I’ve been considering other opportunities along the way. You may not know but I have been sewing for many years and have even sewed a girlfriends wedding dress once! I have opened an Etsy store called Cozy Casuals and hope that you will be able to drop by and take a look. I’m sewing hand made, comfortable tunics for women and I will be expanding my line to include girl’s tunics as well as bathing suit cover ups! I will continue to to follow my dream of becoming a food stylist, but I’ll be sewing in my down times!

Fruit pies have always been JT’s family’s favourite so, I usually make a fruit pie for them. When we had this group over in January for our Re-Do Christmas dinner I had made a lovely apple pie and JTs 90-year old father loved it so much he asked for seconds, so I decided to make the same pie again. The original recipe is from my trusty Five Roses Cookbook.

ApplePie_2490

A delicious, flaky crust.

Traditional Deep Dish Apple Pie

Makes 1 double crust, deep dish pie.

Ingredients:

  • 2 cups AP Flour 
  • 1/2 tsp salt 
  • 1/4 baking powder
  • 1/2 cup unsalted butter, very cold
  • 1/4 cup vegetable shortening, very cold
  • 8-9 tbsp ice cold water
  • 8 apples, washed, peeled and cut into cubes
  • 1/4 cup fresh lemon juice
  • 6 tbsp brown sugar
  • 1/3 cup AP flour
  • 1 tsp cinnamon
  • 1/4 tsp all spice (omit if you prefer)
  • 1/4 tsp ground cloves (omit if you prefer)
  • 1/4 tsp salt

Directions:

  1. Add the flour, salt and baking powder to a large food processor fitted with the metal blade, pulse a few seconds to mix well.
  2. Cut the butter and shortening into small cubes and add to the flour mixture, pulse until you achieve a coarse texture. Add the ice cold water little by little until the pastry forms a ball.
  3. If your home is warm you may wish to refrigerate the pastry for 30 minutes, if not then divide it into two portions and roll out the top and bottom of the pie.  If desired, cut shapes out of the top crust with a decorative cookie cutter, I used flowers for spring!
  4. Preheat the oven to 180°C or 350°F.
  5. In a large bowl add the apple cubes and toss with the lemon juice.
  6. In another bowl, add the brown sugar, flour and spices and mix well (I do this in my mini food processor). Sprinkle over the apples and toss to coat evenly.
  7. Add the apples to the bottom of the pie crust and spread out. Top with the top pastry and trim off excess edges. Use these trimmings to make your decorative edging on the pie, or not.
  8. Bake for 60-70 minutes or until apples are skewer soft. You may need to cover the crust edges with foil if it’s getting too brown as it bakes.
  9. Serve warm.

ApplePie_2488

Notes:

  • Cut a small triangle of parchment paper that you will slide under the bottom crust (between the pan and the crust), making sure a little is sticking out at the edge. This parchment will be your first piece of pie. When you cut your first piece of pie, make sure you cut where you put the parchment triangle is and use the parchment triangle to help lift the first piece out. Works like a charm!
  • Always bake your pie on a parchment lined cookie sheet so when it bubbles over, it won’t make a mess of your oven or your cookie sheet.
  • You may need to cover the pie edges with foil to prevent burning.
  • You can add raisins or currants to make this even more festive.
  • This pastry is very rich so I have intentionally omitted putting little pats of butter under the top crust, but be my guest and add it if you prefer.
  • We love to serve this pie with some extra old Balderson Cheddar Cheese.


Read Full Post »

Flash back to November 2013, please recall our Indian extravaganza thank you dinner I made for our very generous neighbours. As you know, I’m not a huge fan of Indian desserts (remember this one?) so when I planned the dinner party I knew right away that I wanted to make a version of Chai Crème Brûlée. Sadly it’s winter in these parts which means it gets dark anywhere from 4:30, so I wasn’t able to take a decent photo until I was able to remake this tasty dessert and shoot it in daylight!

Chai flavours really come out in this creamy crème brûlée

I served with two spoons so you can have a taste too!

Chai Crème Brûlé

Serves 1 (slightly more than 1/2 cup serving); just multiply by the number of people you need to feed to get your amounts

Ingredients:

  • 1/2 cup of whole milk or cream per person
  • 1.5-2 tsp sugar per person
  • 1 black tea bag
  • 1 cinnamon stick
  • 2 star anise
  • 3 green cardamon pods, smashed gently.
  • 1 egg yolk per person
  • 1-2 tbsp per person of sugar to brûlée

Directions:

  1. Preheat oven to 135°C or 275°F.
  2. Infuse the milk with the Chai spices: combine milk or cream, sugar, black tea bag, cinnamon stick, star anise and cardamon in a small pot and heat until just under boiling, simmer for 15 minutes. Set aside to cool with a lid on the pot (or refrigerate overnight, which is what I did). Strain to remove all the bits, discard strained pieces.
  3. Once cooled, whisk the infused milk, egg yolks in a vessel with a pouring spout.
  4. Pour this mixture into ramekins. My ramekins were about 2/3 of a cup each. Place ramekins into a roasting pan with 5cm sides, put the pan into the pre-heated oven. Pour enough water around the ramekins to reach up just over half way on the side of the ramekins (it’s much easier to do this once the pan is in the oven so you’re not balancing the custard and the water on your way to the oven).
  5. Bake for 30-45 minutes to an hour or so. You’ll know they’re done when you can stick a knife in one and it comes out clean. Remove the ramekins from the baking pan, set them on the counter allow them cool. (The deeper your custard is the longer it will need to bake).
  6. Sprinkle a thin layer of  sugar on the top of each. Make sure it’s a THIN layer, but also make sure it completely covers the custard. Now torch it! Garnish with Whipped cream if you’d like (for the dinner party, I infused the whipping cream with a hot cinnamon stick which I heated for 1 minute on high in the microwave. I refrigerated the whipping cream and hot cinnamon stick until serving and then I removed the stick and whipped the cream).

Tips:

  • To save some time, just use a prepared Chai teabag.
  • Don’t squeeze the tea bag, it will be bitter.

ChaiCremeBrulee_1923

I know you want to dig in!

ChaiCremeBrulee_1925

The chai flavours really go well with the creamy crème brûlée

Screen Shot 2014-01-27 at 12.29.17 PM

Read Full Post »

AppleCake_1034

The aroma that wafted through the cottage was intoxicating. Or maybe it was the wine.

My family has always been cake people; JTs family are pie people. I always thought it was the difference between Europeans and the English. We usually had some fruit with or in our cakes whereas JTs family always had some pastry with their fruit. This was never a big deal for us because I’m not much of a dessert eater, but it did pose a challenge because I had to learn how to make a pie! Now that we’re more accustomed to each other, I make a variety of cakes and pies and JT happily samples them.

Recently, my friend Barbara Bamber from Calgary author of Just a Smidgen posted a gorgeous Martha Stewart recipe for a fall apple cake and I was smitten! When I suggested that I bake this cake to take over to my niece’s cottage-fest on our last weekend at the cottage JT was all over it. It’s moist and quite flavourful, the perfect mix of fruit and cake. We served it warm and at room temperature and both were very tasty. Although cake is always considered a treat, this could be perfect as a breakfast muffin, made in smaller portions.

Martha Stewart’s Apple-Cranberry Cake

makes one 9″ spring-form pan cake

Ingredients:

  • sugar for dusting pan
  • 1 1/2 cups flour
  • 2 tsp baking powder
  • 1/2 tsp salt
  • 1 tsp cinnamon
  • 6 tbsp butter, unsalted and melted, plus a bit more for the pan
  • 3/4 cup dark brown sugar, packed
  • 1/2 cup milk (I used skim)
  • 2 large eggs, room temperature
  • 3 Golden Delicious or Janagold apples, peeled, cored and sliced into 2 mm sliced wedges
  • 1/4 cup dried cranberries
  • 2 tbsp brown sugar
  • 1 tsp cinnamon
  • 1 tbsp butter cut into pieces

Instructions:

  1. Preheat oven to 375° F. Butter a 9″ springform pan and line the bottom with parchment. Sprinkle with sugar and shake the pan to coat.
  2. In a large bowl, whisk together flour, baking powder, salt and cinnamon.
  3. In a medium sized bowl, whisk together melted butter, 3/4 cup brown sugar, milk and eggs.
  4. Slowly fold the butter mixture into the flour mixture, just stirring until blended.
  5. Spoon the batter mixture into the prepared springform pan, smooth the top evenly.
  6. Arrange the apple slices and dried cranberries as you wish onto the cake batter. Then press each piece of fruit gently down into the batter.
  7. Sprinkle over with the 2 tbsp brown sugar and cinnamon. Top the brown sugar by dotting the remaining 1 tablespoon of butter over.
  8. Bake until top is golden and the fruit has softened, about 35-50 minutes in a convection oven (fan oven for my European friends), or until a cake tester inserted in the center comes out clean.

Notes:

I added cinnamon to the batter, the original recipe did not have it.

AppleCake_1028

Next time I will shroud with foil so that the top doesn’t darken as quickly.

Read Full Post »

Hope all the Canadians reading this post are having a Happy Thanksgiving this weekend! The second Monday of October has been designated as Canadian Thanksgiving, not sure why, but we’ll take a holiday in October any day of the week!

We used to spend Thanksgiving at the cottage, often inviting my dear Mom and her hubby Geo, but since her passing in 2005, we’ve been invited to my brother’s cottage in the Muskoka. It’s quite a different life-style than ours to have a cottage in Muskoka. For example, you needn’t do much grocery shopping in the city because you can get everything and anything you need for the weekend in one of the well stocked grocery stores; in comparison, last time I forgot Parmesan Cheese and I was even going to settle for the powdered prepackaged cheese but our little shop didn’t even have that, so we had to drive an hour to find it! You might wonder why it’s so different in the Land of the Thousand Lakes (our cottage area) and Muskoka. Well, let me tell you. It’s because Hollywood has descended on Muskoka and while we have 1,000-2,000 square foot cottages (93-186 square metres) (ours is about 600 square feet), Muskoka boasts 10,000 and 20,000 square foot cottages (930-1860 square metres) with helipads and landing strips!  There is name dropping in Muskoka whereas we just talk about the dear we may have seen on the back road driving in. Goldie Hawn has a sprawling cottage on the same lake as my brother. We’ve never really been close to it, but apparently people think it’s ok to moor their boat and hop out to look around. She has security. My SIL spotted her in their local grocery store, where you could order Sushi grade tuna for the weekend (I’m lucky to get mac and cheese at ours). Steve Martin visits Martin Short who also has a nice place down the road on my brother’s lake. I heard that Steve Martin is very kind and hands out business cards that prove you’ve met him: “this  certifies that you have had a personal encounter with me and that you found me warm, polite, intelligent and funny” and of course he signs it. Martin Short’s wife once ran after my brother while he jogged down the road in front of their place to warn him that there have been bears seen that very morning! So you see, while we hob nob with the dear, chipmunks, bunnies and beavers, the folks in the Muskoka’s hob nob with the rich and famous.

My brother’s family is down to earth and their cottage is much more modest than those around them. They are generous to a fault and we always eat well and drink copious amounts of wine when we visit. We’ve had balmy 24°C days and on the very same weekend, we’ve had snow flurries! But it’s always a relaxing weekend to connect with family and take long quiet walks around the lake.

Snow flurries a few years ago. View from the dining room and kitchen.

Snow flurries a few years ago. View from the dining room and kitchen.

Although I didn’t make this galette for the Thanksgiving weekend, it dawned on me that it would be the perfect sweet for afternoon tea or dessert after a big turkey dinner. I used the lavender sugar that my dear friend Barb (Profiteroles and Ponytails) brought up when they visited us at the cottage this summer. It just made this dessert that much fancier! Thanks Barb.

AppleRhubarbGalette_0961

The Lavender Sugar was a gift from my friend Barb from Profiteroles and Ponytails

Apple Rhubarb Galette with Lavender Sugar

Serves 6-8

The Galette Pastry Recipe comes from Baking with Julia by Dorie Greenspan

Ingredients:

  • 1/2 Galette pastry
  • 1/2 c Rhubarb
  • 3 Apples, chopped into equal-sized pieces
  • 2 tbsp all purpose unbleached flour
  • 1/4 cup sugar
  • 1 tsp cinnamon
  • 1/2 tsp allspice
  • 1 tbsp egg white for brushing pastry
  • 1 tbsp Lavender Sugar for garnish

Directions:

  1. Combine the apples and rhubarb and dust with the spices, sugar and flour, coating evenly
  2. Roll out the galette pastry to about 10cm or 3 inches larger than required. Fill centre with the fruit and turn up the sides to form the galette.
  3. Brush pastry with egg white and bake for 25 minutes or until edges are golden brown and fruit is soft.
  4. Remove from the oven and dust with 1 tbsp Lavender Sugar.
  5. Serve warm or at room temperature.

AppleRhubarbGalette_0962

The Rhubarb was the perfect foil for this sweet dessert

The rhubarb came from our dear friend’s Monica and Rae’s garden in Toronto. I still have some in the freezer, it will be a welcome taste of summer in mid-winter!

AppleRhubarbGalette_0963

Can you see the little Lavender Flowers?

Read Full Post »

Last week I needed a dessert for my pie loving in-law family and I was lucky enough to find Charles‘ beautiful Appelkaka, a Swedish apple cake. I knew JTs family would like it because they are pie people and apple is one of their fav’s. We’re all trying to cut down our carbs, so when I saw this cake is made without the traditional pastry, I decided to make it. Of course, things don’t always go as planned, so when I started out to make the cake, I gathered all my ingredients. Apples: check. Sugar substitute: check (I had one diabetic and one hypo-glycemic in the house). Bread crumbs: wait…does that package say Parmesan Bread Crumbs? Oh my. Change of plans. Nix the bread crumbs and get out the food processor and pulse 120 g of Oats a few times, I wanted some texture, so it wasn’t pulsed to a smooth powder, but almost. And there we had it. When I changed up the bread crumbs to oats, I thought I’d change up the method as bit as well. I hope you don’t mind Charles, it turned out quite successful and the plates were licked clean. Thanks again for a lovely Swedish dessert.

Purple Crocus_4413

A quick taste of spring, and then it snowed.

Yellow Crocus_4412

I think they may have retreated back into the ground.

Appelkaka, A Swedish Apple Cake

Appelkaka_4414

A delicious combination of apples, almonds, oats and cinnamon

Serves 8-10, depending on the slice size

Ingredients:

  • 6 or 7 large Apples
  • 4-6 tsp Stevia (I had organic stevia powder at home, so I just used that. I think it was this brand – no weird aftertaste)
  • 120 g Oats, pulsed a few times in a food processor (not quite 100% powdery but close)
  • 50 g almond meal or roughly chopped almonds
  • 60 g unsalted butter
  • 1 tbsp cinnamon
  • Splash of lemon juice
  • Sliced almonds for garnish
  • 1 cup Greek yogurt
  • 1 tsp stevia
  • 2 tsp lemon zest
  • 1/2 tsp vanilla

Directions:

  1. Pre heat the oven to 395°F. Line a 10″ spring form pan with a little parchment (my pan didn’t have tall enough sides, so I had to make my sides out of parchment).
  2. Peel and coarsely grate the apples and splash a bit of lemon juice into it so it stops them from discolouring.
  3. Mix the pulsed oats, cinnamon, almonds and butter until it resembles a coarse meal.
  4. Take about 1/3 of the oat mix and press firmly into the bottom of the spring form pan. Add about 1/2 of the grated apples on top and sprinkle with another third of the oats. Finish with the remainder of the apples and press firmly down. Sprinkle the final third of the oat mix on top, just like a crumble.
  5. Bake for about 40 minutes or until the apples are soft.
  6. Garnish with sliced almonds and serve with Greek yogurt, flavoured with a tsp of stevia, lemon zest and a small splash of pure vanilla.

A very tasty appelkaka

A very tasty appelkaka

Family1_4417

Laura, Brady and Brian

Our Easter Lunch, complete with the wonderful Beef Tenderloin.

Family2_4418

Dan, Joan, Dad and JT

Beef Tenderloin_4416

Beef Tenderloin with a port sauce.

Read Full Post »

Happy birthday to my brother!
and Happy April Fool’s Day to the rest of you!
This is a joke I played on my friend Kim a couple of years ago. A hundred parking tickets.

We had our nephew Brian and his GF over for dinner some time ago, and I cooked a roast pork tenderloin dish that I hadn’t made in a very long time (sadly, I didn’t take any photos and now I know better than to post a recipe without photos ;-), so I’ll have to make it again in the near future). The pork was dressed in a flavourful Apple Cider and Dijon Mustard gravy for which I had to buy fresh Apple Cider. In my area, fresh Apple Cider is sold in 500 mL or larger and because I only needed a couple of cups of the stuff, I bought the 500 mL. So now I had about 4 cups left over. Now we could have drank it, because it was fresh and delicious, but I prefer to eat my fruit rather than drink it so I was left with the dilemma of what to do with all the cider.

I searched high and low and came across some lovely options but not practical; we don’t eat that much cake so a coffee cake was out of the question, we don’t usually eat that many quick breads, so that was out of the question, and the muffin recipes I found had too much oil in them and therefore quite unhealthy. What to do?

It was in my trusty Jean Paré’s, Company’s Coming, Muffins & More cookbook I found the solution: Tea Biscuits! Now I modified the recipe to include the Apple Cider which I reduced by less than 1/4 of its original volume and these scones did not disappoint; they were soft, buttery and had a very distinct apple cider flavour. This would be a lovely scone to serve during Autumn while you watch the leaves gently fall from the trees with a warm fire burning in the hearth a cup of tea and a couple of scones. Soon enough!

IMG_4200_BLOG

A little tangy from the concentrated flavour of the cider.

Apple Cider Tea Biscuits

Makes about 10 good size tea biscuits

Ingredients:

  • 2 cups flour
  • 2 tablespoons sugar
  • 1 teaspoon salt
  • 4 teaspoons baking powder
  • 1/2 teaspoon cream of tartar
  • 1 tsp cinnamon
  • 1/4 tsp nutmeg
  • 1/8 tsp ground cloves
  • 1/2 cup unsalted cold butter, cut into small bits
  • 1/4 cup sultana raisins
  • 4 cups apple cider
  • 2-3 tbsp milk or yogurt for brushing the tops.

Directions:

  1. Reduce the apple cider to about 1 cup of concentrated liquid by slowly boiling it off (takes about 40-50 minutes).
  2. Pre-heat the oven to 450°F (232°C).
  3. In a food processor, pulse the flour, sugar, salt, baking powder, cream of tartar and spices until well mixed.
  4. Slowly drop in the cold butter while pulsing and blend until is it a coarse mix.
  5. Transfer this mix into another bowl, add the raisins and mix well to coat the raisins with the floury mixture.
  6. Add the cider all at once to the flour, and mix well with a wooden spoon mix until it is a soft ball of dough. (Note this is a slightly softer ball of dough than a tea biscuit usually is).
  7. Transfer to a floured board and knead a couple of times (not enough to melt the butter with the heat of your hands).
  8. Roll out the dough to about 2 cm (~3/4″) thick and cut with a triangular cookie cutter. Repeat until the dough is completely used.
  9. Place on a parchment lined cookie sheet and brush tops with the yogurt or milk (for a beautiful shine) and bake 10-12 minutes until golden. You’ll need to watch the bottoms because the natural colour of these biscuits are more golden and you will only be able to tell how far along they are by looking at the bottoms.
  10. Cool slightly on a wire rack and serve with unsalted butter and preserves.
  11. Enjoy.

IMG_4198_BLOG

Please take one, or even two.
Would you care for tea or coffee with that?

IMG_4199_BLOG

Melt in you mouth scones, served warm with unsalted butter.

Read Full Post »

A mildly spiced layered cake

A mildly spiced layered cake

My friend Genie (Bunny. Eats. Design) in New Zealand very kindly invited me to participate in a new forum called Our Growing Edge which will be held monthly. It’s content will be defined by our cooking bucket list, so to speak — things that we want to conquer or need to conquer and upon our success (or failure!) we will create a post and link it to her page for the month. This is rather exciting because we all have our arch nemesis in cooking. Please click on over to Genie’s lovely blog (particularly on Tofu Tuesday’s when she showcases her most adorable flop eared bunny).

our-growing-edge-badge

In early January, my friend Sam (Sweet Samsations) posted a recipe for an Indonesian cake I had never heard of, which is not rare in this very large world of ours, but what caught my eye was the huge quantity of eggs used in this cake, Sweet Samsations uses 30 – THIRTY; I even found one that used 45 eggs! I just can’t imagine buying that many eggs for one recipe. But it is a beloved cake that’s for sure so I knew I had to look around and find a recipe with a more reasonable egg content because I HAD to make it. Fast forward to late January when Genie asked me to participate in Our Growing Edge, I knew what I wanted to make: Indonesian Spekkoek Lapis Legit. Now to find the time to bake it because it’s quite labourious as you bake each layer individually over the other in the same pan.

I landed on Food Network’s Emeril Lagasse’s recipe (didn’t make sense to me either) because his cake only used 12 eggs, and 12 is easily divided into two; I found my recipe, only 6 eggs! I did a quick assessment of the baking container that Emeril’s recipe used and determined that if I halved his recipe it would fit snugly into my 4″ x 6.7″ loaf pan. I didn’t get as many layers as I had hoped, but it still looked nice and it still had good flavour. Emeril suggests to decorate with powered sugar, and I added candied orange peel as garnish. I will serve it with the orange syrup that was the left over from candying the peel.

Indonesian Spekkoek Lapis Legit (Thousand-Layer Spice Cake)

Serves 4-6 depending on how thick you slice it

Ingredients:

  • 1 tsp ground nutmeg
  • 1 tsp ground cinnamon
  • 1 tsp ground allspice
  • 1 tsp ground mace
  • 1 tsp ground ginger
  • 1 tsp anise extract
  • 170 g (1 1/2 sticks) unsalted butter, softened
  • 1/2 cup granulated sugar
  • 1/2 tsp pure vanilla extract
  • 1/4 tsp salt
  • 6 large eggs, separated
  • 2/3 cups all-purpose flour
  • 2 tbsp confectioners’ sugar
  • Candied orange peel as garnish

Directions:

  1. Preheat the broiler (I have this range with two ovens, I used the larger oven with the rack in the lower middle so it’s not too close to the broiler).
  2. Butter the bottom and sides of a 4″ x 6.7″ loaf pan and line with buttered parchment paper. I left enough of the parchment to go past the top of the pan, so I could use it to lift the cake out when it was done.
  3. Combine the nutmeg, cinnamon, allspice, mace and ginger and set aside.
  4. Weigh your empty bowl, write down the measurement. In this bowl, cream the softened butter, 1/4 cup of sugar, vanilla, and salt. Add the egg yolks one at a time and beat until smooth. Fold the flour into the batter with a rubber spatula.
  5. In a clean bowl with clean beaters, beat the egg whites with the remaining 1/4 cup of sugar until stiff and shiny but not dry. Fold the whites into the egg yolk mixture, being careful not to over-mix. Divide the batter between 2 bowls. Add combined spices to 1 bowl and stir well.
  6. Weigh your bowl with the cake batter. Subtract this new weight from the old weight so you know how much your batter weighs and divide in half. Put your second bowl on a scale that can tare and zero it out. Pour half the batter into this bowl (you can see exactly when you reach half on the scale).
  7. Mix the spices into the second batter along with the anise extract.
  8. Pour 4-6 tablespoons of the batter into the bottom of the pan and spread out evenly. Sammy suggests to pre-heat the pan, which I didn’t do, but I suspect it makes spreading the batter much easier since my subsequent layers spread easier on the hot layer.
  9. Bake in a hot broiler for 2 minutes. Watch carefully.
  10. Pour 4-6 tablespoons of the spiced batter, spreading it over the first layer to form a thin second layer. Place the pan under the preheated broiler for 2 minutes, or until the layer is firm and very lightly browned. Continue until you have exhausted both batters. Emeril noted that the cake typically has between 12 and 15 layers — I ended up with 10, not bad for a first timer!
  11. Allow  the cake cool on a wire rack, turn out onto a cutting board and even up the sides by cutting clean new edges.
  12. Sprinkle with confectioners’ sugar and garnish with candied orange rind.
  13. Slice thinly and serve warm or at room temperature with additional orange syrup, if you so desire.

IMG_4167_BLOG

I should have made the layers much thinner

It's quite a show stopper!

It’s quite a show stopper!

My notes:

  • It’s a mildly spiced cake with a predominant butter flavour, I think I might increase the spices a bit more if I make it again because I thought it tasted a bit greasy.
  • The butter really does need to be soft so it makes a lovely smooth batter.
  • Many Indonesian bakers suggest to press down each layer after you bake it, although I did that, mine bounced right back.
  • It’s a very rich cake so you needn’t cut large pieces.
  • Next time I may try chocolate and vanilla layers or even vanilla and espresso flavour!

Read Full Post »

MM900356605

Happy Valentines Day! I can’t believe it’s the middle of February! And on top of it, it’s Valentine’s Day — do you have something wonderful planned for your partner? Or do you wait for the weekend?

We had our good friends Rae and Mon over for dinner a couple of weeks ago and I made this new rendition of the clafoutis we made in Lyon; I dare say I like this one a touch more, or at least it hit my taste buds perfectly. The warming spices of the cinnamon go well with the apple and the pudding. I will surely make this again.

Apple Cinnamon Clafoutis

Makes 6 Claffoutis about 10cm or 4 inches in diametre

Ingredients:

  • 2 eggs
  • 1 egg yolk
  • 80 g granulated sugar
  • 40 g all purposes unbleached white flour
  • 100 mL Carnation Evaporated Milk (or cream)
  • 150 mL milk (I used skim)
  • 1 tsp vanilla
  • 1/2 tsp lemon jest
  • 2 ripe sugar crisp apples

Cinnamon Slurry:

  • 2 tbsp butter, melted
  • 1 tsp cinnamon
  • 2 tbsp brown sugar

Directions:

  1. Pre-heat oven to 175° C (350° F).
  2. Butter the pans and dust with sugar until sides and bottom are totally coated.
  3. Combine the melted butter, cinnamon and brown sugar into a slurry. Pour into a squeeze container like this. Set aside.
  4. In a bowl, mix the sugar and flour well. Make a well in the centre and slowly pour the cream with the vanilla and lemon zest combined into the flour and then add the milk. Add the lightly beaten whole eggs and yolk and mix delicately until all of the flour and sugar are combined.
  5. Peel and cut up the apples into smallish cubes (1 cm or 0.5 inch), divide evenly in the 6 pans. Pour the pudding mix in about 1/2 way into each cavity and squeeze a pattern of the brown sugar cinnamon slurry on top; add the remaining pudding mix and squeeze a bit more of the slurry onto each one.
  6. Bake for about 45-60 minutes or until firmly set. Cool in pans and remove carefully.
    Set aside.

IMG_4053_BLOG

Pipe the Slurry over each pudding (I actually snuck a layer in between)

This time I made the microwave caramel sauce, if you want more, follow Tracey’s recipe.

Salted Caramel Sauce:

Makes just enough sauce to scantly decorate the clafoutis (there is enough sugar in the clafoutis without the sauce, it’s just lovely to decorate)

Ingredients:

  • 1/2 cup sugar
  • 1 tbsp corn syrup
  • 1 tbsp water
  • splash of lemon juice
  • 1/4 cup hot heavy cream
  • 1/2 tablespoon unsalted butter
  • 1 tsp sea salt

Directions:

  1. Combine the sugar, corn syrup, water and lemon juice together in a 2-cup microwave-safe measuring cup.
  2. Microwave until the caramel is just barely starting to take on some color, 4-6 minutes (depending on your microwave).
  3. Remove from the microwave and allow to sit. Don’t be tempted to keep reheating the caramel in the microwave until it is darker, it will become darker on its own.
  4. Combine the warm cream/milk with the salt.
  5. Slowly add the warm cream/milk and stir until well combined (be careful, it’s very hot still). Add the butter and stir until melted. Cool completely.

Assembly:

  1. Warm the clafoutis in the oven for about 10 minutes.
  2. On a large rimmed plate, pour the caramel sauce into the centre and spread out evenly.
  3. Carefully place one clafoutis into the centre of the sauce and serve warm.

IMG_4075_BLOG

There is a similar ratio of apples to pudding in this romantic dessert. The caramel was meant for the dessert, not your partner’s…

IMG_4078_BLOG

The slurry caramelizes within the clafoutis in the pan and the incredible flavour of cinnamon and brown sugar are woven throughout the pudding. Oh my.

Read Full Post »

It’s not a swear word. I swear. It just sounds like one. “What the Ebelskiver were you thinking?” or “Where in the ebelskiver were you for two and half hours?” You see? But I can assure you, it’s much more delicious than a swear word. It’s actually a little spherical pancake! I know you’ve seen this over at my friend Barb’s when she posted about it last May but I just had to write about my experience because this pan was her wonderful, thoughtful Christmas present to me!

My first attempt was half of Barb’s recipe for the ebelskivers was Christmas day, a few hours after I brought it home and I kept them simple. But as you can see by my deformed little ‘balls’, it takes some skill to be able to prepare them as perfect little balls of joy. I had some practicing to do.

First attempt Christmas Morning

First attempt Christmas Morning

Still no where near perfect, my second attempt I added blue berries to the batter. Still some practicing to do before I could serve them to guests.

Second attempt when we returned from NOTL.

Second attempt when we returned from NOTL. Poor JT had to be the guinea pig for the second batch too. A very sunny day indeed!

IMG_3814_BLOG

After practice, I was able to make more perfect little balls of joy.

Batch numbers 3, 4 and 5 were much better. In fact, most of them turned out very well. And I had the opportunity to experiment with some additional flavours. I did cruise the net to see other recipes and they varied quite a bit, but since I had some experience with Barb’s lovely recipe, I decided to stick to it, with minor modifications. I found this recipe on squidoo and the batter was much thicker (if you scroll down, there is a video of a young lady successfully making ebelskivers one Christmas Eve), so I decided to add a bit more flour to Barb’s version to thicken it up. They were much easier to flip or turn without the batter running out from the centre of the ebelskiver.

IMG_3815_BLOG

Brown sugar, cinnamon and butter are swirled into the batter

If you pile them while they are hot, you will cause indentations. Mind you, I doubt your tummy will care either way.

IMG_3811_BLOG

A little twist Ham, Cheese and Dijon but still breakfast food

Ebelskivers

Original recipe from Barb at Profiteroles and Ponytails

Each batch makes about 24 ebelskivers, I divided the batter into two portions for the ham, cheese and cinnamon bun versions. If you wish to make the entire batch for one flavour, double the flavour ingredients but not the basic batter.

Basic Batter Ingredients:

  • 1 1/2 cups all-purpose flour
  • 1-½ teaspoons sugar
  • ½ teaspoon baking powder
  • 2 large eggs, separated
  • 1 cup milk
  • 2 tbsp unsalted butter, melted and slightly cooled
  • ½ tsp pure vanilla extract (omit for savory ebelskivers)

Directions:

  • In a large bowl, whisk together the flour, sugar, baking powder and salt, set aside.
  • In a small bowl, lightly whisk the egg yolks, then whisk in the milk, melted butter and vanilla extract (if using). Add the yolk mixture to the flour mixture and, using a wooden spoon, stir until well blended. The batter will be lumpy.
  • In a clean bowl, using an electric mixer on high speed, beat the egg whites until stiff, but not dry, peaks form. Using a spatula, fold about one-third of the egg whites into the batter to lighten it, then fold in the rest just until no white streaks remain.
  • Use the batter right away.

Ham, Cheese and Dijon Ebelskiver Ingredients:

  • 1 tbsp Dijon mustard
  • 1/2 finely diced ham
  • 1/2 cup old cheddar, shredded

Directions:

  • For the savoury Ebelskiver, whisk in the Dijon and then gently fold in the diced Ham and cheddar cheese, cook using your lovely ebelskiver pan.

Cinnamon Bun Ebelskiver Ingredients:

  • 2 tbsp brown sugar
  • 1 tsp unsalted butter, melted
  • 1 tsp cinnamon
  • 40 g chopped walnuts

Directions:

  • Mix the brown sugar, butter and cinnamon well. Fold in the walnuts into the basic ebelskiver batter, then drizzle in the brown sugar mix into the batter and fold gently. Since the batter is quite cold, it will seize the butter/sugar mixture allowing you to fold in the swirls. You don’t want to entirely incorporate the butter/sugar mixture, you want swirls throughout the batter. Continue until you have used up all of the mixture.

Ebelskiver cooking directions:

  1. Spray the ebelskiver pan with a good squirt of non-stick spray and place over medium heat. Add about 1/4 cup batter to each round as soon as the pan is quite hot. Maintain the heat at medium, you don’t want to burn the ebelskiver edges before the insides get a chance to cook.
  2. Cook until the bottoms of the pancakes are lightly browned and crisp, 3-5 minutes. Using a fork, lightly push the ebelskiver until it entirely turns around in the pan and the uncooked portion is now facing the bottom.
  3. Transfer the finished pancakes to a platter and keep warm in the oven while you repeat to finish the batter.
  4. Serving suggestions: dust the warm pancakes with the confectioners’ sugar and serve right away. Or serve with warmed maple syrup and fruit.

Read Full Post »

I thought I had my workout in the gym today. That’s what I thought when I got home and prepared to go for a walk around the hood and admire the changing leaves before they are all on the ground. I was wrong. As I went into the kitchen for a glass of water (the wine would come after the walk) I noticed the hardwood in front of our wine fridge was buckling a bit. No problem, I’ll just pull out the fridge and see what’s going on. I should have waited for JT to get home because clearly I was in the ‘blue job’ territory. But I just couldn’t help myself, I’m like that. I discovered that the fridge didn’t budge; oh no, it must be buckling under it and catching the little feet. Oh no. Now THIS is a challenge. Some brains and some brawn (and some good old fashioned Eastern European sweat) I managed to get the fridge out and the boards cut out (with my handy Dremel tool, which I use about once every four years). BRING ON THE DYI, I’m freakin’ READY! Tomorrow I’m ripping out tiles from the stairs and I’m cladding them in wood!

Fortunately, there was no water or even wetness below, so there is relief because if you’ve ever had a water leak, it’s almost impossible to figure out where it’s coming from. But now the question is, why did the boards buckle? Any suggestions would be greatly appreciated.

Doing manual labour like that inspires me to bake. Fortunately, my friend’s (boss, neighbour) daughter’s after school program is having a bake sale and since my friend (Kim) doesn’t bake much, I told her I would bake some cookies for the sale. I ended up making some old fashioned ginger snaps from my recipe from last Christmas, but then I saw a version Zsusza’s delightful cookie and was immediately drawn to it. I loved the way the cookie crackled on top. Well the kid got two batches for the bake sale (maybe a few were set aside!). I made a few alterations to the recipe, so please pop over to Zsuzsa’s blog to see the original recipe, I didn’t have nutmeg handy so I substituted allspice and I also added an extra teaspoon of dry ginger as well as a tablespoon of freshly grated ginger. It makes for a lovely warmly spiced cookie. And baking cookies is a hell of a lot easier than pulling a stuck wine fridge out of its spot.

They are soft and chewy on the inside

Old Fashioned Molasses Spice Cookies

Makes about 30-36 cookies (if you don’t sample the cookie dough)

Ingredients:

  • 2 cups flour
  • 1 Tbsp baking soda
  • 1 tsp cinnamon
  • 2 tsp dry ginger
  • 1 tbsp freshly grated ginger
  • 1 tsp allspice
  • 3/4 tsp salt
  • 3/4 cup shortening
  • 1 cup sugar
  • 1/4 cup molasses
  • 1 large egg

Directions:

  1. Preheat the oven to (175°C) 350° F.
  2. Line a baking sheet with parchment paper.
  3. In a medium bowl, combine the flour, baking soda, cinnamon, ginger, cloves and salt; set it aside.
  4. In the bowl of your mixer, beat the shortening and sugar until fluffy.
  5. Beat in the molasses, egg and the freshly grated ginger and beat on low speed until just combined.
  6. Stir in the flour mixture.
  7. Chill the dough for 30 minutes.
  8. Using a melon baller, form the dough into 19 g balls.
  9. Place the balls leaving at least 2 inches apart on the prepared baking sheet.
  10. Bake for 8 to 10 minutes (baking more will cause the cookies to be hard)
  11. The cookies will be very soft when you take them out of the oven but they will harden up as they cool, then transfer to a wire rack.

Read Full Post »

Hi everyone, a quick update. Our hydro was restored sometime in the middle of the second night but we had already booked into a hotel not far from home. There is something so depressing about darkness, pitch darkness — not being able to find things and tripping over things, plus we wanted a warm bed and a hot shower! (Even though the house is gas heated and we have an on demand hot water domestic and heating system, the pumps are electrically operated, so there was no heat nor hot water!) I guess we could have put the fireplace on and bundled up, but not being able to shower or even eat (didn’t want to open the fridge). My biggest fear was the chest freezer in the basement but fortunately we are in great shape, there were no signs of defrosting at all. The refrigerator freezer didn’t fare so well, nor did the fridge. I suspect that when the power went off, the compressor had a lot of residual heat in it that just dissipated up (as heat rises) into the freezer and the fridge. So we had to toss a lot of stuff. But I remind myself that we were lucky, much luckier than our poor brothers and sisters to the south and east. They’ve lost more than a few shrimp and scallops! Thanks for your kind word of encouragement, we’re all good now. Now back to regular programming.

Today was a rainy, windy and chilly day. In fact, it rained all day. So uninspiring but we needed dinner tonight and lunches for the next day, so back into the kitchen I went and prepared what turned out to be a real winner: Fall Split Pea Soup with Ham.

A hearty and flavourful soup for a chilly, rainy day

Fall Split Pea Soup with Ham

Serves 4-6

Ingredients:

  • 175 g finely chopped onion
  • 175 g cubed cooked ham
  • 50 g pancetta, cut into small slices
  • 20 g garlic, finely chopped
  • 1 tbsp cumin
  • 2 cups green and yellow split peas
  • 1/2 tsp smoked paprika
  • 5-8 cm (2-3″) cinnamon stick
  • 3 cups water
  • 4 cups low sodium chicken stock

Directions:

  1. In a pressure cooker cook the pancetta until crispy then add the onions and until translucent.
  2. Add the split peas and sautée for a minute.
  3. Add the garlic and cumin and sautée for about 30 more seconds (or until you can smell the aroma), add the ham, water and stock. Now add the paprika and cinnamon stick.
  4. Seal the cover and cook under pressure for 45 minutes or until the split peas have softened (I use a fairly low setting). You should check the water level twice during the process to make sure it hasn’t boiled down to nothing, stir. If the liquid is too reduced, add more.
  5. Serve with a dollop of low fat Greek yogurt and home made bread.

Read Full Post »

Last night I was running around the blog-o-sphere looking for something to do and I came across my friend Jed’s recipe for his Grandma’s Oatmeal Cookies on his blog (Sports Glutton). I love oatmeal cookies; maybe because you can almost convince yourself that they are healthy snacks (not even close! wink wink, Kelly). But what I do love about them is the bite of the rolled oats, the wonderful chewy texture and the warm spice of the cinnamon. I prefer traditional oatmeal cookies with just raisins (sometimes I put nuts in but I didn’t this time because JT was taking them into work on Saturday, and I figured it was just safer that way).
I want to thank Jed, that gluttonous-sports-loving-dude for inspiring me with his treasured recipe; sadly I didn’t have enough butter (WHAT?) in the house so I had to find a recipe that used slightly less butter and opted for my good old Fanny Farmer recipe, modified ever so slightly for our taste. I’m not sure why it’s called Cape Cod Oatmeal Cookies, perhaps one of my New England blog-friends can help with that. And if you love oatmeal cookies this is another great recipe, tipping my hat to my Australian friends (Charlie, Lorraine and Maureen)

Can you just taste that chewy oaty goodness?

Cape Cod Oatmeal Cookie

Makes 36 cookies, about 5cm (2.5″) in diametre (recipe has been adapted from the original Fanny Farmer Cape Cod Oatmeal Cookie, you can find it on-line, but it’s best to get her cookbook as there are several yummy treasures in it).

Ingredients:

  • 1 1/2 cups all purpose flour
  • 1/2 tsp baking soda
  • 2 tsp cinnamon (original recipe called for one but I like the heat)
  • 1/2 tsp salt
  • 1 cup brown sugar
  • 2 1/2 cups rolled oats, uncooked
  • 1/2 cup raisins, optional
  • 1 egg, lightly beaten
  • 1/2 cup melted unsalted butter
  • 1/2 cup melted shortening
  • 1 tbsp molasses
  • 1/4 cup milk

Directions:

  1. Preheat oven to 177°C (350°F) degrees.
  2. Combine flour, baking soda, cinnamon, sugar and salt together in your food processor (metal blades) and pulse to combine well.
  3. Pour dry ingredients into a bowl and add the raisins and rolled oats and mix well.
  4. Mix cooled melted butter, shortening, molasses and milk with the egg and whisk lightly to combine. Pour this mixture into the dry ingredients and stir with a wooden spoon until it is entirely incorporated.
  5. Drop by tablespoons-full* onto parchment lined cookie sheet and bake until bottoms are golden-brown, 10-15 minutes (depends on size of cookie).

*I used a 4cm, (1.5″) ice cream scoop, packed well, and then I flattened the cookie with my palm as they don’t spread much.

May I get you a coffee or tea with your cookies?

Read Full Post »

Now that I see it in writing, I must say that the name of this post might be misleading…but I like to be cheeky that way, so I didn’t change it. Oops! 😉

Nancy is a friend and a food stylist I have known through work for several years. She is an accomplished chef, restauranteur and recipe developer in addition to food stylist. Her professionalism and her great sense of humour make her an incredibly fun addition to any studio. And she makes great Cinnamon Sticky Buns. I begged and begged for the recipe last year and she relented. It is a doozy, so you best only make them if you plan to be really active or have a house full of people to share them with. They might have a few calories, but we won’t talk about that!

Nancy’s Incredible Cinnamon Sticky Buns

Makes 12 medium muffin sized buns (I did not alter this recipe, other than omitting the raisins because they were too dry)

Ingredients:

1. In a big bowl, combine:

  • 1/2 cup 2% milk
  • 2 tsp instant or quick rising yeast
  • 2 tbsp sugar
  • 1 egg

2. Add to this wet mixture, all at once, using a wooden spoon and mix only until just combined:

  • 2 cups all purpose flour
  • 1/2 tsp salt
  • 1/4 tsp nutmeg

3. Then add butter, until just combined:

  • 1/4 cup unsalted butter
  • Turn this dough into a lightly-oiled bowl and cover with a tea towel.
  • Let rise for 2 hours.

4. In the meantime, make the following flavour mixture:

  • 1/3 cup soft, unsalted butter
  • 2/3 cup light brown sugar
  • 1/3 cup pure maple syrup
  • 1 tbsp ground cinnamon
  • Spread 1/2 of this mixture into the bottom of 12 muffin tins, butter the side (or spray with non-stick spray)

5. Roll out dough on a lightly-floured surface into a 10″ x 20″ rectangle. Spread evenly with the remaining cinnamon/butter mixture and sprinkle with:

  • 2/3 cup walnut pieces

6. Roll up from the 20″ side and cut into 12 pieces. Place them in the individual muffin tins, cover with a tea towel and let rise for 30 minutes. Bake in a 350ºR oven for 30 minutes, allow to cool slightly and turn out onto parchment paper.

7. Serve warm, and then get on the treadmill for three days!

Read Full Post »

I’m always intrigued as to what draws a person to a recipe. It’s so personal and subjective, yet the food made from the recipe tantalizes taste buds whether you chose the recipe or not. Friday night JT wanted to make mussels, but we were a tad tired of the same old white wine sauce and we had just had a green curry so that was out. He scoured the net and was drawn to a Moroccan style mussel which included chick peas. Now I am trying to cut carbs down considerably (that’s actually JT’s bread he snuck onto my plate for the photo) and when I read the recipe I was immediately drawn to the chick peas…would they be satisfying enough that I wouldn’t need bread? That was the question.

When I first announced that we had planned a trip to Morocco, Greg at Rufus’ Food and Spirits Guide kindly emailed me a link to an article that discussed the merits of  traditional Moroccan cuisine in comparison to Modern Moroccan cuisine and we were so intrigued that we bought the cookbook. It’s been sitting on my kitchen desk and when I have any moment, I page through the lovely photos. Sadly, the recipes are very complex, often involving mixes of pastes and such that I do not have ready (a traditional Moroccan household would) so I have been unable to find something easy enough to make. Fast forward to Friday night: JT scouring the net for a recipe for mussels. He finds one on Epicurious. We have all the ingredients at home and it sounds like it would be fantastic. The spices were definitely a tip of a hat to Morocco.

HEY! Who snuck that piece of bread in my shot?

Moroccan Style Mussels with Chick Peas

Original recipe is from Epicurious, JT modified his version, of course

Ingredients:

  • 1/2 medium onion, coarsely chopped (1/2 cup)
  • 1 garlic clove, finely minced
  • 3/4 tsp ground cumin
  • 1/2 tsp paprika (preferably hot)
  • 1/2 tsp ground ginger
  • 1/4 tsp ground cinnamon
  • pinch cayenne
  • 1 1/2 tbsp olive oil
  • 1/2 tbsp cider vinegar
  • 1/2 (15- to 19-oz) can chickpeas, rinsed and drained
  • 1 tsp sugar
  • 1/2 cup halved grape tomatoes
  • 1 1/2 lb cultivated mussels, scrubbed and beards removed
  • 1/2 cup raisins
  • 1/3 cup low sodium chicken stock

Directions:

  1. Cook onion, garlic, and spices in oil in a 5- to 6-quart heavy pot over moderately low heat, stirring, until onion is softened, about 6 minutes.
  2. Stir in vinegar and simmer 1 minute.
  3. Add chickpeas, sugar, tomatoes, raisins and chicken stock and increase heat to moderate and gently simmer, uncovered, stirring occasionally, until slightly thickened, about 15 minutes.
  4. Add mussels and return to a simmer. Cover tightly with lid and cook until mussels just open wide, 3 to 6 minutes. (Discard any mussels that remain unopened after 6 minutes.)
  5. Serve Immediately.

The verdict? A M A Z  I N G! I not only did not NEED the bread, I did not WANT it. The chick peas were satisfying and filling AND the broth? What can I say, pass that spoon over please. This is going to make repeated appearances in our house, for sure!

Read Full Post »