Feeds:
Posts
Comments

Archive for the ‘Slow Cooker’ Category

We had dear friends come up from America to stay with us as a layover to help mitigate a long, long travel day and I needed a quick and easy breakfast that we could grab before heading out for a busy day and these did the trick. They freeze well which makes them perfect for a quick grab-and-go snack, just pop them into a microwave and zap them until defrosted and slightly warmed.

They freeze well and defrost quickly in the microwave.

Apple Cranberry Bran Muffins

A Kitcheninspirations Original Recipe. Makes 12 good-sized muffins.

Ingredients:

  • 150 mL 2% milk
  • 400 g peeled and shredded apple (about 3 apples)
  • 100 g bran buds
  • 50 g cranberries, roughly chopped and rehydrated in hot water for 10 minutes
  • 3 eggs, beaten
  • 70 g plain Greek yogurt
  • 300 g All Purpose Flour
  • 60 g brown sugar
  • 15 g baking powder
  • 2 g salt
  • 5 g cinnamon
  • 60 g walnuts, chopped

Directions:

  1. Preheat oven to 375° F (190° C). Brush the muffin cups generously with the Secret Release Formula (see notes). Set aside.
  2. Combine the milk, eggs and yogurt and mix well. Layer this liquid with the bran buds, apple and cranberries making sure bran buds are covered in the wet ingredients, and set aside for 20 minutes. In another bowl, combine flour, brown sugar, baking powder, salt, cinnamon and walnuts and set aside.
  3. Stir the bran bud mixture well after 20 minutes of soaking. Fold the flour mixture into the bran bud mixture until just combined.
  4. Divide batter into 12 muffin cups evenly and bake for 20-25 minutes or until toothpick comes clean.

The apples give them the moisture that oil normally does in muffin recipes.

Notes:

  • Secret Release Formula: 3 mL unflavoured oil, 15 g vegetable shortening and 15 g flour. Mix well and brush baking tin generously.
  • I will try a recipe without the brown sugar next time but it only adds 19 calories and 5 g carb


Read Full Post »

This recipe made its first appearance on the blog in 2012. I thought it was time for an update.

This is a surprising recipe that uses pork tenderloin instead of pork shoulder which is the traditional cut for pulled pork. The tenderloin is significantly less fatty than the shoulder so it makes a healthier dish. I’ve reduced the sugar considerably in the Barbeque sauce which is traditionally made with ketchup (about 90% sugar) and includes 110 g of brown sugar; I’ve used passata with a dash of balsamic and only 45 g of sugar. It’s still sweet but not sickly sweet. The baking soda helps reduce the acidity in the passata which in turn makes the tomato sauce taste sweeter. It was well balanced. JT couldn’t stop eating it. I’ve served this dish at parties and die-hard pulled pork aficionados couldn’t tell it was tenderloin!

This is the pork pulled after I removed it from the sauce. It moistens up considerably after it is re-entered into the sauce.

Ingredients for the Barbeque Sauce:

  • 250 mL San Marzano passata
  • 60 mL balsamic vinegar
  • 45 g erythritol or sugar
  • 125 g finely chopped onion
  • 15 mL soy sauce
  • 15 mL Worcestershire sauce
  • 15 mL prepared mustard
  • 15 mL roasted puréed garlic
  • 8 g espresso coffee powder
  • 2.5 mL baking soda

Pulled Pork Ingredients:

  • 600 g pork loin or tenderloin with silver skin and excess fat removed and cut into manageable chunks.
  • 1-2 tbsp canola oil (or an oil with a high flash point)
  • About 350 mL BBQ sauce from above
  • 1 cup water

Directions:

  1. Sear the pork on all sides in a heavy cast iron pan. Add the pork to the slow cooker set on high.
  2. In the same cast iron pan with a splash of oil, caramelize the onions. Add the remaining BBQ sauce ingredients with the exception of the baking soda and cook until the sugar has melted and everything is hot. Add the water and mix well, then add the baking soda and stir until the fizzing has subsided.
  3. Add the sauce and water to the slow cooker and set the timer for 1 hour, then reduce the temperature to low and cook, stirring occasionally for 6 hours or until pork can be pulled apart with a fork.
  4. Remove the pork from the sauce and allow to rest for 10-15 minutes. Pull the pork apart with a fork.
  5. Serve on slider buns, topped with your favourite coleslaw.

We had the pulled pork on homemade tangzhong brioche buns that were slightly toasted and topped with a lovely vinegary coleslaw. It was pretty good even though the lighting sucked.

Read Full Post »

I have been meaning to create a recipe for a vegetarian Bolognese sauce forever, not because we’re vegetarians but because it’s good to mix it up with a vegetarian meal every so often. JT always asks me what’s for dinner with bated breath so he could look forward to it; when he asked about that day, he looked slightly disappointed. He actually said he was lowering his expectations so he wouldn’t be disappointed because he adores Bolognese and couldn’t imagine a mushroom version would/could be better. Boy was he wrong! Dinner was pretty silent that night, mostly because he couldn’t shovel the food in fast enough! After he finished he said that it was significantly better than he thought it would be. That’s one for the good guys.

If you’re vegetarian or vegan and you’ve been missing the rich, flavourful meaty bolognese, this recipe is for you. The mouth-feel is similar, particularly if you don’t pulverize the mushrooms and walnuts too much. But it’s the slow and low cooking that brings out all of the flavours.

Mushroom Bolognese

Serves 2 generously

Ingredients:

  • 30 mL EVOO
  • 1/2 carrot, finely diced
  • 1/2 celery rib, finely diced
  • 1/2 shallot, finely diced
  • 1 large portobello mushroom cap, finely chopped
  • 2 white mushrooms, finely chopped
  • 50 g walnuts, chopped
  • 125 mL milk or cream
  • 125 mL white wine
  • 10 mL puréed roasted garlic
  • 250 mL passata of San Marzano tomatoes
  • 15 mL tomato paste
  • 15 mL Hungarian Sweet Paprika Paste
  • Pinch of baking soda (see notes)
  • Pinch of sweet smoked paprika
  • Sea salt to taste
  • Pepper to taste
  • Parmigiana

Directions:

  1. Heat the oil in a small, enamel skillet. Add the carrots, celery and shallot and cook until semi-soft.
  2. Add the mushrooms and walnuts and cook until most of the mushroom liquid has evaporated. Add the milk or cream and cook until it has evaporated. Do the same with the wine.
  3. Add the remaining ingredients and stir until well combined. Season with salt and pepper to taste.
  4. Pour into a slow cooker or crockpot and set to high and cook for 2-3 hours.
  5. Serve on al dente (homemade) pasta of choice garnished with freshly grated parmigiana.

Notes:

  • I used portobello and white mushrooms because that is what I had on hand, a mixture of wild mushrooms would be delicious too.
  • Baking soda chemically changes the PH of things, tomatoes become much less acidic (I even throw a pinch into my coffee, it literally changes coffee from acidic to alkaline!), I prefer to use baking soda than to add sugar, which many do.
  • I used a slow cooker because our stove is gas and I prefer not to have an open flame on for a few hours. If you don’t care or have an electric stove, feel free to simmer in the same pot on the stove but do simmer.
  • I’m not sure how non-dairy milk will flavour the dish so if you’re vegan, omit the milk or cream.
  • I used walnuts because I like their meaty texture and earthy flavour, pecans would be a good alternative.
  • I whipped together the pasta using 1 egg and as much flour that it can absorb, then I ran it through the Kitchenaid pasta maker from 1 to 7. Then I hand cut the pasta into irregular widths and lengths. The fresh pasta is really worth the effort, it’s so much lighter than store-bought dry pasta.

Read Full Post »

Everyone has busy days, the type of days that you’re too busy to cook and the easy thing to do would be to order in or throw some unhealthy grocery-store frozen dinner into the microwave and be done with it. We’ve all done it and what happens is interesting: you don’t eat for the love of food, you just eat and because it’s fast and easy. But then, it never hits those emotional triggers so we end up feeling awful and regretting our choice. There is nothing I hate more (other than the obvious crap going on in our world) than regretting calories. Fret not dear friends, I have the perfect solution with this slow cooker lasagna, and you need not make enough for an army because this handy hack will have you getting that slow cooker out more often!

This is the one slow cooker hack you’ve been waiting for: Line your slow cooker with a silicon mat and lay your smaller, heat-resistant dish on top of it. Presto, a custom-sized slow cooker.

The Silpat protects the ceramic slow cooker from the metal of the loaf pan.

I made this awesome Lentilles du Puy lasagna this way. I won’t lie, there is some prep work with this dish, but a little pre-planning on the weekend will make it a breeze on that busy weeknight. The recipe was inspired by my LA friend, Greg of Sippity Sup, he had made an incredible Swiss Chard Lasagne with Bechamel that literally had me licking my lips during the entire read through! He used one of my favourite ingredients: béchamel sauce!

Creamy béchamel with eggplant and roasted red peppers just melt in your mouth.

Slow Cooker Lasagna with Eggplant, Roasted Red Pepper and Lentilles du Puy

Recipe inspired by Greg’s Swiss Chard Lasagna

Makes one 12 cm x 22 cm x 10 cm loaf pan, serves 4 to 6

Ingredients:

  • 60 g Lentils du Puys, cooked
  • 100 g onions, chopped
  • 10 g Ice® Mama Mia garlic, finely chopped (see notes)
  • Salt to taste
  • 1 tsp oregano
  • 1 tsp basil
  • 400 mL San Marzano tomatoes, crushed
  • 250 mL béchamel sauce with a pinch of nutmeg (see notes)
  • 4 gluten-free, oven-ready lasagna noodles (I used this brand)
  • 1 Chinese eggplant, sliced into 0.5 cm thickness (about 6 slices)
  • 176 g roasted red peppers (about 6 small roasted red peppers)
  • 150 g Mozzarella cheese, grated

Directions:

  1. In a splash of olive oil, sauté the onions until translucent. Add the garlic and sauté until fragrant. Add the oregano and basil and stir well.  Add the San Marzano tomatoes and cooked lentils, stir well and allow to cool to room temperature. This makes around 500 mL.
  2. Prepare a 12 cm x 22 cm x 10 cm loaf pan with non-stick spray. Spread a couple of spoonfuls of the lentil tomato mixture on the bottom of the prepared pan.
  3. Lay 1 and 1/3 noodles over the lentil-tomato mixture (covering the entire pan area). Top with 1/3 of the lentil-tomato mixture spread evenly over the noodles, then a single layer of 2 roasted red peppers, then lay two slices of the eggplant over the peppers. Top with béchamel and about 1/3 of the cheese. Repeat until everything is layered, making sure you top with the grated cheese.
  4. Lay a silicon mat (like Silpat)  into the slow cooker and place the loaf pan onto it, in the centre (see notes). Cover and turn the slow cooker on high for 3-4 hours or until noodles have cooked through. Relax.
  5. When the noodles have cooked through, pre-heat the broiler in the oven and broil the lasagna on high until cheese is bubbly and caramelized. Serve hot with simply dressed greens.

A nice bubbly, caramelized cheese topping!

Notes:

  • You may have seen me searching for softneck garlic sometime late last year. It was, of course, the wrong time of year for farmer’s market garlic, but that didn’t stop me from trying my best to hunt it down. During this process, a friend on Facebook mentioned Beneli Farms, a Manitoba, 5th generation farming family specializing in garlic for the last 15 years. I reached out to them and they were very quick in getting back to me and eager to help but sadly they were not able to courier me softneck garlic in time, but they did courier a large selection of their specialty garlic! I use garlic a lot but I am still going through my generous stash. For this dish I chose their Mama Mia™ Ice® Garlic for its smooth flavour. It was definitely the right choice as it did not overpower the dish, just provided a smooth, delicate garlic flavour in the tomato sauce. Thank you Garth and Miranda.
  • To make gluten-free béchamel sauce, simply substitute a good gluten-free flour with the all-purpose flour. Don’t forget the pinch of nutmeg.
  • The Silpat mat simply protects the ceramic bowl of the slow cooker from the the metal loaf pan.
  • The Gluten-free noodles I’ve used in this recipe stand up a bit better than regular oven-ready noodles and maintain a good texture in this dish. The liquid proportion I’ve indicated is perfect for cooking the noodles without destroying them, i.e., they still have bite.
  • Leftovers may be frozen for future quick meals, but don’t count on it!

Read Full Post »

I have had a bum shoulder for the longest time. I’m seeing a chiropractor and she does acupuncture and some massage techniques which have been quite successful but I thought I’d help it along by adding some turmeric to my routine because it is widely known as an anti-inflammatory. We had a couple of days with back to back dishes with turmeric and it seems to have helped. Although it isn’t nearly as cold out as it was in December and early January, it is still winter in these parts and soup is definitely at the top of my list of cravings.

Slow Cooker Lentil Tomato Soup with Turmeric

A KitchenInspirations Original Recipe

Makes 750 mL of soup

To print recipe, please click here.

Ingredients:

  • 100 g onions, roughly chopped
  • 20 g roasted garlic (about 3 large cloves)
  • 60 g red lentils
  • 350 mL vegetable stock
  • 200 g tomatoes
  • 10 g turmeric
  • 5 g sea salt
  • 3 kaffir lime leaves
  • 250 mL Coconut Milk

Directions:

  1. Combine everything but the coconut milk in the bowl of a small slow cooker and cook (mine only has one temperature) for 4 hours.
  2. Purée to a smooth creamy velvety soup, adding the coconut milk slowly. Press through a fine sieve. Reheat if necessary. Serve hot with a drizzle of olive oil, chili oil or toasted coconut.


It is a smooth and velvety soup.

Notes:

  • Because I blitzed the kaffir lime leaves into the soup, it is imperative to press the soup through a fine sieve to catch the hard bits. It will also result in a velvety smooth, creamy soup.
  • The coconut milk adds a bit of sweetness to the soup, but doesn’t make it sweet.
  • The lentils add creamy texture and protein.

Read Full Post »

I wish you all the Merriest Christmas and the Happiest New Year! Thank you for your continued support, you have all made this blogging experience so much richer than I ever could have imagined, thank you.

Our neighbourhood progressive dinner party was scheduled for the Saturday after we returned home from Arizona; I didn’t think it would be a problem since we were responsible for hors d’œuvres and appetizers. Had I read more than the heading of the email from the organizers (the main course couple), I would have realized that things were to get a bit more complicated since one person decided to go vegetarian and dairy free (for health reasons). I love a challenge but I would have liked to experiment a bit more, notwithstanding, it turned out delicious so I documented the recipe for the future. Like most recipes, this tastes better the day after it is made!

South Western Bean Soup

A KitchenInspirations Original Recipe

Serves 6-8 depending on serving size

To print recipe, please click here.

Ingredients:

  • 40 g black beans, soaked overnight
  • 160 g navy beans, soaked overnight
  • 100 g kidney beans, soaked overnight
  • 200 g sweet onion, finely chopped
  • 15 mL olive oil
  • 5 g toasted cumin
  • 2 g toasted coriander
  • pinch of chili powder, or to taste
  • 5 g smoked paprika, or to taste
  • 7 g cocoa powder
  • 10 g garlic, finely minced
  • 40 g tomato paste
  • 2 g puréed chipotle peppers
  • 750 mL vegetable stock
  • 250 mL passata
  • 165 g grilled corn, removed from cob
  • cilantro to garnish
  • sour cream or Greek yogurt to garnish
  • grated cheese to garnish
  • 125 mL creamed lentils (see notes)
  • 1 large avocado, cubed to garnish

Directions:

  1. Caramelize chopped onions in the olive oil. In the meantime, add the vegetable stock, passata, beans to the warm crock pot and put on high for 5 hours.
  2. Add the onions, all of the spices, tomato paste, and enchilada sauce and stir well. Cover and cook for 5 hours.
  3. When the beans are soft, add the creamed lentils and stir into the soup so it is consistent and creamy. Add the grilled corn kernels, and cook for an additional 30 minutes on high, stirring occasionally.
  4. Serve in warmed bowls and top with avocado, a spoonful of Greek yogurt, cilantro, and cheese. Serve immediately with Cornbread.

Notes:

  • I use lentils as a thickener particularly when I make gluten-free recipes. Simply cook lentils until soft and purée with a stick blender until smooth. Freeze the excess in an ice-cube tray and when frozen, pop into a zip lock bag.
  • I buy chipotle peppers in a can, purée and freeze the excess in an ice-cube tray and when frozen, pop into a zip lock bag, same goes for tomato paste.

Read Full Post »

The chef at our favourite French Bistro has left and his long-time sous chef has taken over. In general, the menu changes to suit the new chef but, because this is a traditional French Bistro, very few of the menu items changed. Sadly, one item that did change was the serving of the braised short rib, one of JT’s favourites. Instead of blue cheese risotto, the chef serves it with greens and pommes fourchette (literally, forked potatoes) and it’s not quite the same. When I mentioned that I was going to make short ribs, JT specifically asked me to make the blue cheese risotto. This dish is extremely rich, so I suggested that I make it with cauliflower rice instead of real rice and JT agreed. The meat is cooked on low for a long time but that is what makes it so delicious, so don’t fast forward and use high, low and slow is the way to go. Also, cut the carrots into good sized chunks so that they don’t disintegrate during the cooking process, my carrots still had great texture at the end.

Sherry Braised Short Rib with Cauliflower Blue Cheese Risotto

A KitchenInspirations Original Recipe

Please click here to print this recipe.

Serves 2-3

Ingredients:

  • 500 mL beef short ribs
  • 200 g onions, finely chopped
  • 125 mL beef stock
  • 125 mL cooking sherry (or red wine)
  • 15 mL (1 tbsp) tomato paste
  • 200 g (1 medium) carrot, cut into one-bite chunks
  • 120 g (1 stalk) celery, finely chopped
  • 20 g (3 cloves) garlic, finely minced
  • 3 sprigs fresh thyme
  • 1 bay leaf
  • Salt and Pepper to taste
  • 10 g (1 tbsp) corn starch, dissolved in a small amount of cold water


Directions:

  1. Season short ribs with salt and pepper.
  2. Brown the short ribs in small batches in a cast iron pan, transfer to a pre-warmed slow cooker.
  3. Add onions to the hot cast iron pan and cook until translucent, add celery and garlic and cook until garlic becomes aromatic. Add the carrots and cook for about a minute. Transfer to the slow cooker.
  4. Combine the stock, sherry, tomato paste and mix well, use to deglaze the cast iron pan, turn the heat off. Add the cornstarch that has been dissolved in a small amount of water and stir well into the deglazing liquid. Pour the liquid over the meat and carrots in the slow cooker. Stir well.
  5. Lay the fresh thyme and bay leaf into the slow cooker and cover with braising liquid. Cook the ribs for 5-6 hours, covered on low or until meat comes cleanly off the bone. Remove thyme sprigs and bay leaf.
  6. Serve on top of a bed of cauliflower blue cheese risotto (I didn’t jot down the recipe, but this one would be delicious).


Notes:

  • Always brown meat in small batches, otherwise you’ll end up steaming them instead of browning.
  • I sprinkled the seasoned ribs with Mycryo and got a gorgeous sear.
  • My sauce turned out to be the perfect consistency, not soupy at all.

Read Full Post »

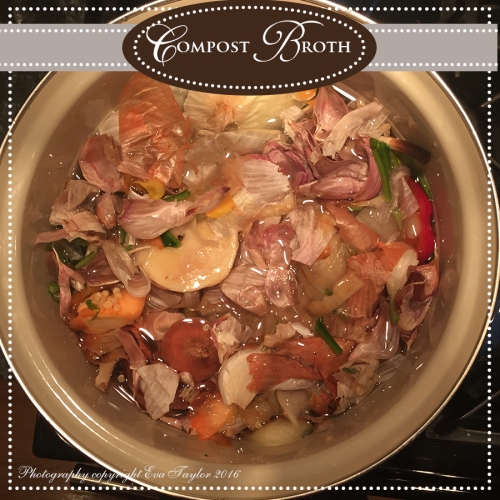
CompostBroth_first

Warning, night photos with very bad lighting!

Many years ago, a woman from Florida started commenting regularly on my blog. Of course, I began reciprocating on her blog (which was the point, I guess) and I discovered that the more blogs I commented on, the more comments my blog would garner. That can get old really fast. I nick-named the task ‘comment whoring’. These days, I only comment on a select few blogs, many of them I have actually met the author in person and have a non-blog relationship. It’s not that I don’t like lots of comments (it makes me feel very popular, unlike real life), but I’d rather have a few of real value than a bunch of “yum!”. I’d love to hear what you think. I like to leave value comments too, you may have noticed that they can be a bit wordy! 😉

That woman from Florida was a Military wife and she knew how to make a dollar stretch. One of her posts was about a vegetable stock made entirely from vegetable trimmings. At first, I thought it was strange (OK, and a bit gross) but a really good friend recently mentioned she does the same thing, so I decided to give it a try. I am proud to say that I am now totally a convert. The stocks are always richly flavoured and a beautiful colour due to the onion skins. Onion skin broth is supposed to be a natural blood pressure remedy, although I have no idea how much you need to have for it to work! I keep a ziplock bag in my freezer and not one Veggy trim goes in the bin, it all goes into the freezer bag and once I have filled the bag, I take out my broth pot and fill it with water and simmer with all the trimmings for 3 hours, give or take. At the end, I turn the gas off and allow it to cool off. I strain the liquid 2-3 times, having the final strain through a metal, fine coffee filter (not the paper kind, they bung up too quickly). The straining allows you to capture any bits of dirt and gunge that may have gotten in the stock. The stock is delicious on its own or used in recipes. No two broths are alike. I encourage you to give this a go, there are no rules other than washing your trimmings well or just buy organic (although, I’d still wash well). And as usual, I don’t salt until I use it because everything requires different seasonings.


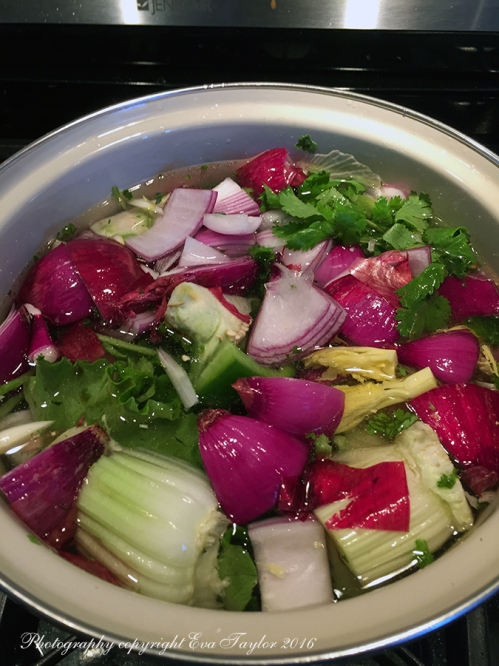
CompostBroth

This pot was comprised of some leftover shoot veggies and lettuces.


Read Full Post »

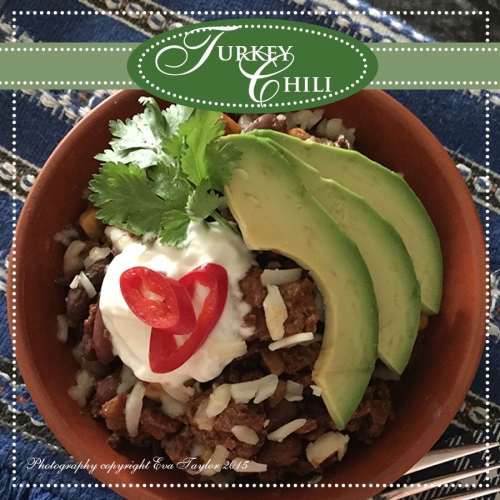
TurkeyChiliFirst

JapaneseCherryBlossoms

The Japanese Sakura Cherry Blossoms in High Park

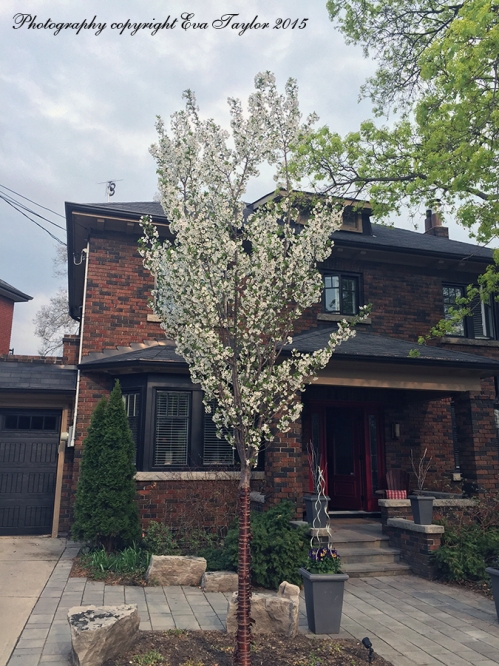
CherryBlossomTree

Our Cherry Blossom tree in the front yard

Cinco de Mayo Inspired Turkey Chili

A Kitcheninspirations Original Recipe

Serves 8-10

Ingredients:

  • 1 cup dried red kidney beans, soaked overnight in water
  • 250 g sweet onions, chopped
  • 25 g garlic, finely chopped
  • 300 mL tomato sauce
  • 2 tbsp tomato paste
  • 500 mL water and or chicken stock
  • 900 g ground turkey breast
  • 1 1/2 tbsp cumin
  • 1 tbsp coriander
  • 1/2 tsp smoked paprika
  • 1/2 tsp chili
  • 1/2 tsp sea salt
  • 5 g dried ancho chili (seeds and veins removed)
  • 1 tbsp unsweetened cocoa
  • 30 mL tequila (a nice smokey one)

Garnish:

  • 1 ripe avocado, sliced thinly
  • 10 tbsp Greek Yogurt (approx 150 mL)
  • 10 tbsp mozzarella cheese
  • handful of Cilantro, or to taste
  • 3-4 Green onions, finely chopped
  • 1 red chili pepper, finely sliced

Directions:

  1. Pre-heat slow cooker on high. Rinse beans and add to the slow cooker along with the onions, garlic, tomato sauce, tomato paste and the water and/or stock and give it a good stir.
  2. Brown the turkey meat in a very hot cast iron pan in batches. Add the browned turkey and juices into the slow cooker in batches. Once you have browned all of the turkey, remove the pan from the heat and deglaze the pan with the tequila, scraping off all the delicious turkey bits from the pan. Add this liquid into the slow cooker.
  3. Give the chili a good stir. Cook on high for 4-5 hours or until the beans are fork tender. If the chili is too liquidy, then remove the lid for the final hour of cooking.
  4. Serve hot garnished with sliced avocado, a tablespoon of yogurt or sour cream, cilantro, chopped green onion, shredded mozzarella cheese and finely sliced peppers.
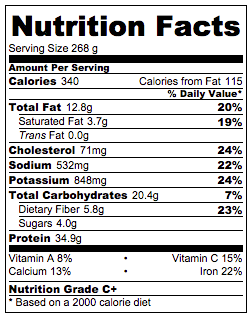
Based ib 10 Servings

Based on 10 Servings

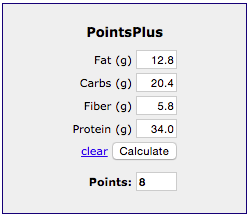
It's heavy on the points but high on flavour.

It’s heavy on the points but high on flavour.

TurkeyChili

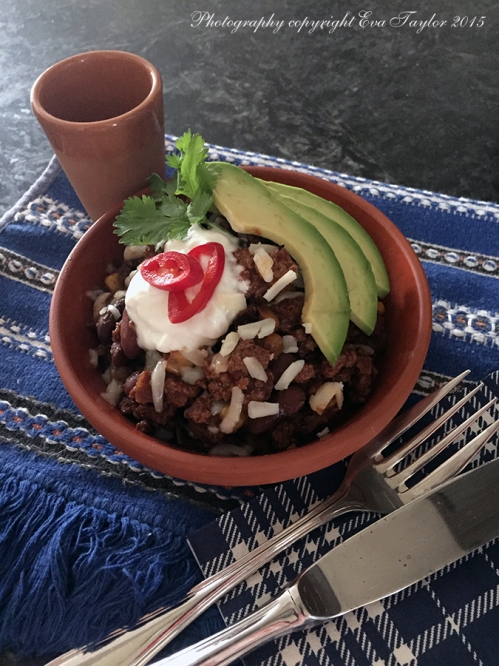
A delicious Mexican Flavoured Chili

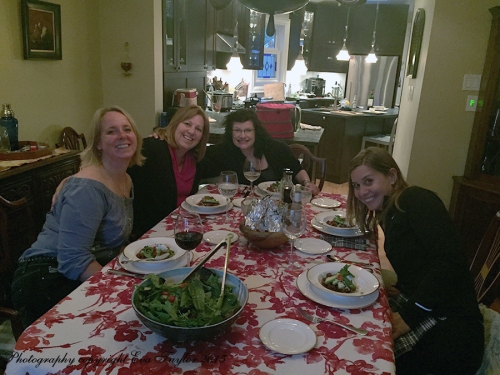
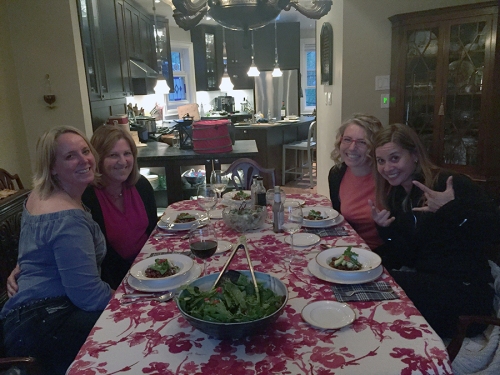
Ladies Night May 2015

Ladies Night May 2015

LadiesNight2

I should have set up the tri-pod for an all in shot.


Read Full Post »