Feeds:
Posts
Comments

Archive for October, 2015

Sourdough_First

I was over the top when Celia from Fig Jam and Lime Cordial offered to send me a piece of Priscilla her sourdough starter. I was worried too…what if Canada Customs opens the small envelope to discover some weird flaky powder? Would I be arrested? Would it be confiscated? Yes, I was wringing my hands with worry for the entire 12 days poor old Bob travelled to us. 12 days for almost 16,000 kilometres! That’s amazing, isn’t it? It often takes Canada Post 12 days to get mail to me from downtown Toronto, a mere 9 km away! But that’s a whole other rant. 😉

This is Bob's chariot, carrying him 16,000 km.

This is Bob’s chariot, carrying him 16,000 km.

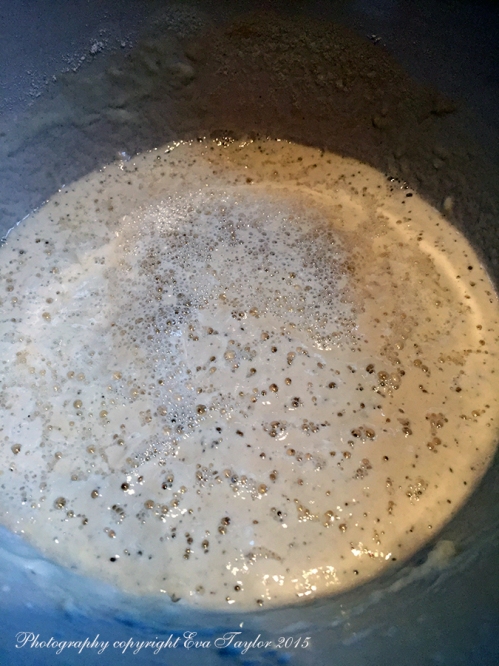
Yes, we named him Bob because we thought it was funny, Bob the starter! Good old Bob came back to life quite nicely and quickly, just as the lovely Celia’s instructions said he would. I chose a King Arthur Sourdough Bread Recipe because I was unable to find 00 bread flour so I needed an All Purpose Flour Recipe. Bob made a very nice first loaf and the remainder of Bob was dried and put into an airtight jar for safekeeping. I’m hoping Bob will provide many loaves for us in the future.

ItsAlive

Meet Bob, he’s ALIVE!

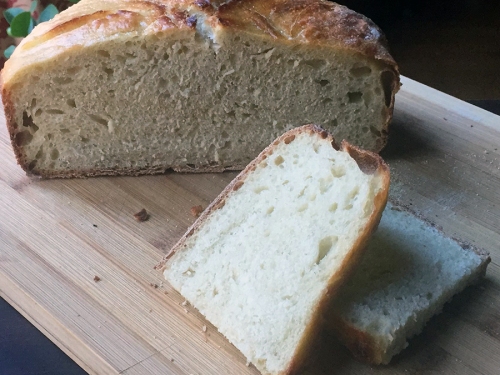
Now I have to come clean, I wasn’t feeling the greatest when I made this recipe, in fact it was my first time out of bed over the last two days (weekend days, no less; nothing serious, just a silly head cold, but they always get me in my sinuses and therefore affects my train of thought). For some reason, I completely skipped over the instant yeast, didn’t even see it! Can you believe it? I usually forget the salt!!!! Don’t you just hate it when that happens? I wondered if something was amiss when the bread didn’t rise as much as I thought it should…but I persevered and son of Bob went into the oven in a dutch oven (hedging my bets) and baked as per directions. Not bad for the mistake and first try. Thank you Celia, I am so grateful you sent me the son of Priscilla!
SonofBobBread

Bob the starter makes a nice, chewy, slightly tangy bread. Bob’s definitely a keeper, thank you Celia

King Arthur Sourdough Bread with a special starter from Australia

Makes 1 very large boulle

Ingredients:

  • 227 g “fed” sourdough starter
  • 340 g cups lukewarm water
  • 2 teaspoons instant yeast (don’t forget this step, nudge nudge, wink wink)
  • 1 tablespoon sugar
  • 2 1/2 teaspoons salt
  • 602 g Unbleached All-Purpose Flour

Directions:

  1. Combine all of the ingredients (including the instant yeast) and knead until you get a relatively smooth but loose dough.
  2. Place in a lightly greased bowl and allow to rise several hours (or until double in size). I did a few risings for obvious reasons! Shape the dough into a smooth boule.
  3. Slightly warm a cast iron dutch oven (make sure the handle can take the heat) and dust with fine cornmeal. Allow the boule to rise in the dutch oven for one hour.
  4. Pre heat the oven to 425° F (218° C). Bake the boule with the lid on for approximately 30-35 minutes, remove the top and bake a further 5-8 minutes or until the boule is golden in colour (internal temperature should be about 190° F (88° C).

Notes:

  • Sourdough bread dough is much looser than normal bread dough so expect a shaggy result after the first kneading.
  • We don’t eat that much bread (to keep the tonnage in check) so I didn’t think I would use Bob quickly, therefore I decided to dry Bob out in the oven with only the light on. He will wait for us whenever we need him in an air-tight container in a dark spot in my pantry.
  • I’ve read recipes on-line where they add butter to the dough but most implied it’s not for amateurs so I will try it next time (hopefully I don’t forget the yeast next time!).
  • Sadly, Bob came to an unfortunate end this morning when someone turned on the oven while Bob was drying out in it. RIP Bob.
Read Full Post »

CoconutPumpkinSoup_first

Sorry guys, I’m a day late with this post…it’s been a little busy!

It’s definitely fall up here in the big smoke; the weather went from 25°-30° C (77°-86° F) to 5°-10° C (41°-50° F). That’s chilly. Mind you, it would help if I started wearing socks in my shoes, I just can’t bear that claustrophobic feeling my tootsies get all confined in socks/shoes/boots. How about you, do you dread confining your dogs in socks and shoes?

This soup came about because I bought a couple of smallish pie pumpkins for social media; I actually carved a client’s logo into one of the pumpkins! It turned out really well and I had an entire pie pumpkin left over. Then I got two more social media clients (bittersweet, story to come) who sells Caribbean food and sauces so I was dying to try their organic coconut milk! I checked my dear friend Lorraine’s blog for an easy pumpkin roasting technique and a delicious starter was born for thanksgiving dinner. This soup would be lovely with butternut squash if pumpkins aren’t in season. I suggest smallish portions (125 mL or 1/2 c) because it’s quite rich.

Coconut Pumpkin Soup

Makes about 875 mL (3.5 cups) depending on how thick you wish to have it.

Ingredients:

  • 1 small pumpkin, oven roasted
  • 1/2 onion, oven roasted
  • 2 cloves garlic, oven roasted
  • 2 tbsp coconut oil
  • 2 cups vegetable stock
  • 3/4 c coconut milk
  • 1/2 banana
  • 1/2 tsp curry powder
  • 1/4 tsp ginger
  • Pinch of nutmeg

Directions:

  1. Pre heat oven to 350° F (177° C). Prepare pumpkin as Lorraine does in this post. Lightly coat onions and garlic with the coconut oil. Roast until soft.
  2. When Pumpkin is cooked through, onions and garlic are soft, add pumpkin flesh, onions and garlic to a blender contain with the vegetable stock, coconut milk, banana, curry powder, ginger and a pinch of nutmeg. Pulse blender until completely smooth. Set aside.
  3. Minutes prior to serving, re heat soup and pulse in blender once more to ‘lighten’. Serve immediately.
CoconutPumpkinSoup_7011

The banana adds a very subtle flavour, try not to overdo it as it will overpower the soup.

Notes:

  • Sadly cottage season is over and we’ve closed it down.
  • The banana is an interesting undertone, omit if you don’t care for bananas.
  • To have a lighter soup, don’t use full fat coconut milk or reduce the amount and replace the difference with skim milk.
  • A seared scallop would be a wonderful garnish in this decadent soup.

Read Full Post »

garbonzo flour twigs,

Happy Thanksgiving to all my Canadian readers!

I am my Mother’s daughter; case in point, Mom was famous for bringing unusual food items into our home. Often we would stand around whatever ‘it’ was wondering what on earth we were expected to do with ‘it’, definitely not eat it! But yes, we were obliged to try it and sometimes it worked out very well (kiwi in the early 70’s (see notes) for example became a fast favourite and sometimes it did not. Lychee fruit for example, or what we sarcastically named “Eyeball Fruit” did not have a happy ending. Mom was pretty sure you could eat this raw, right out of the peel but we made her try it first anyway. She didn’t die immediately and wasn’t offended by it but my brother and I (under 10) were skeptical and hesitant to try it. We did eventually try it but it wasn’t a favourite — although we had some good giggles with the name, Eyeball Fruit.

JT and I were out grocery shopping and I came across Chickpea Flour Twigs and true to form, I grabbed a pack and tossed it into the cart. By now (almost 30 years) JT has learned not to question, just accept it — more often than not, it will become something tasty for him, anyway. Upon my return to the house I did a little investigating and discovered that this unusual treat is a snack food; to be honest, I wouldn’t know how to eat it…it’s so tiny and crumbly (if any of my readers know how to eat this, please let me know in the comments). But it reminded me of an elusive Greek dough called kataifi (shredded Phyllo dough which I haven’t been able to find) so I thought breading shrimp with it would work out well. Also I got a new social media client and they dropped off a bunch of their product so I decided to use coconut flour in the breading instead of all purpose flour. It worked out very well. It turns out that the Chickpea Flour Twigs are deep fried so they are quite rich and rolling the shrimp in them made a nice crunchy textured batter with a mild chickpea flavour.

Shrimp Bundled in Chickpea Flour Twigs

A Kitchen Inspirations Original Recipe.

Makes 8 shrimp bundles

Ingredients:

  • 1/2 cup coconut flour
  • 1 egg whisked with a splash of water
  • about 1/2 cup of chickpea flour twigs
  • 8 shrimp, tails off, cleaned
  • salt and pepper to taste

Directions:

  1. Pre heat an oven to 375°F and line a baking pan with a silicon mat.
  2. To three separate bowls, add the coconut flour, the egg whisked with water and the chickpea flour twigs.
  3. Lightly dredge the shrimp in the coconut flour and then soak in the egg wash, back to the coconut flour an again in the egg wash. Now roll lightly in the chickpea twigs. Lay onto the silicon mat. Repeat until the shrimp are all bundled nicely in the chickpea twigs.
  4. Bake for 10-12 minutes or until the twigs are even more golden and the shrimp is cooked through.
  5. Serve with a tamarind dipping sauce (I combined store bought tamarind sauce with rice vinegar, green onions and chopped cilantro).
A tasty treat for cocktails.

A tasty treat for cocktails. Who drank my cocktail?


Notes

  • I usually repeat the flour dredging and the egg wash because it makes a nice crispy batter, particularly when baking in the oven instead of frying.
  • Toronto in the 70’s (I can only attest to this point forward) was fairly mungie-cake; exotic meant spaghetti and meatballs for most. Chinese takeout was pretty much the only asian food out there, fortunately, we have evolved and we can source any ethnic food on any day of the week and it’s likely to be quite authentic.
  • To be entirely honest, I don’t think I’ll make these again, the nutritional content of the chickpea twigs is not in my healthy realm but it was a fun treat.

Read Full Post »

PlumButter_First

Small Italian plums would have been perfect for those delicious Plum Dumplings my cousin and I made in June, sadly they were not around then. When I spied them at my green grocer a week or so ago, I knew I couldn’t resist so I picked up a small container knowing full well they would be converted to something delicious. While Plum Dumplings are a great childhood memory, they are not the type of thing we eat on a regular basis so I decided on Plum Butter, another thick jam made without the use of pectin. Making jam or Lekvár is so easy, I’m astonished that I hadn’t done it more often in the past; perhaps it was the fear of making more than we could consume! Well, fear not my dear readers because this recipe makes a few small jars so we’ll be in great shape over the cold winter months.

plum butter, plum jam, szilvas lelvár

We enjoyed the delicious plum butter on homemade bread!

Plum Butter

Makes 370 mL thick jam

Ingredients:

  • 630 g plums (a small container)
  • 255 g sugar
  • 60 mL water
  • 1 tsp cinnamon

Directions:

  1. Cut plums in half and remove stone. Put plums into a heavy bottom pan and add water and sugar. Set over medium heat and cook until softened.
  2. Add cinnamon and cook for 30-40 minutes until thickened, testing often with the freezer method.
  3. Once the butter has thickened, pour into sterilized mason jars and follow canning best practice instructions.

Notes:

  • I left the peel in for texture, you may run the mixture through a fine sieve if you prefer no peel.
  • The plums cook down to a very creamy texture so there is no need to purée or press through a food mill, unless you wish to.
plum jam, plum butter, szilvás lekvár

It’s far too chilly to enjoy the plum butter outside now!

Read Full Post »