Feeds:
Posts
Comments

Archive for May, 2014

Hello loyal readers, I do hope you are all well and adjusting to climate changes you are  experiencing (spring-ish for us Northern Hemispherers, fall-ish for those down under!). Cottage season has begun for Canadians, starting with what we call the May 2-4 (two-four) weekend which happened to be last weekend, even though it wasn’t May 24rth! Therefore list season has begun. Since last Saturday, I have made no less than 5 lists believe it or not. Once it goes on the list, I can safely delete it from my memory, so don’t bother asking me about it, check the list! Why 5? We needed a menu plan for last weekend: List 1, then there is the shopping list for said menu plan, List 2. Then we get to the cottage and almost as soon as the front door is opened for the first time of the season, a third list has begun: List 3, things we need to bring/buy for the next time. And then there is the next time, List 4 is the new menu plan and then List 5 the new shopping list and of course, list 6 (to come) is the list of things we need to bring/buy for the next time around! Such fun.

Sunset2014_2779

Being the suck that I am, this was taken in the screened in porch because the bugs were BRUTAL. Believe it or not, even JT put on a bug shirt for the first time EVER.

You also may have realized that I failed to post on Thursday, and sadly for the time being I’ve decided to reduce my blog posts to once per week, I hope you don’t mind. It’s still a joy for me and I want to keep it that way; plus my marketing freelance gig writing for social media has upped the anti and I’ve been contracted until September, god forbid I run out of words. Good news is that it’s steady, bad news is that I’m using up my Data plan like it was going out of style. But I’m not complaining, I’m loving the projects and the people I’m working with so all is good in the new reality!

Now you have probably been wondering why there hasn’t been an Ebelskiver post in a while. I know, I asked myself the same question…and if you’re interested in the other posts, please click here, and here and here. Remember that I have my dear friend Barb (from Profiteroles and Ponytails — she’s on a bit of a break, so busy!) to thank for that gorgeous cast iron Ebelskiver pan, so I can’t let it go unused.

BaconEbelskivers_2664

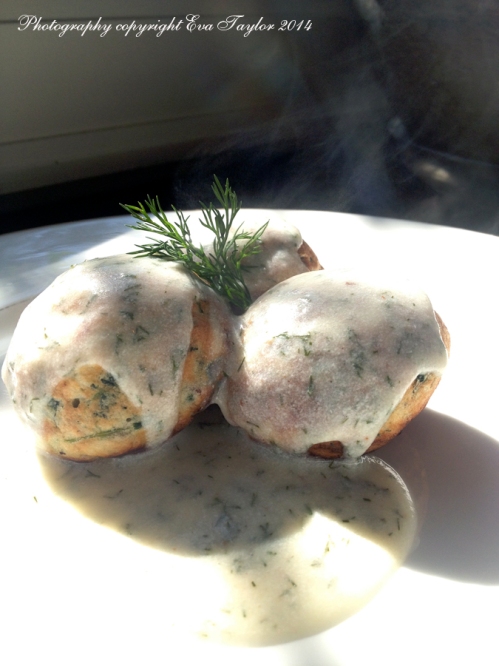
I’m getting much better at making perfectly spherical Ebelskivers.

Bacon, Feta, Kale and Onion Ebelskivers with a Yogurt a Dill Sauce

Makes about 17 Ebelskivers (I used 5 Ebelskivers for breakfast and froze the remainder for another time — guess who had 3)

Filling Ingredients:

  • 140 g onions
  • 60 g bacon (should have been 80!)
  • 60 g feta
  • 100 g kale (or mixed spinach and kale)
  • 1 tsp lemon zest
  • 1 tbsp EVOO

Filling Directions:

  1. Heat the EVOO and cook the bacon until crispy. Set aside. If there is more than one teaspoon of bacon grease left in the pan, remove excess (or not, it’s your arteries!). Cook the onions until soft and translucent, add the greens and wilt. Set aside to cool completely. In the meantime make the batter.

Basic Ebelskiver Batter Ingredients:

  • 1 1/2 cups all-purpose flour
  • 1 teaspoon sugar
  • 1/2 teaspoon baking powder
  • 2 large eggs, separated
  • 1 cup milk
  • 1 tbsp unsalted butter, melted and slightly cooled
  • 1/2 tsp salt

Directions:

  1. In a large bowl, whisk together the flour, sugar, baking powder and salt, set aside.
  2. In a small bowl, lightly whisk the egg yolk until thick and pale, then whisk in the milk and melted butter. Add the yolk mixture to the flour mixture and, using a wooden spoon, stir until well blended. The batter will be lumpy.
  3. In a clean bowl, using an electric mixer on high speed, beat the egg whites until stiff, but not dry, peaks form. Using a spatula, fold about one-third of the egg whites into the batter to lighten it, then fold in the rest just until no white streaks remain.
  4. Fold the cooled wilted greens, onions, bacon and crumbled feta and mix thoroughly.

Ebelskiver cooking directions:

  1. Preheat oven to 325°F.
  2. Spray the ebelskiver pan with a good squirt of non-stick spray and place over medium heat. Add about 1/4 cup batter to each round as soon as the pan is quite hot. Maintain the heat at medium, you don’t want to burn the ebelskiver edges before the insides get a chance to cook.
  3. Cook until the bottoms of the pancakes are lightly browned and crisp, 3-5 minutes. Using a fork, gently push the ebelskiver until it entirely turns around in the pan and the uncooked portion is now facing the bottom.
  4. Transfer the finished spheres to a platter and finish baking in the oven while you repeat to finish the batter (about 15-20 minutes).

Yogurt Dill Sauce

Enough for two servings

Ingredients:

  • 1 cup non-fat yogurt, well stirred
  • 1 tsp butter
  • 1 tbsp flour
  • 2 tbsp dill

Directions:

  1. In a small sauce pan melt the butter and add the flour. Cook the flour but don’t brown it. Add the yogurt and stir.
  2. Remove from heat and stir in the dill.
  3. Serve warm over the Ebelskivers.
BaconEbelskivers_2667

I was surprised and thrilled that the feta stayed whole and did not melt into the batter, it was so tasty.

Read Full Post »

20140519-084249-31369627.jpg

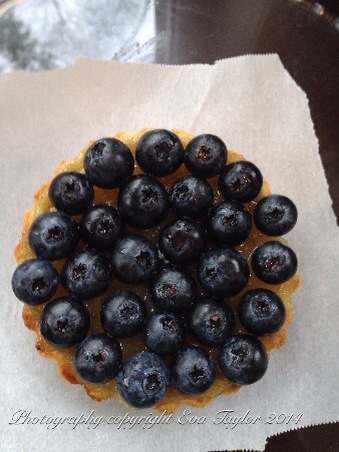
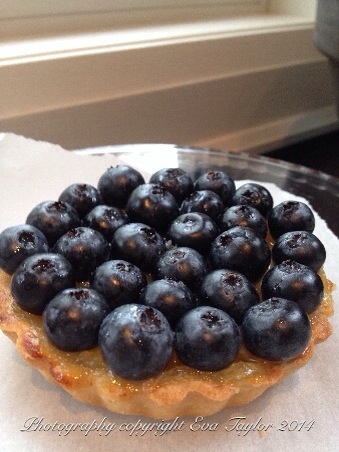
The tart lime custard is a lovely contrast to the sweet blueberries.

It’s our 28th wedding anniversary. Yes, I was a child bride! We celebrated at the cottage, hence the slight delay in this post. We actually married on the Holiday Monday of the Victoria Day long weekend (today) because we didn’t want to wait a year for the reception hall. One place I called had a 3-year waiting list! Can you imagine waiting 3-years for a reception hall? How long did you have to wait? We also didn’t want to pay a king’s ransom for our wedding and the holiday Monday was less expensive than a Friday or Saturday; it meant that we had funds to put a down payment on our first home. What’s the most expensive wedding you attended? About 20 years ago we went to a wedding that was over $40,000!

We didn’t have a traditional wedding cake for our wedding either because neither JT nor I like fruitcake, so we had Black Forest cake but I definitely could have enjoyed these shaker lime tarts instead. The tarts are a cross between a curd and a custard and they are plenty tart, which both JT and I adore. I made these last week when a friend dropped by to deliver his FILs pickled herring so I naturally invited him for dinner. I was inspired by fellow Torontonian blogger Ilan’s Iron Whisk recipe here but I didn’t make his recipe because I thought the Sweetened Evaporated Milk would make it way too sweet for our taste, so I adapted my old favourite Martha Stewart recipe that I first posted here. Both the filling and pastry components come together very quickly and it sure was tasty with the fresh blueberries on top.

Shaker Lime Tarts with Blueberries

Makes 4 small tarts (about 10 cm or 4 inches in diametre)

Ingredients:

  • 3 limes (I used ordinary limes but you can use Key Limes instead, you’ll need about 8)
  • 1 cup granulated sugar
  • 2 large eggs
  • 1 batch of Viennese Pastry (recipe below)

Directions:

  1. Zest the limes entirely into a non reactive bowl (glass works) and reserve about 1 tsp for the pastry. Cut limes crosswise into paper-thin rounds using a mandoline or a very sharp knife; discard ends and seeds.
  2. Place lime slices and any juice that you can collect into non reactive bowl with the zest and cover with sugar; toss to coat evenly. Cover with plastic wrap and allow to stand at room temperature overnight.
  3. Divide the pastry into four equal balls. With the heel of your hand, flatten out the balls into a small disk. Place the disks into the centre of a spring form tart pan and press out to the edges with your fingers. Roll the top to get a nice scalloped edge.
  4. Place the tart pans on a rimmed baking sheet lined with parchment and refrigerate for 1 hour.
  5. Preheat oven to 450° F (232° C) with rack in lower third.
  6. Pour the sugar and lime mixture through a fine sieve, pressing the lime slices to get every drop.
  7. Add the lightly beaten eggs to lime mixture and stir well to combine.
  8. Divide the lime liquid among the refrigerated tart shells.
  9. Bake tarts on parchment covered baking sheet for 15 minutes, then reduce heat to 350° F (177° C) and bake until filling is set and beginning to look golden, about 15 minutes.
  10. Allow to cool on sheet on a wire rack for about 10 minutes. Remove tarts from pans, and allow to cool completely on wire racks.
  11. Top in a even pattern of blueberries.

Viennese Pastry

Originally from the Five Roses Flour Cookbook

Ingredients:

  • 1/2 cup all purpose flour
  • 1/8 cup sugar
  • pinch of salt
  • 1/4 cup unsalted butter
  • 1 large egg yolk at room temperature
  • 1/4 tsp vanilla
  • 1 tsp reserved lime zest

Directions:

  1. In a food processor, add all of the ingredients except the egg yolk and vanilla, process until the butter is incorporated and it resembles coarse corn meal.
  2. Add the egg yolk and vanilla and process until it becomes a ball. If it is very soft, you may want to refrigerate for 30 to 60 minutes.
  3. Follow directions above for use in the lime tarts.

Notes:

  • You may coat this with a neutral glaze but I didn’t.
  • You may also garnish the plate with a simple blueberry coulis. Purée fresh or frozen blueberries and pressing through a fine sieve. Add a bit of water or your favourite booze to loosen to make a rich paste.
20140519-084442-31482191.jpg

Very tasty.

Read Full Post »

I thought I would begin this post with a little spring. I know I’ve been complaining a lot about the weather. A lot. So, in light that this past weekend we finally got some spring-like temperatures and it seemed that everything just burst into bloom, I wanted to share my joy. Yes, spring has sprung in Toronto (about damn time). Here are a few lovely blooms from my morning 8 km or almost 5 mile power walk through High Park.

This is our little Japanese Cherry Tree.

This is our little Japanese Cherry Tree.

JapaneseCherry_2678

These are Japanese Cherry Blossoms in High Park.

JapaneseCherry_2681

There are several places that these beautiful trees are planted so each one has a slightly different time-table depending on how much sun and if they are in the valley like these, they aren’t quite in full bloom yet.

Forsythia_2680

The Forsythia bloomed at the same time as every thing else.

SaucerMagnolias_2674

The Saucer Magnolia, almost there.

Karma. It gets you every time. Case in point: last week I assisted on a national brand motion shoot (video for commercial), two action packed days of sorting through frozen product looking for the ‘perfect’ specimens and then deep frying said specimens. Yes, indeed my friends, deep frying! Now those of you who’ve followed Kitchen Inspirations over 7+ years know that I am not a fan of deep fried foods (yes, I know, it’s blasphemous) so deep frying two days straight was an experience, to say the least. And yes, I did smell like Eau de Frire!

This little recipe can be deep fried but it needn’t be, pan frying does the trick too. I made these for a special celebration coming up this weekend, my father in law turns 90! We’ll be springing him from the long term care facility to bring him to our house to party on. We’ll be breaking out the good china to celebrate! Happy Birthday Dad!

MiniRostiPotatoes_2632

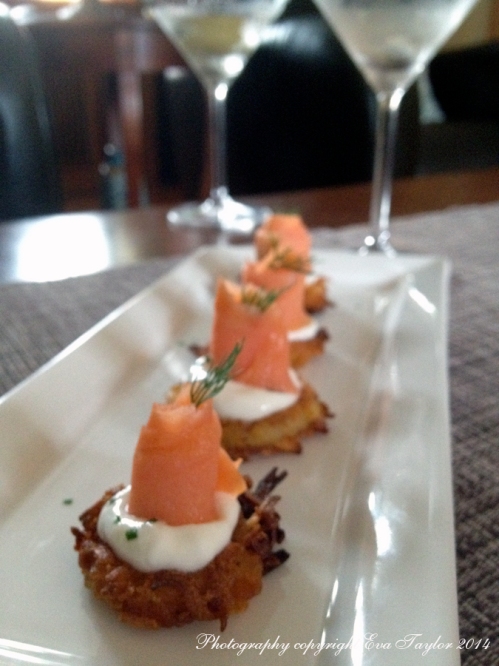
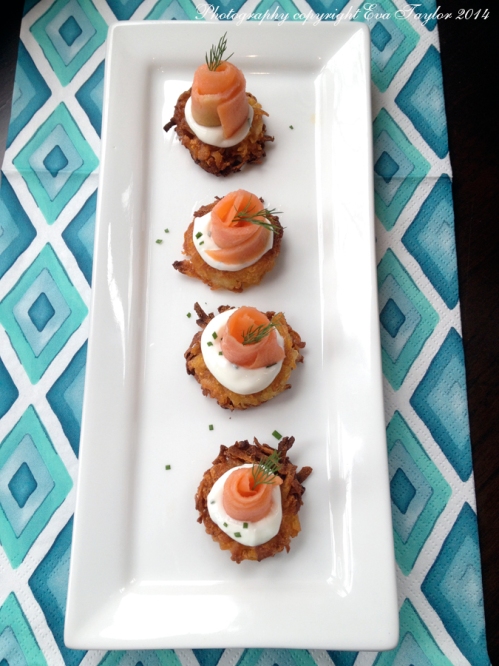
A crisp potato ‘cracker’ with crême fraiche and smoked salmon with a little dill and chives.

Mini Rösti Appetizers

Makes about 60 x 3 cm (~1.25 inch) diametre rounds

Ingredients:

  • 600-800 g (1.3-1.8 lb) Yukon Gold Potatoes (actually, you can use any potato you would use as mashed potatoes)
  • salt and pepper to taste

Directions:

  1. Peel and chop potatoes in half (you want a chunk large enough to grate without grating your knuckles).
  2. Put the potatoes into a pot with cold water and salt (this step was prevalent in many recipes, something to do with cooking evenly) and bring to a boil. Keep on the boil until there is still some resistance when you poke the pieces with a fork or cake tester — you definitely DO NOT want to cook them 100%.
  3. Remove potatoes from the pot and allow to cool completely.
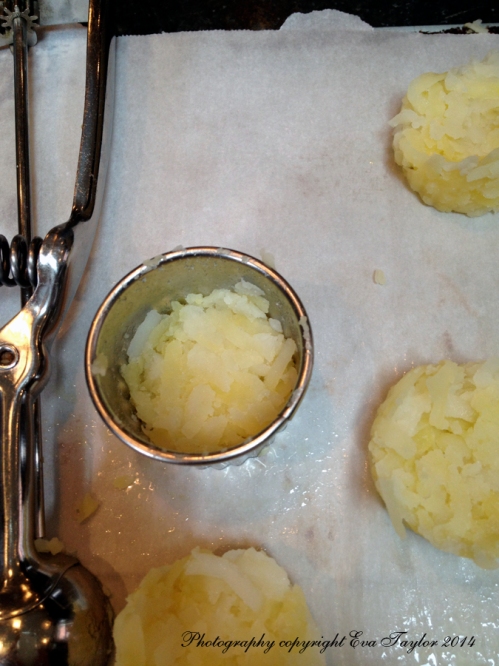
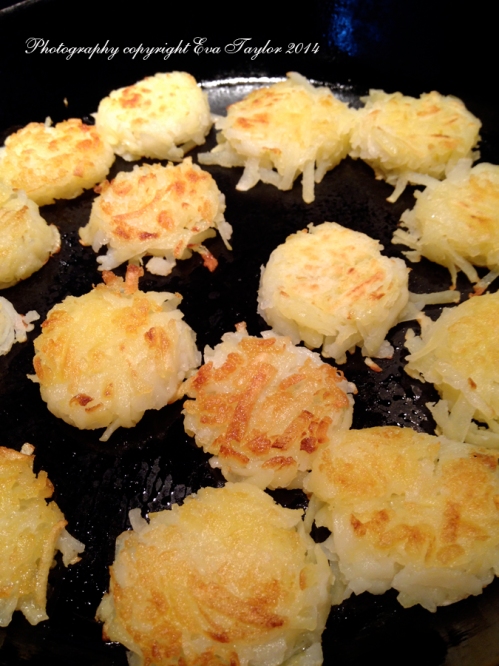
  4. On a large grater, grate the potatoes entirely. Using a 3 cm (~1.25 inch) cookie cutter, sprayed with non-stick cooking oil, press a good tablespoon of grated potato into it and compress slightly. Lift cookie cutter off and repeat until all the potato is used up. Heat a large cast iron skillet with a few tablespoons of oil (err on more than less). Add the little rounds of potatoes and cook until they are crispy and golden on each side. Drain on paper towel, cool and then freeze on a cookie sheet. Once frozen, pack them into a zip lock bag. Use as required.
  5. To reheat: pre heat the oven to 300F and bake frozen potato rounds until warmed through, about 12 minutes.
MiniRostiPotatoes_2621

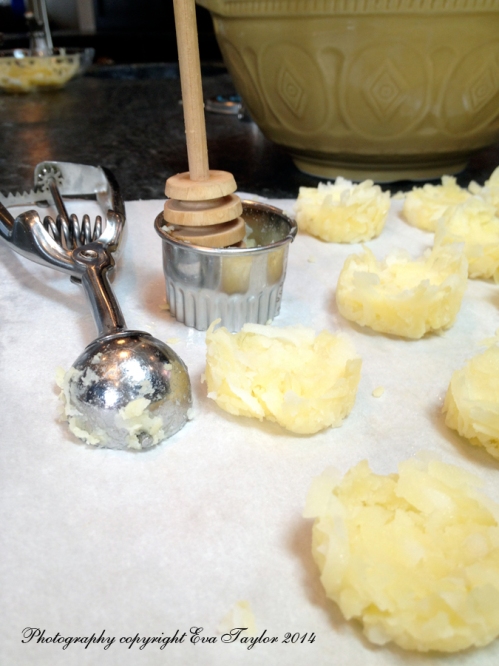
Using a smallish ice cream scoop, I was able to keep each one about the same size.

MiniRostiPotatoes_2620

Yes indeed, that is a honey wand that was repurposed as a plunger to flatten each disk out.

MiniRostiPotatoes_2622

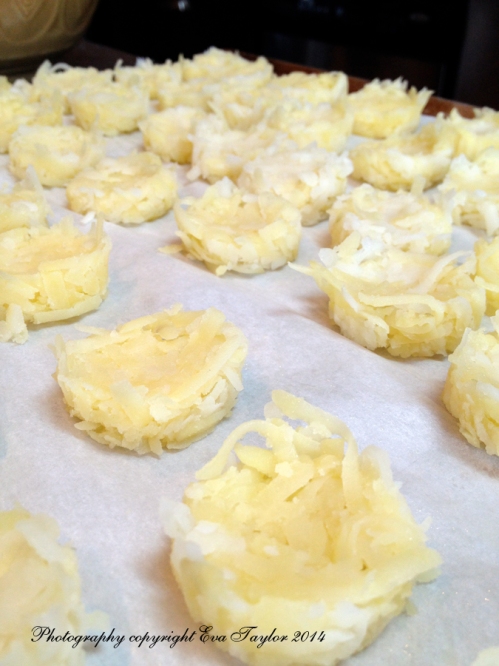
They made quite a few!

MiniRostiPotatoes_2623

They’ll crisp up again when you reheat them.

MiniRostiPotatoes_2629

Just a bite-sized nibble.

Read Full Post »

We’ve been to The Good Fork a few times now and I thought it was time to do a Kitchen Inspirations review. The folks at The Good Fork were incredibly generous around the Christmas holidays when Toronto experienced wide-spread blackouts and JT and I were without charging power for our phones for a couple of days — they let us plug in! The Good Fork is located just on the cusp of the Western edge of Bloor West Village and because it’s on the cusp, sadly it’s pretty easy to forget about it; I’m glad that on that cold December day we didn’t!

It’s about 1.6 km from our house which makes a good walk but there is street parking usually close by. I would recommend reservations if you’re going with a group because it does fill up quickly and there isn’t a bar to wait at. If you’re going for brunch, like we did, make sure you arrive before 10am because you’ll have to wait for a table if you arrive later!

The folks are very nice at The Good Fork and we have found the food to be very good quality. I like that their menu is not huge but what they do is very tasty and the prices are not bad. The portions are a good size and if you’re not starving you may even find it enough to share with an extra salad. The Good Fork is fully licensed and serves VQA wines and beers from Canadian micro breweries. The decor is modern and simple and there are many spacious booths. Their second floor can be rented for events. 

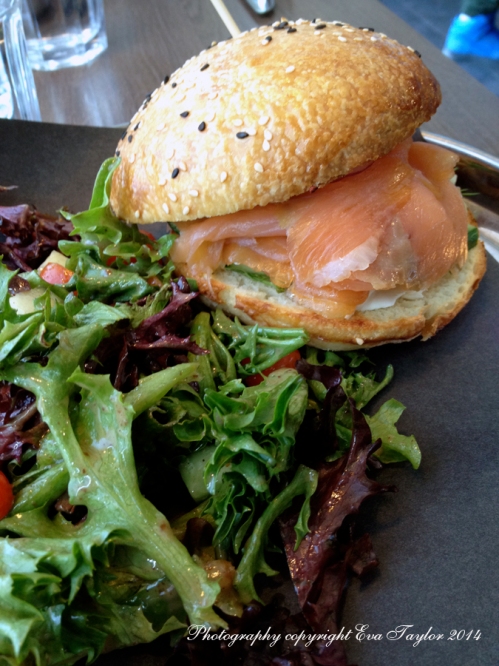
JT and I visited The Good Fork for brunch; I ordered the Nova Scotia Benny ($13.00) which came with two poached eggs, a generous serve of smoked salmon, cream cheese, preserved lemon and fresh dill on Gordy’s gorgeous house-made bun (it was so good that even I found it difficult to resist eating the top!). I chose a side salad instead of home fries and although the salad was very tasty, it was over dressed for my taste which is a mistake I find many restaurants make (note to self, ask for dressing on the side next time).

A delicious combination of flavours.

A delicious combination of flavours.

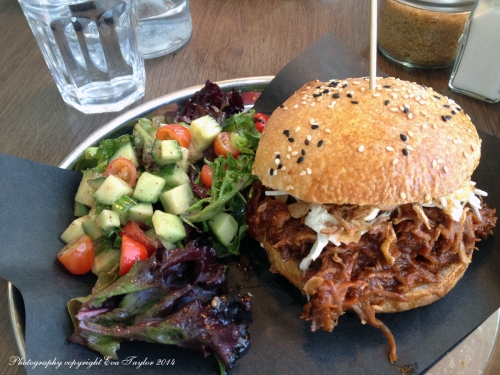
JT ordered a slightly more decadent dish: The Pulled Pork Benny ($13.60) topped with crispy fried shallots and a delicious slaw on the same house-made bun. The pulled pork had fantastic flavour and the crispy fried shallots added the much needed textural contrast to the sweet and tangy pulled pork. JT also ordered the salad as the side and it too was over dressed. Overall, I would say that both dishes were winners and we will order them again (perhaps to share next time).

TGoodFork_2455

Succulent pulled pork and a very tasty house-made bun.


Overall rating of The Good Fork: Decor 2.5/5, service 3/5, food 4/5, Value 3/5, Noise: 5/5 (1 being very noisy, and 5 being very quiet).

Disclaimer: We purchased our meals for full price and my opinions just that, my opinions.


The Good Fork

2432 Bloor St. West
Toronto, ON M6S 1P9


Hours:

Monday and Tuesday 9:00 am-4:00 pm
Wednesday, Thursday and Friday, 9:00 am-10:00 pm
Saturday 9:00 am-4:00 pm and 5:30 pm-10:00 pm
Sunday 9:00 am-5:00 pm


Contact

647.352.5955
ALI@goodfork.ca
TOLGA@goodfork.ca

Read Full Post »

I developed this recipe in the mid 2000’s and for a brief second I thought I would take it to market, but I blinked and lost my window of opportunity when I noticed other gourmet flatbread/crackers selling for $9.00 a box! Damn. Anyway, I’m going to share it with you again because I’ve modified it over the years. It’s really so easy to make and takes such little time and effort that I basically throw it together on the day that I need it. You can leave them flat and break the crisp flatbread by hand to give it more of an artisan look; for this photo I cut them with a pizza cutter, just eye-balling and cutting directly on my cookie sheets before baking (don’t cut on non-stick cookie sheets, you don’t want to damage the surface).

Whole Wheat Oat Crackers with Flax

Makes enough for 4 people for cocktails

Ingredients:

  • 1 cup whole wheat flour
  • 1/4 cup oatmeal
  • 1/4 cup ground and whole flax seeds (a mix 2/3-1/3 is nice)
  • 1 tsp salt
  • 1/4 cup black and white sesame seeds
  • 1/2 cup warm water (plus)

Flavourings: add as desired (not all of them)(pictured recipe has no flavourings other than sesame seeds)

  • 2 tbsp paprika (smoked is good), or
  • 2 tbsp cumin, or
  • 2 tbsp curry, or
  • 1/4 cup dehydrated onion flakes ground finely (not onion salt), or
  • 1/4 cup dehydrated garlic flakes ground finely (not garlic powder or garlic salt).

Directions:

  1. Pre heat oven to 177° C or 350° F.
  2. Sift all dry ingredients (including flavorings of your choice) together into heavy duty mixer with a dough hook.
  3. Add the oatmeal and mix. Slowly add the water with the mixer on low and mix until the result is a nice smooth ball of dough
  4. Generously dust your rolling surface with flour. Cut about 1 cm (1/2 inch) thick chunks of dough and roll out with a wooden rolling pin until the dough is thin enough to go through the largest gap in your pasta maker. Run this dough through gently until your desired thickness is achieved (I go to #4, it makes a very nice thin but not too delicate cracker).
  5. Cut into triangles (like I did on this batch) or simply bake in the sheets that come out of the pasta maker and roughly break into smaller pieces when done.
  6. Bake for about 10 minutes until golden brown and crispy. Cool and enjoy!
WW_Crackers_2468

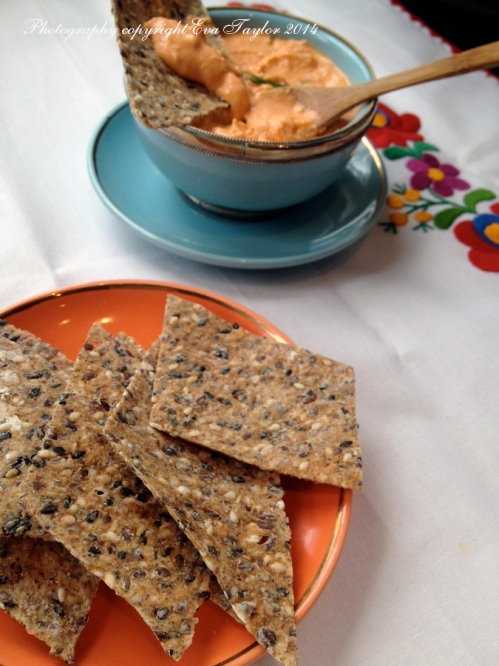
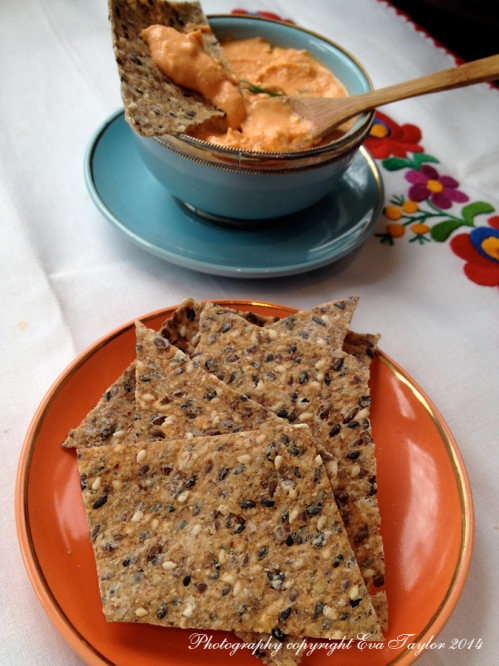
These thin crackers can hold a lot of dip without breaking.

WW_Crackers_2466

Tasty treats.

Notes:

  • I use my Kitchenaid Pasta roller attachment because it makes all the crackers the same even thickness and I am able to whip up a batch in less than 30 minutes baking included!
  • Make sure you run the dough through a couple of times on each thickness so that the larger seeds get gently flattened so they don’t clog the machine and tear the dough.

Read Full Post »

Happy Cinco de Mayo!
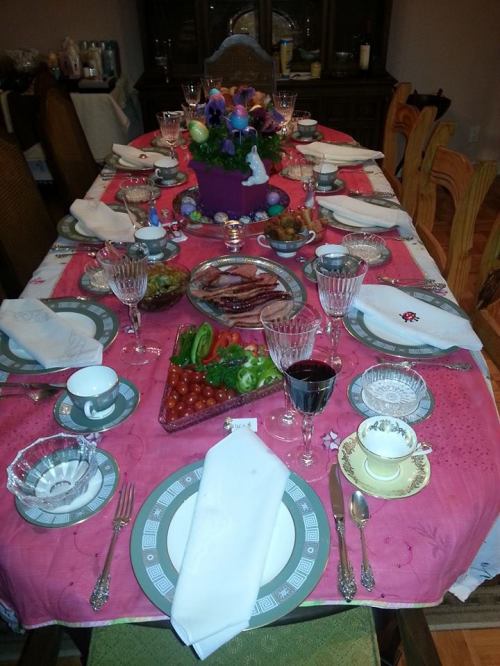
We were invited to my cousin Lucy’s for a Hungarian Easter dinner way back and she had asked me to make Korozot so I thought I’d revisit this old favourite recipe from my October 2011 post. Here are some of the photos from that lovely evening.

TheGrub

Photographing the table just runs in the family. Photography credit: Cousin Lucy

JusvetDecor

The Easter Decor. Photography credit: Cousin Lucy

TheGirls

The Ladies. From left to right: Miss I, me, Cousin Lucy and Cousin Lucy’s MIL. Photography credit: Cousin Larry.

TheBoys

The Gentlemen. From left to right, Mr. V, JT, Cousin Larry and Cousin Lucy’s FIL. Photography credit: Cousin Lucy.

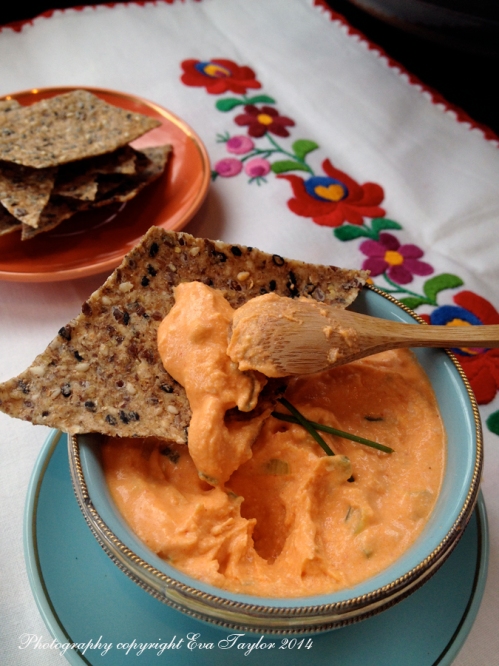
I’ve been making Korozot, a Hungarian soft cheese dip for more years than I can recall. It’s always been my ‘goto’ quick dip because I always have all the ingredients at home (I keep goats cheese in the freezer all the time). Although my version is smooth, many recipes on-line use Quark or cottage cheese as the base, but I prefer the smooth texture and sharp tang of goats cheese. My recipe has slowly changed over the years becoming a wee bit healthier each time; I believe my dear Mom used cream cheese in place of goats cheese and she may have even added some room temperature unsalted butter for flavour and richness. I usually serve this tasty dip with my very own home-made whole wheat crackers (recipe coming soon).

Korozot_2457

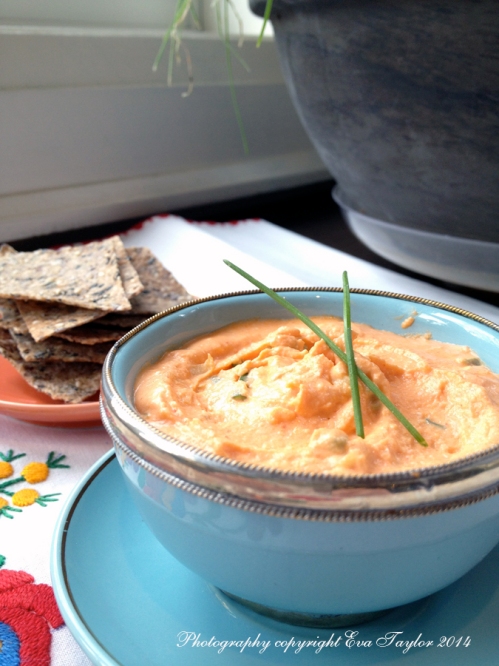
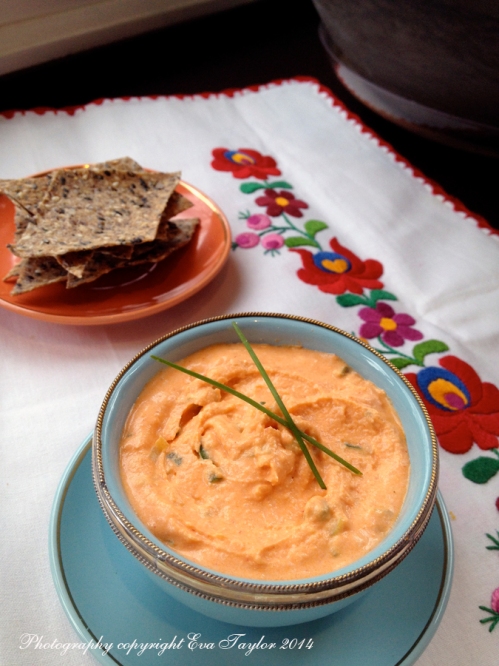
A silky, tangy dip

Hungarian Korozot

Makes about 1/2 cup dip

Ingredients:

  • 113 g (4 oz) Goats Cheese (at room temperature).
  • 2-4 tbsp non fat yogurt (for desired consistency)
  • 2 tbsp Piros Arany Csemege Paprika (or csipos, your choice) OR 1 tbsp paprika powder – try with smoked paprika for a totally different flavour
  • 1 tsp tomato paste (I usually use tomato paste in a tube for this)
  • 1 Green onion, very finely chopped
  • Salt to taste

Directions:

  1. Blend the goats cheese, the paprika paste (or powder) and tomato paste with a little yogurt in a food processor until well mixed, adding the yogurt a tablespoon at a time until desired consistency is achieved. Taste and add salt now, but be careful because the paprika and tomato paste are both extremely salty.
  2. Remove from processor and fold in the finely chopped green onion.
  3. Serve at room temperature with crackers.

Note:

  • This dip is much better the next day when the flavours have had time to blend and mature.
Korozot_2460

Why don’t you grab a cocktail and eat some dip.

Korozot_2462

It’s delicious, particularly on my home-made crackers.

Read Full Post »

Drat! I did it again! Two posts live on the same day, hour and same minute! And you guys are so fast with the comments (thank you by the way) I couldn’t take it down. I wish I could have given more space to highlight the horse radish, so easy and frankly WAY better than store bought. Hope you enjoyed it anyway.

Happy May! It’s been raining for the last couple of days. You know the kind of rain that is consistent all day and all night? I braved it on Tuesday and walked through the wet, muddy park for my walk, but today I’ll head to the gym. Brrrrrrrr! Do you think spring will ever arrive?

Creating recipes for two isn’t always the easiest thing, there are usually oodles of left overs. Not that left overs are a bad thing, some things just don’t keep well or taste good after freezing and defrosting. And then there’s the issue that the recipe just didn’t make enough for four (two meals, one now and one frozen for later). I find that pancakes are such a recipe. My old favourite super fluffy buttermilk pancake recipe makes 6 good size pancakes even when I cut the recipe in half (easy to do since it uses 2 eggs). But we usually only have 4 pancakes (2 each), so you can see my dilemma? Squirrels usually get the leftovers! I think I’ve figured it out! By using 1 small egg I was able to yield 4 decent sized pancakes! And I win on reducing the calories by a bit too which helps in the long run. I didn’t retake the photos this time, but I did want to publish the recipe for my records and thought that those of you who are a family of two like JT and I might appreciate it too.

They are really fluffy and not stuffy

Super Fluffy Buttermilk Pancakes

Makes 4 pancakes about 13 cm wide and 2cm thick! (5″ wide, 3/4″ thick)

Original recipe can be found here.

Ingredients:

  • 1/2 cup all-purpose flour
  • 1/2 cup buttermilk (or 1/2 cup skim milk with 1/2 tbsp white vinegar or lemon juice)
  • 1 small egg
  • 1/2 tablespoon sugar
  • 1/4 teaspoon vanilla extract
  • 1/2 teaspoon baking powder
  • 1/2 teaspoon baking soda
  • pinch of cream of tartar
  • 1/4 teaspoon salt
  • 1 nonstick cooking spray

Directions:

  1. In a small bowl sift flour, baking powder, baking soda and salt together. Set aside.
  2. Separate the egg yolk from egg white. Beat egg white and cream of tartar on high speed until stiff peaks form but not dry.
  3. Beat the egg yolk with the sugar until creamy, pale yellow and thick; add the buttermilk, vanilla and beat until smooth on a slow speed.
  4. Fold in the sifted flour mixture gently (don’t over mix as we don’t want the glutens activated).
  5. Fold the beaten egg white into the batter and mix together gently, do not over mix!
  6. Spray your skillet with non-stick spray set to medium temperature (or 350°F).
  7. Drop about 1/3 cup of batter on pan for each pancake and spread out to about 4-5″ and cook until you see a few bubbles on the surface of the batter. Flip the pancakes and cook for about another 1-2 minutes. Repeat until you have used up all the batter.
  8. Keep warm until you have made all the pancakes and serve warm with butter, maple syrup, fruit and whipped cream!

Pass the cakes of pan, as they are known in our house

Notes:

  • Add sliced bananas and chocolate chips for a change.
  • Add blueberries or your favourite berry or even a mix of berries.
SuperFluffyButtermilkPancakes

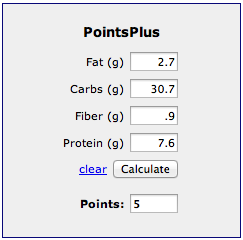
Portion size is 2 pancakes

SuperFluffyButtermilkPancakesWW

Portion size is 2 pancakes

Read Full Post »