Feeds:
Posts
Comments

Archive for June, 2015

AlmasSutemeny_First

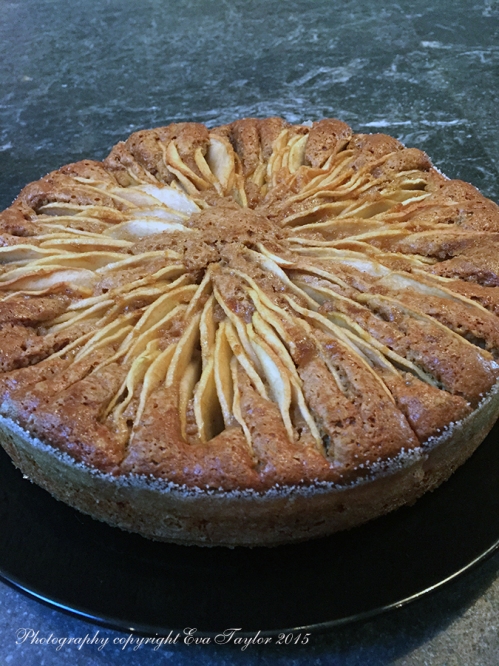
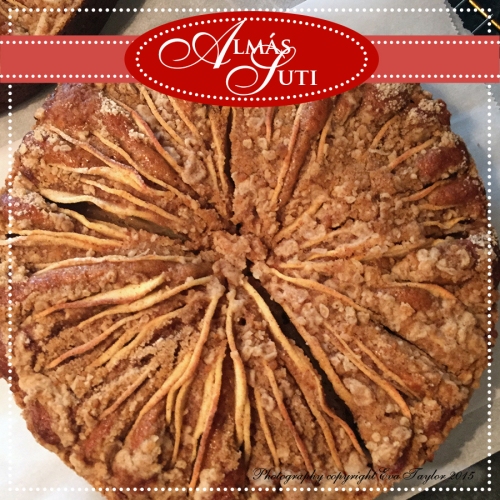
We had a grand 2-week visit with my Hungarian relatives, enjoying the many things that Toronto has to offer. During the annual street party, our dear neighbour (one of whom we do the Progressive dinners with) asked us all over to their place for a BBQ. I made dessert. I chose to remake the Martha Stewart Apple Cake that I previously posted here. It was so well received that My cousin asked for the recipe, so I will post this recipe in Hungarian for my kin in Budapest (English will follow).

Egy nagyon jó két hétes nyaralás volt a magyar rokonokal. Meglátogatunk mindent ami van Torontoba. Az este amikor az utca ünneplés volt, a kedves szomszéd (akikval közül csináljuk Progresszív vacsorákat) meg hivtak minket egy grillezésre. Én csináltam a desszertet. Úgy döntöttem, hogy meg csinálmon a Martha Stewart almás süteményét, amit korábban irtam rola itt. Annyira szereték, hogy az unokatestvérem kérte a receptet, így én hozzászólom a receptet magyarul (English recipe to follow).
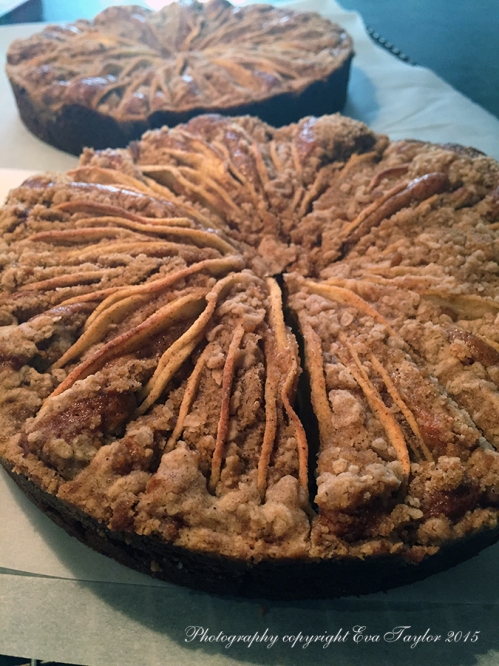
Apple Cake

A tasty combo of cake and apples with a good dose of cinnamon. Egy finom torta almával és egy jó adag fahéjjel.

Almás Sütemény

Az eredeti recept it van.

Egy reczept csinál egy 23 cm kerék tepsit ami 8 – 10 cm magas, vagy két 20 cm kerék tepsit de csak 5 cm magas.

Hozzávalók:

  • szukor meghinteni a tepsit 
  • 195 g liszt
  • 12 g sütőpor
  • 5 g  só
  • 7 g fahéj puder, plusz egy kicsi a tepsinek és a pite tetejére
  • 85 g vaj, olvaszva
  • 170 g barna cukor, plusz egy kicsi a pite tetejére
  • 125 mL tej
  • 2 tojás, szobahőmérség
  • 2 nagy alma, hámozott és vékonyra szeletelve
  • 30 g vaj, plusz egy kicsi a tepsinek és a pite tetejére kis csipetkékb

Utasítás:

  1. A sütőt előmelegítjük 200 °C-ra.
  2. Ki vajazuk a tepsit egy kis vajal és meghintjük cukorral.
  3. A liszthez hozzáadjuk a sütőport, a sót, és a fahéj pudert és alaposan keverjük össze.
  4. Egy másik tálban jól megkeverük egy habverővel az olvasztott vajat, a barna cukrot, a tejet, és a tojást.
  5. Lassan a vaj keveréket a liszt keveréketel hozá adjuk és osze keverjük.
  6. Öntsük a tésztát az előkészített tepsibe és az almát egyenként rendezzük körbe szorokan amíg elfogy (ugy mint a kép).
  7. A pite tetejét meghintjük egy kis barna cukral és fahéjjal es kis csipetke vajjal.
  8. Sütjük amíg a teteje arany szinu és a gyümölcs meg van fóve, körülbelül 40-50 perc, vagy amíg a sütemény teszter (tiszta fogpiszkáló) a tészta közepének jön ki tisztan.
Apple Cake2

Perfect for dessert or afternoon tea. Egy tökéletes desszert, vagy délutáni cávéval.

Apple Cake

Original recipe may be found here.

Makes one 9″ deep spring-form pan cake or two 8″ slightly shallower round cakes.

Ingredients:

  • sugar for dusting pan
  • 195 g flour
  • 12 g baking powder
  • 5 g  salt
  • 7 g cinnamon
  • 85 g butter, unsalted and melted, plus a bit more for the pan and cake top
  • 170 g dark brown sugar, packed
  • 125 mL milk (I used skim)
  • 2 large eggs, room temperature
  • 2 large apples, peeled, cored and sliced into 2 mm sliced wedges

Directions:

  1. Preheat oven to 375° F. Butter a 9″ springform pan and line the bottom with parchment. Sprinkle with sugar and shake the pan to coat.
  2. In a large bowl, whisk together flour, baking powder, salt and cinnamon.
  3. In a medium sized bowl, whisk together melted butter, brown sugar, milk and eggs.
  4. Slowly fold the butter mixture into the flour mixture, just stirring until blended.
  5. Spoon the batter mixture into the prepared springform pan, smooth the top evenly.
  6. Arrange the apple slices in a circle closely together in the cake batter. Then press each piece of fruit gently down into the batter.
  7. Sprinkle over with the 2 tbsp brown sugar and cinnamon. Top the brown sugar by dotting the remaining 1 tablespoon of butter over.
  8. Bake until top is golden and the fruit has softened, about 35-50 minutes in a convection oven (fan oven for my European friends), or until a cake tester inserted in the centre comes out clean.
TheFamily

Our last lunch together on the back patio.

Read Full Post »

ChocolateAlmondCake_First

I was recently reminded of a project I completed in anticipation of family arriving from overseas. The project wasn’t imperative for their comfort or enjoyment, it was just the impetus I needed to “git ‘er done” as they say!

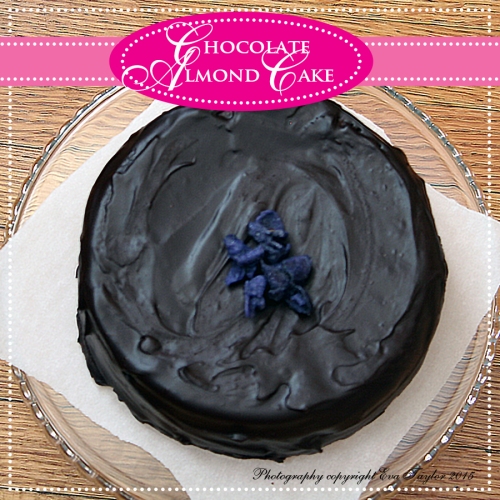
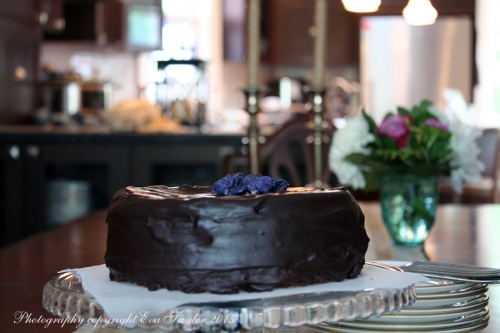
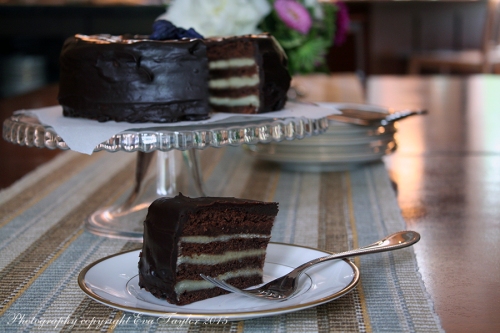
We’ve lived in our present home for almost 15 years, and ever since the first day we moved in, I’ve wanted curtains on both windows in our living room (or lounge) but we already had perfectly good, and totally lovely curtains on the back sliding doors. To replace perfectly good (and well made, I might add) curtains seemed excessive to me, so we lived with them. For 14+ years. Until I did some math and to my utmost delight , I discovered I could get two for the price of one, out of the generous fabric that the original curtains had. I wanted the dated tabs replaced with a more contemporary and clean look (for the sewers out there, I simply folded the tabs down, behind the top and stitched across. Pull the rod through the tabs to hang. I also added recycled toilet tissue rolls to help hold  the role). The sliding door curtains are functional and we do close them down on the very cold days, but the front ones are just for show! I am just so happy every time I look at them. Of course, I had to do the dining room next…it’s really never ending. While hemming the new dining room curtains, I started thinking about the Indonesian Spekkoek Lapis Legit cakes I made a couple of years ago (here and here), specifically about how I can change it up. My FILs birthday was in mid-May so making a cake for him was the perfect opportunity to experiment. We all love Charles’ Kladdkaka and Tuppkaka so I wondered if I could combine the two delicious cakes using the Spekkoek Lapis Legit technique. It was a huge success and the two flavours went together famously. I made the cake again for JTs birthday in June, by special request.

What project have you put off only to get it done for guests?

OldCurtains

These are the very generous old curtains

I changed the rod to something a little more in style with the Craftsman home. I’ve also fixed the hem since this photo!

Kladdkaka

Ingredients:

  • 200 g Caster Sugar
  • 140 g unbleached Flour
  • 50 g Cocoa Powder
  • 2 tsp Baking Powder
  • 2 tsp Vanilla
  • 120 g Butter
  • 2 eggs
  • 1/4 cup water

Directions:

  1. Prepare your spring-form tart pan with non-stick cooking spray. Line the bottom with parchment paper.
  2. Add the sugar, flour, cocoa powder and baking powder to the bowl of your food processor. Plus few times to incorporate evenly.
  3. In the microwave, melt the butter slowly so it doesn’t overheat. Combine the cooled melted butter, eggs, vanilla and water. Slowly pour the melted butter mixture in an even stream while processing. Mix well, scraping down the sides as required. 
  4. Lightly grease a round tin about 20cm in diametre (I used a spring form tin). Spoon the batter into the tin and smooth out to the edges (it is rather thick). Resist the urge to try this batter, it’s seriously good and you will not be able to stop.
  5. Set aside while you make the Tuppkaka layer.

Tuppkaka

Ingredients:

  • 300g Caster Sugar
  • 200g Plain Flour
  • 74g Butter
  • 2 Eggs, separated
  • 2 tsp almond flavouring
  • 1/4 cup water

Directions:

  1. Melt butter and allow to cool to room temperature.
  2. Combine the eggs with the sugar and beat well (until thick and very pale yellow). Combine the melted butter with the almond flavouring and water and and mix well.
  3. Sift in the flour and stir until entirely incorporated.

Making the layered cake:

  1. The first layer is chocolate, use about 1/2 cup of chocolate batter for the first layer.
  2. Broil for 2-4 minutes watching carefully so it doesn’t burn. Once it is set and your tester comes out clean, pour 1/2 cup of the almond batter on top and spread evenly (the heat from the chocolate will begin cooking the batter so you’ll need to work fast.
  3. Broil for 2-4 minutes until it is set and your cake tester comes out clean. Repeat alternating the flavours until you have used up both almond and chocolate batters, broiling each layer individually.
  4. Allow to cool completely before layering the ganache on the cake.

Chocolate Ganache Ingredients:

  • 114 g dark semi-sweet chocolate
  • 125 mL (1/2 cup) heavy cream

Ganache Directions:

  1. Heat cream to almost boiling, pour over chocolate and stir until melted and entirely incorporated and smooth.
  2. Pour over cake and smooth top and sides.
  3. Refrigerate until set.

Notes:

  • Set your oven rack 2nd highest from the top.
  • As the cake becomes taller you may need to reduce the broil to low so it doesn’t burn.
  • I baked the final layer in a 350°F oven for 10 minutes because it just got too close to my boiler and I was concerned it would burn.
ChocolateAlmondCake

It’s a little like eating chocolate marzipan!

ChocolateAlmondCakeCut

I still need to work on my layers but it tasted darn good!

Read Full Post »

SweetPotatoHummus_first

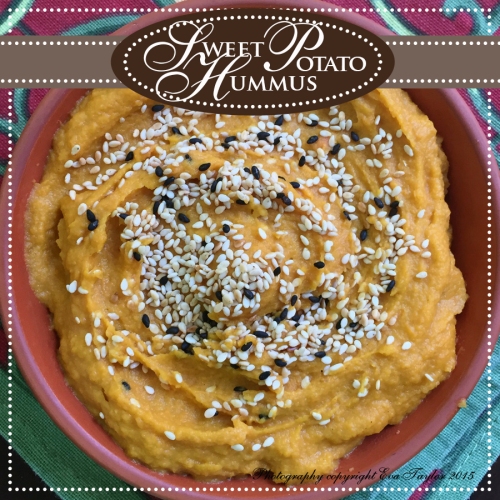
A couple of weeks ago my kitchen had all sorts of half used leftover vegetables from a testing I did for my recipe testing lady. They were for recipes that called for specific volumes of vegetables (such as, 1 cup) instead of the quantity of vegetables (such as 1 medium carrot). I always find those recipes a bit odd because I am left with bits and pieces that lay around for weeks without any specific purpose. Indeed, I could have thrown them into a soup or stew but I wasn’t making either of those things. Then I saw my lovely friend Lorraine’s Roasted Vegetable Hummus recipes and thought “GENIUS”! What a great way to use up bits and pieces of leftover veg. Thank you Lorraine, truly a great idea (ps, it was darn delicious too!).

Because this recipe was created to use up leftover vegetables, feel free to modify the quantity or variety to what you have on hand. This would also work beautifully if you had leftover roasted veg from a dinner. Hummus is an easy Middle Eastern dip/spread and the seasonings should be to your personal taste; we love the traditional flavours so I’ve kept it pretty much the same with the exception of substituting tahini with toasted sesame oil because that’s what I had (you can use peanut butter too, I know, GASP!!!).

It turned out that The Hungarians had never tried sweet potatoes (not sure if it’s a veg not available in Budapest or they were never introduced to it) but it was a grand success as a dip AND as a roasted vegetable side for our roast chicken dinner one night.

Sweet Potato and Carrot Hummus

makes about 1 cup, depending on the size of your vegetables

Ingredients:

  • 1 medium sweet potato, peeled and cut into equal sized cubes
  • 2 medium carrots, peeled and cut into equal sized cubes
  • 1 large clove of garlic, whole
  • 3 tbsp EVOO, divided
  • 1/4 tsp sea salt
  • 1 tbsp each, cumin and coriander
  • 2 tbsp lemon juice
  • 2 tbsp water or vegetable stock
  • 2 tbsp smoked sesame oil
  • toasted sesame seeds for garnish

Directions:

  1. Pre-heat oven to 190° C (375° F).
  2. Add sweet potato and carrot cubes to a large roasting pan and drizzle with 1 tbsp olive oil.
  3. Add garlic (peel and all) to a small ramekin, top off with 2 tbsp olive oil and and water. Season with sea salt. Cover with foil and tuck into a corner of the roasting pan.
  4. Roast vegetables for about 35 minutes or until very tender, try not to brown the vegetables so that the dip colour remains vibrant.
  5. Scrape vegetables from roasting pan into a glass bowl, squeeze the garlic out from its skin and pour the liquid from the garlic into the glass bowl with the sweet potato and carrot.
  6. Toast the cumin and coriander until fragrant, add to the glass bowl along with the remainder of the ingredients (with the exception of the sesame seeds). Purée until smooth, season with salt and pepper, if desired. For an ultra smooth dip, press through a fine sieve. Garnish with toasted sesame seeds. Serve at room temperature with bread, crackers or crisp vegetables.
SweetPotatoHummus

It’s creamy and naturally sweet.

My dear friend Genie of Bunny, Eats, Design suggested I submit this post to our growing edge for June, themed Picnic, hosted by Maddie from Supper Lovin’

our-growing-edge-banner

Read Full Post »

BBQ Sauce_first

The Hungarians have arrived and the “to do” list is finally complete! Just in the nick of time too. We decided to start their visit off with a little welcome party but we all know it’s just my excuse to cook and feed my kin!!! I was fortunate enough to score a sizeable number of vine ripened tomatoes so I decided to make barbeque sauce because JT made a special request for Pulled Pork. The sauce turned out perfectly, sweet, piquant and zesty — cooking it with the pork tenderloin for 5 hours made the flavours all the more richer and balanced the vinegar very nicely. Like any low and slow cooked meal, I made the pulled pork a day in advance because we all know it tastes better the next day!

I’ve geared up a couple of posts for the following weeks, but I may be AWOL depending on how busy things get, so if I miss to comment on your blog or I don’t post, I apologize in advance. Thanks for understanding.

Barbeque Sauce

Makes 1.25 L (42 oz)

Ingredients:

  • 200 g onions, coarsely chopped
  • 50 g garlic, finely chopped
  • 125 mL white vinegar
  • 1.2 kg tomatoes, chopped
  • 30 mL tomato paste
  • 125 mL molasses
  • 50 g sundried tomatoes (not in oil)
  • 1/2 tsp salt
  • 1/2 cup packed brown sugar
  • 1 tsp smoked paprika
  • 1 tbsp of each sweet paprika, cumin, coriander and cocoa powder

Directions:

  1. In a splash of canola oil, sauté onions and garlic until translucent, add dry spices and stir until fragrant.
  2. Add remaining ingredients and stir well. Simmer for one hour or until dark and thickened.
  3. Purée until smooth and press through a fine sieve.
  4. May be kept in the refrigerator for 3-4 days or freeze for 3 months.

BBQ Sauce

Read Full Post »

Last Thursday, my very first client blog post went live! Don’t worry, it’s under my own name — and the reason it is, is because of my blog! I have always known that this humble project of love would somehow weave a path to earn its keep, I just wasn’t sure how…until now. 

The post has four adaptations of my favourite tapas recipes, so please pop over to my very first blog post at the client’s site, and leave a comment, I’d love to hear from you!

Read Full Post »