Feeds:
Posts
Comments

Archive for August, 2012

Hungarian Cherry Squares (Cseresznyés pite)

I am rather thrilled and honoured that my good friend Charles of Five Euro Food has kindly asked me to guest post. Charles has been a valued commenter on my blog for over a year now, and as most of you know, he takes his time to formulate interesting and thoughtful remarks; his comments are a joy to read and sometimes even have a bit of a chuckle over. Thank you Charles, your friendship is cherished, I hope to do your guest post right.

In keeping Charles’ tradition of a little peek into living in Paris, I will give you a little peek into living in Toronto and a lovely Hungarian family recipe. I ask that you head on over to Charles’ blog to check out our little adventure, but I will share my recipe here as well. I belabored over which recipe I would share as Charles’ guest post, because he takes so much time to photograph and document his recipes so well; I didn’t want to get ahead of myself and bite off more than I can chew (pardon the pun) so I hope you enjoy it. This recipe is a cherished favourite for my family (my brother always asks for it when I visit and now that my dear Mom is gone, it is up to me to carry on the tradition).

Cherry Squares

By Éva Hársfai-Robinson (1936-2005)

Makes 1 pan 9” x 13” about 20 squares

Cost: ~€0.31 ($0.40) each piece

Preparation time: ~40 minutes

Calories: ~120 calories per piece

Ingredients:

  • 1 jar pitted cherries 500 mL to 700 mL, drained but reserve liquid
  • 3 eggs separated
  • 120 g unsalted butter (room temperature)
  • 125 g caster sugar
  • 250 g flour
  • 1 tbsp baking powder
  • ½ tsp salt
  • 1 tsp vanilla
  • About ½ cup milk – or use reserved cherry liquid (if you use the reserved liquid your squares will be a bit pink)

Directions:

  1. Grease and flour 9” x 13” x 2” baking pan (22cm x 33cm x 5cm).
  2. Preheat oven to 350° F (175°C)
  3. Drain cherries, liquid reserved (you can use this as your liquid or make a delicious sauce or use it in soda as flavouring!)
  4. Whip egg whites until a stiff but not dry (should be able to stand in a peak) – no need to wash the beater if you do it in this order, if you cream the yolks first, then you must wash the beater and dry thoroughly).
  5. Cream egg yolks with butter and sugar until light and fluffy (should be a lighter shade of yellow).
  6. Sift flour, baking powder and salt – dry ingredients.
  7. Alternating dry ingredients with the milk (or reserved cherry liquid), fold into egg yolk mixture.
  8. Fold beaten egg whites into the mixture.
  9. Pour into greased pan. Note the dough should be quite thick, should have to spread it into the cake pan, it should not pour by it self.
  10. Dot with cherries throughout (you may want to give each cherry a squeeze as you dot so ensure there are no pits!).
  11. Bake in preheated oven for about 20 to 30 minutes (test with toothpick to make sure it’s done).
  12. Cool in pan (don’t cut until it is entirely cool otherwise it will become ‘bacony’ or szalonás, as the Hungarians put it).
  • Creaming the butter, sugar and eggs together takes patience
  • I start out lining up all the cherries, but then I have to fill in the spaces so I can use up the whole jar!
  • The cherries behave as they wish, so there is no point in lining them up anyway

They are moist and not overly sweet.

A short note: This was my very first guest post ever, and I am delighted that it was for Charles’ Blog. I have a new found respect for Charles’ blogging, over and above my original respect, which was plenty! The extra effort Charles puts into this blog is unparalleled, the ingredient shot, the video, the working shots etc., make this blog ever so wonderful to follow but impossible to follow in its footsteps!

Read Full Post »

English Crumpets

This recipe has been in the making for about 30 years; my Mom and I bought the crumpet rings that long ago, and although we tried making crumpets in those days, we were not successful. Without the internet and YouTube to show us how, we simply gave up. But I kept the rings, and every time I see them I am reminded of my failure.

Warm, crispy and chewy, just like a crumpet should be

I spent the weekend at my friends Carmen and Roland who after a re-evaluation of their lives after 9-11 up-rooted and moved themselves and 3 kids from the bustling city of Toronto to the Muskoka‘s. To their credit it’s a wonderful, relaxing life-style with a grand view of the lake. We had an incredible, social weekend catching up, eating, drinking and just having fun. My other friend Pam who runs the blog Downton Abbey Cooks (you know, that enormously popular British drama Downton Abbey) was also there. Pam is a bit of a Tea aficionado and she posts every Tuesday about Tea Tuesday where she talks about the traditions of tea, how the Downton’s handled their tea, and modern day snack to serve with her tea. You’re probably wondering what the heck all this has to do with crumpets, but I’ll get to it.

Roland collects old cookbooks; he loves the particularly wordy one’s and most of his cookbooks don’t even have pictures (or if they do, they are terrible). We were paging through a first edition Fanny Farmer cookbook chatting about food trends when I recalled my crumpet dilemma and decided then and there to try my hand at it again. Plus, with Tea Tuesdays, I really had no choice. So there, you see, I did get around to it!

This was the second crumpet recipe I tried, and even it was not perfect, but I did get two very crumpet-like specimens that I had to blog about. The first recipe cooked blind which means we didn’t get the holes. The trick is to get the right consistency so that the yeast can do its job and bubble up and cook with those wonderful holes. The texture turned out exactly as I had remembered, a little crispy on the outside but nice and chewy in the centre. The taste was perfect too, I’ll just have to perfect the consistency so that all the crumpets cook up with the famous holes. Please click here for the original recipe.

English Crumpets

Makes 6 crumpets

Ingredients:

  • 1 3/4 cup all-purpose flour
  • 1 Tablespoon butter, melted
  • 1 teaspoon salt
  • 1 teaspoon sugar
  • 1 1/4 teaspoons dry yeast
  • 1/2 cup warm water
  • 1/2 cup warm milk
  • 1/4 teaspoons baking soda dissolved in 1/4 cup warm water
  • additional warm water to adjust the consistency of the batter.

Directions:

  1. Proof the yeast in the water with the sugar for 5-10 minutes until its bubbled up. Add the warm milk, butter, and salt.
  2. Beat the liquid into the flour and stir until the batter becomes smooth. Let stand for 30 minutes. It will bubble up and increase in volume somewhat.
  3. Stir the baking soda into the water until it’s disolved; add it to the batter and mix well.  Allow to rise in a warm place 20 to 30 minutes.
  4. Prepare griddle and crumpet rings with a little grease. Heat over medium heat.
  5. Drop batter into crumpets rings so that the batter is about half way up the ring side. Reduce heat to low, cover griddle and cook crumpets until tops look dry, about 10 minutes. During this time, the holes should form, from the outside in.
  6. Flip them over and cook for a couple of minutes or you can put them under the broiler for a minute or so.
  7. Serve toasted with butter and jam.

The holes turned out perfectly in two. The others still tasted good, but didn’t look the part so they didn’t get a call back for the photo shoot (but they made the breakfast table).

Read Full Post »

Last night I was running around the blog-o-sphere looking for something to do and I came across my friend Jed’s recipe for his Grandma’s Oatmeal Cookies on his blog (Sports Glutton). I love oatmeal cookies; maybe because you can almost convince yourself that they are healthy snacks (not even close! wink wink, Kelly). But what I do love about them is the bite of the rolled oats, the wonderful chewy texture and the warm spice of the cinnamon. I prefer traditional oatmeal cookies with just raisins (sometimes I put nuts in but I didn’t this time because JT was taking them into work on Saturday, and I figured it was just safer that way).
I want to thank Jed, that gluttonous-sports-loving-dude for inspiring me with his treasured recipe; sadly I didn’t have enough butter (WHAT?) in the house so I had to find a recipe that used slightly less butter and opted for my good old Fanny Farmer recipe, modified ever so slightly for our taste. I’m not sure why it’s called Cape Cod Oatmeal Cookies, perhaps one of my New England blog-friends can help with that. And if you love oatmeal cookies this is another great recipe, tipping my hat to my Australian friends (Charlie, Lorraine and Maureen)

Can you just taste that chewy oaty goodness?

Cape Cod Oatmeal Cookie

Makes 36 cookies, about 5cm (2.5″) in diametre (recipe has been adapted from the original Fanny Farmer Cape Cod Oatmeal Cookie, you can find it on-line, but it’s best to get her cookbook as there are several yummy treasures in it).

Ingredients:

  • 1 1/2 cups all purpose flour
  • 1/2 tsp baking soda
  • 2 tsp cinnamon (original recipe called for one but I like the heat)
  • 1/2 tsp salt
  • 1 cup brown sugar
  • 2 1/2 cups rolled oats, uncooked
  • 1/2 cup raisins, optional
  • 1 egg, lightly beaten
  • 1/2 cup melted unsalted butter
  • 1/2 cup melted shortening
  • 1 tbsp molasses
  • 1/4 cup milk

Directions:

  1. Preheat oven to 177°C (350°F) degrees.
  2. Combine flour, baking soda, cinnamon, sugar and salt together in your food processor (metal blades) and pulse to combine well.
  3. Pour dry ingredients into a bowl and add the raisins and rolled oats and mix well.
  4. Mix cooled melted butter, shortening, molasses and milk with the egg and whisk lightly to combine. Pour this mixture into the dry ingredients and stir with a wooden spoon until it is entirely incorporated.
  5. Drop by tablespoons-full* onto parchment lined cookie sheet and bake until bottoms are golden-brown, 10-15 minutes (depends on size of cookie).

*I used a 4cm, (1.5″) ice cream scoop, packed well, and then I flattened the cookie with my palm as they don’t spread much.

May I get you a coffee or tea with your cookies?

Read Full Post »

We are trying to eat more fish these days and I’m constantly cruising the web trying to find delicious and unique ways to present said fish. The internet has been busy with peaches recently as they are in season so I created this recipe to include them. Last week we had a grill Tilapia with quinoa tabouleh (or this one) and I wanted a little something to spice it up, so I came up with a Peach Salsa that was quite tasty so I thought I’d share it with you. I’ll leave the ingredients quantities to your own taste, after all, these recipes are meant to inspire.

The small dice allows it to be used as a garnish, plus I love the way it looks

Peach Salsa

Serves 4-6,

Ingredients:

  • Peaches, finely diced 0.5cm or 1/4″ cubes (I left the skin on for texture, plus I always have a really hard time getting the skin off, no matter what technique I use).
  • Jicama, finely diced 0.5cm or 1/4″ cubes
  • Green chili peppers (seeded), finely diced 0.5cm or 1/4″ cubes
  • Sweet red pepper, finely diced 0.5cm or 1/4″ cubes
  • Garlic, finely minced
  • Green onions, finely minced
  • Thai basil, finely chopped
  • Mint, finely chopped
  • Cilantro, finely chopped
  • Rosa’s Lime Cordial, just to wet and mix everything together
  • Salt to taste

Directions:

  1. Combine everything in a glass bowl and refrigerate, this is much better if it can sit for an hour or so.
  2. Garnish with parsley, mint or Thai basil and serve on top of grilled white fish.

Tasty on crackers too

Read Full Post »

OK, I am the first to admit it, we go out a lot. We try to go out only once per weekend for dinner, but sometimes that doesn’t work out. Too tired to cook, forgot to take something out of the freezer, you name it, I can come up with a reason. Bloor West Village has quite a few restaurants but unfortunately most are not that great. Bloom is a place that has been around for quite some time, but changed chefs last year. The food has a Cuban/Latin/Italian flare. We tried it for lunch a few years ago and enjoyed it so last week we decided to try it again for dinner this time.

We didn’t make reservations and fortunately it wasn’t too packed when we arrived around 7:30 in the evening. It’s about a 15 minute walk from our house and it was a lovely warm night. We were greeted by a very nice gentleman who seemed very proud of the place (I’m guessing it’s a family affair). We were seated at a very nice four person table so JT and I were able to sit side by side (which we love).

We were hesitant to order the bottle of Prosecco but the gentleman quickly offered to bring us a taste to see if we liked it; it was nice and dry so we ordered it. They offer 41 bottles on their wine list, which is rather extensive for such a small place. The restaurant quickly filled up and by 8:30 all the tables were occupied. Fortunately another waiter (perhaps his wife?) came in to help our gentleman who seemed to be the only one serving. Not withstanding, he did a good job and we didn’t feel like we were waiting long for anything.

We weren’t starving so we decided to order only appetizers. I ordered the Ceviche which was listed as Chef’s Selection Seafood (sustainable B.C.Halibut, line caught) Lemon Juice, Habanero Pepper, Cilantro $13. It was served in a small martini glass. The white fish was nicely done but it was a tad citrus-y for my taste, perhaps a little more balance with something sweet like a mango would have been a fix. The martini glass was just tall enough that it made it difficult for a vertically challenged person like me to eat from it (click here for a video of Chef Pedro Quintanilla making the ceviche). JT ordered the Caesar Salad with Spanish Style Smoked Bacon, Home Made Garlic Croutons with sliced chicken breast on top $14. You might ask why one would order a Caesar salad in a Latin restaurant…or you might not. Anyway, it was pretty ordinary.

I’d like to go back and try a few other items on the menu that caught my eye, such as the Avocado and Mango Salad $9, or the Cuban Shrimp Cocktail $15, or the Grilled Calamari $14, and the Arepa which is a Venezuelan corn cake with wild mushroom ragout, Asiago and crème fraiche $10

Overall rating of Bloom (in my opinion): Decor 3.5/5, service 3.5/5, food 3/5, Value 3/5, Noise: 5/5 (1 being very noisy, and 5 being very quiet). We paid for our meal in full.

Read Full Post »

I’m always looking for something new and different and when I saw a Wheat Berry Salad on my friend Angie’s blog, Taste of Home, I knew I had to try it at least once. Angie cooks with a lot of whole grains, always healthy and always inventive. She is also a master of bread making, her loaves are gorgeous, appetizing and did I say gorgeous?

I had never heard of wheat berries before reading Angie’s post and I am so glad that I did see it and was inspired to make it. Thank you Angie, I know I will make this grain again and again.

Wheat Berries look very similar to pearl barley, but they are darker in colour and apparently have a nuttier taste. They are a very dense grain and therefore many sites suggest pre-soaking. I soaked my berries overnight and it still took about an hour of boiling. They have more of a bite than barley and are a bit chewier, which I liked, but JT did not.  I have found that you will need a ratio of 3 or 4 parts water to 1 part wheat berries. You can substitute wheat berries anywhere a grain is used, for example rice pilaf or even risotto!

The avocado and the mango are a nice contrast in textures to the wheat berry

Wheat Berry Salad

Serves 4, Inspired by Angie, Taste of Home, Wheat Berry and Watermelon Salad

Ingredients:

  • 1 cup wheat berries, soaked over night
  • 1/2 avocado, cubed
  • 1 Mango,  cubed
  • 1/2 chopped cilantro
  • 1 roasted red pepper, chopped
  • juice of 1/2 lime
  • salt to taste

Directions:

  1. Cook wheat berries in 3-4 cups of water, about 1 hour (at around 45 minutes check to see if you like the texture, and if you do, stop cooking).
  2. Add the cubed avocado, mango and chopped red pepper. Drizzle with the lime juice and salt to taste. Mix in the cilantro. Serve warm or cold as a side to a BBQ’d dish.

Read Full Post »

Villa is a restaurant in our hood that we visit from time to time. They have a good solid contemporary Italian menu with great thin crust pizzas, some wonderful salads and a decent wine list. We were looking for lunch on a Sunday with a patio that was out of the intense sunlight. The temperatures were still broaching 30°C with a reasonable amount of humidity, but at least outside there was a nice breeze.

This restaurant has an interesting history; for years and years there were two restaurants at this location side by side owned by the same people, one was Zsa Zsa (this is where Villa opened in 2004) and the other was Fiasco Trattoria (this was our Friday night place). Sometime prior to 2004, the owner sold off the two locations and the ZsaZsa side opened Ill Fornelo, an Italian wood oven pizza restaurant chain in Toronto. The restaurant failed rather quickly, apparently we Bloor West people don’t prefer chain restaurants and the manager purchased the restaurant and re opened under his own label called Villa. They serve very similar food to Ill Fornelo, but it is not a chain! Go figure!

They did an overhaul of the restaurant when it turned into Ill Fornello, but didn’t change much when it morphed into Villa. It has a nice clean contemporary design, with the kitchen exposed in the centre with the lovely pizza oven. The photos decorating the walls are of Italy and provide a nice personal touch. The staff is friendly, although could use a bit of training. We were there for a late lunch on a Sunday and it wasn’t busy.

I ordered the Grilled Shrimp and Calamari ($14.95) made with grilled calamari and tiger shrimp, black olives, capers, spinach, tomato salsa. I love this dish. It has just the right amount of the tomato salsa to eat with the succulent grilled shrimp and calamari. They leave the tails on the shrimp and I know for presentation it is preferred, but now I have to dig into my saucey dish and pull the tails off with my hands. The calamari is perfectly grilled, tender and not chewy at all.

3 large calamari tubes and 3 good sized shrimps makes a very filling meal

JT ordered the pulled pork eggs benedict ($14.95), which was a plate of 2 poached eggs, braised pork, barbeque sauce, caramelized onions, toasted English muffin with hollandaise sauce. He said it was good but wasn’t bowled over by it. The pulled pork was tender and tasty and not too sweet with the barbeque sauce. Sorry, no photo.

One of my pet peeves is when one person finishes their meal before the other and the server removes the spent plates. I find this so rude to the diner who is still eating (that would be me); it makes me feel like I should hurry up and finish (and he cleared the table of the bread and bread plates as well). So for this fact, the service is getting a low score this time. We have had better service on occasion but not this time. Our adult libations also took quite some time to arrive, but then again, perhaps they had to send a courier to Italy to get what we ordered!

Overall rating of Villa (in my opinion): Decor 3.5/5, service 2.5/5, food 3.5/5, Value 3.5/5, Noise: 5/5 (1 being very noisy, and 5 being very quiet). We paid for our meal in full.

Read Full Post »

I’ve been following a blog called Cooking with Corinna who has been doing the Ducan diet (you know, the French diet). Corinna has been very successful in losing weight following this diet and has decided to try and healthy up some of her favourites so that she doesn’t fall back into old bad habits and jeopardize her success. The first recipe she ‘healthed up’ was pulled pork. JT loves pulled pork but it’s not something I ever make at home, mainly because it is so unhealthy, or so I thought. Corinna’s method was relatively simple and frankly quite obvious but, for some reason I never thought of it myself. She simply chose a leaner and healthier cut of pork — pork tenderloin instead of pork shoulder. Genius! I was inspired to make this pulled pork for dinner the other night and boy was it a success! Corinna used a slow cooker, but I chose to get my roasting pan on the grill outside (it was so hot and humid that day, I couldn’t bear even the slow cooker!). The trick is low and slow; I cooked our 300g tenderloin for almost four hours on 121°C (250°F). I turned it a few times and made sure it was always covered in BBQ sauce. You can use a store bought BBQ sauce, or you can throw one together in minutes like I did. Soooo easy. You will be surprised that you won’t be able to tell the difference from the unhealthy version! And if you want to keep it even healthier, choose a BBQ sauce based with fruit instead of sugar.

Thanks Corinna, this one will be a keeper, that’s for sure!

A Healthier Pulled Pork

Serves 3, 100 g portions

BBQ Sauce Ingredients:

Original recipe can be found here.

  • 1/2 cup ketchup
  • 1/4 cup vinegar, preferably red wine vinegar
  • 1/4 cup brown sugar, packed
  • 1/4 cup finely chopped onion
  • 1 tbsp soy sauce
  • 1 tbsp Worcestershire sauce
  • 1 tbsp prepared mustard
  • 1/2 tsp ground ginger
  • 1-2 cloves garlic, finely minced
  • 1 tbsp espresso coffee powder

Directions:

  1. In a small saucepan, combine all of the ingredients and bring to a slow boil. Reduce heat and simmer for about 5 minutes or until the flavours have blended well. Remove from heat and set aside.

Pulled Pork Ingredients:

Original recipe can be found here.

  • 300 g pork tenderloin with silver skin and excess fat removed. This is a great video on preparing pork tenderloin. I removed ALL of the fat to keep it healthier.
  • 1-2 tbsp canola oil (or an oil with a high flash point)
  • 1 cup BBQ sauce, home made or store bought.
  • 1 cup water

Directions:

  1. Preheat BBQ to 121°C (250°F).
  2. Heat the roasting pan on the stove with the canola oil until almost smoking. Sear all sides of the tenderloin. Remove the pan from the heat and allow to cool for a minute or two. Add the BBQ sauce and make sure that the tenderloin is brushed evenly with it. Place the covered roasting pan on the BBQ and turn off the heat directly below it. You’ll have to watch your BBQ so that the temperature maintained for the 4 hours is around 121°C (250°F).
  3. Turn the tenderloin 3-4 times making sure it is always covered well with the BBQ sauce. I kept about 1 cup of water near the BBQ and added water as the sauce became thicker and evaporated. Eventually around 3.5 hours, the meat will literally fall apart and you will be able to mix it well with the BBQ sauce and cook it for the last half hour.
  4. Serve warm or cold, on a salad, on a bun, or even in a fajita shell. Garnish with chopped cilantro and finely chopped green onions.

Read Full Post »

Tomorrow would have been Julia Child’s 100th birthday and this is my post to celebrate this amazing woman. Julia is an American food icon who literally taught American’s how to cook. She was one of the early “foodies” before Food Network was even a thought; even before most of the chefs on Food Network were born! She was the first celebrity chef!

My friend Betsy over at Bits and Breadcrumbs suggested that we post a recipe from a Julia Child cook book to commemorate and celebrate her life and I was all over it! Betsy posted a gorgeous Clafouti recipe that’s been her dear Mother’s favourite. I also wanted to post an authentic Julia Child recipe, but unlike Betsy, I don’t have one of her actual cookbooks. Last Christmas JT gave me Dorie Greenspans Baking with Julia, a wonderful cookbook of mainly sweets, breads and such. But I didn’t want to bake something sweet, so I searched and searched until I came across a gorgeous luncheon dish, a savoury galette. I was sold. Thanks Betsy, this was a lot of fun.

For the galette pastry, you can click here for a very similar recipe, or you can check page 371 in Baking with Julia by Dorie Greenspan. I changed up the filling to suit our tastes and what I had in my pantry. It is an incredible crust, crispy and slightly sweet that can withstand even the wettest filling but it’s also not dry and crumbly. The cornmeal in the pastry recipe adds enough crunch to make it a little more interesting that a standard pasty. It’s really just perfect. In fact, so much so, I’ve had a special request to bake it again, believe it or not. 😉

I divided the pastry into two portions so that I could keep one galette and give the other away. Both were resounding successes. You can keep this very simple or make it a bit more complex as I did. You can serve this room temperature or right out of the oven or even reheated, it is amazing every-which way.

Savoury Oven Roasted Tomatoes, Caramelized Onion and Goats Cheese Galette

Serves 4-6, makes 2, 15 cm galettes

The oven roasted tomatoes and caramelized onions really went well with the goats cheese. The pesto was icing on the cake, I mean galette.

Ingredients:

Directions:

  1. Prepare the pastry as indicated in the recipe. It needs to be refrigerated for a couple of hours, so you’ll want to plan ahead.
  2. Roll the galette on a piece of parchment into a circle about 10 cm larger than the size you want it to be. Spread the sweet onion confit on the bottom leaving the last 5 cm all the way around clear. Add a layer of tomatoes and dot with 1/2 of the total goats cheese.
  3. Fold up the edges and pleat or do some other fancy design. I wanted my galette rustic looking.
  4. Bake as the recipe indicate (I did our’s for 30 minutes at 176°C or 350°F) just until the crust was starting to get golden.
  5. Serve hot, warm or even at room temperature garnished with fresh basil and a little basil pesto drizzle.

The basil pesto was a nice touch.

That was one tasty galette. Photo by my friend, neighbour and boss, Kim with her iPhone 4Gs.

Read Full Post »

The summer has been literally slipping through our fingers, it’s been going so quickly. And we’re busy (I guess that doesn’t help) so it’s difficult to coordinate a Saturday with friends, unless you book months in advance (we already have plans for October 27th, believe it or not!). So when I tried to get a date with our friends David and Mi Mi, we were only able to come up with a Thursday last week or a date in October other than the 27th! And we didn’t want to wait until October to see them, so we nabbed the date and penned it in. David and Mi Mi work downtown and take the Go Train to the city every day, so we wanted to pick a place that wasn’t too far from the train station so we weren’t wasting time travelling to the station and have more quality time at dinner!

We selected Obikà Mozzarella Bar in Brookfield Place (used to be known as BCE Place, why do they keep changing the names of these buildings?). I have seen this place every time we eat at Marché (another great place to visit if you are in Toronto) and I knew I wanted to try it, particularly with my new found love affair with Burrata Cheese. Obikà flies their fresh mozzarella in TWICE a week from Italy. I kid you not. Their fresh Mozzarella balls are priced at $11 for take away, which isn’t bad considering we usually pay $9 for ordinary stuff at the supermarket! You can read about their fresh Mozzarella here, just click “Read more about our Mozzarella here”.

The restaurant is basically in the main floor atrium of an office building. It’s a lovely space with super high ceilings and the majority of the seating is in the atrium; bottom line is that’s it’s a mall and people walk by all the time. It didn’t give me the warm and cozy feeling. But once we got into the wine, and chatting, we soon became unaware that we were basically sitting in the middle of a mall.

We arrived a little late as I had to get ready — you know me, ladies, I can’t go downtown without the usual accoutrements (mini, heals, bling etc). We arrived by Subway at around 6:30 and David and Mi Mi had already ordered a couple of lovely sampler platters: A Tasting Plate of Three Bufala Mozzarella di Campagna ($34.00) Affumicata a smoked Bufala Mozzarella di Campagna, Classica a regular Bufala Mozzarella di Campagna and Stracciatella di Burrata which is the inside of a Burrata (this is the soft creamy part). I really didn’t care for the way they served the Stracciatella di Burrata in a bowl. My favourite, by far was the smoked Mozzarella, it was so tasty (I’m going to make my own smoked version this weekend!). They also ordered a Selezione di Salumi which was a lovely meat platter ($12.00), showcasing a Prosciutto Crudo di Parma DCP, Prosciutto Cotto and Mortadella. Now I know that Mortadella is the pride of Bologna, but honestly, it’s Boloney! OK, I take that back, I don’t want to offend my Italian friends, suffice it to say, I was not impressed. We ordered the Veneto La Serenissima Pinot Grigio ($35) because we all craved a light summery wine (it was incredibly hot and humid out). For our mains, each couple shared a pizza and believe it or not, we let our hubby’s choose. Mine, made a bee-line for the Cheese Pizza called Formaggio Morbidi ($17) (soft cheese pizza), decorated with Mozzarella di Bufala Campagna DCP, Gorgonzola, Staccchino and Ricotta garnished with fresh basil and EVOO. The crust was super thin and beautifully baked, crispy and soft and chewy all at once. We had asked them not to add the Gorgonzola until the very end after it has come out of the oven as our preference is not to have it render. It could have used a few more little bits (we LOVE our Gorgonzola!). David and Mi Mi ordered Prosciutto ($16) which was Prosciutto Crudo di Parma DCP, Mozzarella di Bufala Campagna DCP, Organic Tomato filets and Arugula. I think they enjoyed it. (I apologize for any spelling errors, the menu on line is extremely difficult to read).

Overall rating of Obikà Mozzarella Bar (in my opinion): Decor 2/5 (this failed incredibly because we were sitting in a mall), service 4/5, food 4/5, Value 2.5/5 (it’s not inexpensive, but the quality is very good), Noise: 2/5 (1 being very noisy, and 5 being very quiet). Reservations are definitely recommended.

This blog has a good photo of the first platter: http://cookbookstoreblog.blogspot.ca/2011/08/obika-mozzarella-bar-toronto.html

This search turned up a good photo of the second plate: http://obika.tumblr.com/post/2431126408/selezione-di-salumi-prosciutto-crudo-di-parma

This search has some good pictures of the restaurant: http://www.pic2fly.com/Obika+Restaurant+Toronto.html

Disclaimer: We purchased our meal for full price and my opinions just that, my opinions.

Read Full Post »

Wednesday August 15 would have been Julia Child‘s 100th birthday. My friend Betsy over at Bits and Breadcrumbs made a wonderful suggestion and I’m ALL OVER IT! I strongly recommend you pop over to see her and find out how we can all participate and celebrate Julia Child’s birthday.

Looking forward to seeing how you celebrate Julia’s day.

An after thought: please be aware of copyrights on recipes; I’ve noticed that Dorie Greenspan recipes ate not reproduced on line! Just sayin’.

Read Full Post »

20120806-123937.jpg

This post was written at the cottage including the photos taken on my lowly iPhone 3GS! Hopefully Apple’s September announcement will be about the iPhone 5, for which I am anxiously awaiting the release.

Do you have to create a meal plan for the weekends at the cottage? I do, I have to. We have no decent stores anywhere near our cottage. I once forgot cream cheese and had to settle for a cream cheese and chive dip from a 7-11. It was pathetic. I have to have everything figured out because to forget an ingredient would be devastating (well, for me anyway).

I had a menu plan for this past weekend which was our Civic Holiday long weekend (each first Monday of August is the Simcoe Day, in honor of our first Lieutenant Governor of Upper Canada, John Graves Simcoe) and it was good and it was well thought out. I had shopping lists and everything. And then I read a couple of posts which made me switch my plan. Yes, you read that correctly. I revised the meal plan to include these wonderful recipes that inspired me.
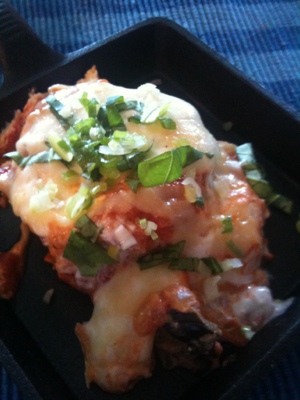
My first deviation was because of Karen at Backroad Journal Posted a healthier version of Eggplant Parmesan that I just couldn’t resist; plus it gave me an opportunity to use my adorable cast iron individual square frying pans! It was incredibly delicious!

Eggplant Parmesan

(only slightly modified from Karen’s lovely recipe)
Serves 4-6 for lunch as a main

Ingredients:

  • 4 baby eggplants, sliced 1 cm (0.5″)
  • 1/2 lemon
  • 2-3 tbsp EVOO
  • 4 garlic cloves, finely minced
  • salt to taste
  • 300-400 mL basic homemade tomato sauce, or your favorite marinara sauce
  • a handful of chopped fresh basil
  • 1 cup ricotta
  • 1 clove garlic, finely minced
  • 1/4 cup freshly grated Parmesan cheese
  • 1 large ball fresh mozzarella, sliced
  • 20 cm (8″) square pan plus individual serving dishes
  • Non-stick spray

Directions:

  1. After slicing the eggplant, rub each side with lemon juice to prevent ‘rusting’.
  2. Mix the olive oil with the garlic and brush each side if the eggplant slices liberally. Grill on a hot grill until slices are soft. Sprinkle with salt to taste. Set aside (may be made in advance).
  3. Mix the ricotta with one clove finely minced garlic, salt to taste.
  4. In an oven proof 20 cm (8″) pan, line with parchment and spray with non-stick spray. Line the bottom with one layer of eggplant, top with half of the ricotta. Dot with roughly torn fresh basil. Drizzle with the tomato sauce, add another layer of eggplant. Top with the remaining ricotta, roughly torn fresh basil and the remainder of the tomato sauce.
  5. Add the sliced fresh mozzarella evenly on top. Bake on indirect heat on the BBQ until fully warmed through and mozzarella has melted. Sprinkle with freshly grated Parmesan and broil until bubbly.
  6. Serve in individual serving dishes garnished with fresh basil and green onions.

20120806-124044.jpg

Read Full Post »

Just a quick word about the blog…I just posted my 500th post! Woohoo!

A week or so ago I was intrigued by a recipe at my friend Liz’s blog That Skinny Chick can Bake for Chocolate Meringue Cookies; it’s a meringue cookie for which you need not beat the egg whites. WHAT? How could this be? I had to give it a try! They were EVERY BIT AS GOOD as Liz made them out to be. EVEN BETTER some might say. So chocolatey and chewy with all the texture of a typical meringue cookie without the fuss. Please pop over to Liz’s blog to check out what all the fuss is about this cookie (plus she has some other tasty treats to ogle over).

So that got me thinking (oh oh, this means trouble), if it worked so well for the chocolate version, I wonder if I can work it with an almond version! So I tried and it worked like a charm! The first time too! Although, I did adjust the recipe a teensy tiny bit. I think next time, I will toast the almonds so that that they give the cookie a bit more interest.

Chewy, crunchy and very almondy

Almond “Meringue” Cookie

Makes about 4 dozen small cookies

Ingredients:

  • 3 cups confectioners sugar (icing sugar)
  • 1 cup almond flour
  • 1/4 teaspoon salt
  • 2 1/2 cups sliced almonds
  • 4 egg whites (no need to beat like with a traditional meringue)
  • 1 tablespoon almond essence

Directions:

  1. Preheat oven to 350º F. Line baking sheets with parchment and spray with non-stick cooking spray.
  2. Mix sugar, almond flour and salt in a bowl. Stir in almonds (if you are going to toast the almonds, I would allow them to cool entirely). Add egg whites and almond essence, and mix until just moistened. Do not over-mix batter. The batter should not be runny.
  3. Drop by small teaspoonfuls onto prepared baking sheets. Leave plenty of space between cookies as they spread quite a bit. I got about 12 per sheet in general.
  4. Bake until the bottoms begin to colour, about 12 minutes. Remove the parchment with the cookies from the hot tray and cool briefly before carefully moving to a cooling rack. Cookies are fragile, but I found them easily removed to a cooling rack with a large spatula. Store with parchment between layers.

If you like almonds, this is the cookie for you!

Norma, over at Garden to Wok had asked that I photograph my onion and garlic harvest, and I finally got around to it, sorry it’s been so late. I planted my garlic too early last fall and it sprouted and then proceeded to rot over the winter. I was so disappointed this spring when they didn’t sprout again that I pulled them out and planted more garlic and a few green onions. The garlic was planted too late and the heat, lack of rain did not help so they are a bit stunted. But I will persevere this fall and plant garlic again.

I like the contrast on the Canadian Soapstone counters

Read Full Post »

On Thursday, July 19th we went to a relatively new restaurant in Roncessvales called Hopgood’s Foodliner. We heard about the place some time back but had reservations about going because they don’t have a menu posted on their blog/website but we did walk by it last weekend and checked out the menu in person.

The restaurant décor is rustic but clean and nicely done (please click here for photos and another review, it was too dark and mine didn’t turn out). They have insets in the walls with interesting ‘sculptures’ made of ordinary pantry items, such as triscuits and Evaporated Milk. They also have my favourite filament lighting hanging evenly from the ceilings (great light to be seen in!).

Cool Décor

We were happily greeted by the hostess and she quickly confirmed our reservations on her iPad. At 7:30 the place was already busy, but there were a few tables still empty. The first table we were shown was at the beginning of the hallway to the back and I feared that we would be constantly disturbed by servers going to the kitchen (in the middle of the restaurant), so she showed us another table in the back room, far corner. I liked the back room as it wasn’t as crowded or noisy as the front (but that would soon change). Unfortunately, our new table was also beside a prep kitchen doorway (see Toronto Life’s 8th picture, with “Watch your Step” on a glass door); it seemed as though there was someone in and out every few minutes, and there was a very chilly draft blowing on me from the A/C above. So we asked to move and they were very cool about it. Our final table had us sitting at the front of the back room at a much warmer space.

Our waiter, Edward seemed quite knowledgeable about the food, and spoke as if he had tried everything. We decided to begin with 6 PEI blueberry point oysters with a delightful ginger Mignonette Sauce and of course, freshly ground horse radish. Both were wonderful with the slightly briny good sized oysters (I like to taste the ocean in my oysters, and I like to chew the oysters!). I had the surf and turf tartare with rave reviews from Edward. It’s a nicely chopped sirloin with scallops (surf and turf). It was traditionally seasoned and then topped with a thin layer of mayo and crispy fried potato pellets (well, that’s the best I could do to described it…kind of looked like mashed potato that has been through a ricer and deep fried). I liked the tartare, but I have to say I did not taste the scallop so it was lost on me. The deep fried potato topping was interesting in terms of texture, but I am neither a potato eater nor a lover of deep fried foods so I wasn’t as hyped about it as Edward, but I did finish it — all of it!

Oops! Almost forgot to take a photo.

JT ordered the Pork cheeks with mini sausages. The mini sausages were delightful and nicely seasoned, I didn’t taste the pork cheeks but they looked very tender. JT wasn’t wowed but he said he liked it. We didn’t have dessert. Our dinner took about ninety minutes and was nicely spaced without being rushed. On a down side, they have a very limited wine and beer selection (and the beers were quite obscure, the most recognizable being Labatt 50 in a can, which was just weird!). Chef Hopgood apparently changes the menu every couple of days, so you’ll never know what will be on, but rest assured it will be creative and tasty. Service was attentive, properly timed, friendly and consistent.

Fortunately, I got a shot before it was inhaled!

Overall rating of Hopgood’s Foodliner (in my opinion): Decor 4/5, service 4/5, food 4/5, Value 4/5, Noise: 2/5 (1 being very noisy, and 5 being very quiet). Reservations are definitely recommended.

Disclaimer: We purchased our meal for full price and my opinions just that, my opinions.

On another note, I wanted to share a photo of Chef Rob Rossi and I (runner up Top Chef Canada Season 1) at his place Bestellen when we were there recently. If you recall, I reviewed the restaurant here; we liked it very much, so we went back.

It was a rather dark photo that I had to doctor in Photoshop

Read Full Post »

One recent weekend we decided to get a little culture and enjoy the Masterpieces from the Musée National Picasso, Paris which are on loan for a special exhibition to the AGO. These cultural experiences always seem to surprise me on how expensive they are (we paid $30 each, including the self guided audio tour). I cannot imagine bringing a family of 4 or 5 to see such a thing, it would literally bankrupt most people. It’s actually a quite sad commentary on our society in Canada, where cultural activities are usually only available for the middle and upper classes. Of course, you could visit the AGO on a Wednesday night (general admission is free) for a mere $12.50 each admission to the special exhibitions, but then you are restricted to 6-8:30 pm. JT and I tried this approach several years ago with the ROM, who offer free admission on Friday evenings, but the line up was so long, we speculated we would have a mere 10 minutes to go through the museum once we got in. Sadly, we haven’t tried it since.

Are museums and galleries expensive where you are? And do they offer free time slots?

The Picasso exhibit was very nicely laid out chronologically through his life experiences around women (or so it seems to me that it was). He was a passionate artist and had several girlfriends, wives and lovers who influenced his work. Since he died in 1973, he was able to communicate much of where he was coming from in his art; of course, he left a lot of interpretation to us, just for the fun of it.

I majored in Art History in University, but that was a million, perhaps even a billion years ago, so the AGO was like a second home to me. But in 2008 Frank Gehry (Toronto born) redesigned the building and it’s a far cry from the gallery I recall (sadly, I was unable to find a photo of it). Non-the-less, it is a superbly beautiful building with Gehry’s trademark organic structures that challenge the materials used and is really a joy to walk through; the spaces where the art is showcased will always remain about the art, but the other areas, such as walkways, stairs and common areas are totally about the architecture.

I have to admit that I am not a huge Picasso fan, I find most of his work jarring and disturbing but I can appreciate it for what it is. He was a visionary in two and three dimensional art, looking at his subject as no other. The perspective is quite interesting but for me, finding the beauty of the subject (not necessarily the art) was challenging. By far, my favourite piece had to be Sacre Cœur, one of my favourite views in Paris (and fortunately this fall we will be staying in this lovely neighbourhood!). Because of copyright issues, photography is not permitted in the galleries with installations, but you can google it or click here to see it.. The facets skim the image, giving us just enough information to be able to recognize the building. Perhaps it’s the tones I am drawn to, or that the facets sparkle like the facets of a diamond, I am not sure; I just know it was my favourite of the entire collection.

The exhibit took us about an hour to go through, and we lingered. We could have stayed on to wonder through the permanent collections but we had to do grocery shopping for the week, otherwise we would have no lunches! Perhaps I’ll pop down one Wednesday when it’s free for a few hours and revisit my past. I hope you click on the links to see more of this impressive structure, known as the AGO.

Read Full Post »

My friend John (from the Bartolini Kitchens) did a post on June 6 for Straw and Hay Pasta including fresh peas that were shelled. It was that vivid picture that John painted sitting at the kitchen table, shelling the peas that brought back such fond memories of my childhood that I had to recreate the recipe that his story conjured: Hungarian Sweet Green Pea Soup with Dumplings — Zold Borsóleves. I didn’t search the internet nor did I look at my mom’s recipe book as that would have been futile, my Mom cooked from memory and instinct. It used to drive my Dad crazy; she would make something he thought was delicious and he’d say, “this is delicious, did you write it down?” And she’d wave him away and say “no, but I can recreate it”. But it was never the same. It could have been our memory of the dish, or that she added a pinch of this or a pinch of that, and on this round may have gotten missed. At any rate, there is no recipe. I haven’t had this soup in over…(oops, there, I almost spilled the beans), in many, many years, but I have recreated it to my best recollection. And as I sat in the kitchen, eating this soup, I felt like I was 10 years old, sitting at the formica top and aluminum lip edge kitchen table. Thanks John.

This is a simple soup dictated only by the simple ingredients. Just water is used as the stock, to allow the sweetness of the peas to come through. After I made the soup, I did search the net to discover people put in carrots, potato, celery root, etc, but our’s was just peas, onion and garlic. My mom also used the young pods in the soup by carefully removing the hard membrane from the inside of the pod after it has been shelled. You can do this by bending the tip in toward the inside of the pod until the exterior cracks, and carefully peel the membrane away. It is hard and plastic-y, you won’t be able to eat it, so make sure you remove it entirely. Or you can just drop the spent pods into the soup for flavour and fish them out before serving.

Even though I pictured the dumplings made with Quinoa flour, I wish I had splurged and made white flour dumplings. The quinoa was OK, but it certainly didn’t have the bite and chewiness that the normal dumplings had. If I were to do it again, regular white flour dumplings. Although, I must say the quinoa made it a filling dinner.

The flavours of this soup conjured up all kinds of childhood memories

Hungarian Sweet Green Pea Soup with Dumplings — Zold Borsóleves

Serves 2 as an appetizer or lunch, or one good-sized bowl for dinner

Ingredients:

  • 1/3 cup white flour (I used quinoa flour but it didn’t turn out as well)
  • 1 large egg or egg white equivalent
  • 1/4 cup onion, finely chopped
  • 12-15 fresh green peas, shelled and pods prepared
  • 2 cloves garlic finely minced
  • 300 mL water
  • non-stick cooking spray
  • Salt to taste

Directions:

  1. Shell peas and remove membrane from pods. Roughly chop pods into bite sized pieces.
  2. Mix the flour and the egg in a small cup. The mixture should be thick so you can pinch small bits off and it doesn’t stick to your spoon (in fact, the chewier you like your dumplings, the thicker the dough should be). Set aside.
  3. Coat the bottom of a soup pan with a good spray of non-stick spray and sauté the onions until translucent (you may need to add a bit of water to help it along). Add the garlic and cook until you can smell the wonderful aroma. Add the pods (not the peas) and cover with 300 mL water. Salt and taste, adding more as required (I ended up adding a good pinch — it should not taste salty, it should just bring out the flavours of this simple soup: peas, onions and garlic).
  4. Bring to a boil and begin ‘pinching’ the dumplings into the boiling water. I used a small spoon which worked out to about 1/2 tsp size (or you can roll the dough into a narrow roll and cut with a knife) the dumplings will grow because of the egg. Add the peas and give give it a stir. Cook on boil for an additional minute until all the dumplings float to the top.
  5. Serve immediately on your favourite Hungarian placemat. Sigh and enjoy the memories.

The Quinoa Dumplings were OK, but nowhere near the wonderful texture of my Mom’s old fashioned white flour chewy dumplings

Read Full Post »